Yoshi's Island 2
- This article is about the level in Super Mario World. For the second Yoshi's Island game, see Yoshi's Island DS.
| Level | |||
|---|---|---|---|
| Yoshi's Island 2 | |||
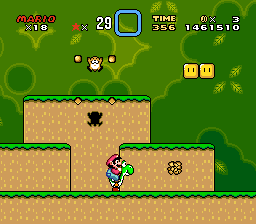
 Mario, Yoshi and two Monty Moles (one preparing to emerge from the platform) | |||
| Level code | 1-2 | ||
| World | Yoshi's Island | ||
| Game | Super Mario World | ||
| Time limit | 400 seconds | ||
| Music track | Ground Theme | ||
| |||
| << Directory of levels >> | |||
Yoshi's Island 2 is the second level on Yoshi's Island in Super Mario World. Finishing the level is compulsory for beating the game, since clearing Yoshi's Island 1 only leads to the Yellow Switch Palace. The level introduces many reoccurring elements, such as Yoshi, Monty Moles, Koopa Troopas, Berries, and Beanstalks. The level has a forest theme.
Layout
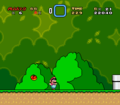
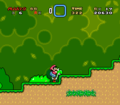
At the beginning of the level, the first of many red Berries can be seen. Soon after, there is a Red Shell on the ground which can be thrown into a series of Koopa Troopas on a plateau, providing the player with many points and an extra life. There are two ? Blocks ahead and, given that the player already has beaten the Yellow Switch Palace, a yellow ! Block containing a Super Mushroom. The next pair of ? Blocks not only contains a Coin, but also Yoshi. When proceeding, the player comes across a Message Block giving information about the Spin Jump. There are also some more red Berries here that Yoshi can eat. After defeating a red-shelled Koopa Troopa and an unshelled Koopa, the player can easily reach the first Dragon Coin, surrounded by some regular Coins. When continuing, another unshelled Koopa can be seen about to step into a Green Shell. Yoshi's abilities make it easy to defeat those. The second Dragon Coin can be found here as well. After going up some steps, the player is attacked by a Chargin' Chuck who protects the third Dragon Coin. A Message Block right before the Midway Gate describes the function of the same.
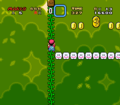
After two yellow Warp Pipes, a ? Block provides a second chance to get Yoshi in this level, or a 1-Up Mushroom if Yoshi is already there. New enemies, Monty Moles, are introduced after this. The right Rotating Block here releases a Beanstalk. Climbing up gives the player access to a row of clouds and the fourth Dragon Coin (Yoshi cannot go up the Beanstalk). The final Dragon Coin can be found just afterwards back on the ground, after another Monty Mole. There is also a pink Berry on a nearby bush. The player can slip into the blue Warp Pipe ahead, taking them to an underground room with six winged ? Blocks and four Grab Blocks. The player can Double Jump off Yoshi to reach the ? Blocks or throw the Grab Blocks. They all contain Coins, except for one which contains a 1-Up Mushroom. When leaving the underground room through the green Pipe, the player finds themselves right next to a Warp Pipe with a Jumping Piranha Plant inside. After this, a Switch Block surrounded by Rotating Blocks can be seen. Hitting the lower central Block makes the Switch Block drop, and hitting the Switch Block turns the Coins to the right into solid Blocks. The player now can walk right onto the Blocks and thus avoid the Chargin' Chuck below and reach a high score at the Giant Gate.
Glitch
There is a glitch commonly associated with Yoshi's Island 2, although it can be done on others: With very precise timing, Fire Mario must, in close enough proximity to a Chuck, spin jump off Yoshi, fireball a Koopa, and then grab the resulting Coin while Yoshi is trying to eat it. This will cause Yoshi to eat the Chuck, who may become a glitchy item in the item storage. Because Chucks were not meant to be eaten by Yoshi, this will crash the game most of the time, but the glitch allows for arbitrary code execution, with the "code" being read from the X-positions in RAM of the last few enemies that were spawned (the red Koopas in the beginning and some of the Berries are often used as candidates). Many speedrunners will manipulate the enemies in such a way that eating the Chuck will trigger some part of the ending sequence, either the "party" at Yoshi's House or the cast list.[1]
In other levels, this glitch may be used to produce a Magic Ball in the Item Box, often with glitchy graphics due to the level's tileset not containing the correct graphics.[2][3] A similar glitch exists in World 7-1 of Super Mario Bros. 3.
Enemies
| Image | Name | Count |
|---|---|---|
| Koopa Troopa (red) | 8 | |
| Unshelled Koopa (green) | 1 | |
| Unshelled Koopa (red) | 1 (regular) 8 (if stomped) | |
| Monty Mole | 5 | |
| Jumping Piranha Plant | 1 | |
| Lookout Chuck | 2 |
Items
Dragon Coins
- In an arc of coins above the Unshelled Red Koopa and Red Koopa Shell.
- Just after the Unshelled Green Koopa and Green Koopa Shell.
- In an upward arc of coins after the ledge with the first Chargin' Chuck.
- Above a platform of Cloud Blocks accessible via Beanstalk after the first two Monty Moles.
- Above the platform on the ground with the third Monty Mole.
A mushroom will be givin to yoshi to make him fat 😎
Gallery
Names in other languages
| Language | Name | Meaning | Notes |
|---|---|---|---|
| Chinese (simplified) | 耀东岛 2[?] Yàodōngdǎo 2 |
Yoshi's Island 2 | |
| French | Ile de Yoshi 2[?] | Yoshi's Island 2 | |
| German | Yoshi-Insel 2[?] | Yoshi Island 2 | |
| Italian | Isola Yoshi 2[?] | Yoshi's Island 2 | |
| Spanish | Isla de Yoshi 2[?] | Yoshi's Island 2 |
References
- ^ SethBling (January 21, 2015). Super Mario World -- Credits Warp in 5:59.6 (First Time Ever on Console). YouTube (English). Retrieved June 22, 2024.
- ^ hitstun (April 20, 2012). Super Mario World - Fun with the Orb Glitch. YouTube (English). Retrieved June 22, 2024.
- ^ Some examples of levels that would have the correct graphics: Cheese Bridge Area, Chocolate Island 3, and the section of Sunken Ghost Ship where the ball is normally found.


