The 'Shroom:Issue 199/Strategy Wing
Director's Notes
Written by: Hooded Pitohui (talk)
Hello and welcome, all you readers of The 'Shroom, to a... well, er, a not-so-spooky edition of Strategy Wing. There's a dark pyramid. That counts for something, right? Don't worry about it, though, because we still have the holiday spirit! We've just decided to focus more on the treats than on the tricks and spooks. We've got treats galore, from Shoey covering another Pikmin type, to an introduction to a new partner Digimon, and even to the return of Pitohui's Pokémon Academy! We even have a fresh edition of Koops, Your Emblem is on Fire! Yes, that's right, our tactician is back already with bonus content from The Blazing Blade!
Unfortunately, though, our master of heists, Kinger, and Getting that Payday are going to go on hiatus. I'm told we can expect more crime right here in Strategy Wing in the future, though, and this might be the only time that being told there will be more crime is a good thing, so keep an eye out down the road! Until then, we have all of those aforementioned treats for you this month, and we're cooking up even more for next month!
"Why", you ask? Well, when our next issue releases, The 'Shroom will have hit issue 200, so of course we'll be going all-out here for the big milestone! If you'd like to get in on the big celebration, there's still time! Head to the sign up page and send an application to our Statistics Manager, Meta Knight before November 11th. Whether you want to debut a recurring or volunteer-based section, or just want to do a special one-off for issue 200, we'll happily have you in Strategy Wing! Take us through one of your favorite games as File City Files and Shine Get do, or look at the history of some game mechanic like The Anatomy of a Pikmin does, give us some tips and tricks, or analyze something from your favorite games, it's all welcome here!
Now, I better let you get to reading the sections our writers have cooked up for you this month, especially before I start getting into the sappy stuff. I've got to save that for next month, after all... I won't keep you any longer. Go on and read!
Section of the Month
This month, we have a tie, with Shoey (talk) and his detailed notes on the ever-useful (if less so in Pikmin 3) Blue Pikmin tying Waluigi Time (talk) and his 2D Flash adventure through Snowman's Land! With Shoey analyzing in detail the unique gameplay niche that Blue Pikmin have occupied without competition (except briefly, from Winged Pikmin), and Waluigi Time offering nicely-organized, concise descriptions of his playthrough (while adding some analysis of the way levels leverage power-ups), it's not hard to see why they did well! I'd like to give a nod to Koops (talk) as well, taking second while bringing his playthrough of Fire Emblem: The Blazing Blade to a close with a grand finale.
Give this loyal Strategy Wing crew of writers your support by casting your votes this month, too!
| STRATEGY WING SECTION OF THE MONTH | ||||
|---|---|---|---|---|
| Place | Section | Votes | % | Writer |
| 1st | The Anatomy of a Pikmin | 7 | 33.33% | Shoey (talk) |
| 1st | Shine Get | 7 | 33.33% | Waluigi Time (talk) |
| 2nd | Koops, Your Emblem is on Fire | 4 | 19.05% | Koops (talk) |
File City Files
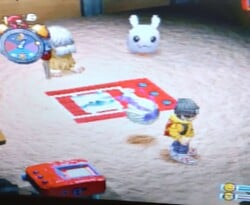
Hello again, and welcome back to File City Files, Cedar Rapid's number-one source for Digimon World strategies. Last month, we chased down a criminal gang, gaining our fair city not only a new protector, but also a water taxi, opening up a new area! Sadly, in the process, our beloved partner, Vomm the Centarumon, passed away from old age. Luckily, instead of going to the great processor in the sky, he instead allowed his data to be reconstructed into an egg, allowing him to continue to help us on our quest.
Digital Childcare is a Lot Different from Regular Childcare
So first, we need to pick our egg. Jijimon gives us four eggs to choose from, each one containing a different fresh Digimon. The four eggs are as following:
| Green Egg | Blue Stripe Egg | Yellow Stripe Egg | Pink Egg | |
|---|---|---|---|---|
| Contains: | Botamon | Punimon | Poyomon | Yuramon |
| After six hours, becomes: | Koromon | Tsunomon | Tokomon | Tanemon |
| After a day, then can become: | Agumon, if its offense is higher than its speed or defense | Elecmon, if its offense or its speed is higher than its brains or defense | Patamon, if its offense, strength, or brains is higher than its speed | Palmon, if its brains is higher than its defense |
| Or can become: | Gabumon, if its defense or speed is higher than its offense | Penguinmon, if its brains or defense is higher than its offense or speed | Biyomon, if its speed is higher than its strength, offense, or brains | Betamon, if its defense is higher than its brains |
In addition, any in-training Digimon has a 50% chance of Digivolving into a Kunemon if it sleeps in the Kunemon's Bed.
For our egg, I decided to go with the Pink Egg, containing Yuramon, because I like the hot pink color.
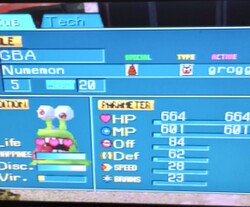
Once the egg hatches, you can change your Digimon's name if you want. I decided to name our new Digimon "GBA" after a dear friend. All fresh and in-training Digimon are of the Data type, and they are all very weak. Which, you know, that makes sense; they are, after all, the Digimon equivalent of babies and toddlers. fresh and in-training Digimon can only learn one move, the pitifully weak Bubble attack. This move is basically useless, and it doesn't matter how many offensive chips you feed them, because they'll never be able to beat even the weakest ModokiBetamon. I mean, they can beat them, but the fight takes so long it isn't worth sitting there and watching.
Raising a fresh Digimon is honestly pretty dull. All you're going to be doing is training stats. Because they're so weak, they can't do anything else. What makes things worse is that you don't even get a lot of training time with them. They get tired so quickly that you're basically running back and forth between resting, feeding, and pooping until they become a rookie. But to be 100% honest, a rookie Digimon, at this point in the game, really isn't better than a fresh Digimon or in-training Digimon. There aren't any rookie Digimon left to recruit, so everything we could face is champion or ultimate. So yes, you have more moves, but, outside of being boosted with the stat-boosting chips we picked up, you're not going to be very strong and your time is better spent training your Digimon. The sad fact is, once your first DIgimon dies, you'll basically be spending hours grinding your Digimon in an attempt to get a champion that you can actually use. It's, how you say, not very fun. One tip I would give you is, once you get your rookie strong enough, go ahead and fight some of the ModakiBetamon outside the city, because those are really weak Digimon and perfect for grinding out the battle requirement some Digimon have to Digivolve. But other than that, fresh all the way through rookie, you'll mainly be grinding stats until you get a champion.
The Frozen Savior in the Snow
Remember when I said you really couldn't do anything with a fresh or in-training Digimon? Well, that's only mostly true. There is actually a Digimon that having a fresh or in-training Digimon can help you get! If you check the Shellmon newspaper and look on page four, you'll see an article about a Digimon in Freezeland who helps those who are sick there. With our curiosity piqued and realizing babies and toddlers are quite weak, we head to Freezeland! Inside Freezeland, you'll head to where there's an igloo with a closed door. OR SO I THOUGHT! It turns out you can be anywhere in Freezeland to do what we need to do.
There are a few ways to do what we need to do. First, you can bring a Digimon that hates the cold and just wait around. In theory, they'll end up sick and then they'll pass out. Here's the thing, though; I've never actually seen a Digimon get sick from the cold and, believe me, I've tried this quite a few times. So, instead, we're going to do what's called a pro-gamer move. In the Native Forest, you can find bright yellow mushrooms called Happy Mushrooms. These mushrooms increase happiness but also can cause sickness in Digimon. What we're going to do is feed our little GBA these Happy Mushrooms and make him sick on purpose.
That's right! We're poisoning a baby! You're going to want to save before you do this, because the Happy Mushrooms aren't guaranteed to make your Digimon sick. Once your Digimon gets sick, they'll pass out. Now, you don't actually need a fresh or in-training Digmon to do this; I just think it makes the most sense to use them, because you can always guarantee they will hate the cold.
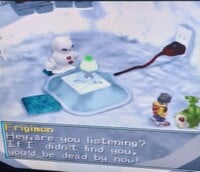
After your Digimon passes out, you awaken inside an igloo with a snowman staring at you. He explains that he's Frigimon, an Ice-Snow Digimon, and that you're in his house. He then starts yelling at us, yammering on about how it was irresponsible to bring a baby that hates cold into the snow area or whatever. Even though the guys seems like a bit of nark, we attempt to ask him if he wants to join the city.
But he keeps yammering on about safe practices and responsibility or whatever, so, you know what? We're out of here! But we'll be back to show this snowman which one of us is a good parent!
Luckily our choice of egg makes this really easy. All we have do is get our Digimon to a Betamon (see the above table for info) and then enter Frigimon's igloo. You talk to him and show him that you're not an incompetent fuck-up who nearly killed his Digimon, then you ask Frigimon to join the city and now he happily agrees to join the city and skips away merrily towards his new life.
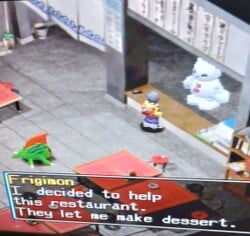
Purpose in City: Before leaving for the city, Frigimon expresses his interest in opening up an ice cream stand. Upon arriving in the city, however, he realizes that, while File City is a growing metropolis, in its current form, a stand devoted entirely to ice cream would be economically infeasible. So, instead, Frigimon joins the restaurant, taking on the graveyard 6:00 PM to 12:00 AM shift as its dessert chef!
Frigimon has three delectable specialties:
- Snow Shake (300 bits): This delicious gourmet shake raises MP by 10, speed by 1, and increases happiness while reducing tiredness.
- Ice Cream (700 bits): This bowl of luxury ice cream increases MP by 30, speed by 2, and increases happiness while decreasing tiredness
- Snow Cone (1600 bits): This tasty treat raises MP by 50 and also increase defense, happiness, and discipline while lowering tiredness.
Legend of the Lake Guardian
After recruiting Frigimon, check back with the Shellmon newspaper. Refer to page three, and it will talk about a legendary guardian that is rumored to live in Dragon Eye Lake. That's going to be our next target. For this mission, we'll need a fishing rod, but, sadly, the fishing rod we got in the trash isn't going to be good enough. I mean, I think it is possible to catch the guardian with the trash fishing rod, but it's a real bitch and I don't want to do it! So, we need a new fishing rod and there's only one way to get a new rod. But first, we're going to need some Digimon Cards!
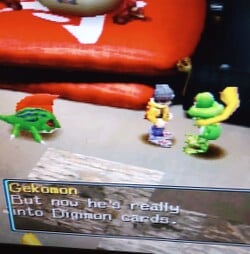
Not only that, but we're going to need rare ones! There are two ways to get Digimon Cards. The first and easiest way to get specific cards is to head to the secret shop during the first fifteen days of a month. They sell not only specific Digimon Cards there, but also sell packs of three. Unfortunately, it's day seventeen in my file ,so we're going to have to resort to the second way to get Digimon Cards. Inside the item shop in File City, there is a machine that sells random Digimon Cards for 100 bits a pop. You're going to need a lot of money to do this, because the cards you get are random and it's weighted to giving you bad-to-mediocre cards. This means you're going to get a lot of Numemon, Sukamon, and Nanimon cards. That's right! We're doing a Gacha!
The more you buy the better odds of getting the real good cards. Luckily for us, we've got all that money from trading fish for discs, so we're not going to have any problem getting the cards we need! But be warned, you're going to waste a lot of money doing this, because you can only hold nine of each card, but that doesn't stop the gacha machine from spitting out a million Numemon, Sukamon, and Nanimon cards!
Now, you're probably wondering how Digimon cards are going to get us a fishing rod? Well, that answer lies within the Geko Swamp, more specifically the Volume Villa. You see, Shogungekomon collects Digimon Cards.
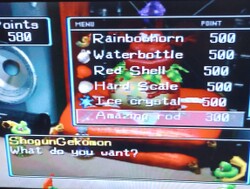
Not only does he collect them, but he also is willing to trade stuff for them! He has even crafted a whole merit system where he assigns each card an amount of merit points they're worth. You can trade cards for points, then you can exchange those merit points for prizes! He offers all kinds of things. There are five categories in his system. Super common cards, such as Veggiemon and Nanimon, are worth one point. Less common rookie and champion cards, such as Tentomon and Toyagumon, are worth five points. Regular champion cards, such as Bakemon and Leomon, are worth ten points. Ultimate cards, such as Giromon and Monzemon, are worth thirty points. Finally, there's a category of special ultimate cards that are worth one-hundred points. These are the rarest of the rare, such as Hercules Kabuterimon and Shogungekomon himself (the conceited fuck). There are a number of things you can trade merit points for, including health items, worthless Digivolution items, and even stat-boosting chips. The stat-boosting items are easily the most valuable items up for grabs, but they're also the most expensive at eight-hundred points each, and, considering that the rarest cards only garner one-hundred points a pop, you can't really bank on buying them consistently. But for our purposes, the most important thing he offers is the Amazing Rod for three-hundred points. The Amazing Rod allows us to cast farther and the line is stronger, so it won't snap as easily.
With our new rod in tow, it's time to head to Dragon Eye Lake, right? Well, yes, but no. Yes, we do need to head to Dragon Eye Lake, but the Lake Guardian will only appear right before sunset or right before sunrise (i.e., when the clock is in the orange or purple zone).
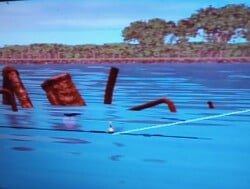
The fish you're looking for is a long shadow that swims across the entire lake. It's a little tricky to cast out to where the shadow is, but, luckily, it will begin its cycle again once it completes a circle. The shadow isn't picky and will bite on any bait you throw out, so you can use cheap things like Digimushrooms or regular meat. Catching the Lake Guardian is very tricky, because first you have to set the hook by pressing "X" as soon as the bobber goes under the water. The Lake Guardian is easily the hardest fish to catch in the game. It's a very tough catch and you have to watch out, because the Lake Guardian will drag the line throughout the lake. It's very important that you watch your tension, because the Lake Guardian can, by itself, cause the line tension to increase. If you end up in the danger red zone, it will snap and, then you have to do everything over again! What I found was that you don't even want to start reeling in the Lake Guardian until the tension is in the blue zone. Then you want to mash it until it's just outside the red zone. Repeat this process until you successfully reel in your catch.
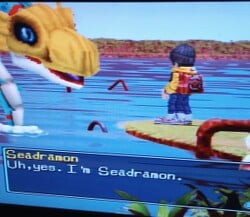
Reeling in the Lake Guardian, it turns out it's a Seadramon! It's a little awkward for a second, but then Seadramon breaks the tension, complimenting us on our fishing skills before asking if we have any requests. Why? Because I guess this is a wish-granting Seadramon, that's why! Seadramon gives you three options:
- Let's be friends.
- Teach me a technique
- I want an item
The latter two are pretty self-explanatory. If you ask him to teach you a technique, he'll teach you an ice technique that Seadramon can learn. There is probably an order to the moves he teaches you, because I did two different runs, and he taught me Aqua Magic first both times. So, yeah, this is useful because, if you have a Digimon that can learn ice-type moves, you can pretty quickly fill out its movepool. This can also be useful in a more abstract way. You see, a lot of the Ultimate Digimon have a technique bonus requirement, and what that means is basically, if you meet that requirement, you've got a better chance of getting that Digimon. The thing is… that requirement refers to techniques known in general, not just techniques specific to your current Digimon. So even if your Digimon can't learn any ice moves, having Seadramon teach you seven ice moves is a good way to bolster your movepool. Plus, you never know what Digimon you will have in the future. The good thing is that you can catch Seadramon multiple times by returning in the same later afternoon/early morning period. All you have to do is leave and come back and Seadramon will reappear. If you ask for an item, he'll give you a Water Bottle, which will turn any rookie into a Seadramon, but if you ask to be friend,s Seadramon will give you a special item, the Blue Flute. This flute allows you to summon Seadramon any time that you want at Dragon Eye Lake.
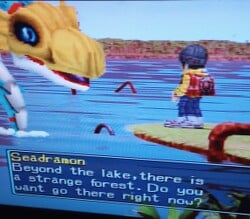
Now, you might be wondering why you want this. Well, there's actually an island on the other side of the lakeL Beetle Land, the land of, well, beetles. Use this flute, and Seadramon will take you to Beetle Land! But before we head to Beetle Land, I have a couple more notes about Seadramon. For starters, the Blue Flute can be used to summon Seadramon whenever, but he will only take you to Beetle Land. He won't grant you new techniques when summoned; if you want those bonuses, you can recatch Seadramon whenever you want (time willing, of course). This means you have a very consistent way to fill out your technique chart. It's probably an easier system than fighting enemies, even if the results are a little more random!
Getting Pumped with the Bugs
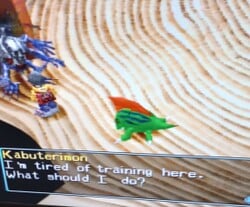
Beetle Land is a rather strange area inhabited entirely by bugs. The wild Digimon you can fight are Tentomon and Kunemon. Now, here's the thing, you'd usually associate bugs with like weakness, right? I mean, Bug-type Pokémon are usually physically weak. Not so with these bugs! These bugs love working out! There are multiple huts that have training areas, and all of them are better than the Green Gym. For example, the Hammer Machine boosts defense by thirteen points, while the base gym Punching Glove only raises it by eight points. This makes it a great place to train your Digimon, but that's not all it's good for! If you have a strong bug-type Digimon and it's a day that ends in "2" (e.g., day 12), you can enter them in a special bug fighting tournament, where, if you win, you get big prizes! But even that's not all, folks! There are two Digimon here that will join the city and help us maximize our pump! The first is a Kabuterimon located in the training hut to the right of the bug tournament registration stand. This Kabuterimon has grown bored of training in Beetle Land.
He asks us where we train, in a training ground or an arena? If you answer "an arena," he says he wants to train there to feel the thrill of live battle, so he agrees to join the city and fight for his own glory!
Purpose in City: Kabuterimon improves the Green Gym, allowing you better stat boosts from training.
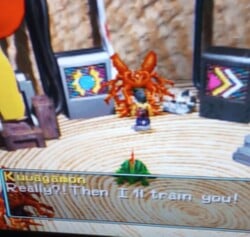
The other Digimon is a Kuwagamon, located in a hut to the left of the tournament registration stand. This Kuwagamon expresses a desire to defeat Kabuterimon in battle. He asks you if you know a way he could accomplish this. If you tell him you know a surefire way to defeat Kabuterimon, he offers to train you.
Not really seeing how him training us is going to give him the ability to defeat Kabuterimon, we instead tell him to just join the city. Shocked for a brief second, Kuwagamon tells us that we're real nice and agrees to join the city.
Purpose in City: Kuwagamon improves the Green Gym, allowing you better stat boosts from training. I believe the way it works is that Kabuterimon increases three stats and Kuwagamon increases three stats, but I don't really know, because I've never not gotten both of them in one go! With these upgrades, the gym is now primed out for you to max your Digimon's pump!
So You Got Yourself a Numemon?
So it finally happened. After four days of training and grinding your Digimon from fresh to rookie, it finally Digivolved into a champion. After all that blood, sweat, and determination, your efforts have been rewarded. Now with your new champion, you'll be ready to return to saving File Island! Except… Oh no! Something went haywire! Somewhere along the way, a wire crossed. You aren't getting something cool like Greymon or Shellmon; no, instead, you got Numemon, the worthless pile of sludge whose stats are actually lower than your rookie's stats were, with its only attack being farting.
So why did you get Numemon? Well, there are actually several potential reasons. You see, the game gives you Numemon when your rookie Digivolves but you don't meet the criteria to become any of the potential champions. This can mean either you don't meet the stat requirements, you have too many care mistakes, or your happiness and discipline meters are too negative. Since you can't get any real champions, the game spits out a Numemon as the failure champion. Numemon are a loser prize, because they only learn filth moves and you take a stat hit from where your rookie was at. Getting a Numemon, to be blunt, means you screwed up somewhere along the way, so the game decided you needed to be punished! This is a holdover from the little pet handhelds where, if you did poorly, you got a Numemon. In that game, it was just a little "haha" because there were no stakes, but here, not only are there stakes, but it's not really fair because, like, you get Numemon for missing any champion requirements, but you have no way of knowing these requirements! There's no information in the game that tells you how to get specific Digimon, and, fun fact, that's related to the overall Digivolution structure. For years it was debated as to how you get certain ultimates, since the game, you know, just doesn't tell you literally anything.
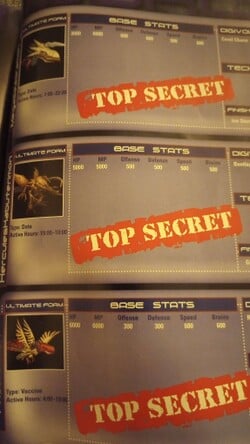
So, I actually own the official Digimon World Prima Strategy Guide, and there are three different ultimates (those being Mega Seadramon, Phoenixmon, and HerculesKabuterimon) that even it has literally no information on how to get them. That's right! The Digivolution system is so convoluted that not even the official guide has all the information! As a result, getting a Numemon is basically being punished for failing to master a system that, if you just played the game and didn't do any outside research, you wouldn't have any chance of succeeding at in the first place!
Now, if this was our first rookie that turned into a Numemon, we'd be screwed and I'd say just start over. Early in the game, it's basically impossible to make a Numemon worthwhile. They only learn filth moves, they start with the weak Horizontal Kick (which doesn't sound very filthy to me), and the only place to learn filth moves through combat is Trash Mountain. So if you get an early Numemon, you're basically stuck with a weak ,worthless champion with zero moves.
At this point in the game, though, you could make Numemon pretty worthwhile, or at least not terrible. With the boosted gym and keeping all your stat chips up to this point (which is something I recommend doing once your champion Digimon hits age ten, unless you're close to a specific ultimate), you can salvage Numemon. If you have those chips and you have access to Trash Mountain and Factory Town, you can just grind against PlatinumSukamons and Geremon until you learn new filth moves, but you'll want to mainly focus on PlatinumSukamons, because they know the best filth move, Ultimate Poop Hell (330 base power). So yes, by the time you open up Trash Mountain and have a bunch of stat-boosting chips, you could make Numemon work if you really wanted too, but really only if you make a conscious decision to make Numemon work. You don't have to do this, though! Importantly, a simple Numemon, the bad prize champion, can become something amazing as long as you head to the right area!
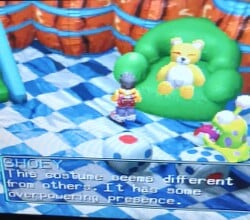
Head into the Misty Trees and return to where you met Cherrymon. Take the left path that opens up after you talk to Cherrymon. This takes you to Toy Town. Toy Town consists of three buildings, these being the Robot House, Toy Mansion, and the Costume House. The Robot House is full of the metallic Tinmon, and, quite frankly, right now they won't talk to you. Next, we have the Toy Mansion, which has a large door with a question mark on it, and, well, you're not strong enough to open it! So that just leaves the Costume House. Inside the Costume House, sitting on a comfy chair next to a set of dice is a teddy bear costume.
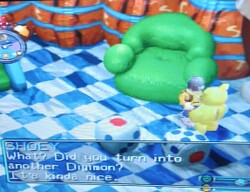
Approaching the costume, you realize that the costume radiates an overpowering aura. The costume falls off the chair, revealing an opening, as if inviting GBA inside. GBA, as if hypnotized, enters the costume and then he Digivolves!
This new Digimon is Monzaemon, a vaccine-type ultimate level Digimon. Now, here's the thing. Unlike every other item that turns you into an ultimate, the Monzaemon suit makes you a true ultimate! You get both the stat boost and the lifespan boost!
That's right! Free ultimate! I actually think this is one of the coolest secrets in the game, because, if you know about this, the worst champion becomes a guaranteed ultimate. Another cool little detail about all this is that every Digimon has areas they like and dislike, with areas they dislike being represented by the face on the happiness meter rotating from a happy smile to a blue sad face. One of the areas Numemon dislikes is Toy Town, almost like it knows it's only here to be transformed, possibly against its will!
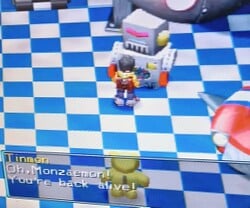
There's just one problem with all of this. If you didn't know about this from an outside source, once again, the game gives you only the vaguest of hints. Like, I believe you learn that a Digimon could slip inside the costume, but how are you supposed to conclude that what you need is a Numemon? I'm not even sure how I learned! It was either a guidebook or just random luck as a wee tot. Now that we have Monzaemon, those snooty Tinmon will now talk to us. Mistaking our Monzaemon for their master Monzaemon, they tell us that Warumonzaemon has kidnapped their friend and they open up the Toy Mansion so that we can save him! But I don't want to do that, because the Toy Mansion is annoying and the reward sucks! More importantly, as long as you don't complete the Toy Town quest line, when your Digimon dies, the Monzaemon costume respawns, so you could just keep getting Numemon and keep getting the free ultimate!
Now that we're equipped with a free ultimate, thanks to the gift left behind by our loyal partner Vomm, we can move forward in saving File City. That's for next month, though! Come back then and see where we take our new Monzaemon!
Pitohui's Pokémon Academy
Written by: Hooded Pitohui (talk)
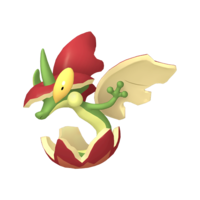
Ah, now, hold on there a moment! Don't go running to the dean to request a tuition refund quite yet, as class is happening this month! In fact, I've even brought a treat befitting the autumnal season. While perhaps overshadowed by the pumpkin, the humble apple is an autumn delight. Apple cider, apple pie, even just a crisp apple plucked directly from a tree (and washed, of course), 'tis the season to enjoy them while crunching through the falling leaves, isn't it? Ah, but perhaps I shouldn't make your mouths water with all the talk of food, as the apple I brought today isn't for eating! No, this apple houses a Pokémon, the worm-like dragon known as Flapple! We'll get right to our discussion of raising a Flapple momentarily, but, first, for those of you who need a refresher or who are just joining us, you can open the box below for a summary of our class's aims.
First, a Smogon University course, this course is not. No, this academy's lessons are designed to get trainers of any stripe thinking about how they can raise their Pokémon, and, as a result, aren't designed to keep up with the widely-accepted metagame for the series. In some cases, the way I've raised my Pokémon may even flies in the face of conventional wisdom. If you're looking for top-tier strategies, do check out Smogon, but if you merely want to get a little deeper into raising Pokémon while still doing things your own way, feel free to use this section as a reference.
Since we all know the importance of citing our sources, I also need to credit the design of some of the tables used in these lectures to Crocodile Dippy, author of the Pocket Handbook which can be found in early editions of Strategy Wing.In addition, if you find yourself struggling to remember the terminology we use in this course, please open the box below for a cheat sheet on the most common terms we'll discuss.
Base Stats: Base stats are the values associated with a particular Pokémon species, and are the same across every individual Pokémon of a given species. You have no influence on them. You can think of them as traits tied to a species. A chimp isn't ever going to be able to get as good as digging as a mole will be, and, likewise, an Abra is never going to have the defensive prowess a Shuckle has.
Individual Values (IVs): Individual values, as their name implies, are associated with individual Pokémon. They range from 0 to 31 in each stat, with 31 being considered a "perfect" IV and higher numbers corresponding to different stats. Magikarp A and Magikarp B will have the same base stats, but they may very well have different IVs. To stick with the animal analogy, one mole may be born with larger claws than another mole, and that first mole is probably going to have an easier time digging through dirt than the latter. Individual values are set in stone, strictly speaking, but you can use Hyper Training (from Generation VII onwards) to functionally get a perfect IV in a stat.
Effort Values (EVs): Effort values are the one thing you can easily change. A Pokémon can earn, primarily through battling, but also through means like the use of certain items or mechanics like Super Training, up to a total of 510 effort values, with up to 252 in any given stat. To finish off the animal analogy, no matter what kind of claws a mole is born with, moles who have more experience digging are probably going to be better at digging than moles which have never dug.
Nature: A Pokémon's nature is, more or a less, a stat modifier with a name meant to make it sound like a Pokémon has some personality. Natures will raise one stat by ten percent and lower another stat by ten percent. Some natures raise and lower the same stat, canceling out the effect and leaving stats unchanged. Natures can be functionally changed with the use of special mint items from Generation VIII onwards.
STAB: STAB stands for Same-Type Attack Bonus, and refers to the boosted power of moves that match the type of the move's user. To illustrate this, consider the case of a Lombre, a dual-type Pokémon which is both a Water-type and a Grass-type. Any Water-type moves Lombre uses will have their power boosted by 1.5x, and any Grass-type moves Lombre uses will, likewise, have their power boosted by 1.5x. (There are circumstances where this does not apply, and, while the 1.5x multiplier is typical, some games use other multipliers.)
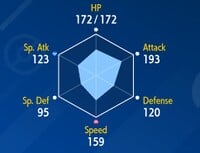
We'll begin our discussion, as always, by looking at Flapple's base stats, and you'll quickly notice that Flapple has an... unusual base stat distribution. Its attack and special attack are its highest stats, both respectable, with its physical attack the higher of the two. You might assume, then, that perhaps Flapple is a glass cannon, designed to strike quickly and strike hard, but a closer look at its base speed stat, coming in at a middling 70, calls that into question. That's not slow, but it leaves Flapple outsped by many other Pokémon. That not being the case, maybe Flapple is one of those Pokémon that goes all-in on either the physical side or special side of the spectrum? Not quite, it turns out. While it does have decent defense, its special defense is low, and its middling HP leaves it without enough bulk to make it an effective physical defender.
So we have a quandary. Flapple doesn't appear to do anything particularly well, straddling this middle ground between being a powerful quick-hitter and exchanging physical blows with its opponents. It's as though it's trying to do both at once, and that works to it's detriment. We're left with a choice to make. Which route do we go? Well, trying to invest heavily in its defense and longevity is going to stretch our EVs thin, as we'd have to shore up HP as well as defense, so let's focus on shorting up Flapple's speed instead. Flapple may not be a glass cannon, but maybe we can help it become a tempered glass cannon, if you will.
What we're going to want is to begin by ensuring Flapple has 31 IVs in attack and speed. We won't worry about Flapple's special attack at all, for reasons we'll touch on when we discuss EV distribution, so feel free to use it as a dump stat here and accept whatever IV you get. Defense, special defense, and HP should all ideally be 31 as well to give Flapple the best chance of holding out through one hit, but, if that proves challenging, any reasonably high special defense IV will suffice if you try and keep Flapple away from opposing special attackers.
|
Name: | Flapple | Base HP: | 70 | |
| Species: | Apple Wing | Base Attack: | 110 | ||
| Type: | Grass | Dragon | Base Defense: | 80 | |
| Abilities: | Ripen | Base Special Attack: | 95 | ||
| Gluttony | Base Special Defense: | 60 | |||
| Hustle | Base Speed: | 70 | |||
With our chosen approach and our IVs selected, we can set Flapple's defensive stats aside for a moment. We can't discard them completely, but they're a lower priority than Flapple's offensive stats. Of those offensive stats, well, the way forward is pretty clear. We want to concentrate EVs as much as possible, and we want Flapple to be as fast as it can be, so we'll invest a full 252 EVs into speed, and then another full 252 EVs into attack, since, even in a hypothetical where its EVs and the power of its moves are held equal, Flapple dishes out more damage with physical moves. That leaves us a few leftover EVs to put into a defensive stat, and we'll choose defense to just add a little more to Flapple's highest of the three.
Now, our IV and EV distribution has already established special attack as our convenient dump stat, which narrows down our choice of Nature to Adamant, Impish, Careful, or Jolly, all of which lower special attack and raise another stat. In our case, the most important goal is giving Flapple whatever speed boosts we can so that it can consistently use its high attack stat, so we'll choose Jolly and raise its speed.
We have one more thing to discuss before building a moveset for Flapple, and that is Flapple's ability. Flapple has access to three abilities, and we can rule one of them - Gluttony - right away. Gluttony merely makes Flapple eat HP-restoring berries earlier than it otherwise would, which doesn't really help it out much, especially since one of the alternative abilities it has is Ripen. With Ripen, Flapple stills eats held berries at the point any other Pokémon would, but the effect the berry has on Flapple is doubled. This is, hands-down, the better option of these two berry-related abilities. Is it the best ability for Flapple, though? It depends. Flapple also has access to Hustle, an ability which increases the power of its physical moves at the expense of a reduction in accuracy. Considering our goal is to make Flapple hit as hard as possible as quickly as it can, there's a logic to choosing Hustle. It's not a bad choice for Flapple, and, if Flapple's defense and HP were even lower, making it less likely that Flapple could take a hit, I'd fully endorse it.
Yet Flapple is just bulky enough to have a chance of lasting through a hit, which, combined with another method for boosting Flapple's attack which we have available to us, makes me reluctant to choose Hustle. A Flapple that endures a hit but that misses while trying to strike back with a OHKO attack likely does not last through another hit. A Flapple that endures a hit, that strikes back but doesn't KO its foe in one shot, and that has half of its HP restored by a Sitrus berry is a Flapple that is likely to endure a second hit and get the KO on its opponent. Both Hustle and Ripen are good abilities on Flapple, and we could find justifications for either one, making this somewhat a matter of preference. I, myself, am risk-averse and prefer to have reliably accurate attacks, so, for today, we're going to select Ripen.
That decision is going to open up an interesting possibility as we get into Flapple's moveset, but, before we discuss that, let's begin with some STAB moves. We may as well get STAB moves for both of Flapple's types, and, luckily for us, Flapple has a great Grass-type move that is exclusive to it. Grav Apple is a Grass-type move with a decent 80 base power and reliable accuracy that also offers a useful secondary effect. Grav Apple reduces the physical defense of any Pokémon it hits by one stage, which lets Flapple's attack stat go even further. It's great to hit an opponent's freshly-switched-in Pokémon with this and to immediately put pressure on them. If Flapple does outspeed them (a moderately big "if", admittedly), they may have to switch out again immediately or face a follow-up from Flapple that is very likely to KO them. On top of all of this, if you should ever happen to find yourself affected by Gravity, Grav Apple's base power increases to a great 120. That's not likely to happen, but it's a nice benefit.
For a STAB Dragon-type move, our choices are basically Outrage or Dragon Rush, and, not only is Outrage more powerful (120 base power versus 100 base power), but it has the less severe drawback. It does lock you into using Outrage for a few turns and leaves Flapple afflicted with confusion when the attack ends, but, if used after a little set-up, that shouldn't be a concern, since Flapple should be able to knock out a few Pokémon in the course of using the move, offsetting its drawbacks. Meanwhile, with only 75% accuracy, Dragon Rush has a high chance of missing, leaving Flapple taking attacks without even dishing out any damage. Outrage is the better pick here.
| Grav Apple | Physical | The user inflicts damage by dropping an apple from high above. This also lowers the target's Defense stat. |
| Outrage | Physical | The user rampages and attacks for two to three turns. The user then becomes confused. |
| Dragon Dance | Status | The user vigorously performs a mystic, powerful dance that boosts its Attack and Speed stats. |
| U-Turn | Physical | After making its attack, the user rushes back to switch places with a party Pokémon in waiting. |
Now we get to that interesting possibility I mentioned earlier. Since Flapple does have enough bulk to take an attack, and since it has access (one single time) to great healing through the combination of Ripen and a Sitrus Berry, we can actually equip Flapple with Dragon Dance and give it an opportunity to raise its attack and speed. This is another reason I prefer Ripen over Hustle; it's still possible to get an attack boost without sacrificing accuracy. The odds are that Flapple will not get multiple Dragon Dances in, but, even one helps it out immensely when it comes to outspeeding more foes (49 other Pokémon tie it when it comes to base speed, meaning that a boost gives it an edge over, at a minimum, 49 more possible opponents) and makes it even more likely it can KO foes in one or two hits. Bring Flapple in, let it take a hit as it uses Dragon Dance, let the Sitrus Berry restore its health, and then let it run wild.
For a fourth move, our options are fairly open. Heavy Slam might look appealing as an Ice-type counter, but Flapple is actually (at the time of this writing) the lightest Pokémon that can learn the move, limiting its usefulness. Furthermore, you ought to be keeping Flapple away from Ice-types altogether. The risk they'll OHKO it, with its 4x weakness, is simply too high. Sucker Punch and U-turn are, as often the case, both good utility options here, running off Flapple's high attack stat and providing it with a means of hitting faster opponents or doing some damage while getting out of dodge. With Flapple's speed only being middling, Sucker Punch might be the better option, speaking broadly, since there are many foes that will strike Flapple before it can flee with U-turn, but, we have a Flapple with a Dragon Dance speed boost (ideally), so I've elected to go with U-turn. Ideally, if it gets in a pinch, Flapple can U-turn out of battle, doing some damage while bringing in a Pokémon better equipped to handle whatever attack is coming.
With that, we conclude our examination of Flapple. I hope you've all taken away that you have some flexibility with this cute apple-dweller. You could, for instance, choose Hustle over Ripen, and, to better take advantage of it, opt for a slightly different moveset than I have presented. That is the joy of it all, isn't it? You can always experiment! Now, then, I must admit... I was not entirely honest at the start of class. Flapple isn't the only apple I brought, you see. You didn't think I would taunt you with the possibility of food only to have none prepared, did you? On your way out, please do pick up a Tart Apple for yourselves, and enjoy the autumn weather!
Shine Get
Written by: Waluigi Time (talk)
Hello there, 'Shroom readers! Welcome back to Shine Get, the section about getting shines in Super Mario 63. Big Boo's Haunt isn't accessible yet, but exploring ancient pyramids can be pretty spooky, right? It's a bit earlier than in 64, but today it's time to tackle the first mini course, Shifting Sand Land!
Entering the rightmost door in the main hall, there's a Toad who doesn't have much interesting to say. He's just happy to see someone since Bowser scared off all the Toads. Before hopping into the painting, I want to check out the secret passage to the left, though. A sign inside explains that this is, and I quote, "Princess Peach's secret passageway of secrets, secretly used to secretly travel secretly from room to room in secretistical secretism", so what I'm getting from this is that it's public kingdom knowledge. Following the path to the left leads to the Bob-omb Battlefield room and a Hover Nozzle box. There's not really anything to do with F.L.U.D.D. in the castle for now, but it's here. There's also a dead end and a sign that says "Sorry, but Bowser has locked up this passage-way", and I like to imagine that it's Bowser himself apologizing for the inconvenience. Apparently, this passageway isn't very secret after all. Anyway, into the painting!
Mission 1: Inside the Pyramid
The first mission today is visiting the Ancent[sic] Pyramid, the burial site of Koopa Pharoah[sic] Yuuzgonadai. Was the name meant to be a warning to all who would dare enter the pyramid, or was it merely sealing the poor Koopa's fate? Well, between the two of us, only one is still alive... Anyway, I should probably explain what a mini course is. It's like a course, but mini. It's smaller and only has 3 Shine Sprites and Star Coins each, instead of the typical 5 Shine Sprites and 6 Star Coins. Basically, it's less work!
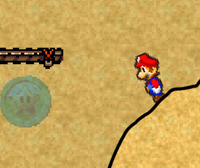
I hurl Mario across the sand, and it's no time at all before I'm at the entrance of the pyramid already. In the process, I collected 3 Red Coins that are going to go to waste, because they were just right in front of me. But before I go into the pyramid, there's a Star Coin suspended over a pit. This would be easy enough to get with F.L.U.D.D., but I don't have it. Mario has four lives to play around with though... Geronimo! Actually, I messed this one up royally and only got it three lives later. I'll admit, I could've done some fancy footwork to reach F.L.U.D.D., but it's out of the way and I'm stubborn. Anyway, time to trespass on Yuuzgonadai's burial grounds. The entrance is on the ground in the middle, and it may not look like a door, but I assure you, it is in fact a door.
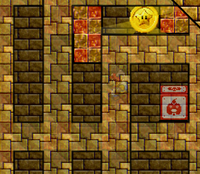
So what horrors await us in the pyramid? Mummies? Yuuzgonadai themselves?! Well, no. Just platforming, Goombas, and death sand. Don't fall in the death sand! I did, because I wanted to see how deathy the sand actually was. The things I put Mario through for you guys! Otherwise, no Grindels, Spindels, or even Eyerok. Just Goombas. Anyway, it's all fairly simple platforming, even without F.L.U.D.D.. Moving platforms, spinning platforms, rotating platforms... A bit of platforming later, and I get the Hover Nozzle finally. At the top, there's a weird "maze" thing with a Star Coin in it. I go to the middle and up, jumping between blocks for enough height. I drop down to the right to get the Star Coin, then jump back up for the Shine Sprite.
With the fifteenth Shine Sprite, a message pops up asking if I've gone back to the previous courses to collect more Shine Sprites. I haven't even gone ahead yet, what are you talking about? Also, when I collected it, the text calls this level Sinking Sand Land, but it's Shifting Sand Land everywhere else. Whoops.
Mission 2: Trekking for 8 Red-Coins
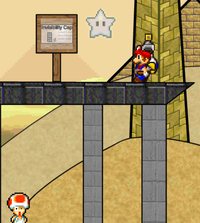
I figure I might as well start out by redoing what I did last time, so in a quick run from one end of the level to the other, I get the first three Red Coins since they're just right there on the ground. Then I triple jump and hover off of a hill to get onto one of the pillars near-ish the pyramid and grab the fourth Red Coin. There's also a Star Coin up here, which I get with another triple jump and hover combo, and a Sling Star. I took the Sling Star but it shot me to the top of the pyramid, and this is actually something for the next Shine Sprite (spoilers!) so I turned around.
According to the mission description, the remaining Red Coins are cursed and require Ancient Magic to reach, or, as it's known in gaming circles, the Invisibility Cap. Back at the start of the stage, I triple jump and hover again (this set of moves gets a lot of mileage) onto the top of the covered platform, where I grab the Invisibility Cap and then book it to the right. Inside a hill is the fifth Red Coin, and with the Invisibility Cap, I can just walk right through! Also, despite my "booking it", speed isn't really necessary, I just like to go fast in this game. The need for speed proved to me my downfall because I ended up hovering horizontally right down into a pit. But hey, you keep all the collected Red Coins when you die, so it doesn't matter at all! Back on the platform with the Invisibility Cap, I Sling Star up into the clouds, do some platforming to the left, and get another Red Coin. Then I go back to the right and... there's a caged Red Coin. Curse my fuzzy memory. So I drop back down, turn invisible, Sling Star back up again, and grab that. The final Red Coin is just below on some platforms, so I drop down, boom, Shine spawns, Shine get!
Mission 3: Shining Atop the Ancient Pyramid
"The Shine Sprite glows brightly from on top of the Pyramid, but how to get there?" Well, as I alluded to, I already figured that one out, but let's do this one real quick. Also, for some reason, the mission select screen is still listing 0/3 Star Coins, even though I have them all. I'm not sure if I specifically did something to glitch this out, or if it's consistently a problem. If this happens to you, don't sweat it, just use the Star Map instead.
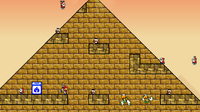
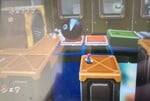
So, what you're supposed to do is take that Sling Star up and follow the platforms all the way to the right, and those will take you to the Sling Star. But I'm not going to do that because performing minor sequence breaks is cooler. Since I already have the Star Coin and I'm not collecting Red Coins, I don't even need to jump from the hill, I can just triple jump and hover from directly below the Sling Star to reach it. It sends me to the top of the pyramid, with a Hover Nozzle box, and a little bit of platforming and enemies. And when I say little bit I do mean a little bit, this section is very small and very easy (if you don't believe me, just look at the picture) and can be trivialized even further with the Hover Nozzle that you get right here! What do you call a cakewalk that involves jumping and a water jetpack? Whatever it is, this is that. Quite possibly the easiest Shine Sprite so far gotten.
That wraps up Shifting Sand Land, but something kind of funny is a Toad added to the castle's main hall around this time. He's running back and forth with an irritated expression on his face, and when you talk to him, he says he has to deliver a letter to General Pepper from the Star Fox series, but he's unable to since he has no idea what a Corneria is, and the only hint he was given is to do a barrel roll. On a similar note, there's also a Toad outside the room with the Shine Sprite Orb who talks about getting a copy of Super Smash Bros. Brawl, then starts complaining that he's not a playable character (could this be the Toad?). He then proceeds to talk about what his moveset could be (with the exception of an up special which he goes blank on, and a Final Smash which is just unmentioned), concluding with his down special, flipping the script on Princess Peach by using her as a shield. It's funny because I wouldn't at all discount the possibility that Runouw wanted Toad in the game and already had a partial moveset idea for him that just got stuck in the dialogue of a random NPC.
Anyway, we've pretty much run up against a wall, and the only thing left to do is take the fight to Bowser himself! What's more fitting for big old Issue 200? (Actually, there's some hidden shortcuts in the castle that I could use to skip ahead to courses much later in the game, but I don't really want to do that. We're going straight through!) See you then!
The Anatomy of a Pikmin
Hello, and welcome back to The Anatomy of a Pikmin, Strategy Wing's award-winning Pikmin section. We've finished up the with the original game's Pikmin types, so now it's time to start on the expansion Pikmin, starting with Purple Pikmin.
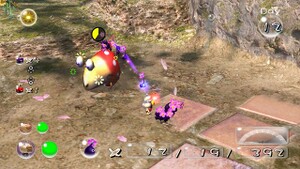
Found in Pikmin 2's first cave, the Emergence Cave, Purple Pikmin make an immediate impression with their girth. By far the biggest Pikmin, Purple Pikmin are incredibly strong, with the lifting power of ten Pikmin. This is a very useful power, because it means that you don't need as many Pikmin to carry treasures or corpses. This is especially useful in caves; since time does not flow in caves, you can simply have a few Purple Pikmin carry things back while you explore the rest of the sub-level. There are even treasures that take advantage of this strength by being heavier than even one-hundred regular Pikmin can carry! Probably the best example of this is the Doomsday Apparatus, a treasure which has a weight of one-thousand, meaning you need one-hundred Purple Pikmin to carry it away! All this girth does have a drawback though, and that's that Purple Pikmin are easily the slowest Pikmin. Even with flowers, Purple Pikmin still move extremely slow, which isn't actually a huge deal. I's more anything then anything. Since Pikmin 2, unlike Pikmin 1, doesn't have a day limit and since most of the game takes place in caves anyways, where, again, time does not flow, you really aren't hindered by the slower movement speed of purples. Like I said, if anything, it's more of an annoyance then a real problem.
Now here's the thing; in Pikmin 2, Purple Pikmin are completely broken! They have the carrying strength of ten Pikmin, right? Well, they also have the highest attacking power in the game, attacking for double the damage done by a standard Pikmin. For comparison's sak,e Red Pikmin, the strongest Pikmin in Pikmin 1, attack for one and a half times the damage of a regular Pikmin. So, as the first thing that makes them broken, Purple Pikmin hit the hardest, but that's still not all! Purple Pikmin also, unlike any other Pikmin, do damage when they land on an enemy. So, if you have like thirty Purple Pikmin and throw them at an enemy, you can beat most standard enemies just with the landing damage. They're even able to beat things like the Fiery Bulblax because, before they run off from being on fire, they'll inflict their landing damage. Purple Pikmin also have a 33% chance of stunning enemies for five seconds!
If an enemy is stunned, that's basically a free win with enough Purple Pikmin. Most enemies and bosses are a joke when you have a squad of Purple Pikmin, because they just do so much damage from the 2x multiplier and the landing damage that most things fall to them quickly. Purple Pikmin even have their own little homing mechanism. If you're slightly off on a throw, the Purple Pikmin will land on the enemy anyways. Really, the only enemies that Purple Pikmin don't dominate are those that have some sort of elemental hazard or ones that are too high up and can't be reached by throwing a Purple Pikmin, since Purple Pikmin also have the lowest throw thanks to their girth. Purple Pikmin even get their own boss, the terrifying Waterwraith, who can only be damaged by throwing a Purple Pikmin on top of them, which, like, fully brings them into this dimension or something, allowing them to be damaged.
But that's not all, because Purple Pikmin also have a bunch of useful utility powers! For starters, the thud that occurs when they land can do things like instantly crack open a bunch of eggs, deactivates fire geysers and electrical wires, and can even damage gas pipes. So, while Purple Pikmin don't resist any elements, their powerful thuds make them great for quickly clearing out annoying cave hazards. They also don't scatter when Mitites hatch out of an egg, and, in fact, can be used to quickly defeat a hoard of Mitites since their thud instantly kills them. They're also immune to being blown away by enemies who shoot wind! The only thing that even begins to keep Purple Pikmin in check is that they don't have an Onion. This means that you can only make new ones by using the Violet Candypop Buds inside select caves. Again, though, it's not like you need a lot of Purple Pikmin (outside of retrieving the Doomsday Apparatus, of course). If you have 30-40 Purple Pikmin and use some Ultra-Spicy Sprays, you'll be able to easily defeat almost any enemy in the game. Purple Pikmin in Pikmin 2 are easily the best Pikmin in the game, because they're just so broken.
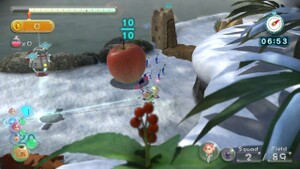
In Pikmin 3 Purple Pikmin were cut from the main story, seemingly replaced by the new Rock Pikmin. Purple Pikmin do, however, make an appearance in the side modes, Mission Mode and Bingo Battle. For some reason, despite only appearing in these side areas, Purple Pikmin were super nerfed. They now have the same power as a Red Pikmin and they no longer stun enemies when they land on top of them, nor do they do damage with their thuds. Basically, most of their combat capabilities are handicapped. What this means is that a lot of their strengths have been taken away but none of their flaws have been taken away to make up for this. They're still really slow, and they still have the shortest throw height of all Pikmin.
Purple Pikmin basically operate as a worse Rock Pikmin. While they have stronger attacks than Rock Pikmin, they no longer do landing damage on the enemy, which Rock Pikmin do. What's odd is that they still do a little ground pound animation when they land on an enemy; it just doesn't do any damage. I wonder if they were originally meant to do landing damage but either it was cut late or an oversight removed it. They also even lose some utility power, because they are no longer immune to being blown away by the wind, and you can no longer bring airborne enemies down with a single Purple Pikmin like you could do in Pikmin 2.
Purple Pikmin in Pikmin 3 are really only useful for their most boring power, which is the ability to carry as much as ten Pikmin.
The only reason you'd need them is to lift something with a carrying weight arbitrarily made higher than one-hundred units or that the level doesn't give you enough Pikmin to carry normally. I don't really see why Purple Pikmin needed to be nerfed this much. Like, I could see if they were in the main game why they'd need to be nerfed, because, yes, with their original powerset, Purple Pikmin were broken and would have rendered Rock Pikmin useful only for breaking down crystal barriers. That's what's strange, though. Purple Pikmin aren't in the main game; they're only in side modes. So why couldn't they just be broken? At least then players would have more reasons to use them instead of only using them where the carrying weight of items requires it.
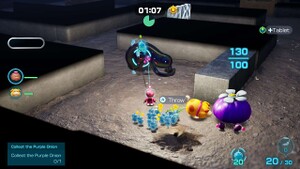
If Purple Pikmin are broken in Pikmin 2 and near-worthless in Pikmin 3, then Pikmin 4 manages to strike a pretty good balance between the two. Purple Pikmin have all their standard traits, still not resisting any elements, still being the slowest and heaviest Pikmin, and still weighing as much as ten Pikmin. They can still carry as much as ten Pikmin, too. Purple Pikmin are once again no longer affected by wind and, like Ice Pikmin, they pop bubbles quicker than other Pikmin types. To counter that added utility, though, they now scatter when confronted by Mitites or upon hearing an Emperor Bulbax roar. So, as you can see, from a utility standpoint, Purple Pikmin have a good mixture of good elements and bad elements in Pikmin 4.
Pikmin 4 also plays with their combat capabilities. In Pikmin 4, much like in Pikmin 3, Purple Pikmin still only hit for a 1.5x multiplier, so they're only as powerful as a Red Pikmin. However, their thud attack has returned, and it's even more powerful in this game! In Pikmin 4, their thud is twice as powerful as a Rock Pikmin's thud. It's kind of funny. In Pikmin 3, Purple Pikmin were basically worse Rock Pikmin, but, in Pikmin 4, Purple Pikmin are far superior to Rock Pikmin. Not only do they do twice as much landing damage, but they latch onto enemies, unlike Rock Pikmin. All of this means that they do damage faster than Rock Pikmin. It's kind of odd that they would go with that. You'd think it'd would be the opposite, that Rock Pikmin would do more landing damage and Purple Pikmin more regular damage. As it stands, though, Purple Pikmin basically render Rock Pikmin worthless if you don't need their ability to destroy obstacles.
Purple Pikmin are probably the second-best combat type in the game, only really competing with Ice Pikmin. While they do more damage than Ice Pikmin, they lack the freezing ability Ice Pikmin have. They don't even have a substitute power, with Purple Pikmin no longer being able to stun enemies. Purple and Ice might be the best offensive combo in the history of the Pikmin franchise, with Ice Pikmin freezing the enemy and Purple Pikmin using their massive attacks to beat them down. While Purple Pikmin don't hit as hard as they do in Pikmin 2 and they don't stun enemies, they might be even more useful in Pikmin 4 for one simple reason. For the first time in the Pikmin franchise, Purple Pikmin are given their own Onion! Found in level 10 of the trials of the Leaf Sage, the purple Onion is referred to as a "Purple Jewel" when first uncovered.
This Purple Jewel can be acquired by completing a very difficult challenge that took me many, many attempts. It also highlights how good the Purple and Ice combo is, because they're the only two Pikmin types in this level! With them having their own Onion, Purple Pikmin are even more useful, because they're no longer a precious commodity you don't want to use. Instead, they're a resource that you can constantly and easily replenish without having to go through caves repeatedly!
Purple Pikmin are a very interesting type of Pikmin. They're really the only Pikmin that solely focuses on combat and not so much on puzzle-solving aspects. Yes, they do have their own puzzles, but those boil down to "bring X amount of purples to carry this thing". Instead, Purple Pikmin are one of the few types, along with rocks and reds (in Pikmin 1), that were built with combat in mind. Because of this, Purple Pikmin tend to rank really high on the Pikmin tier lists, because they're just so dominant in combat that they tend to break that aspect of the game. They're just the most useful Pikmin type to have for enemy encounters that don't require specific Pikmin types, so you end up using them a lot.
That's going to be all for this month. Join us again next month, where we'll be looking at Strategy Wing Director Hooded Pitohui's favorite Pikmin type, the White Pikmin.
Four Steps for a 3D World
Written by: Hooded Pitohui (talk)
Hello, all you readers of The 'Shroom, and welcome back to Four Steps for a 3D World, a section where we are finally covering a level from Super Mario Galaxy 2. For those who haven't been following the section, what we're doing here is taking levels from Super Mario games directed by Koichi Hayashida and seeing if we can successfully identify the four steps that, according to a design philosophy Hayashida has discussed in interviews, a Nintendo-made 3D Super Mario level should take a player through.
According to Hayashida, these levels are (in the games he has influenced, at least) designed around an introduction that lets a player learn a mechanic in a safe environment, further development that builds on what the player is learning and introduces more complicated aspects of a mechanic, a twist that adds some kind of significant wrinkle or challenge to force players to consider the mechanic from a new angle, and a conclusion which gives players one final satisfying chance to show they've mastered the mechanic. Knowing these four steps, we dissect levels from games he directed and see if we can tease out all four steps hopefully gaining some insight as to when it's advantageous or disadvantageous to stray from these four steps.
Now, to this point, we've covered levels from Super 3D Land and Super Mario 3D World, two games with similar structures (e.g., a linear level design philosophy) both directed by a veteran Hayashida. This month, we're going to the game on which Hayashida cut his teeth as a director, Super Mario Galaxy 2. Now, what's interesting about this game is that it's arguably a bit of a bridge between Super Mario Galaxy and the 3D Land/3D World style. The former, while having linear mission structures and levels mostly divided into distinct sections, still retained in some portions of its levels (e.g., the starting planets in Honeyhive Galaxy and Melty Molten Galaxy) the sanxbox feeling of previous 3D titles, while the latter duology went all-in on linear missions and levels, feeling more like direct translations of 2D Mario levels into a third dimension. Super Mario Galaxy 2 sits somewhere in the middle, more linear than Super Mario Galaxy, but not as streamlined as the games that would follow it.
That's precisely what will make diving into it so interesting. As the seeds of a streamlined linear level design are planted, and as Hayashida directs a game for the first time, do we see these four steps that would come to so heavily define later games made under his direction? Do we at least see the beginnings of that design philosophy, or is Super Mario Galaxy 2 doing something completely different? Well, to begin answer those questions, we're going to look at one of my favorite levels in the game, the Chompworks Galaxy, focusing in on its first mission, "Where the Chomps Are Made of Gold".
Clearly, we have a structure resembling the four steps! It doesn't appear to quite be solidified, lacking the Conclusion section we see in later games (though, given that the section usually amounts to "do this thing one more time to reach the top of the flagpole, I don't feel that's a big loss) and starting with a more dangerous Introduction than later games do, but three of the four steps are still identifiable. We have an interlude in the middle of things that seems to toss out the mission's main mechanic entirely, which I personally don't mind because it's fun enough to long jump between the side platforms. I think it's emblematic, though, of the streamlining that occurred between Super Mario Galaxy 2 and its successors; it's the kind of diversion you don't see much in 3D Land and 3D World, for better or for worse.
Interestingly enough, that interlude planet is also a section which does fit well into the second mission of the Chompworks Galaxy, which, again, I think speaks to some design differences between Galaxy 2 and later titles. Even made more linear than Galaxy, Galaxy 2 still has some of that old 3D Mario nature where the game has players revisit levels and complete multiple missions in them. 3D Land and 3D World eschew that in favor of each level existing to be played through once. Galaxy 2 still held onto a shred of the sandbox philosophy that levels should feel like they still have things happening in them when the player isn't around, while the later games, in the name of streamlining, went all-in on making levels into nothing more the obstacle courses made exclusively for the player to run through.
It's interesting to see that shift in design philosophy in the process of occurring, and it's interesting to see that, even here, we can see the broad strokes of the four step framework. Super Mario Galaxy 2 is this fascinating transitional game from a level design standpoint, and one we'll be looking into more as this section continues. After all, we could walk away with an entirely different impression if we were to, say, look at Starshine Beach Galaxy over a mission in the Chompworks Galaxy!
Now that we've covered at least one level in every 3D Super Mario game directed by Hayashida to date, where are we going from here? Well, I have more levels planned out for us to look at from those three games, and maybe someday we'll, for fun, look at levels in the other 3D games, but I'm also open to suggestions from you! If you have a level you'd like to see covered, drop me a line on the forum or on my talk page here on the wiki. For now, though, with levels from four different games covered so far, three of our usual four steps apparent in the Chompworks Galaxy of Galaxy 2, and one month to go until issue 200, this has been Four Steps for a 3D World!
Koops, Your Emblem is on Fire
Gooooood morning, noon, afternoon, evening, night, NEVER, everyone. We're back, we're doing our bonus content issue (much sooner than expected), and we're gonna see some stuff. Enjoy.
Fun fact about the Bartre/Karla support, they actually do have a paired ending if they reach A, even if it's canon they end up together regardless. But the weird thing about said ending is it contains one of the game's weirder cases of mistranslation, up there with Nergal fucking up his death quote. It goes like this:
"Karla and Bartre were reunited in Ostia. During the battle, they became friends. That friendship deepened into love, and they were wed. Later, Karla died of illness. Bartre took their daughter to her uncle and joined Karla."
This is wrong because he didn't die, nor does the Japanese ending even say this. As a matter of fact, a number of paired endings are different in the Japanese release, but end up mistranslated for some reason. It's weird.
Anyway, now we move on to more stuff.
With that, we are (most likely) officially done with FE7.
Next time... possibly next month... we will be starting a new journey. As Santa foretold. Or something to that effect.
See you.
| The 'Shroom: Issue 199 | |
|---|---|
| Staff sections | Staff Notes • The 'Shroom Spotlight |
| Features | Fake News • Fun Stuff • Palette Swap • Pipe Plaza • Critic Corner • Strategy Wing |


