Rice Beach
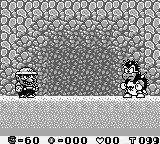
Template:Worldbox Rice Beach is the starting point of Wario's adventure to steal the rumored Princess Toadstool statue in Wario Land: Super Mario Land 3. The area is a small beach on the west side of Kitchen Island that has a couple caves past the water. Rice Beach contains six levels and one secret Treasure. The main beach has typical pirate fare: skull-and-crossbones-covered boxes and barrels probably owned by the Brown Sugar Pirates litter the sand. The beach is home to various creatures, such as Wanderin' Gooms, Pirate Gooms, Munchers, Guragura, Togemaru, Droppers, Yadorā, and Gaugau. Up past the sandy beach lie the caves. Lava, spikes, and long, twisty caverns are obstacles that Wario must pass to proceed, and the caves also house Pirate Gooms, Pouncers, Debidebi, and Penkoons. Spiked Koopa Troopa, Rice Beach's boss, also lives in the caves. Wario must defeat the dangerous turtle to move on to the next world, Mt. Teapot.
Course No. 1 and Course No. 3 experience a high tide once the world is complete. The two levels become partially submerged, although they will retain the same level design. This high tide allows new areas to be reached.
Courses
Course No. 1
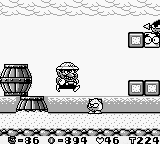
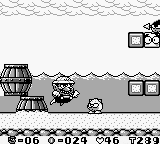
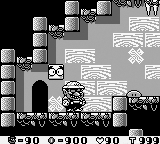
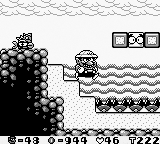
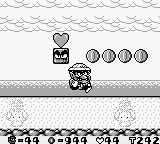
The first course in the game is a relatively straightforward level with only a few distractions. A somewhat wide variety of enemies appear: Wanderin' Gooms, Pirate Gooms, Munchers, and a Guragura. The course starts with a simple straightaway with two blocks and a Wanderin' Goom. It soon becomes a more busy level; barrels are scattered everywhere and Pirate Gooms attempt to halt Wario's progress. About one-third of the way through the level, a ladder leads to a short underground section where coins and hearts can be obtained. Two more ladders lead out of the underground area. Both go straight to the surface, but one leads to a barrel-and-block enclosed area; if Wario breaks the blocks, he will have to go back and use the other ladder. Just past the enclosed area is a small Muncher-infested area. Past the Munchers are more barrels and sand. Two-thirds through is another ladder. This one leads to an area that has a long string of Munchers. Wario cannot cross this line, even if he has a power-up. Just past the final ladder, there is a door protected by bricks, through it is the level's end. The first time the course is played, a small cutscene shows a Guragura using a ten-gold coin to open the door; a mural on the wall shows Wario how to do it as well. In the second and later times it is played, the Guragura attacks Wario.
High Tide Differences
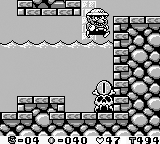
When the world is beaten, the tide rises and floods courses No. 1 and No. 3. In No. 1, there is one- to four-tile high water. This water engulfs all of the levels areas excluding the four spots with ladders. Instead, the underground is flooded. In the first underground area this makes no difference; in the second, however, Wario can now cross the Muncher pit. Across the now-useless blockade is a a Dragon Pot and a room with a giant heart worth three hundred small ones in other words, three extra lives.
Course No. 2
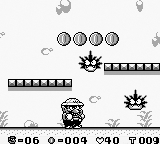
Course No. 2 is another sandy, beach course, but unlike Course No. 1, the second course in the game is a bit more inland; there is hardly any water and many boxes, rocks, and cliffs. The level is mostly straightforward: Wario can stay on the ground and continue or climb on rocky outcroppings to a door. If Wario chooses the lower path, he must avoid Droppers that attempt to fall on his head and Pirate Gooms that try their best to spear the antihero. Once Wario has progressed a bit more, he comes upon a large structure with many blocks and bridgelike outcroppings. If Wario jumps right on the very top of this structure, he can gain access to a hidden room containing Pouncers, Droppers, and spikes. Past these hazards is another door that leads to a long stretch of disappearing platforms. Wario must collect the coins on the unreliable bridges while avoiding Pirate Gooms. If the antihero manages to make it across, he receives two hearts for his trouble and reaches the end of the level. However, if Wario does not go to the hidden room, he must continue past a Togemaru to reach a door to to a save point.
The save point can also be reached by another way; if Wario takes the upper path at the beginning of the level, he can also reach it. The higher path requires some fancy footwork as Wario must jump across platforms that fade in and out of existence while also avoiding two Pirate Gooms. Through the door are three White Puffs that only Dragon Wario can defeat. They will attempt to propel Wario into spikes on the low ceiling. Past the blobs that inflate is a ladder that Wario must climb down. After the ladder is a Dropper, another Inflatoblob and an additional ladder, which, once again, Wario must climb down. Wario then lands in some water, where Helmuts and droppers impede his progress. Past the water is a Save point and a door to the rest of the level.
Wario must break free from some blocks to continue. The thief must avoid Droppers and Pirate Gooms once again. Once the ceiling opens up once again and the threat of Droppers is taken away, disappearing platforms appear with coins above them; also, Togemaru and Pirate Gooms pop up. However, the land is a straight shot to the final door and the exit, where Wario must duel a Dangerous Duck and leave the level.
A small quirk about this level is that there is a long line of glitchy tiles at the very top row of the level from the beginning to about one-quarter through. The player can see this quirk by obtaining a Jet Pot and flying directly left from the second door. Whether this is simply a programmer's error or a glitch is unknown.
Course No. 3
Course No. 3 features large amounts of quicksand. This sand can cause Wario to sink into pits often inhabited by Munchers and Yadorā. Wario's jumping and moving capabilities are severely limited while he is in the sand. However, Wario is able to jump out. When the antihero enters the level, he is confronted by a Wanderin' Goom and a few Yadorā. Wario must avoid these creatures and some Munchers as he enters the first quicksand pit. Wario may obtain the powerups above the sand with some agile jumping. When Wario leaps out of the hole, he must avoid another Yadorā and leap into more sand. Inside this pit is yet another Crab and two Face Blocks. Wario can obtain them only if he has a Jet Pot or a Dragon Pot. After Wario bounds out of the second trap, he finds some poles with sinking sand between them and coins above them. Above the fourth pole is a hidden block with a Heart in it. Just past the poles is a pyramid of barrels; Wario must progress past these or fall between the fourth and fifth poles into a secret door. Through this door, many coins and Face Blocks can be found, as well as one enemy — a Gaugau. Wario must defeat the monster and smash through many breakable blocks to another door, which leads to the rest of the level. However, if Wario does not go through the secret door, he will find a door to a Save Point.
As the antihero continues, he will find a ladder that leads to an underground passageway blocked by a breakable block underfoot; this impassable corridor is the exit to the secret area. Wario breaks the block with his head to escape. When Wario passes the ladder, he finds a long stretch of seemingly flat ground. However, the area is riddled with small quicksand traps and Yadorā. If Wario falls into a trap, he tumbles into a larger pit filled to the brim with sand. At the bottom, Muncher lie in wait for prey. To the right is a ladder out of the pit and onto a door to the final room with the level's exit. This area has a more "civilized" feel, with carefully crafted columns and wood flooring. There are also three waterfalls of quicksand that Wario must pass through and two Pirate Gooms that Wario must avoid. Finally, the fat thief makes it to the exit, where a ten gold coin is required to pass.
High Tide Differences
When the player completes Rice Beach in its entirety, Course No. 3 is flooded by a high tide. No longer is there quicksand throughout the level; almost all of it is replaced with water. Also, the majority of the level is flooded with two or more tiles of water.
The most obvious difference due to this water is clear when Wario takes a step into the first ex-sand pit. Inside the now-watery hole is a treasure door that leads to one of the Brown Sugar Pirates' treasures. Wario can obtain this prize by acquiring a Dragon Suit and hopping in the second pool of water. Inside is a Face Block that holds the key to the door; Wario can use the key to steal himself a rather bombastic goblet. If Wario continues his path, he can find a collection of tall and short posts. In between two of these posts is a water-free hole that leads to the secret pathway containing a Gaugau. None of this underground cave has been changed. If the fat thief chooses to bypass the secret room, he must traverse another large pool of water which contains two doors that lead to the same save area. Past the pool is a large stretch of land with four small holes and five Yadorā that Wario must deftly avoid. If the antihero fails to jump a hole, he will fall into a small lake lined with Munchers. Wario can simply press onward to jump out of the pond.
The last change to the level is the total flooding of the final room. This Middle Ages-esque room is now completely flooded, making it easier for Wario to jump up at the end to find a secret exit to Course No. 6 (although doing this is also possible before the high tide).
Course No. 4
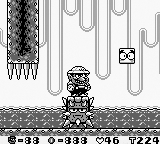
Course No. 4 starts with a bang; as soon as Wario enters the level, he is confronted by a massive Pouncer that begins chasing him. The antihero must immediately take a right and start breaking blocks so as to run away from the dangerously spiky brick that will instantly defeat him. After navigating a long, twisty cavern full of bricks, Wario must use wait for his pursuer to reach him. When the Pouncer reaches Wario, it becomes Wario's only way of completing the level: it floats into the lava and allows Wario to stand atop it and cross the fiery substance. While standing on the Pouncer, Wario must avoid spikes and Debidebi while simultaneously collecting coins and Hearts. Some fancy footwork is also required; at one point, Wario must jump off of the Pouncer and navigate a series of rocks before hitching a ride once more. When the lava is gone, the Pouncer once again begins pursuing the yellow-clad thief through another twisted, block-filled corridor. When Wario reaches the door to the next room, the Pouncer stops the chase and simply disappears through some spikes in the ceiling.
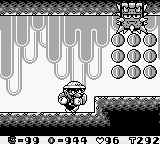
The second (and final) room contains yet another Pouncer, but this time the lethal block attempts to fall on and squash Wario. Two Pirate Gooms also wander the room. If Wario smashes these little beasts by throwing them below the Pouncer, he receives a 10-gold coin. To finish the level, Wario must simply walk through the Skull Door, no coins required.
Course No. 5
Rice Beach's fifth course starts out simply enough: Wario must jump over a barrel and battle a Gaugau to get to the next room, where things get more complicated. Much like the final room in Course No. 4, Wario must avoid a Pouncer that tries to pummel him. However, Wario must also avoid three more Pouncers (with various other obstacles below them) and three Pirate Gooms to get to the next door. The second Pouncer in the room has breakable bricks beneath it that Wario must break to sneak below the monster. The third has coins that Wario should probably avoid if he wants to live, and the fourth has a coin-covered conveyor belt that creates further complications for the antihero. When he finally progresses to the next room, Wario has to bypass electrocution by fleeing two round, spiked electrical creatures. Once the thief makes it past, he can save his progress with a 10-Gold coin.
When Wario passes into the next room, he is immediately assaulted by a Penkoon. By jumping over various ledges and half-broken bricks, he must defeat the four monsters to reach another door that leads to a small room with a single switch. Tripping the switch makes the unbreakable blocks above some Face Blocks disappear, letting Wario hit the Face blocks and collect the Hearts inside. When he's ready, Wario may jump over a large ledge, fight yet another Penkoon, and enter the final room.
Since Course No. 5 is the final (non-secret) level of Rice Beach, the final room naturally contains the world's boss, Spiked Koopa Troopa. The battle takes place in a large, sandy cave. The sand works to Spiked Koopa Troopa's advantage, since he burrows beneath the sand to attack Wario. Wario must avoid the boss's attacks and finally launch a side-tackle when the bro is standing. If Wario has the Bull Pot, he can also jump to hit Spiked Koopa Troopa's underside while he attempts an air attack. Three hits takes the foe out entirely, producing a rain of coins, and allowing Wario to progress to Mt. Teapot.
Course No. 6
Course 6 is a hidden course that is only accessible by reaching the secret exit in Course 3. There are no enemies in this level that can harm Wario; instead, crabs can be bumped upwards from the sand with a Ground Pound. These crabs hold a coin that is worth ten regular gold coins. Wario must body slam the crabs to get their coins. Doing so will make the crab lose grip on it's ten gold coin and knock another one out of it, netting Wario eleven coins. At the end of the level, Wario must give up ten of his coins to go through the exit, which would mean he would end up leaving the level with 91 coins instead of what could have been 101 (if he were to collect every coin in the level). If Wario was to get three wins in a row at the Coin Game however, he would end up leaving the level with 728 coins instead of 91. Template:BoxTop
| Wario Land: Super Mario Land 3 | |||
|---|---|---|---|
| Characters | Wario • Brown Sugar Pirates • Mario | ||
| Bosses | Spiked Koopa • Minotaur • Penguin • Devil's Head • Bobo • Ghost • Captain Syrup • Genie | ||
| Worlds | Rice Beach • Mt. Teapot • Sherbet Land • Stove Canyon • SS Tea Cup • Parsley Woods • Syrup Castle | ||
| Power-ups | Bull Pot • Dragon Pot • Garlic Pot • Jet Pot • Star | ||
| Collectibles | ? Block • 1 Gold Coin • 10 Gold Coin • 100 Coin • 3-Up Heart • Heart • Key • Treasure | ||
| Enemies and obstacles | Batto Shuruken • Bee Fly • Big • Bō • Bucket Head • Chicken Duck • D.D. • Demon Bat • Dropper • Floater • Gaugau • Goboten • Guragura • Harisu • Helmut • Knight • Konotako • Kōmori Missile • Lance • Maizō • Mine • Muncher • Paidan • Pecan • Penkoon • Pikkarikun • Pinwheel • Piranha Plant • Pirate Goom • Pouncer • Skewer • Sparky • Spiked ball • Togemaru • Ukiwani • Wanderin' Goom • Watch • White puff • Yadorā • Yarikuri Obake | ||
| Miscellaneous | Gallery • Glitches • Media • Pre-release and unused content • Staff | ||
