DK: King of Swing: Difference between revisions
m (Text replacement - "(\|[\n ]*)released([\n ]*=)" to "$1release$2") |
No edit summary |
||
| Line 56: | Line 56: | ||
{{br}} | {{br}} | ||
==Characters== | ==Characters== | ||
{|width=100% cellspacing=0 border=2 cellpadding=3 class="dktable-brown" style="border-collapse;background:white" | |||
{|width=100% cellspacing=0 border=2 cellpadding=3 style="border-collapse;background:white" | |- | ||
|-style="background: | !colspan=4 style="background:saddlebrown;color:white"|Playable in all modes | ||
|- | |||
!Image | !Image | ||
!Name | !Name | ||
| Line 65: | Line 66: | ||
|- | |- | ||
| align="center" |[[File:DKKOSDonkeyKongSprite.png]] | | align="center" |[[File:DKKOSDonkeyKongSprite.png]] | ||
|[[Donkey Kong]] | |||
|Donkey Kong is the main protagonist and the playable character of Adventure mode. He is also playable in the Jungle Jam Tournament mode, and has the most balanced statistics of the other characters. | |Donkey Kong is the main protagonist and the playable character of Adventure mode. He is also playable in the Jungle Jam Tournament mode, and has the most balanced statistics of the other characters. | ||
|'''Jump:''' 3/5<br>'''Attack:''' 3/5 | |'''Jump:''' 3/5<br>'''Attack:''' 3/5 | ||
|- | |- | ||
| align="center" |[[File:DKKingofSwing-DiddySprite.png]] | | align="center" |[[File:DKKingofSwing-DiddySprite.png]] | ||
|[[Diddy Kong]] | |||
|Diddy is playable in the unlockable Diddy Mode, where the player plays as Diddy instead of Donkey Kong. Diddy is also playable in the Jungle Jam Tournament mode, where he has a high jumping ability but has a low-average attack. | |Diddy is playable in the unlockable Diddy Mode, where the player plays as Diddy instead of Donkey Kong. Diddy is also playable in the Jungle Jam Tournament mode, where he has a high jumping ability but has a low-average attack. | ||
|'''Jump:''' 4/5<br>'''Attack:''' 2/5 | |'''Jump:''' 4/5<br>'''Attack:''' 2/5 | ||
| | |- | ||
!colspan=4 style="background:saddlebrown;color:white"|Playable in Jungle Jam | |||
|- | |||
|- | |||
!Image | !Image | ||
!Name | !Name | ||
!Description | !Description | ||
!width=5%|Stats | !width=5%|Stats | ||
|- | |- | ||
| align="center" |[[File:DKKOSDixieKongSprite.png]] | | align="center" |[[File:DKKOSDixieKongSprite.png]] | ||
|[[Dixie Kong]] | |||
|Dixie Kong is Diddy Kong's girlfriend. She is one of the four starter characters of the Jungle Jam mode. Out of all the characters, Dixie has the highest jumping ability, but has the weakest attack. | |Dixie Kong is Diddy Kong's girlfriend. She is one of the four starter characters of the Jungle Jam mode. Out of all the characters, Dixie has the highest jumping ability, but has the weakest attack. | ||
|'''Jump:''' 5/5<br>'''Attack:''' 1/5 | |'''Jump:''' 5/5<br>'''Attack:''' 1/5 | ||
|- | |- | ||
| align="center" |[[File:Funky Kong DKKoS sprite.png]] | | align="center" |[[File:Funky Kong DKKoS sprite.png]] | ||
|[[Funky Kong]] | |||
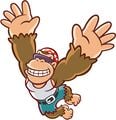
|Funky is one of the four starter characters of the Jungle Jam Tournament mode. His statistics are switched from Diddy's, as he has an average-high attack, but a low-average jumping ability. | |Funky is one of the four starter characters of the Jungle Jam Tournament mode. His statistics are switched from Diddy's, as he has an average-high attack, but a low-average jumping ability. | ||
|'''Jump:''' 2/5<br>'''Attack:''' 4/5 | |'''Jump:''' 2/5<br>'''Attack:''' 4/5 | ||
|-style="background: | |- | ||
! | !colspan=4 style="background:saddlebrown;color:white"|Unlockable in Jungle Jam | ||
|- | |||
!Image | |||
!Name | |||
!Description | |||
!width=5%|Stats | |||
|- | |- | ||
| align="center" |[[File:Kritter-DKKOS.png]] | | align="center" |[[File:Kritter-DKKOS.png]] | ||
|[[Kritter|Kremling]] | |||
|Kremling one of the unlockable characters in the mode. It is a Kritter, but is named "Kremling" in the game. The player can unlock Kremling by obtaining six gold medals in the Jungle Jam Tournament. Its statistics are the same as Donkey Kong's. | |Kremling one of the unlockable characters in the mode. It is a Kritter, but is named "Kremling" in the game. The player can unlock Kremling by obtaining six gold medals in the Jungle Jam Tournament. Its statistics are the same as Donkey Kong's. | ||
|'''Jump:''' 3/5<br>'''Attack:''' 3/5 | |'''Jump:''' 3/5<br>'''Attack:''' 3/5 | ||
|- | |- | ||
| align="center" |[[File:DKKOSWrinklyKongSprite.png]] | | align="center" |[[File:DKKOSWrinklyKongSprite.png]] | ||
|[[Wrinkly Kong]] | |||
|Wrinkly Kong can be unlocked after Donkey Kong obtains all 20 [[Crystal Coconut]]s. Wrinkly is tied with Dixie for highest jump ability. She has a low-average attack power, slightly higher than that of Dixie's. | |Wrinkly Kong can be unlocked after Donkey Kong obtains all 20 [[Crystal Coconut]]s. Wrinkly is tied with Dixie for highest jump ability. She has a low-average attack power, slightly higher than that of Dixie's. | ||
|'''Jump:''' 5/5<br>'''Attack:''' 2/5 | |'''Jump:''' 5/5<br>'''Attack:''' 2/5 | ||
|- | |- | ||
| align="center" |[[File:KingKRool-DKKOS.png]] | | align="center" |[[File:KingKRool-DKKOS.png]] | ||
|[[King K. Rool]] | |||
|King K. Rool is unlocked after earning 12 Gold Medals in the Jungle Jam Tournament. He has a maximum attack power, but his jumping ability is very weak. | |King K. Rool is unlocked after earning 12 Gold Medals in the Jungle Jam Tournament. He has a maximum attack power, but his jumping ability is very weak. | ||
|'''Jump:''' 1/5<br>'''Attack:''' 5/5 | |'''Jump:''' 1/5<br>'''Attack:''' 5/5 | ||
|- | |- | ||
| align="center" |[[File:DKKOSBubblesSprite.png]] | | align="center" |[[File:DKKOSBubblesSprite.png]] | ||
|[[Bubbles (Clu Clu Land)|Bubbles]] | |||
|Bubbles is unlocked after the player completes Diddy Mode from collecting all 24 medals. This is her first and only appearance in a [[Donkey Kong (franchise)|''Donkey Kong'']] game. She has the highest balanced stats of the characters. | |Bubbles is unlocked after the player completes Diddy Mode from collecting all 24 medals. This is her first and only appearance in a [[Donkey Kong (franchise)|''Donkey Kong'']] game. She has the highest balanced stats of the characters. | ||
|'''Jump:''' 4/5<br>'''Attack:''' 4/5 | |'''Jump:''' 4/5<br>'''Attack:''' 4/5 | ||
| | |- | ||
!colspan=4 style="background:saddlebrown;color:white"|Supporting | |||
|- | |||
|- | |||
!Image | !Image | ||
!Name | !Name | ||
!Description | !colspan=2|Description | ||
|- | |- | ||
| align="center" |[[File:DKKOSCrankyKongSprite.png]] | | align="center" |[[File:DKKOSCrankyKongSprite.png]] | ||
|[[Cranky Kong]] | |||
|Cranky Kong's main role is in [[Cranky's Lectures]], where he teaches the controls to Donkey Kong along with providing some advice. | |colspan=2|Cranky Kong's main role is in [[Cranky's Lectures]], where he teaches the controls to Donkey Kong along with providing some advice. | ||
|- | |- | ||
| align="center |[[File:DKKOSCandyKongSprite.png]] | | align="center |[[File:DKKOSCandyKongSprite.png]] | ||
|[[Candy Kong]] | |||
|Candy Kong has a very minimal appearance because she only appears in the opening, when K. Rool stole the medals, and the ending, when Donkey Kong returns with the medals. | |colspan=2|Candy Kong has a very minimal appearance because she only appears in the opening, when K. Rool stole the medals, and the ending, when Donkey Kong returns with the medals. | ||
|} | |} | ||
===Enemies=== | ===Enemies=== | ||
{|width=100% cellspacing=0 border=2 cellpadding=3 style="border-collapse;background:white" | {|width=100% cellspacing=0 border=2 cellpadding=3 class="dktable-brown" style="border-collapse;background:white" | ||
|- | |- | ||
!Image | !Image | ||
!Name | !Name | ||
| Line 144: | Line 144: | ||
|- | |- | ||
| align="center" |[[File:ClickClack-DKKOS.png]] | | align="center" |[[File:ClickClack-DKKOS.png]] | ||
|[[Click-Clack]] | |||
|Click-Clacks are uncommon enemies that walk around Peg Boards. They are invulnerable to frontal attacks due to their pincers, but they can be defeated from behind. When they notice Donkey Kong in the area, they make a clicking noise and follow him. | |Click-Clacks are uncommon enemies that walk around Peg Boards. They are invulnerable to frontal attacks due to their pincers, but they can be defeated from behind. When they notice Donkey Kong in the area, they make a clicking noise and follow him. | ||
| align="center" |[[Cactus Woods]] | | align="center" |[[Cactus Woods]] | ||
| Line 150: | Line 150: | ||
|- | |- | ||
| align="center" |[[File:FlipFlap-DKKOS.png]] | | align="center" |[[File:FlipFlap-DKKOS.png]] | ||
|[[Flipflap]] | |||
|Flipflaps are blue bats that appear mostly in cave levels. They fly above Peg Boards or hover below to the ground. Their attack pattern involves them flying back and forth, either horizontally or vertically. Donkey Kong can defeat them with a charge attack. | |Flipflaps are blue bats that appear mostly in cave levels. They fly above Peg Boards or hover below to the ground. Their attack pattern involves them flying back and forth, either horizontally or vertically. Donkey Kong can defeat them with a charge attack. | ||
| align="center" |[[Contraption Cave]] | | align="center" |[[Contraption Cave]] | ||
| Line 156: | Line 156: | ||
|- | |- | ||
| align="center" |[[File:Flitter-DKKOS.png]] | | align="center" |[[File:Flitter-DKKOS.png]] | ||
|[[Flitter]] | |||
|Flitters are blue dragonflies that are common in the [[Jungle World]]. They move back and forth like Flipflaps, except they do not move in a zigzag pattern. They can only be defeated from a charge attack. | |Flitters are blue dragonflies that are common in the [[Jungle World]]. They move back and forth like Flipflaps, except they do not move in a zigzag pattern. They can only be defeated from a charge attack. | ||
| align="center" |[[Banana Bungalow]] | | align="center" |[[Banana Bungalow]] | ||
| Line 162: | Line 162: | ||
|- | |- | ||
| align="center" |[[File:Ghost DKKoS.png]] | | align="center" |[[File:Ghost DKKoS.png]] | ||
|[[Ghost (DK series)|Ghost]] | |||
|Ghosts are enemies that only appear in one level, Ship of Souls. They can go invisible and move through objects. If a ghost becomes visible, it can injure Donkey Kong by contact. They can only be defeated by a charge attack while they are invisible, but their silhouettes are still perceivable. | |Ghosts are enemies that only appear in one level, Ship of Souls. They can go invisible and move through objects. If a ghost becomes visible, it can injure Donkey Kong by contact. They can only be defeated by a charge attack while they are invisible, but their silhouettes are still perceivable. | ||
| align="center" |[[Ship of Souls]] | | align="center" |[[Ship of Souls]] | ||
| Line 168: | Line 168: | ||
|- | |- | ||
| align="center" |[[File:Kritter-DKKOS2.png]] | | align="center" |[[File:Kritter-DKKOS2.png]] | ||
|[[Kritter|Kremling]] | |||
|Kremlings are one of the most common enemies, as they are in at least one level of every world. Kremlings can do a variety of actions which include climbing around peg boards, throwing rocks, or repeatedly pulling down on a Jack Peg. | |Kremlings are one of the most common enemies, as they are in at least one level of every world. Kremlings can do a variety of actions which include climbing around peg boards, throwing rocks, or repeatedly pulling down on a Jack Peg. | ||
| align="center" |[[Contraption Cave]] | | align="center" |[[Contraption Cave]] | ||
| Line 174: | Line 174: | ||
|- | |- | ||
| align="center" |[[File:Lockjaw-DKKOS.png]] | | align="center" |[[File:Lockjaw-DKKOS.png]] | ||
|[[Lockjaw]] | |||
|Lockjaws are another enemy that return from ''[[Donkey Kong Country 2: Diddy's Kong Quest]]''. They are piranhas encountered in underwater and waterfall levels. If a Lockjaw notices Donkey Kong, it does a biting call and then charges at him. In [[Lockjaw Falls]], they are the main and titular enemy, who attack Donkey Kong by jumping at him from the waterfalls. | |Lockjaws are another enemy that return from ''[[Donkey Kong Country 2: Diddy's Kong Quest]]''. They are piranhas encountered in underwater and waterfall levels. If a Lockjaw notices Donkey Kong, it does a biting call and then charges at him. In [[Lockjaw Falls]], they are the main and titular enemy, who attack Donkey Kong by jumping at him from the waterfalls. | ||
| align="center" |[[Risky Reef]] | | align="center" |[[Risky Reef]] | ||
| Line 180: | Line 180: | ||
|- | |- | ||
| align="center" |[[File:MiniNecky-DKKOS.png]] | | align="center" |[[File:MiniNecky-DKKOS.png]] | ||
|[[Mini-Necky]] | |||
|Mini-Neckies are small vultures that return from the first two ''[[Donkey Kong Country (series)|Donkey Kong Country]]''. Mini-Neckies most often appear in the [[Wild West World]], and they attack by either spitting a coconut at Donkey Kong or by swooping at him. | |Mini-Neckies are small vultures that return from the first two ''[[Donkey Kong Country (series)|Donkey Kong Country]]''. Mini-Neckies most often appear in the [[Wild West World]], and they attack by either spitting a coconut at Donkey Kong or by swooping at him. | ||
| align="center" |[[Necky's Canyon]] | | align="center" |[[Necky's Canyon]] | ||
| Line 186: | Line 186: | ||
|- | |- | ||
| align="center" |[[File:Neek-DKKOS.png]] | | align="center" |[[File:Neek-DKKOS.png]] | ||
|[[Neek]] | |||
|Neeks are rats who scurry around Peg Boards in cave-themed levels. They can be heard making a squeaking noise as they move around. Neeks can be defeated by a charge attack. | |Neeks are rats who scurry around Peg Boards in cave-themed levels. They can be heard making a squeaking noise as they move around. Neeks can be defeated by a charge attack. | ||
| align="center" |[[Contraption Cave]] | | align="center" |[[Contraption Cave]] | ||
| Line 192: | Line 192: | ||
|- | |- | ||
| align="center" |[[File:Shuri-DKKOS.png]] | | align="center" |[[File:Shuri-DKKOS.png]] | ||
|[[Shuri]] | |||
|Shuris are starfish that appear in underwater levels. They have no fixed movement, as they just bounce off the wall. | |Shuris are starfish that appear in underwater levels. They have no fixed movement, as they just bounce off the wall. | ||
| align="center" |[[Risky Reef]] | | align="center" |[[Risky Reef]] | ||
| Line 198: | Line 198: | ||
|- | |- | ||
| align="center" |[[File:Zinger-DKKOS.png]] | | align="center" |[[File:Zinger-DKKOS.png]] | ||
|[[Zinger]] | |||
|Zingers are bees that make a buzzing sound as they move up and down or side to side. They can only be defeated from the front because of the spikes and a stinger on their back. | |Zingers are bees that make a buzzing sound as they move up and down or side to side. They can only be defeated from the front because of the spikes and a stinger on their back. | ||
| align="center" |[[Cactus Woods]] | | align="center" |[[Cactus Woods]] | ||
| Line 205: | Line 205: | ||
===Bosses=== | ===Bosses=== | ||
{|width=100% cellspacing=0 border=2 cellpadding=3 style="border-collapse;background:white" | {|width=100% cellspacing=0 border=2 cellpadding=3 class="dktable-brown" style="border-collapse;background:white" | ||
|-style="background:yellow;" | |-style="background:yellow;" | ||
!Image | !Image | ||
| Line 213: | Line 213: | ||
|- | |- | ||
| align="center" |[[File:Congazuma-DKKOS.png|40px]] | | align="center" |[[File:Congazuma-DKKOS.png|40px]] | ||
|[[Congazuma]] | |||
|Congazuma is a large Kremling statue and the first boss encountered by Donkey Kong. It attacks by slowly jumping toward him. Donkey Kong can attack Congazuma by performing a charge attack into it. He must do this four times to defeat Congazuma. | |Congazuma is a large Kremling statue and the first boss encountered by Donkey Kong. It attacks by slowly jumping toward him. Donkey Kong can attack Congazuma by performing a charge attack into it. He must do this four times to defeat Congazuma. | ||
| align="center" |[[Congazuma's Castle]] | | align="center" |[[Congazuma's Castle]] | ||
|- | |- | ||
| align="center |[[File:FireNecky-DKKOS.png|70px]] | | align="center |[[File:FireNecky-DKKOS.png|70px]] | ||
|[[Fire Necky]] | |||
|As its name suggests, Fire Necky is a large Necky engulfed in flame. It attacks by spitting flames which crystallize into rocks shortly after. Donkey Kong must throw seven rocks at Fire Necky to defeat it. | |As its name suggests, Fire Necky is a large Necky engulfed in flame. It attacks by spitting flames which crystallize into rocks shortly after. Donkey Kong must throw seven rocks at Fire Necky to defeat it. | ||
| align="center" |[[Fire Necky's Nest]] | | align="center" |[[Fire Necky's Nest]] | ||
|- | |- | ||
| align="center |[[File:DavyBones-DKKOS.png|50px]] | | align="center |[[File:DavyBones-DKKOS.png|50px]] | ||
|[[Davy Bones]] | |||
|Davy Bones is the undead skeleton of an eel. It attacks from one of six holes towards Donkey Kong, then swims around him for a few seconds. Donkey Kong must grab the peg at the tip of Davy Bones' tail and swing him into the spikes on the edges. When Davy Bones is hit against the spikes enough times, he is defeated. | |Davy Bones is the undead skeleton of an eel. It attacks from one of six holes towards Donkey Kong, then swims around him for a few seconds. Donkey Kong must grab the peg at the tip of Davy Bones' tail and swing him into the spikes on the edges. When Davy Bones is hit against the spikes enough times, he is defeated. | ||
| align="center" |[[Davy Bones' Locker]] | | align="center" |[[Davy Bones' Locker]] | ||
|- | |- | ||
| align="center |[[File:SassySquatch-DKKOS.png|55px]] | | align="center |[[File:SassySquatch-DKKOS.png|55px]] | ||
|[[Sassy Squatch]] | |||
|Sassy Squatch is a massive sasquatch who chases Donkey Kong up a mountain. Donkey Kong can attack Sassy Squatch by throwing bombs into its large mouth. After taking a hit, Sassy Squatch shoots out crystalized pegs for Donkey Kong to continue up to the next section. When enough bombs are thrown into Sassy Squatch's mouth, it gets defeated. | |Sassy Squatch is a massive sasquatch who chases Donkey Kong up a mountain. Donkey Kong can attack Sassy Squatch by throwing bombs into its large mouth. After taking a hit, Sassy Squatch shoots out crystalized pegs for Donkey Kong to continue up to the next section. When enough bombs are thrown into Sassy Squatch's mouth, it gets defeated. | ||
| align="center" |[[Sassy Squatch's Lair]] | | align="center" |[[Sassy Squatch's Lair]] | ||
|- | |- | ||
| align="center |[[File:KingKRool-DKKOS.png]] | | align="center |[[File:KingKRool-DKKOS.png]] | ||
|[[King K. Rool]] | |||
|K. Rool is the fifth and final boss of the game. He and Donkey Kong first engage in a Climbing Race. If Donkey Kong wins, the king challenges him to an Attack Battle. If Donkey Kong also defeats K. Rool at the attack battle, the game ends, and Donkey Kongs recovers all the medals. | |K. Rool is the fifth and final boss of the game. He and Donkey Kong first engage in a Climbing Race. If Donkey Kong wins, the king challenges him to an Attack Battle. If Donkey Kong also defeats K. Rool at the attack battle, the game ends, and Donkey Kongs recovers all the medals. | ||
| align="center" |[[King K. Rool (level)|King K. Rool]] | | align="center" |[[King K. Rool (level)|King K. Rool]] | ||
| Line 241: | Line 241: | ||
There are five worlds, each with four regular [[level]]s and a boss level at the end. There are a total of 25 levels in the game. | There are five worlds, each with four regular [[level]]s and a boss level at the end. There are a total of 25 levels in the game. | ||
{| border="1" cellspacing=0 cellpadding=2 align="center" | {| border="1" cellspacing=0 cellpadding=2 align="center" class="dktable-brown" width=99% | ||
! colspan=3 style="background: | ! colspan=3 style="background:saddlebrown;color:white" align=center | <big>Levels</big> | ||
|- | |||
! colspan=3 style="background:saddlebrown;color:white" align=center | {{color-link|Jungle World|white}} | |||
|- | |- | ||
!rowspan=1 width=40%|Level | !rowspan=1 width=40%|Level | ||
!rowspan=1 width=20%|[[Medal (DK: King of Swing)|Medal]] | !rowspan=1 width=20%|[[Medal (DK: King of Swing)|Medal]] | ||
!rowspan=1 width=40%|Type of level | !rowspan=1 width=40%|Type of level | ||
|- | |- | ||
|- | |- | ||
|align="center" colspan=1 | [[Banana Bungalow]] ||align="center" | none || align="center" | Jungle | |align="center" colspan=1 | [[Banana Bungalow]] ||align="center" | none || align="center" | Jungle | ||
| Line 261: | Line 261: | ||
|align="center" rowspan=1 | Boss level: [[Congazuma's Castle]] ||align="center" | Gold ||align="center" | Pyramid | |align="center" rowspan=1 | Boss level: [[Congazuma's Castle]] ||align="center" | Gold ||align="center" | Pyramid | ||
|- | |- | ||
! colspan=3 style="background: | ! colspan=3 style="background:saddlebrown;color:white" align=center | {{color-link|Wild West World|white}} | ||
|- | |- | ||
!rowspan=1 width=40%|Level | !rowspan=1 width=40%|Level | ||
!rowspan=1 width=20%|[[Medal (DK: King of Swing)|Medal]] | !rowspan=1 width=20%|[[Medal (DK: King of Swing)|Medal]] | ||
!rowspan=1 width=40%|Type of level | !rowspan=1 width=40%|Type of level | ||
|- | |- | ||
|- | |- | ||
|align="center" rowspan=1 | [[Necky's Canyon]] ||align="center" | Silver ||align="center" | Desert | |align="center" rowspan=1 | [[Necky's Canyon]] ||align="center" | Silver ||align="center" | Desert | ||
| Line 278: | Line 278: | ||
|align="center" rowspan=1 | Boss level: [[Fire Necky's Nest]] ||align="center" | Gold ||align="center" | Desert | |align="center" rowspan=1 | Boss level: [[Fire Necky's Nest]] ||align="center" | Gold ||align="center" | Desert | ||
|- | |- | ||
! colspan=3 style="background: | ! colspan=3 style="background:saddlebrown;color:white" align=center | {{color-link|Aqua World|white}} | ||
|- | |- | ||
!rowspan=1 width=40%|Level | !rowspan=1 width=40%|Level | ||
!rowspan=1 width=20%|[[Medal (DK: King of Swing)|Medal]] | !rowspan=1 width=20%|[[Medal (DK: King of Swing)|Medal]] | ||
!rowspan=1 width=40%|Type of level | !rowspan=1 width=40%|Type of level | ||
|- | |- | ||
|- | |- | ||
|align="center" rowspan=1 | [[Risky Reef]] ||align="center" | Bronze ||align="center" | Underwater | |align="center" rowspan=1 | [[Risky Reef]] ||align="center" | Bronze ||align="center" | Underwater | ||
| Line 295: | Line 295: | ||
|align="center" rowspan=1 | Boss level: [[Davy Bones' Locker]] ||align="center" | Gold ||align="center" | Underwater | |align="center" rowspan=1 | Boss level: [[Davy Bones' Locker]] ||align="center" | Gold ||align="center" | Underwater | ||
|- | |- | ||
! colspan=3 style="background: | ! colspan=3 style="background:saddlebrown;color:white" align=center | {{color-link|Ice World|white}} | ||
|- | |- | ||
!rowspan=1 width=40%|Level | !rowspan=1 width=40%|Level | ||
!rowspan=1 width=20%|[[Medal (DK: King of Swing)|Medal]] | !rowspan=1 width=20%|[[Medal (DK: King of Swing)|Medal]] | ||
!rowspan=1 width=40%|Type of level | !rowspan=1 width=40%|Type of level | ||
|- | |- | ||
|- | |- | ||
|align="center" rowspan=1 | [[Cold Cold Forest]] ||align="center" | Silver ||align="center" | Forest | |align="center" rowspan=1 | [[Cold Cold Forest]] ||align="center" | Silver ||align="center" | Forest | ||
| Line 312: | Line 312: | ||
|align="center" rowspan=1 | Boss level: [[Sassy Squatch's Lair]] ||align="center" | Gold ||align="center" | Ice | |align="center" rowspan=1 | Boss level: [[Sassy Squatch's Lair]] ||align="center" | Gold ||align="center" | Ice | ||
|- | |- | ||
! colspan=3 style="background: | ! colspan=3 style="background:saddlebrown;color:white" align=center | {{color-link|K. Kruizer III|white}} | ||
|- | |- | ||
!rowspan=1 width=40%|Level | !rowspan=1 width=40%|Level | ||
!rowspan=1 width=20%|[[Medal (DK: King of Swing)|Medal]] | !rowspan=1 width=20%|[[Medal (DK: King of Swing)|Medal]] | ||
!rowspan=1 width=40%|Type of level | !rowspan=1 width=40%|Type of level | ||
|- | |- | ||
|- | |- | ||
|align="center" rowspan=1 | [[Booster Barrel Skyway]] ||align="center" | Bronze ||align="center" | Sky | |align="center" rowspan=1 | [[Booster Barrel Skyway]] ||align="center" | Bronze ||align="center" | Sky | ||
| Line 333: | Line 333: | ||
==Items and objects== | ==Items and objects== | ||
{|width=100% cellspacing=0 border=2 cellpadding=3 style="border-collapse:collapse;background:white" | {|width=100% cellspacing=0 border=2 cellpadding=3 class="dktable-brown" style="border-collapse:collapse;background:white" | ||
|-style="background:yellow;" | |-style="background:yellow;" | ||
!Image | !Image | ||
| Line 340: | Line 340: | ||
|- | |- | ||
| align="center" |[[File:DKKOS Banana.png]] | | align="center" |[[File:DKKOS Banana.png]] | ||
|[[Banana]] | |||
|Bananas are common items that appear in every level. Each single banana adds one to Donkey Kong's stash, which could be used for [[Going Bananas]] or for replenishing health. | |Bananas are common items that appear in every level. Each single banana adds one to Donkey Kong's stash, which could be used for [[Going Bananas]] or for replenishing health. | ||
|- | |- | ||
| align="center" |[[File:DKKOS Banana Bunch.png]] | | align="center" |[[File:DKKOS Banana Bunch.png]] | ||
|[[Banana Bunch]] | |||
|Banana Bunches are found in most levels and add a total of five bananas to Donkey Kong's stash. | |Banana Bunches are found in most levels and add a total of five bananas to Donkey Kong's stash. | ||
|- | |- | ||
| align="center" |[[File:DKKOS 10Bananas.png]] | | align="center" |[[File:DKKOS 10Bananas.png]] | ||
|[[Banana Bunch|10 Bananas]] | |||
|A bunch of ten bananas is more rare than the other bananas, but are found in levels after breaking open [[barrel]]s or [[crate]]s. One bunch of ten bananas can restore one full heart of health. | |A bunch of ten bananas is more rare than the other bananas, but are found in levels after breaking open [[barrel]]s or [[crate]]s. One bunch of ten bananas can restore one full heart of health. | ||
|- | |- | ||
| align="center" |[[File:DKKOSBronze.png]][[File:DKKOSSilver.png]]<br>[[File:DKKOSGold.png]] | | align="center" |[[File:DKKOSBronze.png]][[File:DKKOSSilver.png]]<br>[[File:DKKOSGold.png]] | ||
|[[Medal (DK: King of Swing)|Medals]] | |||
|Medals appear in each level besides [[Banana Bungalow]]. They can be found in [[Bonus Area]]s or inside of barrels or crates. The gold variants are awarded after defeating a boss. | |Medals appear in each level besides [[Banana Bungalow]]. They can be found in [[Bonus Area]]s or inside of barrels or crates. The gold variants are awarded after defeating a boss. | ||
|- | |- | ||
| align="center" |[[File:DKKOSCrystalCoconut.png]] | | align="center" |[[File:DKKOSCrystalCoconut.png]] | ||
|[[Crystal Coconut]] | |||
|Crystal Coconuts are found in each level. They are usually found in similar spots to the Medal, and can also be obtained by defeating an enemy. | |Crystal Coconuts are found in each level. They are usually found in similar spots to the Medal, and can also be obtained by defeating an enemy. | ||
|- | |- | ||
| align="center" |[[File:DKKOSTire.png]] | | align="center" |[[File:DKKOSTire.png]] | ||
|[[Tire (object)|Tire]] | |||
|Tires are common objects that can be bounced off, helping Donkey Kong reach high places that would not be reachable otherwise. | |Tires are common objects that can be bounced off, helping Donkey Kong reach high places that would not be reachable otherwise. | ||
|- | |- | ||
| align="center" |[[File:DKKOSRock.png]] | | align="center" |[[File:DKKOSRock.png]] | ||
|[[Rock]] | |||
|Rocks are common items that are used to damage enemies or destroy breakable walls. | |Rocks are common items that are used to damage enemies or destroy breakable walls. | ||
|- | |- | ||
| align="center" |[[File:DKKOSBomb.png]] | | align="center" |[[File:DKKOSBomb.png]] | ||
|[[Bomb (object)|Bomb]] | |||
|Bombs are items that can break open obstacles or destroy enemies. They detonate withinin approximately five seconds and will cause one heart of damage to Donkey Kong if he holds onto it for too long. | |Bombs are items that can break open obstacles or destroy enemies. They detonate withinin approximately five seconds and will cause one heart of damage to Donkey Kong if he holds onto it for too long. | ||
|- | |- | ||
| align="center" |[[File:DKKOSSpike.png]] | | align="center" |[[File:DKKOSSpike.png]] | ||
|[[Floating Mine|Mine]] | |||
|Mines are spiked objects that are common obstacles throughout some levels. They cause Donkey Kong one heart of damage if he makes contact with them. Mines can also move around, too. | |Mines are spiked objects that are common obstacles throughout some levels. They cause Donkey Kong one heart of damage if he makes contact with them. Mines can also move around, too. | ||
|- | |- | ||
| align="center" |[[File:DKKOSCannonGreen.png]][[File:DKKOSCannonRed.png]]<br>[[File:DKKOSCannonBlue.png]] | | align="center" |[[File:DKKOSCannonGreen.png]][[File:DKKOSCannonRed.png]]<br>[[File:DKKOSCannonBlue.png]] | ||
|[[Cannon]]s | |||
|Cannons are objects that are encountered in the levels on the [[K. Kruizer III]]. They shoot fireballs at Donkey Kong in an attempt to cause damage to his health. Some cannons rotate towards the direction of Donkey Kong while others stay in the same position. | |Cannons are objects that are encountered in the levels on the [[K. Kruizer III]]. They shoot fireballs at Donkey Kong in an attempt to cause damage to his health. Some cannons rotate towards the direction of Donkey Kong while others stay in the same position. | ||
|- | |- | ||
|align="center" |[[File:DKKOSCrate.png]] | |align="center" |[[File:DKKOSCrate.png]] | ||
|[[Crate|Wooden Crate]] | |||
|Wooden Crates are large boxes of wood that can be broken by Donkey Kong with a simple attack. They usually take up an entire peg board, and, when broken, allow the Kong to progress up. Additionally, wooden crates represent 100 bananas in the player's stash in the bottom right of the screen. | |Wooden Crates are large boxes of wood that can be broken by Donkey Kong with a simple attack. They usually take up an entire peg board, and, when broken, allow the Kong to progress up. Additionally, wooden crates represent 100 bananas in the player's stash in the bottom right of the screen. | ||
|- | |- | ||
|align="center" |[[File:DKKOSCoconut.png]] | |align="center" |[[File:DKKOSCoconut.png]] | ||
|[[Coconut]] | |||
|Coconuts are objects that some [[Mini-Necky|Mini-Neckies]] shoot from their mouths. They cause one heart's worth of damage to Donkey Kong if it comes into contact with him. Coconuts can be destroyed if they hit a projectile that Donkey Kong throws, such as a rock. | |Coconuts are objects that some [[Mini-Necky|Mini-Neckies]] shoot from their mouths. They cause one heart's worth of damage to Donkey Kong if it comes into contact with him. Coconuts can be destroyed if they hit a projectile that Donkey Kong throws, such as a rock. | ||
|} | |} | ||
===Barrels=== | ===Barrels=== | ||
{|width=100% cellspacing=0 border=2 cellpadding=3 style="border-collapse:collapse;background:white" | {|width=100% cellspacing=0 border=2 cellpadding=3 class="dktable-brown" style="border-collapse:collapse;background:white" | ||
|-style="background:yellow;" | |-style="background:yellow;" | ||
!Image | !Image | ||
| Line 396: | Line 396: | ||
|- | |- | ||
| align="center" |[[File:DKKOSBarrel.png]] | | align="center" |[[File:DKKOSBarrel.png]] | ||
|[[Barrel]] | |||
|Standard barrels, if broken by Donkey Kong, reveal bananas or other items. Additionally, barrels represent fifty bananas in the player's stash in the bottom right of the screen. | |Standard barrels, if broken by Donkey Kong, reveal bananas or other items. Additionally, barrels represent fifty bananas in the player's stash in the bottom right of the screen. | ||
|- | |- | ||
| align="center" |[[File:DKKOSQuestionBarrel.png]] | | align="center" |[[File:DKKOSQuestionBarrel.png]] | ||
|[[Question Barrel]] | |||
|Question Barrels are like standard ones, where if broken they reveal something. These barrels reveal [[Peg Board]]s or activate doors. | |Question Barrels are like standard ones, where if broken they reveal something. These barrels reveal [[Peg Board]]s or activate doors. | ||
|- | |- | ||
| align="center" |[[File:DKKOSBoosterBarrel.png]] | | align="center" |[[File:DKKOSBoosterBarrel.png]] | ||
|[[Booster Barrel]] | |||
|Booster Barrels are barrels that act as rockets and are steered with {{button|gba|L}} and {{button|gba|R}}. They are the subject of the level [[Booster Barrel Skyway]]. | |Booster Barrels are barrels that act as rockets and are steered with {{button|gba|L}} and {{button|gba|R}}. They are the subject of the level [[Booster Barrel Skyway]]. | ||
|- | |- | ||
| align="center" |[[File:DKKOSBonusBarrel.png]] | | align="center" |[[File:DKKOSBonusBarrel.png]] | ||
|[[Bonus Barrel]] | |||
|Bonus Barrels shoot Donkey Kong to a Bonus Area upon entering it. | |Bonus Barrels shoot Donkey Kong to a Bonus Area upon entering it. | ||
|- | |- | ||
| align="center" |[[File:DKKOSBarrelCannon.png]] | | align="center" |[[File:DKKOSBarrelCannon.png]] | ||
|[[Barrel Cannon]] | |||
|Barrel Cannons are enterable barrels that launch Donkey Kong in a given direction. | |Barrel Cannons are enterable barrels that launch Donkey Kong in a given direction. | ||
|- | |- | ||
| align="center"|[[File:DKKOSRollingBarrel.png]] | | align="center"|[[File:DKKOSRollingBarrel.png]] | ||
|[[Rolling Barrel]] | |||
|Rolling Barrels are enterable barrels and their aims can be adjusted with the {{button|gba|L}} and {{button|gba|R}} buttons. | |Rolling Barrels are enterable barrels and their aims can be adjusted with the {{button|gba|L}} and {{button|gba|R}} buttons. | ||
|} | |} | ||
| Line 422: | Line 422: | ||
===Pegs=== | ===Pegs=== | ||
[[Peg]]s are common objects in the game that have many different variants. Each variant performs a different function and assists Donkey Kong in reaching further areas. | [[Peg]]s are common objects in the game that have many different variants. Each variant performs a different function and assists Donkey Kong in reaching further areas. | ||
{|width=100% cellspacing=0 border=2 cellpadding=3 style="border-collapse:collapse;background:white" | {|width=100% cellspacing=0 border=2 cellpadding=3 class="dktable-brown" style="border-collapse:collapse;background:white" | ||
|-style="background:yellow;" | |-style="background:yellow;" | ||
!Image | !Image | ||
| Line 429: | Line 429: | ||
|- | |- | ||
| align="center"|[[File:DKKOSPegs.png]] | | align="center"|[[File:DKKOSPegs.png]] | ||
|[[Peg]] | |||
|Pegs are single, floating studs that the Kongs are able to grab onto. They are the most common of all Peg variants and featured in [[Jungle Jam Tournament]] Events as well. | |Pegs are single, floating studs that the Kongs are able to grab onto. They are the most common of all Peg variants and featured in [[Jungle Jam Tournament]] Events as well. | ||
|- | |- | ||
| align="center"|[[File:DKKOSPegBoards.png]] | | align="center"|[[File:DKKOSPegBoards.png]] | ||
|[[Peg Board]] | |||
|Peg Boards are groups of pegs that the Kongs are able to climb on. They come in many different sizes, ranging from two by two pegs to five by six pegs. They are also the main obstacle in the Jungle Jam Tournament Events. | |Peg Boards are groups of pegs that the Kongs are able to climb on. They come in many different sizes, ranging from two by two pegs to five by six pegs. They are also the main obstacle in the Jungle Jam Tournament Events. | ||
|- | |- | ||
| align="center"|[[File:DKKOSHandlePeg.png]]<br>[[File:DKKOSRedHandlePeg.png]] | | align="center"|[[File:DKKOSHandlePeg.png]]<br>[[File:DKKOSRedHandlePeg.png]] | ||
|[[Handle Peg]] | |||
|Handle Pegs are wheel-like pegs that, if grabbed onto, carry Donkey Kong on a mechanism. These mechanisms run up and down or left and right. | |Handle Pegs are wheel-like pegs that, if grabbed onto, carry Donkey Kong on a mechanism. These mechanisms run up and down or left and right. | ||
|- | |- | ||
| align="center"|[[File:DKKOSSwitchPegGreen.png]][[File:DKKOSSwitchPegRed.png]][[File:DKKOSSwitchPegBlue.png]] | | align="center"|[[File:DKKOSSwitchPegGreen.png]][[File:DKKOSSwitchPegRed.png]][[File:DKKOSSwitchPegBlue.png]] | ||
|[[Switch Peg]] | |||
|Switch Pegs can open doors or reveal new secrets if grabbed onto and pulled down with both hands. | |Switch Pegs can open doors or reveal new secrets if grabbed onto and pulled down with both hands. | ||
|- | |- | ||
| align="center"|[[File:DKKOSJackPegGreen.png]][[File:DKKOSJackPegRed.png]][[File:DKKOSJackPegBlue.png]] | | align="center"|[[File:DKKOSJackPegGreen.png]][[File:DKKOSJackPegRed.png]][[File:DKKOSJackPegBlue.png]] | ||
|[[Jack Peg]] | |||
|Jack Pegs are peg variants that operate mechanism if pulled down on repeatedly. They can open doors or reveal new peg boards. | |Jack Pegs are peg variants that operate mechanism if pulled down on repeatedly. They can open doors or reveal new peg boards. | ||
|- | |- | ||
|align="center"|[[File:DKKOSRotatingPeg.png]] | |align="center"|[[File:DKKOSRotatingPeg.png]] | ||
|[[Spinning Peg]] | |||
|Spinning Pegs rotate quickly either clockwise or counterclockwise. If grabbed with the correct hand, they can launch Donkey Kong high up to new areas. | |Spinning Pegs rotate quickly either clockwise or counterclockwise. If grabbed with the correct hand, they can launch Donkey Kong high up to new areas. | ||
|- | |- | ||
|align="center"|[[File:DKKOSGreenCrackedPeg.png]][[File:DKKOSRedCrackedPeg.png]][[File:DKKOSBlueCrackedPeg.png]] | |align="center"|[[File:DKKOSGreenCrackedPeg.png]][[File:DKKOSRedCrackedPeg.png]][[File:DKKOSBlueCrackedPeg.png]] | ||
|Cracked Peg | |||
|Cracked Pegs are rare types of pegs that slowly fall once Donkey Kong grabs onto them. | |Cracked Pegs are rare types of pegs that slowly fall once Donkey Kong grabs onto them. | ||
|- | |- | ||
|align="center"|[[File:DKKOSConveyerBelt.png]] | |align="center"|[[File:DKKOSConveyerBelt.png]] | ||
|[[Conveyor Belt]] | |||
|Conveyor Belts are variants of peg boards that slide Donkey Kong from up to down or side to side if he simply stays still while grabbing on it. They are common in Mine-themed levels. | |Conveyor Belts are variants of peg boards that slide Donkey Kong from up to down or side to side if he simply stays still while grabbing on it. They are common in Mine-themed levels. | ||
|- | |- | ||
|align="center"|[[File:DKKOSIcyPeg.png]] | |align="center"|[[File:DKKOSIcyPeg.png]] | ||
|Icy Peg Board | |||
|Icy Peg Boards are types of peg boards that are frozen over, causing the Kong to slip on it before being able to get a firm grip. They appear in the level [[Ice Castle]] | |Icy Peg Boards are types of peg boards that are frozen over, causing the Kong to slip on it before being able to get a firm grip. They appear in the level [[Ice Castle]] | ||
|} | |} | ||
Revision as of 23:57, May 8, 2022
| DK: King of Swing | |||||||||
|---|---|---|---|---|---|---|---|---|---|
 For alternate box art, see the game's gallery. | |||||||||
| Developer | Paon Nintendo SPD Group No.4 | ||||||||
| Publisher | Nintendo | ||||||||
| Platform(s) | Game Boy Advance, Virtual Console (Wii U) | ||||||||
| Release date | Game Boy Advance: Template:Release Virtual Console (Wii U): Template:Release[?] | ||||||||
| Genre | Puzzle | ||||||||
| Rating(s) |
| ||||||||
| Mode(s) | Single-player, multiplayer | ||||||||
| Input | Wii U: Game Boy Advance:
| ||||||||
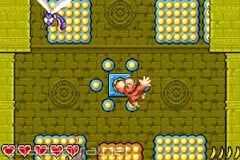
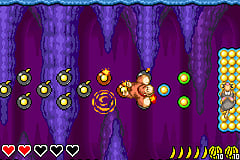
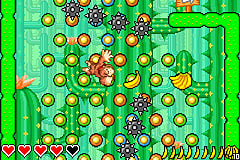
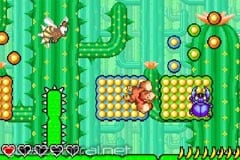
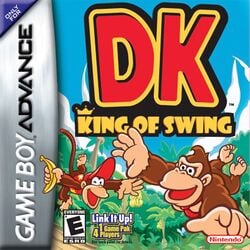
DK: King of Swing is a puzzle game starring Donkey Kong for the Game Boy Advance. It is the first installment of the DK series. Its gameplay is similar to the NES game Clu Clu Land, but it has been re-formatted in aspects to provide more of an adventure game feel. In the game, Donkey Kong must quest across five worlds to recover the Jungle Jam medals that King K. Rool has stolen and scattered across the levels. DK: King of Swing is the first Donkey Kong franchise game to be developed by Paon.
A sequel, titled DK: Jungle Climber, was released for the Nintendo DS in 2007.
DK: King of Swing was re-released for the Wii U's Virtual Console in Japan and North America in November 2014 and in Europe and Australia in January 2015.
Story
The game takes place during the Jungle Jam Tournament, where a huge festival held occurs. During the tournament, medals are given out as prizes to participants in contests like breaking barrels and jumping pegs, with the winner being crowned the hero of the jungle. King K. Rool appears and steals all the medals before the tournament commences, proclaiming himself the jungle hero. Donkey Kong goes on an adventure after King K. Rool to recover the medals. After traveling through four different world, gaining the stolen medals dropped by K. Rool, Donkey Kong enters the final world, K. Kruizer III. At the end of the last world, Donkey Kong is confronted by K. Rool, who challenges him to both a climbing race and battle for the last medal. After defeating K. Rool, Donkey Kong leaves the location using a small, green aircraft while the King Kruizer III explodes and falls from of the sky.
Gameplay
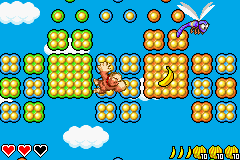
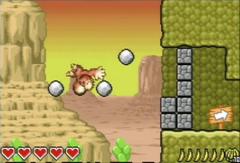
Like Clu Clu Land, the gameplay consists of Donkey Kong swinging and climbing across many pegs. Donkey Kong's goal is to climb, swing, and even blast his way to the top of the level. Donkey Kong cannot battle the world boss without completing every level prior. When Donkey Kong defeats the boss, he can continue to the next world.
There is either a bronze or a silver medal hidden in each level. In every boss level, Donkey Kong is rewarded a gold medal if he defeats the boss. Medals are usually found inside a barrel located in detours of the main path, or in hard to reach areas.
Crystal Coconuts are another collectible item in the game, and they are often hidden inside a crate, a barrel, or as a reward for completing a Bonus Barrel challenge. Sometimes, Donkey Kong must defeat an enemy to obtain the Crystal Coconut. While they are not required to complete the adventure mode, the Crystal Coconuts allow the player to unlock more content. If Donkey Kong obtains all twenty of them, the player unlocks Wrinkly Kong in the single player Jungle Jam Tournament.
After completing the game and obtaining every medal, the player unlocks the Diddy Mode, where they play as Diddy Kong during the adventure mode instead of Donkey Kong. A few things were removed from Diddy Mode, including the tutorial level, the Crystal Coconuts and thus the Bonus Barrels, and most bananas were removed except for those that can be obtained from defeating enemies or breaking crates. Diddy is able to jump higher than Donkey Kong.
Controls
The game mainly uses the ![]() and
and ![]() buttons, which moves Donkey Kong left and right respectively. While Donkey Kong is holding on a peg, the player can hold the
buttons, which moves Donkey Kong left and right respectively. While Donkey Kong is holding on a peg, the player can hold the ![]() or
or ![]() buttons to make him spin in a counterclockwise or clockwise direction respectively. If the player releases either button, Donkey Kong jumps in the direction that he is facing. While Donkey Kong is in midair, the player can press
buttons to make him spin in a counterclockwise or clockwise direction respectively. If the player releases either button, Donkey Kong jumps in the direction that he is facing. While Donkey Kong is in midair, the player can press ![]() or
or ![]() to make him grab with his left or right hand respectively.
to make him grab with his left or right hand respectively.
When Donkey Kong is on the ground, the player can make him move quickly from left to right by pressing the respective ![]() and
and ![]() buttons. If they simultaneously press the buttons, Donkey Kong jumps up into the air.
buttons. If they simultaneously press the buttons, Donkey Kong jumps up into the air.
If the player holds down both the ![]() and
and ![]() buttons, Donkey Kong clutches on the pegs and builds up energy for performing a charge attack. When Donkey Kong is glowing red, the player must release the buttons to make Donkey Kong spin into a ball and charge in the direction he is facing.
buttons, Donkey Kong clutches on the pegs and builds up energy for performing a charge attack. When Donkey Kong is glowing red, the player must release the buttons to make Donkey Kong spin into a ball and charge in the direction he is facing.
By pressing the ![]() button, the player can use ten of Donkey Kong's collected bananas to restore one of his heart units. By pressing
button, the player can use ten of Donkey Kong's collected bananas to restore one of his heart units. By pressing ![]() , the player can use twenty of Donkey Kong's bananas to have temporarily invincible and perform the Going Bananas move. The move also allows him to jump higher. The moves do not work if Donkey Kong does not have the necessary number to perform either move.
, the player can use twenty of Donkey Kong's bananas to have temporarily invincible and perform the Going Bananas move. The move also allows him to jump higher. The moves do not work if Donkey Kong does not have the necessary number to perform either move.
The ![]() is rarely used except to select an option on the main menu or a level from the world map.
is rarely used except to select an option on the main menu or a level from the world map.
Game modes
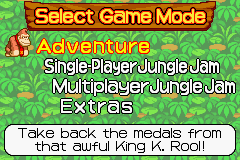
- Adventure: The main mode of the game.
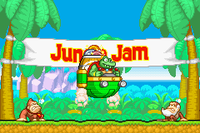
- Single Jungle Jam Tournament: The mode has a total of twelve events, most of which are races. The player can choose between Donkey Kong, Diddy Kong, Dixie Kong, and Funky Kong, and they can also unlock Bubbles, Wrinkly Kong, King K. Rool, and Kritter too. The CPU uses the other characters. The first accessible events are: Climbing Race 1, Climbing Race 2, Obstable Race 1 and Attack Battle 1.
- Multiplayer Jungle Jam Tournament: The same as above, but in multiplayer with four players using the GBA Link Cable.
- Extras: It features Cranky's Lectures (the tutorial level), a Time Attack Mode, and Diddy Mode.
Time Attack mode
The player can unlock the Time Attack mode after completing the Adventure mode. When the player selects the mode, they are given a list of every level, each with its own best time that the player can beat. Three other times also exist in the high scores list that the player can beat. The times are optional and do not allow the player to unlock any new mode or item.
During the mode, Donkey Kong has three hearts like in the regular adventure. If he loses all three of them, the player must restart the level. Donkey Kong can still find bananas around the level, although he is not given any to start with. When Donkey Kong completes a level, the player can record their time if it beats a score on the high scores list.
Characters
| Playable in all modes | |||
|---|---|---|---|
| Image | Name | Description | Stats |
| Donkey Kong | Donkey Kong is the main protagonist and the playable character of Adventure mode. He is also playable in the Jungle Jam Tournament mode, and has the most balanced statistics of the other characters. | Jump: 3/5 Attack: 3/5 | |
| Diddy Kong | Diddy is playable in the unlockable Diddy Mode, where the player plays as Diddy instead of Donkey Kong. Diddy is also playable in the Jungle Jam Tournament mode, where he has a high jumping ability but has a low-average attack. | Jump: 4/5 Attack: 2/5 | |
| Playable in Jungle Jam | |||
| Image | Name | Description | Stats |
| Dixie Kong | Dixie Kong is Diddy Kong's girlfriend. She is one of the four starter characters of the Jungle Jam mode. Out of all the characters, Dixie has the highest jumping ability, but has the weakest attack. | Jump: 5/5 Attack: 1/5 | |
| Funky Kong | Funky is one of the four starter characters of the Jungle Jam Tournament mode. His statistics are switched from Diddy's, as he has an average-high attack, but a low-average jumping ability. | Jump: 2/5 Attack: 4/5 | |
| Unlockable in Jungle Jam | |||
| Image | Name | Description | Stats |
| Kremling | Kremling one of the unlockable characters in the mode. It is a Kritter, but is named "Kremling" in the game. The player can unlock Kremling by obtaining six gold medals in the Jungle Jam Tournament. Its statistics are the same as Donkey Kong's. | Jump: 3/5 Attack: 3/5 | |
| Wrinkly Kong | Wrinkly Kong can be unlocked after Donkey Kong obtains all 20 Crystal Coconuts. Wrinkly is tied with Dixie for highest jump ability. She has a low-average attack power, slightly higher than that of Dixie's. | Jump: 5/5 Attack: 2/5 | |
| King K. Rool | King K. Rool is unlocked after earning 12 Gold Medals in the Jungle Jam Tournament. He has a maximum attack power, but his jumping ability is very weak. | Jump: 1/5 Attack: 5/5 | |
| Bubbles | Bubbles is unlocked after the player completes Diddy Mode from collecting all 24 medals. This is her first and only appearance in a Donkey Kong game. She has the highest balanced stats of the characters. | Jump: 4/5 Attack: 4/5 | |
| Supporting | |||
| Image | Name | Description | |
| Cranky Kong | Cranky Kong's main role is in Cranky's Lectures, where he teaches the controls to Donkey Kong along with providing some advice. | ||
| Candy Kong | Candy Kong has a very minimal appearance because she only appears in the opening, when K. Rool stole the medals, and the ending, when Donkey Kong returns with the medals. | ||
Enemies
| Image | Name | Description | First level appearance | Last level appearance |
|---|---|---|---|---|
| Click-Clack | Click-Clacks are uncommon enemies that walk around Peg Boards. They are invulnerable to frontal attacks due to their pincers, but they can be defeated from behind. When they notice Donkey Kong in the area, they make a clicking noise and follow him. | Cactus Woods | Cactus Woods | |
| Flipflap | Flipflaps are blue bats that appear mostly in cave levels. They fly above Peg Boards or hover below to the ground. Their attack pattern involves them flying back and forth, either horizontally or vertically. Donkey Kong can defeat them with a charge attack. | Contraption Cave | Kremling Kamp | |
| Flitter | Flitters are blue dragonflies that are common in the Jungle World. They move back and forth like Flipflaps, except they do not move in a zigzag pattern. They can only be defeated from a charge attack. | Banana Bungalow | Cactus Woods | |
| Ghost | Ghosts are enemies that only appear in one level, Ship of Souls. They can go invisible and move through objects. If a ghost becomes visible, it can injure Donkey Kong by contact. They can only be defeated by a charge attack while they are invisible, but their silhouettes are still perceivable. | Ship of Souls | Ship of Souls | |
| Kremling | Kremlings are one of the most common enemies, as they are in at least one level of every world. Kremlings can do a variety of actions which include climbing around peg boards, throwing rocks, or repeatedly pulling down on a Jack Peg. | Contraption Cave | K. Kruizer III Hull | |
| Lockjaw | Lockjaws are another enemy that return from Donkey Kong Country 2: Diddy's Kong Quest. They are piranhas encountered in underwater and waterfall levels. If a Lockjaw notices Donkey Kong, it does a biting call and then charges at him. In Lockjaw Falls, they are the main and titular enemy, who attack Donkey Kong by jumping at him from the waterfalls. | Risky Reef | Underwater Ruins | |
| Mini-Necky | Mini-Neckies are small vultures that return from the first two Donkey Kong Country. Mini-Neckies most often appear in the Wild West World, and they attack by either spitting a coconut at Donkey Kong or by swooping at him. | Necky's Canyon | Booster Barrel Skyway | |
| Neek | Neeks are rats who scurry around Peg Boards in cave-themed levels. They can be heard making a squeaking noise as they move around. Neeks can be defeated by a charge attack. | Contraption Cave | Madcap Mine | |
| Shuri | Shuris are starfish that appear in underwater levels. They have no fixed movement, as they just bounce off the wall. | Risky Reef | Underwater Ruins | |
| Zinger | Zingers are bees that make a buzzing sound as they move up and down or side to side. They can only be defeated from the front because of the spikes and a stinger on their back. | Cactus Woods | Booster Barrel Skyway |
Bosses
| Image | Name | Description | Level Appearance |
|---|---|---|---|
| Congazuma | Congazuma is a large Kremling statue and the first boss encountered by Donkey Kong. It attacks by slowly jumping toward him. Donkey Kong can attack Congazuma by performing a charge attack into it. He must do this four times to defeat Congazuma. | Congazuma's Castle | |
| Fire Necky | As its name suggests, Fire Necky is a large Necky engulfed in flame. It attacks by spitting flames which crystallize into rocks shortly after. Donkey Kong must throw seven rocks at Fire Necky to defeat it. | Fire Necky's Nest | |
| Davy Bones | Davy Bones is the undead skeleton of an eel. It attacks from one of six holes towards Donkey Kong, then swims around him for a few seconds. Donkey Kong must grab the peg at the tip of Davy Bones' tail and swing him into the spikes on the edges. When Davy Bones is hit against the spikes enough times, he is defeated. | Davy Bones' Locker | |

|
Sassy Squatch | Sassy Squatch is a massive sasquatch who chases Donkey Kong up a mountain. Donkey Kong can attack Sassy Squatch by throwing bombs into its large mouth. After taking a hit, Sassy Squatch shoots out crystalized pegs for Donkey Kong to continue up to the next section. When enough bombs are thrown into Sassy Squatch's mouth, it gets defeated. | Sassy Squatch's Lair |
| King K. Rool | K. Rool is the fifth and final boss of the game. He and Donkey Kong first engage in a Climbing Race. If Donkey Kong wins, the king challenges him to an Attack Battle. If Donkey Kong also defeats K. Rool at the attack battle, the game ends, and Donkey Kongs recovers all the medals. | King K. Rool |
Worlds and levels
There are five worlds, each with four regular levels and a boss level at the end. There are a total of 25 levels in the game.
| Levels | ||
|---|---|---|
| Template:Color-link | ||
| Level | Medal | Type of level |
| Banana Bungalow | none | Jungle |
| Tropical Treetops | Bronze | Jungle |
| Contraption Cave | Bronze | Cave |
| Puzzling Pyramid | Silver | Pyramid |
| Boss level: Congazuma's Castle | Gold | Pyramid |
| Template:Color-link | ||
| Level | Medal | Type of level |
| Necky's Canyon | Silver | Desert |
| Cactus Woods | Silver | Cactus |
| Treacherous Twister | Bronze | Desert |
| Madcap Mine | Bronze | Mines |
| Boss level: Fire Necky's Nest | Gold | Desert |
| Template:Color-link | ||
| Level | Medal | Type of level |
| Risky Reef | Bronze | Underwater |
| Lockjaw Falls | Bronze | Waterfalls |
| Kremling Kamp | Silver | Ship |
| Ship of Souls | Silver | Ship |
| Boss level: Davy Bones' Locker | Gold | Underwater |
| Template:Color-link | ||
| Level | Medal | Type of level |
| Cold Cold Forest | Silver | Forest |
| Raging Ravine | Silver | Ice |
| Underwater Ruins | Bronze | Underwater |
| Ice Castle | Gold | Ice |
| Boss level: Sassy Squatch's Lair | Gold | Ice |
| Template:Color-link | ||
| Level | Medal | Type of level |
| Booster Barrel Skyway | Bronze | Sky |
| K. Kruizer III Artillery | Silver | Gunship |
| K. Kruizer III Hull | Gold | Gunship |
| K. Kruizer III Engine | Gold | Gunship |
| Boss level: King K. Rool | Gold | Gunship |
Items and objects
| Image | Name | Description |
|---|---|---|
| Banana | Bananas are common items that appear in every level. Each single banana adds one to Donkey Kong's stash, which could be used for Going Bananas or for replenishing health. | |
| Banana Bunch | Banana Bunches are found in most levels and add a total of five bananas to Donkey Kong's stash. | |
| 10 Bananas | A bunch of ten bananas is more rare than the other bananas, but are found in levels after breaking open barrels or crates. One bunch of ten bananas can restore one full heart of health. | |
| Medals | Medals appear in each level besides Banana Bungalow. They can be found in Bonus Areas or inside of barrels or crates. The gold variants are awarded after defeating a boss. | |
| Crystal Coconut | Crystal Coconuts are found in each level. They are usually found in similar spots to the Medal, and can also be obtained by defeating an enemy. | |
| Tire | Tires are common objects that can be bounced off, helping Donkey Kong reach high places that would not be reachable otherwise. | |
| Rock | Rocks are common items that are used to damage enemies or destroy breakable walls. | |
| Bomb | Bombs are items that can break open obstacles or destroy enemies. They detonate withinin approximately five seconds and will cause one heart of damage to Donkey Kong if he holds onto it for too long. | |
| Mine | Mines are spiked objects that are common obstacles throughout some levels. They cause Donkey Kong one heart of damage if he makes contact with them. Mines can also move around, too. | |
| Cannons | Cannons are objects that are encountered in the levels on the K. Kruizer III. They shoot fireballs at Donkey Kong in an attempt to cause damage to his health. Some cannons rotate towards the direction of Donkey Kong while others stay in the same position. | |
| Wooden Crate | Wooden Crates are large boxes of wood that can be broken by Donkey Kong with a simple attack. They usually take up an entire peg board, and, when broken, allow the Kong to progress up. Additionally, wooden crates represent 100 bananas in the player's stash in the bottom right of the screen. | |
| Coconut | Coconuts are objects that some Mini-Neckies shoot from their mouths. They cause one heart's worth of damage to Donkey Kong if it comes into contact with him. Coconuts can be destroyed if they hit a projectile that Donkey Kong throws, such as a rock. |
Barrels
| Image | Name | Description |
|---|---|---|
| Barrel | Standard barrels, if broken by Donkey Kong, reveal bananas or other items. Additionally, barrels represent fifty bananas in the player's stash in the bottom right of the screen. | |
| Question Barrel | Question Barrels are like standard ones, where if broken they reveal something. These barrels reveal Peg Boards or activate doors. | |
| Booster Barrel | Booster Barrels are barrels that act as rockets and are steered with | |
| Bonus Barrel | Bonus Barrels shoot Donkey Kong to a Bonus Area upon entering it. | |
| Barrel Cannon | Barrel Cannons are enterable barrels that launch Donkey Kong in a given direction. | |
| Rolling Barrel | Rolling Barrels are enterable barrels and their aims can be adjusted with the |
Pegs
Pegs are common objects in the game that have many different variants. Each variant performs a different function and assists Donkey Kong in reaching further areas.
| Image | Name | Description |
|---|---|---|
| Peg | Pegs are single, floating studs that the Kongs are able to grab onto. They are the most common of all Peg variants and featured in Jungle Jam Tournament Events as well. | |
| Peg Board | Peg Boards are groups of pegs that the Kongs are able to climb on. They come in many different sizes, ranging from two by two pegs to five by six pegs. They are also the main obstacle in the Jungle Jam Tournament Events. | |
| Handle Peg | Handle Pegs are wheel-like pegs that, if grabbed onto, carry Donkey Kong on a mechanism. These mechanisms run up and down or left and right. | |
| Switch Peg | Switch Pegs can open doors or reveal new secrets if grabbed onto and pulled down with both hands. | |
| Jack Peg | Jack Pegs are peg variants that operate mechanism if pulled down on repeatedly. They can open doors or reveal new peg boards. | |
| Spinning Peg | Spinning Pegs rotate quickly either clockwise or counterclockwise. If grabbed with the correct hand, they can launch Donkey Kong high up to new areas. | |
| Cracked Peg | Cracked Pegs are rare types of pegs that slowly fall once Donkey Kong grabs onto them. | |
| Conveyor Belt | Conveyor Belts are variants of peg boards that slide Donkey Kong from up to down or side to side if he simply stays still while grabbing on it. They are common in Mine-themed levels. | |
| Icy Peg Board | Icy Peg Boards are types of peg boards that are frozen over, causing the Kong to slip on it before being able to get a firm grip. They appear in the level Ice Castle |
Reception
| Reviews | |||
|---|---|---|---|
| Release | Reviewer, Publication | Score | Comment |
| Game Boy Advance | Craig Harris, IGN | 7.8/10 | "DK: King of Swing is a classic example of a Nintendo game attempting something that's both unique and familiar at the same time. It's a concept that could only be successful on the Game Boy Advance for its rather basic structure, but even with its simplistic design DK: King of Swing has a lot going for it. Simple L and R gameplay isn't enough to keep interest high all the way through, so it works best as a quick-shot experience." |
| Game Boy Advance | Frank Provo, GameSpot | 7.3/10 | "All told, DK: King of Swing is a unique and interesting take on the puzzle genre that people will either love or hate depending on how accepting they are of the game's innovative control scheme." |
| Game Boy Advance | Kristan Reed, Eurogamer | 7/10 | "But ignoring the entirely superfluous Jungle Jam, the single-player adventure more than makes up for it and although has arguably way too many incidences of annoying level design to get too excited about, for those with a steely mindset and a longing for something genuinely new DK: King Of Swing is a surprisingly worthwhile addition to the handheld (swinging) scene. Monkeys and bananas are still evidently doing it for us." |
| Aggregators | |||
| Compiler | Platform / Score | ||
| Metacritic | 70 | ||
| GameRankings | 71.85% | ||
Staff
- Main article: List of DK: King of Swing staff
Quotes
- Main article: List of DK: King of Swing quotes
Pre-release and unused content
DK: King of Swing went through some changes during its development.
Gallery
- For this subject's image gallery, see Gallery:DK: King of Swing.
Media
- For a complete list of media for this subject, see List of DK: King of Swing media.
| File info |
Names in other languages
| Language | Name | Meaning | Notes |
|---|---|---|---|
| Japanese | ぶらぶらドンキー[?] Burabura Donkī |
Hanging Donkey | |
| Chinese | 摇摆森喜刚[1] Yáobǎi Sēnxǐgāng |
Swing Donkey Kong | |
| German | DK: King of Swing[?] | - |
Trivia
- It is the first game where Funky Kong, Wrinkly Kong, Kritter, and King K. Rool are playable.
- It is the first and only game where Dixie Kong does not wear her top tied.
- This game was planned to release in mainland China by iQue, but left unreleased due to the huge scene of piracy in China at that time. The unreleased Chinese prototype received an ISBN, meaning it was approved for distribution despite the ban on video games from Chinese government.
- A promotional browser game was released in 2005 called DK: King of Swing -- Hurling for Distance.
References
- ^ From the unreleased iQue version.
