User:RHG1951: Difference between revisions
From the Super Mario Wiki, the Mario encyclopedia
Jump to navigationJump to search
(→Locations: World 2 and 3) |
|||
| Line 27: | Line 27: | ||
!style="text-align:center"|Connects to | !style="text-align:center"|Connects to | ||
|- | |- | ||
!rowspan= | !rowspan=5 style="background:deepskyblue"|[[File:Mushroom Kingdom SMRPG.png]]<br>[[Mushroom Kingdom]] | ||
|-style="background:white" | |-style="background:white" | ||
|[[File:MarioSMRPG.png|150px]]<br>'''[[Mario Bros.' House|Mario's Pad]]''' | |[[File:MarioSMRPG.png|150px]]<br>'''[[Mario Bros.' House|Mario's Pad]]''' | ||
| Line 44: | Line 44: | ||
|A longer road branching off of Mushroom Kingdom. It leads to a dead end where Mario and [[Mallow]] chase and fight [[Croco]] for the first time. | |A longer road branching off of Mushroom Kingdom. It leads to a dead end where Mario and [[Mallow]] chase and fight [[Croco]] for the first time. | ||
|[[Toad Town|Mushroom Kingdom]] | |[[Toad Town|Mushroom Kingdom]] | ||
|- | |||
!rowspan=9 style="background:lime"|[[File:SMRPG Pond to Pipes and Yoster Isle.png]]<br>[[Pond to Pipes]] | |||
|-style="background:white" | |||
|[[File:KeroSewers.png|150px]]<br>'''[[Kero Sewers]]''' | |||
|A large sewer system located above the falls. Its end is guarded by [[Belome]]. | |||
|[[Toad Town|Mushroom Kingdom]]<br>[[Midas River]] | |||
|-style="background:white" | |||
|[[File:MidasRiver.png|150px]]<br>'''[[Midas River]]''' | |||
|A large river fed by [[Midas Waterfall]]. A barrel minigame can be played here. | |||
|[[Kero Sewers]]<br>[[Tadpole Pond]] | |||
|-style="background:white" | |||
|[[File:TadpolePond.png|150px]]<br>'''[[Tadpole Pond]]''' | |||
|Home of [[Frogfucius]] and once the home of Mallow. As the name implies, many [[tadpole]]s inhabit it, two of which run shops. On the right side of the pond is [[Melody Bay]], an off-branch of Tadpole Pond where [[Toadofsky]] resides and composes his music. | |||
|[[Midas River]]<br>[[Rose Way]] | |||
|-style="background:white" | |||
|[[File:RoseWay.png|150px]]<br>'''[[Rose Way]]''' | |||
|A short, swampy road from Tadpole Pond to Rose Town. | |||
|[[Tadpole Pond]]<br>[[Rose Town]] | |||
|-style="background:white" | |||
|[[File:Rose Town.png|150px]]<br>'''[[Rose Town]]''' | |||
|A town attacked by [[Aero|arrow]]s. If an arrow hits one of the inhabitants, they become paralyzed. | |||
|[[Rose Way]]<br>[[Forest Maze]]<br>[[Pipe Vault]] | |||
|-style="background:white" | |||
|[[File:Forest Maze.png|150px]]<br>'''[[Forest Maze]]''' | |||
|A large, winding forest near Rose Town inhabited by enemies. [[Bowyer]] resides here, awarding the second star when defeated. | |||
|[[Rose Town]] | |||
|-style="background:white" | |||
|[[File:Pipe Vault.png|150px]]<br>'''[[Pipe Vault]]''' | |||
|An optional tunnel system leading to Yo'ster Isle, with many pipes and patches of lava. | |||
|[[Rose Town]]<br>[[Yoshi's Island (location)|Yo'ster Isle]]<br>[[Moleville]] | |||
|-style="background:white" | |||
|[[File:Racetrack.PNG|150px]]<br>'''[[Yoshi's Island (location)|Yo'ster Isle]]''' | |||
|The home of the [[Mushroom Derby]]. As the name implies, many [[Yoshi (species)|Yoshi]]s live here, including [[Boshi]]. | |||
|[[Pipe Vault]] | |||
|- | |||
!rowspan=6 style="background:orange"|[[File:Mole Mountains SMRPG.png]]<br>[[Mole Mountains]] | |||
|-style="background:white" | |||
|[[File:Moleville.png|150px]]<br>'''[[Moleville]]''' | |||
|A small mountain town inhabited by [[mole (Super Mario RPG: Legend of the Seven Stars)|mole]]s. | |||
|[[Pipe Vault]]<br>[[Booster Pass]] | |||
|-style="background:white" | |||
|[[File:BoosterPass.png|150px]]<br>'''[[Booster Pass]]''' | |||
|The road between Moleville and Booster Tower used by [[Apprentice (enemy)|Apprentice]]s, containing a lot of rocks and [[Artichoker]]s. | |||
|[[Moleville]]<br>[[Booster Tower]] | |||
|-style="background:white" | |||
|[[File:BoosterTower.png|150px]]<br>'''[[Booster Tower]]''' | |||
|The home of [[Booster]] and his [[Snifit (Super Mario RPG: Legend of the Seven Stars)|Snifit]]s, which has been in his family for generations. He closed off the tower from visitors while he kidnapped [[Princess Peach|Princess Toadstool]]. | |||
|[[Booster Pass]]<br>[[Booster Hill]] | |||
|-style="background:white" | |||
|[[File:BoosterHill.png|150px]]<br>'''[[Booster Hill]]''' | |||
|A hill between Booster Tower and Marrymore, containing beetles and barrels. | |||
|[[Booster Tower]]<br>[[Marrymore]] | |||
|-style="background:white" | |||
|[[File:Marrymore.PNG|150px]]<br>'''[[Marrymore]]''' | |||
|A town famous for its large chapel where couples travel to be wed. | |||
|[[Booster Hill]]<br>[[Star Hill]] | |||
|} | |} | ||
Revision as of 20:51, November 6, 2021
Hi, I'm RHG1951. You may know me for such classics as:
- Getting Paper Mario: Sticker Star to featured status
- Most of the Thing articles
- Taking care of pictures stuck in Category:Quality requested
- De-stubbing NES Remix 2
- Adding most of the commands for Listen to the Doctor!
- Improving Fortune Street
- Adding the flavor text for the WarioWare, Inc.: Mega Party Game$! minigames
- Adding the French translations for the WarioWare Gold microgames
- Adding top quotes on pages
Projects I will get to eventually
- Upload the rest of the music for Fortune Street
- Make the articles for Sticker and Battle Card (Paper Mario: Color Splash)
- Upload images for List of Luigi sightings in NES Remix 2
- Make Sora Sora
- Take images of the Super Mario Chess pieces
- Find the elusive "Toadsworth is Peach's father" citation
Locations
| World | Level | Description | Connects to |
|---|---|---|---|
 Mushroom Kingdom | |||
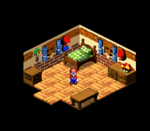 Mario's Pad |
Mario's home, and where his adventure begins. It includes tools and a pipe for a smokestack. The bed here can be rested in for free. He can first learn about Timed Hits here. | Vista Hill Mushroom Way | |
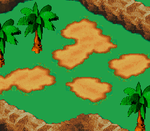 Mushroom Way |
A short road leading from Mario's Pad to Mushroom Kingdom. | Mario's Pad Mushroom Kingdom | |
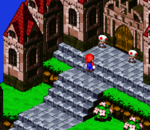 Mushroom Kingdom |
The seat of the region, where the Mushroom people live. It contains a shop, an inn, and Mushroom Castle. Mario first meets Mallow After Mario returns from Bandit's Way, Mack and his Shysters invade the town. | Mushroom Way Bandit's Way Kero Sewers | |
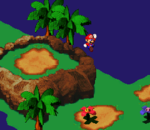 Bandit's Way |
A longer road branching off of Mushroom Kingdom. It leads to a dead end where Mario and Mallow chase and fight Croco for the first time. | Mushroom Kingdom | |
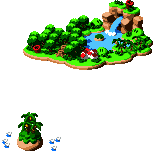 Pond to Pipes | |||
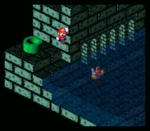 Kero Sewers |
A large sewer system located above the falls. Its end is guarded by Belome. | Mushroom Kingdom Midas River | |
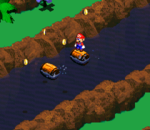 Midas River |
A large river fed by Midas Waterfall. A barrel minigame can be played here. | Kero Sewers Tadpole Pond | |
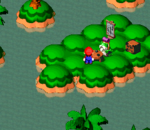 Tadpole Pond |
Home of Frogfucius and once the home of Mallow. As the name implies, many tadpoles inhabit it, two of which run shops. On the right side of the pond is Melody Bay, an off-branch of Tadpole Pond where Toadofsky resides and composes his music. | Midas River Rose Way | |
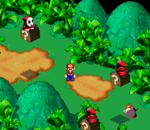 Rose Way |
A short, swampy road from Tadpole Pond to Rose Town. | Tadpole Pond Rose Town | |
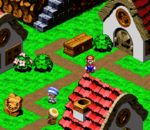 Rose Town |
A town attacked by arrows. If an arrow hits one of the inhabitants, they become paralyzed. | Rose Way Forest Maze Pipe Vault | |
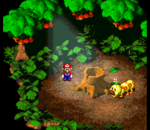 Forest Maze |
A large, winding forest near Rose Town inhabited by enemies. Bowyer resides here, awarding the second star when defeated. | Rose Town | |
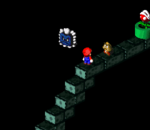 Pipe Vault |
An optional tunnel system leading to Yo'ster Isle, with many pipes and patches of lava. | Rose Town Yo'ster Isle Moleville | |
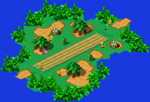 Yo'ster Isle |
The home of the Mushroom Derby. As the name implies, many Yoshis live here, including Boshi. | Pipe Vault | |
 Mole Mountains | |||
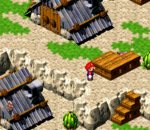 Moleville |
A small mountain town inhabited by moles. | Pipe Vault Booster Pass | |
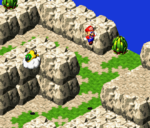 Booster Pass |
The road between Moleville and Booster Tower used by Apprentices, containing a lot of rocks and Artichokers. | Moleville Booster Tower | |
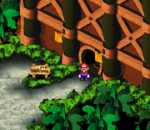 Booster Tower |
The home of Booster and his Snifits, which has been in his family for generations. He closed off the tower from visitors while he kidnapped Princess Toadstool. | Booster Pass Booster Hill | |
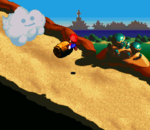 Booster Hill |
A hill between Booster Tower and Marrymore, containing beetles and barrels. | Booster Tower Marrymore | |
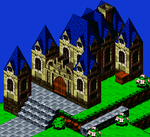 Marrymore |
A town famous for its large chapel where couples travel to be wed. | Booster Hill Star Hill |
Wario Table
| Character | Special ability |
|---|---|
 Wario |
"Dashes and hovers with a cool jet pack—oh yeah!" |
 Mona |
"Zooms around on her scooter and throws a boomerang in any direction." |
 Jimmy T. |
"Thrusts his hips in multiple directions—sounds painful!" |
 Dribble |
"Blasts shots from the right side." |
 Spitz (2-player mode only) |
"Blasts shots from the left side." |
 Kat |
"Jumps continuously and throws shuriken to the right." |
 Ana (2-player mode only) |
"Jumps continuously and throws shuriken to the left." |
| File:WWGIT Orbulon.jpg Orbulon |
"Vacuums objects into a spaceship." |
 Dr. Crygor |
N/A |
 18-Volt |
"Shoots powerful discs." |
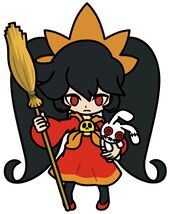 Ashley |
"Casts spooky spells and rides a broom." |
 Mike |
"Glides through the air and blasts music notes straight up." |
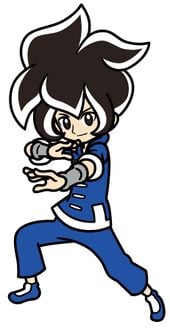 Young Cricket |
"Runs and leaps high into the air. You know—like a cricket?" |
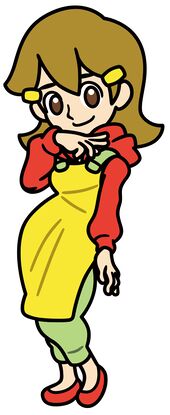 5-Volt |
"Teleports anywhere and creates a shockwave." |
Squares
Scraps
| Scrap | Location | Purpose |
|---|---|---|
 Wooden Bridge |
Warm Fuzzy Plains | Cross a river and continue with the level. |
 Decalburg Fountain |
Decalburg | Rescue the Sticker Museum curator. |
 Comet Piece |
Water's Edge Way | Complete the level. |
 Green Warp Pipe |
Hither Thither Hill | Progress through the level. |
 White Gate |
Whammino Mountain | Access the sticker shop and progress through the level. |
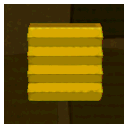 Block Switch |
Goomba Fortress | Rotate a turntable. |
 Ship's Wheel |
Surfshine Harbor | Repair the boat at Surfshine Harbor. |
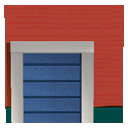 Warehouse Door |
Surfshine Harbor | Access a portion of the warehouse. |
 Tablet Pieces |
Drybake Desert, Yoshi Sphinx, Damp Oasis | Restore Drybake Stadium. |
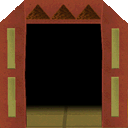 Stone Entry |
Drybake Stadium | Progress through the level. |
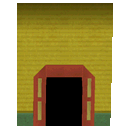 Tower Outer Wall |
Drybake Stadium | Progress through the level. |
 Tree Stump |
Loop Loop River | Access a Comet Piece. |


