User:Scrooge200/Sandbox2: Difference between revisions
From the Super Mario Wiki, the Mario encyclopedia
Jump to navigationJump to search
Scrooge200 (talk | contribs) No edit summary |
Scrooge200 (talk | contribs) No edit summary |
||
| Line 228: | Line 228: | ||
|} | |} | ||
^ indicates unpainted. We don't have unpainted card images so go upload them. | ^ indicates unpainted. We don't have unpainted card images so go upload them. | ||
==Card Gallery== | |||
===Basic Cards=== | |||
<gallery> | |||
|[[File:WOJumpCard.png|55px]] | |||
|Worn-Out Jump{{anchor|Worn-Out Jump}} | |||
|Stomps a single enemy with a weak jump. | |||
|N/A | |||
|[[Ruddy Road]] | |||
|- | |||
|02 | |||
|[[File:WOJump3Card.png|55px]] | |||
|Worn-Out Jump ×3{{anchor|Worn-Out Jump ×3}} | |||
|Stomps a single enemy with a weak jump. Repeats three times. | |||
|N/A | |||
|[[Ruddy Road]] | |||
|-style="background:#F3F3F3" | |||
|03 | |||
|[[File:WOJump5Card.png|55px]] | |||
|Worn-Out Jump ×5{{anchor|Worn-Out Jump ×5}} | |||
|Stomps a single enemy with a weak jump. Repeats five times. | |||
|N/A | |||
|[[Sacred Forest]] | |||
|- | |||
|04 | |||
|[[File:JumpCard.png|55px]] | |||
|[[Jump]]{{anchor|Jump}} | |||
|Stomps a single enemy with a regular jump. | |||
|[[File:GUICoinPMCS.png|10px]]5{{br}}[[File:GUICoinPMCS.png|10px]]20 | |||
|[[Ruddy Road]] | |||
|-style="background:#F3F3F3" | |||
|05 | |||
|[[File:Jump2Card.png|55px]] | |||
|Jump ×2{{anchor|Jump ×2}} | |||
|Stomps a single enemy with a regular jump. Repeats twice. | |||
|[[File:GUICoinPMCS.png|10px]]15 | |||
|[[The Crimson Tower]] | |||
|- | |||
|06 | |||
|[[File:Jump3Card.png|55px]] | |||
|Jump ×3{{anchor|Jump ×3}} | |||
|Stomps a single enemy with a regular jump. Repeats three times. | |||
|N/A | |||
|[[Fortune Island]] | |||
|-style="background:#F3F3F3" | |||
|07 | |||
|[[File:BigJumpCard.png|55px]] | |||
|Big Jump{{anchor|Big Jump}} | |||
|Stomps a single enemy with a strong jump. | |||
|[[File:GUICoinPMCS.png|10px]]15{{br}}[[File:GUICoinPMCS.png|10px]]60 | |||
|[[Mondo Woods]] | |||
|- | |||
|08 | |||
|[[File:BigJump2Card.png|55px]] | |||
|Big Jump ×2{{anchor|Big Jump ×2}} | |||
|Stomps a single enemy with a strong jump. Repeats twice. | |||
|[[File:GUICoinPMCS.png|10px]]40 | |||
|[[Redpepper Volcano]] | |||
|-style="background:#F3F3F3" | |||
|09 | |||
|[[File:HugeJumpCard.png|55px]] | |||
|Huge Jump{{anchor|Huge Jump}} | |||
|Stomps a single enemy with a super-strong jump. | |||
|[[File:GUICoinPMCS.png|10px]]36{{br}}[[File:GUICoinPMCS.png|10px]]170 | |||
|[[Green Energy Plant]] | |||
|- | |||
|10 | |||
|[[File:LineJumpCard.png|55px]] | |||
|Line Jump{{anchor|Line Jump}} | |||
|Stomps all enemies in order with a jump—forward and backward with perfect execution. | |||
|[[File:GUICoinPMCS.png|10px]]20{{br}}[[File:GUICoinPMCS.png|10px]]90 | |||
|[[Bloo Bay Beach]] | |||
|-style="background:#F3F3F3" | |||
|11 | |||
|[[File:BigLineJumpCard.png|55px]] | |||
|Big Line Jump{{anchor|Big Line Jump}} | |||
|Stomps all enemies in order with a strong jump—forward and backward with perfect execution. | |||
|[[File:GUICoinPMCS.png|10px]]50{{br}}[[File:GUICoinPMCS.png|10px]]250 | |||
|[[Plum Park]] | |||
|- | |||
|12 | |||
|[[File:HugeLineJumpCard.png|55px]] | |||
|Huge Line Jump{{anchor|Huge Line Jump}} | |||
|Stomps all enemies in order with a super-strong jump—forward and backward with perfect execution. | |||
|N/A | |||
|[[Green Energy Plant]] | |||
|-style="background:#F3F3F3" | |||
|13 | |||
|[[File:HopslipperCard.png|55px]] | |||
|Hopslipper{{anchor|Hopslipper}} | |||
|Quickly stomps a single enemy up to 10 times. | |||
|[[File:GUICoinPMCS.png|10px]]5{{br}}[[File:GUICoinPMCS.png|10px]]15 | |||
|[[Ruddy Road]] | |||
|- | |||
|14 | |||
|[[File:Hopslipper2Card.png|55px]] | |||
|Hopslipper ×2{{anchor|Hopslipper ×2}} | |||
|Quickly stomps a single enemy up to 10 times. Repeats twice. | |||
|[[File:GUICoinPMCS.png|10px]]12 | |||
|[[Plum Park]] | |||
|-style="background:#F3F3F3" | |||
|15 | |||
|[[File:Hopslipper3Card.png|55px]] | |||
|Hopslipper ×3{{anchor|Hopslipper ×3}} | |||
|Quickly stomps a single enemy up to 10 times. Repeats three times. | |||
|N/A | |||
|[[Redpepper Volcano]] | |||
|- | |||
|16 | |||
|[[File:BigHopslipperCard.png|55px]] | |||
|Big Hopslipper{{anchor|Big Hopslipper}} | |||
|Quickly stomps a single enemy with extra power, up to 10 times. | |||
|[[File:GUICoinPMCS.png|10px]]20{{br}}[[File:GUICoinPMCS.png|10px]]60 | |||
|[[Mondo Woods]] | |||
|-style="background:#F3F3F3" | |||
|17 | |||
|[[File:HugeHopslipperCard.png|55px]] | |||
|Huge Hopslipper{{anchor|Huge Hopslipper}} | |||
|Quickly stomps a single enemy with super power, up to 10 times. | |||
|N/A | |||
|[[Green Energy Plant]] | |||
|- | |||
|18 | |||
|[[File:IronJumpCard.png|55px]] | |||
|Iron Jump{{anchor|Iron Jump}} | |||
|Stomps even spiked enemies with a regular jump. | |||
|[[File:GUICoinPMCS.png|10px]]6{{br}}[[File:GUICoinPMCS.png|10px]]22 | |||
|[[Sunglow Ridge]] | |||
|-style="background:#F3F3F3" | |||
|19 | |||
|[[File:IronJump2Card.png|55px]] | |||
|Iron Jump ×2{{anchor|Iron Jump ×2}} | |||
|Stomps even spiked enemies with two regular jumps. | |||
|[[File:GUICoinPMCS.png|10px]]20 | |||
|[[Plum Park]] | |||
|- | |||
|20 | |||
|[[File:IronJump3Card.png|55px]] | |||
|Iron Jump ×3{{anchor|Iron Jump ×3}} | |||
|Stomps even spiked enemies with three regular jumps. | |||
|N/A | |||
|[[Redpepper Crater]] | |||
|-style="background:#F3F3F3" | |||
|21 | |||
|[[File:BigIronJumpCard.png|55px]] | |||
|Big Iron Jump{{anchor|Big Iron Jump}} | |||
|Stomps even spiked enemies with a strong jump. | |||
|[[File:GUICoinPMCS.png|10px]]20{{br}}[[File:GUICoinPMCS.png|10px]]70 | |||
|[[Plum Park]] | |||
|- | |||
|22 | |||
|[[File:HugeIronJumpCard.png|55px]] | |||
|Huge Iron Jump{{anchor|Huge Iron Jump}} | |||
|Stomps even spiked enemies with a super-strong jump. | |||
|N/A | |||
|[[Mossrock Theater]] | |||
|-style="background:#F3F3F3" | |||
|23 | |||
|[[File:SpinJumpCard.png|55px]] | |||
|Spin Jump{{anchor|Spin Jump}} | |||
|Stomps a single enemy—spiked or not—with a metal drill. Damages multiple enemies if executed well. | |||
|[[File:GUICoinPMCS.png|10px]]10{{br}}[[File:GUICoinPMCS.png|10px]]30 | |||
|[[Marmalade Valley]] | |||
|- | |||
|24 | |||
|[[File:BigSpinJumpCard.png|55px]] | |||
|Big Spin Jump{{anchor|Big Spin Jump}} | |||
|Stomps a single enemy—spiked or not—with a strong metal drill. Damages many enemies if executed well. | |||
|[[File:GUICoinPMCS.png|10px]]20{{br}}[[File:GUICoinPMCS.png|10px]]80 | |||
|[[Toad Trainworks]] | |||
|-style="background:#F3F3F3" | |||
|25 | |||
|[[File:WOHammerCard.png|55px]] | |||
|Worn-Out Hammer{{anchor|Worn-Out Hammer}} | |||
|Whacks one enemy with a weak hammer. Damages multiple enemies if executed well. | |||
|N/A | |||
|[[Ruddy Road]] | |||
|- | |||
|26 | |||
|[[File:WOHammer3Card.png|55px]] | |||
|Worn-Out Hammer ×3{{anchor|Worn-Out Hammer ×3}} | |||
|Whacks one enemy with a weak hammer. Damages multiple enemies if executed well. Repeats three times. | |||
|N/A | |||
|[[Ruddy Road]] | |||
|-style="background:#F3F3F3" | |||
|27 | |||
|[[File:WOHammer5Card.png|55px]] | |||
|Worn-Out Hammer ×5{{anchor|Worn-Out Hammer ×5}} | |||
|Whacks one enemy with a weak hammer. Damages multiple enemies if executed well. Repeats five times. | |||
|N/A | |||
|[[The Crimson Tower]] | |||
|- | |||
|28 | |||
|[[File:HammerCard.png|55px]] | |||
|[[Hammer]]{{anchor|Hammer}} | |||
|Whacks one enemy with a regular hammer. Damages multiple enemies if executed well. | |||
|[[File:GUICoinPMCS.png|10px]]5{{br}}[[File:GUICoinPMCS.png|10px]]20 | |||
|[[Ruddy Road]] | |||
|-style="background:#F3F3F3" | |||
|29 | |||
|[[File:Hammer2Card.png|55px]] | |||
|Hammer ×2{{anchor|Hammer ×2}} | |||
|Whacks one enemy with a regular hammer. Damages multiple enemies if executed well. Repeats twice. | |||
|[[File:GUICoinPMCS.png|10px]]16 | |||
|[[The Crimson Tower]] | |||
|- | |||
|30 | |||
|[[File:Hammer3Card.png|55px]] | |||
|Hammer ×3{{anchor|Hammer ×3}} | |||
|Whacks one enemy with a regular hammer. Damages multiple enemies if executed well. Repeats three times. | |||
|N/A | |||
|[[Redpepper Crater]] | |||
|-style="background:#F3F3F3" | |||
|31 | |||
|[[File:BigHammerCard.png|55px]] | |||
|Big Hammer{{anchor|Big Hammer}} | |||
|Whacks one enemy with a strong hammer. Damages multiple enemies if executed well. | |||
|[[File:GUICoinPMCS.png|10px]]18{{br}}[[File:GUICoinPMCS.png|10px]]75 | |||
|[[Mondo Woods]] | |||
|- | |||
|32 | |||
|[[File:BigHammer2Card.png|55px]] | |||
|Big Hammer ×2{{anchor|Big Hammer ×2}} | |||
|Whacks one enemy with a strong hammer. Damages multiple enemies if executed well. Repeats twice. | |||
|[[File:GUICoinPMCS.png|10px]]50 | |||
|[[Redpepper Crater]] | |||
|-style="background:#F3F3F3" | |||
|33 | |||
|[[File:HugeHammerCard.png|55px]] | |||
|Huge Hammer{{anchor|Huge Hammer}} | |||
|Whacks one enemy with a super-strong hammer. Damages multiple enemies if executed well. | |||
|[[File:GUICoinPMCS.png|10px]]52{{br}}[[File:GUICoinPMCS.png|10px]]250 | |||
|[[Black Bowser's Castle]] after beating the game | |||
|- | |||
|34 | |||
|[[File:KOHammerCard.png|55px]] | |||
|KO Hammer{{anchor|KO Hammer}} | |||
|Whacks a single enemy from the side with a hammer. Damages multiple enemies if executed well. | |||
|[[File:GUICoinPMCS.png|10px]]7{{br}}[[File:GUICoinPMCS.png|10px]]28 | |||
|[[Bloo Bay Beach]] | |||
|-style="background:#F3F3F3" | |||
|35 | |||
|[[File:BigKOHammerCard.png|55px]] | |||
|Big KO Hammer{{anchor|BIg KO Hammer}} | |||
|Whacks a single enemy from the side with a strong hammer. Damages multiple enemies if executed well. | |||
|[[File:GUICoinPMCS.png|10px]]16{{br}}[[File:GUICoinPMCS.png|10px]]70 | |||
|[[Plum Park]] | |||
|- | |||
|36 | |||
|[[File:HugeKOHammerCard.png|55px]] | |||
|Huge KO Hammer{{anchor|Huge KO Hammer}} | |||
|Whacks a single enemy from the side with a super-strong hammer. Damages multiple enemies if executed well. | |||
|N/A | |||
|[[Green Energy Plant]] | |||
|-style="background:#F3F3F3" | |||
|37 | |||
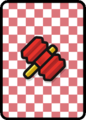
|[[File:EekhammerCard.png|55px]] | |||
|Eekhammer{{anchor|Eekhammer}} | |||
|Quickly whacks a single enemy with a hammer up to five times. | |||
|[[File:GUICoinPMCS.png|10px]]5{{br}}[[File:GUICoinPMCS.png|10px]]20 | |||
|[[Fortune Island]] | |||
|- | |||
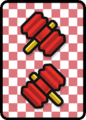
|38 | |||
|[[File:Eekhammer2Card.png|55px]] | |||
|Eekhammer ×2{{anchor|Eekhammer ×2}} | |||
|Quickly whacks a single enemy with a hammer up to five times. Repeats twice. | |||
|[[File:GUICoinPMCS.png|10px]]15 | |||
|[[Plum Park]] | |||
|-style="background:#F3F3F3" | |||
|39 | |||
EekhammerCard.png|Eekhammer | |||
Eekhammer2Card.png|Eekhammer x2 | |||
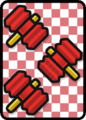
Eekhammer3Card.png|Eekhammer x3 | |||
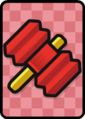
BigEekhammerCard.png|Big Eekhammer | |||
BigEekhammer2Card.png|Big Eekhammer x2 | |||
HugeEekhammerCard.png|Huge Eekhammer | |||
HurlhammerCard.png|Hurlhammer | |||
Hurlhammer2Card.png|Hurlhammer x2 | |||
Hurlhammer3Card.png|Hurlhammer x3 | |||
BigHurlhammerCard.png|Big Hurlhammer | |||
HugeHurlhammerCard.png|Huge Hurlhammer | |||
BlazehammerCard.png|Blazehammer | |||
FireFlowerCard.png|Fire Flower | |||
BigFireFlowerCard.png|Big Fire Flower | |||
IceFlowerCard.png|Ice Flower | |||
BigIceFlowerCard.png|Big Ice Flower | |||
POWBlockCard.png|POW Block | |||
MushroomCard.png|Mushroom | |||
BigMushroomCard.png|Big Mushroom | |||
MegaMushroomCard.png|Mega Mushroom | |||
1UpMushroomCard.png|1-Up Mushroom | |||
TailCard.png|Tail | |||
SpikeHelmetCard.png|Spike Helmet | |||
FrogSuitCard.png|Frog Suit | |||
</gallery> | |||
Revision as of 02:59, May 26, 2020
My second sandbox for smaller projects.
Color Splash Pages Needed
- Oceanfest
- Blissful Beach
- Sunset Express (train),
- Starlight Cape
- Prisma Cafe
- Prisma Postal Toad
- Prisma Times
Languages
- Japanese
- Spanish
- French
- Dutch
- German
- Italian
- Portuguese
- Russian
I have access to the US English, Spanish, and French translations.
Other useful sources:
- 100% playthrough in Italian
- Playthrough in Dutch
- Portugese playthroughs: Start-Ch2, Start-Ch1
Prisma Cardware
At my current pre-Fortune Island save, I have the following:
| Image | Card | Price |
|---|---|---|
| Jump^ | 5 | |

|
Jump | 20 |
| Jump x2^ | 15 | |
| Big Jump^ | 15 | |

|
Big Jump | 60 |
| Hopslipper^ | 5 | |

|
Hopslipper | 15 |
| Hopslipper^ x2 | 12 | |
| Big Hopslipper^ | 20 | |

|
Big Hopslipper | 60 |
| Iron Jump^ | 6 | |

|
Iron Jump | 22 |
| Iron Jump x2^ | 20 | |
| Big Iron Jump^ | 20 | |

|
Big Iron Jump | 70 |
| Line Jump^ | 20 | |

|
Line Jump | 90 |
| Big Line Jump^ | 50 | |

|
Big Line Jump | 250 |
| Spin Jump^ | 10 | |

|
Spin Jump | 30 |
| Hammer^ | 5 | |

|
Hammer | 20 |
| Hammer x2^ | 16 | |
| Big Hammer^ | 18 | |

|
Big Hammer | 75 |
| Eekhammer^ | 5 | |

|
Eekhammer | 20 |
| Eekhammer x2^ | 15 | |
| Big Eekhammer^ | 15 | |

|
Big Eekhammer | 60 |
| KO Hammer^ | 7 | |

|
KO Hammer | 28 |
| Hurlhammer^ | 15 | |

|
Hurlhammer | 65 |
| Fire Flower^ | 40 | |

|
Fire Flower | 200 |
| Big Fire Flower^ | 80 | |

|
Big Fire Flower | 300 |
| Ice Flower^ | 40 | |

|
Ice Flower | 200 |
| Big Ice Flower^ | 80 | |

|
Big Ice Flower | 200 |

|
POW Block | 100 |

|
Mushroom | 20 |

|
Big Mushroom | 70 |

|
Tail | 80 |

|
Spike Helmet | 80 |

|
Frog Suit | 80 |
^ indicates unpainted. We don't have unpainted card images so go upload them.
Card Gallery
Basic Cards
Eekhammer
Eekhammer x2
Eekhammer x3
Big Eekhammer
Big Eekhammer x2

Huge Eekhammer
Hurlhammer
Hurlhammer x2
Hurlhammer x3
Big Hurlhammer
Huge Hurlhammer
Blazehammer

Fire Flower

Big Fire Flower

Ice Flower

Big Ice Flower

POW Block

Mushroom

Big Mushroom

Mega Mushroom

1-Up Mushroom

Tail
Spike Helmet

Frog Suit


