Sticker: Difference between revisions
ShadeTempest (talk | contribs) mNo edit summary |
ShadeTempest (talk | contribs) |
||
| Line 203: | Line 203: | ||
|★★★☆☆ | |★★★☆☆ | ||
|Ground/Low Altitude/Air | |Ground/Low Altitude/Air | ||
| | |[[Ice Flow]] | ||
|- | |- | ||
|20 | |20 | ||
Revision as of 14:11, March 31, 2013
- “Hey, that's a sticker, isn't it?! Lucky you, picking up something so great.”
- —Kersti, Paper Mario: Sticker Star
Stickers are important elements in Paper Mario: Sticker Star. They serve as Mario's main method of attacking, and as such there are a wide variety of stickers to attack with. They are also used to solve puzzles and unlock pathways.
Background
Stickers come from the Sticker Comet. Once every year, they rain down on the Mushroom Kingdom during the Sticker Festival. After Bowser accidentally shatters the Comet and scatters the Royal Stickers, Mario is forced to retrieve them with the help of Kersti, a sticker being who is the caretaker of the Sticker Comet. Along the way, stickers are used to solve puzzles and battle enemies.
Stickers can be found almost everywhere. Battle/item stickers are sorted into 7 different categories by strength; Worn-Out, Normal, Shiny, Flashy, Big, Big Shiny, and Megaflash. They are sometimes dropped by enemies, found on walls, found in ? Blocks, bought at shops, etc. Collected stickers are kept in Mario's sticker album, and each page in the album is 6-by-10 spaces (which can hold 15 small stickers in a 3x5 arrangement). Stickers can only be kept as long as there is space in the album, and certain stickers take up more room than others. In order to maximize usage of space, it may be necessary to rearrange stickers or even remove them. Pressing Start while looking at the sticker album will automatically re-arrange all stickers to maximize free space. This setup usually consists of two large stickers in a corner surrounded by smaller ones, though it varies depending on the size of the stickers collected.
The Sticker Album is grouped into different tabs:
- Stickers - This section of the album holds all battle/item stickers and Thing stickers.
- Things - While not technically stickers themselves, Things can be converted into Thing stickers at a shop in Decalburg or at Outlook Point (World 3-6).
- Scraps - These are obtained from removing environmental objects from a Paperized scene. They can be re-pasted later to alter a new environment, either by simply filling voids or revealing new objects and paths. Some levels require the player to do this in real time, like Bowser's Snow Fort.
Stickers vary in size. The three different sizes stickers come in are:
- Small (1x1) takes up 4 Spaces in the Album.
- Medium (1.5x1.5) takes up 9 Spaces in the Album.
- Large (2x2) takes up 16 Spaces in the Album.
Battle Stickers
There are 96 battle stickers in the game.
| # | Image | Name | In-game Description | Sticking Points | Attack Power | Attack Range | Where to Buy/Dropped By |
|---|---|---|---|---|---|---|---|
| 01 | 
|
Worn-Out Jump | Stomps foes with a weak jump. | A jump-and-stomp attack so weak that reputable shops are too ashamed to stock it. | ★☆☆☆☆ | Ground/Low Altitude/Air | Decalburg |
| 02 | File:JumpstickerPMSS.png | Jump | Stomps a single foe but will take damage from spiked foes. Can stomp multiple times if you're good. | A jump-and-stomp attack. A word to the wise: do NOT use this attack on spiked enemies or you'll regret it. | ★☆☆☆☆ | Ground/Low Altitude/Air | Decalburg |
| 03 | 
|
Shiny Jump | Stomps foes with a fairly strong jump. | A pretty strong and pretty pretty jump-and-stomp attack. Shininess aside, it's still a bad choice for spiked foes. | ★★☆☆☆ | Ground/Low Altitude/Air | Shaved-Ice Cave, Rumble Volcano |
| 04 | 
|
Flashy Jump | Stomps foes with a pretty strong jump. | A fairly strong and fairly fair jump-and-stomp attack. No amount of flash will make it good against spiky baddies. | ★★★☆☆ | Ground/Low Altitude/Air | Rumble Volcano |
| 05 | 
|
Big Shiny Jump | Stomps foes with a very strong jump. | A bit bigger and shinier than the standard model, this jump attack also boasts some crumpling power. | ★★★★☆ | Ground/Low Altitude/Air | Outlook Point, Decalburg (after World 3), Rumble Volcano |
| 06 | 
|
Megaflash Jump | Stomps foes with a superstrong jump. | A big, strong, shiny attack blessed with great power and solid crumpling ability. Tell me this thing doesn't look cool. | ★★★★★ | Ground/Low Altitude/Air | Bowser Jr.'s Flotilla |
| 07 | 
|
Iron Jump | Stomps even spiked foes effortlessly. | As the name implies, a battle sticker that laughs in the face of spiked foes. Feel free to laugh along with it. | ★☆☆☆☆ | Ground/Low Altitude/Air | Decalburg |
| 08 | 
|
Shiny Iron Jump | Stomps even spiked foes effortlessly with a fairly strong jump. | An attack that delivers a slightly stronger stomp on spiked enemies. Though made of iron, it's quite light! | ★★☆☆☆ | Ground/Low Altitude/Air | Shaved-Ice Cave, Rumble Volcano |
| 09 | 
|
Flashy Iron Jump | Stomps even spiked foes effortlessly with a pretty strong jump. | A compact and pretty powerful stomp that doesn't mind spiked landings. Who knew iron could be so pretty? | ★★★☆☆ | Ground/Low Altitude/Air | N/A |
| 10 | 
|
Big Shiny Iron Jump | Stomps even spiked foes effortlessly with a very strong jump. | A strong stomp attack designed for spiked enemies. You really would think such a big iron sticker would be heavy. | ★★★★☆ | Ground/Low Altitude/Air | Decalburg (after World 3), Rumble Volcano |
| 11 | 
|
Megaflash Iron Jump | Stomps even spiked foes effortlessly with a superstrong jump. | An extreme stomp attack that crushes any spiked enemy. This thing is almost not fair in battle. | ★★★★★ | Ground/Low Altitude/Air | Rugged Road |
| 12 | 
|
Hopslipper | If you're good, stomps a single foe many times. | The slighty weak attack befitting a slipper, but capable of up to ten jumps if your timing is on. | ★☆☆☆☆ | Ground/Low Altitude/Air | Decalburg |
| 13 | 
|
Shiny Hopslipper | If you're good, stomps a single foe many times with a fairly strong jump. | A less-than-powerful attack that can stomp up to ten times using wonderful spring technology. | ★★☆☆☆ | Ground/Low Altitude/Air | Shaved-Ice Cave |
| 14 | 
|
Flashy Hopslipper | If you're good, stomps a single foe many times with a pretty strong jump. | A flashy sticker that doesn't exactly look cool, seeing as it's a slipper with a spring on it. But it can stomp ten times! | ★★★☆☆ | Ground/Low Altitude/Air | N/A |
| 15 | 
|
Big Shiny Hopslipper | If you're good, stomps a single foe many times with a very strong jump. | An attack whose size hides weak power. But ten jumps does mean ten attacks, so it's got that going for it. | ★★★★☆ | Ground/Low Altitude/Air | Decalburg (after Chapter 3), Rumble Volcano |
| 16 | 
|
Megaflash Hopslipper | If you're good, stomps a single foe many times with a superstrong jump. | A big, shiny...slipper. Still, if you can land ten jumps, it's a MEAN slipper. So just lay off with the slipper hate. | ★★★★★ | Ground/Low Altitude/Air | Chomp Ruins |
| 17 | 
|
Line Jump | Stomps all foes in a line. Gets progressively weaker and faster with each jump. | An attack that lets you stomp foe after foe with decreasing power, but only if you have good jump timing. | ★☆☆☆☆ | Ground/Low Altitude/Air | Decalburg |
| 18 | 
|
Shiny Line Jump | Stomps all foes in a line with a fairly strong jump. | A Line Jump with a bit more oomph. Try to stomp each enemy three times, since three is better than two or one. | ★★☆☆☆ | Ground/Low Altitude/Air | Shaved-Ice Cave |
| 19 | 
|
Flashy Line Jump | Stomps all foes in a line with a pretty strong jump. | A flashy-looking Line Jump with flashy-feeling attack power. It's got the max power of the small Line Jump line. | ★★★☆☆ | Ground/Low Altitude/Air | Ice Flow |
| 20 | 
|
Big Shiny Line Jump | Stomps all foes in a line with a very strong jump. | A sticker whose jump in size mirrors a jump in jumping-attack power. Foes will line up to take their whupping! | ★★★★☆ | Ground/Low Altitude/Air | Decalburg (after Chapter 3) |
| 21 | 
|
Megaflash Line Jump | Stomps all foes in a line with a superstrong jump. | The strongest sticker in the Line Jump line. Enjoy the megapower as you stomp each enemy up to three times! | ★★★★★ | Ground/Low Altitude/Air | Bowser's Snow Fort |
| 22 | 
|
Flashy Clone Jump | Cloned Marios stomp a single foe. | An attack that sends four Marios leaping in succession. This attack can sometimes crumple foes too. | ★★★☆☆ | Ground/Low Altitude/Air | Shaved-Ice Cave |
| 23 | 
|
Big Shiny Clone Jump | Cloned Marios stomp a single foe with a very strong jump. | A sparkling clone attack with power befitting the sticker's size and raw, untamed sparklability. | ★★★★☆ | Ground/Low Altitude/Air | Shaved-Ice Cave |
| 24 | 
|
Megaflash Clone Jump | Cloned Marios stomp a single foe with a superstrong jump. | An attack that unleashes the four strongest Marios and delivers a strong crumpling effect. Wow. | ★★★★★ | Ground/Low Altitude/Air | Rumble Volcano |
| 25 | 
|
Flashy Infinijump | If you're good, stomps a single foe many times. This sticker is really strong if you can keep stomping. | An attack with weak power but unreal stamina. Go for the maximum 100 jumps. Yes, you read that right. | ★★★☆☆ | Ground/Low Altitude/Air | The Enigmansion, Chomp Ruins |
| 26 | 
|
Big Shiny Infinijump | If you're good, stomps a single foe many times. This sticker is very strong if you can keep stomping. | A slightly bigger sticker that still has weak power. But c'mon, 100 stomps! 100 stomps is pretty solid. | ★★★★☆ | Ground/Low Altitude/Air | Long Fall Falls |
| 27 | 
|
Megaflash Infinijump | If you're good, stomps a single foe many times. This sticker is megastrong if you can keep stomping. | An attack said to bring enlightenment if you make your mind blank and become one with your jump. | ★★★★★ | Ground/Low Altitude/Air | Long Fall Falls |
| 28 | 
|
Worn-Out Hammer | Strikes foes with a weak whack. | A battle sticker that doesn't look so hot. To be completely honest, it doesn't work so hot, either. | ★☆☆☆☆ | Ground/Low Altitude | N/A |
| 29 | File:HammerstickerPMSS.png | Hammer | Strikes foes with a swung hammer. Can damage multiple foes but won't hit flying ones. | A hammer that can pound enemies flat but it is useless against flying enemies. Use it wisely. | ★☆☆☆☆ | Ground/Low Altitude | Decalburg |
| 30 | 
|
Shiny Hammer | Strikes foes with a fairly strong whack. | A stronger hammer attack. It will build power as you hold your windup, but don't overdo it or the head will pop off! | ★★☆☆☆ | Ground/Low Altitude | Shaved-Ice Cave, Rumble Volcano |
| 31 | 
|
Flashy Hammer | Strikes foes with a pretty strong whack. | Like many others, a hammer that can damage enemies near its main target. Plan for collateral damage! | ★★★☆☆ | Ground/Low Altitude | Rumble Volcano |
| 32 | 
|
Big Shiny Hammer | Strikes foes with a very strong whack. | A big, shiny hammer boasting big, shiny damage. Definitely do not miss your swing, or you'll be really bummed out. | ★★★★☆ | Ground/Low Altitude | Outlook Point, Decalburg (after Chapter 3), Shaved-Ice Cave |
| 33 | 
|
Megaflash Hammer | Strikes foes with a superstrong whack. | A hammer with ultimate attack power. The main target and its neighbors get seriously BONKED. | ★★★★★ | Ground/Low Altitude | Yoshi Sphinx |
| 34 | 
|
Slaphammer | Strikes a single foe from the side. | An attack that strikes from the side. If swung with good timing, it sends the enemies flying. | ★☆☆☆☆ | Ground/Low Altitude | Decalburg |
| 35 | 
|
Shiny Slaphammer | Strikes a single foe from the side with a fairly strong whack. | A side-striking hammer attack that has a chance of making an enemy dizzy, which could make its attacks miss. | ★★☆☆☆ | Ground/Low Altitude | Shaved-Ice Cave |
| 36 | 
|
Flashy Slaphammer | Strikes a single foe from the side with a pretty strong whack. | An attack that only hits a single target, but hits it really hard and might make it dizzy. | ★★★☆☆ | Ground/Low Altitude | Shy Guy Jungle |
| 37 | 
|
Big Shiny Slaphammer | Strikes a single foe from the side with a very strong whack. | A big hammer attack with big damage, but like all attacks, it's totally dependent on good timing. | ★★★★☆ | Ground/Low Altitude | Decalburg (after Chapter 3) |
| 38 | 
|
Megaflash Slaphammer | Strikes a single foe from the side with a superstrong whack. | An attack whose mighty swing punishes foes, launching them dramatically and often making them dizzy. | ★★★★★ | Ground/Low Altitude | Rugged Road |
| 39 | File:Eekhammersticker.png | Eekhammer | If you're good, strikes a single foe many times. | A hammer that really looks like a toy. Land up to five strikes for five times the annoyance. Squeaksqueaksqueak! | ★☆☆☆☆ | Ground/Low Altitude | Decalburg |
| 40 | 
|
Shiny Eekhammer | If you're good, strikes a single foe many times with fairly strong whacks. | A shiny attack that is regrettably still toylike. Still, delivering five strikes should ease the shame of using it. | ★★☆☆☆ | Ground/Low Altitude | Shaved-Ice Cave |
| 41 | 
|
Flashy Eekhammer | If you're good, strikes a single foe many times with pretty strong whacks. | A pretty flashy hammer attack. Get in five hits so you can hear the squeaksqueaksqueaksqueaksqueak! | ★★★☆☆ | Ground/Low Altitude | N/A |
| 42 | 
|
Big Shiny Eekhammer | If you're good, strikes a single foe many times with very strong whacks. | Like other Eekhammers, its power gets stronger with each swing for a max of five strikes. This one's bigger, though. | ★★★★☆ | Ground/Low Altitude | Decalburg (after Chapter 3) |
| 43 | 
|
Megaflash Eekhammer | If you're good, strikes a single foe many times with superstrong whacks. | A megasized attack that packs a serious wallop for a toy. Get in five strikes for perfection. | ★★★★★ | Ground/Low Altitude | Chomp Ruins |
| 44 | 
|
Hurlhammer | Hurls a huge hammer into the air that plunges down on unwitting foes and strikes them all. Also hits flying foes. | A hurlable hammer that, with good timing, can damage all foes--even flying ones. Bad timing just ain't gonna cut it. | ★☆☆☆☆ | Ground/Low Altitude/Air | Decalburg |
| 45 | 
|
Shiny Hurlhammer | Hurls a huge hammer into the air that plunges down and strikes all foes with fairly strong force. Also hits flying foes. | An attack that, like other hammers, fails if held too long. If you throw it too fast, it'll hit only one foe. | ★★☆☆☆ | Ground/Low Altitude/Air | Shaved-Ice Cave |
| 46 | 
|
Flashy Hurlhammer | Hurls a huge hammer into the air that plunges down and strikes all foes with pretty strong force. Also hits flying foes. | A hurlable hammer that, like others, damages enemies in front the most but can also hit subsequent targets. | ★★★☆☆ | Ground/Low Altitude/Air | N/A |
| 47 | 
|
Big Shiny Hurlhammer | Hurls a huge hammer into the air that plunges down and strikes all foes with very strong force. Also hits flying foes. | A decent-sized shiny hammer that falls from above as its targets gaze in awe, helplessly watching doom approach. | ★★★★☆ | Ground/Low Altitude/Air | Decalburg (after Chapter 3) |
| 48 | 
|
Megaflash Hurlhammer | Hurls a huge hammer into the air that plunges down and strikes all foes with superstrong force. Also hits flying foes. | A big, pretty, very hurlable hammer. In fact, it's almost too pretty to hurl. Good thing you put it in here. | ★★★★★ | Ground/Low Altitude/Air | Shy Guy Jungle, Chomp Ruins |
| 49 | File:BaahammerstickerPMSS.png | Baahammer | Makes all foes kind of sleepy. | A hammer that, with good timing, puts enemies to sleep. The fact that it deals damage is a bonus. | ★☆☆☆☆ | Ground/Low Altitude | Decalburg |
| 50 | 
|
Big Shiny Baahammer | Makes all foes very sleepy. | A hammer that can knock even the most sleep-resistant enemy out. Of course, you've got to time it well. | ★★★★☆ | Ground/Low Altitude | Decalburg (after Chapter 3), Shaved-Ice Cave, Rumble Volcano |
| 51 | 
|
Megaflash Baahammer | Makes all foes extremely sleepy with significant damage. | A hammer attack with good power that also puts foes to bed. If you mess up the timing, though, that's baaaaaaaad. | ★★★★★ | Ground/Low Altitude | Chomp Ruins |
| 52 | 
|
Burnhammer | Looses a giant flame on impact, burning most foes. Does not hit or affect all foes. | A hammer whos tepid flames can fry small fry. If your timing's off, though, you won't produce any flames. | ★☆☆☆☆ | Ground/Low Altitude | Decalburg |
| 53 | 
|
Big Shiny Burnhammer | Looses a giant flame on impact, scorching foes to a medium rare. Does not hit or affect all foes. | A hot, flaming hammer attack that's nonethless ineffective against the Buzzy Beetle family. | ★★★★☆ | Ground/Low Altitude | Decalburg (after Chapter 3), Shaved-Ice Cave, Rumble Volcano |
| 54 | 
|
Megaflash Burnhammer | Looses a giant flame on impact, charbroiling most foes well done. Does not hit or affect all foes. | A flaming hammer attack that damages all foes that it strikes equally. We just want to see you succeed, y'know? | ★★★★★ | Ground/Low Altitude | Rugged Road |
| 55 | 
|
Chillhammer | Releases a frigid blast, freezing most foes. Does not hit or affect all foes. | A hammer that, if timed well, sends a freezing arctic blast howling into faces of all enemies. | ★☆☆☆☆ | Ground/Low Altitude | Decalburg |
| 56 | 
|
Big Shiny Chillhammer | Releases a frigid blast, freezing most foes with a powerful chill. Does not hit or affect all foes. | A hammer attack that cold haters hate, but cold lovers love not hating. You know what I mean? | ★★★★☆ | Ground/Low Altitude | Decalburg (after Chapter 3), Shaved-Ice Cave, Rumble Volcano |
| 57 | 
|
Megaflash Chillhammer | Releases a frigid blast, freezing most foes with an arctic chill. Does not hit or affect all foes. | An attack that launches a really nasty cold wave boasting megaflash damage. Miss, and you hit zip. | ★★★★★ | Ground/Low Altitude | Bowser's Snow Fort |
| 58 | 
|
Super Boot | Avoids enemy attacks with a jump. As a bonus, slightly increases attack power of subsequent jump-type stickers. | Attack-dodging boots. If you use them, the attack power of any subsequent jump-type stickers will go up. | N/A | N/A | Outlook Point |
| 59 | 
|
Shiny Super Boot | Avoids enemy attacks with a jump. As a bonus, increases attack power of subsequent jump-type stickers a fair bit. | A defensive sticker that hugely boosts the attack power of subsequent jump stickers. Definitely stick this one first! | N/A | N/A | Outlook Point |
| 60 | File:TailSticker.png | Tail | Counters enemy attacks with a swipe of the tail. Has no effect against attacks from above. | A tail that repels attacks that come flying right at you. You've got to swing that tail with good timing, though! | N/A | N/A | Outlook Point |
| 61 | 
|
Shiny Tail | Strongly counters enemy attacks with a tail swipe. Has no effect against attacks from above. | A shiny tail that smacks onrushing enemies and straight-flying projectiles. When you connect, it feels gooood. | N/A | N/A | Outlook Point |
| 62 | File:FrogsuitPMSS.png | Frog Suit | Dodges enemy attacks by jumping over them. As a bonus, slightly increases attack power of subsequent stickers. | A froggy dodge maneuver that ups the attack power on subsequent stickers, too. Not bad for a frog. | N/A | N/A | Outlook Point |
| 63 | 
|
Shiny Frog Suit | Dodges enemy attacks by jumping over them. As a bonus, increases attack power of subsequent stickers a fair bit. | A shiny, froggy dodge that drastically boosts the attack power of subsequent stickers. Well done, frog. | N/A | N/A | Outlook Point |
| 64 | 
|
Spike Helmet | Protects against and counters attacks from above with the helmet's spike. | An attack that provides a spiky surprise for attackers from above when you crouch and hold it over your head. | N/A | N/A | Decalburg |
| 65 | 
|
Shiny Spike Helmet | Protects against and strongly counters attacks from above with the helmet's spike. | A stronger spiked-helmet attack, this one hurts even more if you time your poke with the foe's landing. | N/A | N/A | Shaved-Ice Cave |
| 66 | 
|
Flashy Spike Helmet | Protects against and powerfully counters attacks from above with the helmet's spike. | A flashy spike attack that counters attacks from above with authority. Time it right, and OW! | N/A | N/A | Drybake Stadium |
| 67 | File:FireflowerstickerPMSS.png | Fire Flower | Throws fireballs at multiple foes. Does not hit or affect some foes. | An attack that launches one fireball per enemy but doesn't reach flying foes. Fireballs can't bounce that high. | ★★☆☆☆ | Ground/Low Altitude | Whammino Mountain |
| 68 | 
|
Shiny Fire Flower | Throws fairly hot fireballs at multiple foes. Does not hit or affect some foes. | An attack that fires one shiny fireball per foe. Like others, this attack is a bit stronger if timed well. | ★★★☆☆ | Ground/Low Altitude | Whammino Mountain |
| 69 | 
|
Flashy Fire Flower | Throws very hot fireballs at multiple foes. Does not hit or affect some foes. | An attack that greets each grounded and low altitude foes with a strong, made-to-order fireball. | ★★★★☆ | Ground/Low Altitude | Whammino Mountain |
| 70 | 
|
Ice Flower | Throw balls of ice at multiple foes. Does not hit or affect some foes. | A chilly attack that serves an ice ball to each nonflying enemy. These ice balls are the opposite of refreshing. | ★★☆☆☆ | Ground/Low Altitude | Whammino Mountain |
| 71 | 
|
Shiny Ice Flower | Throws fairly strong balls of ice at multiple foes. Does not hit or affect some foes. | A stronger ice-ball attack that strikes ground-bound and low-altitude foes with shiny chill damage. | ★★★☆☆ | Ground/Low Altitude | Whammino Mountain |
| 72 | 
|
Flashy Ice Flower | Throws pretty strong balls of ice at multiple foes. Does not hit or affect some foes. | A flashy ice-ball attack that boasts boosted wintry power if you time your throws correctley. | ★★★★☆ | Ground/Low Altitude | Whammino Mountain |
| 73 | File:POWstickerPMSS.png | POW Block | Deals damage to all foes when hit. Can also crumple foes. Does not damage flying enemies. | An attack that can crumple grounded foes. You get two chances at it so time it well. | ★★☆☆☆ | Ground | Decalburg |
| 74 | 
|
Shiny POW Block | Deals fairly serious damage to all foes when hit. Can also crumple foes. Does not damage flying enemies. | An attack that offers higher damage and an elevated crumple rate if you time it well. | ★★★☆☆ | Ground | Shaved-Ice Cave |
| 75 | 
|
Flashy POW Block | Deals pretty serious damage to all foes when hit. Can also crumple foes. Does not damage flying enemies. | A two-shot crumpler. As expected, its attack power is also higher due to extreme flashiness. | ★★★★☆ | Ground | N/A |
| 76 | File:Koopashellsticker.png | Shell | Hits ground-bound foes with a sliding shell. | A shell that knocks around foes when stomped and kicked. Time it well for more power. | ★★☆☆☆ | Ground | Decalburg |
| 77 | 
|
Shiny Shell | Hits ground-bound foes with a fairly strong sliding shell. | A powerful shell that should remind you to pre-stomp Koopas on the field. Then you can use them to scatter other foes. | ★★★☆☆ | Ground | Decalburg (after World 3) |
| 78 | 
|
Flashy Shell | Hits ground-bound foes with a pretty strong sliding shell. | A flashy shell that delivers big damage. The damage on this attack nearly doubles with good timing. | ★★★★☆ | Ground | Chomp Ruins, The Bafflewood |
| 79 | 
|
Mushroom | Makes you feel better. Just the thing when you're tired. | An all-important HP-restoring sticker that can only be used during battle. Always, ALWAYS carry one with you! | N/A | N/A | Decalburg, Whammino Mountain |
| 80 | 
|
Shiny Mushroom | Makes you feel quite a bit better. Unknown if it tastes good or not. | An item that increases HP more that a regular mushroom. Wait until you're really flagging to use it! | N/A | N/A | Decalburg, Whammino Mountain, Outlook Point, Shaved-Ice Cave, Rumble Volcano |
| 81 | 
|
Flashy Mushroom | Makes you feel great. Useful when you're REALLY tired. | A flashy Mushroom that greatly restores HP with flashy mushroom goodness. You get bonus HP for good timing. | N/A | N/A | Decalburg (after World 4) |
| 82 | 
|
Big 1-UP | Become a little heartier for a short time. Useful in tiring fights. | A sticker that should teach you that big mushrooms are great for you. This one slowly restores HP over ten turns. | N/A | N/A | Drybake Desert |
| 83 | File:BigShiny1Up.png | Big Shiny 1-UP | Become fairly heartier for a short time. Useful in tiring fights. | A shiny HP restorer effective over ten turns. Time it with Mario's hands in the air for extra restorative power! | N/A | N/A | Rumble Volcano |
| 84 | 
|
Poison Mushroom | Scary and poisonous, even to you. | Oh no! An item that poisons you! But hang on... What if you touch an enemy while poisoned... | N/A | N/A | Whammino Mountain |
| 85 | 
|
Leaf | Unknown use. If you take it to the shop, maybe something good will happen. | A helpful sticker that automatically makes every attack. Excellent and every block successful. | N/A | N/A | Strike Lake |
| 86 | 
|
Shiny Leaf | Unknown use. If you take it to the shop, maybe something fairly good will happen. | A sticker with the exact same effects of an ordinary leaf sticker. But look! It's shiny! So it sells for more. | N/A | N/A | Rumble Volcano |
| 87 | 
|
Secret Door | A portable emergency exit that can help you escape most battles, or to find secret areas in most levels. | A door that opens the way to a secret place. This sticker can also be used to flee a battle. | N/A | N/A | Outlook Point |
| 88 | 
|
Snowball | Sometimes dropped by Snow Spikes. Launches a giant snowball that snares all ground-bound foes. Doesn't reach high-flying foes. | An icy snowball yacked up by a Snow Spike that hits all grounded foes with a cold-blooded attack. | ★★★☆☆ | N/A | Drop by Snow Spikes. |
| 89 | 
|
Spike Ball | Sometimes dropped by Spikes. Provides a spiked ball that can be thrown at a single foe. Doesn't reach high-flying foes. | A spiky steel ball horked up by a Spike. This bad boy deals bonus damage for a well-timed throw. | ★★★☆☆ | N/A | Drop by Spikes. |
| 90 | 
|
Barrel | Sometimes dropped by Broozers. Provides a barrel that can be hurled at a single foe. | A wooden barrel thrown by a Broozer. This thing is heavy, so be careful when tossing it. | ★★★☆☆ | N/A | Drop by Broozers. |
| 91 | 
|
Wrench | Sometimes dropped by Rocky Wrenches. Provides a wrench that can be chucked at a single foe. | A repair wrench tossed by Rocky Wrenches. Time your toss well, because it'll affect the power of the spin! | ★★★☆☆ | N/A | Drop by Rocky Wrenches. |
| 92 | 
|
Bone | Sometimes dropped by Dry Bones. Provides some kind of throwable bone that can hit a single foe. | Part of a Dry Bones? Some kind of bone, anyway. It hits with a satisfying BONK if thrown with enough force. | ★★★☆☆ | N/A | Drop by Dry Bones. |
| 93 | File:BoomerbangPMSS.png | Boomerang | Sometimes dropped by Boomerang Bros. Provides a boomerang that hits all foes in its flight path. | A boomerang beloved by the Boomerang Bros. Put your elbow into it to get some force into your throw! | ★★★☆☆ | N/A | Drop by Boomerang Bro. |
| 94 | 
|
Bomb | Sometimes dropped by Bob-ombs. Calls forth a tossable bomb that can explode and hit multiple grounded foes | An unused bomb dropped by a Bob-omb. This explosive has a dramatic effect if tossed properly. | ★★★☆☆ | N/A | Drop by Bob-ombs. |
| 95 | File:Sombrerosticker.png | Sombrero | Sometimes dropped by Sombrero Guys. Provides a throwable hat that can hit a single foe. | A sombrero worn by Sombrero Guys. The angle of the throw affects how cool the attack turns out! | ★★★☆☆ | N/A | Drop by Sombrero Guys. |
| 96 | 
|
Throwing Star | Sometimes dropped by Ninjis. Provides a throwing star that can hit a single foe. | A Throwing star favored by Ninjis. It's easy to time this attack if you concentrate. | ★★★☆☆ | N/A | Drop by Ninjis. |
Other Stickers
These stickers are plot-related, and are only available in certain battles. These two stickers are not required for the Sticker Museum.
| Image | Name | In-game Description | Effect | Location |
|---|---|---|---|---|
| File:BowsersandlePMSS.png | Flip-flop | Sticker turned into a sandal by Kamek's magic. What was this sticker before it got transformed? | Mario hits Kamek with a sandal. The effect is similar to an Eekhammer. It misses Kamek if he is flying. | Kamek battles in Yoshi Sphinx and Bowser's Sky Castle |
| File:3DS PaperMario 3 char02 E3.png | Kersti | Sacrifices herself to give Mario all her power, leaving everything to him. | Turns Mario shiny, grants him permanent 5-sticker usage per turn, and increases attack power. | Final Bowser battle (Bowser's Sky Castle) |
Things
Things are objects that can be found within the game. They are named such because, unlike most of the denizens in the game, the items are not actually made out of either paper or similar material such as cardboard. There are a total of 64 things throughout the game, each with a different purpose. Mario finds them as actual objects, and they cannot be used in this state. Although they aren't made out of paper, as noted before, they can be rendered into stickers by flinging them onto a special board. In addition, a specific Toad in Decalburg will sell things in a manner that is implied to be illegal. The player can then take the sticker and either paste it on the environment to cause events or use them in battle. A little-known feature of these stickers is that when used to battle, Mario can indeed execute Action Commands up to "Excellent" on most things by pressing or use the touch screen at a specific time.
| # | Image | Name | Sticker Size | Type | Effect | Sticky Wiki Entry | Location(s) | Coins Needed to Buy |
|---|---|---|---|---|---|---|---|---|
| 01 | 
|
Sewing Scissors (NTSC-U) Sewing Clippers (PAL) |
Small | Cutting | Cuts enemies like the other types of scissors. Action Command: Press |
NTSC-U: When compressed by a team of Toads, this catapult is capable of low-orbit launches. As the bladed end is lethal, this was likely a discarded prototype. PAL: When compressed by a team of Toads, this catapult is capable of low-orbit launches. As the bladed end is lethal, this is likely to only be a prototype. |
Bowser's Snow Fort | 90 |
| 02 | 
|
Hair Shears (NTSC-U) Barber's Scissors (PAL) |
Medium | Cutting | Cuts enemies with slightly more power than the scissors. Action Command: Press |
Like other bladed things, this requires a command Toad in each circular cockpit. However, the protruding flange suggests a third operator is required for steering. | Damp Oasis |
120 |
| 03 | 
|
Scissors | Medium | Cutting | Three green scissors fly off the screen and cut up the image. Deals damage to all enemies. Action Command: Press |
NTSC-U: When maneuvered by two skilled thing captains, this device cleaves anything. This discovery will surely revolutionize the Toad construction business. PAL: When maneuvered by two skilled thing captains, this device cleaves anything. This discovery will surely revolutionise the Toad construction business. |
Warm Fuzzy Plains | 90 |
| 04 | 
|
Tailor Shears (NTSC-U) Tailor's Shears (PAL) |
Large | Cutting | This powerful pair of scissors cuts the screen rapidly. Action Command: Press |
NTSC-U: This massive, linked pair of sharpened blades was likely used for landscaping. Trained Toads can operate in tandem from the two oval command cockpits. PAL:This massive, linked pair of sharpened blades was likely used for landscaping. Trained Toads can operate in tandem from the two oval cockpits. |
Shy Guy Jungle |
777 |
| 05 | 
|
Bellows | Small | Wind | Damages enemies with wind. Action Command: Mash |
NTSC-U: Requiring an entire platoon of Toads to operate, this primitive pinwheel motivator is a monument to inefficiency. PAL: Requiring an entire platoon of Toads to operate, this primitive tool was used to rotate the sails of pinwheels and shows that not all inventions boost inefficiency. |
Whammino Mountain |
80 |
| 06 | 
|
Paper Fan | Medium | Wind | Two paper fans beat the air until the enemies are caught in the whirlwind. Attacks all enemies. Action Command: Repeatedly tap |
NTSC-U: Though its gigantic size limits its use to only the largest of griddles, this ornate spatula is a sight to behold. The symbol is thought to mean "succulent pancake." PAL: Though its gigantic size limits its use to only the largest of Crepe pans, this ornate spatula is a sight to behold. The symbol is thought to mean "succulent pancake." |
Yoshi Sphinx |
120 |
| 07 | 
|
Fan | Large | Wind | Blows enemies around. Does damage to all enemies. Action Command: Repeatedly tap |
NTSC-U: While voice modulators are not unheard of, this device is clearly the first built for crowd use. It was likely used for intimidation at sporting events. PAL: A device used to drown the sound of roaring crowds at sporting events. One of its less desirable side effects is gale-force winds. use with caution. |
Bouquet Gardens | 130 |
| 08 | 
|
Mini Vacuum | Small | Suction | Sucks up all enemies on the screen (including most bosses) and spits them back out. Action Command: Press |
The smallest of what is believed to be a previously undiscovered type of suction robot, this variation is highly maneuverable and easily satiated. | Jungle Rapids |
100 |
| 09 | 
|
Upright Vacuum | Medium | Suction | Same as Mini Vacuum, but deals more damage. Action Command: Press |
A member of the Suction Thing family, this variation waits for prey in an upright position, disguising itself as a part of the canopy. Then it strikes. | Rustle Burrow |
160 |
| 10 | 
|
Vacuum | Large | Suction | Same as other vacuums, but more damage. Required to progress. Action Command: Press |
This mechanical thing appears to exist for one purpose: to consume anything within reach. While not necessarily alive, it is most certainly hungry. | Surfshine Harbor | 120 |
| 11 | 
|
Watering Can | Small | Flood | Floods the battlefield, damaging all enemies. Action Command: Mash |
This piece of demolition equipment is only operable by highly trained Toads. Once filled, targeted water sprinkles can destabilize any paper edifice. | The Enigmansion | 70 |
| 12 | 
|
Faucet (NTSC-U) Tap (PAL) |
Medium | Flood | A more powerful version of the Watering Can. Action Command: Mash |
This hydroelectric-dam release valve may once have functioned well, but those days are long past. It now requires a leaping Toad to activate. | Water's Edge Way | 120 |
| 13 | 
|
Teapot (NTSC-U) Kettle (PAL) |
Large | Flood | Fills the stage with hot water that might leave the enemies soggy, not allowing them to move. Action Command: Press |
This ancient house alarm was designed for icy climates. Placed by the furnace, its contents would boil when burglars turned the heat on, activating a siren. | Chomp Ruins | 300 |
| 14 | 
|
Trumpet | Small | Noise | Causes a great sound that attacks all enemies at once. Action Command: Press |
This valve-based alarm system requires the operator to exhale as hard as possible into the apparatus. The result is a din trespassers won't soon forget. | Goomba's Fortress | 90 |
| 15 | 
|
Violin | Medium | Noise | Bombards enemies with a terrible cacophony. Action Command: Mash |
This audio-warfare thing requires a squad of Toads to operate--one each to man the taut vibration hawsers and a pair to manipulate the friction saw. | The Bafflewood |
100 |
| 16 | 
|
Guitar | Large | Noise | Same as Trumpet and Violin, but it is a little stronger. It has a Mario themed design. Action Command: Mash |
A fairly sophisticated audio weapon, this thing utilizes electricity to minimize Toadpower. A single Toad can launch blistering assault "solos." | Rumble Volcano |
270 |
| 17 | 
|
Newspaper | Small | Bat | A weaker version of the bat. The headline reads, "The Mario Times." Action Command: Press |
A testament to the quiet strength of paper power, this triumphant rolled tube of separate sheets symbolizes how unity can bring forth might. | Whitecap Beach |
100 |
| 18 | 
|
Toy Bat | Medium | Bat | A mediocre version of the wooden bat with a picture of a mushroom on it. Action Command: Hit |
While the width of this cylinder makes swinging at targets a breeze, its accuracy is bought with a loud bonking noise sure to anger the neighbors. | Shy Guy Jungle | 200 |
| 19 | 
|
Bat (NTSC-U) Baseball Bat (PAL |
Large | Bat | Hits every enemy, one at a time. The side says "Mario". Action Command: Press |
This piece of wood has the power to send round objects flying when swung correctly. The individual responsible for vandalizing it has yet to be identified. | Sandshifter Ruins | 300 |
| 20 | 
|
Square Can | Small | Crushes | A weak version of the Drum that only hits one foe. Action Command: Hit |
This metal container could have been useful for anything, but leading scholars believe it was almost certainly slept on by a cat at some point. | Stump Glade |
170 |
| 21 | 
|
Basin | Medium | Crushes | A Medium powered smasher that targets all enemies. Action Command: Tap |
Plated in what is almost certainly gold, this private, solar-powered hot tub was likely overpaid for by a rich Toad who forgot that he was made of paper. | Rugged Road |
150 |
| 22 | 
|
Drum | Large | Crushes | Falls from above and crushes all enemies. Action Command: Press |
A debate rages about the contents of this huge canister, but since breaching the hull could ruin whatever's within, it stays sealed. Also, we can't open it. | Strike Lake |
180 |
| 23 | 
|
Lightbulb (NTSC-U) Light Bulb (PAL) |
Small | Light | Weaker version of the Searchlight. Required to progress in the game. Action Command: Press |
This large bulb was engineered to house and protect a glowing filament, but a major design flow allows all the precious light to escape into the surroundings. | Yoshi Sphinx | 80 |
| 24 | 
|
Flashlight (NTSC-U) Torch (PAL) |
Medium | Light | Turns on in front of the enemies, damaging them strongly. Action Command: Press |
This compact lighthouse is designed to be mobile, but the fact that it points straight up when installed would lead to many a naval disaster. | Whiteout Valley |
120 |
| 25 | 
|
Searchlight | Large | Light | Blasts enemies with a bright light, which somehow hurts them. Action Command: Mash |
Our most learned academics remain stumped as to why anyone would install blinds on such a massive light source. It kind of defeats the purpose. | Leaflitter Path |
200 |
| 26 | 
|
Watch Battery | Small | Shocking | A weak version of the Car Battery. Targets all enemies. Action Command: Press |
This adorable little power source should not, under any circumstances, be ingested, no matter how hungry you are and how much it looks like candy. | Tree Branch Trail | 50 |
| 27 | 
|
D-Cell Battery | Medium | Shocking | Blasts all enemies with lightning. The side says "Thunder". Action Command: Press |
All readings indicate that this cylinder harbors a huge amount of latent power. We have attempted to access it, but a vigorous stick-poking met with failure. | Chomp Ruins | 170 |
| 28 | 
|
Car Battery | Large | Shocking | Shocks every enemy with strong power. Action Command: Press |
Inside this device sleeps a power no Toad could hope to control. In fact, you’d probably better step back a bit. Maybe a little farther. | Drybake Desert |
200 |
| 29 | 
|
Billiard Ball (NTSC-U) Pool Ball (PAL) |
Small | Thrown | Weak version of the bowling ball. Rolls through all ground enemies. there is a number 9 printed on it. Action Command: Press |
This orb would be indistinguishable from other massive spheres if not for the inexplicable number on its side. For the love of Toad, what does it MEAN?! | Strike Lake | 50 |
| 30 | 
|
Curling Stone | Medium | Thrown | Mario throws this to all ground enemies. Action Command: Press |
It seems increasingly possible that this boulder spontaneously grew a handle out of its side. The wonders of nature are endless and often really weird. | Ice Flow | 300 |
| 31 | 
|
Bowling Ball | Large | Thrown | Mario rolls it towards the enemies. Action Command: Press |
Whether this orb was designed for battle or merely construction, one thing is clear: the engineers who piloted it from the three Toad holes were brave. | The Bafflewood (Strike Lake after it is used on the bowling pins) | 150 |
| 32 | 
|
Trophy | Large | Thrown | The trophy throws it's ball at the enemies to damage them. The bottom says "Mario". Action Command: Time the |
This extravagant chalice looks pricey but functionally, it's a disaster. It's too big for one Toad to drink out of, and what's that weird guy doing on top? | The Bafflewood (after using the Bowling Ball on the bowling pins) | 270 |
| 33 | 
|
Cell Phone (NTSC-U) Mobile Phone (PAL) |
Small | Earthquake | Vibrates violently, causing an earthquake that hits all non-flying enemies. The phone's logo says "Mario." Action Command: Mash |
For a device that appears to have but a single purpose--violent vibration--this thing has far too many buttons. | Snow Rise |
100 |
| 34 | 
|
Jackhammer (NTSC-U) Pneumatic Drill (PAL) |
Large | Earthquake | Drills into the ground, causing a powerful earthquake that damages all non-flying foes. Action Command: Mash |
What began as a training apparatus for an aspiring pogo-stick champion clearly spiraled out of control during the development phase. | Sandshifter Ruins | 300 |
| 35 | 
|
Radiator | Small | Heat | Heats up the battlefield, damaging all the enemies. Action Command: Mash |
While most Toad breakfast scientists agree that this gargantuan machine is a toaster, none have had success with the bread-insertion procedure. | Stump Glade (after Snifit or Whiffit) | 250 |
| 36 | 
|
Hair Dryer (NTSC-U) Hairdryer (PAL) |
Medium | Heat | Blasts enemies with a stream of hot air. Action Command: Mash |
This large-scale rewarmer was likely utilized by primitive caterers, though it proved rather ineffective in both our quiche and chili-dog tests. | Ice Flow |
150 |
| 37 | 
|
Oven | Large | Heat | Traps enemies in an oven that heats up the inside and the foes. Action Command: Press |
For a supposedly high-end home feature, this sauna is sorely lacking in seating, fancy perfumed steam waters, and most importantly, a temperature control. | The Enigmansion | 150 |
| 38 | 
|
Magnifying Glass | Small | Fire | A magnifying glass comes on screen, setting the enemy on fire with the sun's rays. Action Command: Press |
A leading Toad physicist burned basically everything in the lab before discovering this thing worked as a magnification device. | Sandshifter Ruins | 200 |
| 39 | 
|
Matches | Medium | Fire | Attacks enemies with a fireball. Action Command: Press |
Under no circumstances should these sticks be rubbed against their own packaging. You just need to trust the management on this one. | Hither Thither Hill |
120 |
| 40 | 
|
Lighter | Large | Fire | Attacks enemies with a flame. Action Command: Mash |
This portable campfire works best when entrenched in cool earth. Deployment of s'mores is up to the camper, but have you ever tried adding peanut butter? | Sandshifter Ruins |
200 |
| 41 | 
|
Shaved Ice | Small | Cold/Ice | The shaved iced appears in the background with glaciers. Attacks enemies with icy cold air. Action Command: Mash |
Some frozen mountains can only be scaled by the burliest of Toad explorers. Others can be scaled by any Toad with a spoon and a lust for refreshment. | Damp Oasis | 60 |
| 42 | 
|
Air Conditioner | Medium | Cold/Ice | Same animation as the Shaved Ice, but the background is replaced with the Air Conditioner. Attacks enemies with icy cold air. Action Command: Press |
While researchers claim that this device has a cooling effect, skeptics abound. If anything, toting this thing around would probably make you look uncool. | Chomp Ruins |
200 |
| 43 | 
|
Refrigerator (NTSC-U) Fridge (PAL) |
Large | Cold/Ice | It has the same animation as the other cold Things. Attacks enemies with icy cold air. Action Command: Mash |
Once thought to be a transportation pod for northern Toads, this thing has since proven to be a very effective storage unit for management’s lunch. | The Enigmansion | 150 |
| 44 | 
|
Soda (NTSC-U) Fizzy Drink (PAL) |
Small | Spray | Sprays enemies with a blast of shaken-up soda. The can says "soda" and has a picture of a mushroom on it. Action Command: Mash |
Apparently, whatever mad scientist created this thing thought it would be funny to load liquid into a highly pressurized container. Ha ha. | Drybake Desert | 80 |
| 45 | 
|
Squirt Gun (NTSC-U) Water Pistol (PAL) |
Medium | Spray | Allows Mario to go into a First-person shooting-like mode with the gun, using Action Command: Mash |
In its current state, this liquid launcher is but a memory of wars long past. But load it with water, and it becomes more terrifying than you can imagine. | Goomba's Fortress |
130 |
| 46 | 
|
Rubber Ducky | Large | Miscellaneous | Water appears under the enemies, as a large and four small rubber ducks spawn to mow them down. Action Command: Press |
There's been some speculation that this enormous synthetic duck suggests a past when Toads rode on birds, but this theory is roundly ridiculed. | Jungle Rapids | 300 |
| 47 | 
|
Powder Puff | Small | Defense | Absorbs five hits from enemies. Action Command: None. |
Luxurious, if a bit dusty, this lush body pillow was likely reclined upon by royalty. It even SMELLS like royalty. | Shy Guy Jungle | 240 |
| 48 | File:SpongePMSs.png | Sponge | Medium | Defense | The Sponge stands in front of Mario and when an indirect attack (i.e. Gooper Blooper's poison) hits it, the attack is shot back at the enemy. Otherwise it absorbs all damage. Action Command: None. |
The bed of choice for Toads afflicted with night sweats, this revolutionary mattress is as comfortable as it is absorbent. Treat yourself today! | Gauntlet Pond | 180 |
| 49 | 
|
Car Sponge | Large | Defense | Absorbs three hits from enemies. Action Command: None. |
This liquid transporter can carry an absolutely unbelievable amount of whatever beverage your prefer, but be warned: it gets HEAVY and MESSY. | Rugged Road | 260 |
| 50 | 
|
Pillow | Small | Sleep | Weak version of the bed. Enemies do not stay asleep as long. Action Command: Press |
This piece of emergency-response equipment helps fire brigades rescue people from high buildings. It’s also crucial for battling nap attacks. | Loop Loop River |
100 |
| 51 | 
|
Bed | Medium | Sleep | Puts enemies to sleep, but may put Mario to sleep as well. Action Command: Mash |
While this thing resembles a common bed, it makes the typical paper bed of management's childhood look like a crumpled-up piece of used paper towel. | Water's Edge Way |
140 |
| 52 | 
|
Luxurious Bed (NTSC-U) Four-Poster Bed (PAL) |
Large | Sleep | It puts enemies to sleep, while also inflicting damage. Action Command: Mash |
This thing cannot be a bed, it has some bed-like characteristics, but there's no way--it's too nice. If you slept in that, you'd dream of that exact same bed. | Long Fall Falls |
210 |
| 53 | 
|
Tape | Small | Immobilize | Stuns enemies by taping them to the ground. Action Command: Press |
A variation of this thing has long been used by Toad security forces to restrain ne'er-do-wells. It should not be used on your little brother. I MEAN IT! | Tree Branch Trail |
100 |
| 54 | 
|
Thumbtack (NTSC-U) Drawing Pin (PAL) |
Medium | Immobilize | Pins enemies to the ground. Action Command: Press |
It's not uncommon for the younger generation of Toads to get paper piercings, but in general, they don't use something that affixes them to a wall. | Warm Fuzzy Plains |
130 |
| 55 | 
|
Stapler | Large | Immobilize | Much like the Tape and the Thumbtack, staples enemies to the scenary. Action Command: Press |
This anti-aircraft battery launches twin-pronged missiles when popped open but mangles the ordnance when fired in the prone position. | The Enigmansion | 150 |
| 56 | 
|
Fishhook (NTSC-U) Fish Hook (PAL) |
Large | Miscellaneous | Fishes out random item. Required to defeat the Giant Cheep Cheep. Action Command: Tap |
We know what this thing is: a hook. What we don't know is what terrors of the deep inspired a fisherman to make something so huge. And what of bait? | Outlook Point |
100 |
| 57 | 
|
Balloon | Large | Miscellaneous | Inflates and pops a giant balloon. Action Command: Press |
Friction tests conducted on this flotation transportation resulted in one of the worst Toad pile-ups in memory. Every scientist was stuck to this thing. | Holey Thicket |
200 |
| 58 | 
|
Pocket Watch | Large | Miscellaneous | Stops time for the enemies. Action Command: Press |
While this thing can theoretically manipulate time, every effort to use it to go back and avert that unfortunate chowder incident has failed. | Whitecap Beach | 70 |
| 59 | 
|
Cat-o-Luck | Large | Miscellaneous | Crushes enemies from above with several big stomps. Action Command: Press |
It's not uncommon to see a cat offering up a high-five-hence this sculture. We believe the symbol may mean "Down low! You're too slow." | Bouquet Gardens | 140 |
| 60 | File:HighheelPMSS.png | High Heel | Large | Miscellaneous | Two shoes appear. Each one grinds enemies with its heel. Action Command: Mash |
This single-Toad sleeping chamber offers the snug fit and steep reclining angle popularized by certain celebrities. Trust us, it's really not comfortable. | Wiggler's Tree House | 120 |
| 61 | 
|
Goat | Large | Miscellaneous | Chew and eats the enemies. Action Command: Press |
This statue of a voracious goat seems cute at first but becomes unsettling. We're pretty sure it moved this one time. And we swear we heard a baa. | Snow Rise | 160 |
| 62 | 
|
Turkey | Medium | Miscellaneous | Dances with the enemies, kickeng them all out of the stage. Action Command: Press |
This giant prehistoric bird was prepared for a feast. That much is quite clear. But was it brined? What kind of rub? Critical questions remain unanswered. | Rugged Road | 250 |
| 63 | 
|
Cake | Large | Miscellaneous | A techno arrangement of "Happy Birthday to You" (by Mildred J. and Patty Smith Hill) plays while the cake rises from the background. Action Command: Blow into the 3DS microphone when the song ends to perform an action command, which restores HP. |
A dessert of such magnitude comes around once in a long while, which is why this one is under surveillance. Step away from the display, sir. | The Enigmansion | 100 |
| 64 | 
|
Boom Box (NTSC-U) Stereo (PAL) |
Medium | Miscellaneous | A remixed version of Space Zone (from Super Mario Land 2: Six Golden Coins) plays, it doubles Mario's attack for 2-4 turns. Action Command: Repeatedly tap |
This portable party machine requires two Toads to transport, but it's well worth the effort if one wishes to rock anytime and anywhere. | Wiggler's Tree House | 80 |
Scraps
Scraps are pieces of the environment that can be pasted into a certain location later on. They can either be obtained on their own or by peeling a certain piece of the environment off by paperizing, and can be placed back in their proper location with the same process. Removing something from the environment results in a void appearing in its place, which shows where the removed scrap or even another scrap is to go.
| Image | Name | Location | Where to place | Purpose |
|---|---|---|---|---|

|
Wooden Bridge | Warm Fuzzy Plains | Warm Fuzzy Plains | Crossing a river. |
|
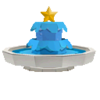
Decalburg Fountain | Decalburg | Decalburg | Helping the green Toad escape from underneath. |
| Comet Piece | Water's Edge Way | Water's Edge Way | Finishing the level. | |
| Green Warp Pipe | Hither Thither Hill | Hither Thither Hill | Enabling use of a Warp Pipe to progress further. | |

|
White Gate | Whammino Mountain | Whammino Mountain | Accessing the item shop and finishing the level. |
| Block Switch | Goomba Fortress | Goomba Fortress | Rotating it so as to rotate the platform and progress. | |
| Ship's Wheel | Surfshine Harbor | Surfshine Harbor | Repairing the ship at the harbor. | |
|
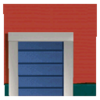
Warehouse Door | Surfshine Harbor | Surfshine Harbor | Rotating it the correct way so as to enter a section of the warehouse. |

|
Tablet Piece (X3) | Drybake Desert, Yoshi Sphinx, Damp Oasis | Drybake Stadium | Accessing the stadium itself. |
|
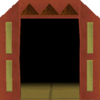
Stone Entry | Drybake Stadium | Drybake Stadium | Progressing through Drybake Stadium. |
|
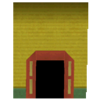
Tower Outer Wall | Drybake Stadium | Drybake Stadium | Draining the massive hill of sand in front of a door. |
| File:PMSS Tree Stump.png | Tree Stump (X2) | Loop Loop River, Tree Branch Trail | Wiggler's Tree House | Collecting the other two Comet Pieces at Wiggler's Tree House. |

|
Burrow Door | Rustle Burrow | Rustle Burrow | Progressing on the path to the Hammer. |
| File:BowertapePMSS.png | Bowser Tape | Holey Thicket | Holey Thicket | Peeling it off of where it has been removed to access the Comet Piece. |
| File:PMSS Pipe in a Cave.png | Pipe in a Cave | Snow Rise | Snow Rise | Granting access to a Warp Pipe so as to progress. |
|
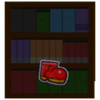
Mansion Bookcase | The Enigmansion | The Enigmansion | Obtaining a Flashy Infinijump sticker; removed to make a spot for the Mansion Safe. |

|
Mansion Wall | The Enigmansion | The Enigmansion | Removed to make way for a door; Obtaining a Flashy Infinijump sticker. |
|
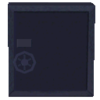
Mansion Safe | The Enigmansion | The Enigmansion | Revealing a golden Boo. |

|
Mansion Door | The Enigmansion | The Enigmansion | Accessing the mansion greenhouse; removed to make way for a separate wall. |

|
Steward's Portrait | The Enigmansion | The Enigmansion | Fighting a Boo; removed to make way for the Mansion Door. |
|
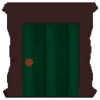
Mansion Door | The Enigmansion | The Enigmansion | Accessing the second floor of the mansion. |

|
Big Bookcase | The Enigmansion | The Enigmansion | Accessing the basement. |
|
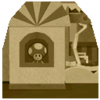
Forebear's Portrait | The Enigmansion | Whiteout Valley | Gaining access to the ski lift. |

|
Mine-Cart Rail | Bowser's Snow Fort | Bowser's Snow Fort | Repairing the rails for the mine cart ride. |

|
Diagonal Rail | Bowser's Snow Fort | Bowser's Snow Fort | Flipped so as to give access to another portion of the tracks. |

|
Mine-Cart Exit | Bowser's Snow Fort | Bowser's Snow Fort | Exiting the cavern. |
| File:BridgepiecePMSS.png | Bridge Piece (X3) | Shy Guy Jungle | Shy Guy Jungle | Repairing a bridge leading to the Comet Piece. |
|
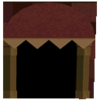
Jungle Floodgate | Long Fall Falls | Long Fall Falls | Flipping the gate so as to divert the path of the river. |

|
Ruin Slope | Chomp Ruins | Chomp Ruins | Mirroring the slope so as to access another portion of the temple. |

|
Bomp | Chomp Ruins | Chomp Ruins | Flipping a section of the wall upside-down to access a door on a higher ledge. |
| Ruin Floor | Chomp Ruins | Chomp Ruins | Accessing a portion of the ruins. | |
|
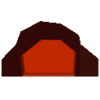
Mountain Hole | Rugged Road | Rugged Road | Accessing the path leading to a near-split rock that must be hammered. |
|
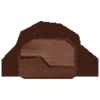
Mountain Boulder | Rugged Road | Rugged Road | Removed to make room for and replaces the Mountain Hole; accessing a heart and the Car Sponge thing. |
|
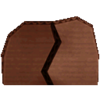
Cracked Boulder | Rugged Road | Rugged Road | Placed on part of a larger boulder to hammer and knock down a dangerously placed rock on top. |
|
Huge Mountain Slab | Rugged Road | Rugged Road | Flipped to unveil the Comet Piece, which is squished against the underside. |

|
Hidden Bowser Castle | Gate Cliff | Gate Cliff | Flip to reveal Bowser's Sky Castle. |

|
Banzai Bill Cannon | Bowser Jr.'s Flotilla | Bowser Jr.'s Flotilla | Flipped to create a pathway through the airship. |
Trivia
- No matter how big, powerful, or valuable a Thing is, they will always sell for 20 coins.
- When Mario jumps on the Bed in its Thing form, he will rest on top of it and eventually be healed. This happens only inside the secret door where the Bed is found.
- The Soda and D-Cell Battery things make a cameo during the Bat animation in-battle. They appear as pictures on the scoreboard.
- If the 3DS system is tilted when the Sticker Album is open, the shine of the Shiny Stickers move as well.


