User:LadySophie17/Wiggler Sandbox: Difference between revisions
LadySophie17 (talk | contribs) mNo edit summary |
LadySophie17 (talk | contribs) m (→Customization) |
||
| (29 intermediate revisions by 2 users not shown) | |||
| Line 80: | Line 80: | ||
===''Mario & Luigi: Superstar Saga + Bowser's Minions''=== | ===''Mario & Luigi: Superstar Saga + Bowser's Minions''=== | ||
<gallery> | <gallery> | ||
Stealing peach voice.png | |||
TolstarMinions.png | |||
MLSSBMBorderJump.jpg | |||
MLSSDX Hammer Tutorial.png | MLSSDX Hammer Tutorial.png | ||
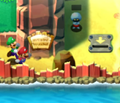
MLSS Remake Hoohooligans Bridge.png | |||
MLSSBM Beanlet 1.png|better to keep both screens in the screenshots for those | |||
MLSSBM Beanlet 2.png | |||
MLSSBM Beanlet 3.png | |||
MLSSBM Beanlet 4.png | |||
MLSSBM Beanlet 5.png | |||
MLSSBMChuckolatorScreenshot.png | |||
TrunkleBowsersMinions.jpg | |||
M&LSSBM Bloat room.jpg | |||
LilSparkySS+BM.png | |||
JellyfishChild2.png | |||
JellyfishChild3.png | |||
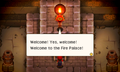
MLSSBM Fire Palace.png | |||
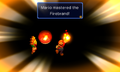
MLSSBM Firebrand.png | |||
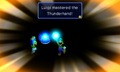
MLSSBM Thunder Palace Thunderhand.png | |||
MLSSBM Thunder Palace.png | |||
MLSSDX SuperThunderBros.png|Ideally have the word Excellent show up? | |||
MLSSBMTimeBobOmbExplanation.jpg | |||
Popple tripping on Bowser.png | |||
Chance MinionQuest.png | Chance MinionQuest.png | ||
Rally MinionQuest.png | |||
MightiestMinions MinionQuest.png | MightiestMinions MinionQuest.png | ||
CapGoombaKoopas.jpg | |||
CaptainBooTrial MinionQuest.png | |||
Bowser's minions'.png | |||
</gallery> | </gallery> | ||
| Line 102: | Line 123: | ||
MLBISBJJ Wisdurm Overworld.png | MLBISBJJ Wisdurm Overworld.png | ||
M&L-BIS+BJJ Unstable Dark Bowser.png | M&L-BIS+BJJ Unstable Dark Bowser.png | ||
CapGoombaKoopas.jpg | CapGoombaKoopas.jpg | ||
Bowser Jr. Snack Time BJJ.png | Bowser Jr. Snack Time BJJ.png | ||
| Line 122: | Line 141: | ||
BetterTogether BowserJrJourney.png | BetterTogether BowserJrJourney.png | ||
BewareBigEaters.png | BewareBigEaters.png | ||
</gallery> | </gallery> | ||
| Line 209: | Line 227: | ||
===''Mario Golf: World Tour''=== | ===''Mario Golf: World Tour''=== | ||
<gallery> | <gallery> | ||
MGWT Castle Club Lobby.png | MGWT Castle Club Lobby.png | ||
</gallery> | </gallery> | ||
| Line 240: | Line 257: | ||
</gallery> | </gallery> | ||
</div> | </div> | ||
=''[[Luigi's Mansion: Dark Moon]]''= | |||
==Enemies and obstacles== | |||
===Enemies=== | |||
{|class="wikitable sortable"style="width:100%;text-align:center" | |||
|-style="color:#0ac020;background:black" | |||
!rowspan=2 width=10%|Name | |||
!class="unsortable"rowspan=2|Description | |||
!class="unsortable"colspan=2 |Missions | |||
!rowspan=2|HP | |||
|-style="color:#0ac020;background:black" | |||
!width=8%|First | |||
!width=8%|Last | |||
|- | |||
|[[File:LMDM Green Ghost.jpg|200px]]<br>[[Greenie]] | |||
|align=left|A playful green ghost and the most common and type of ghost in the game. Greenies attack by either punching Luigi, or by using objects they wield. | |||
|'''A-1:''' [[Poltergust 5000 (mission)|Poltergust 5000]] | |||
| | |||
|10 | |||
|- | |||
|[[File:Stronggreenie.png|200px]]<br>[[Strong Greenie]] | |||
|align=left|A more powerful variant of the Greenie, enhanced by special crystals in the Secret Mine. A Strong Greenie in [[paranormal chain]]s also appears as one of three mini-bosses in the third mission of Secret Mine. | |||
| | |||
| | |||
|50 | |||
|- | |||
|[[File:GoldGreenieLM2.png|200px]]<br>[[Gold Greenie]] | |||
|align=left|A golden variant of the Greenie. Usually, only one of these is hidden in each mission for each mansion, and try to escape instead of attacking once found. Catching one will drop a large sum of treasure and gold. | |||
| | |||
| | |||
|20 | |||
|- | |||
|[[File:UndergroundExpeditionLMDM.png|200px]]<br>[[Mummy]] | |||
|align=left|A Greenie or Strong Greenie, disguised as mummy. Mummies will charge at Luigi, but bumping into a wall causes their wrapping to loosen up. In this state, Luigi can suck up the loose wrapping to reveal the Greenie. | |||
| | |||
| | |||
|— | |||
|- | |||
|[[File:ToughPossessor3.png|200px]]<br>[[Statue Armour Ghost]] | |||
|align=left|Statue Armour Ghosts are suits of armor possessed by Greenies. These will charge at Luigi and strike him with their weapon; if they miss, their weapon gets stuck in the ground. | |||
| | |||
| | |||
|— | |||
|- | |||
|[[File:Slammer LMDM artwork.jpg|200px]]<br>[[Slammer (enemy)|Slammer]] | |||
|align=left|A burly, red ghost that creates shockwaves by clapping their hands together. | |||
| | |||
| | |||
|30 | |||
|- | |||
![[File:Strongslammer.png|200px]]<br>[[Strong Slammer]] | |||
|align=left|A more powerful variant of the Slammer, enhanced by special crystals in the Secret Mine. A Strong Slammer in [[paranormal chain]]s also appears as one of three mini-bosses in the third mission of Secret Mine. | |||
| | |||
| | |||
|150 | |||
|- | |||
|[[File:Hider LMDM.jpg|200px]]<br>[[Hider]] | |||
|align=left|Blue, lanky ghosts that tend to hide in one spot, and flee to another once discovered. | |||
| | |||
| | |||
|15 | |||
|- | |||
|[[File:Strong Hider.png|200px]]<br>[[Strong Hider]] | |||
|align=left|A more powerful variant of the Hider, enhanced by special crystals in the Secret Mine. | |||
| | |||
| | |||
|75 | |||
|- | |||
|[[File:Gobber LMDM artwork.jpg|200px]]<br>[[Gobber]] | |||
|align=left|A yellow, rotund, bulky ghost that moves slowly and throws puddles of goo across the floor. | |||
| | |||
| | |||
|100 | |||
|- | |||
|[[File:Strong Gobber.PNG|200px]]<br>[[Strong Gobber]] | |||
|align=left|A more powerful variant of the Gobber, enhanced by special crystals in the Secret Mine. A Strong Gobber in [[paranormal chain]]s also appears as one of three mini-bosses in the third mission of Secret Mine. | |||
| | |||
| | |||
|200 | |||
|- | |||
|[[File:LMDM Sneaker.png|150px]]<br>[[Sneaker]] | |||
|align=left|A pink ghost that sneaks up behind Luigi and scares him as he is busy catching other ghosts. | |||
| | |||
| | |||
|25 | |||
|- | |||
|[[File:PieceatLastLMDM.png|200px]]<br>[[Strong Sneaker]] | |||
|align=left|A more powerful variant of the Sneaker, enhanced by special crystals in the Secret Mine. | |||
| | |||
| | |||
|100 | |||
|- | |||
|[[File:CreeperLMDM.png|200px]]<br>[[Creeper]] | |||
|align=left|Purple, gooey ghosts that initially appear as puddles, trying to trap Luigi as he walks over them. | |||
| | |||
| | |||
| | |||
|- | |||
|[[File:LMDM - Polterpup (alt 2)(transparent).png|x200px]]<br>[[Polterpup]] | |||
|align=left|A white, canine ghost that occasionally hinders Luigi's progress in certain missions, though not out of malice. If Luigi loses all his health, Polterpup may revive him if he carries a [[Gold Bone]]. | |||
| | |||
| | |||
| | |||
|- | |||
|[[File:Boo LMDM.jpg|200px]]<br>[[Boo]] | |||
|align=left|{{main|List of Boos in Luigi's Mansion: Dark Moon}} | |||
| | |||
| | |||
| | |||
|} | |||
===The [[Boo]]s=== | |||
*[[Gloomy Manor]] | |||
**Boogie Woogie (A-1) | |||
**BaBoon (A-2) | |||
**Boo Boo (A-3) | |||
**Boo (A-4) | |||
**Ooga Booga (A-5) | |||
*[[Haunted Towers]] | |||
**Mamboo (B-1) | |||
**Boolean (B-2) | |||
**Booluga (B-3) | |||
**Boo B. Trap (B-4) | |||
**French Boodle (B-5) | |||
*[[Old Clockworks]] | |||
**Combooter (C-1) | |||
**Bootine (C-2) | |||
**Boodonkulous (C-3) | |||
**Jamboolaya (C-4) | |||
**Boony Raboot (C-5) | |||
*[[Secret Mine]] | |||
**Boofoon (D-1) | |||
**Booger (D-2) | |||
**Paraboola (D-3) | |||
*[[Treacherous Mansion]] | |||
**Booldog (E-1) | |||
**Boopa Trooppa (E-2) | |||
**Booreaucrat (E-3) | |||
**Big Boo (E-4) | |||
**Maraboo (E-5) | |||
===[[Pest]]s=== | |||
*[[Spider (Luigi's Mansion series)|Spider]] | |||
*[[Bat (Luigi's Mansion series)|Bat]] | |||
*[[Crow]] | |||
*[[Mouse]] | |||
*[[Beetle (Luigi's Mansion: Dark Moon)|Beetle]] | |||
*[[Frog]] | |||
===Other=== | |||
*[[Spirit Ball]] | |||
*[[Fake door|False door]] | |||
*[[Robomb]] | |||
*[[Flytrap]] | |||
*[[Fuzzball]] | |||
*[[Orange flower]] | |||
=[[Desert Ruin]]= | |||
==Customization== | |||
Strikers Club allows for the player to customize Desert Ruin's visual appearance by collecting tokens from season matches. The following is a list of customization options, as well as how many tokens they cost to purchase the first time. After purchasing an item for the first time, the item has to be purchased again for a lower price if another one of the same type is selected. | |||
{| class="wikitable" style="width:50%" | |||
|- | |||
! colspan=5 style="background:#FF8C00" | Stadium Theme | |||
|-style= "text-align:center" | |||
!style="background:#FF8C00"|Image | |||
!style="background:#FF8C00"|Description | |||
!style="background:#FF8C00"|First time price | |||
!style="background:#FF8C00"|Reduced price | |||
!style="background:#FF8C00; width:15%"|How to unlock | |||
|-style= "text-align:center" | |||
![[File:MSBL Desert Ruin 1.png|200px]]<br>Desert Ruin 1 | |||
|The smallest version of the stadium, set in a small group of sandstone ruins surrounded by broken stone pillars and small grass platforms containing a few palm trees. In the background, mountains similar to ones found in [[World 2 (Super Mario 3D World)|World 2]] of ''[[Super Mario 3D World]]'' can be seen sticking out of the sand. | |||
|Already purchased | |||
|10000 | |||
|Available at the start | |||
|-style= "text-align:center" | |||
![[File:MSBL Desert Ruin 2.png|200px]]<br>Desert Ruin 2 | |||
|A slightly larger stadium, now with stands for spectators and four large screens, one on each corner. Two large archways can be seen on each side of the stadium. | |||
|50000 | |||
|10000 | |||
|Available at the start | |||
|-style= "text-align:center" | |||
![[File:MSBL Desert Ruin 3.png|200px]]<br>Desert Ruin 3 | |||
|An even larger stadium, with more levels for spectators. The walls of the stadium are more visible from the outside, as well as patches of stone paths in the sand. | |||
|100000 | |||
|10000 | |||
|Purchase Desert Ruin 2 | |||
|-style= "text-align:center" | |||
![[File:MSBL Desert Ruin 4.png|200px]]<br>Desert Ruin 4 | |||
|The largest stadium, adding a third level for spectators. The walls of the structure are now much taller and surrounded by various pillars. | |||
|250000 | |||
|10000 | |||
|Purchase Desert Ruin 3 | |||
|- | |||
|} | |||
{| class="wikitable" style="width:50%" | |||
|- | |||
! colspan=5 style="background:#FF8C00" | Fence Posts | |||
|-style= "text-align:center" | |||
!style="background:#FF8C00"|Image | |||
!style="background:#FF8C00"|Description | |||
!style="background:#FF8C00"|First time price | |||
!style="background:#FF8C00"|Reduced price | |||
!style="background:#FF8C00; width:15%"|How to unlock | |||
|-style= "text-align:center" | |||
![[File:MSBL Ruin Fence 1.png|150px]]<br>Ruin Fence 1 | |||
|An obelisk with a glowing light blue center. <br>Its electric fence consists of a complex grid based on {{wp|Islamic geometric patterns}}. | |||
|Already purchased | |||
|100 | |||
|Available at the start | |||
|-style= "text-align:center" | |||
![[File:MSBL Ruin Fence 2.png|150px]]<br>Ruin Fence 2 | |||
|A gray rock pillar with a brazier on top.<br>Its electric fence also consists of a complex geometric pattern. | |||
|1000 | |||
|100 | |||
|Available at the start | |||
|-style= "text-align:center" | |||
![[File:MSBL Ruin Fence 3.png|150px]]<br>Ruin Fence 3 | |||
|A tall green cactus with black thorns and a smaller round cactus on top.<br>Its electric fence also consists of a complex geometric pattern. | |||
|1000 | |||
|100 | |||
|Available at the start | |||
|-style= "text-align:center" | |||
![[File:MSBL Ruin Fence 4.png|150px]]<br>Ruin Fence 4 | |||
|A small pillar shaped like the larger mountains found outside the statue that resemble the ones in [[World 2 (Super Mario 3D World)|World 2]] of ''[[Super Mario 3D World]]''.<br>Its electric fence consists of a pattern of irregular shapes that resemble flowers or suns. | |||
|1000 | |||
|100 | |||
|Available at the start | |||
|-style= "text-align:center" | |||
![[File:MSBL Ruin Fence 5.png|150px]]<br>Ruin Fence 5 | |||
|A stack of three sandstone blocks with a dark gray block on top.<br>Its electric fence also consists of a complex geometric pattern. | |||
|2500 | |||
|250 | |||
|Purchase Desert Ruin 3 | |||
|-style= "text-align:center" | |||
![[File:MSBL Ruin Fence 6.png|150px]]<br>Ruin Fence 6 | |||
|A gray cobblestone pillar with intricate decorations at the bottom and top <br>Its electric fence consists of a complex pattern of thin triangles. | |||
|2500 | |||
|250 | |||
|Purchase Desert Ruin 3 | |||
|-style= "text-align:center" | |||
![[File:MSBL Ruin Fence 7.png|150px]]<br>Ruin Fence 7 | |||
|A cylindrical sandstone pillar with green and yellow markings on each edge and across the middle.<br>Its electric fence also consists of a complex geometric pattern. | |||
|2500 | |||
|250 | |||
|Purchase Desert Ruin 3 | |||
|-style= "text-align:center" | |||
![[File:MSBL Ruin Fence 8.png|150px]]<br>Ruin Fence 8 | |||
|A dark green obelisk with copper square markings and a glowing light blue pyramid shape at the top.<br>Its electric fence consists of a pattern of irregular shapes that resemble flowers or suns. | |||
|2500 | |||
|250 | |||
|Purchase Desert Ruin 3 | |||
|- | |||
|} | |||
{| class="wikitable" style="width:50%" | |||
|- | |||
! colspan=5 style="background:#FF8C00" | Goal-Line Decorations | |||
|-style= "text-align:center" | |||
!style="background:#FF8C00"|Image | |||
!style="background:#FF8C00"|Description | |||
!style="background:#FF8C00"|First time price | |||
!style="background:#FF8C00"|Reduced price | |||
!style="background:#FF8C00; width:15%"|How to unlock | |||
|-style= "text-align:center" | |||
![[File:MSBL Ruin Decoration 1.png|150px]]<br>Ruin Decoration 1 | |||
|A green cactus with yellow thorns and a red flower on a black square pot. | |||
|Already purchased | |||
|100 | |||
|Available at the start | |||
|-style= "text-align:center" | |||
![[File:MSBL Ruin Decoration 2.png|150px]]<br>Ruin Decoration 2 | |||
|A small pillar shaped like the larger mountains found outside the statue that resemble the ones in World 2 of ''Super Mario 3D World'' inside a small square brick fence. | |||
|1000 | |||
|100 | |||
|Available at the start | |||
|-style= "text-align:center" | |||
![[File:MSBL Ruin Decoration 3.png|150px]]<br>Ruin Decoration 3 | |||
|A sandcastle. | |||
|1000 | |||
|100 | |||
|Available at the start | |||
|-style= "text-align:center" | |||
![[File:MSBL Ruin Decoration 4.png|150px]]<br>Ruin Decoration 4 | |||
|A brown rectangular tower with sand pouring out of four holes on the top. | |||
|1000 | |||
|100 | |||
|Available at the start | |||
|-style= "text-align:center" | |||
![[File:MSBL Ruin Decoration 5.png|150px]]<br>Ruin Decoration 5 | |||
|A green cactus with green thorns and shaped like a [[Pokey]]. | |||
|2500 | |||
|250 | |||
|Purchase Desert Ruin 3 | |||
|-style= "text-align:center" | |||
![[File:MSBL Ruin Decoration 6.png|150px]]<br>Ruin Decoration 6 | |||
|A large glowing light blue structure resembling an obelisk with dark brown supports on its edges. | |||
|2500 | |||
|250 | |||
|Purchase Desert Ruin 3 | |||
|-style= "text-align:center" | |||
![[File:MSBL Ruin Decoration 7.png|150px]]<br>Ruin Decoration 7 | |||
|A sand statue of a [[Klepto]] in their ''[[Super Mario Odyssey]]'' design. | |||
|2500 | |||
|250 | |||
|Purchase Desert Ruin 3 | |||
|-style= "text-align:center" | |||
![[File:MSBL Ruin Decoration 8.png|150px]]<br>Ruin Decoration 8 | |||
|A glistening golden pipe surrounded by a small pool of water. | |||
|2500 | |||
|250 | |||
|Purchase Desert Ruin 3 | |||
|- | |||
|} | |||
{| class="wikitable" style="width:50%" | |||
|- | |||
! colspan=5 style="background:#FF8C00" | Goals | |||
|-style= "text-align:center" | |||
!style="background:#FF8C00"|Image | |||
!style="background:#FF8C00"|Description | |||
!style="background:#FF8C00"|First time price | |||
!style="background:#FF8C00"|Reduced price | |||
!style="background:#FF8C00; width:15%"|How to unlock | |||
|-style= "text-align:center" | |||
![[File:MSBL Ruin Goal 1.png|150px]]<br>Ruin Goal 1 | |||
|A goal made out of four obelisks with glowing light blue centers and a square top. | |||
|Already purchased | |||
|100 | |||
|Available at the start | |||
|-style= "text-align:center" | |||
![[File:MSBL Ruin Goal 2.png|150px]]<br>Ruin Goal 2 | |||
|A goal made out of bricks with two braziers on the sides and a much larger metal structure on fire on top. | |||
|1000 | |||
|100 | |||
|Available at the start | |||
|-style= "text-align:center" | |||
![[File:MSBL Ruin Goal 3.png|150px]]<br>Ruin Goal 3 | |||
|A goal made out of green cacti with black thorns. The front two cacti have purple flowers, and three large round cacti decorate the center. | |||
|1000 | |||
|100 | |||
|Available at the start | |||
|-style= "text-align:center" | |||
![[File:MSBL Ruin Goal 4.png|150px]]<br>Ruin Goal 4 | |||
|A goal made out of structures shaped like the larger mountains found outside the statue that resemble the ones in World 2 of ''Super Mario 3D World'' inside a small square brick fence. | |||
|1000 | |||
|100 | |||
|Available at the start | |||
|-style= "text-align:center" | |||
![[File:MSBL Ruin Goal 5.png|150px]]<br>Ruin Goal 5 | |||
|A goal made out of sandstone blocks with dark brown blocks decorating the tops of each pillar. A central pillar with four holes spills sand over the goal. | |||
|2500 | |||
|250 | |||
|Purchase Desert Ruin 3 | |||
|-style= "text-align:center" | |||
![[File:MSBL Ruin Goal 6.png|150px]]<br>Ruin Goal 6 | |||
|A goal made out of gray cobblestone with intricate decorations at the top. A large circular structure decorates the top of the goal. | |||
|2500 | |||
|250 | |||
|Purchase Desert Ruin 3 | |||
|-style= "text-align:center" | |||
![[File:MSBL Ruin Goal 7.png|150px]]<br>Ruin Goal 7 | |||
|A goal made out of two golden pipes as a structure supporting a small island with two palm trees over a pool of water. | |||
|2500 | |||
|250 | |||
|Purchase Desert Ruin 3 | |||
|-style= "text-align:center" | |||
![[File:MSBL Ruin Goal 8.png|150px]]<br>Ruin Goal 8 | |||
|A goal made out of intricate dark green structures with glowing light blue details. A large obelisk-like structure decorates the top, with two pyramids on each side. | |||
|2500 | |||
|250 | |||
|Purchase Desert Ruin 3 | |||
|- | |||
|} | |||
{| class="wikitable" style="width:50%" | |||
|- | |||
! colspan=5 style="background:#FF8C00" | Fields | |||
|-style= "text-align:center" | |||
!style="background:#FF8C00"|Image | |||
!style="background:#FF8C00"|Description | |||
!style="background:#FF8C00"|First time price | |||
!style="background:#FF8C00"|Reduced price | |||
!style="background:#FF8C00; width:15%"|How to unlock | |||
|-style= "text-align:center" | |||
![[File:MSBL Ruin Field 1.png|150px]]<br>Ruin Field 1 | |||
|Zig-zagging patterns running across either side of the field. | |||
|Already purchased | |||
|100 | |||
|Available at the start | |||
|-style= "text-align:center" | |||
![[File:MSBL Ruin Field 2.png|150px]]<br>Ruin Field 2 | |||
|A pattern of repeating diamonds going along the entire edge of the field | |||
|1000 | |||
|100 | |||
|Available at the start | |||
|-style= "text-align:center" | |||
![[File:MSBL Ruin Field 3.png|150px]]<br>Ruin Field 3 | |||
|A detailed symbol of a sun. | |||
|1500 | |||
|150 | |||
|Purchase Desert Ruin 2 | |||
|-style= "text-align:center" | |||
![[File:MSBL Ruin Field 4.png|150px]]<br>Ruin Field 4 | |||
|A brazier on fire. | |||
|1500 | |||
|150 | |||
|Purchase Desert Ruin 2 | |||
|-style= "text-align:center" | |||
![[File:MSBL Ruin Field 5.png|150px]]<br>Ruin Field 5 | |||
|Three obelisks. | |||
|2500 | |||
|250 | |||
|Purchase Desert Ruin 3 | |||
|-style= "text-align:center" | |||
![[File:MSBL Ruin Field 6.png|150px]]<br>Ruin Field 6 | |||
|A rectangular structure supported by two pillars, making an archway. | |||
|2500 | |||
|250 | |||
|Purchase Desert Ruin 3 | |||
|-style= "text-align:center" | |||
!{{No image}}<br>Ruin Field 7 | |||
|A circular structure supported by two pillars, making an archway with a brazier underneath. | |||
|5000 | |||
| | |||
|Purchase Desert Ruin 4 | |||
|-style= "text-align:center" | |||
!{{No image}}<br>Ruin Field 8 | |||
|Mountains like those found outside the statue that resemble the ones in World 2 of ''Super Mario 3D World'' | |||
|5000 | |||
| | |||
|Purchase Desert Ruin 4 | |||
|- | |||
|} | |||
Latest revision as of 15:43, January 31, 2025
This page works as a place for me to test layouts of random smaller changes that don't warrant their own pages.
Halloween Tour (2022)
In the 2022 Halloween Tour, Twilight House appeared as the third course in the Mii Cup and the second course in the Metal Mario Cup, both locations for Balloon Battle.
2022
- In the Mii Cup, the King Bob-Omb Mii Racing Suit and the Wario Mii Racing Suit were upgraded to the Favorite tier, while every other Mii Racing Suit was upgraded to the Favored tier.
- In the Metal Mario Cup, Metal Mario was upgraded to the Favored tier.
2023
During the Tour's rerun in 2023, every driver, kart and glider from the original 2022 run returned in the same position, with the addition of the following drivers, karts and gliders:
| Drivers | Karts | Gliders | |
|---|---|---|---|
| Favorite of | Pauline (Cowgirl) • Black Mii Racing Suit • Purple Mii Racing Suit • Fish Bone Mii Racing Suit • Light Green Mii Racing Suit | Purple Rattle Buggy • Blue Crawly Kart • Black Jingle Bell | Gold Meteors • Rainbow Fare Flier • 8-Bit Goomba • Roy Oilpaper |
| Favored by | Green Toad (Pit Crew) • Blue Shy Guy • Santa Mii Racing Suit • Ludwig Mii Racing Suit • Waluigi Mii Racing Suit | Gold Comet • Mach 8-R • Rainbow Pipe Buggy | Gold Umbrella |
- In the Mii Cup, the King Bob-Omb Mii Racing Suit, Wario Mii Racing Suit, Santa Mii Racing Suit, Ludwig Mii Racing Suit and Waluigi Mii Racing Suit were upgraded to the Favorite tier, while every other Mii Racing Suit was upgraded to the Favored tier.
- In the Metal Mario Cup, Metal Mario was upgraded to the Favored tier.
2023
- In the Mii Cup, the King Bob-Omb Mii Racing Suit, Wario Mii Racing Suit, Santa Mii Racing Suit, Ludwig Mii Racing Suit and Waluigi Mii Racing Suit were upgraded to the Favorite tier, while every other Mii Racing Suit was upgraded to the Favored tier.
- In the Metal Mario Cup, Metal Mario was upgraded to the Favored tier.
List of images that need replacing
Super Mario 3D Land

Paper Mario: Sticker Star


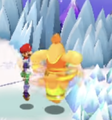
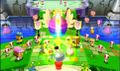
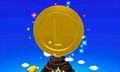
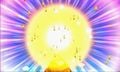
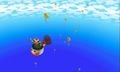
Mario & Luigi: Superstar Saga + Bowser's Minions

better to keep both screens in the screenshots for those


Ideally have the word Excellent show up?


Mario & Luigi: Bowser's Inside Story + Bowser Jr.'s Journey


Mario & Luigi: Dream Team
Also get Jump version


.png)


Mario & Luigi: Paper Jam


Mario Kart 7


Mario Golf: World Tour

Mario Party 3

Mario Party DS

Mario Party: Island Tour

Luigi's Mansion (Nintendo 3DS)

Luigi's Mansion: Dark Moon


Luigi's Mansion: Dark Moon
Enemies and obstacles
Enemies
| Name | Description | Missions | HP | |
|---|---|---|---|---|
| First | Last | |||
 Greenie |
A playful green ghost and the most common and type of ghost in the game. Greenies attack by either punching Luigi, or by using objects they wield. | A-1: Poltergust 5000 | 10 | |
 Strong Greenie |
A more powerful variant of the Greenie, enhanced by special crystals in the Secret Mine. A Strong Greenie in paranormal chains also appears as one of three mini-bosses in the third mission of Secret Mine. | 50 | ||
 Gold Greenie |
A golden variant of the Greenie. Usually, only one of these is hidden in each mission for each mansion, and try to escape instead of attacking once found. Catching one will drop a large sum of treasure and gold. | 20 | ||
 Mummy |
A Greenie or Strong Greenie, disguised as mummy. Mummies will charge at Luigi, but bumping into a wall causes their wrapping to loosen up. In this state, Luigi can suck up the loose wrapping to reveal the Greenie. | — | ||
 Statue Armour Ghost |
Statue Armour Ghosts are suits of armor possessed by Greenies. These will charge at Luigi and strike him with their weapon; if they miss, their weapon gets stuck in the ground. | — | ||
 Slammer |
A burly, red ghost that creates shockwaves by clapping their hands together. | 30 | ||
 Strong Slammer |
A more powerful variant of the Slammer, enhanced by special crystals in the Secret Mine. A Strong Slammer in paranormal chains also appears as one of three mini-bosses in the third mission of Secret Mine. | 150 | ||
 Hider |
Blue, lanky ghosts that tend to hide in one spot, and flee to another once discovered. | 15 | ||
 Strong Hider |
A more powerful variant of the Hider, enhanced by special crystals in the Secret Mine. | 75 | ||
 Gobber |
A yellow, rotund, bulky ghost that moves slowly and throws puddles of goo across the floor. | 100 | ||
 Strong Gobber |
A more powerful variant of the Gobber, enhanced by special crystals in the Secret Mine. A Strong Gobber in paranormal chains also appears as one of three mini-bosses in the third mission of Secret Mine. | 200 | ||
 Sneaker |
A pink ghost that sneaks up behind Luigi and scares him as he is busy catching other ghosts. | 25 | ||
 Strong Sneaker |
A more powerful variant of the Sneaker, enhanced by special crystals in the Secret Mine. | 100 | ||
 Creeper |
Purple, gooey ghosts that initially appear as puddles, trying to trap Luigi as he walks over them. | |||
(transparent).png) Polterpup |
A white, canine ghost that occasionally hinders Luigi's progress in certain missions, though not out of malice. If Luigi loses all his health, Polterpup may revive him if he carries a Gold Bone. | |||
 Boo |
|
|||
The Boos
- Gloomy Manor
- Boogie Woogie (A-1)
- BaBoon (A-2)
- Boo Boo (A-3)
- Boo (A-4)
- Ooga Booga (A-5)
- Haunted Towers
- Mamboo (B-1)
- Boolean (B-2)
- Booluga (B-3)
- Boo B. Trap (B-4)
- French Boodle (B-5)
- Old Clockworks
- Combooter (C-1)
- Bootine (C-2)
- Boodonkulous (C-3)
- Jamboolaya (C-4)
- Boony Raboot (C-5)
- Secret Mine
- Boofoon (D-1)
- Booger (D-2)
- Paraboola (D-3)
- Treacherous Mansion
- Booldog (E-1)
- Boopa Trooppa (E-2)
- Booreaucrat (E-3)
- Big Boo (E-4)
- Maraboo (E-5)
Pests
Other
Desert Ruin
Customization
Strikers Club allows for the player to customize Desert Ruin's visual appearance by collecting tokens from season matches. The following is a list of customization options, as well as how many tokens they cost to purchase the first time. After purchasing an item for the first time, the item has to be purchased again for a lower price if another one of the same type is selected.
| Stadium Theme | ||||
|---|---|---|---|---|
| Image | Description | First time price | Reduced price | How to unlock |
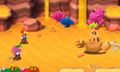
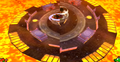
 Desert Ruin 1 |
The smallest version of the stadium, set in a small group of sandstone ruins surrounded by broken stone pillars and small grass platforms containing a few palm trees. In the background, mountains similar to ones found in World 2 of Super Mario 3D World can be seen sticking out of the sand. | Already purchased | 10000 | Available at the start |
 Desert Ruin 2 |
A slightly larger stadium, now with stands for spectators and four large screens, one on each corner. Two large archways can be seen on each side of the stadium. | 50000 | 10000 | Available at the start |
 Desert Ruin 3 |
An even larger stadium, with more levels for spectators. The walls of the stadium are more visible from the outside, as well as patches of stone paths in the sand. | 100000 | 10000 | Purchase Desert Ruin 2 |
 Desert Ruin 4 |
The largest stadium, adding a third level for spectators. The walls of the structure are now much taller and surrounded by various pillars. | 250000 | 10000 | Purchase Desert Ruin 3 |
| Fence Posts | ||||
|---|---|---|---|---|
| Image | Description | First time price | Reduced price | How to unlock |
 Ruin Fence 1 |
An obelisk with a glowing light blue center. Its electric fence consists of a complex grid based on Islamic geometric patterns. |
Already purchased | 100 | Available at the start |
 Ruin Fence 2 |
A gray rock pillar with a brazier on top. Its electric fence also consists of a complex geometric pattern. |
1000 | 100 | Available at the start |
 Ruin Fence 3 |
A tall green cactus with black thorns and a smaller round cactus on top. Its electric fence also consists of a complex geometric pattern. |
1000 | 100 | Available at the start |
 Ruin Fence 4 |
A small pillar shaped like the larger mountains found outside the statue that resemble the ones in World 2 of Super Mario 3D World. Its electric fence consists of a pattern of irregular shapes that resemble flowers or suns. |
1000 | 100 | Available at the start |
 Ruin Fence 5 |
A stack of three sandstone blocks with a dark gray block on top. Its electric fence also consists of a complex geometric pattern. |
2500 | 250 | Purchase Desert Ruin 3 |
 Ruin Fence 6 |
A gray cobblestone pillar with intricate decorations at the bottom and top Its electric fence consists of a complex pattern of thin triangles. |
2500 | 250 | Purchase Desert Ruin 3 |
 Ruin Fence 7 |
A cylindrical sandstone pillar with green and yellow markings on each edge and across the middle. Its electric fence also consists of a complex geometric pattern. |
2500 | 250 | Purchase Desert Ruin 3 |
 Ruin Fence 8 |
A dark green obelisk with copper square markings and a glowing light blue pyramid shape at the top. Its electric fence consists of a pattern of irregular shapes that resemble flowers or suns. |
2500 | 250 | Purchase Desert Ruin 3 |
| Goal-Line Decorations | ||||
|---|---|---|---|---|
| Image | Description | First time price | Reduced price | How to unlock |
 Ruin Decoration 1 |
A green cactus with yellow thorns and a red flower on a black square pot. | Already purchased | 100 | Available at the start |
 Ruin Decoration 2 |
A small pillar shaped like the larger mountains found outside the statue that resemble the ones in World 2 of Super Mario 3D World inside a small square brick fence. | 1000 | 100 | Available at the start |
 Ruin Decoration 3 |
A sandcastle. | 1000 | 100 | Available at the start |
 Ruin Decoration 4 |
A brown rectangular tower with sand pouring out of four holes on the top. | 1000 | 100 | Available at the start |
 Ruin Decoration 5 |
A green cactus with green thorns and shaped like a Pokey. | 2500 | 250 | Purchase Desert Ruin 3 |
 Ruin Decoration 6 |
A large glowing light blue structure resembling an obelisk with dark brown supports on its edges. | 2500 | 250 | Purchase Desert Ruin 3 |
 Ruin Decoration 7 |
A sand statue of a Klepto in their Super Mario Odyssey design. | 2500 | 250 | Purchase Desert Ruin 3 |
 Ruin Decoration 8 |
A glistening golden pipe surrounded by a small pool of water. | 2500 | 250 | Purchase Desert Ruin 3 |
| Goals | ||||
|---|---|---|---|---|
| Image | Description | First time price | Reduced price | How to unlock |
 Ruin Goal 1 |
A goal made out of four obelisks with glowing light blue centers and a square top. | Already purchased | 100 | Available at the start |
 Ruin Goal 2 |
A goal made out of bricks with two braziers on the sides and a much larger metal structure on fire on top. | 1000 | 100 | Available at the start |
 Ruin Goal 3 |
A goal made out of green cacti with black thorns. The front two cacti have purple flowers, and three large round cacti decorate the center. | 1000 | 100 | Available at the start |
 Ruin Goal 4 |
A goal made out of structures shaped like the larger mountains found outside the statue that resemble the ones in World 2 of Super Mario 3D World inside a small square brick fence. | 1000 | 100 | Available at the start |
 Ruin Goal 5 |
A goal made out of sandstone blocks with dark brown blocks decorating the tops of each pillar. A central pillar with four holes spills sand over the goal. | 2500 | 250 | Purchase Desert Ruin 3 |
 Ruin Goal 6 |
A goal made out of gray cobblestone with intricate decorations at the top. A large circular structure decorates the top of the goal. | 2500 | 250 | Purchase Desert Ruin 3 |
 Ruin Goal 7 |
A goal made out of two golden pipes as a structure supporting a small island with two palm trees over a pool of water. | 2500 | 250 | Purchase Desert Ruin 3 |
 Ruin Goal 8 |
A goal made out of intricate dark green structures with glowing light blue details. A large obelisk-like structure decorates the top, with two pyramids on each side. | 2500 | 250 | Purchase Desert Ruin 3 |
| Fields | ||||
|---|---|---|---|---|
| Image | Description | First time price | Reduced price | How to unlock |
 Ruin Field 1 |
Zig-zagging patterns running across either side of the field. | Already purchased | 100 | Available at the start |
 Ruin Field 2 |
A pattern of repeating diamonds going along the entire edge of the field | 1000 | 100 | Available at the start |
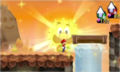
 Ruin Field 3 |
A detailed symbol of a sun. | 1500 | 150 | Purchase Desert Ruin 2 |
 Ruin Field 4 |
A brazier on fire. | 1500 | 150 | Purchase Desert Ruin 2 |
 Ruin Field 5 |
Three obelisks. | 2500 | 250 | Purchase Desert Ruin 3 |
 Ruin Field 6 |
A rectangular structure supported by two pillars, making an archway. | 2500 | 250 | Purchase Desert Ruin 3 |
 Ruin Field 7 |
A circular structure supported by two pillars, making an archway with a brazier underneath. | 5000 | Purchase Desert Ruin 4 | |
Ruin Field 8 |
Mountains like those found outside the statue that resemble the ones in World 2 of Super Mario 3D World | 5000 | Purchase Desert Ruin 4 | |