The Great Tower of Bowser Land: Difference between revisions
m (Reverted edits by 76.243.198.58 (talk) to last revision by Mario jc) Tag: Rollback |
m (Text replacement - "(\| *)Jap([RMCN\d]* *=)" to "$1Jpn$2") |
||
| (16 intermediate revisions by 9 users not shown) | |||
| Line 1: | Line 1: | ||
{{level infobox | {{level infobox | ||
|image=[[File:The Great Tower of Bowser Land.jpg|300px]] | |image=[[File:The Great Tower of Bowser Land.jpg|300px]] | ||
|code={{world| | |code={{world|Bowser|castle3dw}} | ||
|world=[[World Bowser]] | |world=[[World Bowser]] | ||
|game=''[[Super Mario 3D World]]''<br>''[[Super Mario 3D World + Bowser's Fury]]'' | |game=''[[Super Mario 3D World]]''<br>''[[Super Mario 3D World + Bowser's Fury]]'' | ||
| Line 9: | Line 9: | ||
|after=[[Rainbow Run (level)|>>]] | |after=[[Rainbow Run (level)|>>]] | ||
}} | }} | ||
'''The Great Tower of Bowser Land''' (known as '''The Great Tower of Bowser World''' in the British English Wii U version), also known as '''{{world| | '''The Great Tower of Bowser Land''' (known as '''The Great Tower of Bowser World''' in the British English Wii U version), also known as '''{{world|Bowser|castle3dw}}''' is the final standard course of [[World Bowser]], and the final main course in ''[[Super Mario 3D World]]'' and its [[Nintendo Switch]] port ''[[Super Mario 3D World + Bowser's Fury]]''. It is set in an amusement-park themed [[Bowser's Castle]], with a very tall tower in the center. Unlocking this level requires 170 [[Green Star]]s, as well as the completion of both [[Motley Bossblob's Encore]] and [[Hisstocrat Returns]]. | ||
==Layout== | ==Layout== | ||
[[File:TowerBowserLand.jpg|thumb|left|250px|The entrance from the world map | [[File:TowerBowserLand.jpg|thumb|left|250px|The entrance from the world map]] | ||
[[File:World Bowser.png|thumb|250px|The entrance from the cutscene | [[File:World Bowser.png|thumb|250px|The entrance from the cutscene]] | ||
The course begins near the remains of [[Bowser's Muscle Car]], with a [[zipline lift]] right next to it; scratching the car while wearing a [[Cat Suit]] will cause it to light up while the horn blares. The zipline lift leads onto a rooftop with obstacles that include [[Pit|bottomless pit]]s, [[ | The course begins near the remains of [[Bowser's Muscle Car]], with a [[zipline lift]] right next to it; scratching the car while wearing a [[Cat Mario|Cat Suit]] will cause it to light up while the horn blares. The zipline lift leads onto a rooftop with obstacles that include [[Pit|bottomless pit]]s, [[Volcanic debris|debris]] from the volcano in the background, and [[Spike Trap|spike]]s in the floor. Upon reaching the Ferris wheel-like platforms, [[Captain Toad]] greets the player(s) as he stands next to another zipline lift. | ||
Once the player(s) reach the large tower in the center, [[Bowser]] appears and uses a [[Super Bell]] to turn | Once the player(s) reach the large tower in the center, [[Bowser]] appears and uses a [[Super Bell]], causing him to turn into [[Meowser]]. The rest of the course involves climbing the tower while Meowser attacks them repeatedly; he shoots fireballs, climbs up walls and slides down them, and often breaks through them with his scratches. After hitting him with a [[POW Block]], he is sent flying and the wall to the rest of the tower is revealed. When the player goes up the [[Clear Pipe Cannon]] to the top of the tower, Meowser returns and uses [[Double Cherry|Double Cherries]] to [[Double Mario|double himself]]. These doubles can assist Meowser by destroying sections of the level. As the player heads up to the very tower, a giant [[POW Block|Super POW Block]] is on the top as the real Meowser stands on top with the bottle containing all seven of the [[Sprixie Princesses]]. This POW Block must be hit four times to finally defeat Meowser, after which he is sent flying and the Sprixie Princesses are freed. | ||
Upon defeating him, a [[Clear Pipe]] to the [[Goal Pole]] reveals itself, with the Goal Pole having a transparent base, and the course ends with all seven Sprixie Princesses rescued. | Upon defeating him, a [[Clear Pipe]] to the [[Goal Pole]] reveals itself, with the Goal Pole having a transparent base, and the course ends with all seven Sprixie Princesses rescued. From there, the game is finished, and the credits sequence follows. | ||
During the [[List of Super Mario 3D World staff|credits]], [[Mario]], [[Luigi]], [[Princess Peach|Peach]], and [[Toad]] return to the [[Mushroom Kingdom]], as do [[Captain Toad]] and the other [[Toad (species)|Toad]]s. Bowser is left trapped inside a bottle, while [[Boom Boom]] is upset and [[Pom Pom]] tries to comfort him. The [[Sprixie | During the [[List of Super Mario 3D World staff|credits]], [[Mario]], [[Luigi]], [[Princess Peach|Peach]], and [[Toad]] return to the [[Mushroom Kingdom]], as do [[Captain Toad]] and the other [[Toad (species)|Toad]]s. Bowser is left trapped inside a bottle, while [[Boom Boom]] is upset and [[Pom Pom]] tries to comfort him. The [[Sprixie Princesses]], [[Sprixie|their people]] and [[Plessie]] also give their new friends a fond farewell. Additionally, [[Rosalina]] appears if the player replays the level after unlocking her, replacing the Sprixies. | ||
==[[Green Star]]s== | ==Collectables== | ||
===[[Green Star]]s=== | |||
{| class="wikitable" style="text-align: center" | |||
!Image | |||
!Location | |||
|- | |||
|[[File:SM3DW WB-C 1st Green Star.jpg|150px]] | |||
|After getting off of the first [[zipline lift]], the first Green Star is on the rightmost side of the highest part of the first building the player lands on. | |||
|- | |||
|[[File:SM3DW WB-C 2nd Green Star.jpg|150px]] | |||
|On the Ferris Wheel, the four [[Bully|Bullies]] must be knocked off the platforms to reveal the second Green Star. If all the Bullies are knocked off, the Green Star will reveal in the center of the Ferris Wheel. | |||
|- | |||
|[[File:SM3DW WB-C 3rd Green Star.jpg|150px]] | |||
|During the first phase of the final battle, the third Green Star is revealed after collecting every [[Green Coin]] from the [[Green Star Ring]]. | |||
|} | |||
==[[Stamp]]== | ===[[List of Super Mario 3D World stamps|Stamp]]=== | ||
{{Multiple image | {{Multiple image | ||
|align=right | |align=right | ||
|direction=horizontal | |direction=horizontal | ||
|width=70 | |width=70 | ||
|image1=SM3DW-MeowserStamp.png | |image1=SM3DW-MeowserStamp.png | ||
|alt1=Wii U version | |alt1=Wii U version | ||
| Line 38: | Line 48: | ||
|alt2=Switch version | |alt2=Switch version | ||
}} | }} | ||
{| class="wikitable" style="text-align: center" | |||
!Image | |||
!Location | |||
|- | |||
|[[File:SM3DW The Great Tower of Bowser Land stamp.jpg|150px]] | |||
|At the end of the stage, near the [[Goal Pole]], there is a bell tree with the [[stamp]] floating directly above it. The stamp is [[Meowser]]. | |||
|} | |||
==Enemies== | ==Enemies== | ||
{{number of enemies | |||
Fire Bro SM3DW Prima.jpg|[[Fire Bro]] | |image1=[[File:Fire Bro SM3DW Prima.jpg|50px]] | ||
Cat Goomba Artwork - Super Mario 3D World.png|[[Cat Goomba]] | |name1=[[Fire Bro]] | ||
Bully Artwork - Super Mario 3D World.png|[[Bully | |count1=3 | ||
SM3DWVolcanicDebris.jpg|[[Volcanic debris]] | |image2=[[File:Cat Goomba Artwork - Super Mario 3D World.png|50px]] | ||
|name2=[[Cat Goomba]] | |||
|count2=5 | |||
|image3=[[File:Bully Artwork - Super Mario 3D World.png|50px]] | |||
|name3=[[Bully]] | |||
|count3=4 | |||
|image4=[[File:SM3DWVolcanicDebris.jpg|50px]] | |||
|name4=[[Volcanic debris]] | |||
|count4=(infinitely spawned) | |||
|image5=[[File:SM3DW Artwork Meowser.png|50px]] | |||
|name5=[[Meowser]] | |||
|count5=(boss) | |||
}} | |||
==Names in other languages== | ==Names in other languages== | ||
{{foreign names | {{foreign names | ||
| | |Jpn=決戦! クッパランドのスーパータワー | ||
| | |JpnR=Kessen! Kuppa rando no sūpā tawā | ||
| | |JpnM=Final Showdown! Super Tower of Bowser Land | ||
|Fre=Tour infernale de Bowser | |Fre=Tour infernale de Bowser | ||
|FreM=Bowser's Infernal Tower | |FreM=Bowser's Infernal Tower | ||
| Line 69: | Line 96: | ||
|RusR=Bolshushchaya bashnya Bouzera | |RusR=Bolshushchaya bashnya Bouzera | ||
|RusM=Bowser's gigantic tower | |RusM=Bowser's gigantic tower | ||
| | |ChiS=决战!酷霸王乐园的超级塔 | ||
| | |ChiSR=Juézhàn! Kùbàwáng Lèyuán de Chāojítǎ | ||
| | |ChiSM=Showdown! Super Tower of Bowser Land | ||
|ChiT=決戰!庫巴樂園的超級塔 | |||
|ChiTR=Juézhàn! Kùbā Lèyuán de Chāojítǎ | |||
|ChiTM=Showdown! Super Tower of Bowser Land | |||
|Kor=결전! 쿠파 랜드의 슈퍼 타워 | |Kor=결전! 쿠파 랜드의 슈퍼 타워 | ||
|KorR=Gyeoljeon! Kupa Raendeu-ui Syupeo Tawo | |KorR=Gyeoljeon! Kupa Raendeu-ui Syupeo Tawo | ||
Latest revision as of 14:51, January 7, 2025
| Level | |
|---|---|
| The Great Tower of Bowser Land | |

| |
| Level code | World |
| World | World Bowser |
| Game | Super Mario 3D World Super Mario 3D World + Bowser's Fury |
| Time limit | 500 seconds |
| Boss | Meowser |
| << << Directory of levels >> | |
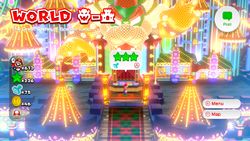
The Great Tower of Bowser Land (known as The Great Tower of Bowser World in the British English Wii U version), also known as World ![]() Bowser-
Bowser-![]() Castle is the final standard course of World Bowser, and the final main course in Super Mario 3D World and its Nintendo Switch port Super Mario 3D World + Bowser's Fury. It is set in an amusement-park themed Bowser's Castle, with a very tall tower in the center. Unlocking this level requires 170 Green Stars, as well as the completion of both Motley Bossblob's Encore and Hisstocrat Returns.
Castle is the final standard course of World Bowser, and the final main course in Super Mario 3D World and its Nintendo Switch port Super Mario 3D World + Bowser's Fury. It is set in an amusement-park themed Bowser's Castle, with a very tall tower in the center. Unlocking this level requires 170 Green Stars, as well as the completion of both Motley Bossblob's Encore and Hisstocrat Returns.
Layout[edit]
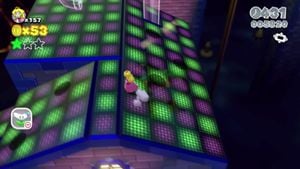
The course begins near the remains of Bowser's Muscle Car, with a zipline lift right next to it; scratching the car while wearing a Cat Suit will cause it to light up while the horn blares. The zipline lift leads onto a rooftop with obstacles that include bottomless pits, debris from the volcano in the background, and spikes in the floor. Upon reaching the Ferris wheel-like platforms, Captain Toad greets the player(s) as he stands next to another zipline lift.
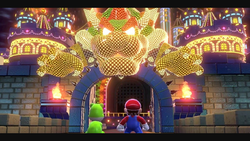
Once the player(s) reach the large tower in the center, Bowser appears and uses a Super Bell, causing him to turn into Meowser. The rest of the course involves climbing the tower while Meowser attacks them repeatedly; he shoots fireballs, climbs up walls and slides down them, and often breaks through them with his scratches. After hitting him with a POW Block, he is sent flying and the wall to the rest of the tower is revealed. When the player goes up the Clear Pipe Cannon to the top of the tower, Meowser returns and uses Double Cherries to double himself. These doubles can assist Meowser by destroying sections of the level. As the player heads up to the very tower, a giant Super POW Block is on the top as the real Meowser stands on top with the bottle containing all seven of the Sprixie Princesses. This POW Block must be hit four times to finally defeat Meowser, after which he is sent flying and the Sprixie Princesses are freed.
Upon defeating him, a Clear Pipe to the Goal Pole reveals itself, with the Goal Pole having a transparent base, and the course ends with all seven Sprixie Princesses rescued. From there, the game is finished, and the credits sequence follows.
During the credits, Mario, Luigi, Peach, and Toad return to the Mushroom Kingdom, as do Captain Toad and the other Toads. Bowser is left trapped inside a bottle, while Boom Boom is upset and Pom Pom tries to comfort him. The Sprixie Princesses, their people and Plessie also give their new friends a fond farewell. Additionally, Rosalina appears if the player replays the level after unlocking her, replacing the Sprixies.
Collectables[edit]
Green Stars[edit]
| Image | Location |
|---|---|

|
After getting off of the first zipline lift, the first Green Star is on the rightmost side of the highest part of the first building the player lands on. |

|
On the Ferris Wheel, the four Bullies must be knocked off the platforms to reveal the second Green Star. If all the Bullies are knocked off, the Green Star will reveal in the center of the Ferris Wheel. |

|
During the first phase of the final battle, the third Green Star is revealed after collecting every Green Coin from the Green Star Ring. |
Stamp[edit]
| Image | Location |
|---|---|

|
At the end of the stage, near the Goal Pole, there is a bell tree with the stamp floating directly above it. The stamp is Meowser. |
Enemies[edit]
| Image | Name | Count |
|---|---|---|

|
Fire Bro | 3 |

|
Cat Goomba | 5 |
| Bully | 4 | |
| Volcanic debris | (infinitely spawned) | |
| Meowser | (boss) |
Names in other languages[edit]
| Language | Name | Meaning | Notes |
|---|---|---|---|
| Japanese | 決戦! クッパランドのスーパータワー[?] Kessen! Kuppa rando no sūpā tawā |
Final Showdown! Super Tower of Bowser Land | |
| Chinese (simplified) | 决战!酷霸王乐园的超级塔[?] Juézhàn! Kùbàwáng Lèyuán de Chāojítǎ |
Showdown! Super Tower of Bowser Land | |
| Chinese (traditional) | 決戰!庫巴樂園的超級塔[?] Juézhàn! Kùbā Lèyuán de Chāojítǎ |
Showdown! Super Tower of Bowser Land | |
| Dutch | Bowsers kermiskasteel[?] | Bowser's Funfair Castle | |
| French | Tour infernale de Bowser[?] | Bowser's Infernal Tower | |
| German | Bowsers großer Turm[?] | Bowser's Great Tower | |
| Italian | Scontro nella supertorre di Bowser[?] | Clash at Bowser's supertower | |
| Korean | 결전! 쿠파 랜드의 슈퍼 타워[?] Gyeoljeon! Kupa Raendeu-ui Syupeo Tawo |
Decisive Battle! Super Tower of Bowser Land | |
| Portuguese | Desafio na torre final do Bowser[?] | Challenge in Bowser's final tower | |
| Russian | Большущая башня Боузера[?] Bolshushchaya bashnya Bouzera |
Bowser's gigantic tower | |
| Spanish | Ascenso a la torre de Bowser[?] | Bowser's tower ascent |
Trivia[edit]
- The music that plays during the second phase of the fight with Meowser on this level, "The Great Tower Showdown 2", is available in Super Smash Bros. for Wii U and Super Smash Bros. Ultimate as a track that can be heard on the Mario Galaxy stage and any Super Mario-series stage, respectively.
- In Super Mario 3D World + Bowser's Fury, the rain particle effect in the level is slightly more visible.


