Diddy Kong Racing: Difference between revisions
| (99 intermediate revisions by 32 users not shown) | |||
| Line 1: | Line 1: | ||
{{ | {{redirect|DKR|the canceled [[Nintendo GameCube]] follow-up starring [[Donkey Kong]]|[[Donkey Kong Racing]]|the [[Wii]] game referred to as "Donkey Kong Returns" in Japan|[[Donkey Kong Country Returns]]}} | ||
{{italic title}} | {{italic title}} | ||
{{game infobox | {{game infobox | ||
|image=[[File:Diddysracing.jpg|300px]] | |image=[[File:Diddysracing.jpg|300px]] | ||
|developer=[[Rare Ltd.|Rareware]] | |developer=[[Rare Ltd.|Rareware]] | ||
|publisher=Rareware ( | |publisher=Rareware (publication)<br>[[Nintendo]] (distribution) | ||
|release={{release|Europe|November 21, 1997|Japan|November 21, 1997|USA|November 24, 1997}} | |release={{release|Europe|November 21, 1997|Japan|November 21, 1997|USA|November 24, 1997}} | ||
|languages={{languages|en_us=y|fr_fr=y|de=y|jp=y}} | |||
|genre=[[Genre#Racing games|Racing]], adventure | |genre=[[Genre#Racing games|Racing]], adventure | ||
|modes=Single-player, multiplayer | |modes=Single-player, multiplayer | ||
|ratings={{ratings|esrb=K-A|pegi=3}} | |ratings={{ratings|esrb=K-A|pegi=3}} | ||
|platforms=[[Nintendo 64]] | |platforms=[[Nintendo 64]] | ||
| | |format={{format|n64=1}} | ||
|input={{input|n64=1}} | |input={{input|n64=1}} | ||
|serials=NUS-NDYJ-JPN (Japan) | |||
}} | }} | ||
'''''Diddy Kong Racing''''' is a [[Genre#Racing games|racing]]/adventure game developed and published by [[Rare Ltd.|Rareware]] for [[Nintendo 64]]. Featuring gameplay elements | {{Quote|A Wild Racing Adventure|Slogan}} | ||
'''''Diddy Kong Racing''''' is a [[Genre#Racing games|racing]]/adventure game developed and published by [[Rare Ltd.|Rareware]] for the [[Nintendo 64]]. Featuring gameplay elements similar to the ''[[Mario Kart (series)|Mario Kart]]'' series, the game includes the use of airplanes, hovercrafts, and cars. The game features a story mode and a multiplayer mode. Most of the game's playable characters besides the titular [[Diddy Kong]] are original characters, though two characters who would go on to be the main characters of their own franchises, [[Banjo]] and [[Conker]], first appeared in ''Diddy Kong Racing'' while their own games were still in development. | |||
''Diddy Kong Racing'' | ''Diddy Kong Racing'' sold 4.5 million copies upon release<ref name="makingof">{{cite|url=www.timeextension.com/features/the-making-of-diddy-kong-racing-the-game-that-overtook-mario-kart|title=The Making Of Diddy Kong Racing, The Game That Overtook Mario Kart|author=Watts, Martin|date=October 8, 2022|publisher=Time Extension|accessdate=May 23, 2024}}</ref> and was recognized by ''[[Guinness World Records]]'' as the fastest-selling game of the time, with 800,000 copies sold before Christmas 1997. The game was even successful enough to become a [[Player's Choice]] title. | ||
Two sequels were planned, but both were subsequently canceled in the aftermath of {{wp|Microsoft}}'s | Two sequels were planned, but both were subsequently canceled in the aftermath of {{wp|Microsoft}}'s acquisition of Rare in 2002. These included ''[[Donkey Kong Racing]]'' for the [[Nintendo GameCube]] and ''[[Diddy Kong Pilot]]'' for the [[Game Boy Advance]], the latter of which was eventually reworked into the ''Banjo-Kazooie'' game ''{{wp|Banjo-Pilot}}''. Around 2004, Climax pitched their own sequel idea to Nintendo, ''[[Diddy Kong Racing Adventure]]'', but it was ultimately rejected. A [[Reissue#Remakes|remake]] of the game was released for the [[Nintendo DS]] in 2007, titled ''[[Diddy Kong Racing DS]]''. | ||
==Story== | ==Story== | ||
[[File:Taj introduction DKR.png|thumb|left|200px|Taj introduces himself to Diddy.]] | [[File:Taj introduction DKR.png|thumb|left|200px|Taj introduces himself to Diddy.]] | ||
According to the instruction manual, the story begins with [[Diddy Kong]] sitting on the porch of his tree house opening a letter delivered by a carrier pigeon. The note reads, "Dear Diddy, Help!!!" The message is from his old friend, [[Timber]], the son of the [[Kong]]s' guests, the Tigers. Diddy reads the note and invites his friends, [[Banjo]] and [[Conker]] to join him in the fight against [[Wizpig]]. Diddy calls [[Squawks]] to deliver the message to his friends. | According to the instruction manual, the story begins with [[Diddy Kong]] sitting on the porch of his tree house opening a letter delivered by a carrier pigeon. The note reads, "Dear Diddy, Help!!!" The message is from his old friend, [[Timber]], the son of the [[Kong]]s' guests, the Tigers. Diddy reads the note and invites his friends, [[Banjo]] and [[Conker]] to join him in the fight against [[Wizpig]]. Diddy calls [[Squawks]] to deliver the message to his friends. While Diddy is in the jungle, two [[Kremling]]s watch him from behind a boulder. One Kremling, [[Krunch]], suggests they follow Diddy, but the other Kremling ignores him; Krunch eventually follows Diddy Kong. | ||
Meanwhile, Timber is trying to calm [[Pipsy]], where she exclaims that she had just seen [[Taj]], who said he would help. [[Tiptup|TipTup]], confused, protests that Taj has been missing for 50 years. Afterwards, the group thinks about the Wizpig face that was carved onto the mountainside overnight and the race courses that were magically sealed. The group knows they need to solve the problem before Timber's parents return. [[Bumper (character)|Bumper]] then concludes the conversation by telling his friend that everybody needs to start practicing. Agreeing with Bumper, Timber and his friends leave, hoping that Diddy Kong does not mention this to Timber's parents; this is where the story leads into the game's own opening, where Taj introduces himself to the player character and explains what they need to do to progress. | |||
When the first four worlds are completed, the carving of Wizpig's head on the mountainside opens and allows one of the characters [[Wizpig's First Strike|to race Wizpig]]. After beating him, the group has a party along the beach. However, Wizpig interferes in the party before a spaceship arrives and takes him into space. The lighthouse on the beach transforms into a rocket ship that takes them to [[Future Fun Land]]. | |||
When the first four worlds are completed, the carving of Wizpig's head on the mountainside opens and allows one of the characters [[Wizpig's First Strike|to race Wizpig]]. After beating him, the group has a party along the beach. However, Wizpig interferes in the party before a spaceship arrives and takes him into space. The lighthouse on the beach | |||
After the character completes all the tasks in that world and gets the whole [[T.T. amulet]], [[Wizpig Strikes Back|Wizpig can be faced again]], racing against him in their plane, while he rides a rocket. After winning, Wizpig's rocket short circuits and blasts him into an unknown planet. Once again, the characters celebrate their victory without Wizpig interfering and with the carving of Wizpig's head on the mountainside turned into a golden carving of Taj's head. | After the character completes all the tasks in that world and gets the whole [[T.T. amulet]], [[Wizpig Strikes Back|Wizpig can be faced again]], racing against him in their plane, while he rides a rocket. After winning, Wizpig's rocket short circuits and blasts him into an unknown planet. Once again, the characters celebrate their victory without Wizpig interfering and with the carving of Wizpig's head on the mountainside turned into a golden carving of Taj's head. | ||
Right before the credits roll, one of Wizpig's spaceships appears, and Wizpig's laughter is heard, leaving the game on a cliffhanger. | Right before the credits roll, one of Wizpig's spaceships appears, and Wizpig's laughter is heard, leaving the game on a cliffhanger. | ||
==Gameplay== | |||
[[File:Windmill Plains.png|thumb|left|One of ''Diddy Kong Racing'''s main mechanics is the use of different vehicles. For example, [[Diddy Kong|Diddy]] is riding a [[plane]].]] | |||
''Diddy Kong Racing'' features ten playable characters—eight of which are available by default, and two unlockable—and three different types of vehicles for different terrain: [[car]]s for land, [[hovercraft]]s for water or land, and [[plane]]s for air. Each character and vehicle has different strengths and weaknesses, sometimes in combination. For example, [[Krunch]] normally has low steering, but his steering is higher in a hovercraft due to that vehicle's emphasis on weight. | |||
In the Adventure mode, the player is placed on [[Timber's Island]] and tasked with collecting [[Golden Balloon]]s to access various challenges. There is a total of five worlds that can be accessed from the main Timber's Island hub, and each has four main racetracks, a [[trophy]] championship, a boss track, and—aside from the last one—a special battle minigame. Different vehicles are sometimes required for different tracks, and the player can change them at any time by speaking with [[Taj]], located in the center of the Timber's Island map. Each of the smaller worlds, meanwhile, instead has [[T.T.]] walking around the hub, and he tells the player's progress when approached. | |||
In races, [[banana]]s can be picked up to increase speed, while [[Weapon Balloon]]s provide items to use in the race. The color of the Weapon Balloon determines what item it will be, and collecting multiple of the same color in sequence improves the item's effects by up to a total of three levels. Collecting a balloon of another color cancels it out and replaces it with the new item. | |||
Golden Balloons can be found scattered on Timber's Island or won from races, either from tracks or from Taj on the island. All of the standard tracks have two Golden Balloons available: one from a standard race, and one from completing a [[Silver Coin]] collection challenge. The standard races must be completed first to race the world's boss, who then challenges the player to complete the Silver Coin races; after they are completed as well, the player can rematch the boss for a piece of the [[Wizpig amulet]]. The boss then challenges the player to complete the Trophy Race championship. Each of the first four worlds has a [[Wish Key|key]] hidden in one track that opens a gate to the respective world's battle minigame, which awards a piece of the [[T.T. amulet]]. | |||
When all four pieces of the Wizpig amulet are gathered, the player is able to race Wizpig himself to banish him from the island. Upon losing, he throws a tantrum and retreats to his own planet (the final world), and the player must have all four trophies to reach it. To race him again, the player must complete all races and Silver Coin challenges in this last world (itself requiring every Golden Balloon in the game) and collect all four pieces of the T.T. amulet from the Challenge levels. The adventure is complete once Wizpig is defeated here. | |||
The game also has a time trial mode, where the player needs to race to beat T.T.'s best times. This is optional in the main game, but it is required to unlock T.T. himself. Additionally, "magic codes" can be used to affect the game in various ways, with one being told to the player after they complete the adventure. | |||
==Characters== | ==Characters== | ||
===Playable characters=== | ===Playable characters=== | ||
There are 10 playable characters in ''Diddy Kong Racing'', with | [[File:Character Selection DKR.png|thumb|All of ''Diddy Kong Racing''{{'}}s playable characters unlocked]] | ||
There are 10 playable characters in ''Diddy Kong Racing'', with eight available from the start and two being unlockable. All of these characters except [[Diddy Kong]] debut in this game. Some characters have discrepancies depending on the vehicle they use; [[Tiptup|TipTup]] and [[Pipsy]] have the same speed as Diddy on a car when they have 4 to 10 bananas and have the same speed as Diddy on a hovercraft and a plane, while [[T.T.]] has the same speed and acceleration as [[Krunch]] on a plane.<ref>{{cite|author=William5000000|date=February 25, 2017|url=www.youtube.com/watch?v=LkeqPxKQ_Tk|title=''Diddy Kong Racing'' - Character Stats|language=en|publisher=YouTube|accessdate=April 5, 2020}}</ref> This is the first game to introduce [[Banjo]], [[Tiptup|TipTup]] (later renamed Tiptup), and [[Conker]], three characters who appear in other [[Rare Ltd.|Rare]] games with Banjo being one of the main characters in ''[[jiggywikki:Banjo-Kazooie|Banjo-Kazooie]]'' and Tiptup appearing as a minor character, returning in the sequel ''[[jiggywikki:Banjo-Tooie|Banjo-Tooie]]''. Conker would appear in ''Conker's Pocket Tales'' and would've appeared in ''Twelve Tales: Conker 64'' until it was reworked into the adult-oriented title, ''Conker's Bad Fur Day''. Banjo and Conker would be removed in ''[[Diddy Kong Racing DS]]'', replaced by [[Tiny Kong]] and [[Dixie Kong]] respectively. However, Tiptup still appears in both versions. | |||
{|class=" | {|border=1 style="text-align:center; border:1px solid black; border-collapse:collapse; max-width:1258px; background:wheat" | ||
|- | |||
!style="background:saddlebrown; color:white"|Default characters | |||
|- | |||
|style="display:inline-block; background:peru; max-width:306px" width=100%| | |||
{|class="wikitable dk" border=0 cellspacing=0 cellpadding=4 margin=0 padding=0 style="border:1px solid black; border-collapse:collapse; padding:0px; margin:0px; height:100%" width=100% | |||
|- | |||
!colspan=2 style="background:burlywood; height:64px" align="center"|[[File:Krunch-CSS-DKR.png]]<br><big>{{text outline|{{color-link|orange|Krunch}}}} | |||
|- | |||
!colspan=2 style="background:white; height:250px" align="center"|[[File:Krunch.jpg|294x250px]] | |||
|- | |||
!colspan=2 style="background:burlywood"|Bio: | |||
|- | |||
|colspan=2 style="height:128px"|"''Seeing Diddy Kong rush off so suddenly makes the Kremlings very suspicious, so Krunch goes bounding after him to make sure there aren't any anti-Kremling plots in the works. Diddy Kong, Timber and company don't exactly trust him, but Krunch insists he's only there to lend a hand...''" | |||
|- | |||
!width=50% style="background:burlywood"|Weight group: | |||
|'''{{color|red|Heavy}}''' | |||
|- | |||
!style="background:burlywood"|Acceleration: | |||
|1/5 | |||
|- | |||
!style="background:burlywood"|Turning: | |||
|1/5 | |||
|- | |||
!style="background:burlywood"|Top speed: | |||
|4/5 | |||
|- | |||
!style="background:burlywood"|Vehicle color: | |||
|'''{{text outline|{{color|orange|Orange}}}}''' | |||
|} | |||
|style="display:inline-block; background:peru; max-width:306px" width=100%| | |||
{|class="wikitable dk" border=0 cellspacing=0 cellpadding=4 margin=0 padding=0 style="border:1px solid black; border-collapse:collapse; padding:0px; margin:0px; height:100%" width=100% | |||
|- | |||
!colspan=2 style="background:burlywood; height:64px" align="center"|[[File:Diddy-CSS-DKR.png]]<br><big>{{text outline|{{color-link|blue|Diddy Kong}}}}</big> | |||
|- | |||
!colspan=2 style="background:white; height:250px" align="center"|[[File:Diddywave.jpg|294x250px]] | |||
|- | |||
!colspan=2 style="background:burlywood"|Bio: | |||
|- | |||
|colspan=2 style="height:128px"|"''Regarded as a hero after all his adventures in Kong country, the young primate is a long-time friend of Timber and doesn't think twice about responding to his call for help. With his family tending to their guests, he even manages to sneak off without their interference.''" | |||
|- | |||
!width=50% style="background:burlywood"|Weight group: | |||
|'''{{color|green|Middle}}''' | |||
|- | |||
!style="background:burlywood"|Acceleration: | |||
|3/5 | |||
|- | |||
!style="background:burlywood"|Turning: | |||
|3/5 | |||
|- | |||
!style="background:burlywood"|Top speed: | |||
|2.5/5 | |||
|- | |||
!style="background:burlywood"|Vehicle color: | |||
|'''{{text outline|{{color|blue|Blue}}}}''' | |||
|- | |||
|} | |||
|style="display:inline-block; background:peru; max-width:306px" width=100%| | |||
{|class="wikitable dk" border=0 cellspacing=0 cellpadding=4 margin=0 padding=0 style="border:1px solid black; border-collapse:collapse; padding:0px; margin:0px; height:100%" width=100% | |||
|- | |||
!colspan=2 style="background:burlywood; height:64px" align="center"|[[File:Bumper-CSS-DKR.png]]<br><big>{{text outline|{{color-link|yellow|Bumper (character)|Bumper}}}}</big> | |||
|- | |||
!colspan=2 style="background:white; height:250px" align="center"|[[File:Bumper DKR art.png|294x250px]] | |||
|- | |- | ||
!colspan= | !colspan=2 style="background:burlywood"|Bio: | ||
|- | |- | ||
|colspan=2 style="height:128px"|"''Unlike most of his kind, Bumper the badger prefers speed and thrills to a quiet nocturnal lifestyle. He gets even more worked up than his friends when he realizes how much racing and excitement will be involved in the crusade against Wizpig...''" | |||
|- | |- | ||
!width=50% style="background:burlywood"|Weight group: | |||
|'''{{color|green|Middle}}''' | |||
| | |||
|- | |- | ||
!style="background:burlywood"|Acceleration: | |||
|2.5/5 | |||
| | |||
|- | |- | ||
!style="background:burlywood"|Turning: | |||
|2.5/5 | |||
| | |||
|- | |- | ||
!style="background:burlywood"|Top speed: | |||
| | |3/5 | ||
|- | |- | ||
!style="background:burlywood"|Vehicle color: | |||
|'''{{text outline|{{color|yellow|Yellow}}}}''' | |||
| | |||
| | |||
|- | |- | ||
| | |} | ||
| | |||
| | |style="display:inline-block; background:peru; max-width:306px" width=100%| | ||
{|class="wikitable dk" border=0 cellspacing=0 cellpadding=4 margin=0 padding=0 style="border:1px solid black; border-collapse:collapse; padding:0px; margin:0px; height:100%" width=100% | |||
|- | |- | ||
!colspan=2 style="background:burlywood; height:64px" align="center"|[[File:Banjo-CSS-DKR.png]]<br><big>{{text outline|{{color-link|turquoise|Banjo}}}}</big> | |||
| | |||
| | |||
|- | |- | ||
! | !colspan=2 style="background:white; height:250px" align="center"|[[File:Carbanjo.png|294x250px]] | ||
|- | |- | ||
!colspan=2 style="background:burlywood"|Bio: | |||
|- | |- | ||
| | |colspan=2 style="height:128px"|"''Even before the start of his future partnership with Kazooie, Banjo isn't one to turn down the chance of an adventure. So when Squawks brings the message from his pal Diddy Kong, the Honey Bear stuffs a few things into his trusty backpack and takes to his heels.''" | ||
|- | |- | ||
!width=50% style="background:burlywood"|Weight group: | |||
|'''{{color|red|Heavy}}''' | |||
| | |||
| | |||
|- | |- | ||
!style="background:burlywood"|Acceleration: | |||
|2/5 | |||
| | |||
|- | |- | ||
!style="background:burlywood"|Turning: | |||
|2/5 | |||
| | |||
|- | |- | ||
!style="background:burlywood"|Top speed: | |||
|4/5 | |||
| | |||
|- | |- | ||
!style="background:burlywood"|Vehicle color: | |||
| | |'''{{text outline|{{color|turquoise|Teal}}}}''' | ||
| | |||
| | |||
|- | |- | ||
|} | |||
|style="display:inline-block; background:peru; max-width:306px" width=100%| | |||
{|class="wikitable dk" border=0 cellspacing=0 cellpadding=4 margin=0 padding=0 style="border:1px solid black; border-collapse:collapse; padding:0px; margin:0px; height:100%" width=100% | |||
|- | |- | ||
!style="background:burlywood" align="center" | !colspan=2 style="background:burlywood; height:64px" align="center"|[[File:Conker-CSS-DKR.png]]<br><big>{{text outline|{{color-link|white|Conker}}}}</big> | ||
|- | |- | ||
!colspan=2 style="background:white; height:250px" align="center"|[[File:Conker the Squirrel DKR artwork.jpg|294x250px]] | |||
|- | |- | ||
!colspan=2 style="background:burlywood"|Bio: | |||
|- | |- | ||
| | |colspan=2 style="height:128px"|"''Another friend made by Diddy Kong on one of his endless adventures with Donkey Kong, Conker is also an exploration nut who'll jump at any chance to break free of a squirrel's less than exciting daily routine. He's eager to join up with Banjo as the bear passes through.''" | ||
| | |||
|- | |- | ||
!width=50% style="background:burlywood"|Weight group: | |||
| | |'''{{color|green|Middle}}''' | ||
|- | |- | ||
!style="background:burlywood"|Acceleration: | |||
| | |2.5/5 | ||
|- | |- | ||
!style="background:burlywood"|Turning: | |||
| | |2.5/5 | ||
|- | |- | ||
!style="background:burlywood"|Top speed: | |||
| | |3/5 | ||
|- | |||
!style="background:burlywood"|Vehicle color: | |||
|'''{{text outline|{{color|white|White}}}}''' | |||
|- | |- | ||
|} | |} | ||
=== | |style="display:inline-block; background:peru; max-width:306px" width=100%| | ||
{|class="wikitable dk" border=0 cellspacing=0 cellpadding=4 margin=0 padding=0 style="border:1px solid black; border-collapse:collapse; padding:0px; margin:0px; height:100%" width=100% | |||
< | |- | ||
!colspan=2 style="background:burlywood; height:64px" align="center"|[[File:Tiptup-CSS-DKR.png]]<br><big>{{text outline|{{color-link|cyan|Tiptup|TipTup}}}}</big> | |||
|- | |||
!colspan=2 style="background:white; height:250px" align="center"|[[File:Hoveringtiptup.jpg|294x250px]] | |||
|- | |||
!colspan=2 style="background:burlywood"|Bio: | |||
|- | |||
|colspan=2 style="height:128px"|"''TipTup the turtle is another member of the close group of animal friends, but because of his nervous (and maybe even slightly clumsy) nature, he's never been particularly fond of the racing that the others seem to like so much. Now, though, he doesn't seem to have much choice!''" | |||
|- | |||
!width=50% style="background:burlywood"|Weight group: | |||
|'''{{color|dodgerblue|Light}}''' | |||
|- | |- | ||
! | !style="background:burlywood"|Acceleration: | ||
|4.5/5 | |||
|- | |- | ||
| | !style="background:burlywood"|Turning: | ||
|4.5/5 | |||
|- | |||
!style="background:burlywood"|Top speed: | |||
|1.5/5 | |||
|- | |||
!style="background:burlywood"|Vehicle color: | |||
|'''{{text outline|{{color|cyan|Cyan}}}}''' | |||
|- | |- | ||
|} | |} | ||
</center> | |||
====Bosses | |style="display:inline-block; background:peru; max-width:306px" width=100%| | ||
{|class="wikitable dk" border=0 cellspacing=0 cellpadding=4 margin=0 padding=0 style="border:1px solid black; border-collapse:collapse; padding:0px; margin:0px; height:100%" width=100% | |||
|- | |||
!colspan=2 style="background:burlywood; height:64px" align="center"|[[File:Pipsy-CSS-DKR.png]]<br><big>{{text outline|{{color-link|magenta|Pipsy}}}}</big> | |||
|- | |||
!colspan=2 style="background:white; height:250px" align="center"|[[File:Pipsycar.png|294x250px]] | |||
|- | |||
!colspan=2 style="background:burlywood"|Bio: | |||
|- | |||
|colspan=2 style="height:128px"|"''Evicted from her mountain home by the wicked Wizpig, Pipsy the mouse turns to her friends for help and gives them yet another reason to want the intruder out. She might seem delicate, but take her on in a race and you'll find that she's a lot tougher than she looks!''" | |||
|- | |||
!width=50% style="background:burlywood"|Weight group: | |||
|'''{{color|dodgerblue|Light}}''' | |||
|- | |||
!style="background:burlywood"|Acceleration: | |||
|5/5 | |||
|- | |||
!style="background:burlywood"|Turning: | |||
|5/5 | |||
|- | |||
!style="background:burlywood"|Top speed: | |||
|1/5 | |||
|- | |||
!style="background:burlywood"|Vehicle color: | |||
|'''{{text outline|{{color|magenta|Pink}}}}''' | |||
|- | |||
|} | |||
|style="display:inline-block; background:peru; max-width:306px" width=100%| | |||
{|class="wikitable dk" border=0 cellspacing=0 cellpadding=4 margin=0 padding=0 style="border:1px solid black; border-collapse:collapse; padding:0px; margin:0px; height:100%" width=100% | |||
|- | |||
!colspan=2 style="background:burlywood; height:64px" align="center"|[[File:Timber-CSS-DKR.png]]<br><big>{{text outline|{{color-link|lime|Timber}}}}</big> | |||
|- | |||
!colspan=2 style="background:white; height:250px" align="center"|[[File:Timber Plane DKR.png|294x250px]] | |||
|- | |||
!colspan=2 style="background:burlywood"|Bio: | |||
|- | |||
|colspan=2 style="height:128px"|"''A playful young tiger, Timber has been left in charge of the island while his parents visit their old friends over in Kong Country. Desperate to get Wizpig out and everything else back to normal before they return, Timber rallies his friends to join up with Taj's resistance!''" | |||
|- | |||
!width=50% style="background:burlywood"|Weight group: | |||
|'''{{color|green|Middle}}''' | |||
|- | |||
!style="background:burlywood"|Acceleration: | |||
|3/5 | |||
|- | |||
!style="background:burlywood"|Turning: | |||
|2.5/5 | |||
|- | |||
!style="background:burlywood"|Top speed: | |||
|3/5 | |||
|- | |||
!style="background:burlywood"|Vehicle color: | |||
|'''{{text outline|{{color|lime|Green}}}}''' | |||
|- | |||
|} | |||
|- | |||
!style="background:saddlebrown; color:white"|Unlockable characters | |||
|- | |||
|style="display:inline-block; background:peru; max-width:306px" width=100%| | |||
{|class="wikitable dk" border=0 cellspacing=0 cellpadding=4 margin=0 padding=0 style="border:1px solid black; border-collapse:collapse; padding:0px; margin:0px; height:100%" width=100% | |||
|- | |||
!colspan=2 style="background:burlywood; height:64px" align="center"|[[File:Drumstick-CSS-DKR.png]]<br><big>{{text outline|{{color-link|red|Drumstick (character)|Drumstick}}}}</big> | |||
|- | |||
!colspan=2 style="background:white; height:250px" align="center"|[[File:Drumstick - Plane Artwork - Diddy Kong Racing.png|294x250px]] | |||
|- | |||
!colspan=2 style="background:burlywood"|Bio: | |||
|- | |||
|colspan=2 style="height:128px"|"''The most experienced racer on the island, Drumstick was the animals' best hope for getting rid of the intruder. Unfortunately, something seems to have gone wrong and he hasn't been seen since he went off to make a stand. Could he have fallen afoul of one of Wizpig's spells?''" | |||
|- | |||
!width=50% style="background:burlywood"|Weight group: | |||
|'''{{color|red|Heavy}}''' | |||
|- | |||
!style="background:burlywood"|Acceleration: | |||
|2/5 | |||
|- | |||
!style="background:burlywood"|Turning: | |||
|1.5/5 | |||
|- | |||
!style="background:burlywood"|Top speed: | |||
|4.5/5 | |||
|- | |||
!style="background:burlywood"|Vehicle color: | |||
|'''{{text outline|{{color|red|Red}}}}''' | |||
|- | |||
!colspan=2 style="background:burlywood"|To unlock: | |||
|- | |||
|colspan=2 style="height:96px" align="center"|The player must get all four Grand Prix trophies, which reveals a frog with a rooster crest in Timber's Island hub. The racer must run over it to return Drumstick to normal. | |||
|} | |||
|style="display:inline-block; background:peru; max-width:306px" width=100%| | |||
{|class="wikitable dk" border=0 cellspacing=0 cellpadding=4 margin=0 padding=0 style="border:1px solid black; border-collapse:collapse; padding:0px; margin:0px; height:100%" width=100% | |||
|- | |||
!colspan=2 style="background:burlywood; height:64px" align="center"|[[File:TT-CSS-DKR.png]]<br><big>{{text outline|{{color-link|silver|T.T.}}}}</big> | |||
|- | |||
!colspan=2 style="background:white; height:250px" align="center"|[[File:TickTock.jpg|294x250px]] | |||
|- | |||
!colspan=2 style="background:burlywood"|Bio: | |||
|- | |||
|colspan=2 style="height:128px"|"''Like Taj, the overseer of the racetracks is less than impressed with Wizpig's behavior, but in T.T.'s case, it's because the bully has sealed off his beloved courses. He can't do much on his own, but he's certainly willing to give the animals any help he can in their mission.''" | |||
|- | |||
!width=50% style="background:burlywood"|Weight group: | |||
|'''{{color|green|Middle}}''' | |||
|- | |||
!style="background:burlywood"|Acceleration: | |||
|5/5 | |||
|- | |||
!style="background:burlywood"|Turning: | |||
|2.5/5 | |||
|- | |||
!style="background:burlywood"|Top speed: | |||
|5/5 | |||
|- | |||
!style="background:burlywood"|Vehicle color: | |||
|'''{{text outline|{{color|silver|Silver}}}}''' | |||
|- | |||
!colspan=2 style="background:burlywood"|To unlock: | |||
|- | |||
|colspan=2 style="height:96px" align="center"|Get good enough times around tracks in Time Trials mode to unlock T.T.'s ghost for each course, and then beat each. | |||
|} | |||
|} | |||
===Other important characters=== | |||
{|border=1 style="text-align:center; border:1px solid black; border-collapse:collapse; max-width:1258px; background:wheat" | |||
|- | |||
|style="display:inline-block; background:peru; max-width:306px" width=100%| | |||
{|class="wikitable dk" border=0 cellspacing=0 cellpadding=4 margin=0 padding=0 style="border:1px solid black; border-collapse:collapse; padding:0px; margin:0px; height:100%" width=100% | |||
|- | |||
!{{text outline|<big>{{color-link|white|Taj}}}}</big> | |||
|- | |||
|style="background:white"|[[File:Taj Walking.png|300x250px]] | |||
|- | |||
!style="background:burlywood"|Bio: | |||
|- | |||
|style="height:128px"|"''Evicted from his mountain home and cut off from his lamp, this ancient Genie isn't exactly pleased with the despicable Wizpig. Now, he's in search of a champion racer to go up against the uninvited guest and hopefully teach him a lesson in manners!''" | |||
|} | |||
|style="display:inline-block; background:peru; max-width:306px" width=100%| | |||
{|class="wikitable dk" border=0 cellspacing=0 cellpadding=4 margin=0 padding=0 style="border:1px solid black; border-collapse:collapse; padding:0px; margin:0px; height:100%" width=100% | |||
|- | |||
!{{text outline|<big>{{color-link|white|Wizpig}}}}</big> | |||
|- | |||
|style="background:white"|[[File:Wizpig.jpg|300x250px]] | |||
|- | |||
!style="background:burlywood"|Bio: | |||
|- | |||
|style="height:128px"|"''The big bad bully himself, a spiteful space traveler who hops from planet to planet looking for good places to drop in and cause havoc until there's nothing left there to amuse him. Nobody's ever managed to kick him out before he got bored, but there has to be a first time...''" | |||
|} | |||
|} | |||
===Bosses=== | |||
''Diddy Kong Racing'' has five bosses, all of which are raced twice. The first four, the Island Guardians, have been enchanted by the final boss, [[Wizpig]], into racing on his behalf. For the Island Guardians, the only difference between the first and second race is a slight increase in difficulty, though Wizpig's races are completely different from each other. Each boss cheats by beginning before the starting countdown ends, with this becoming more and more obvious the further into the game it happens. | ''Diddy Kong Racing'' has five bosses, all of which are raced twice. The first four, the Island Guardians, have been enchanted by the final boss, [[Wizpig]], into racing on his behalf. For the Island Guardians, the only difference between the first and second race is a slight increase in difficulty, though Wizpig's races are completely different from each other. Each boss cheats by beginning before the starting countdown ends, with this becoming more and more obvious the further into the game it happens. | ||
{| | {|border=1 style="text-align:center; border:1px solid black; border-collapse:collapse; max-width:1258px; background:wheat" | ||
! | |- | ||
!style="background:#000000; color:white;"|<span style="background:teal;display:inline-block;">[[File:DKR Wizpig ghost alt.png|x25px|top|link=List of bosses]]</span> Bosses <span style="background:teal;display:inline-block;">[[File:DKR Wizpig ghost alt.png|x25px|top|link=List of bosses]]</span> | |||
|- | |||
!style="background:saddlebrown; color:white"|Island Guardians | |||
|- | |||
|style="display:inline-block; background:peru; max-width:306px" width=100%| | |||
{|class="wikitable dk" border=0 cellspacing=0 cellpadding=4 margin=0 padding=0 style="border:1px solid black; border-collapse:collapse; padding:0px; margin:0px; height:100%" width=100% | |||
|- | |||
!{{text outline|<big>{{color-link|white|Tricky}}}}</big> | |||
|- | |||
|style="background:white"|[[File:DKR Trickythetriceratops.png|300x250px]] | |||
|- | |||
|[[Dino Domain]] - [[Car]] | |||
|- | |||
|style="height:128px"|Tricky races the player character up a spiraling mountain. Beyond constantly charging forward and potentially flattening the player, he has no special behavior. [[Boulder]]s occasionally travel down the mountain. In the second race, more boulders as well as falling pillars are added. | |||
|} | |||
|style="display:inline-block; background:peru; max-width:306px" width=100%| | |||
{|class="wikitable dk" border=0 cellspacing=0 cellpadding=4 margin=0 padding=0 style="border:1px solid black; border-collapse:collapse; padding:0px; margin:0px; height:100%" width=100% | |||
|- | |||
!{{text outline|<big>{{color-link|white|Bluey}}}}</big> | |||
|- | |||
|style="background:white"|[[File:Bluey Artwork - Diddy Kong Racing.png|300x250px]] | |||
|- | |||
|[[Snowflake Mountain]] - [[Hovercraft]] | |||
|- | |||
|style="height:128px"|Bluey races on a jagged, icy, downhill ski slope full of trees to act as obstacles. As with Tricky, his only behavior is stampeding forward, though he does not squish the player character. In the second race, a few [[snowball]]s are added as further obstacles. | |||
|} | |||
|style="display:inline-block; background:peru; max-width:306px" width=100%| | |||
{|class="wikitable dk" border=0 cellspacing=0 cellpadding=4 margin=0 padding=0 style="border:1px solid black; border-collapse:collapse; padding:0px; margin:0px; height:100%" width=100% | |||
|- | |||
!{{text outline|<big>{{color-link|white|Bubbler}}}}</big> | |||
|- | |||
|style="background:white"|[[File:Bubbler DKR.png|300x250px]] | |||
|- | |||
|[[Sherbet Island]] - [[Hovercraft]] | |||
|- | |||
|style="height:128px"|Bubbler swims three laps circling the sea around a small island, tossing explosive mines around him. In the second race, he instead launches giant bubbles that can trap the player character. | |||
|} | |||
|style="display:inline-block; background:peru; max-width:306px" width=100%| | |||
{|class="wikitable dk" border=0 cellspacing=0 cellpadding=4 margin=0 padding=0 style="border:1px solid black; border-collapse:collapse; padding:0px; margin:0px; height:100%" width=100% | |||
|- | |||
!<big>{{text outline|{{color-link|white|Smokey}}}}</big> | |||
|- | |||
|style="background:white"|[[File:Smokey DKR.png|300x250px]] | |||
|- | |||
|[[Dragon Forest]] - [[Plane]] | |||
|- | |||
|style="height:128px"|Smokey runs and flies three laps through a series of caves and fields. He attacks by spitting clouds of hot ash to be ran into. In the second race, he spits much more. | |||
|} | |||
|- | |- | ||
! | !style="background:saddlebrown; color:white"|Wizpig | ||
|- | |- | ||
| | |||
| | |||
|style="display:inline-block; background:peru; max-width:306px" width=100%| | |||
{|class="wikitable dk" border=0 cellspacing=0 cellpadding=4 margin=0 padding=0 style="border:1px solid black; border-collapse:collapse; padding:0px; margin:0px; height:100%" width=100% | |||
|- | |- | ||
| | !<big>{{text outline|{{color-link|white|Wizpig|Wizpig - 1}}}}</big> | ||
| | |||
| | |||
|- | |- | ||
| | |style="background:white"|[[File:WizpigPink.png|300x250px]] | ||
|- | |- | ||
|[[Timber's Island]] - [[Car]] | |||
|- | |- | ||
| | |style="height:128px"|For Wizpig's first race, he runs and floats three laps through a stormy flooded canyon. He does not use any offensive abilities here, but moves extremely fast. | ||
| | |} | ||
|style="display:inline-block; background:peru; max-width:306px" width=100%| | |||
{|class="wikitable dk" border=0 cellspacing=0 cellpadding=4 margin=0 padding=0 style="border:1px solid black; border-collapse:collapse; padding:0px; margin:0px; height:100%" width=100% | |||
|- | |- | ||
| | !<big>{{text outline|{{color-link|white|Wizpig|Wizpig - 2}}}}</big> | ||
| | |||
|- | |- | ||
| | |style="background:white"|[[File:Wizpig 2.png|300x250px]] | ||
| | |- | ||
|[[Future Fun Land]] - [[Plane]] | |||
|- | |||
|style="height:128px"|Wizpig's second race takes place on his homeworld, where he rides on a giant silver rocket three laps around his kingdom. Many obstacles appear here, such as floating asteroids, random laser blasts, attacking spaceships, and giant arcs of electricity. | |||
|} | |||
|} | |} | ||
==Vehicles== | ==Vehicles== | ||
There are three different vehicles: | There are three different vehicles: | ||
{|class=" | {|class="wikitable dk"style="vertical-align:center;width:85%;margin:auto" | ||
!Vehicle | !Vehicle | ||
!Description | !Description | ||
| Line 222: | Line 485: | ||
===Adventure Mode=== | ===Adventure Mode=== | ||
[[File:Diddy Kong Racing Overworld.png|200px|thumb|The overworld for adventure mode.]] | [[File:Diddy Kong Racing Overworld.png|200px|thumb|The overworld for adventure mode.]] | ||
Adventure mode is the main mode of the game. | Adventure mode is the main mode of the game. While exploring [[Timber's Island]], the players must find a number of golden balloons to defeat Wizpig. In order to find them, they must win races. After the players win all the races in one of the five worlds, they will race a boss. If the players beats the boss they will be given the challenge of collecting eight silver coins in each course of that world and then win simultaneously. When the challenge is complete, the player will face the boss again. After beating the boss again, the racer receives a piece of [[Wizpig amulet]], and the player can participate in a world's Grand Prix mode, the [[Trophy Race]], which the boss even suggests. The player obtains a gold trophy if they win first place, a silver one for second place, and a bronze one for third place. | ||
===Adventure Two Mode=== | ===Adventure Two Mode=== | ||
| Line 228: | Line 491: | ||
===Tracks Mode=== | ===Tracks Mode=== | ||
Players can freely play all the race tracks unlocked. Tracks with a Taj symbol are completed tracks, and players can choose any vehicle that is compatible with the track. Tracks with a Wizpig symbol have not been cleared, and players will be unable to play that track at all. | Players can freely play all the race tracks unlocked. Tracks with a Taj symbol are completed tracks, and players can choose any vehicle that is compatible with the track. Tracks with a Wizpig symbol have not been cleared, and players will be unable to play that track at all. The tracks are listed in the order they appear in Trophy Races, not in the order they are unlocked in Adventure Mode. At the start of the game, only the first of the tracks (as ordered by the Trophy Race) can be played from each of the main four worlds. | ||
Trophy Races and | Trophy Races and Challenge levels are also accessible through Tracks mode, however players will always use each track's default vehicle, regardless if a Taj symbol is present. | ||
If Adventure Mode progress is deleted via the Save Options menu, the Tracks Mode will also reset its status. | |||
==Types of races and other challenges== | ==Types of races and other challenges== | ||
| Line 240: | Line 505: | ||
===Silver Coin challenges=== | ===Silver Coin challenges=== | ||
Silver Coin challenges are much like normal races, except that the eight [[Silver Coin]]s scattered across the track must be collected before winning. | Silver Coin challenges are much like normal races, except that the eight [[Silver Coin]]s scattered across the track must be collected before winning. For the first four worlds, they are recommended after the boss is defeated the first time and are necessary to rematch them. In Future Fun Land, they are simply done after all the normal races with no boss race in between. As with normal races, a Golden Balloon is earned by beating them. | ||
===Trophy races=== | ===Trophy races=== | ||
Trophy Races are a grand prix-style challenge where the player goes through all four of a world's normal tracks back-to-back (sometimes in an order different from unlocking), trying to get a higher ranking than the opponents. Winning within the top three earns a different trophy for each placement. Collecting a trophy in each of the first four worlds is necessary to reach the final world. | Trophy Races are a grand prix-style challenge where the player goes through all four of a world's normal tracks back-to-back (sometimes in an order different from unlocking), trying to get a higher ranking than the opponents. Winning within the top three earns a different trophy for each placement. Collecting a trophy in each of the first four worlds is necessary to reach the final world. | ||
===Challenge | ===Challenge levels=== | ||
[[File:DKR BattleStageDoor.png|thumb|A key unlocks a door leading to a Challenge | [[File:DKR BattleStageDoor.png|thumb|A key unlocks a door leading to a Challenge level]] | ||
Challenge | Challenge levels are challenges that appear in each of the four main worlds. Each world has a single Challenge level that matches the world's theme, and has a unique objective and layout. Each Challenge level's door can be unlocked by a [[Wish Key|key]] located a specific course of that world. The player obtains a part of the [[T.T. amulet]] when they win at a challenge. | ||
====Fire Mountain==== | |||
In [[Fire Mountain (battle course)|Fire Mountain]], the players, using planes, complete to be the first to gather three dinosaur eggs from the center of the arena into their respective nest. | |||
====Icicle Pyramid==== | |||
In [[Icicle Pyramid]], players, using cars, battle each other directly using items, with each player getting four hit points (represented by a total of eight bananas). It is functionally equivalent to the [[Battle Mode#Balloon Battle|Balloon Battle]] from the ''[[Mario Kart (series)|Mario Kart]]'' games. | |||
====Darkwater Beach==== | |||
The gameplay in [[Darkwater Beach]] is identical to Icicle Pyramid, but uses hovercrafts instead of cars. | |||
====Smokey Castle==== | |||
In [[Smokey Castle]], players, using cars, complete to gather ten bananas into their respective treasure chest, with only two at a time being able to be carried. | |||
===Taj's challenges=== | ===Taj's challenges=== | ||
[[File:DKR TajRace.png|thumb|left|TipTup racing Taj | [[File:DKR TajRace.png|thumb|left|TipTup racing Taj in a plane]] | ||
After the player collects enough Golden Balloons in Adventure Mode, Taj | After the player collects enough Golden Balloons in Adventure Mode, Taj will appear and challenge the player to a race in a specific vehicle. The player has to race Taj, who rides a flying carpet. The racetrack is marked with red flags showing the Nintendo 64 logo and the player has to follow them. If they leave the set track by too far a margin, they will be disqualified. After Taj is beaten, he will reward the player with another Golden Balloon. There are three different challenges and each of them can be repeated at any time after they have been unlocked (the player will only obtain one Golden Balloon per challenge however). | ||
Car Challenge is a relatively easy race done in a car. This race goes around a dirt road right in front of Dino Domain and reaches into a tunnel. This should be very easy for the player because of Taj's slow movement. | Car Challenge is a relatively easy race done in a car. This race goes around a dirt road right in front of Dino Domain and reaches into a tunnel. This should be very easy for the player because of Taj's slow movement. | ||
| Line 261: | Line 538: | ||
==Tracks and progression== | ==Tracks and progression== | ||
''Diddy Kong Racing'' contains twenty race tracks split between five worlds. In most races (marked with a check mark), racers are able to choose what type of vehicle to bring into the race, which can | ''Diddy Kong Racing'' contains twenty race tracks split between five worlds. In most races (marked with a check mark), racers are able to choose what type of vehicle to bring into the race, which can affect the paths in the course they are able to take. For some races, there are vehicles that are not able to be taken into it (marked with a red X). Every race also has a default vehicle type to use (marked with a D), which is usually the best type of vehicle to use for the race. | ||
{|border= | |||
! | {|border=1 cellspacing=0 cellpadding=0 margin=0 padding=0 style="background:wheat; text-align:center; border:1px solid black; border-collapse:collapse; width:100%; max-width:1354px" | ||
!style="background:#9C6936;color:white"align=center|<big>{{color-link|#FFF8DC|Timber's Island}} Areas</big> | |||
|- | |- | ||
! | !style="background:#BE9966; color:white"| | ||
{|border=0 cellspacing=0 cellpadding=0 margin=0 padding=0 style="background:#BE9966; border:0 solid #BE9966; width:100%" | |||
!width=33% style="background:white"| | |||
!width=33%|[[File:Diddy Kong Racing Overworld.png]]<br><big> Hub: '''{{color-link|white|Timber's Island}}'''</big> | |||
!width=33% style="background:white"|[[File:Wizpig.jpg|240x240px]] | |||
|} | |||
|- | |||
|style="background:cornsilk"|The main hub of the game, Timber's Island is a large area between the other worlds with a few scattered objectives in it that can be completed at different parts of the game. Once the player has obtained the full [[Wizpig amulet]] by beating all four Island Guardians twice, the giant Wizpig carving in the central part of Timber's Island opens, leading to the race against Wizpig himself. | |||
|- | |- | ||
|colspan= | |||
|style="display:inline-block; background:peru; max-width:332px" width=100%| | |||
{|class="wikitable dk" border=0 cellspacing=0 cellpadding=4 margin=0 padding=0 style="border:1px solid black; border-collapse:collapse; padding:0px; margin:0px; height:100%" width=100% | |||
!colspan=4 style="color:white"|<big>'''Hidden Balloons'''</big> | |||
|- | |||
!colspan=4 style="background:white" width=324px height=244px|[[File:TI Golden Balloon Location 1.png]] | |||
|- | |||
|rowspan=2 style="background:#BE9966" width=84px height=84px|[[File:DKR Map Timber's Island.png]] | |||
|width=80px|[[File:Car DKR art.png|76x38px|Car|link=Car]] | |||
|width=80px|[[File:DKR Hovercraft.png|76x38px|Hovercraft|link=Hovercraft]] | |||
|width=80px|[[File:DKR Plane.png|76x38px|Plane|link=Plane]] | |||
|- | |- | ||
|[[File:DKR D.png|Default]] | |[[File:DKR D.png|Default]] | ||
|[[File:Check mark.svg|x27px|Yes]] | |[[File:Check mark.svg|x27px|Yes]] | ||
|[[File:Check mark.svg|x27px|Yes]] | |[[File:Check mark.svg|x27px|Yes]] | ||
| | |- | ||
|- | !colspan=4 style="color:white"|Unlock requirements: | ||
| | |- | ||
|rowspan=2 style="background:# | |colspan=4 height=70px|Available from start | ||
|rowspan=2 style="background:# | |- | ||
|[[File:Car DKR art.png| | !colspan=4 style="color:white"|Rewards: | ||
|[[File:DKR Hovercraft.png| | |- | ||
|[[File:DKR Plane.png| | |colspan=4 height=36px|{{DKR balloons|4}} | ||
|Default{{br} | |} | ||
|rowspan=2 style="background:# | |||
|- | |style="display:inline-block; background:peru; max-width:332px" width=100%| | ||
{|class="wikitable dk" border=0 cellspacing=0 cellpadding=4 margin=0 padding=0 style="border:1px solid black; border-collapse:collapse; padding:0px; margin:0px; height:100%" width=100% | |||
!colspan=4 style="color:white"|<big>'''Taj's Challenges'''</big> | |||
|- | |||
!colspan=4 style="background:white" width=324px height=244px|[[File:DKR TajRace.png]] | |||
|- | |||
|rowspan=2 style="background:#BE9966" width=84px height=84px|[[File:DKR Map Timber's Island.png]] | |||
|width=80px|[[File:Car DKR art.png|76x38px|Car|link=Car]] | |||
|width=80px|[[File:DKR Hovercraft.png|76x38px|Hovercraft|link=Hovercraft]] | |||
|width=80px|[[File:DKR Plane.png|76x38px|Plane|link=Plane]] | |||
|- | |||
|[[File:DKR D.png|Default]] (1) | |||
|[[File:DKR D.png|Default]] (2) | |||
|[[File:DKR D.png|Default]] (3) | |||
|- | |||
!colspan=4 style="color:white"|Unlock requirements: | |||
|- | |||
|colspan=1 height=70px| | |||
|colspan=1 height=70px|1:<br>{{DKR balloons|5}} | |||
|colspan=1|2:<br>{{DKR balloons|13}} | |||
|colspan=1|3:<br>{{DKR balloons|18}} | |||
|- | |||
!colspan=4 style="color:white"|Rewards: | |||
|- | |||
|colspan=4 height=36px|{{DKR balloons|3}} | |||
|} | |||
|style="display:inline-block; background:peru; max-width:332px" width=100%| | |||
{|class="wikitable dk" border=0 cellspacing=0 cellpadding=4 margin=0 padding=0 style="border:1px solid black; border-collapse:collapse; padding:0px; margin:0px; height:100%" width=100% | |||
!colspan=4 style="color:white"|<big>'''Boss: {{color-link|white|Wizpig's First Strike}}'''</big> | |||
|- | |||
!colspan=4 style="background:white" width=324px height=244px|[[File:Wizpig's First Strike.png]] | |||
|- | |||
|rowspan=2 style="background:#BE9966" width=84px height=84px|[[File:DKR Map Wizpig's First Strike.png]] | |||
|width=80px|[[File:Car DKR art.png|76x38px|Car|link=Car]] | |||
|width=80px|[[File:DKR Hovercraft.png|76x38px|Hovercraft|link=Hovercraft]] | |||
|width=80px|[[File:DKR Plane.png|76x38px|Plane|link=Plane]] | |||
|- | |||
|[[File:DKR D.png|Default]] | |||
|[[File:X mark.svg|x27px|No]] | |||
|[[File:X mark.svg|x27px|No]] | |||
|- | |||
!colspan=4 style="color:white"|Unlock requirements: | |||
|- | |||
|colspan=4 height=70px|All four pieces of the [[Wizpig amulet]] | |||
|- | |||
!colspan=4 style="color:white"|Rewards: | |||
|- | |||
|colspan=4 height=36px|Ending 1 | |||
|} | |||
|- | |||
!style="background:#BE9966; color:white"| | |||
{|border=0 cellspacing=0 cellpadding=0 margin=0 padding=0 style="background:#BE9966; border:0 solid #BE9966; width:100%" | |||
!width=33% style="background:white"|[[File:Dino Domain map.jpg|480x240px]] | |||
!width=33%|[[File:Dino Domain DKR.png]]<br><big>World 1: '''{{color-link|white|Dino Domain}}'''</big><br> | |||
!width=33% style="background:white"|[[File:Tricky1.png|240x240px]] | |||
|} | |||
|- | |||
|style="background:cornsilk"|A prehistoric area full of [[dinosaur]]s and [[pterodactyl]]s. It is accessed across the bridge in the central part of Timber's Island and requires one balloon to enter. | |||
|- | |||
|style="display:inline-block; background:peru; max-width:332px" width=100%| | |||
{|class="wikitable dk" border=0 cellspacing=0 cellpadding=4 margin=0 padding=0 style="border:1px solid black; border-collapse:collapse; padding:0px; margin:0px; height:100%" width=100% | |||
!colspan=4 style="color:white"|<big>'''1: {{color-link|white|Ancient Lake}}'''</big> | |||
|- | |||
!colspan=4 style="background:white" width=324px height=244px|[[File:DKR-AncientLake.png]] | |||
|- | |||
|rowspan=2 style="background:#BE9966" width=84px height=84px|[[File:DKR Map Ancient Lake.png]] | |||
|width=80px|[[File:Car DKR art.png|76x38px|Car|link=Car]] | |||
|width=80px|[[File:DKR Hovercraft.png|76x38px|Hovercraft|link=Hovercraft]] | |||
|width=80px|[[File:DKR Plane.png|76x38px|Plane|link=Plane]] | |||
|- | |||
|[[File:DKR D.png|Default]] | |[[File:DKR D.png|Default]] | ||
|[[File:Check mark.svg|x27px|Yes]] | |[[File:Check mark.svg|x27px|Yes]] | ||
|[[File:Check mark.svg|x27px|Yes]] | |[[File:Check mark.svg|x27px|Yes]] | ||
|Silver Coin Challenge | |- | ||
|- | !colspan=4 style="color:white"|Unlock requirements: | ||
| | |- | ||
| | |colspan=2 height=70px|Default:<br>{{DKR balloons|1}} | ||
|rowspan=2 style="background:#BE9966"|[[File:DKR Map | |colspan=2|Silver Coin Challenge:<br>{{DKR balloons|6}} | ||
|[[File:Car DKR art.png| | |- | ||
|[[File:DKR Hovercraft.png| | !colspan=4 style="color:white"|Rewards: | ||
|[[File:DKR Plane.png| | |- | ||
|Default{{ | |colspan=4 height=36px|{{DKR balloons|2}}, [[File:DKR Wish Key model.png|x32px|key|link=Wish Key]] | ||
| | |} | ||
|- | |||
|style="display:inline-block; background:peru; max-width:332px" width=100%| | |||
{|class="wikitable dk" border=0 cellspacing=0 cellpadding=4 margin=0 padding=0 style="border:1px solid black; border-collapse:collapse; padding:0px; margin:0px; height:100%" width=100% | |||
!colspan=4 style="color:white"|<big>'''2: {{color-link|white|Fossil Canyon}}'''</big> | |||
|- | |||
!colspan=4 style="background:white" width=324px height=244px|[[File:DKR-FossilCanyon.png]] | |||
|- | |||
|rowspan=2 style="background:#BE9966" width=84px height=84px|[[File:DKR Map Fossil Canyon.png]] | |||
|width=80px|[[File:Car DKR art.png|76x38px|Car|link=Car]] | |||
|width=80px|[[File:DKR Hovercraft.png|76x38px|Hovercraft|link=Hovercraft]] | |||
|width=80px|[[File:DKR Plane.png|76x38px|Plane|link=Plane]] | |||
|- | |||
|[[File:DKR D.png|Default]] | |||
|[[File:Check mark.svg|x27px|Yes]] | |||
|[[File:Check mark.svg|x27px|Yes]] | |||
|- | |||
!colspan=4 style="color:white"|Unlock requirements: | |||
|- | |||
|colspan=2 height=70px|Default:<br>{{DKR balloons|2}} | |||
|colspan=2|Silver Coin Challenge:<br>{{DKR balloons|7}} | |||
|- | |||
!colspan=4 style="color:white"|Rewards: | |||
|- | |||
|colspan=4 height=36px|{{DKR balloons|2}} | |||
|} | |||
|style="display:inline-block; background:peru; max-width:332px" width=100%| | |||
{|class="wikitable dk" border=0 cellspacing=0 cellpadding=4 margin=0 padding=0 style="border:1px solid black; border-collapse:collapse; padding:0px; margin:0px; height:100%" width=100% | |||
!colspan=4 style="color:white"|<big>'''3: {{color-link|white|Jungle Falls (Diddy Kong Racing)|Jungle Falls}}'''</big> | |||
|- | |||
!colspan=4 style="background:white" width=324px height=244px|[[File:DKR-JungleFalls.png]] | |||
|- | |||
|rowspan=2 style="background:#BE9966" width=84px height=84px|[[File:DKR Map Jungle Falls.png]] | |||
|width=80px|[[File:Car DKR art.png|76x38px|Car|link=Car]] | |||
|width=80px|[[File:DKR Hovercraft.png|76x38px|Hovercraft|link=Hovercraft]] | |||
|width=80px|[[File:DKR Plane.png|76x38px|Plane|link=Plane]] | |||
|- | |||
|[[File:DKR D.png|Default]] | |[[File:DKR D.png|Default]] | ||
|[[File:Check mark.svg|x27px|Yes]] | |[[File:Check mark.svg|x27px|Yes]] | ||
|[[File:Check mark.svg|x27px|Yes]] | |[[File:Check mark.svg|x27px|Yes]] | ||
|Silver Coin Challenge{{ | |- | ||
|- | !colspan=4 style="color:white"|Unlock requirements: | ||
| | |- | ||
| | |colspan=2 height=70px|Default:<br>{{DKR balloons|3}} | ||
|rowspan=2 style="background:# | |colspan=2|Silver Coin Challenge:<br>{{DKR balloons|8}} | ||
|[[File:Car DKR art.png| | |- | ||
|[[File:DKR Hovercraft.png| | !colspan=4 style="color:white"|Rewards: | ||
|[[File:DKR Plane.png| | |- | ||
|colspan=4 height=36px|{{DKR balloons|2}} | |||
|} | |||
|- | |||
|style="display:inline-block; background:peru; max-width:332px" width=100%| | |||
{|class="wikitable dk" border=0 cellspacing=0 cellpadding=4 margin=0 padding=0 style="border:1px solid black; border-collapse:collapse; padding:0px; margin:0px; height:100%" width=100% | |||
!colspan=4 style="color:white"|<big>'''4: {{color-link|white|Hot Top Volcano}}'''</big> | |||
|- | |||
!colspan=4 style="background:white" width=324px height=244px|[[File:DKR-HotTopVolcano.png]] | |||
|- | |||
|rowspan=2 style="background:#BE9966" width=84px height=84px|[[File:DKR Map Hot Top Volcano.png]] | |||
|width=80px|[[File:Car DKR art.png|76x38px|Car|link=Car]] | |||
|width=80px|[[File:DKR Hovercraft.png|76x38px|Hovercraft|link=Hovercraft]] | |||
|width=80px|[[File:DKR Plane.png|76x38px|Plane|link=Plane]] | |||
|- | |||
|[[File:X mark.svg|x27px|No]] | |[[File:X mark.svg|x27px|No]] | ||
|[[File:Check mark.svg|x27px|Yes]] | |[[File:Check mark.svg|x27px|Yes]] | ||
|[[File:DKR D.png|Default]] | |[[File:DKR D.png|Default]] | ||
|Silver Coin Challenge | |- | ||
|- | !colspan=4 style="color:white"|Unlock requirements: | ||
| | |- | ||
| | |colspan=2 height=70px|Default:<br>{{DKR balloons|4}} | ||
|rowspan=2 style="background:#BE9966"|[[File:DKR Map Tricky the Triceratops.png]] | |colspan=2|Silver Coin Challenge:<br>{{DKR balloons|10}} | ||
|[[File:Car DKR art.png| | |- | ||
|[[File:DKR Hovercraft.png| | !colspan=4 style="color:white"|Rewards: | ||
|[[File:DKR Plane.png| | |- | ||
|colspan=4 height=36px|{{DKR balloons|2}} | |||
|} | |||
|- | |||
|style="display:inline-block; background:peru; max-width:332px" width=100%| | |||
{|class="wikitable dk" border=0 cellspacing=0 cellpadding=4 margin=0 padding=0 style="border:1px solid black; border-collapse:collapse; padding:0px; margin:0px; height:100%" width=100% | |||
!colspan=4 style="color:white"|<big>'''Boss: {{color-link|white|Tricky Challenge}}'''</big> | |||
|- | |||
!colspan=4 style="background:white" width=324px height=244px|[[File:Tricky's Course DKR.png]] | |||
|- | |||
|rowspan=2 style="background:#BE9966" width=84px height=84px|[[File:DKR Map Tricky the Triceratops.png]] | |||
|width=80px|[[File:Car DKR art.png|76x38px|Car|link=Car]] | |||
|width=80px|[[File:DKR Hovercraft.png|76x38px|Hovercraft|link=Hovercraft]] | |||
|width=80px|[[File:DKR Plane.png|76x38px|Plane|link=Plane]] | |||
|- | |||
|[[File:DKR D.png|Default]] | |[[File:DKR D.png|Default]] | ||
|[[File:X mark.svg|x27px|No]] | |[[File:X mark.svg|x27px|No]] | ||
|[[File:X mark.svg|x27px|No]] | |[[File:X mark.svg|x27px|No]] | ||
|Second | |- | ||
|- | !colspan=4 style="color:white"|Unlock requirements: | ||
| | |- | ||
| | |colspan=2 height=70px|First:<br>All four default races complete | ||
|rowspan=2 style="background:# | |colspan=2|Second:<br>All four Silver Coin Challenges complete | ||
|[[File:Car DKR art.png| | |- | ||
|[[File:DKR Hovercraft.png| | !colspan=4 style="color:white"|Rewards: | ||
|[[File:DKR Plane.png| | |- | ||
|colspan=4 height=36px|Wizpig amulet piece | |||
|} | |||
|- | |||
|style="display:inline-block; background:peru; max-width:332px" width=100%| | |||
{|class="wikitable dk" border=0 cellspacing=0 cellpadding=4 margin=0 padding=0 style="border:1px solid black; border-collapse:collapse; padding:0px; margin:0px; height:100%" width=100% | |||
!colspan=4 style="color:white"|<big>'''Challenge: {{color-link|white|Fire Mountain (battle course)|Fire Mountain}}'''</big> | |||
|- | |||
!colspan=4 style="background:white" width=324px height=244px|[[File:DKR-FireMountain.png]] | |||
|- | |||
|rowspan=2 style="background:#BE9966" width=84px height=84px|[[File:DKR Map Fire Mountain.png]] | |||
|width=80px|[[File:Car DKR art.png|76x38px|Car|link=Car]] | |||
|width=80px|[[File:DKR Hovercraft.png|76x38px|Hovercraft|link=Hovercraft]] | |||
|width=80px|[[File:DKR Plane.png|76x38px|Plane|link=Plane]] | |||
|- | |||
|[[File:X mark.svg|x27px|No]] | |[[File:X mark.svg|x27px|No]] | ||
|[[File:X mark.svg|x27px|No]] | |[[File:X mark.svg|x27px|No]] | ||
|[[File:DKR D.png|Default]] | |[[File:DKR D.png|Default]] | ||
|- | |- | ||
!colspan= | !colspan=4 style="color:white"|Unlock requirements: | ||
|- | |||
|colspan=4 height=70px|[[File:DKR Wish Key model.png|x32px|key|link=Wish Key]] | |||
|- | |||
!colspan=4 style="color:white"|Rewards: | |||
|- | |||
|colspan=4 height=36px|TT amulet piece | |||
|} | |||
|style="display:inline-block; background:peru; max-width:332px" width=100%| | |||
{|class="wikitable dk" border=0 cellspacing=0 cellpadding=4 margin=0 padding=0 style="border:1px solid black; border-collapse:collapse; padding:0px; margin:0px; height:100%" width=100% | |||
!colspan=3 style="color:white"|<big>'''Trophy Race'''</big> | |||
|- | |||
!colspan=3 style="background:white" width=324px height=244px|[[File:DKR TrophyRaceTrophy.png]] | |||
|- | |||
|rowspan=2 style="background:#BE9966" width=56px height=84px|[[File:WizpigGoldStatue.png|80x80px]] | |||
|width=144px|1:Ancient Lake | |||
|width=144px|2:Fossil Canyon | |||
|- | |||
|3:Jungle Falls | |||
|4:Hot Top Volcano | |||
|- | |||
!colspan=3 style="color:white"|Unlock requirements: | |||
|- | |- | ||
|colspan= | |colspan=3 height=70px|Second Tricky race complete | ||
|- | |||
!colspan=3 style="color:white"|Rewards: | |||
|- | |||
|colspan=3 height=36px|Trophy | |||
|} | |||
|- | |||
!style="background:#BE9966; color:white"| | |||
{|border=0 cellspacing=0 cellpadding=0 margin=0 padding=0 style="background:#BE9966; border:0 solid #BE9966; width:100%" | |||
!width=33% style="background:white"|[[File:Snowflake Mountain DKR map.jpg|480x240px]] | |||
!width=33%|[[File:Snowflake Mountain.png]]<br><big>World 2: '''{{color-link|white|Snowflake Mountain}}'''</big><br> | |||
!width=33% style="background:white"|[[File:Bluey2.png|240x240px]] | |||
|} | |||
|- | |||
|style="background:cornsilk"|A snowy, Christmas-themed area. It is accessed from the frosty northeast corner of Timber's Island and requires two balloons to enter. | |||
|- | |||
|style="display:inline-block; background:peru; max-width:332px" width=100%| | |||
{|class="wikitable dk" border=0 cellspacing=0 cellpadding=4 margin=0 padding=0 style="border:1px solid black; border-collapse:collapse; padding:0px; margin:0px; height:100%" width=100% | |||
!colspan=4 style="color:white"|<big>'''1: {{color-link|white|Everfrost Peak}}'''</big> | |||
|- | |||
!colspan=4 style="background:white" width=324px height=244px|[[File:DKR-EverfrostPeak.png]] | |||
|- | |||
|rowspan=2 style="background:#BE9966" width=84px height=84px|[[File:DKR Map Everfrost Peak.png]] | |||
|width=80px|[[File:Car DKR art.png|76x38px|Car|link=Car]] | |||
|width=80px|[[File:DKR Hovercraft.png|76x38px|Hovercraft|link=Hovercraft]] | |||
|width=80px|[[File:DKR Plane.png|76x38px|Plane|link=Plane]] | |||
|- | |- | ||
|[[File:Check mark.svg|x27px|Yes]] | |[[File:Check mark.svg|x27px|Yes]] | ||
|[[File:Check mark.svg|x27px|Yes]] | |[[File:Check mark.svg|x27px|Yes]] | ||
|[[File:DKR D.png|Default]] | |[[File:DKR D.png|Default]] | ||
|Silver Coin Challenge{{ | |- | ||
|- | !colspan=4 style="color:white"|Unlock requirements: | ||
| | |- | ||
| | |colspan=2 height=70px|Default:<br>{{DKR balloons|2}} | ||
|rowspan=2 style="background:#BE9966"|[[File:DKR Map Walrus Cove.png]] | |colspan=2|Silver Coin Challenge:<br>{{DKR balloons|10}} | ||
|[[File:Car DKR art.png| | |- | ||
|[[File:DKR Hovercraft.png| | !colspan=4 style="color:white"|Rewards: | ||
|[[File:DKR Plane.png| | |- | ||
|colspan=4 height=36px|{{DKR balloons|2}} | |||
|} | |||
|- | |||
|style="display:inline-block; background:peru; max-width:332px" width=100%| | |||
{|class="wikitable dk" border=0 cellspacing=0 cellpadding=4 margin=0 padding=0 style="border:1px solid black; border-collapse:collapse; padding:0px; margin:0px; height:100%" width=100% | |||
!colspan=4 style="color:white"|<big>'''2: {{color-link|white|Walrus Cove}}'''</big> | |||
|- | |||
!colspan=4 style="background:white" width=324px height=244px|[[File:DKR-WalrusCove.png]] | |||
|- | |||
|rowspan=2 style="background:#BE9966" width=84px height=84px|[[File:DKR Map Walrus Cove.png]] | |||
|width=80px|[[File:Car DKR art.png|76x38px|Car|link=Car]] | |||
|width=80px|[[File:DKR Hovercraft.png|76x38px|Hovercraft|link=Hovercraft]] | |||
|width=80px|[[File:DKR Plane.png|76x38px|Plane|link=Plane]] | |||
|- | |||
|[[File:DKR D.png|Default]] | |[[File:DKR D.png|Default]] | ||
|[[File:Check mark.svg|x27px|Yes]] | |[[File:Check mark.svg|x27px|Yes]] | ||
|[[File:X mark.svg|x27px|No]] | |[[File:X mark.svg|x27px|No]] | ||
|Silver Coin Challenge | |- | ||
|- | !colspan=4 style="color:white"|Unlock requirements: | ||
| | |- | ||
| | |colspan=2 height=70px|Default:<br>{{DKR balloons|3}} | ||
|rowspan=2 style="background:# | |colspan=2|Silver Coin Challenge:<br>{{DKR balloons|11}} | ||
|[[File:Car DKR art.png| | |- | ||
|[[File:DKR Hovercraft.png| | !colspan=4 style="color:white"|Rewards: | ||
|[[File:DKR Plane.png| | |- | ||
|colspan=4 height=36px|{{DKR balloons|2}} | |||
|} | |||
|- | |||
|style="display:inline-block; background:peru; max-width:332px" width=100%| | |||
{|class="wikitable dk" border=0 cellspacing=0 cellpadding=4 margin=0 padding=0 style="border:1px solid black; border-collapse:collapse; padding:0px; margin:0px; height:100%" width=100% | |||
!colspan=4 style="color:white"|<big>'''3: {{color-link|white|Snowball Valley}}'''</big> | |||
|- | |||
!colspan=4 style="background:white" width=324px height=244px|[[File:DKR-SnowballValley.png]] | |||
|- | |||
|rowspan=2 style="background:#BE9966" width=84px height=84px|[[File:DKR Map Snowball Valley.png]] | |||
|width=80px|[[File:Car DKR art.png|76x38px|Car|link=Car]] | |||
|width=80px|[[File:DKR Hovercraft.png|76x38px|Hovercraft|link=Hovercraft]] | |||
|width=80px|[[File:DKR Plane.png|76x38px|Plane|link=Plane]] | |||
|- | |||
|[[File:DKR D.png|Default]] | |[[File:DKR D.png|Default]] | ||
|[[File:Check mark.svg|x27px|Yes]] | |[[File:Check mark.svg|x27px|Yes]] | ||
|[[File:X mark.svg|x27px|No]] | |[[File:X mark.svg|x27px|No]] | ||
|Silver Coin Challenge{{ | |- | ||
|- | !colspan=4 style="color:white"|Unlock requirements: | ||
| | |- | ||
| | |colspan=2 height=70px|Default:<br>{{DKR balloons|6}} | ||
|rowspan=2 style="background:#BE9966"|[[File:DKR Map Frosty Village.png]] | |colspan=2|Silver Coin Challenge:<br>{{DKR balloons|14}} | ||
|[[File:Car DKR art.png| | |- | ||
|[[File:DKR Hovercraft.png| | !colspan=4 style="color:white"|Rewards: | ||
|[[File:DKR Plane.png| | |- | ||
|colspan=4 height=36px|{{DKR balloons|2}}, [[File:DKR Wish Key model.png|x32px|key|link=Wish Key]] | |||
|} | |||
|- | |||
|style="display:inline-block; background:peru; max-width:332px" width=100%| | |||
{|class="wikitable dk" border=0 cellspacing=0 cellpadding=4 margin=0 padding=0 style="border:1px solid black; border-collapse:collapse; padding:0px; margin:0px; height:100%" width=100% | |||
!colspan=4 style="color:white"|<big>'''4: {{color-link|white|Frosty Village}}'''</big> | |||
|- | |||
!colspan=4 style="background:white" width=324px height=244px|[[File:DKR-FrostyVillage.png]] | |||
|- | |||
|rowspan=2 style="background:#BE9966" width=84px height=84px|[[File:DKR Map Frosty Village.png]] | |||
|width=80px|[[File:Car DKR art.png|76x38px|Car|link=Car]] | |||
|width=80px|[[File:DKR Hovercraft.png|76x38px|Hovercraft|link=Hovercraft]] | |||
|width=80px|[[File:DKR Plane.png|76x38px|Plane|link=Plane]] | |||
|- | |||
|[[File:DKR D.png|Default]] | |[[File:DKR D.png|Default]] | ||
|[[File:Check mark.svg|x27px|Yes]] | |[[File:Check mark.svg|x27px|Yes]] | ||
|[[File:Check mark.svg|x27px|Yes]] | |[[File:Check mark.svg|x27px|Yes]] | ||
|Silver Coin Challenge | |- | ||
|- | !colspan=4 style="color:white"|Unlock requirements: | ||
| | |- | ||
| | |colspan=2 height=70px|Default:<br>{{DKR balloons|9}} | ||
|rowspan=2 style="background:# | |colspan=2|Silver Coin Challenge:<br>{{DKR balloons|16}} | ||
|[[File:Car DKR art.png| | |- | ||
|[[File:DKR Hovercraft.png| | !colspan=4 style="color:white"|Rewards: | ||
|[[File:DKR Plane.png| | |- | ||
|colspan=4 height=36px|{{DKR balloons|2}} | |||
|} | |||
|- | |||
|style="display:inline-block; background:peru; max-width:332px" width=100%| | |||
{|class="wikitable dk" border=0 cellspacing=0 cellpadding=4 margin=0 padding=0 style="border:1px solid black; border-collapse:collapse; padding:0px; margin:0px; height:100%" width=100% | |||
!colspan=4 style="color:white"|<big>'''Boss: {{color-link|white|Bluey Challenge}}'''</big> | |||
|- | |||
!colspan=4 style="background:white" width=324px height=244px|[[File:Bluey's Course.png]] | |||
|- | |||
|rowspan=2 style="background:#BE9966" width=84px height=84px|[[File:DKR Map Bluey the Walrus.png]] | |||
|width=80px|[[File:Car DKR art.png|76x38px|Car|link=Car]] | |||
|width=80px|[[File:DKR Hovercraft.png|76x38px|Hovercraft|link=Hovercraft]] | |||
|width=80px|[[File:DKR Plane.png|76x38px|Plane|link=Plane]] | |||
|- | |||
|[[File:X mark.svg|x27px|No]] | |[[File:X mark.svg|x27px|No]] | ||
|[[File:DKR D.png|Default]] | |[[File:DKR D.png|Default]] | ||
|[[File:X mark.svg|x27px|No]] | |[[File:X mark.svg|x27px|No]] | ||
|Second | |- | ||
|- | !colspan=4 style="color:white"|Unlock requirements: | ||
| | |- | ||
| | |colspan=2 height=70px|First:<br>All four default races complete | ||
|rowspan=2 style="background:#BE9966"|[[File:DKR Map Icicle Pyramid.png]] | |colspan=2|Second:<br>All four Silver Coin Challenges complete | ||
|[[File:Car DKR art.png| | |- | ||
|[[File:DKR Hovercraft.png| | !colspan=4 style="color:white"|Rewards: | ||
|[[File:DKR Plane.png| | |- | ||
|colspan=4 height=36px|Wizpig amulet piece | |||
|} | |||
|- | |||
|style="display:inline-block; background:peru; max-width:332px" width=100%| | |||
{|class="wikitable dk" border=0 cellspacing=0 cellpadding=4 margin=0 padding=0 style="border:1px solid black; border-collapse:collapse; padding:0px; margin:0px; height:100%" width=100% | |||
!colspan=4 style="color:white"|<big>'''Challenge: {{color-link|white|Icicle Pyramid}}'''</big> | |||
|- | |||
!colspan=4 style="background:white" width=324px height=244px|[[File:DKR-IciclePyramid.png]] | |||
|- | |||
|rowspan=2 style="background:#BE9966" width=84px height=84px|[[File:DKR Map Icicle Pyramid.png]] | |||
|width=80px|[[File:Car DKR art.png|76x38px|Car|link=Car]] | |||
|width=80px|[[File:DKR Hovercraft.png|76x38px|Hovercraft|link=Hovercraft]] | |||
|width=80px|[[File:DKR Plane.png|76x38px|Plane|link=Plane]] | |||
|- | |||
|[[File:DKR D.png|Default]] | |[[File:DKR D.png|Default]] | ||
|[[File:X mark.svg|x27px|No]] | |[[File:X mark.svg|x27px|No]] | ||
|[[File:X mark.svg|x27px|No]] | |[[File:X mark.svg|x27px|No]] | ||
|- | |- | ||
!colspan= | !colspan=4 style="color:white"|Unlock requirements: | ||
|- | |||
|colspan=4 height=70px|[[File:DKR Wish Key model.png|x32px|key|link=Wish Key]] | |||
|- | |||
!colspan=4 style="color:white"|Rewards: | |||
|- | |- | ||
|colspan= | |colspan=4 height=36px|TT amulet piece | ||
|} | |||
|style="display:inline-block; background:peru; max-width:332px" width=100%| | |||
{|class="wikitable dk" border=0 cellspacing=0 cellpadding=4 margin=0 padding=0 style="border:1px solid black; border-collapse:collapse; padding:0px; margin:0px; height:100%" width=100% | |||
!colspan=3 style="color:white"|<big>'''Trophy Race'''</big> | |||
|- | |||
!colspan=3 style="background:white" width=324px height=244px|[[File:DKR TrophyRaceTrophy.png]] | |||
|- | |||
|rowspan=2 style="background:#BE9966" width=56px height=84px|[[File:WizpigGoldStatue.png|80x80px]] | |||
|width=144px|1:Everfrost Peak | |||
|width=144px|2:Walrus Cove | |||
|- | |||
|3:Snowball Valley | |||
|4:Frosty Village | |||
|- | |||
!colspan=3 style="color:white"|Unlock requirements: | |||
|- | |||
|colspan=3 height=70px|Second Bluey race complete | |||
|- | |||
!colspan=3 style="color:white"|Rewards: | |||
|- | |||
|colspan=3 height=36px|Trophy | |||
|} | |||
|- | |||
!style="background:#BE9966; color:white"| | |||
{|border=0 cellspacing=0 cellpadding=0 margin=0 padding=0 style="background:#BE9966; border:0 solid #BE9966; width:100%" | |||
!width=33% style="background:white"|[[File:Sherbet Island DKR artwork.jpg|480x240px]] | |||
!width=33%|[[File:Sherbet Island.png]]<br><big>World 3: '''{{color-link|white|Sherbet Island}}'''</big><br> | |||
!width=33% style="background:white"|[[File:Bubbler DKR art.jpg|240x240px]] | |||
|} | |||
|- | |||
|style="background:cornsilk"|An oceanside area extensively requiring the hovercraft. It is accessed from the small island to the east of Timber's Island and requires ten balloons to enter. | |||
|- | |||
|style="display:inline-block; background:peru; max-width:332px" width=100%| | |||
{|class="wikitable dk" border=0 cellspacing=0 cellpadding=4 margin=0 padding=0 style="border:1px solid black; border-collapse:collapse; padding:0px; margin:0px; height:100%" width=100% | |||
!colspan=4 style="color:white"|<big>'''1: {{color-link|white|Whale Bay}}'''</big> | |||
|- | |||
!colspan=4 style="background:white" width=324px height=244px|[[File:DKR-WhaleBay.png]] | |||
|- | |||
|rowspan=2 style="background:#BE9966" width=84px height=84px|[[File:DKR Map Whale Bay.png]] | |||
|width=80px|[[File:Car DKR art.png|76x38px|Car|link=Car]] | |||
|width=80px|[[File:DKR Hovercraft.png|76x38px|Hovercraft|link=Hovercraft]] | |||
|width=80px|[[File:DKR Plane.png|76x38px|Plane|link=Plane]] | |||
|- | |- | ||
|[[File:X mark.svg|x27px|No]] | |[[File:X mark.svg|x27px|No]] | ||
|[[File:DKR D.png|Default]] | |[[File:DKR D.png|Default]] | ||
|[[File:X mark.svg|x27px|No]] | |[[File:X mark.svg|x27px|No]] | ||
|Silver Coin Challenge{{ | |- | ||
|- | !colspan=4 style="color:white"|Unlock requirements: | ||
| | |- | ||
| | |colspan=2 height=70px|Default:<br>{{DKR balloons|10}} | ||
|rowspan=2 style="background:# | |colspan=2|Silver Coin Challenge:<br>{{DKR balloons|17}} | ||
|[[File:Car DKR art.png| | |- | ||
|[[File:DKR Hovercraft.png| | !colspan=4 style="color:white"|Rewards: | ||
|[[File:DKR Plane.png| | |- | ||
|colspan=4 height=36px|{{DKR balloons|2}} | |||
|} | |||
|- | |||
|style="display:inline-block; background:peru; max-width:332px" width=100%| | |||
{|class="wikitable dk" border=0 cellspacing=0 cellpadding=4 margin=0 padding=0 style="border:1px solid black; border-collapse:collapse; padding:0px; margin:0px; height:100%" width=100% | |||
!colspan=4 style="color:white"|<big>'''2: {{color-link|white|Crescent Island}}'''</big> | |||
|- | |||
!colspan=4 style="background:white" width=324px height=244px|[[File:DKR-CrescentIsland.png]] | |||
|- | |||
|rowspan=2 style="background:#BE9966" width=84px height=84px|[[File:DKR Map Crescent Island.png]] | |||
|width=80px|[[File:Car DKR art.png|76x38px|Car|link=Car]] | |||
|width=80px|[[File:DKR Hovercraft.png|76x38px|Hovercraft|link=Hovercraft]] | |||
|width=80px|[[File:DKR Plane.png|76x38px|Plane|link=Plane]] | |||
|- | |||
|[[File:DKR D.png|Default]] | |[[File:DKR D.png|Default]] | ||
|[[File:Check mark.svg|x27px|Yes]] | |[[File:Check mark.svg|x27px|Yes]] | ||
|[[File:X mark.svg|x27px|No]] | |[[File:X mark.svg|x27px|No]] | ||
|Silver Coin Challenge | |- | ||
|- | !colspan=4 style="color:white"|Unlock requirements: | ||
| | |- | ||
| | |colspan=2 height=70px|Default:<br>{{DKR balloons|11}} | ||
|rowspan=2 style="background:#BE9966"|[[File:DKR Map Pirate Lagoon.png]] | |colspan=2|Silver Coin Challenge:<br>{{DKR balloons|18}} | ||
|[[File:Car DKR art.png| | |- | ||
|[[File:DKR Hovercraft.png| | !colspan=4 style="color:white"|Rewards: | ||
|[[File:DKR Plane.png| | |- | ||
|colspan=4 height=36px|{{DKR balloons|2}}, [[File:DKR Wish Key model.png|x32px|key|link=Wish Key]] | |||
|} | |||
|- | |||
|style="display:inline-block; background:peru; max-width:332px" width=100%| | |||
{|class="wikitable dk" border=0 cellspacing=0 cellpadding=4 margin=0 padding=0 style="border:1px solid black; border-collapse:collapse; padding:0px; margin:0px; height:100%" width=100% | |||
!colspan=4 style="color:white"|<big>'''3: {{color-link|white|Pirate Lagoon}}'''</big> | |||
|- | |||
!colspan=4 style="background:white" width=324px height=244px|[[File:DKR-PirateLagoon.png]] | |||
|- | |||
|rowspan=2 style="background:#BE9966" width=84px height=84px|[[File:DKR Map Pirate Lagoon.png]] | |||
|width=80px|[[File:Car DKR art.png|76x38px|Car|link=Car]] | |||
|width=80px|[[File:DKR Hovercraft.png|76x38px|Hovercraft|link=Hovercraft]] | |||
|width=80px|[[File:DKR Plane.png|76x38px|Plane|link=Plane]] | |||
|- | |||
|[[File:X mark.svg|x27px|No]] | |[[File:X mark.svg|x27px|No]] | ||
|[[File:DKR D.png|Default]] | |[[File:DKR D.png|Default]] | ||
|[[File:X mark.svg|x27px|No]] | |[[File:X mark.svg|x27px|No]] | ||
|Silver Coin Challenge{{ | |- | ||
|- | !colspan=4 style="color:white"|Unlock requirements: | ||
| | |- | ||
| | |colspan=2 height=70px|Default:<br>{{DKR balloons|13}} | ||
|rowspan=2 style="background:# | |colspan=2|Silver Coin Challenge:<br>{{DKR balloons|20}} | ||
|[[File:Car DKR art.png| | |- | ||
|[[File:DKR Hovercraft.png| | !colspan=4 style="color:white"|Rewards: | ||
|[[File:DKR Plane.png| | |- | ||
|colspan=4 height=36px|{{DKR balloons|2}} | |||
|} | |||
|- | |||
|style="display:inline-block; background:peru; max-width:332px" width=100%| | |||
{|class="wikitable dk" border=0 cellspacing=0 cellpadding=4 margin=0 padding=0 style="border:1px solid black; border-collapse:collapse; padding:0px; margin:0px; height:100%" width=100% | |||
!colspan=4 style="color:white"|<big>'''4: {{color-link|white|Treasure Caves}}'''</big> | |||
|- | |||
!colspan=4 style="background:white" width=324px height=244px|[[File:DKR-TreasureCaves.png]] | |||
|- | |||
|rowspan=2 style="background:#BE9966" width=84px height=84px|[[File:DKR Map Treasure Caves.png]] | |||
|width=80px|[[File:Car DKR art.png|76x38px|Car|link=Car]] | |||
|width=80px|[[File:DKR Hovercraft.png|76x38px|Hovercraft|link=Hovercraft]] | |||
|width=80px|[[File:DKR Plane.png|76x38px|Plane|link=Plane]] | |||
|- | |||
|[[File:DKR D.png|Default]] | |[[File:DKR D.png|Default]] | ||
|[[File:Check mark.svg|x27px|Yes]] | |[[File:Check mark.svg|x27px|Yes]] | ||
|[[File:Check mark.svg|x27px|Yes]] | |[[File:Check mark.svg|x27px|Yes]] | ||
|Silver Coin Challenge | |- | ||
|- | !colspan=4 style="color:white"|Unlock requirements: | ||
| | |- | ||
| | |colspan=2 height=70px|Default:<br>{{DKR balloons|16}} | ||
|rowspan=2 style="background:#BE9966"|[[File:DKR Map Bubbler the Octopus.png]] | |colspan=2|Silver Coin Challenge:<br>{{DKR balloons|22}} | ||
|[[File:Car DKR art.png| | |- | ||
|[[File:DKR Hovercraft.png| | !colspan=4 style="color:white"|Rewards: | ||
|[[File:DKR Plane.png| | |- | ||
|colspan=4 height=36px|{{DKR balloons|2}} | |||
|} | |||
|- | |||
|style="display:inline-block; background:peru; max-width:332px" width=100%| | |||
{|class="wikitable dk" border=0 cellspacing=0 cellpadding=4 margin=0 padding=0 style="border:1px solid black; border-collapse:collapse; padding:0px; margin:0px; height:100%" width=100% | |||
!colspan=4 style="color:white"|<big>'''Boss: {{color-link|white|Bubbler Challenge}}'''</big> | |||
|- | |||
!colspan=4 style="background:white" width=324px height=244px|[[File:Bubbler's Course.png]] | |||
|- | |||
|rowspan=2 style="background:#BE9966" width=84px height=84px|[[File:DKR Map Bubbler the Octopus.png]] | |||
|width=80px|[[File:Car DKR art.png|76x38px|Car|link=Car]] | |||
|width=80px|[[File:DKR Hovercraft.png|76x38px|Hovercraft|link=Hovercraft]] | |||
|width=80px|[[File:DKR Plane.png|76x38px|Plane|link=Plane]] | |||
|- | |||
|[[File:X mark.svg|x27px|No]] | |[[File:X mark.svg|x27px|No]] | ||
|[[File:DKR D.png|Default]] | |[[File:DKR D.png|Default]] | ||
|[[File:X mark.svg|x27px|No]] | |[[File:X mark.svg|x27px|No]] | ||
|Second | |- | ||
|- | !colspan=4 style="color:white"|Unlock requirements: | ||
| | |- | ||
| | |colspan=2 height=70px|First:<br>All four default races complete | ||
|rowspan=2 style="background:# | |colspan=2|Second:<br>All four Silver Coin Challenges complete | ||
|[[File:Car DKR art.png| | |- | ||
|[[File:DKR Hovercraft.png| | !colspan=4 style="color:white"|Rewards: | ||
|[[File:DKR Plane.png| | |- | ||
|colspan=4 height=36px|Wizpig amulet piece | |||
|} | |||
|- | |||
|style="display:inline-block; background:peru; max-width:332px" width=100%| | |||
{|class="wikitable dk" border=0 cellspacing=0 cellpadding=4 margin=0 padding=0 style="border:1px solid black; border-collapse:collapse; padding:0px; margin:0px; height:100%" width=100% | |||
!colspan=4 style="color:white"|<big>'''Challenge: {{color-link|white|Darkwater Beach}}'''</big> | |||
|- | |||
!colspan=4 style="background:white" width=324px height=244px|[[File:DKR-DarkwaterBeach.png]] | |||
|- | |||
|rowspan=2 style="background:#BE9966" width=84px height=84px|[[File:DKR Map Darkwater Beach.png]] | |||
|width=80px|[[File:Car DKR art.png|76x38px|Car|link=Car]] | |||
|width=80px|[[File:DKR Hovercraft.png|76x38px|Hovercraft|link=Hovercraft]] | |||
|width=80px|[[File:DKR Plane.png|76x38px|Plane|link=Plane]] | |||
|- | |||
|[[File:X mark.svg|x27px|No]] | |[[File:X mark.svg|x27px|No]] | ||
|[[File:DKR D.png|Default]] | |[[File:DKR D.png|Default]] | ||
|[[File:X mark.svg|x27px|No]] | |[[File:X mark.svg|x27px|No]] | ||
|- | |- | ||
!colspan= | !colspan=4 style="color:white"|Unlock requirements: | ||
|- | |||
|colspan=4 height=70px|[[File:DKR Wish Key model.png|x32px|key|link=Wish Key]] | |||
|- | |||
!colspan=4 style="color:white"|Rewards: | |||
|- | |||
|colspan=4 height=36px|TT amulet piece | |||
|} | |||
|style="display:inline-block; background:peru; max-width:332px" width=100%| | |||
{|class="wikitable dk" border=0 cellspacing=0 cellpadding=4 margin=0 padding=0 style="border:1px solid black; border-collapse:collapse; padding:0px; margin:0px; height:100%" width=100% | |||
!colspan=3 style="color:white"|<big>'''Trophy Race'''</big> | |||
|- | |||
!colspan=3 style="background:white" width=324px height=244px|[[File:DKR TrophyRaceTrophy.png]] | |||
|- | |||
|rowspan=2 style="background:#BE9966" width=56px height=84px|[[File:WizpigGoldStatue.png|80x80px]] | |||
|width=144px|1:Whale Bay | |||
|width=144px|2:Pirate Lagoon | |||
|- | |||
|3:Crescent Island | |||
|4:Treasure Caves | |||
|- | |||
!colspan=3 style="color:white"|Unlock requirements: | |||
|- | |||
|colspan=3 height=70px|Second Bubbler race complete | |||
|- | |||
!colspan=3 style="color:white"|Rewards: | |||
|- | |||
|colspan=3 height=36px|Trophy | |||
|} | |||
|- | |||
!style="background:#BE9966; color:white"| | |||
{|border=0 cellspacing=0 cellpadding=0 margin=0 padding=0 style="background:#BE9966; border:0 solid #BE9966; width:100%" | |||
!width=33% style="background:white"|[[File:Dragon Forest DKR map artwork.jpg|480x240px]] | |||
!width=33%|[[File:Dragon Forest lobby DKR.png]]<br><big>World 4: '''{{color-link|white|Dragon Forest}}'''</big><br> | |||
!width=33% style="background:white"|[[File:Smokey.png|240x240px]] | |||
|} | |||
|- | |- | ||
|colspan= | |style="background:cornsilk"|A medieval countryside. It is accessed from behind a waterfall in the central part of Timber's Island and requires sixteen balloons to enter. | ||
|- | |||
|style="display:inline-block; background:peru; max-width:332px" width=100%| | |||
{|class="wikitable dk" border=0 cellspacing=0 cellpadding=4 margin=0 padding=0 style="border:1px solid black; border-collapse:collapse; padding:0px; margin:0px; height:100%" width=100% | |||
!colspan=4 style="color:white"|<big>'''1: {{color-link|white|Windmill Plains}}'''</big> | |||
|- | |||
!colspan=4 style="background:white" width=324px height=244px|[[File:DKR-WindmillPlains.png]] | |||
|- | |||
|rowspan=2 style="background:#BE9966" width=84px height=84px|[[File:DKR Map Windmill Plains.png]] | |||
|width=80px|[[File:Car DKR art.png|76x38px|Car|link=Car]] | |||
|width=80px|[[File:DKR Hovercraft.png|76x38px|Hovercraft|link=Hovercraft]] | |||
|width=80px|[[File:DKR Plane.png|76x38px|Plane|link=Plane]] | |||
|- | |- | ||
|[[File:Check mark.svg|x27px|Yes]] | |[[File:Check mark.svg|x27px|Yes]] | ||
|[[File:Check mark.svg|x27px|Yes]] | |[[File:Check mark.svg|x27px|Yes]] | ||
|[[File:DKR D.png|Default]] | |[[File:DKR D.png|Default]] | ||
|Silver Coin Challenge{{ | |- | ||
|- | !colspan=4 style="color:white"|Unlock requirements: | ||
| | |- | ||
| | |colspan=2 height=70px|Default:<br>{{DKR balloons|16}} | ||
|rowspan=2 style="background:#BE9966"|[[File:DKR Map Greenwood Village.png]] | |colspan=2|Silver Coin Challenge:<br>{{DKR balloons|23}} | ||
|[[File:Car DKR art.png| | |- | ||
|[[File:DKR Hovercraft.png| | !colspan=4 style="color:white"|Rewards: | ||
|[[File:DKR Plane.png| | |- | ||
|colspan=4 height=36px|{{DKR balloons|2}} | |||
|} | |||
|- | |||
|style="display:inline-block; background:peru; max-width:332px" width=100%| | |||
{|class="wikitable dk" border=0 cellspacing=0 cellpadding=4 margin=0 padding=0 style="border:1px solid black; border-collapse:collapse; padding:0px; margin:0px; height:100%" width=100% | |||
!colspan=4 style="color:white"|<big>'''2: {{color-link|white|Greenwood Village}}'''</big> | |||
|- | |||
!colspan=4 style="background:white" width=324px height=244px|[[File:DKR-GreenwoodVillage.png]] | |||
|- | |||
|rowspan=2 style="background:#BE9966" width=84px height=84px|[[File:DKR Map Greenwood Village.png]] | |||
|width=80px|[[File:Car DKR art.png|76x38px|Car|link=Car]] | |||
|width=80px|[[File:DKR Hovercraft.png|76x38px|Hovercraft|link=Hovercraft]] | |||
|width=80px|[[File:DKR Plane.png|76x38px|Plane|link=Plane]] | |||
|- | |||
|[[File:DKR D.png|Default]] | |[[File:DKR D.png|Default]] | ||
|[[File:Check mark.svg|x27px|Yes]] | |[[File:Check mark.svg|x27px|Yes]] | ||
|[[File:X mark.svg|x27px|No]] | |[[File:X mark.svg|x27px|No]] | ||
|Silver Coin Challenge | |- | ||
|- | !colspan=4 style="color:white"|Unlock requirements: | ||
| | |- | ||
| | |colspan=2 height=70px|Default:<br>{{DKR balloons|17}} | ||
|rowspan=2 style="background:# | |colspan=2|Silver Coin Challenge:<br>{{DKR balloons|24}} | ||
|[[File:Car DKR art.png| | |- | ||
|[[File:DKR Hovercraft.png| | !colspan=4 style="color:white"|Rewards: | ||
|[[File:DKR Plane.png| | |- | ||
|colspan=4 height=36px|{{DKR balloons|2}} | |||
|} | |||
|- | |||
|style="display:inline-block; background:peru; max-width:332px" width=100%| | |||
{|class="wikitable dk" border=0 cellspacing=0 cellpadding=4 margin=0 padding=0 style="border:1px solid black; border-collapse:collapse; padding:0px; margin:0px; height:100%" width=100% | |||
!colspan=4 style="color:white"|<big>'''3: {{color-link|white|Boulder Canyon}}'''</big> | |||
|- | |||
!colspan=4 style="background:white" width=324px height=244px|[[File:DKR-BoulderCanyon.png]] | |||
|- | |||
|rowspan=2 style="background:#BE9966" width=84px height=84px|[[File:DKR Map Boulder Canyon.png]] | |||
|width=80px|[[File:Car DKR art.png|76x38px|Car|link=Car]] | |||
|width=80px|[[File:DKR Hovercraft.png|76x38px|Hovercraft|link=Hovercraft]] | |||
|width=80px|[[File:DKR Plane.png|76x38px|Plane|link=Plane]] | |||
|- | |||
|[[File:X mark.svg|x27px|No]] | |[[File:X mark.svg|x27px|No]] | ||
|[[File:DKR D.png|Default]] | |[[File:DKR D.png|Default]] | ||
|[[File:X mark.svg|x27px|No]] | |[[File:X mark.svg|x27px|No]] | ||
|Silver Coin Challenge{{ | |- | ||
|- | !colspan=4 style="color:white"|Unlock requirements: | ||
| | |- | ||
| | |colspan=2 height=70px|Default:<br>{{DKR balloons|20}} | ||
|rowspan=2 style="background:#BE9966"|[[File:DKR Map Haunted Woods.png]] | |colspan=2|Silver Coin Challenge:<br>{{DKR balloons|30}} | ||
|[[File:Car DKR art.png| | |- | ||
|[[File:DKR Hovercraft.png| | !colspan=4 style="color:white"|Rewards: | ||
|[[File:DKR Plane.png| | |- | ||
|colspan=4 height=36px|{{DKR balloons|2}}, [[File:DKR Wish Key model.png|x32px|key|link=Wish Key]] | |||
|} | |||
|- | |||
|style="display:inline-block; background:peru; max-width:332px" width=100%| | |||
{|class="wikitable dk" border=0 cellspacing=0 cellpadding=4 margin=0 padding=0 style="border:1px solid black; border-collapse:collapse; padding:0px; margin:0px; height:100%" width=100% | |||
!colspan=4 style="color:white"|<big>'''4: {{color-link|white|Haunted Woods}}'''</big> | |||
|- | |||
!colspan=4 style="background:white" width=324px height=244px|[[File:DKR-HauntedWoods.png]] | |||
|- | |||
|rowspan=2 style="background:#BE9966" width=84px height=84px|[[File:DKR Map Haunted Woods.png]] | |||
|width=80px|[[File:Car DKR art.png|76x38px|Car|link=Car]] | |||
|width=80px|[[File:DKR Hovercraft.png|76x38px|Hovercraft|link=Hovercraft]] | |||
|width=80px|[[File:DKR Plane.png|76x38px|Plane|link=Plane]] | |||
|- | |||
|[[File:DKR D.png|Default]] | |[[File:DKR D.png|Default]] | ||
|[[File:Check mark.svg|x27px|Yes]] | |[[File:Check mark.svg|x27px|Yes]] | ||
|[[File:X mark.svg|x27px|No]] | |[[File:X mark.svg|x27px|No]] | ||
|Silver Coin Challenge | |- | ||
|- | !colspan=4 style="color:white"|Unlock requirements: | ||
| | |- | ||
| | |colspan=2 height=70px|Default:<br>{{DKR balloons|22}} | ||
|rowspan=2 style="background:# | |colspan=2|Silver Coin Challenge:<br>{{DKR balloons|37}} | ||
|[[File:Car DKR art.png| | |- | ||
|[[File:DKR Hovercraft.png| | !colspan=4 style="color:white"|Rewards: | ||
|[[File:DKR Plane.png| | |- | ||
|colspan=4 height=36px|{{DKR balloons|2}} | |||
|} | |||
|- | |||
|style="display:inline-block; background:peru; max-width:332px" width=100%| | |||
{|class="wikitable dk" border=0 cellspacing=0 cellpadding=4 margin=0 padding=0 style="border:1px solid black; border-collapse:collapse; padding:0px; margin:0px; height:100%" width=100% | |||
!colspan=4 style="color:white"|<big>'''Boss: {{color-link|white|Smokey Challenge}}'''</big> | |||
|- | |||
!colspan=4 style="background:white" width=324px height=244px|[[File:Smokey's Course.png]] | |||
|- | |||
|rowspan=2 style="background:#BE9966" width=84px height=84px|[[File:DKR Map Smokey the Dragon.png]] | |||
|width=80px|[[File:Car DKR art.png|76x38px|Car|link=Car]] | |||
|width=80px|[[File:DKR Hovercraft.png|76x38px|Hovercraft|link=Hovercraft]] | |||
|width=80px|[[File:DKR Plane.png|76x38px|Plane|link=Plane]] | |||
|- | |||
|[[File:X mark.svg|x27px|No]] | |[[File:X mark.svg|x27px|No]] | ||
|[[File:X mark.svg|x27px|No]] | |[[File:X mark.svg|x27px|No]] | ||
|[[File:DKR D.png|Default]] | |[[File:DKR D.png|Default]] | ||
|Second | |- | ||
|- | !colspan=4 style="color:white"|Unlock requirements: | ||
| | |- | ||
| | |colspan=2 height=70px|First:<br>All four default races complete | ||
|rowspan=2 style="background:#BE9966"|[[File:DKR Map Smokey Castle.png]] | |colspan=2|Second:<br>All four Silver Coin Challenges complete | ||
|[[File:Car DKR art.png| | |- | ||
|[[File:DKR Hovercraft.png| | !colspan=4 style="color:white"|Rewards: | ||
|[[File:DKR Plane.png| | |- | ||
|colspan=4 height=36px|Wizpig amulet piece | |||
|} | |||
|- | |||
|style="display:inline-block; background:peru; max-width:332px" width=100%| | |||
{|class="wikitable dk" border=0 cellspacing=0 cellpadding=4 margin=0 padding=0 style="border:1px solid black; border-collapse:collapse; padding:0px; margin:0px; height:100%" width=100% | |||
!colspan=4 style="color:white"|<big>'''Challenge: {{color-link|white|Smokey Castle}}'''</big> | |||
|- | |||
!colspan=4 style="background:white" width=324px height=244px|[[File:DKR-SmokeyCastle.png]] | |||
|- | |||
|rowspan=2 style="background:#BE9966" width=84px height=84px|[[File:DKR Map Smokey Castle.png]] | |||
|width=80px|[[File:Car DKR art.png|76x38px|Car|link=Car]] | |||
|width=80px|[[File:DKR Hovercraft.png|76x38px|Hovercraft|link=Hovercraft]] | |||
|width=80px|[[File:DKR Plane.png|76x38px|Plane|link=Plane]] | |||
|- | |||
|[[File:DKR D.png|Default]] | |[[File:DKR D.png|Default]] | ||
|[[File:X mark.svg|x27px|No]] | |[[File:X mark.svg|x27px|No]] | ||
|[[File:X mark.svg|x27px|No]] | |[[File:X mark.svg|x27px|No]] | ||
|- | |- | ||
!colspan= | !colspan=4 style="color:white"|Unlock requirements: | ||
|- | |||
|colspan=4 height=70px|[[File:DKR Wish Key model.png|x32px|key|link=Wish Key]] | |||
|- | |||
!colspan=4 style="color:white"|Rewards: | |||
|- | |||
|colspan=4 height=36px|TT amulet piece | |||
|} | |||
|style="display:inline-block; background:peru; max-width:332px" width=100%| | |||
{|class="wikitable dk" border=0 cellspacing=0 cellpadding=4 margin=0 padding=0 style="border:1px solid black; border-collapse:collapse; padding:0px; margin:0px; height:100%" width=100% | |||
!colspan=3 style="color:white"|<big>'''Trophy Race'''</big> | |||
|- | |||
!colspan=3 style="background:white" width=324px height=244px|[[File:DKR TrophyRaceTrophy.png]] | |||
|- | |||
|rowspan=2 style="background:#BE9966" width=56px height=84px|[[File:WizpigGoldStatue.png|80x80px]] | |||
|width=144px|1:Boulder Canyon | |||
|width=144px|2:Greenwood Village | |||
|- | |||
|3:Windmill Plains | |||
|4:Haunted Woods | |||
|- | |- | ||
!colspan=3 style="color:white"|Unlock requirements: | |||
|- | |- | ||
!style= | |colspan=3 height=70px|Second Smokey race complete | ||
|- | |||
!style=background:# | !colspan=3 style="color:white"|Rewards: | ||
|- | |||
|colspan=3 height=36px|Trophy | |||
!style=background: | |} | ||
| | |||
|- | |||
!style="background:#BE9966; color:white"| | |||
| | {|border=0 cellspacing=0 cellpadding=0 margin=0 padding=0 style="background:#BE9966; border:0 solid #BE9966; width:100%" | ||
!width=33% style="background:white"|[[File:Future Fun Land DKR map.jpg|480x240px]] | |||
| | !width=33%|[[File:Future Fun Land.png]]<br><big>World 5: '''{{color-link|white|Future Fun Land}}'''</big><br> | ||
| | !width=33% style="background:white"|[[File:Wizpig 2.png|240x240px]] | ||
| | |} | ||
|- | |||
| | |- | ||
|style="background:cornsilk"|Wizpig's homeworld, accessed from the lighthouse in the southeastern corner of Timber's Island. To reach it, the player needs to complete the four previous trophy races in a high enough position to earn a trophy in each, then approach the sign near the lighthouse after Wizpig's first race has been beaten. | |||
|- | |||
|style="display:inline-block; background:peru; max-width:332px" width=100%| | |||
{|class="wikitable dk" border=0 cellspacing=0 cellpadding=4 margin=0 padding=0 style="border:1px solid black; border-collapse:collapse; padding:0px; margin:0px; height:100%" width=100% | |||
!colspan=4 style="color:white"|<big>'''1: {{color-link|white|Spacedust Alley}}'''</big> | |||
|- | |- | ||
!colspan= | !colspan=4 style="background:white" width=324px height=244px|[[File:DKR-SpacedustAlley.png]] | ||
|- | |- | ||
| | |rowspan=2 style="background:#BE9966" width=84px height=84px|[[File:DKR Map Spacedust Alley.png]] | ||
|width=80px|[[File:Car DKR art.png|76x38px|Car|link=Car]] | |||
|width=80px|[[File:DKR Hovercraft.png|76x38px|Hovercraft|link=Hovercraft]] | |||
|width=80px|[[File:DKR Plane.png|76x38px|Plane|link=Plane]] | |||
|- | |- | ||
|[[File:Check mark.svg|x27px|Yes]] | |[[File:Check mark.svg|x27px|Yes]] | ||
|[[File:Check mark.svg|x27px|Yes]] | |[[File:Check mark.svg|x27px|Yes]] | ||
|[[File:DKR D.png|Default]] | |[[File:DKR D.png|Default]] | ||
|Silver Coin Challenge{{ | |- | ||
|- | !colspan=4 style="color:white"|Unlock requirements: | ||
| | |- | ||
| | |colspan=2 height=70px|Default:<br>{{DKR balloons|39}} | ||
|rowspan=2 style="background:#BE9966"|[[File:DKR Map Darkmoon Caverns.png]] | |colspan=2|Silver Coin Challenge:<br>{{DKR balloons|43}} | ||
|[[File:Car DKR art.png| | |- | ||
|[[File:DKR Hovercraft.png| | !colspan=4 style="color:white"|Rewards: | ||
|[[File:DKR Plane.png| | |- | ||
|colspan=4 height=36px|{{DKR balloons|2}} | |||
|} | |||
|- | |||
|style="display:inline-block; background:peru; max-width:332px" width=100%| | |||
{|class="wikitable dk" border=0 cellspacing=0 cellpadding=4 margin=0 padding=0 style="border:1px solid black; border-collapse:collapse; padding:0px; margin:0px; height:100%" width=100% | |||
!colspan=4 style="color:white"|<big>'''2: {{color-link|white|Darkmoon Caverns}}'''</big> | |||
|- | |||
!colspan=4 style="background:white" width=324px height=244px|[[File:DKR-DarkmoonCaverns.png]] | |||
|- | |||
|rowspan=2 style="background:#BE9966" width=84px height=84px|[[File:DKR Map Darkmoon Caverns.png]] | |||
|width=80px|[[File:Car DKR art.png|76x38px|Car|link=Car]] | |||
|width=80px|[[File:DKR Hovercraft.png|76x38px|Hovercraft|link=Hovercraft]] | |||
|width=80px|[[File:DKR Plane.png|76x38px|Plane|link=Plane]] | |||
|- | |||
|[[File:DKR D.png|Default]] | |[[File:DKR D.png|Default]] | ||
|[[File:Check mark.svg|x27px|Yes]] | |[[File:Check mark.svg|x27px|Yes]] | ||
|[[File:X mark.svg|x27px|No]] | |[[File:X mark.svg|x27px|No]] | ||
|Silver Coin Challenge | |- | ||
|- | !colspan=4 style="color:white"|Unlock requirements: | ||
| | |- | ||
| | |colspan=2 height=70px|Default:<br>{{DKR balloons|40}} | ||
|rowspan=2 style="background:# | |colspan=2|Silver Coin Challenge:<br>{{DKR balloons|44}} | ||
|[[File:Car DKR art.png| | |- | ||
|[[File:DKR Hovercraft.png| | !colspan=4 style="color:white"|Rewards: | ||
|[[File:DKR Plane.png| | |- | ||
|colspan=4 height=36px|{{DKR balloons|2}} | |||
|} | |||
|- | |||
|style="display:inline-block; background:peru; max-width:332px" width=100%| | |||
{|class="wikitable dk" border=0 cellspacing=0 cellpadding=4 margin=0 padding=0 style="border:1px solid black; border-collapse:collapse; padding:0px; margin:0px; height:100%" width=100% | |||
!colspan=4 style="color:white"|<big>'''3: {{color-link|white|Spaceport Alpha}}'''</big> | |||
|- | |||
!colspan=4 style="background:white" width=324px height=244px|[[File:DKR-SpaceportAlpha.png]] | |||
|- | |||
|rowspan=2 style="background:#BE9966" width=84px height=84px|[[File:DKR Map Spaceport Alpha.png]] | |||
|width=80px|[[File:Car DKR art.png|76x38px|Car|link=Car]] | |||
|width=80px|[[File:DKR Hovercraft.png|76x38px|Hovercraft|link=Hovercraft]] | |||
|width=80px|[[File:DKR Plane.png|76x38px|Plane|link=Plane]] | |||
|- | |||
|[[File:Check mark.svg|x27px|Yes]] | |[[File:Check mark.svg|x27px|Yes]] | ||
|[[File:Check mark.svg|x27px|Yes]] | |[[File:Check mark.svg|x27px|Yes]] | ||
|[[File:DKR D.png|Default]] | |[[File:DKR D.png|Default]] | ||
|Silver Coin Challenge{{ | |- | ||
|- | !colspan=4 style="color:white"|Unlock requirements: | ||
| | |- | ||
| | |colspan=2 height=70px|Default:<br>{{DKR balloons|41}} | ||
|rowspan=2 style="background:#BE9966"|[[File:DKR Map Star City.png]] | |colspan=2|Silver Coin Challenge:<br>{{DKR balloons|45}} | ||
|[[File:Car DKR art.png| | |- | ||
|[[File:DKR Hovercraft.png| | !colspan=4 style="color:white"|Rewards: | ||
|[[File:DKR Plane.png| | |- | ||
|colspan=4 height=36px|{{DKR balloons|2}} | |||
|} | |||
|- | |||
|style="display:inline-block; background:peru; max-width:332px" width=100%| | |||
{|class="wikitable dk" border=0 cellspacing=0 cellpadding=4 margin=0 padding=0 style="border:1px solid black; border-collapse:collapse; padding:0px; margin:0px; height:100%" width=100% | |||
!colspan=4 style="color:white"|<big>'''4: {{color-link|white|Star City}}'''</big> | |||
|- | |||
!colspan=4 style="background:white" width=324px height=244px|[[File:DKR-StarCity.png]] | |||
|- | |||
|rowspan=2 style="background:#BE9966" width=84px height=84px|[[File:DKR Map Star City.png]] | |||
|width=80px|[[File:Car DKR art.png|76x38px|Car|link=Car]] | |||
|width=80px|[[File:DKR Hovercraft.png|76x38px|Hovercraft|link=Hovercraft]] | |||
|width=80px|[[File:DKR Plane.png|76x38px|Plane|link=Plane]] | |||
|- | |||
|[[File:DKR D.png|Default]] | |[[File:DKR D.png|Default]] | ||
|[[File:Check mark.svg|x27px|Yes]] | |[[File:Check mark.svg|x27px|Yes]] | ||
|[[File:Check mark.svg|x27px|Yes]] | |[[File:Check mark.svg|x27px|Yes]] | ||
|Silver Coin Challenge | |- | ||
|- | !colspan=4 style="color:white"|Unlock requirements: | ||
| | |- | ||
| | |colspan=2 height=70px|Default:<br>{{DKR balloons|42}} | ||
|rowspan=2 style="background:# | |colspan=2|Silver Coin Challenge:<br>{{DKR balloons|46}} | ||
|[[File:Car DKR art.png| | |- | ||
|[[File:DKR Hovercraft.png| | !colspan=4 style="color:white"|Rewards: | ||
|[[File:DKR Plane.png| | |- | ||
|colspan=4 height=36px|{{DKR balloons|2}} | |||
|} | |||
|- | |||
|style="display:inline-block; background:peru; max-width:332px" width=100%| | |||
{|class="wikitable dk" border=0 cellspacing=0 cellpadding=4 margin=0 padding=0 style="border:1px solid black; border-collapse:collapse; padding:0px; margin:0px; height:100%" width=100% | |||
!colspan=4 style="color:white"|<big>'''Boss: {{color-link|white|Wizpig Strikes Back}}'''</big> | |||
|- | |||
!colspan=4 style="background:white" width=324px height=244px|[[File:Wizpig Strikes Back.png]] | |||
|- | |||
|rowspan=2 style="background:#BE9966" width=84px height=84px|[[File:DKR Map Wizpig Strikes Back.png]] | |||
|width=80px|[[File:Car DKR art.png|76x38px|Car|link=Car]] | |||
|width=80px|[[File:DKR Hovercraft.png|76x38px|Hovercraft|link=Hovercraft]] | |||
|width=80px|[[File:DKR Plane.png|76x38px|Plane|link=Plane]] | |||
|- | |||
|[[File:X mark.svg|x27px|No]] | |[[File:X mark.svg|x27px|No]] | ||
|[[File:X mark.svg|x27px|No]] | |[[File:X mark.svg|x27px|No]] | ||
|[[File:DKR D.png|Default]] | |[[File:DKR D.png|Default]] | ||
|- | |- | ||
|style="background: | !colspan=4 style="color:white"|Unlock requirements: | ||
|style="background: | |- | ||
|style=" | |colspan=4 height=70px|All four Silver Coin Challenges complete | ||
|colspan=3 style=" | |- | ||
|style=" | !colspan=4 style="color:white"|Rewards: | ||
|- | |||
|colspan=4 height=36px|Ending 2 | |||
|} | |||
|style="display:inline-block; background:peru; max-width:332px" width=100%| | |||
{|class="wikitable dk" border=0 cellspacing=0 cellpadding=4 margin=0 padding=0 style="border:1px solid black; border-collapse:collapse; padding:0px; margin:0px; height:100%" width=100% | |||
!colspan=3 style="color:white"|<big>'''Trophy Race'''</big> | |||
|- | |||
!colspan=3 style="background:white" width=324px height=244px|[[File:DKR TrophyRaceTrophy.png]] | |||
|- | |||
|rowspan=2 style="background:#BE9966" width=56px height=84px|[[File:WizpigGoldStatue.png|80x80px]] | |||
|width=144px|1:Spacedust Alley | |||
|width=144px|2:Darkmoon Caverns | |||
|- | |||
|3:Star City | |||
|4:Spaceport Alpha | |||
|- | |||
!colspan=3 style="color:white"|Unlock requirements: | |||
|- | |||
|colspan=3 height=70px|Second Wizpig race complete | |||
|- | |||
!colspan=3 style="color:white"|Rewards: | |||
|- | |||
|colspan=3 height=36px|Trophy | |||
|} | |||
|} | |||
===Staff ghosts=== | |||
{|class="wikitable dk" style="text-align:center" | |||
|- | |||
!colspan=3 style="background:saddlebrown; color:white"|[[File:TT-CSS-DKR.png]]<br>{{color-link|white|T.T.}}'s ghosts | |||
|- | |||
!Course | |||
!Unlock time | |||
!Ghost time | |||
|- | |||
|[[Ancient Lake]] | |||
|1:07.00 | |||
|1:01.28 | |||
|- | |||
|[[Fossil Canyon]] | |||
|1:37.00 | |||
|1:30.16 | |||
|- | |||
|[[Jungle Falls (Diddy Kong Racing)|Jungle Falls]] | |||
|1:08.00 | |||
|1:02.50 | |||
|- | |||
|[[Hot Top Volcano]] | |||
|1:35.00 | |||
|1:30.71 | |||
|- | |||
|[[Everfrost Peak]] | |||
|1:53.00 | |||
|1:48.00 | |||
|- | |||
|[[Walrus Cove]] | |||
|2:10.00 | |||
|2:06.28 | |||
|- | |||
|[[Snowball Valley]] | |||
|1:13.00 | |||
|1:06.41 | |||
|- | |||
|[[Frosty Village]] | |||
|1:44.00 | |||
|1:39.40 | |||
|- | |||
|[[Whale Bay]] | |||
|1:19.00 | |||
|1:13.11 | |||
|- | |||
|[[Pirate Lagoon]] | |||
|1:34.00 | |||
|1:28.56 | |||
|- | |||
|[[Crescent Island]] | |||
|1:39.00 | |||
|1:33.16 | |||
|- | |||
|[[Treasure Caves]] | |||
|1:10.00 | |||
|1:05.63 | |||
|- | |||
|[[Boulder Canyon]] | |||
|2:11.00 | |||
|2:02.35 | |||
|- | |||
|[[Greenwood Village]] | |||
|1.46:00 | |||
|1:40.61 | |||
|- | |||
|[[Windmill Plains]] | |||
|2:22.00 | |||
|2:13.13 | |||
|- | |||
|[[Haunted Woods]] | |||
|1:22.00 | |||
|1:09.51 | |||
|- | |||
|[[Spacedust Alley]] | |||
|2:12.00 | |||
|2:06.16 | |||
|- | |||
|[[Darkmoon Caverns]] | |||
|2:20.00 | |||
|2:12.05 | |||
|- | |||
|[[Star City]] | |||
|2:07.00 | |||
|2:01.45 | |||
|- | |||
|[[Spaceport Alpha]] | |||
|2:16.00 | |||
|2:09.03 | |||
|} | |} | ||
==Items and objects== | ==Items and objects== | ||
{|class=" | {|class="wikitable dk"style="vertical-align:center;width:85%;margin:auto" | ||
!width=20%|Item/object | !width=20%|Item/object | ||
!Description | !Description | ||
| Line 803: | Line 1,628: | ||
|- | |- | ||
|align=center|[[File:DKR Flag.png]]<br>Flag | |align=center|[[File:DKR Flag.png]]<br>Flag | ||
|Flags mark the path around [[Timber's Island]] during [[ | |Flags mark the path around [[Timber's Island]] during [[Taj]]'s races. | ||
|- | |- | ||
|align=center|[[File:Golden Balloon DKR64.png]]<br>[[Golden Balloon]] | |align=center|[[File:Golden Balloon DKR64.png]] [[File:DKR Golden Balloon small.png]] [[File:Silver Balloon DKR64.png]] [[File: DKR Silver Balloon small.png]]<br>[[Golden Balloon|Golden Balloon / Silver Balloon]] | ||
|Golden Balloons are the key items in the game. The player must collect a specified amount access each course and world. After the player's character wins at a race, [[Taj]] gives them a Golden Balloon. A total of 47 Golden Balloons appear in the game. | |Golden Balloons are the key items in the game. The player must collect a specified amount access each course and world. After the player's character wins at a race, [[Taj]] gives them a Golden Balloon. A total of 47 Golden Balloons appear in the game. In Adventure Two, they are replaced by Silver Balloons, which function identically in this Adventure, differing only in physical appearance. | ||
|- | |- | ||
|align=center|[[File:DKR Wish Key model.png|40px]]<br>[[Wish Key|Key]] | |align=center|[[File:DKR Wish Key model.png|40px]]<br>[[Wish Key|Key]] | ||
|The game features four keys. One is hidden in a race course of each world. Their purpose is to unlock the door to the Challenge | |The game features four keys. One is hidden in a race course of each world. Their purpose is to unlock the door to the Challenge level in the corresponding world's hub, where the racer can compete against CPUs or other players. A key appears in [[Ancient Lake]] of [[Dino Domain]], [[Snowball Valley]] of [[Snowflake Mountain]], [[Crescent Island]] of [[Sherbet Island]], and lastly, [[Boulder Canyon]] of [[Dragon Forest]]. | ||
|- | |- | ||
|align=center|[[File:DKR Silver Coin.png]]<br>[[Silver Coin]] | |align=center|[[File:DKR Silver Coin.png]]<br>[[Silver Coin]] | ||
|Eight Silver Coins appear in each standard race | |Eight Silver Coins appear in each standard race course for their Coin Challenges. | ||
|- | |- | ||
|align=center|[[File:Zipper Ground DKRDS.png|75px]] [[File:DKR Zipper hovercraft model.png|75px]] [[File:DKR Zipper plane model.png|75px]]<br>[[Dash Panel|Zipper]] | |align=center|[[File:Zipper Ground DKRDS.png|75px]] [[File:DKR Zipper hovercraft model.png|75px]] [[File:DKR Zipper plane model.png|75px]]<br>[[Dash Panel|Zipper]] | ||
| Line 820: | Line 1,645: | ||
During the challenges on the different race tracks throughout the game the player can find these [[Weapon Balloon]]s on the track. Similar to the [[Item Box]]es of the [[Mario Kart (series)|''Mario Kart'' series]], these objects will give the player an Item when they break them. There are five different types of Weapon Balloons, each with a unique color and a specific type of Item. A special feature of the Weapon Balloons is their ability to power up, meaning that the player will receive stronger items if they collect more balloons of one color. An item can be upgraded two times, making a total of three items obtainable from one type of balloon. | During the challenges on the different race tracks throughout the game the player can find these [[Weapon Balloon]]s on the track. Similar to the [[Item Box]]es of the [[Mario Kart (series)|''Mario Kart'' series]], these objects will give the player an Item when they break them. There are five different types of Weapon Balloons, each with a unique color and a specific type of Item. A special feature of the Weapon Balloons is their ability to power up, meaning that the player will receive stronger items if they collect more balloons of one color. An item can be upgraded two times, making a total of three items obtainable from one type of balloon. | ||
{{br}} | {{br}} | ||
{|class=" | {|class="wikitable dk"style="vertical-align:center;width:85%;margin:auto" | ||
|- | |- | ||
!rowspan="2" style="width:19%"|Type of Balloon | !rowspan="2" style="width:19%"|Type of Balloon | ||
| Line 856: | Line 1,681: | ||
===Special rewards=== | ===Special rewards=== | ||
{|class=" | {|class="wikitable dk"style="vertical-align:center;width:85%;margin:auto" | ||
!width=15%|Reward | !width=15%|Reward | ||
!Description | !Description | ||
|- | |- | ||
|align=center|[[File:DKR TrophyRaceTrophy.png|160px]]<br>[[Trophy Race#Trophies|Trophy]] | |align=center|[[File:DKR TrophyRaceTrophy.png|160px]]<br>[[Trophy Race#Trophies|Trophy]] | ||
|Trophies can be gained by placing high enough in a world's [[Trophy Race]], racing through the world's four tracks back-to-back to accumulate the most points. First place earns a golden [[Wizpig]] trophy, second place earns a silver [[Taj | |Trophies can be gained by placing high enough in a world's [[Trophy Race]], racing through the world's four tracks back-to-back to accumulate the most points. First place earns a golden [[Wizpig]] trophy, second place earns a silver [[Taj]] trophy, and third place earns a bronze [[T.T.]] trophy. Four trophies are needed to access [[Future Fun Land]]. | ||
|- | |- | ||
|align=center|[[File:Wizpig Amulet.png|160px]]<br>[[Wizpig amulet]] | |align=center|[[File:Wizpig Amulet.png|160px]]<br>[[Wizpig amulet]] | ||
| Line 867: | Line 1,692: | ||
|- | |- | ||
|align=center|[[File:TT Amulet.png|160px]]<br>[[T.T. amulet]] | |align=center|[[File:TT Amulet.png|160px]]<br>[[T.T. amulet]] | ||
|One fourth of the T.T. amulet can be found by beating each of the four Challenge | |One fourth of the T.T. amulet can be found by beating each of the four Challenge levels around the island. Collecting them all is needed to open [[Wizpig Strikes Back]]. | ||
|} | |} | ||
==Magic Codes== | ==Magic Codes== | ||
[[File:Magic Codes Menu DKR.png|thumb|200px|The Magic Codes menu.]] | [[File:Magic Codes Menu DKR.png|thumb|200px|The Magic Codes menu.]] | ||
[[Cheat code#Diddy Kong Racing|Magic Code]]s are game cheats, always accessible in the options menu. These cheats mostly alter only the tracks mode rather than the Adventure mode, while some others do miscellaneous tasks such as allowing players to listen to music in the game. At the end of the game credits, a random magic code is given to players. | [[Cheat code#Diddy Kong Racing|Magic Code]]s are game cheats, always accessible in the options menu. These cheats mostly alter only the tracks mode rather than the Adventure mode, while some others do miscellaneous tasks such as allowing players to listen to music in the game. At the end of the game credits, a random magic code is given to players. The "Clear All Codes" option only deletes the codes from the Code List that the player has entered; the ones that are earned from progression, such as "Control Drumstick," do not get deleted. | ||
{|class=" | |||
{|class="wikitable dk"width=40% | |||
|- | |- | ||
!Code | !Code | ||
| Line 879: | Line 1,705: | ||
|- | |- | ||
|ARNOLD | |ARNOLD | ||
|Large players | |Large players (code is named after {{wp|Arnold Schwarzenegger}}) | ||
|- | |- | ||
|BLABBERMOUTH | |BLABBERMOUTH | ||
| Line 903: | Line 1,729: | ||
|- | |- | ||
|EOLAOBFENRLONE | |EOLAOBFENRLONE | ||
|Free balloon | |Free balloon (code is an anagram of "one free balloon") | ||
|- | |- | ||
|EPC | |EPC | ||
| Line 939: | Line 1,765: | ||
|- | |- | ||
|TOXICOFFENDER | |TOXICOFFENDER | ||
|All balloons are green | |All balloons are green (code is named after ''{{wp|The Toxic Avenger (1984 film)|The Toxic Avenger}}'') | ||
|- | |- | ||
|VITAMINB | |VITAMINB | ||
| Line 963: | Line 1,789: | ||
|caption2=Japan | |caption2=Japan | ||
}} | }} | ||
The Japanese version of ''Diddy Kong Racing'' redesigned the font for the English text. One example is the start-up screen for the Rareware logo, which uses a different and larger font for the copyright information. | The Japanese version of ''Diddy Kong Racing'' redesigned the [[font]] for the English text. One example is the start-up screen for the Rareware logo, which uses a different and larger font for the copyright information. | ||
{{multiple image | {{multiple image | ||
|align=center | |align=center | ||
| Line 978: | Line 1,804: | ||
==Development== | ==Development== | ||
[[File:Diddy-kong-racing-beta-01.jpg|thumb|100px|A mammoth character repurposed from the RTS build.]] | [[File:Diddy-kong-racing-beta-01.jpg|thumb|100px|A mammoth character repurposed from the RTS build.]] | ||
''Diddy Kong Racing'' found its root in a short-lived prototype. According to Lead Designer Lee Schuneman, a team of four at [[Rareware]] was developing a caveman/time travel-themed real time strategy game for the [[Nintendo 64]]<ref name= | ''Diddy Kong Racing'' found its root in a short-lived prototype. According to Lead Designer Lee Schuneman, a team of four at [[Rareware]] was developing a caveman/time travel-themed real time strategy game for the [[Nintendo 64]]<ref name=GamesTM>{{cite|title=''GamesTM'', Issue 79 - "Behind the Scenes of Diddy Kong Racing"|publisher=GamesTM|date=January 2009}}</ref>; however, the idea was quickly abandoned and the developers decided to create a "fun" racing game named ''Wild Cartoon Kingdom'' using assets from the canceled RTS (3D artist Lee Musgrave denies, however, that the two projects were ever related).<ref name="makingof"/> | ||
The | The racing aspect was heavily inspired by ''[[Super Mario Kart]]'' while the concept of an "adventure" mode was inspired by {{wp|Disney World}} according to Schumenam.<ref name=GamesTM/> The initial concept featured a hub world based on theme parks. Development was initially slow until a larger team was brought in to help accelerate the project, and the game was renamed to ''Adventure Racers''. | ||
The project was renamed ''Pro Am 64'' (in reference to Rare's [[Nintendo Entertainment System|NES]] hit ''{{wp|R.C. Pro-Am|R.C. Pro-AM}}'') later in development and briefly featured the characters using three-wheeled {{wp|trike}}-like vehicles.<ref name=GamesTM/> The game was demoed to [[Shigeru Miyamoto]] in June 1997, who approved of it and suggested that it should feature [[Diddy Kong]].<ref name=GamesTM/> The development team initially hated the idea,<ref name=GamesTM/> but eventually agreed with Miyamoto's suggestion as featuring Diddy Kong brought stronger marketing from [[Nintendo]] and greater visibility to the game due to the popularity of the ''Donkey Kong'' brand. | |||
===Pre-release and unused content=== | ===Pre-release and unused content=== | ||
{{main|List of Diddy Kong Racing pre-release and unused content}} | {{main|List of Diddy Kong Racing pre-release and unused content}} | ||
| Line 997: | Line 1,822: | ||
==Reception== | ==Reception== | ||
{|class="wikitable | {| class="wikitable reviews" | ||
!colspan="4"style="font-size:120%; text-align:center; background-color:silver;"|Reviews | !colspan="4"style="font-size:120%; text-align:center; background-color:silver;"|Reviews | ||
|-style="background-color:#E6E6E6" | |-style="background-color:#E6E6E6" | ||
| Line 1,029: | Line 1,854: | ||
==Canceled sequels== | ==Canceled sequels== | ||
Owing to the game's success, numerous attempts at sequels were made. However, each ended up canceled due to [[Rare Ltd.|Rare]]'s sale to {{wp|Microsoft}} in 2002, among other reasons. | Owing to the game's success, numerous attempts at sequels were made. However, each ended up canceled due to [[Rare Ltd.|Rare]]'s sale to {{wp|Microsoft}} in 2002, among other reasons. | ||
{|class=" | {|class="wikitable dk"style="vertical-align:center;width:100%;margin:auto" | ||
!Game | !Game | ||
!Description | !Description | ||
| Line 1,048: | Line 1,873: | ||
<gallery> | <gallery> | ||
Diddy car.jpg|[[Diddy Kong]] | Diddy car.jpg|[[Diddy Kong]] | ||
Banjo DKR art.jpg|[[Banjo]] | |||
Conker | DKR Conker artwork.png|[[Conker]] | ||
Timber | Timber Hovercraft DKR.png|[[Timber]] | ||
CarTiptup.jpg|[[Tiptup|TipTup]] | |||
Taj | Taj the Genie.png|[[Taj]] | ||
</gallery> | </gallery> | ||
==Quotes== | ==Quotes== | ||
{{main|List of Diddy Kong Racing quotes}} | {{main|List of Diddy Kong Racing quotes}} | ||
==Glitches== | |||
{{main|List of Diddy Kong Racing glitches}} | |||
==Media== | ==Media== | ||
{{more | {{media missing|more=yes|section=yes|More music samples}} | ||
{{main-media|List of Diddy Kong Racing media}} | |||
{{media table | {{media table | ||
|file1=DK (Diddy Kong Racing).oga | |file1=DK (Diddy Kong Racing).oga | ||
| Line 1,071: | Line 1,900: | ||
*''[[Donkey Kong 64]]'': The [[Kritter]]s in this game are physically similar to [[Krunch]]. | *''[[Donkey Kong 64]]'': The [[Kritter]]s in this game are physically similar to [[Krunch]]. | ||
*''[[Diddy Kong Pilot (2001)|Diddy Kong Pilot]]'': Krunch's sound effects were reused, as was Diddy's. T.T.'s voice is also used. | *''[[Diddy Kong Pilot (2001)|Diddy Kong Pilot]]'': Krunch's sound effects were reused, as was Diddy's. T.T.'s voice is also used. | ||
*''[[ | * ''[[Donkey Kong Country (Game Boy Advance)]]'': Krunch's sound effects were reused at a different pitch for [[Kritter]], as was Diddy's. | ||
*''[[Donkey Kong Country 2 (Game Boy Advance)]]'': Krunch's sound effects were reused for [[Kannon]], as was Diddy's. | |||
*''[[Donkey Kong Country 3 (Game Boy Advance)]]'': Krunch's sound effects were reused for [[Rekoil]], as was Diddy's. | |||
*''[[DK: King of Swing]]'': Diddy's sound effects were reused. | |||
==Staff== | ==Staff== | ||
| Line 1,096: | Line 1,928: | ||
|JapR=Didī Kongu Rēshingu | |JapR=Didī Kongu Rēshingu | ||
|JapM=Diddy Kong Racing | |JapM=Diddy Kong Racing | ||
}} | }} | ||
| Line 1,110: | Line 1,935: | ||
==External links== | ==External links== | ||
{{NIWA|StrategyWiki=1}} | {{NIWA|StrategyWiki=1}} | ||
{{TCRF}} | |||
*[https://www.nintendo.co.jp/n01/n64/software/nus_p_ndyj/index.html Japanese site] | *[https://www.nintendo.co.jp/n01/n64/software/nus_p_ndyj/index.html Japanese site] | ||
*[https://www.nintendo.co.uk/Games/Nintendo-64/Diddy-Kong-Racing-269448.html Nintendo UK site] | *[https://www.nintendo.co.uk/Games/Nintendo-64/Diddy-Kong-Racing-269448.html Nintendo UK site] | ||
*[https://web.archive.org/web/19981203020725/http://www.dkr.com/ North American site (Archived)] | *[https://web.archive.org/web/19981203020725/http://www.dkr.com/ North American site (Archived)] | ||
{{DKR}} | {{DKR}} | ||
{{Donkey Kong games}} | {{Donkey Kong games}} | ||
Latest revision as of 09:57, September 3, 2024
- "DKR" redirects here. For the canceled Nintendo GameCube follow-up starring Donkey Kong, see Donkey Kong Racing. For the Wii game referred to as "Donkey Kong Returns" in Japan, see Donkey Kong Country Returns.
| Diddy Kong Racing | |||||
|---|---|---|---|---|---|
 For alternate box art, see the game's gallery. | |||||
| Developer | Rareware | ||||
| Publisher | Rareware (publication) Nintendo (distribution) | ||||
| Platform(s) | Nintendo 64 | ||||
| Release date | |||||
| Language(s) | English (United States) French (France) German Japanese | ||||
| Genre | Racing, adventure | ||||
| Rating(s) |
| ||||
| Mode(s) | Single-player, multiplayer | ||||
| Format | Nintendo 64:
| ||||
| Input | Nintendo 64:
| ||||
| Serial code(s) | NUS-NDYJ-JPN (Japan) | ||||
- “A Wild Racing Adventure”
- —Slogan
Diddy Kong Racing is a racing/adventure game developed and published by Rareware for the Nintendo 64. Featuring gameplay elements similar to the Mario Kart series, the game includes the use of airplanes, hovercrafts, and cars. The game features a story mode and a multiplayer mode. Most of the game's playable characters besides the titular Diddy Kong are original characters, though two characters who would go on to be the main characters of their own franchises, Banjo and Conker, first appeared in Diddy Kong Racing while their own games were still in development.
Diddy Kong Racing sold 4.5 million copies upon release[1] and was recognized by Guinness World Records as the fastest-selling game of the time, with 800,000 copies sold before Christmas 1997. The game was even successful enough to become a Player's Choice title.
Two sequels were planned, but both were subsequently canceled in the aftermath of Microsoft's acquisition of Rare in 2002. These included Donkey Kong Racing for the Nintendo GameCube and Diddy Kong Pilot for the Game Boy Advance, the latter of which was eventually reworked into the Banjo-Kazooie game Banjo-Pilot. Around 2004, Climax pitched their own sequel idea to Nintendo, Diddy Kong Racing Adventure, but it was ultimately rejected. A remake of the game was released for the Nintendo DS in 2007, titled Diddy Kong Racing DS.
Story[edit]

According to the instruction manual, the story begins with Diddy Kong sitting on the porch of his tree house opening a letter delivered by a carrier pigeon. The note reads, "Dear Diddy, Help!!!" The message is from his old friend, Timber, the son of the Kongs' guests, the Tigers. Diddy reads the note and invites his friends, Banjo and Conker to join him in the fight against Wizpig. Diddy calls Squawks to deliver the message to his friends. While Diddy is in the jungle, two Kremlings watch him from behind a boulder. One Kremling, Krunch, suggests they follow Diddy, but the other Kremling ignores him; Krunch eventually follows Diddy Kong.
Meanwhile, Timber is trying to calm Pipsy, where she exclaims that she had just seen Taj, who said he would help. TipTup, confused, protests that Taj has been missing for 50 years. Afterwards, the group thinks about the Wizpig face that was carved onto the mountainside overnight and the race courses that were magically sealed. The group knows they need to solve the problem before Timber's parents return. Bumper then concludes the conversation by telling his friend that everybody needs to start practicing. Agreeing with Bumper, Timber and his friends leave, hoping that Diddy Kong does not mention this to Timber's parents; this is where the story leads into the game's own opening, where Taj introduces himself to the player character and explains what they need to do to progress.
When the first four worlds are completed, the carving of Wizpig's head on the mountainside opens and allows one of the characters to race Wizpig. After beating him, the group has a party along the beach. However, Wizpig interferes in the party before a spaceship arrives and takes him into space. The lighthouse on the beach transforms into a rocket ship that takes them to Future Fun Land.
After the character completes all the tasks in that world and gets the whole T.T. amulet, Wizpig can be faced again, racing against him in their plane, while he rides a rocket. After winning, Wizpig's rocket short circuits and blasts him into an unknown planet. Once again, the characters celebrate their victory without Wizpig interfering and with the carving of Wizpig's head on the mountainside turned into a golden carving of Taj's head.
Right before the credits roll, one of Wizpig's spaceships appears, and Wizpig's laughter is heard, leaving the game on a cliffhanger.
Gameplay[edit]

Diddy Kong Racing features ten playable characters—eight of which are available by default, and two unlockable—and three different types of vehicles for different terrain: cars for land, hovercrafts for water or land, and planes for air. Each character and vehicle has different strengths and weaknesses, sometimes in combination. For example, Krunch normally has low steering, but his steering is higher in a hovercraft due to that vehicle's emphasis on weight.
In the Adventure mode, the player is placed on Timber's Island and tasked with collecting Golden Balloons to access various challenges. There is a total of five worlds that can be accessed from the main Timber's Island hub, and each has four main racetracks, a trophy championship, a boss track, and—aside from the last one—a special battle minigame. Different vehicles are sometimes required for different tracks, and the player can change them at any time by speaking with Taj, located in the center of the Timber's Island map. Each of the smaller worlds, meanwhile, instead has T.T. walking around the hub, and he tells the player's progress when approached.
In races, bananas can be picked up to increase speed, while Weapon Balloons provide items to use in the race. The color of the Weapon Balloon determines what item it will be, and collecting multiple of the same color in sequence improves the item's effects by up to a total of three levels. Collecting a balloon of another color cancels it out and replaces it with the new item.
Golden Balloons can be found scattered on Timber's Island or won from races, either from tracks or from Taj on the island. All of the standard tracks have two Golden Balloons available: one from a standard race, and one from completing a Silver Coin collection challenge. The standard races must be completed first to race the world's boss, who then challenges the player to complete the Silver Coin races; after they are completed as well, the player can rematch the boss for a piece of the Wizpig amulet. The boss then challenges the player to complete the Trophy Race championship. Each of the first four worlds has a key hidden in one track that opens a gate to the respective world's battle minigame, which awards a piece of the T.T. amulet.
When all four pieces of the Wizpig amulet are gathered, the player is able to race Wizpig himself to banish him from the island. Upon losing, he throws a tantrum and retreats to his own planet (the final world), and the player must have all four trophies to reach it. To race him again, the player must complete all races and Silver Coin challenges in this last world (itself requiring every Golden Balloon in the game) and collect all four pieces of the T.T. amulet from the Challenge levels. The adventure is complete once Wizpig is defeated here.
The game also has a time trial mode, where the player needs to race to beat T.T.'s best times. This is optional in the main game, but it is required to unlock T.T. himself. Additionally, "magic codes" can be used to affect the game in various ways, with one being told to the player after they complete the adventure.
Characters[edit]
Playable characters[edit]

There are 10 playable characters in Diddy Kong Racing, with eight available from the start and two being unlockable. All of these characters except Diddy Kong debut in this game. Some characters have discrepancies depending on the vehicle they use; TipTup and Pipsy have the same speed as Diddy on a car when they have 4 to 10 bananas and have the same speed as Diddy on a hovercraft and a plane, while T.T. has the same speed and acceleration as Krunch on a plane.[2] This is the first game to introduce Banjo, TipTup (later renamed Tiptup), and Conker, three characters who appear in other Rare games with Banjo being one of the main characters in Banjo-Kazooie and Tiptup appearing as a minor character, returning in the sequel Banjo-Tooie. Conker would appear in Conker's Pocket Tales and would've appeared in Twelve Tales: Conker 64 until it was reworked into the adult-oriented title, Conker's Bad Fur Day. Banjo and Conker would be removed in Diddy Kong Racing DS, replaced by Tiny Kong and Dixie Kong respectively. However, Tiptup still appears in both versions.
| Default characters | |||||||||||||||||||||||||||||||||||||||||||||||||||||||||||||||||||||||||||||||||||||||||||||||||||||||||||||||||||||||||||||||||||||||||||||||||||||||
|---|---|---|---|---|---|---|---|---|---|---|---|---|---|---|---|---|---|---|---|---|---|---|---|---|---|---|---|---|---|---|---|---|---|---|---|---|---|---|---|---|---|---|---|---|---|---|---|---|---|---|---|---|---|---|---|---|---|---|---|---|---|---|---|---|---|---|---|---|---|---|---|---|---|---|---|---|---|---|---|---|---|---|---|---|---|---|---|---|---|---|---|---|---|---|---|---|---|---|---|---|---|---|---|---|---|---|---|---|---|---|---|---|---|---|---|---|---|---|---|---|---|---|---|---|---|---|---|---|---|---|---|---|---|---|---|---|---|---|---|---|---|---|---|---|---|---|---|---|---|---|---|
|
|
|
|
|
|
|
| ||||||||||||||||||||||||||||||||||||||||||||||||||||||||||||||||||||||||||||||||||||||||||||||||||||||||||||||||||||||||||||||||||||||||||||||||
| Unlockable characters | |||||||||||||||||||||||||||||||||||||||||||||||||||||||||||||||||||||||||||||||||||||||||||||||||||||||||||||||||||||||||||||||||||||||||||||||||||||||
|
| ||||||||||||||||||||||||||||||||||||||||||||||||||||||||||||||||||||||||||||||||||||||||||||||||||||||||||||||||||||||||||||||||||||||||||||||||||||||


Other important characters[edit]
|
|


Bosses[edit]
Diddy Kong Racing has five bosses, all of which are raced twice. The first four, the Island Guardians, have been enchanted by the final boss, Wizpig, into racing on his behalf. For the Island Guardians, the only difference between the first and second race is a slight increase in difficulty, though Wizpig's races are completely different from each other. Each boss cheats by beginning before the starting countdown ends, with this becoming more and more obvious the further into the game it happens.
| Island Guardians | |||||||||||||||||||
|---|---|---|---|---|---|---|---|---|---|---|---|---|---|---|---|---|---|---|---|
|
|
|
| ||||||||||||||||
| Wizpig | |||||||||||||||||||
|
|


Vehicles[edit]
There are three different vehicles:
| Vehicle | Description |
|---|---|
 Car |
The car is a simple-to-control vehicle, and it can drift. It is affected by off-road, however, and water slows it to a crawl. |
 Hovercraft |
The hovercraft has slippery controls, requiring players to hop to turn. The hovercraft, however, is not affected by off-road, and it can ride on water and lava without losing speed. |
 Plane |
Planes can fly over any terrain. They can turn the most sharply and players can perform stunts with them. If players are hit by items or bump into obstacles, however, the plane crashes into the ground, losing speed and altitude, making them more costly than hits on a car or hovercraft. |
Modes[edit]
Adventure Mode[edit]

Adventure mode is the main mode of the game. While exploring Timber's Island, the players must find a number of golden balloons to defeat Wizpig. In order to find them, they must win races. After the players win all the races in one of the five worlds, they will race a boss. If the players beats the boss they will be given the challenge of collecting eight silver coins in each course of that world and then win simultaneously. When the challenge is complete, the player will face the boss again. After beating the boss again, the racer receives a piece of Wizpig amulet, and the player can participate in a world's Grand Prix mode, the Trophy Race, which the boss even suggests. The player obtains a gold trophy if they win first place, a silver one for second place, and a bronze one for third place.
Adventure Two Mode[edit]
Adventure Two is played the same as the standard Adventure Mode, but harder. The balloons are silver, the tracks are flipped (very similar to Mirror Mode in the Mario Kart series), and the locations of the silver coins are different, often in hard to reach places. It is unlocked by defeating Wizpig at Future Fun Land in Adventure Mode.
Tracks Mode[edit]
Players can freely play all the race tracks unlocked. Tracks with a Taj symbol are completed tracks, and players can choose any vehicle that is compatible with the track. Tracks with a Wizpig symbol have not been cleared, and players will be unable to play that track at all. The tracks are listed in the order they appear in Trophy Races, not in the order they are unlocked in Adventure Mode. At the start of the game, only the first of the tracks (as ordered by the Trophy Race) can be played from each of the main four worlds.
Trophy Races and Challenge levels are also accessible through Tracks mode, however players will always use each track's default vehicle, regardless if a Taj symbol is present.
If Adventure Mode progress is deleted via the Save Options menu, the Tracks Mode will also reset its status.
Types of races and other challenges[edit]
Normal races[edit]
During standard races, eight characters travel three laps around the track in the same type of vehicle as each other. Each world has four standard race tracks, and a Golden Balloon is the prize for winning.
Boss races[edit]
Races against bosses are always one-on-one, and depending on the track layout may be three laps or a single end-to-end run. The four Island Guardians must be raced twice, once after each normal race and once after each Silver Coin challenge in their world is completed; winning the second race earns a piece of the amulet needed to reach the first Wizpig race. Both Wizpig races lead to endings when completed.
Silver Coin challenges[edit]
Silver Coin challenges are much like normal races, except that the eight Silver Coins scattered across the track must be collected before winning. For the first four worlds, they are recommended after the boss is defeated the first time and are necessary to rematch them. In Future Fun Land, they are simply done after all the normal races with no boss race in between. As with normal races, a Golden Balloon is earned by beating them.
Trophy races[edit]
Trophy Races are a grand prix-style challenge where the player goes through all four of a world's normal tracks back-to-back (sometimes in an order different from unlocking), trying to get a higher ranking than the opponents. Winning within the top three earns a different trophy for each placement. Collecting a trophy in each of the first four worlds is necessary to reach the final world.
Challenge levels[edit]

Challenge levels are challenges that appear in each of the four main worlds. Each world has a single Challenge level that matches the world's theme, and has a unique objective and layout. Each Challenge level's door can be unlocked by a key located a specific course of that world. The player obtains a part of the T.T. amulet when they win at a challenge.
Fire Mountain[edit]
In Fire Mountain, the players, using planes, complete to be the first to gather three dinosaur eggs from the center of the arena into their respective nest.
Icicle Pyramid[edit]
In Icicle Pyramid, players, using cars, battle each other directly using items, with each player getting four hit points (represented by a total of eight bananas). It is functionally equivalent to the Balloon Battle from the Mario Kart games.
Darkwater Beach[edit]
The gameplay in Darkwater Beach is identical to Icicle Pyramid, but uses hovercrafts instead of cars.
Smokey Castle[edit]
In Smokey Castle, players, using cars, complete to gather ten bananas into their respective treasure chest, with only two at a time being able to be carried.
Taj's challenges[edit]

After the player collects enough Golden Balloons in Adventure Mode, Taj will appear and challenge the player to a race in a specific vehicle. The player has to race Taj, who rides a flying carpet. The racetrack is marked with red flags showing the Nintendo 64 logo and the player has to follow them. If they leave the set track by too far a margin, they will be disqualified. After Taj is beaten, he will reward the player with another Golden Balloon. There are three different challenges and each of them can be repeated at any time after they have been unlocked (the player will only obtain one Golden Balloon per challenge however).
Car Challenge is a relatively easy race done in a car. This race goes around a dirt road right in front of Dino Domain and reaches into a tunnel. This should be very easy for the player because of Taj's slow movement.
Hovercraft Challenge is the second of Taj's races and is somewhat more difficult than the Car Challenge. The track is mostly in water and begins next to the bridge which leads to Dino Domain. In the race the player will hover into a waterfall that is on the far east of the river. Here, they will be in a cave leading to Snowflake Mountain and eventually fall down two small waterfalls taking them to the ocean. Going east will take the player back on shore where they need to go through a small tunnel leading to the finish line.
Plane Challenge is considered to be the hardest of Taj's three races and a plane is used in it. This race begins at the same place where the Car Challenge begins. From the start the player must fly up to the tunnel leading to Snowflake Mountain and then move east, going over a long river. From there, the player must glide to the beach and go east again. After going through a small tunnel, the player should end up at the finish line.
Tracks and progression[edit]
Diddy Kong Racing contains twenty race tracks split between five worlds. In most races (marked with a check mark), racers are able to choose what type of vehicle to bring into the race, which can affect the paths in the course they are able to take. For some races, there are vehicles that are not able to be taken into it (marked with a red X). Every race also has a default vehicle type to use (marked with a D), which is usually the best type of vehicle to use for the race.
| Timber's Island Areas | |||||||||||||||||||||||||||||||||||||||||||||||||||||||||||||||||||||||||||||||||||||||||||||||||||||||||||||||||||||||||||||||||||||||||||||||||||||||||||||||||||||||||||||||||||||||||||||||||||||||||||||||||||||||
|---|---|---|---|---|---|---|---|---|---|---|---|---|---|---|---|---|---|---|---|---|---|---|---|---|---|---|---|---|---|---|---|---|---|---|---|---|---|---|---|---|---|---|---|---|---|---|---|---|---|---|---|---|---|---|---|---|---|---|---|---|---|---|---|---|---|---|---|---|---|---|---|---|---|---|---|---|---|---|---|---|---|---|---|---|---|---|---|---|---|---|---|---|---|---|---|---|---|---|---|---|---|---|---|---|---|---|---|---|---|---|---|---|---|---|---|---|---|---|---|---|---|---|---|---|---|---|---|---|---|---|---|---|---|---|---|---|---|---|---|---|---|---|---|---|---|---|---|---|---|---|---|---|---|---|---|---|---|---|---|---|---|---|---|---|---|---|---|---|---|---|---|---|---|---|---|---|---|---|---|---|---|---|---|---|---|---|---|---|---|---|---|---|---|---|---|---|---|---|---|---|---|---|---|---|---|---|---|---|---|---|---|---|---|---|---|
| |||||||||||||||||||||||||||||||||||||||||||||||||||||||||||||||||||||||||||||||||||||||||||||||||||||||||||||||||||||||||||||||||||||||||||||||||||||||||||||||||||||||||||||||||||||||||||||||||||||||||||||||||||||||
| The main hub of the game, Timber's Island is a large area between the other worlds with a few scattered objectives in it that can be completed at different parts of the game. Once the player has obtained the full Wizpig amulet by beating all four Island Guardians twice, the giant Wizpig carving in the central part of Timber's Island opens, leading to the race against Wizpig himself. | |||||||||||||||||||||||||||||||||||||||||||||||||||||||||||||||||||||||||||||||||||||||||||||||||||||||||||||||||||||||||||||||||||||||||||||||||||||||||||||||||||||||||||||||||||||||||||||||||||||||||||||||||||||||
|
|
| |||||||||||||||||||||||||||||||||||||||||||||||||||||||||||||||||||||||||||||||||||||||||||||||||||||||||||||||||||||||||||||||||||||||||||||||||||||||||||||||||||||||||||||||||||||||||||||||||||||||||||||||||||||
| |||||||||||||||||||||||||||||||||||||||||||||||||||||||||||||||||||||||||||||||||||||||||||||||||||||||||||||||||||||||||||||||||||||||||||||||||||||||||||||||||||||||||||||||||||||||||||||||||||||||||||||||||||||||
| A prehistoric area full of dinosaurs and pterodactyls. It is accessed across the bridge in the central part of Timber's Island and requires one balloon to enter. | |||||||||||||||||||||||||||||||||||||||||||||||||||||||||||||||||||||||||||||||||||||||||||||||||||||||||||||||||||||||||||||||||||||||||||||||||||||||||||||||||||||||||||||||||||||||||||||||||||||||||||||||||||||||
|
|
|
|
|
|
| |||||||||||||||||||||||||||||||||||||||||||||||||||||||||||||||||||||||||||||||||||||||||||||||||||||||||||||||||||||||||||||||||||||||||||||||||||||||||||||||||||||||||||||||||||||||||||||||||||||||||||||||||
| |||||||||||||||||||||||||||||||||||||||||||||||||||||||||||||||||||||||||||||||||||||||||||||||||||||||||||||||||||||||||||||||||||||||||||||||||||||||||||||||||||||||||||||||||||||||||||||||||||||||||||||||||||||||
| A snowy, Christmas-themed area. It is accessed from the frosty northeast corner of Timber's Island and requires two balloons to enter. | |||||||||||||||||||||||||||||||||||||||||||||||||||||||||||||||||||||||||||||||||||||||||||||||||||||||||||||||||||||||||||||||||||||||||||||||||||||||||||||||||||||||||||||||||||||||||||||||||||||||||||||||||||||||
|
|
|
|
|
|
| |||||||||||||||||||||||||||||||||||||||||||||||||||||||||||||||||||||||||||||||||||||||||||||||||||||||||||||||||||||||||||||||||||||||||||||||||||||||||||||||||||||||||||||||||||||||||||||||||||||||||||||||||
| |||||||||||||||||||||||||||||||||||||||||||||||||||||||||||||||||||||||||||||||||||||||||||||||||||||||||||||||||||||||||||||||||||||||||||||||||||||||||||||||||||||||||||||||||||||||||||||||||||||||||||||||||||||||
| An oceanside area extensively requiring the hovercraft. It is accessed from the small island to the east of Timber's Island and requires ten balloons to enter. | |||||||||||||||||||||||||||||||||||||||||||||||||||||||||||||||||||||||||||||||||||||||||||||||||||||||||||||||||||||||||||||||||||||||||||||||||||||||||||||||||||||||||||||||||||||||||||||||||||||||||||||||||||||||
|
|
|
|
|
|
| |||||||||||||||||||||||||||||||||||||||||||||||||||||||||||||||||||||||||||||||||||||||||||||||||||||||||||||||||||||||||||||||||||||||||||||||||||||||||||||||||||||||||||||||||||||||||||||||||||||||||||||||||
| |||||||||||||||||||||||||||||||||||||||||||||||||||||||||||||||||||||||||||||||||||||||||||||||||||||||||||||||||||||||||||||||||||||||||||||||||||||||||||||||||||||||||||||||||||||||||||||||||||||||||||||||||||||||
| A medieval countryside. It is accessed from behind a waterfall in the central part of Timber's Island and requires sixteen balloons to enter. | |||||||||||||||||||||||||||||||||||||||||||||||||||||||||||||||||||||||||||||||||||||||||||||||||||||||||||||||||||||||||||||||||||||||||||||||||||||||||||||||||||||||||||||||||||||||||||||||||||||||||||||||||||||||
|
|
|
|
|
|
| |||||||||||||||||||||||||||||||||||||||||||||||||||||||||||||||||||||||||||||||||||||||||||||||||||||||||||||||||||||||||||||||||||||||||||||||||||||||||||||||||||||||||||||||||||||||||||||||||||||||||||||||||
| |||||||||||||||||||||||||||||||||||||||||||||||||||||||||||||||||||||||||||||||||||||||||||||||||||||||||||||||||||||||||||||||||||||||||||||||||||||||||||||||||||||||||||||||||||||||||||||||||||||||||||||||||||||||
| Wizpig's homeworld, accessed from the lighthouse in the southeastern corner of Timber's Island. To reach it, the player needs to complete the four previous trophy races in a high enough position to earn a trophy in each, then approach the sign near the lighthouse after Wizpig's first race has been beaten. | |||||||||||||||||||||||||||||||||||||||||||||||||||||||||||||||||||||||||||||||||||||||||||||||||||||||||||||||||||||||||||||||||||||||||||||||||||||||||||||||||||||||||||||||||||||||||||||||||||||||||||||||||||||||
|
|
|
|
|
| ||||||||||||||||||||||||||||||||||||||||||||||||||||||||||||||||||||||||||||||||||||||||||||||||||||||||||||||||||||||||||||||||||||||||||||||||||||||||||||||||||||||||||||||||||||||||||||||||||||||||||||||||||


Staff ghosts[edit]
T.T.'s ghosts | ||
|---|---|---|
| Course | Unlock time | Ghost time |
| Ancient Lake | 1:07.00 | 1:01.28 |
| Fossil Canyon | 1:37.00 | 1:30.16 |
| Jungle Falls | 1:08.00 | 1:02.50 |
| Hot Top Volcano | 1:35.00 | 1:30.71 |
| Everfrost Peak | 1:53.00 | 1:48.00 |
| Walrus Cove | 2:10.00 | 2:06.28 |
| Snowball Valley | 1:13.00 | 1:06.41 |
| Frosty Village | 1:44.00 | 1:39.40 |
| Whale Bay | 1:19.00 | 1:13.11 |
| Pirate Lagoon | 1:34.00 | 1:28.56 |
| Crescent Island | 1:39.00 | 1:33.16 |
| Treasure Caves | 1:10.00 | 1:05.63 |
| Boulder Canyon | 2:11.00 | 2:02.35 |
| Greenwood Village | 1.46:00 | 1:40.61 |
| Windmill Plains | 2:22.00 | 2:13.13 |
| Haunted Woods | 1:22.00 | 1:09.51 |
| Spacedust Alley | 2:12.00 | 2:06.16 |
| Darkmoon Caverns | 2:20.00 | 2:12.05 |
| Star City | 2:07.00 | 2:01.45 |
| Spaceport Alpha | 2:16.00 | 2:09.03 |
Items and objects[edit]
| Item/object | Description |
|---|---|
Banana |
Bananas are scattered in every course. By collecting them, the player is able to increase the top-speed of his or her vehicle until the banana counter reaches ten (with the exception of the VITAMINB magic code that enables bananas to infinitely boost any character's top speed). After that, the bananas do not affect the vehicle any further. If players get hit (by a level 1-3 red balloon or level 2-3 green balloon), they lose some bananas. Additionally, bananas play a key role in the battle games of Icicle Pyramid and Darkwater Beach, where they act as the player's life gauge, and in Smokey Castle, where they need to be collected and stored in a treasure chest. If the BOGUSBANANAS magic code is in use, bananas will reduce speed rather than increase it. |
Egg |
Eggs only appear in the Fire Mountain battle course, where the goal is to gather and hatch three in one's own nest as quickly as possible. |
Flag |
Flags mark the path around Timber's Island during Taj's races. |
Golden Balloon / Silver Balloon |
Golden Balloons are the key items in the game. The player must collect a specified amount access each course and world. After the player's character wins at a race, Taj gives them a Golden Balloon. A total of 47 Golden Balloons appear in the game. In Adventure Two, they are replaced by Silver Balloons, which function identically in this Adventure, differing only in physical appearance. |
Key |
The game features four keys. One is hidden in a race course of each world. Their purpose is to unlock the door to the Challenge level in the corresponding world's hub, where the racer can compete against CPUs or other players. A key appears in Ancient Lake of Dino Domain, Snowball Valley of Snowflake Mountain, Crescent Island of Sherbet Island, and lastly, Boulder Canyon of Dragon Forest. |
Silver Coin |
Eight Silver Coins appear in each standard race course for their Coin Challenges. |
  Zipper |
Zippers can be used to give the player an extra speed boost. They are found in every track. Letting go of the |
Weapon Balloons[edit]
During the challenges on the different race tracks throughout the game the player can find these Weapon Balloons on the track. Similar to the Item Boxes of the Mario Kart series, these objects will give the player an Item when they break them. There are five different types of Weapon Balloons, each with a unique color and a specific type of Item. A special feature of the Weapon Balloons is their ability to power up, meaning that the player will receive stronger items if they collect more balloons of one color. An item can be upgraded two times, making a total of three items obtainable from one type of balloon.
| Type of Balloon | Number of Balloons | |||||
|---|---|---|---|---|---|---|
| 1 | 2 | 3 | ||||
| Red Balloon Missiles |
||||||
| Blue Balloon Speed boosts |
||||||
| Yellow Balloon Shield |
||||||
| Green Balloon Dropper |
||||||
| Rainbow Balloon Special |
||||||
Special rewards[edit]
| Reward | Description |
|---|---|
 Trophy |
Trophies can be gained by placing high enough in a world's Trophy Race, racing through the world's four tracks back-to-back to accumulate the most points. First place earns a golden Wizpig trophy, second place earns a silver Taj trophy, and third place earns a bronze T.T. trophy. Four trophies are needed to access Future Fun Land. |
 Wizpig amulet |
One fourth of this magical amulet is held by each of the four Island Guardians. Each must be beaten twice to collect them all, leading to Wizpig's First Strike. |
 T.T. amulet |
One fourth of the T.T. amulet can be found by beating each of the four Challenge levels around the island. Collecting them all is needed to open Wizpig Strikes Back. |
Magic Codes[edit]

Magic Codes are game cheats, always accessible in the options menu. These cheats mostly alter only the tracks mode rather than the Adventure mode, while some others do miscellaneous tasks such as allowing players to listen to music in the game. At the end of the game credits, a random magic code is given to players. The "Clear All Codes" option only deletes the codes from the Code List that the player has entered; the ones that are earned from progression, such as "Control Drumstick," do not get deleted.
| Code | Description |
|---|---|
| ARNOLD | Large players (code is named after Arnold Schwarzenegger) |
| BLABBERMOUTH | Changes horn sounds into character sounds |
| BODYARMOR | All balloons are yellow |
| BOGUSBANANAS | Bananas slow players down |
| BOMBSAWAY | All balloons are red |
| BYEBYEBALLOONS | Balloons are disabled |
| DODGYROMMER | Displays ROM Checksum |
| DOUBLEVISION | Multiple players can be the same character |
| EOLAOBFENRLONE | Free balloon (code is an anagram of "one free balloon") |
| EPC | EPC lockup display |
| FREEFORALL | Fully powered-up balloons |
| FREEFRUIT | Players start with ten bananas |
| JOINTVENTURE | A second player joins Adventure mode. Players take turns racing bosses. |
| JUKEBOX | Adds Music Test to audio menu |
| NOYELLOWSTUFF | No bananas in Tracks mode. |
| OFFROAD | Four-wheel drive |
| OPPOSITESATTRACT | All balloons are rainbows |
| ROCKETFUEL | All balloons are blue |
| TEENYWEENIES | Small players |
| TIMETOLOSE | CPUs are harder |
| TOXICOFFENDER | All balloons are green (code is named after The Toxic Avenger) |
| VITAMINB | Unlimited bananas |
| WHODIDTHIS | Players can view credits |
| ZAPTHEZIPPERS | Disables Zippers |
Regional differences[edit]
 This section is a stub. You can help the Super Mario Wiki by expanding it.
The Japanese version of Diddy Kong Racing redesigned the font for the English text. One example is the start-up screen for the Rareware logo, which uses a different and larger font for the copyright information.


The English letters of the yellow-green font were redesigned in the Japanese version.
Development[edit]

Diddy Kong Racing found its root in a short-lived prototype. According to Lead Designer Lee Schuneman, a team of four at Rareware was developing a caveman/time travel-themed real time strategy game for the Nintendo 64[3]; however, the idea was quickly abandoned and the developers decided to create a "fun" racing game named Wild Cartoon Kingdom using assets from the canceled RTS (3D artist Lee Musgrave denies, however, that the two projects were ever related).[1]
The racing aspect was heavily inspired by Super Mario Kart while the concept of an "adventure" mode was inspired by Disney World according to Schumenam.[3] The initial concept featured a hub world based on theme parks. Development was initially slow until a larger team was brought in to help accelerate the project, and the game was renamed to Adventure Racers.
The project was renamed Pro Am 64 (in reference to Rare's NES hit R.C. Pro-AM) later in development and briefly featured the characters using three-wheeled trike-like vehicles.[3] The game was demoed to Shigeru Miyamoto in June 1997, who approved of it and suggested that it should feature Diddy Kong.[3] The development team initially hated the idea,[3] but eventually agreed with Miyamoto's suggestion as featuring Diddy Kong brought stronger marketing from Nintendo and greater visibility to the game due to the popularity of the Donkey Kong brand.
Pre-release and unused content[edit]
- Main article: List of Diddy Kong Racing pre-release and unused content
All objects are assigned a name according to the files. One unfinished track remains in the game, Horseshoe Gulch. It can be accessed with cheats.
No animation. Adventure Two doesn't work right.
Only available vehicle is a car.
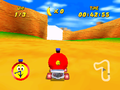
The first part of the unfinished track.
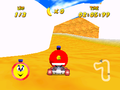
Driving through the only curve in the track.
The other end of the track.


Reception[edit]
| Reviews | |||
|---|---|---|---|
| Release | Reviewer, Publication | Score | Comment |
| N64 | Doug Perry, IGN | 8.4/10 | "In the end, Diddy Kong Racing is a calculated, copy of a game that Nintendo, not Rare, originated. But as is the case with Rare, the company has that amazing knack for taking an idea and crafting it into something beautiful. Diddy Kong Racing is a deep, colorful game with an overly kiddy feel and look. But after a few minutes, you'll be compelled with subtle details, blissful gameplay and graphics, and the full, rich world that makes Diddy Kong Racing an even better game than Mario Kart." |
| N64 | Jeff Gerstmann, GameSpot | 6.6/10 | "Diddy Kong Racing is a game that shouldn't have been released for at least another six months. The foul taste left behind by Mario Kart 64 is still too fresh in my mind to accept a game as similar as this, even though this is a much better game than Kart 64 ever was. Also, the game could have used a few more worlds and more tracks, as the repetitiveness of DKR is what ultimately kills it.'" |
| Aggregators | |||
| Compiler | Platform / Score | ||
| Metacritic | 88 | ||
| GameRankings | 88.65% | ||
Canceled sequels[edit]
Owing to the game's success, numerous attempts at sequels were made. However, each ended up canceled due to Rare's sale to Microsoft in 2002, among other reasons.
| Game | Description |
|---|---|
 Diddy Kong Pilot |
Rare planned to make a Diddy Kong Pilot, based solely around the plane. It was intended to release on the Game Boy Advance, and several Kongs, as well as King K. Rool and Krunch, were set to be playable in the original 2001 iteration, including Dixie, Donkey, Cranky and Candy Kong. The second iteration in 2003 is based around the rivalry between the Kong family and the Kremlings, but ended up reworked into Banjo-Pilot, an indirect sequel to Diddy Kong Racing. |
 Donkey Kong Racing |
Rare and Nintendo also planned to make Donkey Kong Racing for the Nintendo GameCube. However, this game was also canceled along with Donkey Kong Coconut Crackers in August 2002, one month before Rare's move to Microsoft. Very little had been revealed about it, but Animal Buddies (including some that are normally enemies) would have replaced the mechanical vehicles, and Taj and Kiddy Kong were supposed to reappear. |
 Diddy Kong Racing Adventure |
The Climax Group planned a different GameCube sequel, featuring new vehicle types and the ability to switch between them during races. The plot was to involve saving Donkey Kong Island and the Kong family from a team-up of Wizpig and King K. Rool. The pitch ended up rejected, in part due to the ambiguities over who held the rights to most of the Diddy Kong Racing-original characters. |
While no sequel ended up happening, a remake for the Nintendo DS was released: Diddy Kong Racing DS. Although a remake, it featured more characters, tracks, and some different challenges. Some music had also changed. Eventually, another Donkey Kong-themed racing game was released, the unrelated Donkey Kong Barrel Blast for the Wii.
Gallery[edit]
- Main article: Gallery:Diddy Kong Racing


Quotes[edit]
- Main article: List of Diddy Kong Racing quotes
Glitches[edit]
- Main article: List of Diddy Kong Racing glitches
Media[edit]
| It has been requested that more audio and/or video files related to this section be uploaded. Specific(s): More music samples Please upload all related music, sound effects, voice clips, or any videos for this section. See the help page for information on how to get started. |
- For a complete list of media for this subject, see List of Diddy Kong Racing media.
| File info |
References to other games[edit]
- Donkey Kong Country: The introduction to the story found in the instruction booklet has an opening on Donkey Kong Island, the setting of this game. In addition, Squawks is mentioned. Diddy's character select theme is an arrangement of DK Island Swing.
References in later games[edit]
- Donkey Kong 64: The Kritters in this game are physically similar to Krunch.
- Diddy Kong Pilot: Krunch's sound effects were reused, as was Diddy's. T.T.'s voice is also used.
- Donkey Kong Country (Game Boy Advance): Krunch's sound effects were reused at a different pitch for Kritter, as was Diddy's.
- Donkey Kong Country 2 (Game Boy Advance): Krunch's sound effects were reused for Kannon, as was Diddy's.
- Donkey Kong Country 3 (Game Boy Advance): Krunch's sound effects were reused for Rekoil, as was Diddy's.
- DK: King of Swing: Diddy's sound effects were reused.
Staff[edit]
- Main article: List of Diddy Kong Racing staff
Software director:
- Robert Harrison
Software engineers:
- Paul Mountain
- John Pegg
- Richard Gale
Art director:
3D artists:
- Lee Musgrave
- Keith Rabbette
- Dean Smith
- Johnni Christensen
- Brian Smyth
- Paul Cunningham
Names in other languages[edit]
| Language | Name | Meaning | Notes |
|---|---|---|---|
| Japanese | ディディーコングレーシング Didī Kongu Rēshingu |
Diddy Kong Racing |
References[edit]
- ^ a b Watts, Martin (October 8, 2022). The Making Of Diddy Kong Racing, The Game That Overtook Mario Kart. Time Extension. Retrieved May 23, 2024.
- ^ William5000000 (February 25, 2017). Diddy Kong Racing - Character Stats. YouTube (English). Retrieved April 5, 2020.
- ^ a b c d e January 2009. GamesTM, Issue 79 - "Behind the Scenes of Diddy Kong Racing". GamesTM.
External links[edit]
| Nintendo 64 games | ||
|---|---|---|
| Super Mario franchise | Super Mario 64 (1996) • Mario Kart 64 (1996) • Mario no Photopi (1998) • Mario Party (1998) • Mario Golf (1999) • Mario Artist: Paint Studio* (1999) • Mario Party 2 (1999) • Mario Artist: Talent Studio* (2000) • Mario Artist: Communication Kit* (2000) • Mario Tennis (2000) • Paper Mario (2000) • Mario Artist: Polygon Studio* (2000) • Mario Party 3 (2000) • Dr. Mario 64 (2001) | |
| Donkey Kong franchise | Diddy Kong Racing (1997) • Donkey Kong 64 (1999) | |
| Yoshi franchise | Yoshi's Story (1997) | |
| Crossovers | Super Smash Bros. (1999) | |