Yosu Ko: Difference between revisions
From the Super Mario Wiki, the Mario encyclopedia
Jump to navigationJump to search
Master Crash (talk | contribs) mNo edit summary |
m (Text replacement - "(\| *)Jap([RMCN\d]* *=)" to "$1Jpn$2") |
||
| (82 intermediate revisions by 30 users not shown) | |||
| Line 1: | Line 1: | ||
''' | {{another language}} | ||
== | {{world infobox | ||
|title=Yosu Ko | |||
|image=[[File:M&WLevel2.png]] | |||
|game=''[[Mario & Wario]]'' | |||
|levels=10 | |||
|before=[[Yōsei no Mori|<<]] | |||
|after=[[Kumotori Yama|>>]] | |||
}} | |||
'''Yosu Ko''' is the second stage found in ''[[Mario & Wario]]''. It is a lake that is rumored to be the place where [[Yoshi]] was born.<ref name="manual">{{cite|language=ja|publisher=Nintendo|title=''Mario & Wario'' instruction booklet|page=12|date=1993}}</ref> Multiple [[Yoshi (species)|Yoshis]] are seen relaxing in the background with their [[Baby Yoshi|children]]; as such, this area may be located on [[Yoshi's Island (location)|Yoshi's Island]]. [[Wario]] uses half of a cracked [[Yoshi Egg]] to subdue the character. | |||
==Level 2-2 | ==Levels== | ||
{| style="text-align: center" class=wikitable | |||
!width="1%"|Level | |||
!width="1%"|Image | |||
[[ | !width="10%"|Description | ||
This | !width="1%"|Enemies and obstacles | ||
|- | |||
|[[Level 2-1 (Mario & Wario)|Level 2-1]] | |||
[[ | |[[File:M&W Level 2-1 Map.png|200px]] | ||
This | |This is a basic course that involves [[Wanda]] getting her character up a few [[elevator]]s using [[Flip-Flop Block]]s while watching out for spikes and collecting [[Star (Mario & Wario)|Star]]s. [[Luigi]] is at the top left. | ||
|[[Spike Trap|Spikes]] | |||
|- | |||
[[ | |[[Level 2-2 (Mario & Wario)|Level 2-2]] | ||
The | |[[File:M&W Level 2-2 Map.png|200px]] | ||
|The player starts in the bottom-right corner, in front of them is three elevators, and some Flip-Flop Blocks to save falling time of the elevators. The player must watch out for spikes while activating the blocks. This level introduce the hidden Flip-Flop Blocks, five of them are found in the top-right corner of the level, they must be activated in order to collect the third Star. | |||
|Spikes | |||
[[ | |- | ||
|[[Level 2-3 (Mario & Wario)|Level 2-3]] | |||
|[[File:M&W Level 2-3 Map.png|200px]] | |||
|This course has [[Rock Block]]s and [[Jump Block]]s, as well as a new obstacle - Dodorigesu Jr. These little black birds are immobile and can simply be clicked away. | |||
[[ | |[[Dodorigesu Jr.]] | ||
|- | |||
|[[Level 2-4 (Mario & Wario)|Level 2-4]] | |||
|[[File:M&W Level 2-4 Map.png|200px]] | |||
|This course contains a series of floating footholds with Jump Blocks and Flip-Flop Blocks suspended over a pit lined with spikes. The path is still mostly linear, with some complexity arising should the player try to obtain all the Stars. | |||
|Spikes | |||
|- | |||
|[[Level 2-5 (Mario & Wario)|Level 2-5]] | |||
|[[File:M&W Level 2-5 Map.png|200px]] | |||
|The character starts at the top right with the Luigi goal lying directly beneath them, but there is another spike pit. The layout suggests following a series of gradually descending Flip-Flop Blocks, which lead to Stars and [[Coin Block]]s. The ideal path also splits between left and right; right leads the player to a Star and a Jump Block to restart the path. | |||
|Spikes | |||
|- | |||
|[[Level 2-6 (Mario & Wario)|Level 2-6]] | |||
|[[File:M&W Level 2-6 Map.png|200px]] | |||
|This course is similar to Level 2-4, but with narrower platforms and trickier Star spots. | |||
|Spikes | |||
|- | |||
|[[Level 2-7 (Mario & Wario)|Level 2-7]] | |||
|[[File:M&W Level 2-7 Map.png|200px]] | |||
|This course starts out with a more complicated presentation but several previous elements in one area, but once the player breaks through some Rock Blocks and reaches the bottom, the path to Luigi becomes easier with simple Flip-Flop Blocks, although spikes are present. | |||
|Spikes | |||
|- | |||
|[[Level 2-8 (Mario & Wario)|Level 2-8]] | |||
|[[File:M&W Level 2-8 Map.png|200px]] | |||
|This course has tiny Flip-Flop and Rock Blocks, leading the player to do more work while avoiding several Dodorigesu Jr. and spikes. However, Wanda only needs to break the bottom Rock Block on the ground for her character to be able to pass through. | |||
|Spikes, Dodorigesu Jr. | |||
|- | |||
|[[Level 2-9]] | |||
|[[File:M&W Level 2-9 Map.png|200px]] | |||
|This course has the same concept as Level 2-5, but with the goal in the bottom right, tiny Flip-Flop Blocks and more scattered Stars. | |||
|Spikes | |||
|- | |||
|[[Level 2-10]] | |||
|[[File:M&W Level 2-10 Map.png|200px]] | |||
|In this cramped space, Wanda's character begins in the bottom right between two elevators. There are many elevators, Flip-Flop and Jump Blocks in here. One of the Jump Blocks leads directly to Luigi, who is on his own disconnected platform. Grabbing all the Stars requires more time and effort. | |||
|N/A | |||
|} | |||
== | ==Media== | ||
{{media table | |||
|file1=MW Lakeside.oga | |||
|title1=Lakeside | |||
== | }} | ||
==Names in other languages== | |||
{{foreign names | |||
== | |Jpn=ヨス{{ruby|湖|こ}}<ref name="manual"/> | ||
[[ | |JpnR=Yosu Ko | ||
|JpnM=Yos Lake; "Yos" is a contraction of "Yoshi" | |||
[[Category: | }} | ||
==References== | |||
<references/> | |||
{{M&W}} | |||
[[Category:Lakes]] | |||
[[Category:Mario & Wario worlds]] | |||
Latest revision as of 17:19, January 7, 2025
The title of this article is official, but it comes from a non-English source. If an acceptable English name is found, then the article should be moved to the new title.
| Yosu Ko | |
|---|---|

| |
| Game | Mario & Wario |
| Level(s) | 10 |
| << List of worlds >> | |
Yosu Ko is the second stage found in Mario & Wario. It is a lake that is rumored to be the place where Yoshi was born.[1] Multiple Yoshis are seen relaxing in the background with their children; as such, this area may be located on Yoshi's Island. Wario uses half of a cracked Yoshi Egg to subdue the character.
Levels[edit]
| Level | Image | Description | Enemies and obstacles |
|---|---|---|---|
| Level 2-1 | 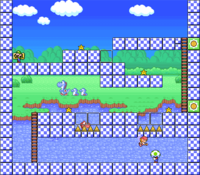
|
This is a basic course that involves Wanda getting her character up a few elevators using Flip-Flop Blocks while watching out for spikes and collecting Stars. Luigi is at the top left. | Spikes |
| Level 2-2 | 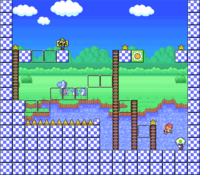
|
The player starts in the bottom-right corner, in front of them is three elevators, and some Flip-Flop Blocks to save falling time of the elevators. The player must watch out for spikes while activating the blocks. This level introduce the hidden Flip-Flop Blocks, five of them are found in the top-right corner of the level, they must be activated in order to collect the third Star. | Spikes |
| Level 2-3 | 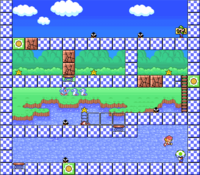
|
This course has Rock Blocks and Jump Blocks, as well as a new obstacle - Dodorigesu Jr. These little black birds are immobile and can simply be clicked away. | Dodorigesu Jr. |
| Level 2-4 | 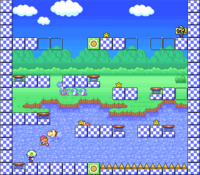
|
This course contains a series of floating footholds with Jump Blocks and Flip-Flop Blocks suspended over a pit lined with spikes. The path is still mostly linear, with some complexity arising should the player try to obtain all the Stars. | Spikes |
| Level 2-5 | 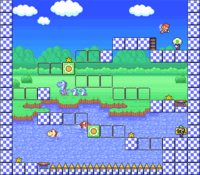
|
The character starts at the top right with the Luigi goal lying directly beneath them, but there is another spike pit. The layout suggests following a series of gradually descending Flip-Flop Blocks, which lead to Stars and Coin Blocks. The ideal path also splits between left and right; right leads the player to a Star and a Jump Block to restart the path. | Spikes |
| Level 2-6 | 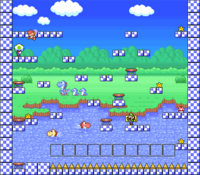
|
This course is similar to Level 2-4, but with narrower platforms and trickier Star spots. | Spikes |
| Level 2-7 | 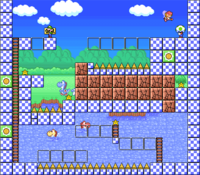
|
This course starts out with a more complicated presentation but several previous elements in one area, but once the player breaks through some Rock Blocks and reaches the bottom, the path to Luigi becomes easier with simple Flip-Flop Blocks, although spikes are present. | Spikes |
| Level 2-8 | 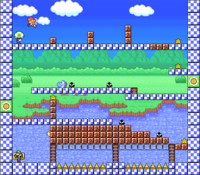
|
This course has tiny Flip-Flop and Rock Blocks, leading the player to do more work while avoiding several Dodorigesu Jr. and spikes. However, Wanda only needs to break the bottom Rock Block on the ground for her character to be able to pass through. | Spikes, Dodorigesu Jr. |
| Level 2-9 | 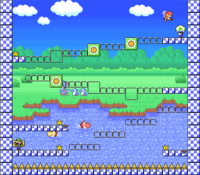
|
This course has the same concept as Level 2-5, but with the goal in the bottom right, tiny Flip-Flop Blocks and more scattered Stars. | Spikes |
| Level 2-10 | 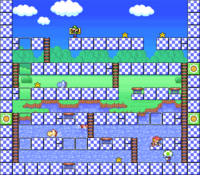
|
In this cramped space, Wanda's character begins in the bottom right between two elevators. There are many elevators, Flip-Flop and Jump Blocks in here. One of the Jump Blocks leads directly to Luigi, who is on his own disconnected platform. Grabbing all the Stars requires more time and effort. | N/A |
Media[edit]
| File info |
Names in other languages[edit]
| Language | Name | Meaning | Notes |
|---|---|---|---|
| Japanese | ヨス Yosu Ko |
Yos Lake; "Yos" is a contraction of "Yoshi" |
References[edit]
| Mario & Wario | ||||
|---|---|---|---|---|
| Main characters | Luigi • Mario • Princess Peach • Wanda • Wario • Yoshi | |||
| Enemies | Dodorigesu Jr. • Guriguri • Komorin • Tsubōn • Unibo | |||
| Stages | Yōsei no Mori • Yosu Ko • Kumotori Yama • Kōri no Dōkutsu • Honō no Dōkutsu • Pukupuku Kai • Balloon Bridge • Karakara Sabaku • Wario no Niwa • Wario Tei • EXTRA | |||
| Items & obstacles | 1-Up Mushroom • Bucket • Coin Block • Elevator • Flip-Flop Block • Fūsen Block • Hammer • Jump Block • Magic Wand • Nebaneba Block • Rock Block • Star • Switch Block • Time Kinoko • Timer Block • Toge Block | |||
| Other | Bulldog • Staff • Gallery • Media | |||