ScareScraper: Difference between revisions
No edit summary |
|||
| (209 intermediate revisions by 76 users not shown) | |||
| Line 1: | Line 1: | ||
{{ | {{location infobox | ||
| | |title=ScareScraper | ||
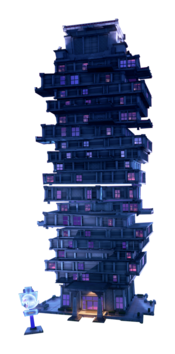
|image= | |image=[[File:LM3 ScareScraper Artwork.png|175px]]<br>Artwork of a 20-story ScareScraper from ''[[Luigi's Mansion 3]]'' | ||
| | |greater_location= [[Evershade Valley]]<br>[[The Last Resort]] | ||
| | |inhabitants=[[Bat (ghost)|Bats]], [[beetle (Luigi's Mansion: Dark Moon)|beetle]]s, [[mouse|mice]], [[Robomb]]s, [[spider (Luigi's Mansion series)|spider]]s, [[Greenie]]s, [[Strong Greenie]]s, [[Slammer (enemy)|Slammer]]s, [[Hider]]s, [[Sneaker]]s, [[Creeper]]s, [[Gobber]]s, [[Polterpup]]s, [[Big Polterpup]], [[The Brain]], [[Bomb Brother]], [[Beetle Whisperer]], [[Terrible Teleporter]], [[Primordial Goo]], [[Creeper Launcher]], [[Bomb Brother#Fright Knight|Fright Knight]], [[Beetle Whisperer#Cold Catcher|Cold Catcher]], [[Terrible Teleporter#Freaker Sneaker|Freaker Sneaker]], [[Primordial Goo#Tether Jacket|Tether Jacket]], [[Creeper Launcher#Yukata Ball|Yukata Ball]], [[Bomb Brother#Blue Pimpernel|Blue Pimpernel]], [[Beetle Whisperer#Sun Flower|Sun Flower]], [[Terrible Teleporter#Pink Zinnia|Pink Zinnia]], [[Primordial Goo#Violet|Violet]], [[Creeper Launcher#Daisy|Daisy]], [[Bomb Brother#Spookumber|Spookumber]], [[Beetle Whisperer#Aweberry|Aweberry]], [[Terrible Teleporter#Scorn|Scorn]], [[Primordial Goo#Scareambles|Scareambles]], [[Creeper Launcher#Terrorange|Terrorange]], [[Bomb Brother#Spooky Spook|Spooky Spook]], [[Beetle Whisperer#Scars|Scars]], [[Terrible Teleporter#Scool|Scool]], [[Primordial Goo#Jack-goo-lantern|Jack-goo-lantern]], [[Creeper Launcher#Blimp Reaper|Blimp Reaper]], [[Bomb Brother#Dreadonfly|Dreadonfly]], [[Beetle Whisperer#Lady Gug|Lady Gug]], [[Terrible Teleporter#Fright Fly|Fright Fly]], [[Primordial Goo#Blobberfly|Blobberfly]], [[Creeper Launcher#Go-Bee|Go-Bee]], [[Bomb Brother#Horrorca|Horrorca]], [[Beetle Whisperer#Clown Fishy|Clown Fishy]], [[Terrible Teleporter#Shriek Shark|Shriek Shark]], [[Primordial Goo#Pondguin|Pondguin]], [[Creeper Launcher#Wurdle|Wurdle]], [[Bomb Brother#Bad-minton|Bad-minton]], [[Beetle Whisperer#Footbrawl|Footbrawl]], [[Terrible Teleporter#Tennis Menace|Tennis Menace]], [[Primordial Goo#Goolf|Goolf]], [[Creeper Launcher#Soccer Ball|Soccer Ball]], [[Bomb Brother#Awelligator|Awelligator]], [[Beetle Whisperer#Banegal|Banegal]], [[Terrible Teleporter#Zebrawl|Zebrawl]], [[Primordial Goo#Leoprank|Leoprank]], [[Creeper Launcher#Cawe|Cawe]], [[Strong Hider]]s*, [[Strong Sneaker]]s*, [[Strong Gobber]]s*, [[Strong Slammer]]s*, [[Goob]]s, [[Hammer (Luigi's Mansion 3)|Hammers]], [[Oozer (Luigi's Mansion 3)|Oozer]]s, [[Slinker]]s, [[Mini Goob]]s, [[Mini Hammer]]s, [[Golden Goob]]s, [[Bomb Goob]]s, [[Bomb Hammer]]s, [[Bomb Oozer]]s, [[Regen Goob]]s, [[Regen Hammer]]s, [[Regen Slinker]]s, [[Speed Goob]]s, [[Speed Hammer]]s, [[Speed Oozer]]s, [[Lethal Goob]]s, [[Lethal Hammer]]s, [[Lethal Oozer]]s, [[Lethal Slinker]]s, [[Thieving Slinker]]s, [[Agoobis]], [[Tutankhammer]]s, [[Slabhammer]]s, [[Sir Goob]]s, [[Disco Hammer]]s, [[Neon Goob]]s <br>(*=Only in Endless Mode and Expert difficulty) | ||
|inhabitants=[[Bat ( | |first_appearance=''[[Luigi's Mansion: Dark Moon]]'' ([[List of games by date#2013|2013]]) | ||
|first_appearance=''[[Luigi's Mansion: Dark Moon]]'' | |latest_appearance=''[[Luigi's Mansion 2 HD]]'' ([[List of games by date#2024|2024]]) | ||
}} | }} | ||
{{quote|This nightmarish skyscraper full of ghostly challenges awaits you and your courageous friends! Can you battle your way to the top?|E. Gadd (In-game description)|[[Luigi's Mansion: Dark Moon]]}} | |||
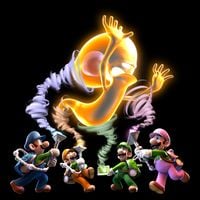
The '''ScareScraper''' (known as the '''Thrill Tower''' in the British English version of ''Luigi's Mansion: Dark Moon'') is the multiplayer mode of ''[[Luigi's Mansion: Dark Moon]]'' and ''[[Luigi's Mansion 2 HD]]'' that is unlocked by completing the fourth mission, [[Visual Tricks]], in the main game. The mode returns in ''[[Luigi's Mansion 3]]''. It can be played online, locally, or alone. Its name is a portmanteau of "scare" and "skyscraper". | |||
The | The game puts four different-colored [[Luigi]]s (as well as four other different-colored [[Gooigi]]s in ''Luigi's Mansion 3'') in one of the modes. The host player can set the amount of floors to five, ten, twenty-five, and endless, as well as the difficulty of the mode: Normal, Hard, and Expert. The endless floor option is available only for the chosen mode once the 25 floors of that game mode are cleared. If the amount of floors is set to endless, the difficulty is automatically set to endless and cannot be changed. The final room is always the roof, unless it is set on Endless. The ghost bosses in the ScareScraper have different amounts of [[Heart Point|HP]] than their original versions in the main game, and in ''Dark Moon'', for every five floors cleared, non-boss ghosts gain 5 additional health. | ||
The game ends when all Luigis are KO'd (or trapped), or when they do not complete a floor in an amount of time. Other Luigis can revive a fainted Luigi by pressing {{button|3DS|X}} near him to revive him. This brings his HP back to 20, and it releases hearts. Luigis can communicate with each other (even when KO'd) when the player either presses the {{button|3DS|Pad}} or touches the touchscreen. | The game ends when all Luigis are KO'd (or trapped), or when they do not complete a floor in an amount of time. Other Luigis can revive a fainted Luigi by pressing {{button|3DS|X}} ({{button|switch|A}} repeatedly in ''[[Luigi's Mansion 3]]'') near him to revive him. This brings his HP back to 20, and it releases hearts (50 in ''Luigi's Mansion 3''). Luigis can communicate with each other (even when KO'd in ''Dark Moon'') when the player either presses the {{button|3DS|Pad}} or touches the touchscreen. | ||
In ''Luigi's Mansion 3'', every ScareScraper floor features a different objective.<ref>[https://www.youtube.com/watch?v=R5y5DQEJcgM Nintendo Threehouse at E3 2019 - Day 2]</ref> | |||
==Players== | ==Players== | ||
When playing a ScareScraper, Luigis are colored depending on the order of when they join it, meaning that the player is always a {{color|green|green}} Luigi when playing solo on their own ScareScraper or hosting it for other players. Player 2's Luigi's cap, Poltergust, overalls (undershirt in ''Luigi's Mansion 3''), and Gooigi (in ''Luigi's Mansion 3'') are {{color|blue|blue}}; player 3's are {{color|orange|orange}}; and player 4's are {{color|magenta|pink}} (pink and orange are switched in ''Luigi's Mansion 3''). All players wear Luigi's standard green undershirts in ''Luigi's Mansion: Dark Moon'' and blue overalls in ''Luigi's Mansion 3''. | |||
===Voice commands=== | |||
====''Luigi's Mansion: Dark Moon''==== | |||
*"''Hey!''" ({{button|3DS|Padup}}) | |||
*"''Thank you very much!''" ({{button|3DS|Padleft}}) | |||
*"''Good job!''" ({{button|3DS|Padright}}) | |||
*"''Help help!''" ({{button|3DS|Paddown}}) | |||
*"''Over here!''" ({{button|3DS|Stylus}}) | |||
=== | ====''Luigi's Mansion 3''==== | ||
*'' | *"''Over here!''" ({{button|switch|right}}) | ||
*'' | *"''Thank you!''" ({{button|switch|left}}) | ||
*'' | *"''Help!''" ({{button|switch|down}}) | ||
*''"Help | |||
*'' | ====''Luigi's Mansion 2 HD''==== | ||
*"''Hey!''" {{button|switch|Up}} | |||
*"''Help!''" {{button|switch|Down}} | |||
*"''Thank you!''" {{button|switch|Left}} | |||
*"''Good job!''" {{button|switch|Right}} | |||
The "''Over here!''" voice command has been removed, due to the lack of a second screen on the Nintendo Switch. | |||
==Modes== | ==Modes== | ||
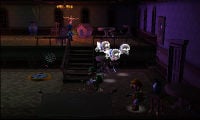
[[File:Multiplayer-LMDM.jpg|thumb | [[File:Multiplayer-LMDM.jpg|thumb|Luigis cooperating to capture [[The Brain]].]] | ||
===''Luigi's Mansion: Dark Moon'' / ''Luigi's Mansion 2 HD''=== | |||
===Hunter Mode=== | ====Hunter Mode==== | ||
All Luigis work together to capture all ghosts on the floors before time runs out. A gauge on the right side of the bottom screen shows ghostly activity that | All Luigis work together to capture all ghosts on the floors before time runs out. A gauge on the right side of the bottom screen shows ghostly activity that empties as ghosts are captured. Depending on the difficulty, such as in Endless mode, Strong versions of ghosts may appear in earlier floors. The time limit is 5 minutes per floor. | ||
;Names in | ;Names in other languages | ||
{{ | {{foreign names | ||
| | |Spa=Modo Caza | ||
| | |SpaM=Hunt Mode | ||
| | |Fre=Chasse | ||
| | |FreM=Hunting | ||
|Dut=Jachtstand | |Dut=Jachtstand | ||
|DutM=Hunting Mode | |DutM=Hunting Mode | ||
| Line 50: | Line 62: | ||
}} | }} | ||
===Rush Mode=== | ====Rush Mode==== | ||
Luigis try to escape each floor by reaching the exit and stepping on the switches before time runs out. The timer starts at 30 seconds, but the time limit can be extended by collecting timepieces (for an additional 10 seconds) from paintings and furniture, or by clearing rooms of ghosts. Rush Mode does not have locked doors or keys, however [[Gobber]]s may occasionally drop from ceilings in dark rooms and block the doors with its goo; they must be captured in order to proceed. | Luigis try to escape each floor by reaching the exit and stepping on the switches before time runs out. The timer starts at 30 seconds (45 in ''Luigi's Mansion 2 HD''), but the time limit can be extended by collecting timepieces (for an additional 10 seconds) from paintings and furniture, or by clearing rooms of ghosts. Rush Mode does not have locked doors or keys, however, [[Gobber]]s may occasionally drop from ceilings in dark rooms and block the doors with its goo; they must be captured in order to proceed. | ||
;Names in | ;Names in other languages | ||
{{ | {{foreign names | ||
| | |Spa=Modo Tiempo | ||
| | |SpaM=Time Mode | ||
| | |Fre=Sprint | ||
| | |FreM=Sprint | ||
|Dut=Tijdnoodstand | |Dut=Tijdnoodstand | ||
|DutM=Timetrouble Mode | |DutM=Timetrouble Mode | ||
| Line 67: | Line 79: | ||
|PorM=Time Mode | |PorM=Time Mode | ||
}} | }} | ||
===Polterpup Mode=== | |||
====Polterpup Mode==== | |||
[[File:PolterpupScareScraper.jpg|thumb|Polterpups escaping their hiding place in Polterpup Mode.]] | [[File:PolterpupScareScraper.jpg|thumb|Polterpups escaping their hiding place in Polterpup Mode.]] | ||
Luigis work together to capture all [[Polterpup]]s on each floor by following their invisible paw prints with the [[Dark-Light Device]]. The Luigis must first locate the kennel before the Polterpups can even be caught. Sometimes Polterpups may even summon other ghosts to hinder progress. Depending on the difficulty of the ScareScraper, the amount of Polterpups to be captured on a floor | Luigis work together to capture all [[Polterpup]]s on each floor by following their invisible paw prints with the [[Dark-Light Device]]. The Luigis must first locate the kennel before the Polterpups can even be caught. Sometimes Polterpups may even summon other ghosts to hinder progress. Depending on the difficulty of the ScareScraper, the amount of Polterpups to be captured on a floor vary, ranging from a minimum of 2 Polterpups to a maximum of 6. The Luigis have 5 minutes to capture them all. | ||
;Names in | ;Names in other languages | ||
{{ | {{foreign names | ||
|SpaA=Modo | |SpaA=Modo Espectroguau | ||
|SpaAM= | |SpaAN=''Luigi's Mansion 2 HD'' | ||
|SpaAM=Polterpup Mode | |||
|SpaA2=Modo Espectrochucho | |||
|SpaA2N=''Luigi's Mansion: Dark Moon'' | |||
|SpaA2M=Polterpup Mode | |||
|SpaE=Modo Ectochucho | |SpaE=Modo Ectochucho | ||
|SpaEM= | |SpaEM=Polterpup Mode | ||
| | |Fre=Traque | ||
| | |FreM=Hunt | ||
|Dut=Polterpupstand | |Dut=Polterpupstand | ||
|DutM=Polterpup Mode | |DutM=Polterpup Mode | ||
| Line 83: | Line 100: | ||
|GerM=Pinscher Mode | |GerM=Pinscher Mode | ||
|Ita=Modalità Poltercuccioli | |Ita=Modalità Poltercuccioli | ||
|ItaM=Polterpups Mode | |ItaM=Polterpups Mode | ||
|Por=Modo de Fantacães | |Por=Modo de Fantacães | ||
|PorM=Polterpups Mode | |PorM=Polterpups Mode | ||
}} | }} | ||
===Surprise Mode=== | ====Surprise Mode==== | ||
A combination of the Hunter, Rush, and Polterpup Modes — two Hunter Mode floors, one Rush Mode floor, and one Polterpup Mode floor in random order. It is unlocked by completing the other three modes on any difficulty/floor amount at least once. | A combination of the Hunter, Rush, and Polterpup Modes — two Hunter Mode floors, one Rush Mode floor, and one Polterpup Mode floor in random order. It is unlocked by completing the other three modes on any difficulty/floor amount at least once. | ||
;Names in | ;Names in other languages | ||
{{ | {{foreign names | ||
|SpaE=Modo Sorpresa | |SpaE=Modo Sorpresa | ||
|SpaEM=Surprise Mode | |SpaEM=Surprise Mode | ||
|Ger=Zufalls-Modus | |Ger=Zufalls-Modus | ||
|GerM=Coincidence Mode | |GerM=Coincidence Mode | ||
|Ita=Modalità Sorpresa | |||
|ItaM=Surprise Mode | |||
}} | }} | ||
===''Luigi's Mansion 3''=== | |||
In ''Luigi's Mansion 3'', there are only four modes that are selected randomly when a new floor starts. Only either five, ten, twenty (as of version 1.3.1), or random floors can be selected when starting up a new game. | |||
====Capture the Ghosts!==== | |||
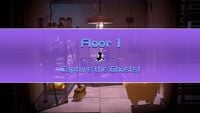
[[File:LM3 ScareScraper Capture The Ghosts Intro.jpg|200px|thumb]] | |||
The Luigis must catch all of the ghosts in some rooms located on the map within five minutes; unlike in ''Luigi's Mansion: Dark Moon'', however, time pieces can be found to add 30 seconds on the clock. Once all ghosts are captured, players can advance to the next floor. The total number of ghosts captured is displayed on the bottom right corner of the screen. On rare occasions, all of the ghosts on a floor can be Mini Goobs and Mini Hammers. | |||
;Names in other languages | |||
{{foreign names | |||
|Jpn=すべてのおばけを つかまえろ! | |||
|JpnR=Subete no obake o tsukamaero! | |||
|JpnM=Catch all the ghosts! | |||
|Kor=유령을 전부 붙잡아라! | |||
|KorR=Yuryeong-eul jeonbu butjjabara! | |||
|KorM=Catch all the ghosts! | |||
|Fre=Capturez les fantômes ! | |||
|FreM=Capture the ghosts! | |||
|Ger=Fange alle Geister! | |||
|GerM=Capture all the Ghosts! | |||
|Ita=Cattura i fantasmi! | |||
|ItaM=Capture the ghosts! | |||
|SpaA=¡Atrapa a todos los fantasmas! | |||
|SpaM=Catch all the ghosts! | |||
|SpaE=¡Caza a los fantasmas! | |||
|SpaEM=Hunt the ghosts! | |||
}} | |||
====Collect the Money!==== | |||
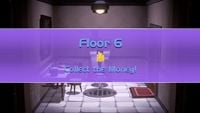
[[File:LM3 ScareScraper Collect The Money Intro.jpg|200px|thumb]] | |||
The Luigis have five minutes to collect the amount of money required to advance to the next floor. They must search every room possible with Coins, Bills, Gold Bars, and Pearls. Most rooms contain [[Golden Goob]]s hidden in some furniture to search for and shows a gold sparkle where it is located; some furniture may need to be revealed with Dark-Light Device. Gold Goobs also hide inside boxes which Luigi must pull a string one side with [[Gooigi]] or another Luigi on another side to open. The amount of money needed to be collected depends on how many players are on during this event. The amount of money collected is displayed at the bottom right corner of the screen. | |||
Prior to version 1.3.1, only Golden Goobs and possessed bins appeared in this mode, but later versions of the game add normal ghosts too, with the boxes sometimes either holding the Golden Goobs along with a Hammer or five normal Goobs, or some money without any ghosts appearing. Normal ghosts can also spawn in a room a player walks into for the first time, without any furniture being shaken or boxes being opened. | |||
*One player: 4500G | |||
*Two players: 6000G | |||
*Three players: 7500G | |||
*Four players: 10000G | |||
;Names in other languages | |||
{{foreign names | |||
|Jpn=お{{ruby|金|かね}}を {{ruby|回収|かいしゅう}}しろ! | |||
|JpnR=Okane o kaishū shiro! | |||
|JpnM=Collect the money! | |||
|Kor=돈을 회수하라! | |||
|KorR=Don-eul Hoesuhara! | |||
|KorM=Collect the money! | |||
|Fre=Ramassez l'argent ! | |||
|FreM=Collect the money! | |||
|Ita=Raccogli il denaro! | |||
|ItaM=Collect the money! | |||
|SpaA=¡Recoge todo el dinero! | |||
|SpaAM=Collect all the money! | |||
}} | |||
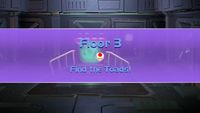
====Find the Toads!==== | |||
[[File:LM3 ScareScraper Find The Toads Intro.jpg|200px|thumb]] | |||
The Luigis must search for four colored [[Toad (species)|Toad]]s hidden in the rooms. They come in red, blue, yellow, and green. When a Toad is found, they cannot proceed if a room is dark as they will panic while ghosts are present, Toads also cannot proceed if a [[Possessed Bin]] is triggered. Once a room is cleared, the Toad can be led back to where the Luigis spawned. The number of Toads rescued is displayed at the bottom right corner of the screen. | |||
;Names in other languages | |||
{{foreign names | |||
|Jpn=キノピオを {{ruby|探|さが}}せ! | |||
|JpnR=Kinopio o sagase! | |||
|JpnM=Find the Toads! | |||
|Kor=키노피오를 찾아라! | |||
|KorR=Kinopio-reul chajara! | |||
|KorM=Find the Toads! | |||
|Fre=Trouvez les Toads ! | |||
|FreM=Find the Toads! | |||
|Ger=Finde alle Toads! | |||
|GerM=Find all the Toads! | |||
|Ita=Trova i Toad! | |||
|ItaM=Find the Toads! | |||
|SpaA=¡Encuentra a los Toads! | |||
|SpaAM=Find the Toads! | |||
|SpaE=¡Busca a los Toads! | |||
|SpaEM=Search for the Toads! | |||
}} | |||
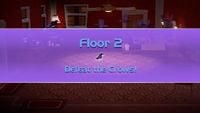
====Defeat the Crows!==== | |||
[[File:LM3 ScareScraper Defeat The Crows Intro.jpg|200px|thumb]] | |||
The Luigis must defeat all of the [[crow]]s found in the rooms and with a [[Strobulb]] charge or by vacuuming them up. Prior to version 1.3.1, no ghosts appeared in this mode, but they do appear in later versions of the game. The number of crows defeated is displayed at the bottom right corner of the screen. | |||
;Names in other languages | |||
{{foreign names | |||
|Jpn=すべてのカーラを {{ruby|倒|たお}}せ! | |||
|JpnR=Subete no Kāra o taose! | |||
|JpnM=Defeat all the crows! | |||
|Kor=까악을 전부 쓰러뜨려라! | |||
|KorR=Kkaak-eul jeonbu sseureotteuryeora! | |||
|KorM=Knock down all the crows! | |||
|Fre=Éliminez les corbeaux ! | |||
|FreM=Eliminate the crows! | |||
|Ger=Besiege alle Krähen! | |||
|GerM=Defeat all the Crows! | |||
|Ita=Sconfiggi i corvi! | |||
|ItaM=Defeat the crows! | |||
|Spa=¡Derrota a los cuervos! | |||
|SpaM=Defeat the crows! | |||
}} | |||
===Boss Floors=== | ===Boss Floors=== | ||
====''Luigi's Mansion: Dark Moon'' / ''Luigi's Mansion 2 HD''==== | |||
On every fifth floor, a boss ghost is fought, regardless of the mode. On the final floor, [[The Brain]] is always the boss (unless playing on Endless). Boss ghosts are assisted by regular ghosts as the Luigis vacuum them up, with more regular ghosts appearing with more players. The Luigis have 5 minutes to defeat the boss. | On every fifth floor, a boss ghost is fought, regardless of the mode. On the final floor, [[The Brain]] is always the boss (unless playing on Endless). Boss ghosts are assisted by regular ghosts as the Luigis vacuum them up, with more regular ghosts appearing with more players. The Luigis have 5 minutes to defeat the boss. | ||
After clearing a Boss Floor, all ghosts' HP increase by 5, other than bosses. This only affects them if the host player selects more than 5 floors. | |||
====''Luigi's Mansion 3''==== | |||
If the host selects ten or twenty floors at the beginning of a new game, every 5 floors will have a rare ghost boss; the Luigis need to find the key to progress and all four of them including switching to Gooigis must stand on a huge button to begin the rare ghost boss fight. There are 19 rare ghosts in the game and one on each 5th floor is random; they include Speed ghosts, Bomb ghosts, Regen ghosts, Lethal ghosts, a Thieving Slinker that can temporarily steal the Poltergust, a Medic Goob that can heal other ghosts, an Electric Oozer that shoots electricity, two Diffusing ghosts that can summon mini versions of themselves, and a Warp Slinker that can teleport a player to a random room on the floor. | |||
Additionally, if a DLC floor theme is chosen, there is a chance that "mini-boss" style rare ghosts will appear there, even if it is not a boss floor. These are thematically appropriate versions of Goobs and Hammers with more HP, and appear in large groups in rooms off of the main path. | |||
On the roof of a ScareScraper, a [[Boolossus]] battle begins which is similar to the [[King Boo]] boss fight; the Luigis must defeat it within ten minutes to complete the ScareScraper. | |||
===Bonuses=== | ===Bonuses=== | ||
When a floor is completed, '''Red Coin Scramble!''' | ====''Luigi's Mansion: Dark Moon'' / ''Luigi's Mansion 2 HD''==== | ||
When a floor is completed, the '''Red Coin Scramble!''' occurs: four [[Red Coin]]s appear in random rooms and the Luigis have 20 seconds to collect them all for a chance to play '''Red Coin Bonus!''' (a sole Luigi has an all-or-nothing chance to play). The bonus game rewards a Luigi with a bonus item if their icon stops next to it. The more Red Coins a Luigi gets, the more consecutive icons of his appear in the roulette, increasing his chances of winning the bonus item at the end of the floor (a sole Luigi has a bonus item randomly selected). The bonus items consist of the following: | |||
*'''Dark-Light Goggles''' - Reveals invisible objects and ghosts to players before the [[Dark-Light Device]] is used. | *'''Dark-Light Goggles''' - Reveals invisible objects and ghosts to players before the [[Dark-Light Device]] is used. | ||
*'''Poltergust x2''' or '''x3''' - Increases the sucking power of the vacuum. Stacks with Poltergust Suction upgrades (once earned). | *'''Poltergust x2''' or '''Poltergust x3''' - Increases the sucking power of the vacuum. Stacks with Poltergust Suction upgrades (once earned). | ||
*'''Restorator (Heal-Vac in | *'''Restorator''' ('''Heal-Vac''' in the British English version) - Converts captured ghosts into hearts. | ||
*'''Map''' - Reveals the entire floor layout. This includes the exit (in Rush Mode) and Polterpup locations (in Polterpup Mode). In Rush Mode, a map can sometimes be obtained once a dark room that it | *'''Map''' - Reveals the entire floor layout. This includes the exit (in Rush Mode) and Polterpup locations (in Polterpup Mode). In Rush Mode, a map can sometimes be obtained once a dark room that it is in is cleared of ghosts. | ||
Bonus items take effect only on the next floor. Sometimes a bonus item can even be found in vases, paintings, or other furniture. A Luigi can have up to three bonus items equipped at a time. | Bonus items take effect only on the next floor. Sometimes a bonus item can even be found in vases, paintings, or other furniture. A Luigi can have up to three bonus items equipped at a time. | ||
====''Luigi's Mansion 3''==== | |||
In ScareScraper, the Luigis can find items throughout each floor, which only lasts until the next floor. Sometimes a floor may have a hidden room containing a chest of four items and money, which can be found with the use of the Dark-Light Device from an invisible door with two lights next to it. | |||
*'''Hyper Strobulb''' - Lights up the entire room with a powerful flash, stunning every ghost and defeating every mouse and crow after use. | |||
*'''Super Poltergust''' - Possesses a very strong suction power that instantly refills the meter to slam sooner; additionally, the slam power increases by x2, making defeating ghosts much easier. | |||
*'''Trap Detector''' - A siren is attached to Luigi's head, alerting the player when nearby a trap. | |||
*'''Super Star''' - Grants the player invincibility for a short while, instantly defeating ghosts upon running into them and also makes the player run faster. | |||
*'''Dark-Light Goggles''' - Reveals invisible objects and ghosts to players before the [[Dark-Light Device]] is used. | |||
*'''Map''' - Reveals the entire floor layout; unlike in ''Luigi's Mansion: Dark Moon'', it is only shown to the player who collects it first. | |||
*'''Timer''' - Extends the time limit by 30 seconds; only appears when the time limit is running out. | |||
==Upgrades== | ==Upgrades== | ||
Upgrades are rewarded to the entire team if they reach certain treasure totals. These totals differ depending on the mode being played. Once players earn the Suction Level 3 upgrade, the next upgrades | Upgrades are rewarded to the entire team if they reach certain treasure totals. These totals differ depending on the mode being played. Once players earn the Suction Level 3 upgrade, the next upgrades is always Heart Drops up until a certain point. Unlike in Dark Moon Quest, the upgrades are not permanent; the next time the Luigis play another ScareScraper, they must earn these upgrades again. | ||
{|class="wikitable" | |||
{| class="wikitable" | |||
|- | |- | ||
! Upgrade !! Hunter Mode !! Rush Mode !! Polterpup Mode !! Surprise Mode | !Upgrade!!Hunter Mode!!Rush Mode!!Polterpup Mode!!Surprise Mode | ||
|- | |- | ||
| align="center"|Poltergust Lv2||align="right"|600 G ||align="right"|400 G||align="right"|250 G ||align="right"|500 G | |align="center"|Poltergust Lv2||align="right"|600 G ||align="right"|400 G||align="right"|250 G||align="right"|500 G | ||
|- | |- | ||
| align="center"|Dark-Light Lv2||align="right"| | |align="center"|Dark-Light Lv2||align="right"|1,800 G ||align="right"|1,100 G ||align="right"|750 G||align="right"|1,500 G | ||
|- | |- | ||
| align="center"|Suction Lv2||align="right"| | |align="center"|Suction Lv2||align="right"|4,000 G||align="right"|2,400 G||align="right"|1,600 G||align="right"|3,000 G | ||
|- | |- | ||
| align="center"|Poltergust Lv3||align="right"| | |align="center"|Poltergust Lv3||align="right"| 7,000 G||align="right"|4,000 G||align="right"|2,500 G||align="right"|5,500 G | ||
|- | |- | ||
| align="center"|Dark-Light Lv3||align="right"| | |align="center"|Dark-Light Lv3||align="right"|11,500 G||align="right"|7,000 G||align="right"|4,500 G||align="right"|9,000 G | ||
|- | |- | ||
| align="center"|Suction Lv3||align="right"| | |align="center"|Suction Lv3||align="right"|16,000 G||align="right"|10,000 G||align="right"|6,500 G||align="right"|12,500 G | ||
|- | |- | ||
| align="center"|Heart Drop||align="right"| | |align="center"|Heart Drop||align="right"|20,000 G||align="right"|12,000 G||align="right"|7,500 G||align="right"|15,500 G | ||
|- | |- | ||
| align="center"|Heart Drop||align="right"| | |align="center"|Heart Drop||align="right"|24,000 G||align="right"|14,000 G||align="right"|8,500 G||align="right"|18,500 G | ||
|- | |- | ||
| align="center"|Heart Drop||align="right"| | |align="center"|Heart Drop||align="right"|28,000 G||align="right"|16,000 G||align="right"|9,500 G||align="right"|21,500 G | ||
|- | |- | ||
| align="center"|Heart Drop||align="right"| | |align="center"|Heart Drop||align="right"|32,000 G||align="right"|18,000 G||align="right"|10,500 G||align="right"|24,500 G | ||
|- | |- | ||
| align="center"|Heart Drop||align="right"| | |align="center"|Heart Drop||align="right"|36,000 G||align="right"|20,000 G||align="right"|11,500 G||align="right"|27,500 G | ||
|- | |- | ||
| align="center"|Heart Drop||align="right"| | |align="center"|Heart Drop||align="right"|40,000 G||align="right"|22,000 G||align="right"|12,500 G||align="right"|30,500 G | ||
|- | |- | ||
| align="center"|Heart Drop||align="right"| | |align="center"|Heart Drop||align="right"|44,000 G||align="right"|24,000 G||align="right"|13,500 G||align="right"|33,500 G | ||
|- | |- | ||
| align="center"|Heart Drop||align="right"| | |align="center"|Heart Drop||align="right"|48,000 G||align="right"|26,000 G||align="right"|14,500 G||align="right"|36,500 G | ||
|- | |- | ||
| align="center"|Heart Drop||align="right"| | |align="center"|Heart Drop||align="right"|52,000 G||align="right"|28,000 G||align="right"|15,500 G||align="right"|39,500 G | ||
|- | |- | ||
| align="center"|Heart Drop||align="right"| | |align="center"|Heart Drop||align="right"|56,000 G||align="right"|30,000 G||align="right"|16,500 G||align="right"|42,500 G | ||
|- | |- | ||
| align="center"|Heart Drop||align="right"| | |align="center"|Heart Drop||align="right"|60,000 G||align="right"|32,000 G||align="right"|17,500 G||align="right"|45,500 G | ||
|- | |- | ||
| align="center"|Heart Drop||align="right"| | |align="center"|Heart Drop||align="right"|64,000 G||align="right"|34,000 G||align="right"|18,500 G||align="right"|48,500 G | ||
|- | |- | ||
| align="center"|Heart Drop||align="right"| | |align="center"|Heart Drop||align="right"|68,000 G||align="right"|36,000 G||align="right"|19,500 G||align="right"|51,500 G | ||
|- | |- | ||
| align="center"|Heart Drop||align="right"| | |align="center"|Heart Drop||align="right"|72,000 G||align="right"|38,000 G||align="right"|20,500 G||align="right"|54,500 G | ||
|- | |- | ||
| align="center"|Heart Drop||align="right"| | |align="center"|Heart Drop||align="right"|76,000 G||align="right"|40,000 G||align="right"|21,500 G||align="right"|57,500 G | ||
|- | |- | ||
| align="center"|Heart Drop||align="right"| | |align="center"|Heart Drop||align="right"|80,000 G||align="right"|42,000 G||align="right"|22,500 G||align="right"|60,500 G | ||
|- | |- | ||
| align="center"|Heart Drop||align="right"| | |align="center"|Heart Drop||align="right"|84,000 G||align="right"|44,000 G||align="right"|23,500 G||align="right"|63,500 G | ||
|- | |- | ||
| align="center"|Heart Drop||align="right"| | |align="center"|Heart Drop||align="right"|88,000 G||align="right"|46,000 G||align="right"|24,500 G||align="right"|66,500 G | ||
|- | |- | ||
| align="center"|Heart Drop||align="right"| | |align="center"|Heart Drop||align="right"|92,000 G||align="right"|48,000 G||align="right"|25,500 G||align="right"|69,500 G | ||
|- | |- | ||
| align="center"|Heart Drop||align="right"| | |align="center"|Heart Drop||align="right"|96,000 G||align="right"|50,000 G||align="right"|26,500 G||align="right"|72,500 G | ||
|} | |} | ||
==Traps== | ==Traps== | ||
There are | There are different traps that the Luigis can encounter. In ''Luigi's Mansion: Dark Moon'', these only appear in multiplayer and require the help of another Luigi to escape, whereas in the third game they also appear in single player and will automatically end after approximately 30 seconds if no one frees the trapped player. Having all players caught in traps in ''Luigi's Mansion: Dark Moon'' ends the game. | ||
*A player can get trapped by a carpet in a room. Another player needs to vacuum carpet tassel in order to pull the player free. The room remains dark until the player gets freed, and ghosts | ===''Luigi's Mansion: Dark Moon'' / ''Luigi's Mansion 2 HD''=== | ||
*A player can get trapped by a carpet in a room. Another player needs to vacuum carpet tassel in order to pull the player free. The room remains dark until the player gets freed, and ghosts keep spawning to damage the trapped player. | |||
*A player has a chance of getting cursed when inspecting furniture. The curse reverses a player's controls, and it can be spread if the affected player makes contact with another player. Cursed players drop their bonus items, if any, and cannot pick them up. A player has to shine the Dark-Light Device on the affected player to relieve the player of the conditions. | *A player has a chance of getting cursed when inspecting furniture. The curse reverses a player's controls, and it can be spread if the affected player makes contact with another player. Cursed players drop their bonus items, if any, and cannot pick them up. A player has to shine the Dark-Light Device on the affected player to relieve the player of the conditions. | ||
*A player has a chance of getting stuck in a large vase upon inspecting it. The affected player is unable to do anything other than moving. Another player has to vacuum and pull a dangling cord in order to free the player. The room remains dark until the player gets freed. Ghosts | *A player has a chance of getting stuck in a large vase upon inspecting it. The affected player is unable to do anything other than moving. Another player has to vacuum and pull a dangling cord in order to free the player. The room remains dark until the player gets freed. Ghosts keep spawning to deal damage to the affected player until the vase is removed. This can be avoided if the player vacuums the vase with the Poltergust beforehand to see if it wobbles or not -- vases that don't wobble are traps. If there are any active suits of armor available in the room while the Luigi is trapped, the Luigi can free himself if he can make the suit of armor shatter the vase with its sword; the player still takes damage, however. | ||
===''Luigi's Mansion 3''=== | |||
*A Luigi can get trapped in a carpet in a corridor. This causes the carpet to trap the Luigi and another player must tug the carpet. The carpet looks different from the rest and can be destroyed before activating it by tugging the corner. The carpet eventually releases the player if they have not been rescued by another player. | |||
*A Luigi can open a [[fake door]] and it will trap him; another player needs to use the [[Suction Shot]] on it to save him. Fake doors do not appear on the map, and there are no carpets beneath the fake doors. | |||
*A Luigi can be trapped in a wardrobe by interacting with it. Another player has to use the Suction Shot on the wardrobe to free the other Luigi. The trap wardrobe looks different from a regular one. | |||
*All Luigis' [[Poltergust G-00]]s can be teleported; as a result, the Luigis cannot use any of their moves and must pick up the Poltergust of their color. If the player has not entered the room a Poltergust is in, it will be grayed out on the map. | |||
*A power outage can happen causing the lights to go off and the map to show static for a few moments. The map will eventually go back to normal but the lights will remain off; they will come back on if a Luigi uses the Strobulb on the wall in the storage rooms. | |||
==Results== | ==Results== | ||
===Totals=== | ===Totals=== | ||
At the end of each floor, the players can view statistics of their activity on the floor they completed on the top screen. Upon completing -- or losing in -- a ScareScraper, the Luigis are ranked based on their performance (e.g. capturing ghosts and avoiding traps, and taking as little damage as possible) and are rewarded in G for the Vault. The higher ranked a Luigi is and the more floors they have cleared, the larger the prize. | At the end of each floor, the players can view statistics of their activity on the floor they completed on the top screen. Upon completing -- or losing in -- a ScareScraper, the Luigis are ranked based on their performance (e.g. capturing ghosts and avoiding traps, and taking as little damage as possible) and are rewarded in G for the Vault. The higher ranked a Luigi is and the more floors they have cleared, the larger the prize. | ||
*Amount of spectral mass (W) obtained from ghosts. | *Amount of spectral mass (W) obtained from ghosts. | ||
*Amount of treasure (G) collected. | *Amount of treasure (G) collected. | ||
| Line 189: | Line 333: | ||
*Amount of times cursed. | *Amount of times cursed. | ||
*Amount of times trapped (in vases or carpet traps). | *Amount of times trapped (in vases or carpet traps). | ||
After defeating a boss ghost, the player can view the total statistics of all the floors they completed so far, after viewing the statistics of the floor they just completed. | After defeating a boss ghost, the player can view the total statistics of all the floors they completed so far, after viewing the statistics of the floor they just completed. | ||
===Achievements=== | ===Achievements=== | ||
In the results screen, before all the players are ready to begin the next floor, they can see achievements they have obtained on the floor they just cleared on the bottom screen. These achievements are based on their performance, but they're otherwise there just for fun. | In the results screen, before all the players are ready to begin the next floor, they can see achievements they have obtained on the floor they just cleared on the bottom screen. These achievements are based on their performance, but they're otherwise there just for fun. | ||
*'''MVP''' / '''Master Tracker''' - ''Most Ghosts Captured''<br> | *'''MVP''' / '''Master Tracker''' - ''Most Ghosts Captured''<br> | ||
*'''Workhorse''' - ''Most Ghost HP Drained''<br> | *'''Workhorse''' - ''Most Ghost HP Drained''<br> | ||
| Line 212: | Line 354: | ||
==Ghosts== | ==Ghosts== | ||
There are 47 ghosts encountered solely within the ScareScraper (not including normal Polterpups). One of 45 of these ghosts (excluding [[ | ===''Luigi's Mansion: Dark Moon'' / ''Luigi's Mansion 2 HD''=== | ||
There are 47 ghosts encountered solely within the ScareScraper (not including normal Polterpups). One of 45 of these ghosts (excluding the [[Big Polterpup]] and [[The Brain]]) are fought on every fifth floor, and The Brain is fought on the final floor. If the player is playing multiplayer without a game card, then they see special boss ghosts simply as larger, yellow, common ghosts. | |||
Names in parentheses are the British English localization if different from the American English name. | |||
====Gold Ghost Series==== | |||
{|class=wikitable cellspacing=0 cellpadding=3 width=100% border=1 style="font-style:Arial;border-collapsible:collapse;text-align:center" | |||
|- | |||
!width=10%|Ghost | |||
!width=10%|Name | |||
!width=80%|Ghost Container Description | |||
|- | |||
|[[File:BombBrothersLMDM.png|200px]] | |||
|[[Bomb Brother]] | |||
|align=left|''These identical twin brothers sure have a blast playing with bombs!'' | |||
|- | |||
|[[File:LMDM Beetle Whisperer.png|200px]] | |||
|[[Beetle Whisperer]]<br>(Scarab Nabber) | |||
|align=left|''This ghost isn't exactly a people person. He gets downright grumpy when disturbed, and won't hesitate to "introduce" you to his beetle friends.'' | |||
|- | |||
|[[File:Terribleteleporter.png|200px]] | |||
|[[Terrible Teleporter]] | |||
|align=left|[[File:Flag of USA.png|25px]]: ''These twin [[sneaker]]s are trouble with a capital T! Mess with them and you might end up being teleported out of the room! I learned that lesson the hard way.''<br> | |||
[[File:Flag of Europe.png|25px]]: ''These twin sneakers are trouble with a capital T! Mess with them and you're likely to be teleported out of the room! I learned that the hard way.'' | |||
|- | |||
|[[File:LMDM Primordial Goo.png|200px]] | |||
|[[Primordial Goo]] | |||
|align=left|[[File:Flag of USA.png|25px]]: ''This ancient ghost is the granddaddy of all [[Creeper]]s. Be careful! If you pull too hard, you might get more than you bargained for!''<br> | |||
[[File:Flag of Europe.png|25px]]: ''This ancient ghost here is your chief Creeper. Be careful around this fellow, or you might get more than you bargained for!'' | |||
|- | |||
|[[File:Creeper Launcher.png|200px]] | |||
|[[Creeper Launcher]]<br>(Creeper Creator) | |||
|align=left|''An enormous ghost with the uncanny ability to produce other ghosts! I've never seen anything like it! I'd recommend ghost hunters deal with him in a group, just to be safe.'' | |||
|} | |||
=== | ====Common Ghosts==== | ||
{|class=wikitable cellspacing=0 cellpadding=3 width=100% border=1 style="font-style:Arial;border-collapsible:collapse;text-align:center" | |||
|- | |||
!width=10%|Ghost | |||
!width=10%|Name | |||
!width=80%|Ghost Container Description | |||
|- | |||
|[[File:Polterpup ScareScraper.png|200px]] | |||
|[[Polterpup]] | |||
|align=left|''Normally very playful and kind, the Polterpups started misbehaving after the Dark Moon shattered.'' | |||
|- | |||
|[[File:BigPolterpup ScareScraper.png|200px]] | |||
|[[Big Polterpup]] | |||
|align=left|''This pooch is big, so it might take more than one ghost hunter to keep him under control!'' | |||
|- | |||
|[[File:TheBrain ScareScraper.png|200px]] | |||
|[[The Brain]] | |||
|align=left|[[File:Flag of USA.png|25px]]: ''This cunning ghost is the most evolved of all the [[Poltergeist]]s. He awaits ghost hunters who are both brave and smart enough to match his powers.''<br> | |||
[[File:Flag of Europe.png|25px]]: ''This ghost is the most cunning of the Boffins. He awaits ghost trackers who are both brave and smart enough to match his powers.'' | |||
|} | |||
=== | ====Fashion Ghost Series==== | ||
{|class=wikitable cellspacing=0 cellpadding=3 width=100% border=1 style="font-style:Arial;border-collapsible:collapse;text-align:center" | |||
|- | |||
!width=10%|Ghost | |||
!width=10%|Name | |||
!width=80%|Ghost Container Description | |||
|- | |||
|[[File:Fright Knight.png|200px]] | |||
|[[Bomb Brother#Fright Knight|Fright Knight]] | |||
|align=left|''Rumor has it that this [[Greenie]] comes from the middle ages, where he was a knight searching for a kidnapped princess. Sadly, wherever he went, she always seemed to be in another castle.'' | |||
|- | |||
|[[File:LMDM Cold Catcher.png|200px]] | |||
|[[Beetle Whisperer#Cold Catcher|Cold Catcher]]<br>(Snug Thug) | |||
|align=left|[[File:Flag of USA.png|25px]]: ''Even tough guys get chilly every now and then. Trust me. I speak from experience.''<br> | |||
[[File:Flag of Europe.png|25px]]: ''Slammers are mainly known for their strength, but this one has enough brains to know that when it's cold, you need to wear a coat!'' | |||
|- | |||
|[[File:FreakerSneaker LMDM.png|200px]] | |||
|[[Terrible Teleporter#Freaker Sneaker|Freaker Sneaker]]<br>(Sleek Sneaker) | |||
|align=left|[[File:Flag of USA.png|25px]]: ''It seems this narcissistic ghost doesn't like to turn invisible because he wants everyone to see how good he looks. Bizarre.''<br> | |||
[[File:Flag of Europe.png|25px]]: ''It seems this narcissistic ghost doesn't like turning invisible because it makes it harder for the other ghosts to be dazzled by its fashion sense.'' | |||
|- | |||
|[[File:LMDM Tether Jacket.png|200px]] | |||
|[[Primordial Goo#Tether Jacket|Tether Jacket]] | |||
|align=left|''At first I thought he was trying to attack me, but then I realized he just wanted me to try on his fancy jacket. He could have just asked...'' | |||
|- | |||
|[[File:Yukata Ball.png|200px]] | |||
|[[Creeper Launcher#Yukata Ball|Yukata Ball]]<br>(Spectral Sloth) | |||
|align=left|''After a nice hot shower and with no other plans for the day, this [[Gobber]] slips right into his bathrobe and gets ready to lounge around. This ghost is living the dream.'' | |||
|} | |||
=== | ====Flower Ghost Series==== | ||
{|class=wikitable cellspacing=0 cellpadding=3 width=100% border=1 style="font-style:Arial;border-collapsible:collapse;text-align:center" | |||
|- | |||
!width=10%|Ghost | |||
!width=10%|Name | |||
!width=80%|Ghost Container Description | |||
|- | |||
|[[File:Blue Pimpernel.png|200px]] | |||
|[[Bomb Brother#Blue Pimpernel|Blue Pimpernel]] | |||
|align=left|[[File:Flag of USA.png|25px]]: ''I imagine he would have chosen green flowers instead of blue, but green flowers are surprisingly difficult to find. Go figure.''<br> | |||
[[File:Flag of Europe.png|25px]]: ''I imagine he would have chosen green flowers instead of blue, but green flowers are surprisingly difficult to find. Who would've guessed?'' | |||
|- | |||
|[[File:LMDM SunFlower.png|200px]] | |||
|[[Beetle Whisperer#Sun Flower|Sun Flower]] | |||
|align=left|''Heh! The funny thing...heh heh...the funny thing is...he can't stand the sun! Ho ho! Oho! Hooooo... Is that irony? I never know if I'm using that word correctly.'' | |||
|- | |||
|[[File:LMDM Pink Zinnia.png|200px]] | |||
|[[Terrible Teleporter#Pink Zinnia|Pink Zinnia]] | |||
|align=left|''Whenever he appears, he's hard to miss!'' | |||
|- | |||
|[[File:Violet LMDM.png|200px]] | |||
|[[Primordial Goo#Violet|Violet]] | |||
|align=left|''When he's in puddle form, he looks like a little garden dotted with beautiful flowers. It's really breathtaking...but not in a good way.'' | |||
|- | |||
|[[File:Daisy Ghost.png|200px]] | |||
|[[Creeper Launcher#Daisy|Daisy]] | |||
|align=left|[[File:Flag of USA.png|25px]]: ''When he's not hungry, he's probably as gentle as a freshly picked flower. Too bad he has a bottomless stomach.''<br> | |||
[[File:Flag of Europe.png|25px]]: ''When he's not hungry, he's probably as gentle as a freshly picked flower. Too bad we'll never know, though; this fellow has a bottomless stomach.'' | |||
|} | |||
=== | ====Food Ghost Series==== | ||
{|class=wikitable cellspacing=0 cellpadding=3 width=100% border=1 style="font-style:Arial;border-collapsible:collapse;text-align:center" | |||
|- | |||
!width=10%|Ghost | |||
!width=10%|Name | |||
!width=80%|Ghost Container Description | |||
|- | |||
|[[File:Spookumber.png|200px]] | |||
|[[Bomb Brother#Spookumber|Spookumber]]<br>(Melon-choly) | |||
|align=left|[[File:Flag of USA.png|25px]]: ''He may look like one of my favorite vegetables, but this ghost didn't come from a creeping vine. More like a creepy vine, right?''<br> | |||
[[File:Flag of Europe.png|25px]]: ''Although his body looks like a big ol' melon, the vertical stripes have a slimming effect.'' | |||
|- | |||
|[[File:LMDM Aweberry.png|200px]] | |||
|[[Beetle Whisperer#Aweberry|Aweberry]] | |||
|align=left|''His favorite thing to do is dip himself in mud and pretend it's chocolate. It's...odd, to say the least.'' | |||
|- | |||
|[[File:LMDM Scorn.png|200px]] | |||
|[[Terrible Teleporter#Scorn|Scorn]] | |||
|align=left|[[File:Flag of USA.png|25px]]: ''This funny-looking ghost has kernels for teeth. I bet he wishes he could pop them when he smiles - if not to give people a big ol'fright, at least to get free popcorn at the movie theater.''<br> | |||
[[File:Flag of Europe.png|25px]]: ''This funny-looking ghost has kernels for teeth. I bet he wishes he could pop them all at once - if not to give people a big ol'fright, at least to get free popcorn at the cinema.'' | |||
|- | |||
|[[File:Scareambles.png|200px]] | |||
|[[Primordial Goo#Scareambles|Scareambles]]<br>(Fright Egg) | |||
|align=left|''Eureka! This ghostly egg can reassemble itself once it's cracked!'' | |||
|- | |||
|[[File:Terrorange.png|200px]] | |||
|[[Creeper Launcher#Terrorange|Terrorange]] | |||
|align=left|[[File:Flag of USA.png|25px]]: ''He once helped an amateur farmer win a contest by pretending he was a gigantic orange. Don't ask me how I know that.''<br> | |||
[[File:Flag of Europe.png|25px]]: ''Once he helped a farmer win a contest by pretending he was a gigantic orange. Don't ask me how I know that.'' | |||
|} | |||
=== | ====Halloween Ghost Series==== | ||
{|class=wikitable cellspacing=0 cellpadding=3 width=100% border=1 style="font-style:Arial;border-collapsible:collapse;text-align:center" | |||
|- | |||
!width=10%|Ghost | |||
!width=10%|Name | |||
!width=80%|Ghost Container Description | |||
|- | |||
|[[File:Spooky Spook.png|200px]] | |||
|[[Bomb Brother#Spooky Spook|Spooky Spook]] | |||
|align=left|[[File:Flag of USA.png|25px]]: ''That's not a costume. He always dresses like that. Seriously.''<br> | |||
[[File:Flag of Europe.png|25px]]: ''That's not a costume. He's just really retro.'' | |||
|- | |||
|[[File:LMDM Scars.png|200px]] | |||
|[[Beetle Whisperer#Scars|Scars]] | |||
|align=left|''Even though he's both a zombie and a ghost, he has fun and enjoys life to the fullest.'' | |||
|- | |||
|[[File:LMDM Scool.png|200px]] | |||
|[[Terrible Teleporter#Scool|Scool]]<br>(Skoul) | |||
|align=left|[[File:Flag of USA.png|25px]]: ''There's no denying that he looks creepy, but he's actually a pretty interesting feller once you get to know him.''<br> | |||
[[File:Flag of Europe.png|25px]]: ''On first impression, you might think this fellow is creepy, but once you get to know him....you know for sure.'' | |||
|- | |||
|[[File:Jack-goo-lantern LMDM.png|200px]] | |||
|[[Primordial Goo#Jack-goo-lantern|Jack-goo-lantern]] | |||
|align=left|''It's always "trick or trick" with this guy! He seems to have conveniently forgotten the treat part. Sheesh!'' | |||
|- | |||
|[[File:Blimp Reaper.png|200px]] | |||
|[[Creeper Launcher#Blimp Reaper|Blimp Reaper]] | |||
|align=left|''Instead of a scythe, he walks around with a giant roast turkey leg. Uh huh...'' | |||
|} | |||
=== | ====Bug Ghost Series==== | ||
{|class=wikitable cellspacing=0 cellpadding=3 width=100% border=1 style="font-style:Arial;border-collapsible:collapse;text-align:center" | |||
|- | |||
!width=10%|Ghost | |||
!width=10%|Name | |||
!width=80%|Ghost Container Description | |||
|- | |||
|[[File:Dreadonfly.png|200px]] | |||
|[[Bomb Brother#Dreadonfly|Dreadonfly]] | |||
|align=left|''He doesn't have two pairs of wings. In fact, he doesn't have any wings. What good are wings on a ghost?'' | |||
|- | |||
|[[File:LMDM Lady Gug.png|200px]] | |||
|[[Beetle Whisperer#Lady Gug|Lady Gug]]<br>(Shadybird) | |||
|align=left|[[File:Flag of USA.png|25px]]: ''Sure, his name might have "lady" in it, but nothing could be further from the truth.''<br> | |||
[[File:Flag of Europe.png|25px]]: ''His name may have "bird" in it, but don't expect him to sing for you.'' | |||
|- | |||
|[[File:LMDM FrightFly.png|200px]] | |||
|[[Terrible Teleporter#Fright Fly|Fright Fly]]<br>(Terrorfly) | |||
|align=left|''Criminy! I didn't think something so small could be so...terrifying! The size-to scare ratio of this little guy is off the charts!'' | |||
|- | |||
|[[File:Blobberfly.png|200px]] | |||
|[[Primordial Goo#Blobberfly|Blobberfly]] | |||
|align=left|''This ghost isn't anywhere near as graceful as a regular butterfly, or as harmless.'' | |||
|- | |||
|[[File:Go Bee.png|200px]] | |||
|[[Creeper Launcher#Go-Bee|Go-Bee]]<br>(Grumble Bee) | |||
|align=left|[[File:Flag of USA.png|25px]]: ''Incredible! This ghostly bee has glands that produce delicious spectral honey! Although, too much of the stuff will make your tongue numb. Take my word for it.''<br> | |||
[[File:Flag of Europe.png|25px]]: ''Instead of covering everything with goo, our stripey friend here prefers to splatter the walls and floors with honey. But be careful not to lick it! It'll make your tongue go numb.'' | |||
|} | |||
=== | ====Marine Ghost Series==== | ||
{|class=wikitable cellspacing=0 cellpadding=3 width=100% border=1 style="font-style:Arial;border-collapsible:collapse;text-align:center" | |||
|- | |||
!width=10%|Ghost | |||
!width=10%|Name | |||
!width=80%|Ghost Container Description | |||
|- | |||
|[[File:Horrorca.png|200px]] | |||
|[[Bomb Brother#Horrorca|Horrorca]] | |||
|align=left|''Fascinating! This ghost appears to speak fluent Whale!'' | |||
|- | |||
|[[File:LMDM ClownFishy.png|200px]] | |||
|[[Beetle Whisperer#Clown Fishy|Clown Fishy]] | |||
|align=left|''The reason this fellow is so angry is because people keep thinking clown fish are actual clowns. They're not. No sense of humor whatsoever. Didn't laugh at any of my jokes.'' | |||
|- | |||
|[[File:LMDM ShriekShark.png|200px]] | |||
|[[Terrible Teleporter#Shriek Shark|Shriek Shark]] | |||
|align=left|''The entire time I've been observing him, this tough looking spook has been practicing swimming through the air like a shark. Still needs some work.'' | |||
|- | |||
|[[File:Pondguin LMDM.png|200px]] | |||
|[[Primordial Goo#Pondguin|Pondguin]] | |||
|align=left|''I tried to feed him some fish, but he wouldn't eat them. He just kept trying to scare them. It didn't work.'' | |||
|- | |||
|[[File:Wurdle.png|200px]] | |||
|[[Creeper Launcher#Wurdle|Wurdle]]<br>(Snapper) | |||
|align=left|[[File:Flag of USA.png|25px]]: ''This ghost would have you believe that he moves very slowly, but he's just trying to trick you. He's actually very fast!''<br> | |||
[[File:Flag of Europe.png|25px]]: ''This ghost would have you believe that he moves really slowly, but don't be fooled - it's just an act. Yep, this one's not just crafty, he's pretty swift too!'' | |||
|} | |||
=== | ====Sport Ghost Series==== | ||
{|class=wikitable cellspacing=0 cellpadding=3 width=100% border=1 style="font-style:Arial;border-collapsible:collapse;text-align:center" | |||
|- | |||
!width=10%|Ghost | |||
!width=10%|Name | |||
!width=80%|Ghost Container Description | |||
|- | |||
|[[File:Bad-minton.png|200px]] | |||
|[[Bomb Brother#Bad-minton|Bad-minton]] | |||
|align=left|[[File:Flag of USA.png|25px]]: ''He tries to act like a roughneck, but he secretly loves argyle sweater-vests. I'm pretty sure he comes from old money.''<br> | |||
[[File:Flag of Europe.png|25px]]: ''He's not bad, per se. He's just... really mischievous.'' | |||
|- | |||
|[[File:LMDM Footbrawl.png|200px]] | |||
|[[Beetle Whisperer#Footbrawl|Footbrawl]]<br>(American Footbrawl) | |||
|align=left|[[File:Flag of USA.png|25px]]: ''I'd stay out of his way unless you want to get tackled. He's been voted MVP of the ghost football league for three consecutive years!''<br> | |||
[[File:Flag of Europe.png|25px]]: ''I'd stay out of his way unless you want to get tackled. Nothing like a bit of protective padding to bring out your boisterous side.'' | |||
|- | |||
|[[File:LMDM TennisMenace.png|200px]] | |||
|[[Terrible Teleporter#Tennis Menace|Tennis Menace]] | |||
|align=left|''Careful with this one! He's been known to sneak onto tennis courts midmatch and cover the ball with ghostly goo!'' | |||
|- | |||
|[[File:Goolf LMDM.png|200px]] | |||
|[[Primordial Goo#Goolf|Goolf]] | |||
|align=left|''The only thing he enjoys more than playing golf is creating "hazards" on the green.'' | |||
|- | |||
|[[File:Soccerball - Luigi's Mansion.png|200px]] | |||
|[[Creeper Launcher#Soccer Ball|Soccer Ball]]<br>(Ball Hog) | |||
|align=left|[[File:Flag of USA.png|25px]]: ''Whatever you do, don't try to touch him with your hands! Oddly, though, he doesn't mind if you knock him around with your feet.''<br> | |||
[[File:Flag of Europe.png|25px]]: ''Whatever you do, don't try to pick him up or touch him with your hands! He hates that. Oddly, though, he doesn't seem to mind if you knock him around with your feet.'' | |||
|} | |||
=== | ====Animal Ghost Series==== | ||
{|class=wikitable cellspacing=0 cellpadding=3 width=100% border=1 style="font-style:Arial;border-collapsible:collapse;text-align:center" | |||
|- | |||
!width=10%|Ghost | |||
!width=10%|Name | |||
!width=80%|Ghost Container Description | |||
|- | |||
|[[File:Awelligator.png|200px]] | |||
|[[Bomb Brother#Awelligator|Awelligator]]<br>(Maligator) | |||
|align=left|[[File:Flag of USA.png|25px]]: ''Much like a real gator, he hides under the water until someone steps a little too close.''<br> | |||
[[File:Flag of Europe.png|25px]]: ''Much like a real alligator, he hides under the water until someone steps a little too close.'' | |||
|- | |||
|[[File:LMDM Banegal.png|200px]] | |||
|[[Beetle Whisperer#Banegal|Banegal]] | |||
|align=left|''He tries to roar ferociously, but what comes out sounds more like an adorable kitty meowing. Don't tell him I said that.'' | |||
|- | |||
|[[File:LMDM Zebrawl.png|200px]] | |||
|[[Terrible Teleporter#Zebrawl|Zebrawl]] | |||
|align=left|''Between you and me, his striped camouflage seems a bit unnecessary considering he can turn invisible whenever he wants.'' | |||
|- | |||
|[[File:LMDM Leoprank.png|200px]] | |||
|[[Primordial Goo#Leoprank|Leoprank]] | |||
|align=left|''His hunting method is simple but effective: He waits until someone steps on him'' | |||
|- | |||
|[[File:Cawe.png|200px]] | |||
|[[Creeper Launcher#Cawe|Cawe]]<br>(Full Moo) | |||
|align=left|''I don't recommend pouring this ghostly bovine's milk over your cereal. Trust me on this. I'm still cleaning up the mess.'' | |||
|} | |||
=== | ===''Luigi's Mansion 3''=== | ||
====Rare Ghosts==== | |||
{|class="wikitable"width=100% | |||
!width=5%|Ghost | |||
!width=10%|Name | |||
!width=1%|HP | |||
!width=84%|Description | |||
|- | |||
|[[File:LM3ASpeedGoob.png|120px]] | |||
|style="text-align:center"|[[Speed Goob]] | |||
|style="text-align:center"|250 | |||
|Red-glowing variants of Goobs that are much faster than their ordinary counterparts. | |||
|- | |||
|[[File:LM3ASpeedHammer.png|120px]] | |||
|style="text-align:center"|[[Speed Hammer]] | |||
|style="text-align:center"|350 | |||
|Red-glowing variants of Hammers that are much faster than their ordinary counterparts. | |||
|- | |||
|[[File:LM3ASpeedOozer.png|120px]] | |||
|style="text-align:center"|[[Speed Oozer]] | |||
|style="text-align:center"|200 | |||
|Red-glowing variants of Oozers that are much faster than their ordinary counterparts. | |||
|- | |||
|[[File:BombGoobLM3.png|120px]] | |||
|style="text-align:center"|[[Bomb Goob]] | |||
|style="text-align:center"|250 | |||
|Yellow-glowing variants of Goobs that throw bombs randomly at the player. | |||
|- | |||
|[[File:LM3ABombHammer.png|120px]] | |||
|style="text-align:center"|[[Bomb Hammer]] | |||
|style="text-align:center"|350 | |||
|Yellow-glowing variants of Hammers that throw bombs randomly at the player. | |||
|- | |||
|[[File:BombOozerLM3.png|120px]] | |||
|style="text-align:center"|[[Bomb Oozer]] | |||
|style="text-align:center"|200 | |||
|Yellow-glowing variants of Oozers that throw bombs randomly at the player. | |||
|- | |||
|[[File:LM3ARegenGoob.png|120px]] | |||
|style="text-align:center"|[[Regen Goob]] | |||
|style="text-align:center"|250 | |||
|Pink-glowing variants of Goobs that restore their HP if they are not captured. | |||
|- | |||
|[[File:RegenHammerLM3.png|120px]] | |||
|style="text-align:center"|[[Regen Hammer]] | |||
|style="text-align:center"|350 | |||
|Pink-glowing variants of Hammers that restore their HP if they are not captured. | |||
|- | |||
|[[File:RegenSlinkerLM3.png|120px]] | |||
|style="text-align:center"|[[Regen Slinker]] | |||
|style="text-align:center"|250 | |||
|Pink-glowing variants of Slinkers that restore their HP if they are not captured. | |||
|- | |||
|[[File:LM3 Lethal Goob.jpg|120px]] | |||
|style="text-align:center"|[[Lethal Goob]] | |||
|style="text-align:center"|250 | |||
|Red and black Goobs with glowing eyes that instantly KO the player in one hit. | |||
|- | |||
|align=center|[[File:LM3 Lethal Hammer.png|120px]] | |||
|style="text-align:center"|[[Lethal Hammer]] | |||
|style="text-align:center"|350 | |||
|Red and black Hammers with glowing eyes that instantly KO the player in one hit. | |||
|- | |||
|[[File:LM3 Lethal Oozer.jpg|120px]] | |||
|style="text-align:center"|[[Lethal Oozer]] | |||
|style="text-align:center"|200 | |||
|Red and black Oozers with glowing eyes that instantly KO the player in one hit. | |||
|- | |||
|[[File:LM3 Lethal Slinker.jpg|120px]] | |||
|style="text-align:center"|[[Lethal Slinker]] | |||
|style="text-align:center"|250 | |||
|Red and black Slinkers with glowing eyes that instantly KO the player in one hit. | |||
|- | |||
|align=center|[[File:LM3 Thieving Slinker.png|120px]] | |||
|style="text-align:center"|[[Thieving Slinker]] | |||
|style="text-align:center"|250 | |||
|Dark purple Slinkers with glowing eyes that can steal Luigi's Poltergust (like the ScareScraper trap). | |||
|- | |||
|align=center|[[File:LM3 Medic Goob.png|120px]] | |||
|style="text-align:center"|[[Medic Goob]] | |||
|style="text-align:center"|250 | |||
|Green Goobs that can heal other ghosts. | |||
|- | |||
|align=center|[[File:LM3 Electric Oozer.png|120px]] | |||
|style="text-align:center"|[[Electric Oozer]] | |||
|style="text-align:center"|200 | |||
|Dark blue Oozers that throw balls of electricity at the player. | |||
|- | |||
|align=center|[[File:LM3 Diffusing Goob.png|120px]] | |||
|style="text-align:center"|[[Diffusing Goob]] | |||
|style="text-align:center"|250 | |||
|Orange Goobs that summon large amounts of Mini Goobs. | |||
|- | |||
|align=center|[[File:LM3 Diffusing Hammer.png|120px]] | |||
|style="text-align:center"|[[Diffusing Hammer]] | |||
|style="text-align:center"|350 | |||
|Orange Hammers that summon large amounts of Mini Hammers. | |||
|- | |||
|align=center|[[File:LM3 Warp Slinker.png|120px]] | |||
|style="text-align:center"|[[Warp Slinker]] | |||
|style="text-align:center"|250 | |||
|Cyan Slinkers that, if allowed to grab the player, warp them to another part of the floor. | |||
|} | |||
== | ==Gallery== | ||
<gallery> | <gallery> | ||
RushModeOpening.jpg| | LMDM Scarescraper Silhouette.png|Artwork from ''[[Luigi's Mansion: Dark Moon]]'' | ||
PolterpupModeOpening.jpg| | RushModeOpening.jpg|Opening screen for Rush Mode in ''Luigi's Mansion: Dark Moon'' | ||
PolterpupModeOpening.jpg|Opening screen for Polterpup Mode in ''Luigi's Mansion: Dark Moon'' | |||
</gallery> | </gallery> | ||
==Names in other languages== | ==Names in other languages== | ||
{{ | {{foreign names | ||
| | |Jpn=テラータワー | ||
| | |JpnR=Terā Tawā | ||
| | |JpnM=Terror Tower | ||
| | |Chi=恐怖高塔 | ||
| | |ChiR=Kǒngbù Gāotǎ | ||
|ChiM=Terrifying Tower | |||
| | |||
|Dut=Tumulttoren | |Dut=Tumulttoren | ||
|DutM= | |DutM=Portmanteau of ''tumult'' ("disorder") and ''toren'' ("tower") | ||
|Fre=Tour Hantée | |||
|FreM=Haunted Tower | |||
|Ger=Wirrwarrturm | |Ger=Wirrwarrturm | ||
|GerM=Tangle Tower | |GerM=Tangle Tower | ||
|Ita=Torre del caos | |Ita=Torre del caos | ||
|ItaM=Tower of Chaos | |ItaM=Tower of Chaos | ||
|Kor=공포의 타워 | |||
|KorR=Gongpo-ui Tawo | |||
|KorM=Tower of Terror | |||
|Por=Torre dos Sustos | |Por=Torre dos Sustos | ||
|PorM=Tower of Scares | |PorM=Tower of Scares | ||
|Rus=Башня кошмаров | |Rus=Башня кошмаров | ||
|RusR=Bashnya koshmarov | |||
|RusM=Tower of Nightmares | |RusM=Tower of Nightmares | ||
| | |Rus2=Пугоскреб | ||
| | |Rus2N=''Luigi's Mansion 3'' | ||
| | |Rus2R=Pugoskreb | ||
| | |Rus2M=From ''пугать'' (''pugat'', "to scare") and ''небоскрёб'' (''neboskryob'', "skyscraper") | ||
| | |SpaA=Torre del Horror | ||
| | |SpaAM=Tower of horror | ||
|SpaE=Torre de los Desafíos | |||
|SpaEM=Tower of Challenges | |||
}} | }} | ||
==Trivia== | ==Trivia== | ||
*The ScareScraper uses [ | *The ScareScraper uses [https://www.youtube.com/watch?v=6lzyBpbZ5YA two] [https://www.youtube.com/watch?v=yxsIyQDvzec ghost themes] from [[Gloomy Manor]] and [https://www.youtube.com/watch?v=8VRHDV0YqUQ one] from the [[Treacherous Mansion]]. | ||
*If the Luigis manage to climb more than 99 floors in a ScareScraper on Endless, the game stops counting at 99. | *If the Luigis manage to climb more than 99 floors in a ScareScraper on Endless, the game stops counting at 99. | ||
*One of the fashion ghosts, the [[Fright Knight]], | *One of the fashion ghosts, the [[Fright Knight]], references the original ''[[Super Mario Bros.]]'', where his description says, "He tried to rescue the princess, but she was always in another castle". | ||
* In [http://www.mtv.com/news/2466737/luigis-mansion-dark-moon-qa-part-2-multiplayer-luigis-nintendo-land-and-the-poltergust/ an interview] with [[Next Level Games]], it is revealed having [[Mario]], [[Toad]], and [[Princess Peach|Peach]] was considered at one point, but they | * In [http://www.mtv.com/news/2466737/luigis-mansion-dark-moon-qa-part-2-multiplayer-luigis-nintendo-land-and-the-poltergust/ an interview] with [[Next Level Games]], it is revealed having [[Mario]], [[Toad]], and [[Princess Peach|Peach]] be playable characters was considered at one point, but they would not fit within the space for Download Play, which is limited to 32 MB. | ||
* According to an Iwata Asks interview, [[Luigi's Ghost Mansion]] helped adjust a mechanic used in the ScareScraper. Originally, the developers wanted a fallen Luigi to stay dead and could not be revived. After playing Luigi's Ghost Mansion, they changed it so other players could revive a fallen Luigi<ref>[https://iwataasks.nintendo.com/interviews/#/3ds/luigis-mansion-dark-moon/0/3 Iwata Asks - Luigi's Mansion: Dark Moon, page 4]</ref>. | |||
*During "Collect the Money!" in ''Luigi's Mansion 3'', the [[Golden Goob]] / [[Jewel Rausuto]] theme plays regardless if the enemy encountered is a Golden Goob or not. | |||
==References== | |||
<references/> | |||
{{LMDM}} | {{LMDM}} | ||
{{LM3}} | |||
[[Category:Towers]] | [[Category:Towers]] | ||
[[Category:Ghost Houses]] | [[Category:Ghost Houses]] | ||
[[Category:Luigi's Mansion: Dark Moon | [[Category:Luigi's Mansion: Dark Moon locations]] | ||
[[Category:Luigi's Mansion 3 locations]] | |||
[[de:Wirrwarrtur]] | |||
[[it:Torre del caos]] | |||
Latest revision as of 21:48, January 7, 2025
- “This nightmarish skyscraper full of ghostly challenges awaits you and your courageous friends! Can you battle your way to the top?”
- —E. Gadd (In-game description), Luigi's Mansion: Dark Moon
The ScareScraper (known as the Thrill Tower in the British English version of Luigi's Mansion: Dark Moon) is the multiplayer mode of Luigi's Mansion: Dark Moon and Luigi's Mansion 2 HD that is unlocked by completing the fourth mission, Visual Tricks, in the main game. The mode returns in Luigi's Mansion 3. It can be played online, locally, or alone. Its name is a portmanteau of "scare" and "skyscraper".
The game puts four different-colored Luigis (as well as four other different-colored Gooigis in Luigi's Mansion 3) in one of the modes. The host player can set the amount of floors to five, ten, twenty-five, and endless, as well as the difficulty of the mode: Normal, Hard, and Expert. The endless floor option is available only for the chosen mode once the 25 floors of that game mode are cleared. If the amount of floors is set to endless, the difficulty is automatically set to endless and cannot be changed. The final room is always the roof, unless it is set on Endless. The ghost bosses in the ScareScraper have different amounts of HP than their original versions in the main game, and in Dark Moon, for every five floors cleared, non-boss ghosts gain 5 additional health.
The game ends when all Luigis are KO'd (or trapped), or when they do not complete a floor in an amount of time. Other Luigis can revive a fainted Luigi by pressing (
repeatedly in Luigi's Mansion 3) near him to revive him. This brings his HP back to 20, and it releases hearts (50 in Luigi's Mansion 3). Luigis can communicate with each other (even when KO'd in Dark Moon) when the player either presses the
or touches the touchscreen.
In Luigi's Mansion 3, every ScareScraper floor features a different objective.[1]
Players[edit]
When playing a ScareScraper, Luigis are colored depending on the order of when they join it, meaning that the player is always a green Luigi when playing solo on their own ScareScraper or hosting it for other players. Player 2's Luigi's cap, Poltergust, overalls (undershirt in Luigi's Mansion 3), and Gooigi (in Luigi's Mansion 3) are blue; player 3's are orange; and player 4's are pink (pink and orange are switched in Luigi's Mansion 3). All players wear Luigi's standard green undershirts in Luigi's Mansion: Dark Moon and blue overalls in Luigi's Mansion 3.
Voice commands[edit]
Luigi's Mansion: Dark Moon[edit]
- "Hey!" (
)
- "Thank you very much!" (
)
- "Good job!" (
)
- "Help help!" (
)
- "Over here!" (
 )
)
Luigi's Mansion 3[edit]
- "Over here!" (
)
- "Thank you!" (
)
- "Help!" (
)
Luigi's Mansion 2 HD[edit]
- "Hey!"
- "Help!"
- "Thank you!"
- "Good job!"
The "Over here!" voice command has been removed, due to the lack of a second screen on the Nintendo Switch.
Modes[edit]
Luigi's Mansion: Dark Moon / Luigi's Mansion 2 HD[edit]
Hunter Mode[edit]
All Luigis work together to capture all ghosts on the floors before time runs out. A gauge on the right side of the bottom screen shows ghostly activity that empties as ghosts are captured. Depending on the difficulty, such as in Endless mode, Strong versions of ghosts may appear in earlier floors. The time limit is 5 minutes per floor.
- Names in other languages
| Language | Name | Meaning | Notes |
|---|---|---|---|
| Dutch | Jachtstand[?] | Hunting Mode | |
| French | Chasse[?] | Hunting | |
| German | Jäger-Modus[?] | Hunter Mode | |
| Italian | Modalità Cacciatore[?] | Hunter Mode | |
| Portuguese | Modo de Caça[?] | Hunt Mode | |
| Spanish | Modo Caza[?] | Hunt Mode |
Rush Mode[edit]
Luigis try to escape each floor by reaching the exit and stepping on the switches before time runs out. The timer starts at 30 seconds (45 in Luigi's Mansion 2 HD), but the time limit can be extended by collecting timepieces (for an additional 10 seconds) from paintings and furniture, or by clearing rooms of ghosts. Rush Mode does not have locked doors or keys, however, Gobbers may occasionally drop from ceilings in dark rooms and block the doors with its goo; they must be captured in order to proceed.
- Names in other languages
| Language | Name | Meaning | Notes |
|---|---|---|---|
| Dutch | Tijdnoodstand[?] | Timetrouble Mode | |
| French | Sprint[?] | Sprint | |
| German | Tempo-Modus[?] | Speed Mode | |
| Italian | Modalità Tempo[?] | Time Mode | |
| Portuguese | Modo de Tempo[?] | Time Mode | |
| Spanish | Modo Tiempo[?] | Time Mode |
Polterpup Mode[edit]
Luigis work together to capture all Polterpups on each floor by following their invisible paw prints with the Dark-Light Device. The Luigis must first locate the kennel before the Polterpups can even be caught. Sometimes Polterpups may even summon other ghosts to hinder progress. Depending on the difficulty of the ScareScraper, the amount of Polterpups to be captured on a floor vary, ranging from a minimum of 2 Polterpups to a maximum of 6. The Luigis have 5 minutes to capture them all.
- Names in other languages
| Language | Name | Meaning | Notes |
|---|---|---|---|
| Dutch | Polterpupstand[?] | Polterpup Mode | |
| French | Traque[?] | Hunt | |
| German | Pinscher-Modus[?] | Pinscher Mode | |
| Italian | Modalità Poltercuccioli[?] | Polterpups Mode | |
| Portuguese | Modo de Fantacães[?] | Polterpups Mode | |
| Spanish (NOA) | Modo Espectroguau[?] | Polterpup Mode | Luigi's Mansion 2 HD |
| Modo Espectrochucho[?] | Luigi's Mansion: Dark Moon | ||
| Spanish (NOE) | Modo Ectochucho[?] | Polterpup Mode |
Surprise Mode[edit]
A combination of the Hunter, Rush, and Polterpup Modes — two Hunter Mode floors, one Rush Mode floor, and one Polterpup Mode floor in random order. It is unlocked by completing the other three modes on any difficulty/floor amount at least once.
- Names in other languages
| Language | Name | Meaning | Notes |
|---|---|---|---|
| German | Zufalls-Modus[?] | Coincidence Mode | |
| Italian | Modalità Sorpresa[?] | Surprise Mode | |
| Spanish (NOE) | Modo Sorpresa[?] | Surprise Mode |
Luigi's Mansion 3[edit]
In Luigi's Mansion 3, there are only four modes that are selected randomly when a new floor starts. Only either five, ten, twenty (as of version 1.3.1), or random floors can be selected when starting up a new game.
Capture the Ghosts![edit]
The Luigis must catch all of the ghosts in some rooms located on the map within five minutes; unlike in Luigi's Mansion: Dark Moon, however, time pieces can be found to add 30 seconds on the clock. Once all ghosts are captured, players can advance to the next floor. The total number of ghosts captured is displayed on the bottom right corner of the screen. On rare occasions, all of the ghosts on a floor can be Mini Goobs and Mini Hammers.
- Names in other languages
| Language | Name | Meaning | Notes |
|---|---|---|---|
| Japanese | すべてのおばけを つかまえろ![?] Subete no obake o tsukamaero! |
Catch all the ghosts! | |
| French | Capturez les fantômes ![?] | Capture the ghosts! | |
| German | Fange alle Geister![?] | Capture all the Ghosts! | |
| Italian | Cattura i fantasmi![?] | Capture the ghosts! | |
| Korean | 유령을 전부 붙잡아라![?] Yuryeong-eul jeonbu butjjabara! |
Catch all the ghosts! | |
| Spanish (NOA) | ¡Atrapa a todos los fantasmas![?] | - | |
| Spanish (NOE) | ¡Caza a los fantasmas![?] | Hunt the ghosts! |
Collect the Money![edit]
The Luigis have five minutes to collect the amount of money required to advance to the next floor. They must search every room possible with Coins, Bills, Gold Bars, and Pearls. Most rooms contain Golden Goobs hidden in some furniture to search for and shows a gold sparkle where it is located; some furniture may need to be revealed with Dark-Light Device. Gold Goobs also hide inside boxes which Luigi must pull a string one side with Gooigi or another Luigi on another side to open. The amount of money needed to be collected depends on how many players are on during this event. The amount of money collected is displayed at the bottom right corner of the screen.
Prior to version 1.3.1, only Golden Goobs and possessed bins appeared in this mode, but later versions of the game add normal ghosts too, with the boxes sometimes either holding the Golden Goobs along with a Hammer or five normal Goobs, or some money without any ghosts appearing. Normal ghosts can also spawn in a room a player walks into for the first time, without any furniture being shaken or boxes being opened.
- One player: 4500G
- Two players: 6000G
- Three players: 7500G
- Four players: 10000G
- Names in other languages
| Language | Name | Meaning | Notes |
|---|---|---|---|
| Japanese | お Okane o kaishū shiro! |
Collect the money! | |
| French | Ramassez l'argent ![?] | Collect the money! | |
| Italian | Raccogli il denaro![?] | Collect the money! | |
| Korean | 돈을 회수하라![?] Don-eul Hoesuhara! |
Collect the money! | |
| Spanish (NOA) | ¡Recoge todo el dinero![?] | Collect all the money! |
Find the Toads![edit]
The Luigis must search for four colored Toads hidden in the rooms. They come in red, blue, yellow, and green. When a Toad is found, they cannot proceed if a room is dark as they will panic while ghosts are present, Toads also cannot proceed if a Possessed Bin is triggered. Once a room is cleared, the Toad can be led back to where the Luigis spawned. The number of Toads rescued is displayed at the bottom right corner of the screen.
- Names in other languages
| Language | Name | Meaning | Notes |
|---|---|---|---|
| Japanese | キノピオを Kinopio o sagase! |
Find the Toads! | |
| French | Trouvez les Toads ![?] | Find the Toads! | |
| German | Finde alle Toads![?] | Find all the Toads! | |
| Italian | Trova i Toad![?] | Find the Toads! | |
| Korean | 키노피오를 찾아라![?] Kinopio-reul chajara! |
Find the Toads! | |
| Spanish (NOA) | ¡Encuentra a los Toads![?] | Find the Toads! | |
| Spanish (NOE) | ¡Busca a los Toads![?] | Search for the Toads! |
Defeat the Crows![edit]
The Luigis must defeat all of the crows found in the rooms and with a Strobulb charge or by vacuuming them up. Prior to version 1.3.1, no ghosts appeared in this mode, but they do appear in later versions of the game. The number of crows defeated is displayed at the bottom right corner of the screen.
- Names in other languages
| Language | Name | Meaning | Notes |
|---|---|---|---|
| Japanese | すべてのカーラを Subete no Kāra o taose! |
Defeat all the crows! | |
| French | Éliminez les corbeaux ![?] | Eliminate the crows! | |
| German | Besiege alle Krähen![?] | Defeat all the Crows! | |
| Italian | Sconfiggi i corvi![?] | Defeat the crows! | |
| Korean | 까악을 전부 쓰러뜨려라![?] Kkaak-eul jeonbu sseureotteuryeora! |
Knock down all the crows! | |
| Spanish | ¡Derrota a los cuervos![?] | Defeat the crows! |
Boss Floors[edit]
Luigi's Mansion: Dark Moon / Luigi's Mansion 2 HD[edit]
On every fifth floor, a boss ghost is fought, regardless of the mode. On the final floor, The Brain is always the boss (unless playing on Endless). Boss ghosts are assisted by regular ghosts as the Luigis vacuum them up, with more regular ghosts appearing with more players. The Luigis have 5 minutes to defeat the boss.
After clearing a Boss Floor, all ghosts' HP increase by 5, other than bosses. This only affects them if the host player selects more than 5 floors.
Luigi's Mansion 3[edit]
If the host selects ten or twenty floors at the beginning of a new game, every 5 floors will have a rare ghost boss; the Luigis need to find the key to progress and all four of them including switching to Gooigis must stand on a huge button to begin the rare ghost boss fight. There are 19 rare ghosts in the game and one on each 5th floor is random; they include Speed ghosts, Bomb ghosts, Regen ghosts, Lethal ghosts, a Thieving Slinker that can temporarily steal the Poltergust, a Medic Goob that can heal other ghosts, an Electric Oozer that shoots electricity, two Diffusing ghosts that can summon mini versions of themselves, and a Warp Slinker that can teleport a player to a random room on the floor.
Additionally, if a DLC floor theme is chosen, there is a chance that "mini-boss" style rare ghosts will appear there, even if it is not a boss floor. These are thematically appropriate versions of Goobs and Hammers with more HP, and appear in large groups in rooms off of the main path.
On the roof of a ScareScraper, a Boolossus battle begins which is similar to the King Boo boss fight; the Luigis must defeat it within ten minutes to complete the ScareScraper.
Bonuses[edit]
Luigi's Mansion: Dark Moon / Luigi's Mansion 2 HD[edit]
When a floor is completed, the Red Coin Scramble! occurs: four Red Coins appear in random rooms and the Luigis have 20 seconds to collect them all for a chance to play Red Coin Bonus! (a sole Luigi has an all-or-nothing chance to play). The bonus game rewards a Luigi with a bonus item if their icon stops next to it. The more Red Coins a Luigi gets, the more consecutive icons of his appear in the roulette, increasing his chances of winning the bonus item at the end of the floor (a sole Luigi has a bonus item randomly selected). The bonus items consist of the following:
- Dark-Light Goggles - Reveals invisible objects and ghosts to players before the Dark-Light Device is used.
- Poltergust x2 or Poltergust x3 - Increases the sucking power of the vacuum. Stacks with Poltergust Suction upgrades (once earned).
- Restorator (Heal-Vac in the British English version) - Converts captured ghosts into hearts.
- Map - Reveals the entire floor layout. This includes the exit (in Rush Mode) and Polterpup locations (in Polterpup Mode). In Rush Mode, a map can sometimes be obtained once a dark room that it is in is cleared of ghosts.
Bonus items take effect only on the next floor. Sometimes a bonus item can even be found in vases, paintings, or other furniture. A Luigi can have up to three bonus items equipped at a time.
Luigi's Mansion 3[edit]
In ScareScraper, the Luigis can find items throughout each floor, which only lasts until the next floor. Sometimes a floor may have a hidden room containing a chest of four items and money, which can be found with the use of the Dark-Light Device from an invisible door with two lights next to it.
- Hyper Strobulb - Lights up the entire room with a powerful flash, stunning every ghost and defeating every mouse and crow after use.
- Super Poltergust - Possesses a very strong suction power that instantly refills the meter to slam sooner; additionally, the slam power increases by x2, making defeating ghosts much easier.
- Trap Detector - A siren is attached to Luigi's head, alerting the player when nearby a trap.
- Super Star - Grants the player invincibility for a short while, instantly defeating ghosts upon running into them and also makes the player run faster.
- Dark-Light Goggles - Reveals invisible objects and ghosts to players before the Dark-Light Device is used.
- Map - Reveals the entire floor layout; unlike in Luigi's Mansion: Dark Moon, it is only shown to the player who collects it first.
- Timer - Extends the time limit by 30 seconds; only appears when the time limit is running out.
Upgrades[edit]
Upgrades are rewarded to the entire team if they reach certain treasure totals. These totals differ depending on the mode being played. Once players earn the Suction Level 3 upgrade, the next upgrades is always Heart Drops up until a certain point. Unlike in Dark Moon Quest, the upgrades are not permanent; the next time the Luigis play another ScareScraper, they must earn these upgrades again.
| Upgrade | Hunter Mode | Rush Mode | Polterpup Mode | Surprise Mode |
|---|---|---|---|---|
| Poltergust Lv2 | 600 G | 400 G | 250 G | 500 G |
| Dark-Light Lv2 | 1,800 G | 1,100 G | 750 G | 1,500 G |
| Suction Lv2 | 4,000 G | 2,400 G | 1,600 G | 3,000 G |
| Poltergust Lv3 | 7,000 G | 4,000 G | 2,500 G | 5,500 G |
| Dark-Light Lv3 | 11,500 G | 7,000 G | 4,500 G | 9,000 G |
| Suction Lv3 | 16,000 G | 10,000 G | 6,500 G | 12,500 G |
| Heart Drop | 20,000 G | 12,000 G | 7,500 G | 15,500 G |
| Heart Drop | 24,000 G | 14,000 G | 8,500 G | 18,500 G |
| Heart Drop | 28,000 G | 16,000 G | 9,500 G | 21,500 G |
| Heart Drop | 32,000 G | 18,000 G | 10,500 G | 24,500 G |
| Heart Drop | 36,000 G | 20,000 G | 11,500 G | 27,500 G |
| Heart Drop | 40,000 G | 22,000 G | 12,500 G | 30,500 G |
| Heart Drop | 44,000 G | 24,000 G | 13,500 G | 33,500 G |
| Heart Drop | 48,000 G | 26,000 G | 14,500 G | 36,500 G |
| Heart Drop | 52,000 G | 28,000 G | 15,500 G | 39,500 G |
| Heart Drop | 56,000 G | 30,000 G | 16,500 G | 42,500 G |
| Heart Drop | 60,000 G | 32,000 G | 17,500 G | 45,500 G |
| Heart Drop | 64,000 G | 34,000 G | 18,500 G | 48,500 G |
| Heart Drop | 68,000 G | 36,000 G | 19,500 G | 51,500 G |
| Heart Drop | 72,000 G | 38,000 G | 20,500 G | 54,500 G |
| Heart Drop | 76,000 G | 40,000 G | 21,500 G | 57,500 G |
| Heart Drop | 80,000 G | 42,000 G | 22,500 G | 60,500 G |
| Heart Drop | 84,000 G | 44,000 G | 23,500 G | 63,500 G |
| Heart Drop | 88,000 G | 46,000 G | 24,500 G | 66,500 G |
| Heart Drop | 92,000 G | 48,000 G | 25,500 G | 69,500 G |
| Heart Drop | 96,000 G | 50,000 G | 26,500 G | 72,500 G |
Traps[edit]
There are different traps that the Luigis can encounter. In Luigi's Mansion: Dark Moon, these only appear in multiplayer and require the help of another Luigi to escape, whereas in the third game they also appear in single player and will automatically end after approximately 30 seconds if no one frees the trapped player. Having all players caught in traps in Luigi's Mansion: Dark Moon ends the game.
Luigi's Mansion: Dark Moon / Luigi's Mansion 2 HD[edit]
- A player can get trapped by a carpet in a room. Another player needs to vacuum carpet tassel in order to pull the player free. The room remains dark until the player gets freed, and ghosts keep spawning to damage the trapped player.
- A player has a chance of getting cursed when inspecting furniture. The curse reverses a player's controls, and it can be spread if the affected player makes contact with another player. Cursed players drop their bonus items, if any, and cannot pick them up. A player has to shine the Dark-Light Device on the affected player to relieve the player of the conditions.
- A player has a chance of getting stuck in a large vase upon inspecting it. The affected player is unable to do anything other than moving. Another player has to vacuum and pull a dangling cord in order to free the player. The room remains dark until the player gets freed. Ghosts keep spawning to deal damage to the affected player until the vase is removed. This can be avoided if the player vacuums the vase with the Poltergust beforehand to see if it wobbles or not -- vases that don't wobble are traps. If there are any active suits of armor available in the room while the Luigi is trapped, the Luigi can free himself if he can make the suit of armor shatter the vase with its sword; the player still takes damage, however.
Luigi's Mansion 3[edit]
- A Luigi can get trapped in a carpet in a corridor. This causes the carpet to trap the Luigi and another player must tug the carpet. The carpet looks different from the rest and can be destroyed before activating it by tugging the corner. The carpet eventually releases the player if they have not been rescued by another player.
- A Luigi can open a fake door and it will trap him; another player needs to use the Suction Shot on it to save him. Fake doors do not appear on the map, and there are no carpets beneath the fake doors.
- A Luigi can be trapped in a wardrobe by interacting with it. Another player has to use the Suction Shot on the wardrobe to free the other Luigi. The trap wardrobe looks different from a regular one.
- All Luigis' Poltergust G-00s can be teleported; as a result, the Luigis cannot use any of their moves and must pick up the Poltergust of their color. If the player has not entered the room a Poltergust is in, it will be grayed out on the map.
- A power outage can happen causing the lights to go off and the map to show static for a few moments. The map will eventually go back to normal but the lights will remain off; they will come back on if a Luigi uses the Strobulb on the wall in the storage rooms.
Results[edit]
Totals[edit]
At the end of each floor, the players can view statistics of their activity on the floor they completed on the top screen. Upon completing -- or losing in -- a ScareScraper, the Luigis are ranked based on their performance (e.g. capturing ghosts and avoiding traps, and taking as little damage as possible) and are rewarded in G for the Vault. The higher ranked a Luigi is and the more floors they have cleared, the larger the prize.
- Amount of spectral mass (W) obtained from ghosts.
- Amount of treasure (G) collected.
- Amount of ghosts captured.
- Amount of ghost HP drained.
- Amount of times KO'd.
- Amount of damage taken.
- Amount of times cursed.
- Amount of times trapped (in vases or carpet traps).
After defeating a boss ghost, the player can view the total statistics of all the floors they completed so far, after viewing the statistics of the floor they just completed.
Achievements[edit]
In the results screen, before all the players are ready to begin the next floor, they can see achievements they have obtained on the floor they just cleared on the bottom screen. These achievements are based on their performance, but they're otherwise there just for fun.
- MVP / Master Tracker - Most Ghosts Captured
- Workhorse - Most Ghost HP Drained
- Life Support - Most Hearts Collected
- Money Maker - Most Treasure Collected
- Heavy Lifter - Most Boss HP Drained
- Bulldozer - Most Teammates Knocked Down
- The Bigger They Are... - Most Bosses Captured
- Brightens the Place Up / Torch Bearer - Most Rooms Cleared
- All Shook Up - Most Furniture Searched
- Leecher - Most Steals
- Prettiest Wallflower - Try to get more involved on the next floor!
- Room for Improvement - There's nowhere to go but up!
- Participator - You'll do better next time!
- Mostly Harmless - Your team needs more from you!
- Here, Doggie! - Most Polterpups Discovered
Ghosts[edit]
Luigi's Mansion: Dark Moon / Luigi's Mansion 2 HD[edit]
There are 47 ghosts encountered solely within the ScareScraper (not including normal Polterpups). One of 45 of these ghosts (excluding the Big Polterpup and The Brain) are fought on every fifth floor, and The Brain is fought on the final floor. If the player is playing multiplayer without a game card, then they see special boss ghosts simply as larger, yellow, common ghosts.
Names in parentheses are the British English localization if different from the American English name.
Gold Ghost Series[edit]
| Ghost | Name | Ghost Container Description |
|---|---|---|
|
Bomb Brother | These identical twin brothers sure have a blast playing with bombs! |
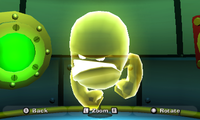
|
Beetle Whisperer (Scarab Nabber) |
This ghost isn't exactly a people person. He gets downright grumpy when disturbed, and won't hesitate to "introduce" you to his beetle friends. |
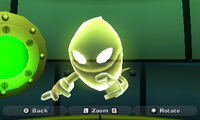
|
Terrible Teleporter |
|
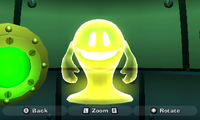
|
Primordial Goo |
|
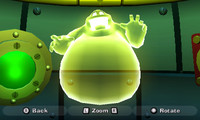
|
Creeper Launcher (Creeper Creator) |
An enormous ghost with the uncanny ability to produce other ghosts! I've never seen anything like it! I'd recommend ghost hunters deal with him in a group, just to be safe. |
Common Ghosts[edit]
| Ghost | Name | Ghost Container Description |
|---|---|---|
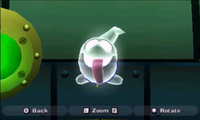
|
Polterpup | Normally very playful and kind, the Polterpups started misbehaving after the Dark Moon shattered. |
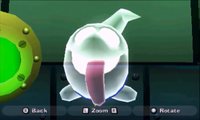
|
Big Polterpup | This pooch is big, so it might take more than one ghost hunter to keep him under control! |
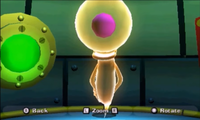
|
The Brain |
|
Fashion Ghost Series[edit]
| Ghost | Name | Ghost Container Description |
|---|---|---|
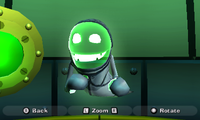
|
Fright Knight | Rumor has it that this Greenie comes from the middle ages, where he was a knight searching for a kidnapped princess. Sadly, wherever he went, she always seemed to be in another castle. |
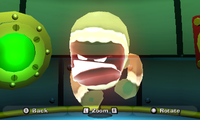
|
Cold Catcher (Snug Thug) |
|
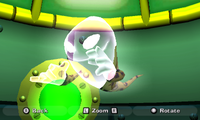
|
Freaker Sneaker (Sleek Sneaker) |
|
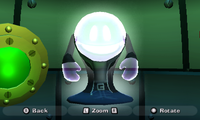
|
Tether Jacket | At first I thought he was trying to attack me, but then I realized he just wanted me to try on his fancy jacket. He could have just asked... |
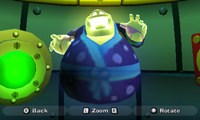
|
Yukata Ball (Spectral Sloth) |
After a nice hot shower and with no other plans for the day, this Gobber slips right into his bathrobe and gets ready to lounge around. This ghost is living the dream. |
Flower Ghost Series[edit]
| Ghost | Name | Ghost Container Description |
|---|---|---|
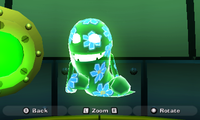
|
Blue Pimpernel |
|
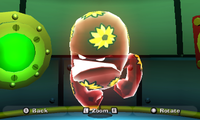
|
Sun Flower | Heh! The funny thing...heh heh...the funny thing is...he can't stand the sun! Ho ho! Oho! Hooooo... Is that irony? I never know if I'm using that word correctly. |
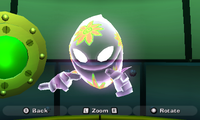
|
Pink Zinnia | Whenever he appears, he's hard to miss! |
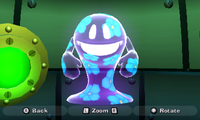
|
Violet | When he's in puddle form, he looks like a little garden dotted with beautiful flowers. It's really breathtaking...but not in a good way. |
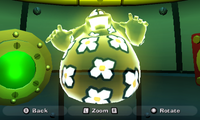
|
Daisy |
|
Food Ghost Series[edit]
| Ghost | Name | Ghost Container Description |
|---|---|---|
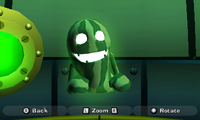
|
Spookumber (Melon-choly) |
|
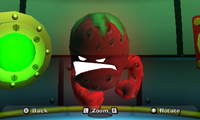
|
Aweberry | His favorite thing to do is dip himself in mud and pretend it's chocolate. It's...odd, to say the least. |
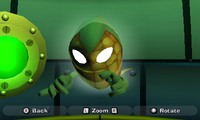
|
Scorn |
|
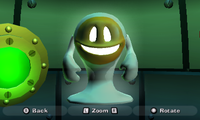
|
Scareambles (Fright Egg) |
Eureka! This ghostly egg can reassemble itself once it's cracked! |
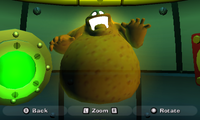
|
Terrorange |
|
Halloween Ghost Series[edit]
| Ghost | Name | Ghost Container Description |
|---|---|---|
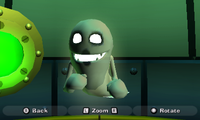
|
Spooky Spook | |
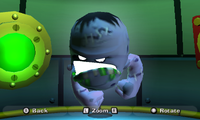
|
Scars | Even though he's both a zombie and a ghost, he has fun and enjoys life to the fullest. |
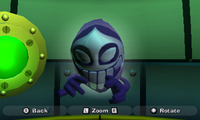
|
Scool (Skoul) |
|
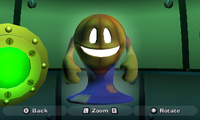
|
Jack-goo-lantern | It's always "trick or trick" with this guy! He seems to have conveniently forgotten the treat part. Sheesh! |
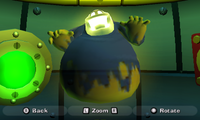
|
Blimp Reaper | Instead of a scythe, he walks around with a giant roast turkey leg. Uh huh... |
Bug Ghost Series[edit]
| Ghost | Name | Ghost Container Description |
|---|---|---|
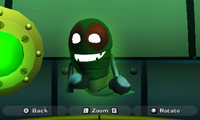
|
Dreadonfly | He doesn't have two pairs of wings. In fact, he doesn't have any wings. What good are wings on a ghost? |
|
Lady Gug (Shadybird) |
|
|
Fright Fly (Terrorfly) |
Criminy! I didn't think something so small could be so...terrifying! The size-to scare ratio of this little guy is off the charts! |
|
Blobberfly | This ghost isn't anywhere near as graceful as a regular butterfly, or as harmless. |
|
Go-Bee (Grumble Bee) |
|
Marine Ghost Series[edit]
| Ghost | Name | Ghost Container Description |
|---|---|---|
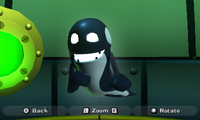
|
Horrorca | Fascinating! This ghost appears to speak fluent Whale! |
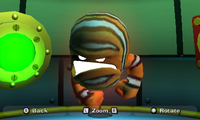
|
Clown Fishy | The reason this fellow is so angry is because people keep thinking clown fish are actual clowns. They're not. No sense of humor whatsoever. Didn't laugh at any of my jokes. |
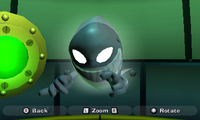
|
Shriek Shark | The entire time I've been observing him, this tough looking spook has been practicing swimming through the air like a shark. Still needs some work. |
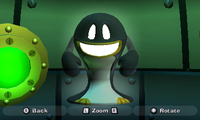
|
Pondguin | I tried to feed him some fish, but he wouldn't eat them. He just kept trying to scare them. It didn't work. |
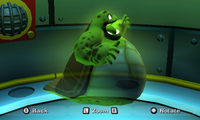
|
Wurdle (Snapper) |
|
Sport Ghost Series[edit]
| Ghost | Name | Ghost Container Description |
|---|---|---|
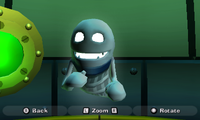
|
Bad-minton | |
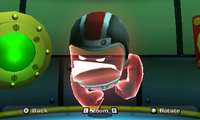
|
Footbrawl (American Footbrawl) |
|
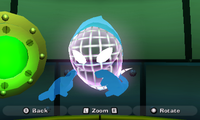
|
Tennis Menace | Careful with this one! He's been known to sneak onto tennis courts midmatch and cover the ball with ghostly goo! |
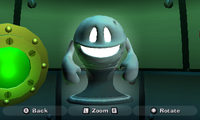
|
Goolf | The only thing he enjoys more than playing golf is creating "hazards" on the green. |
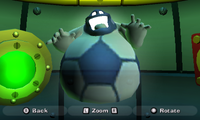
|
Soccer Ball (Ball Hog) |
|
Animal Ghost Series[edit]
| Ghost | Name | Ghost Container Description |
|---|---|---|
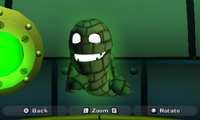
|
Awelligator (Maligator) |
|
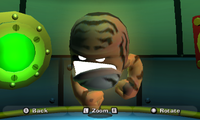
|
Banegal | He tries to roar ferociously, but what comes out sounds more like an adorable kitty meowing. Don't tell him I said that. |
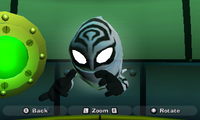
|
Zebrawl | Between you and me, his striped camouflage seems a bit unnecessary considering he can turn invisible whenever he wants. |
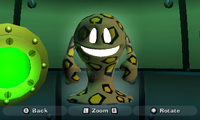
|
Leoprank | His hunting method is simple but effective: He waits until someone steps on him |
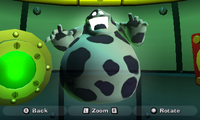
|
Cawe (Full Moo) |
I don't recommend pouring this ghostly bovine's milk over your cereal. Trust me on this. I'm still cleaning up the mess. |
Luigi's Mansion 3[edit]
Rare Ghosts[edit]
| Ghost | Name | HP | Description |
|---|---|---|---|

|
Speed Goob | 250 | Red-glowing variants of Goobs that are much faster than their ordinary counterparts. |

|
Speed Hammer | 350 | Red-glowing variants of Hammers that are much faster than their ordinary counterparts. |
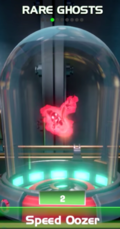
|
Speed Oozer | 200 | Red-glowing variants of Oozers that are much faster than their ordinary counterparts. |

|
Bomb Goob | 250 | Yellow-glowing variants of Goobs that throw bombs randomly at the player. |
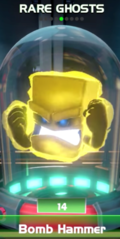
|
Bomb Hammer | 350 | Yellow-glowing variants of Hammers that throw bombs randomly at the player. |

|
Bomb Oozer | 200 | Yellow-glowing variants of Oozers that throw bombs randomly at the player. |
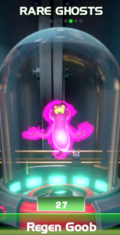
|
Regen Goob | 250 | Pink-glowing variants of Goobs that restore their HP if they are not captured. |
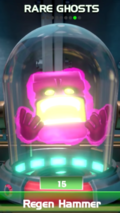
|
Regen Hammer | 350 | Pink-glowing variants of Hammers that restore their HP if they are not captured. |
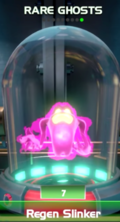
|
Regen Slinker | 250 | Pink-glowing variants of Slinkers that restore their HP if they are not captured. |
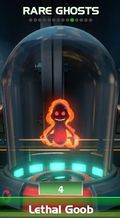
|
Lethal Goob | 250 | Red and black Goobs with glowing eyes that instantly KO the player in one hit. |

|
Lethal Hammer | 350 | Red and black Hammers with glowing eyes that instantly KO the player in one hit. |
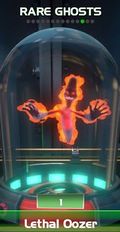
|
Lethal Oozer | 200 | Red and black Oozers with glowing eyes that instantly KO the player in one hit. |
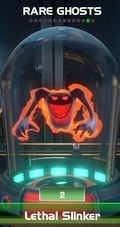
|
Lethal Slinker | 250 | Red and black Slinkers with glowing eyes that instantly KO the player in one hit. |
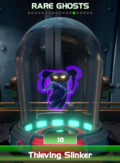
|
Thieving Slinker | 250 | Dark purple Slinkers with glowing eyes that can steal Luigi's Poltergust (like the ScareScraper trap). |

|
Medic Goob | 250 | Green Goobs that can heal other ghosts. |
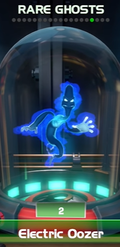
|
Electric Oozer | 200 | Dark blue Oozers that throw balls of electricity at the player. |
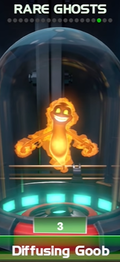
|
Diffusing Goob | 250 | Orange Goobs that summon large amounts of Mini Goobs. |
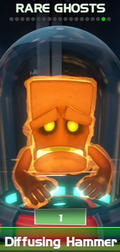
|
Diffusing Hammer | 350 | Orange Hammers that summon large amounts of Mini Hammers. |
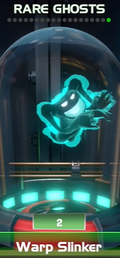
|
Warp Slinker | 250 | Cyan Slinkers that, if allowed to grab the player, warp them to another part of the floor. |
Gallery[edit]
Artwork from Luigi's Mansion: Dark Moon
Names in other languages[edit]
| Language | Name | Meaning | Notes |
|---|---|---|---|
| Japanese | テラータワー[?] Terā Tawā |
Terror Tower | |
| Chinese | 恐怖高塔[?] Kǒngbù Gāotǎ |
Terrifying Tower | |
| Dutch | Tumulttoren[?] | Portmanteau of tumult ("disorder") and toren ("tower") | |
| French | Tour Hantée[?] | Haunted Tower | |
| German | Wirrwarrturm[?] | Tangle Tower | |
| Italian | Torre del caos[?] | Tower of Chaos | |
| Korean | 공포의 타워[?] Gongpo-ui Tawo |
Tower of Terror | |
| Portuguese | Torre dos Sustos[?] | Tower of Scares | |
| Russian | Башня кошмаров[?] Bashnya koshmarov |
Tower of Nightmares | |
| Пугоскреб[?] Pugoskreb |
From пугать (pugat, "to scare") and небоскрёб (neboskryob, "skyscraper") | Luigi's Mansion 3 | |
| Spanish (NOA) | Torre del Horror[?] | Tower of horror | |
| Spanish (NOE) | Torre de los Desafíos[?] | Tower of Challenges |
Trivia[edit]
- The ScareScraper uses two ghost themes from Gloomy Manor and one from the Treacherous Mansion.
- If the Luigis manage to climb more than 99 floors in a ScareScraper on Endless, the game stops counting at 99.
- One of the fashion ghosts, the Fright Knight, references the original Super Mario Bros., where his description says, "He tried to rescue the princess, but she was always in another castle".
- In an interview with Next Level Games, it is revealed having Mario, Toad, and Peach be playable characters was considered at one point, but they would not fit within the space for Download Play, which is limited to 32 MB.
- According to an Iwata Asks interview, Luigi's Ghost Mansion helped adjust a mechanic used in the ScareScraper. Originally, the developers wanted a fallen Luigi to stay dead and could not be revived. After playing Luigi's Ghost Mansion, they changed it so other players could revive a fallen Luigi[2].
- During "Collect the Money!" in Luigi's Mansion 3, the Golden Goob / Jewel Rausuto theme plays regardless if the enemy encountered is a Golden Goob or not.
