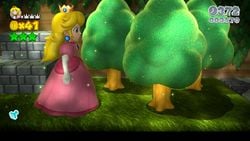
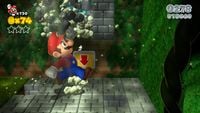
Gargantuan Grotto: Difference between revisions
(→Green Stars: --described where a bonus area was) |
m (Text replacement - "(\| *)Jap([RMCN\d]* *=)" to "$1Jpn$2") |
||
| (46 intermediate revisions by 26 users not shown) | |||
| Line 1: | Line 1: | ||
{{ | {{about|the level in ''[[Super Mario 3D World]]''|the level in ''[[New Super Mario Bros. 2]]''|{{world link|star|7|World Star-7 (New Super Mario Bros. 2)}}}} | ||
{{level infobox | |||
{{ | |||
|title=Gargantuan Grotto | |title=Gargantuan Grotto | ||
|image=[[File:Gargantuan Grotto.jpg|250px]] | |image=[[File:Gargantuan Grotto.jpg|250px]] | ||
|code={{world|star2|7}} | |code={{world|star2|7}} | ||
|world=[[World Star (Super Mario 3D World)|World Star]] | |world=[[World Star (Super Mario 3D World)|World Star]] | ||
|game=''[[Super Mario 3D World]]'' | |game=''[[Super Mario 3D World]]''<br>''[[Super Mario 3D World + Bowser's Fury]]'' | ||
|limit=400 seconds | |||
|before=[[Honeycomb Starway|<<]] | |before=[[Honeycomb Starway|<<]] | ||
|after=[[Peepa's Fog Bog|>>]] | |after=[[Peepa's Fog Bog|>>]] | ||
}} | }} | ||
'''Gargantuan Grotto''', also known as '''{{world|star2|7}}''', is the seventh [[level]] of [[World Star (Super Mario 3D World)|World Star]] in ''[[Super Mario 3D World]]''. It is unlocked after completing [[Honeycomb Starway]], and | '''Gargantuan Grotto''', also known as '''{{world|star2|7}}''', is the seventh [[level]] of [[World Star (Super Mario 3D World)|World Star]] in ''[[Super Mario 3D World]]'' and its [[Nintendo Switch]] port ''[[Super Mario 3D World + Bowser's Fury]]''. It is unlocked after completing [[Honeycomb Starway]], and its own completion unlocks [[Peepa's Fog Bog]]. | ||
==[[ | ==Layout== | ||
[[File:SM3DW Rock Blocks.jpg|thumb|left|The area with the Stamp]] | |||
The level starts off in a jungle area with two [[Goomba Tower]]s. Next is a hill the player can slide down with more Goomba Towers. Then, there are two more very tall Goomba Towers, one of which has a [[1-Up Mushroom]] on its head, followed by a [[? Block]] with a [[Mega Mushroom]]. There are two [[Big Galoomba]]s and sets of [[Mega Block|Big Block]]s which the player must destroy. Next is a set of Big Blocks in the air that contains a stamp. Below this are two panels of Big Blocks that must be destroyed by Mega Mario to progress. In the next area, there is a [[Hidden Block]] with a [[Super Leaf]] and a set of [[Mini Goomba]]s. There is a wall made of [[Blurker]]s that the player must destroy to reach the first Green Star. After this is the [[Checkpoint Flag]] and a body of water. The player finds several [[Blooper]]s and spike boxes with water currents under them. In the middle is an area where the player can surface for a Mega Mushroom. After more spike boxes, the player must break through a set of Big Blocks to reach the next area. Immediately above this is another set with the second Green Star above it. Above the [[Green Pipe]] is a hidden bonus area where the player must collect all [[Blue Coin]]s to get the third [[Green Star]]. Through the pipe is the area with the [[Goal Pole]]. | |||
==[[ | ==Collectables== | ||
[[File: | ===[[Green Star]]s=== | ||
{| class="wikitable" style="text-align: center" | |||
!Image | |||
!Location | |||
|- | |||
|[[File:SM3DW WS-7 1st Green Star.jpg|150px]] | |||
|After the stamp, the first Green Star is behind a wall of [[Blurker]]s. | |||
|- | |||
|[[File:SM3DW WS-7 2nd Green Star.jpg|150px]] | |||
|In the area with the second [[Mega Mushroom]], the player must use the mushroom trampolines to break through two layers of [[Mega Block|Big Block]]s. The second Green Star is beyond the second wall. | |||
|- | |||
|[[File:SM3DW WS-7 3rd Green Star.jpg|150px]] | |||
|Inside a bonus area, which is located above the pipe leading out of the underwater section. The player needs to use a [[Mega Mushroom]] to collect all the [[Blue Coin]]s and reveal the third Green Star. | |||
|} | |||
===[[List of Super Mario 3D World stamps|Stamp]]=== | |||
{{Multiple image | |||
|align=right | |||
|direction=horizontal | |||
|width=70 | |||
|image1=SM3DW-MegaMushroomStamp.png | |||
|alt1=Wii U version | |||
|image2=SM3DW_BF_MegaMushroomStamp.png | |||
|alt2=Switch version | |||
}} | |||
{| class="wikitable" style="text-align: center" | |||
!Image | |||
!Location | |||
|- | |||
|[[File:SM3DW Gargantuan Grotto stamp.jpg|150px]] | |||
|At the start of the level, enclosed in some Mega Blocks. A [[Mega Mushroom]] is required to reach this stamp. The stamp is a Mega Mushroom. | |||
|} | |||
==Enemies== | ==Enemies== | ||
{{number of enemies | |||
|image1=[[File:Goomba Artwork - Super Mario 3D World.png|50px]] | |||
|name1=[[Goomba]] | |||
|count1=29<br>(28 found on Goomba Towers) | |||
|image2=[[File:GoombaTowerSM3DW.jpg|50px]] | |||
|name2=[[Goomba Tower]] | |||
|count2=8 | |||
|image3=[[File:Big Galoomba SM3DW Prima.jpg|50px]] | |||
|name3=[[Big Galoomba]] | |||
|count3=2 | |||
|image4=[[File:Mini Goomba SM3DW Prima.jpg|50px]] | |||
|name4=[[Mini Goomba]] | |||
|count4=6 | |||
|image5=[[File:Blurker SM3DW Prima.jpg|50px]] | |||
|name5=[[Blurker]] | |||
|count5=30 | |||
|image6=[[File:Blooper SM3DW Prima.jpg|50px]] | |||
|name6=[[Blooper]] | |||
|count6=9 | |||
}} | |||
==Names in other languages== | ==Names in other languages== | ||
{{ | {{foreign names | ||
| | |Jpn=探検!でっかい洞窟 | ||
| | |JpnR=Tanken! Dekkai dōkutsu | ||
| | |JpnM=Explore! Gargantuan Cave | ||
| | |ChiS=探险!巨大洞窟 | ||
| | |ChiSR=Tànxiǎn! Jùdà Dòngkū | ||
| | |ChiSM=Adventure! Huge Cave | ||
| | |ChiT=探險!巨大洞窟 | ||
| | |ChiTR=Tànxiǎn! Jùdà Dòngkū | ||
| | |ChiTM=Adventure! Huge Cave | ||
|Dut=De grote groeigrot | |Dut=De grote groeigrot | ||
|DutM=The big growth cave | |DutM=The big growth cave | ||
|FreA=Grotte Méga | |||
|FreAM=Mega Cave | |||
|FreE=Grotte gargantuesque | |||
|FreEM=Gargantuan cave | |||
|Ger=Die Grotte der Giganten | |Ger=Die Grotte der Giganten | ||
|GerM=The Grotto of Giants | |GerM=The Grotto of Giants | ||
|Ita=Piccoli grandi cunicoli | |||
|ItaM=Small big tunnels | |||
|Kor=탐험! 거대 동굴 | |||
|KorR=Tamheom! Geodae Donggul | |||
|KorM=Explore! Giant Cave | |||
|Por=Caverna megalómana | |||
|PorM=Megalomaniac cave | |||
|Rus=Грот гигантов | |||
|RusR=Grot gigantov | |||
|RusM=Grotto of giants | |||
|Spa=La megacaverna | |||
|SpaM=The megacavern | |||
}} | }} | ||
{{SM3DW}} | {{SM3DW levels}} | ||
[[Category:Forests]] | |||
[[Category:Super Mario 3D World | [[Category:Super Mario 3D World levels]] | ||
[[ | [[de:Die Grotte der Giganten]] | ||
Latest revision as of 12:27, January 7, 2025
- This article is about the level in Super Mario 3D World. For the level in New Super Mario Bros. 2, see World
 Star-7.
| Level | |
|---|---|
| Gargantuan Grotto | |

| |
| Level code | World |
| World | World Star |
| Game | Super Mario 3D World Super Mario 3D World + Bowser's Fury |
| Time limit | 400 seconds |
| << Directory of levels >> | |
Gargantuan Grotto, also known as World ![]() Star-7, is the seventh level of World Star in Super Mario 3D World and its Nintendo Switch port Super Mario 3D World + Bowser's Fury. It is unlocked after completing Honeycomb Starway, and its own completion unlocks Peepa's Fog Bog.
Star-7, is the seventh level of World Star in Super Mario 3D World and its Nintendo Switch port Super Mario 3D World + Bowser's Fury. It is unlocked after completing Honeycomb Starway, and its own completion unlocks Peepa's Fog Bog.
Layout[edit]
The level starts off in a jungle area with two Goomba Towers. Next is a hill the player can slide down with more Goomba Towers. Then, there are two more very tall Goomba Towers, one of which has a 1-Up Mushroom on its head, followed by a ? Block with a Mega Mushroom. There are two Big Galoombas and sets of Big Blocks which the player must destroy. Next is a set of Big Blocks in the air that contains a stamp. Below this are two panels of Big Blocks that must be destroyed by Mega Mario to progress. In the next area, there is a Hidden Block with a Super Leaf and a set of Mini Goombas. There is a wall made of Blurkers that the player must destroy to reach the first Green Star. After this is the Checkpoint Flag and a body of water. The player finds several Bloopers and spike boxes with water currents under them. In the middle is an area where the player can surface for a Mega Mushroom. After more spike boxes, the player must break through a set of Big Blocks to reach the next area. Immediately above this is another set with the second Green Star above it. Above the Green Pipe is a hidden bonus area where the player must collect all Blue Coins to get the third Green Star. Through the pipe is the area with the Goal Pole.
Collectables[edit]
Green Stars[edit]
| Image | Location |
|---|---|

|
After the stamp, the first Green Star is behind a wall of Blurkers. |

|
In the area with the second Mega Mushroom, the player must use the mushroom trampolines to break through two layers of Big Blocks. The second Green Star is beyond the second wall. |

|
Inside a bonus area, which is located above the pipe leading out of the underwater section. The player needs to use a Mega Mushroom to collect all the Blue Coins and reveal the third Green Star. |
Stamp[edit]
| Image | Location |
|---|---|

|
At the start of the level, enclosed in some Mega Blocks. A Mega Mushroom is required to reach this stamp. The stamp is a Mega Mushroom. |
Enemies[edit]
| Image | Name | Count |
|---|---|---|

|
Goomba | 29 (28 found on Goomba Towers) |

|
Goomba Tower | 8 |

|
Big Galoomba | 2 |

|
Mini Goomba | 6 |

|
Blurker | 30 |

|
Blooper | 9 |
Names in other languages[edit]
| Language | Name | Meaning | Notes |
|---|---|---|---|
| Japanese | 探検!でっかい洞窟[?] Tanken! Dekkai dōkutsu |
Explore! Gargantuan Cave | |
| Chinese (simplified) | 探险!巨大洞窟[?] Tànxiǎn! Jùdà Dòngkū |
Adventure! Huge Cave | |
| Chinese (traditional) | 探險!巨大洞窟[?] Tànxiǎn! Jùdà Dòngkū |
Adventure! Huge Cave | |
| Dutch | De grote groeigrot[?] | The big growth cave | |
| French (NOA) | Grotte Méga[?] | Mega Cave | |
| French (NOE) | Grotte gargantuesque[?] | Gargantuan cave | |
| German | Die Grotte der Giganten[?] | The Grotto of Giants | |
| Italian | Piccoli grandi cunicoli[?] | Small big tunnels | |
| Korean | 탐험! 거대 동굴[?] Tamheom! Geodae Donggul |
Explore! Giant Cave | |
| Portuguese | Caverna megalómana[?] | Megalomaniac cave | |
| Russian | Грот гигантов[?] Grot gigantov |
Grotto of giants | |
| Spanish | La megacaverna[?] | The megacavern |


