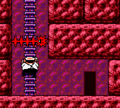
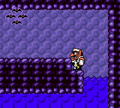
The Volcano's Base: Difference between revisions
(re-adding translation; maintenance) |
ZanyDragon (talk | contribs) mNo edit summary |
||
| (44 intermediate revisions by 13 users not shown) | |||
| Line 1: | Line 1: | ||
[[ | {{DEFAULTSORT:Volcano's Base}} | ||
'''The Volcano's Base''' is | [[File:WL3 S VolcanosBase9.PNG|thumb|W2 The Volcano's Base]] | ||
'''The Volcano's Base''' is the second level on the western side of the [[music box (world)|music box world]] in ''[[Wario Land 3]]''. After obtaining the two halves of the scroll from both the [[Desert Ruins]]' Gray Chest and Red Chest, the storm is calmed, then this level becomes accessible. | |||
The level | The level is set at the base of the volcano located in the center of the music box world. Besides the usual enemies like [[Spearhead (enemy)|Spearhead]]s, the level features many slopes on which [[Wario]] can perform his rolling attack. There are also some caves to be found and also a big, flooded cavern located underneath the level. In the higher area of level, there is a set of rails with carts on them. | ||
== | ==Enemies== | ||
*[[Spearhead (enemy)|Spearhead]] (17) | |||
[[ | *[[Nobiiru]] (5) | ||
*[[Para-Goom]] (1) | |||
*[[Fire Robota]] (4) | |||
*[[Snake (Wario Land 3)|Snake]] (1), summoned with the [[The Stagnant Swamp|Flute]]. | |||
*[[Kobatto]] (2) | |||
[[ | ==Reaction abilities== | ||
In battle, Doll Boy attacks by throwing hammers at Wario, which | *[[Bouncy Wario]] (via Doll Boy) | ||
*[[Bubble Wario]] | |||
*[[Flaming Wario|Hot Wario]] (via Fire Robota or snake) | |||
*[[Vampire Wario]] (via Kobatto) | |||
==Items== | |||
===Treasures=== | |||
====Gray Chest: Lead Overalls==== | |||
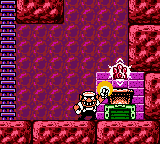
[[File:WL3 S VolcanosBase5.PNG|thumb|left|Wario, finding the Lead Overalls]] | |||
The Lead Overalls,<ref>{{cite|deadlink=y|archive=web.archive.org/web/20010501091156/http://www.warioland3.com/strategy/body.asp?key_id=W2_SILVER&land_id=W2|title=W2|publisher=''Wario Land 3'' website|language=en-us|accessdate=June 4, 2024}}</ref> also known as the Jump Smash Overalls,<ref>{{cite|author=Brady, Matthew K., Nathan Beittenmiller, Debra McBride, and David Cassady|title=''Game Boy Game Secrets, 2001 Edition'' Prima's Official Strategy Guide|page=90|publisher=[[Prima Games]]|date=February 5, 2001|language=en-us|isbn=0-7615-3090-8}}</ref> is a power-up in the [[treasure chest|Gray Chest]]. It is available as soon as the level is unlocked. | |||
The [[key|Gray Key]] to open this chest can be accessed by rolling from the second slope to the right from the beginning. From there, Wario must jump to break through the set of blocks along the narrow passageway towards the Gray Key. | |||
In order to access the room where [[Doll Boy]], the boss of the level is, Wario must roll from the same slope. Instead of going towards the narrow passageway, Wario must jump to the thin platform in between the two narrow gaps to jump over the hill, and then go downwards to break the damaged blocks to reach the [[Warp Pipe|pipe]]. Should he miss it, there is a nearby left-leaning slope near the pipe to roll back to return to the same slope. | |||
[[File:WL3 S VolcanosBase4.PNG|thumb|The Doll Boy, throwing hammers]] | |||
After entering the pipe, the boss battle immediately starts. In battle, the Doll Boy attacks by throwing hammers at Wario, which triggers [[Bouncy Wario]] upon contact and ejects him out of the arena. In order to be able to damage the boss, a [[Dash Attack]] is required to knock off the barrels as they flash. After the three barrels are knocked away, the boss will pursue Wario by swinging its hammer. Attacking the boss from any side except for the front while it swings its hammer will leave it temporarily vulnerable, where a Dash Attack will defeat it. After defeat, a floating hammer will appear that will lead directly to a door. Behind the door, Wario will drop to where the Gray Chest is. | |||
The Lead Overalls | The Lead Overalls allows Wario to use a [[Ground Pound|Smash Attack]], allowing him to use a Smash Attack that can smash through cracked blocks, defeat enemies, and move certain creatures out of the way from above. This opens the way for new treasures in [[Out of the Woods]] and [[The Vast Plain]], which contain [[Futamogu]] that can be pushed down by the new move. | ||
{{br}} | {{br}} | ||
The Blue | ====Red Chest: Blue Gem==== | ||
[[File:WL3 S VolcanosBase6.PNG|thumb|left|Wario, finding the Blue Gem]] | |||
The Blue Gem,<ref>{{cite|deadlink=y|archive=web.archive.org/web/20010709103343/http://www.warioland3.com/strategy/body.asp?key_id=W2_RED&land_id=W2|title=W2_RED|publisher=''Wario Land 3'' website|accessdate=June 4, 2024|language=en-us}}</ref> also known as the Blue Relic,<ref>{{cite|author=Brady, Matthew K., Nathan Beittenmiller, Debra McBride, and David Cassady|title=''Game Boy Game Secrets, 2001 Edition'' Prima's Official Strategy Guide|page=91|publisher=[[Prima Games]]|date=February 5, 2001|language=en-us|isbn=0-7615-3090-8}}</ref> is in the Red Chest. To access it, the Wheels from [[The Grasslands]]'s Red Chest is needed, as they will repair the carts through fitting the wheels on them, and thus become operational. | |||
In order to get to the area where the Red Chest is, Wario must roll from the first slope near the beginning to reach the door along the lower floor. In this room, there are five [[Nobiiru]] along the ladder and a [[Para-Goom]] atop the ladder. The pipe is in the ceiling, which leads to the upper portion of the mountain where the carts are. The cart near the beginning will move from left to right towards the Red Chest, but along the way are obstacles such as [[Spike (Wario Land series)|Spike]]s and [[Fire Robota]] and platforms that needed to be crossed or jumped over. Next to the Red Chest is a ladder, which has another cart all the way down from it. This cart moves from right to left, where there are also obstacles along the way. The Red Key is past the first set of platforms, reachable by crouching past the narrow gap. | |||
After obtaining the Red Key, the cart can be ridden all the way to the left where a ladder is, where climbing it up all the way returns Wario to the first cart. If Wario falls from any point, he must re-enter the door to go back to the upper portion of the mountain. The Red Chest is at end of the upper rail. | |||
The Blue Gem does not affect the world in any way. | |||
{{br|left}} | {{br|left}} | ||
The Crown is | ====Green Chest: Crown==== | ||
[[File:WL3 S VolcanosBase7.PNG|thumb|Wario, finding the Crown]] | |||
The Crown<ref>Brady, Matthew K., Nathan Beittenmiller, Debra McBride, and David Cassady. ''Game Boy Game Secrets, 2001 Edition'' Prima's Official Strategy Guide. Page 92.</ref> is in the Green Chest. It can be accessed after obtaining the Flute from [[The Stagnant Swamp]]'s Gray Chest, which summons the [[Snake (Wario Land 3)|snakes]] from the pots, including in this level. | |||
Like the Red Chest, the Key and Treasure are found in the upper portion of the mountain. The first cart must be ridden until Wario reaches the platform with a door and the snake pot, which means that this treasure cannot be completed without the Wheels from The Grasslands's Red Chest either. The Green Key is located within the room next to the pot, where it is found by going underwater, then going down and right, and the up to the air where the key is. | |||
The chest is accessible after jumping from the snake's head from the highest point, but the path is blocked by a mini-game block to the right. The Golf minigame to open the entrance is to the left across platforms past the Fire Robota. After completing the minigame, the block opens up the path to two platforms before the entrance to the Green Chest, which is down the ladder. | |||
The Crown does not affect the world in any way. | |||
{{br|right}} | {{br|right}} | ||
The | ====Blue Chest: Tusk (blue)==== | ||
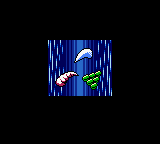
[[File:WL3 S VolcanosBase8.PNG|thumb|left|The Tusks and Green Flower]] | |||
= | The Tusk<ref>{{cite|author=Brady, Matthew K., Nathan Beittenmiller, Debra McBride, and David Cassady|title=''Game Boy Game Secrets, 2001 Edition'' Prima's Official Strategy Guide|page=93|publisher=[[Prima Games]]|date=February 5, 2001|language=en-us|isbn=0-7615-3090-8}}</ref> in the Blue Chest. It is accessible after obtaining the Foot of Stone in [[The Tidal Coast]]'s Red Chest, which creates an earthquake strong enough to cause a collapse on the left side of the level and opening up access to the left door and the pit below. | ||
From the beginning, the room to the Blue Chest is to the left. There is also a slope which can be used to roll down into a flooded cavern below the ground. To access the Blue Key, Wario must swim four levels below to reach a set of damaged blocks to the left, which must be broken from below before riding a bubble as [[Bubble Wario]] past the [[current]]. | |||
To escape from the pit, Wario must go to the door at the floor of the cavern. Within the door, there are a few [[Spearhead (enemy)|Spearhead]]s and a set of [[Kobatto]] that triggers Vampire Wario. In order to fly out of the cavern, the damaged blocks along the way must be destroyed first. After that, Vampire Wario must fly as a bat to the topmost part while avoiding water droplets until the top near the pipe, then only he can be exposed to water to return to normal. The pipe leads to the ground above, where going all the way to the left and then up inside the leftmost door leads toward the Blue Chest within the room. | |||
The blue Tusk, along with both the red Tusk in [[The Steep Canyon]]'s Red Chest and the Green Flower in [[The Stagnant Swamp]]'s Red Chest, causes both [[The Colossal Hole]] and [[The West Crater]] to become accessible as a result of the volcano's eruption due to the gathering of the three treasures. | |||
===[[Musical Coin]]s=== | |||
{|width=60% class=wikitable | |||
|- | |||
!Location | |||
!Description | |||
|- | |||
|[[File:WL3 S VolcanosBase MC1.png]] | |||
|align="center"|After rolling into the pit to the left from the beginning where the Blue Key is located, and swimming to the bottom of the flooded cavern, there is an entrance to a cave with Kobatto and Spearheads. The Musical Coin is in the ceiling past the first set of damaged blocks past the Kobatto, which requires Vampire Wario as a bat to reach. | |||
|- | |||
|[[File:WL3 S VolcanosBase MC2.png]] | |||
|align="center"|In the entrance reachable by rolling along the lower level from the slope to the right near the beginning, there is a tall room with a ladder and five Nobiiru are. At the top of the ladder, the rightmost floor is damaged with a Smash Attack, and the Musical Coin is on the way down. To exit from this hole, there are breakable rocks on the left side a few blocks below where the Musical Coin is. | |||
|- | |||
|[[File:WL3 S VolcanosBase MC3.png]] | |||
|align="center"|In the area where the Red Chest is, there is a cart that travels to the right next to the pipe. On the way, there is a room next to the Snake. In this room, there is a Musical Coin at the right past a wall, which can only be reached with Vampire Wario that is triggered by this room's Kobatto. | |||
|- | |||
|[[File:WL3 S VolcanosBase MC4.png]] | |||
|align="center"|In the area where the Red Chest is, on the way to the Red Chest, there is a Musical Coin along the rails, which can be reached by crouching to the right of the coin and then moving to the left towards it. | |||
|- | |||
|[[File:WL3 S VolcanosBase MC5.png]] | |||
|align="center"|In the area where the Red Chest is, past the Red Chest and down the ladder, there is another cart that travels to the left. After the first Spike and before the second one, there is a Musical Coin on a platform where a [[Fire Robota]] is. | |||
|- | |||
|[[File:WL3 S VolcanosBase MC6.png]] | |||
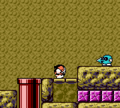
|align="center"|From the beginning of the level, the Musical Coin can be reached by rolling from the first slope to the right, and then breaking the upper level of damaged blocks. | |||
|- | |||
|[[File:WL3 S VolcanosBase MC7.png]] | |||
|align="center"|At the second slope to the right from the beginning, Wario must roll from it. Past the first set of damaged blocks, Wario must roll along the platforms above, reaching higher platforms to break the blocks next to the Musical Coin. | |||
|- | |||
|[[File:WL3 S VolcanosBase MC8 Loc.png]] | |||
[[File:WL3 S VolcanosBase MC8.png]] | |||
|align="center"|To reach this Musical Coin, Wario must go in the rightmost pipe, and then go to the upper exit in the room where Doll Boy is. It can be reached by purposely triggering Bouncy Wario from the hammers thrown by this boss, or using a high jump to reach the highest level. The Musical Coin is past this exit, where Wario will fall towards it. | |||
|} | |||
==Gallery== | ==Gallery== | ||
<gallery> | <gallery> | ||
WL3 S VolcanosBase1.PNG|On the surface of The Volcano's Base | |||
WL3 S VolcanosBase2.PNG|The red-walled caves | |||
WL3 S VolcanosBase3.PNG|Underneath the surface | |||
</gallery> | </gallery> | ||
==Names in other languages== | ==Names in other languages== | ||
{{ | {{foreign names | ||
| | |Jpn=火山のふもと | ||
| | |JpnR=Kazan no Fumoto | ||
| | |JpnM=The Volcano's Base | ||
}} | |||
==References== | |||
<references/> | |||
{{WL3}} | {{WL3}} | ||
[[Category:Mountains]] | [[Category:Mountains]] | ||
[[Category: | [[Category:Underground areas]] | ||
[[Category:Wario | [[Category:Wario Land 3 levels]] | ||
Latest revision as of 21:19, January 31, 2025
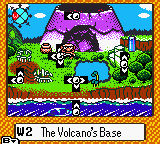
The Volcano's Base is the second level on the western side of the music box world in Wario Land 3. After obtaining the two halves of the scroll from both the Desert Ruins' Gray Chest and Red Chest, the storm is calmed, then this level becomes accessible.
The level is set at the base of the volcano located in the center of the music box world. Besides the usual enemies like Spearheads, the level features many slopes on which Wario can perform his rolling attack. There are also some caves to be found and also a big, flooded cavern located underneath the level. In the higher area of level, there is a set of rails with carts on them.
Enemies[edit]
- Spearhead (17)
- Nobiiru (5)
- Para-Goom (1)
- Fire Robota (4)
- Snake (1), summoned with the Flute.
- Kobatto (2)
Reaction abilities[edit]
- Bouncy Wario (via Doll Boy)
- Bubble Wario
- Hot Wario (via Fire Robota or snake)
- Vampire Wario (via Kobatto)
Items[edit]
Treasures[edit]
Gray Chest: Lead Overalls[edit]
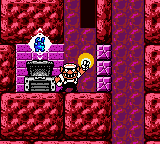
The Lead Overalls,[1] also known as the Jump Smash Overalls,[2] is a power-up in the Gray Chest. It is available as soon as the level is unlocked.
The Gray Key to open this chest can be accessed by rolling from the second slope to the right from the beginning. From there, Wario must jump to break through the set of blocks along the narrow passageway towards the Gray Key.
In order to access the room where Doll Boy, the boss of the level is, Wario must roll from the same slope. Instead of going towards the narrow passageway, Wario must jump to the thin platform in between the two narrow gaps to jump over the hill, and then go downwards to break the damaged blocks to reach the pipe. Should he miss it, there is a nearby left-leaning slope near the pipe to roll back to return to the same slope.
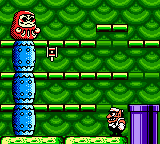
After entering the pipe, the boss battle immediately starts. In battle, the Doll Boy attacks by throwing hammers at Wario, which triggers Bouncy Wario upon contact and ejects him out of the arena. In order to be able to damage the boss, a Dash Attack is required to knock off the barrels as they flash. After the three barrels are knocked away, the boss will pursue Wario by swinging its hammer. Attacking the boss from any side except for the front while it swings its hammer will leave it temporarily vulnerable, where a Dash Attack will defeat it. After defeat, a floating hammer will appear that will lead directly to a door. Behind the door, Wario will drop to where the Gray Chest is.
The Lead Overalls allows Wario to use a Smash Attack, allowing him to use a Smash Attack that can smash through cracked blocks, defeat enemies, and move certain creatures out of the way from above. This opens the way for new treasures in Out of the Woods and The Vast Plain, which contain Futamogu that can be pushed down by the new move.
Red Chest: Blue Gem[edit]
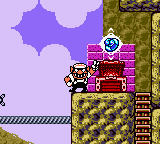
The Blue Gem,[3] also known as the Blue Relic,[4] is in the Red Chest. To access it, the Wheels from The Grasslands's Red Chest is needed, as they will repair the carts through fitting the wheels on them, and thus become operational.
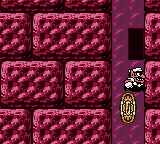
In order to get to the area where the Red Chest is, Wario must roll from the first slope near the beginning to reach the door along the lower floor. In this room, there are five Nobiiru along the ladder and a Para-Goom atop the ladder. The pipe is in the ceiling, which leads to the upper portion of the mountain where the carts are. The cart near the beginning will move from left to right towards the Red Chest, but along the way are obstacles such as Spikes and Fire Robota and platforms that needed to be crossed or jumped over. Next to the Red Chest is a ladder, which has another cart all the way down from it. This cart moves from right to left, where there are also obstacles along the way. The Red Key is past the first set of platforms, reachable by crouching past the narrow gap.
After obtaining the Red Key, the cart can be ridden all the way to the left where a ladder is, where climbing it up all the way returns Wario to the first cart. If Wario falls from any point, he must re-enter the door to go back to the upper portion of the mountain. The Red Chest is at end of the upper rail.
The Blue Gem does not affect the world in any way.
Green Chest: Crown[edit]
The Crown[5] is in the Green Chest. It can be accessed after obtaining the Flute from The Stagnant Swamp's Gray Chest, which summons the snakes from the pots, including in this level.
Like the Red Chest, the Key and Treasure are found in the upper portion of the mountain. The first cart must be ridden until Wario reaches the platform with a door and the snake pot, which means that this treasure cannot be completed without the Wheels from The Grasslands's Red Chest either. The Green Key is located within the room next to the pot, where it is found by going underwater, then going down and right, and the up to the air where the key is.
The chest is accessible after jumping from the snake's head from the highest point, but the path is blocked by a mini-game block to the right. The Golf minigame to open the entrance is to the left across platforms past the Fire Robota. After completing the minigame, the block opens up the path to two platforms before the entrance to the Green Chest, which is down the ladder.
The Crown does not affect the world in any way.
Blue Chest: Tusk (blue)[edit]
The Tusk[6] in the Blue Chest. It is accessible after obtaining the Foot of Stone in The Tidal Coast's Red Chest, which creates an earthquake strong enough to cause a collapse on the left side of the level and opening up access to the left door and the pit below.
From the beginning, the room to the Blue Chest is to the left. There is also a slope which can be used to roll down into a flooded cavern below the ground. To access the Blue Key, Wario must swim four levels below to reach a set of damaged blocks to the left, which must be broken from below before riding a bubble as Bubble Wario past the current.
To escape from the pit, Wario must go to the door at the floor of the cavern. Within the door, there are a few Spearheads and a set of Kobatto that triggers Vampire Wario. In order to fly out of the cavern, the damaged blocks along the way must be destroyed first. After that, Vampire Wario must fly as a bat to the topmost part while avoiding water droplets until the top near the pipe, then only he can be exposed to water to return to normal. The pipe leads to the ground above, where going all the way to the left and then up inside the leftmost door leads toward the Blue Chest within the room.
The blue Tusk, along with both the red Tusk in The Steep Canyon's Red Chest and the Green Flower in The Stagnant Swamp's Red Chest, causes both The Colossal Hole and The West Crater to become accessible as a result of the volcano's eruption due to the gathering of the three treasures.
Musical Coins[edit]
| Location | Description |
|---|---|
|
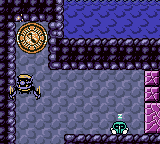
After rolling into the pit to the left from the beginning where the Blue Key is located, and swimming to the bottom of the flooded cavern, there is an entrance to a cave with Kobatto and Spearheads. The Musical Coin is in the ceiling past the first set of damaged blocks past the Kobatto, which requires Vampire Wario as a bat to reach. |
|
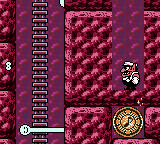
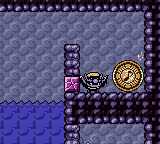
In the entrance reachable by rolling along the lower level from the slope to the right near the beginning, there is a tall room with a ladder and five Nobiiru are. At the top of the ladder, the rightmost floor is damaged with a Smash Attack, and the Musical Coin is on the way down. To exit from this hole, there are breakable rocks on the left side a few blocks below where the Musical Coin is. |
|
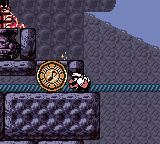
In the area where the Red Chest is, there is a cart that travels to the right next to the pipe. On the way, there is a room next to the Snake. In this room, there is a Musical Coin at the right past a wall, which can only be reached with Vampire Wario that is triggered by this room's Kobatto. |
|
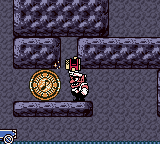
In the area where the Red Chest is, on the way to the Red Chest, there is a Musical Coin along the rails, which can be reached by crouching to the right of the coin and then moving to the left towards it. |
|
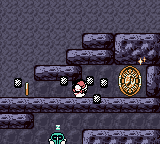
In the area where the Red Chest is, past the Red Chest and down the ladder, there is another cart that travels to the left. After the first Spike and before the second one, there is a Musical Coin on a platform where a Fire Robota is. |
|
From the beginning of the level, the Musical Coin can be reached by rolling from the first slope to the right, and then breaking the upper level of damaged blocks. |
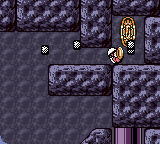
|
At the second slope to the right from the beginning, Wario must roll from it. Past the first set of damaged blocks, Wario must roll along the platforms above, reaching higher platforms to break the blocks next to the Musical Coin. |
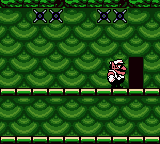
|
To reach this Musical Coin, Wario must go in the rightmost pipe, and then go to the upper exit in the room where Doll Boy is. It can be reached by purposely triggering Bouncy Wario from the hammers thrown by this boss, or using a high jump to reach the highest level. The Musical Coin is past this exit, where Wario will fall towards it. |
Gallery[edit]
Names in other languages[edit]
| Language | Name | Meaning | Notes |
|---|---|---|---|
| Japanese | 火山のふもと[?] Kazan no Fumoto |
The Volcano's Base |
References[edit]
- ^ W2. Wario Land 3 website (American English). Archived May 1, 2001, 09:11:56 UTC from the original via Wayback Machine. Retrieved June 4, 2024.
- ^ Brady, Matthew K., Nathan Beittenmiller, Debra McBride, and David Cassady (February 5, 2001). Game Boy Game Secrets, 2001 Edition Prima's Official Strategy Guide. Prima Games (American English). ISBN 0-7615-3090-8. Page 90.
- ^ W2_RED. Wario Land 3 website (American English). Archived July 9, 2001, 10:33:43 UTC from the original via Wayback Machine. Retrieved June 4, 2024.
- ^ Brady, Matthew K., Nathan Beittenmiller, Debra McBride, and David Cassady (February 5, 2001). Game Boy Game Secrets, 2001 Edition Prima's Official Strategy Guide. Prima Games (American English). ISBN 0-7615-3090-8. Page 91.
- ^ Brady, Matthew K., Nathan Beittenmiller, Debra McBride, and David Cassady. Game Boy Game Secrets, 2001 Edition Prima's Official Strategy Guide. Page 92.
- ^ Brady, Matthew K., Nathan Beittenmiller, Debra McBride, and David Cassady (February 5, 2001). Game Boy Game Secrets, 2001 Edition Prima's Official Strategy Guide. Prima Games (American English). ISBN 0-7615-3090-8. Page 93.
