The Bafflewood: Difference between revisions
(Replaced the Things section with Items and Paperization Spots sections.) |
|||
| (59 intermediate revisions by 35 users not shown) | |||
| Line 1: | Line 1: | ||
{{ | {{DEFAULTSORT:Bafflewood}} | ||
{{level infobox | |||
|image=[[File:TheBafflewood.png|250px]] | |image=[[File:TheBafflewood.png|250px]]<br>Mario taking one of the numerous paths of the maze. | ||
|code=W3-2 | |code=W3-2 | ||
|world=[[World 3 (Paper Mario: Sticker Star)|World 3]] | |world=[[World 3 (Paper Mario: Sticker Star)|World 3]] | ||
|game=''[[Paper Mario: Sticker Star]]'' | |game=''[[Paper Mario: Sticker Star]]'' | ||
|boss= | |boss=[[Wiggler Segment]] | ||
| | |before_alt=[[Tree Branch Trail|**]] [[Loop Loop River|**]] | ||
|before=[[Leaflitter Path|<<]] | |before=[[Leaflitter Path|<<]] | ||
|after=[[Wiggler's Tree House|>>]] | |after=[[Wiggler's Tree House|>>]] | ||
|secret= | |secret= | ||
}} | }} | ||
{{quote|Be Careful In There|[[Sign]]|Paper Mario: Sticker Star}} | |||
'''The Bafflewood''' is the second level of [[World 3 (Paper Mario: Sticker Star)|World 3]] in ''[[Paper Mario: Sticker Star]]''. Mario is required to take a specific path to successfully navigate a maze leading to a [[Comet Piece]]. Near each path is a [[sign]] that Mario can place [[sticker]]s on. Taking a wrong path will send Mario back to the beginning. This level is similar to [[Forever Forest]] from ''[[Paper Mario]]''. | |||
Collecting the Comet Piece at the end opens the path to W3-3, [[Wiggler's Tree House]], on the world map. | |||
==Layout== | |||
There is a path which leads into the maze. In the first area of the maze, there are a [[Recovery Block]], two [[Snifit]]s, and a sign that can change its message. The area splits into 2 direction with the path to the right being the correct way as marked by the [[Jump]] sticker on the nearby sign. | |||
In the next area, there is a [[? Block]] that contains a [[Shiny Line Jump]] sticker and more enemies. The path splits into 2 directions again with the left path being the correct path. However, both signs are unmarked. | |||
The next area has some flowers and no enemies. The path splits into 3 directions with the path to the right being the correct way. | |||
The next area features a pool of [[Poison (obstacle)|poison]] that 2 Snifits are walking in. A ? Block floats above the pool that contains a [[Blazehammer|Burnhammer]], [[Baahammer]], and [[Chillhammer]] stickers. The path splits into 3 directions with the middle and right path being correct ways forward. | |||
If Mario chooses the middle path, it takes him to a large area with some stickers, some enemies, and 5 paths. The left-most path is the correct way. Going down the path brings Mario to an area with a sign from the Bafflewood Management that congratulates him, a ? Block that contains an [[Ice Flower]], and a hill with a dandelion on top. Continuing forward takes Mario to the Comet Piece. | |||
If Mario chooses the path to the right, it takes him to an empty area with 3 paths that lack signs. The correct path is the one to the right which is marked by some flowers in a hexagonal formation. The path takes Mario to an area with many stickers. | |||
After [[Kamek#Paper Mario: Sticker Star|Kamek]] splits [[Wiggler#Paper Mario: Sticker Star|Wiggler]] into segments, one segment hides in the Bafflewood. A [[Toad (species)|Toad]] stands near the entrance and tells Mario "something yellow and round passed by here". Mario must travel to the alternate path of the Bafflewood to find it in the area with the many stickers. After it spots Mario, it runs into a fence and knocks itself out, revealing a new path. If Mario approaches the segment, it will start a battle. After beating the segment, it will follow Mario. If Mario brings the segment to the area with the dandelion and uses his [[hammer]] to release the dandelion puffs, the segment will jump in joy. This unlocks one of Wiggler's [[Wiggler's Diary|diary entries]]. | |||
Beyond a fence is another area with 2 [[Piranha Plant]]s that guard ? Blocks. Unlike most other Piranha Plants, they will not chase Mario if he approaches. In the left ? Block are a [[Shiny Hopslipper]], [[Shiny Iron Jump]], and Shiny Line Jump. In the right ? Block are the three variants of the Shell sticker. Continuing forward is an area with bushes that bear fruit. The next area is a dead end that contains a [[Bowling Ball (Thing)|Bowling Ball]] or [[Trophy#Paper Mario: Sticker Star|Trophy]] Thing depending on the player's progress. | |||
Before [[Gooper Blooper#Paper Mario: Sticker Star|Gooper Blooper]] is defeated, [[Poison Blooper]]s can be seen swimming in the background. Once Mario beats Gooper Blooper, the Poison Bloopers and the pool of poison disappear. | |||
==Enemies== | ==Enemies== | ||
| Line 30: | Line 40: | ||
*[[Paint Guy]]s | *[[Paint Guy]]s | ||
*[[Clip Guy]]s | *[[Clip Guy]]s | ||
*[[Wiggler Segment]] (Mini-Boss) | |||
==Items== | |||
Other items not included here are peelable Stickers and items from sticker upgrade spots. | |||
===Blocks=== | |||
{|class=wikitable style="text-align:center" | |||
!Item | |||
!Icon | |||
!Location | |||
!Image | |||
|- | |||
|[[Shiny Line Jump]] | |||
|[[File:ShinyLineJumpPMSS.png]] | |||
|In the second scene, in the north. | |||
|[[File:The Bafflewood Block 1.png|250px]] | |||
|- | |||
|[[Blazehammer#Paper Mario: Sticker Star|Burnhammer]], [[Baahammer]], [[Chillhammer]] | |||
|[[File:BurnhammerPMSS.png]][[File:PMSS Baahammer sticker.png]][[File:ChillhammerPMSS.png]] | |||
|In the fourth scene, in the middle. | |||
|[[File:The Bafflewood Block 2.png|250px]] | |||
|- | |||
|[[Ice Flower#Paper Mario: Sticker Star|Ice Flower]] | |||
|[[File:IceFlowerPMSS.png]] | |||
|In second-to-last scene, near the entrance. | |||
|[[File:The Bafflewood Block 3.png|250px]] | |||
|- | |||
|[[Shiny Iron Boots#Paper Mario: Sticker Star|Shiny Iron Jump]], [[Shiny Hopslipper]], Shiny Line Jump<br>[[Shell (sticker)|Shell]], [[Koopa Shell#Paper Mario: Sticker Star|Shiny Shell]], [[Flashy Shell]] | |||
|[[File:ShinyIronJumpPMSS.png]][[File:ShinyHopslipperPMSS.png]][[File:ShinyLineJumpPMSS.png]]<br>[[File:PMSS Shell sticker.png]][[File:ShinyShellPMSS.png]][[File:FlashyShellPMSS.png]]<br> | |||
|In the scene reached by going two times right and then north from the fourth scene. Available only after [[Wiggler Segment]] from [[Stump Glade]] comes here. | |||
|[[File:The Bafflewood Blocks 4-5.png|250px]] | |||
|} | |||
===Field/Object=== | |||
{|class=wikitable style="text-align:center" | |||
!Item | |||
!Icon | |||
!Location | |||
!Image | |||
|- | |||
|[[Bowling Ball (Thing)|Bowling Ball]] | |||
|[[File:PMSS Bowling Ball Icon.png|50px]] | |||
|After the Wiggler Segment from Stump Glade opens up a new path, in the third scene of said path. | |||
|[[File:The Bafflewood (Bowling Ball).png|250px]] | |||
|- | |||
|[[Heart_(item)#Paper_Mario_series|Heart]] | |||
|[[File:PMSS Heart.png]] | |||
|After the Wiggler Segment from Stump Glade opens up a new path, in the second scene of said path, in the upper right bush. | |||
|[[File:The Bafflewood (Heart).png|250px]] | |||
|- | |||
|[[Trophy (Thing)|Trophy]] | |||
|[[File:PMSS Trophy Icon.png|50px]] | |||
|After the Wiggler Segment from Stump Glade opens up a new path, in the third scene of said path. Only available after using Bowling Ball in Strike Lake and then having it in possession. | |||
|[[File:The Bafflewood (Trophy).png|250px]] | |||
|- | |||
|[[Violin (Thing)|Violin]] | |||
|[[File:PMSS Violin Icon.png|50px]] | |||
|In the scene behind the Secret Door. | |||
|[[File:The Bafflewood (Violin).png|250px]] | |||
|} | |||
==Paperization Spots== | |||
{|class=wikitable style="text-align:center" | |||
!Scrap/Sticker | |||
!Icon | |||
!Location | |||
!Image | |||
|- | |||
|Random 1x1 [[Sticker]] | |||
|N/A | |||
|In the scene reached by going right from the fourth scene, above the circle of flowers that can be bloomed by hammering. | |||
|[[File:The Bafflewood Paperization Spot 1.png|250px]] | |||
|- | |||
|4 random 1x1 Stickers | |||
|N/A | |||
|In the scene reached by going north from the fourth scene, found above the circles of flowers thac can be bloomed by hammering in front of every exit but the southwest one. | |||
|[[File:The Bafflewood Paperization Spots 2-5.png|250px]] | |||
|- | |||
|[[Secret Door]] | |||
|[[File:SecretDoorPMSS.png]] | |||
|In the scene reached by going right from the fourth scene, in the southeast. Available only after getting access to Outlook Point and getting Secret Door sticker from there. | |||
|[[File:The Bafflewood Paperization Spot 6.png|250px]] | |||
|} | |||
== | ==Area tattles== | ||
* | *"''We're not walking the right way? You can't be serious. In case I haven't told you, I hate getting lost.''" (NA) | ||
* | *"''We're not walking the right way? You can't be serious! In case I haven't told you, I hate getting lost.''" (EU) | ||
* | ===Advice=== | ||
*''For the time being, we should probably go and check Wiggler's house for clues. We HAVE to get through the Bafflewood.'' | |||
==Names in | ==Names in other languages== | ||
{{ | {{foreign names | ||
| | |Jpn=マヨエルの森 | ||
| | |JpnR=Mayoeru no Mori | ||
| | |JpnM=Forest of the Lost | ||
| | |FreE=Futaie confuse | ||
| | |FreEM=Confused timberland | ||
|FreA=La forêt déroutante | |||
|FreAM=The baffling forest | |||
|SpaA=Bosque Valladar | |SpaA=Bosque Valladar | ||
|SpaAM=Blocker Woods | |SpaAM=Blocker Woods | ||
|SpaE= | |SpaE=Bosques Traviados | ||
|SpaEM= | |SpaEM=Portmanteau of ''bosques'' (woods) and ''extraviados'' (lost) | ||
|Ger=Wirrwald | |Ger=Wirrwald | ||
|GerM= | |GerM=Pun on ''wirrwarr'' (complex) and ''wald'' (woods) | ||
|Ita=Bosconfuso | |Ita=Bosconfuso | ||
|ItaM= | |ItaM=Portmanteau of ''bosco'' (forest) and "confuso" (confused) | ||
|Chi=迷途森林 | |||
|ChiR=Mítú Sēnlín | |||
|ChiM=Forest of way-losing | |||
}} | |||
== | ==Notes== | ||
*The sign at the entrance of the Bafflewood states, "Be Careful Not to Become That Guy Who Got Baffled [...] Times" | *The sign at the entrance of the Bafflewood states, "Be Careful Not to Become That Guy Who Got Baffled [...] Times". The "[...]" represents a number that increases by one each time the player is "baffled". However, if the player gets baffled 100 times, the [...] is replaced with "Any More". | ||
*If Mario sticks an oversized Thing or sticker onto a sign, the sign will snap. This trick can be helpful to remove fake paths. | |||
*If Mario sticks an oversized | |||
{{PMSS}} | {{PMSS}} | ||
[[Category:Forests | [[Category:Forests]] | ||
[[Category:Paper Mario: Sticker Star | [[Category:Mazes]] | ||
[[Category:Paper Mario: Sticker Star locations]] | |||
[[it:Bosconfuso]] | |||
Latest revision as of 18:12, April 23, 2025
| Level | |
|---|---|
| The Bafflewood | |
 Mario taking one of the numerous paths of the maze. | |
| Level code | W3-2 |
| World | World 3 |
| Game | Paper Mario: Sticker Star |
| Boss | Wiggler Segment |
| ** ** << Directory of levels >> | |
- “Be Careful In There”
- —Sign, Paper Mario: Sticker Star
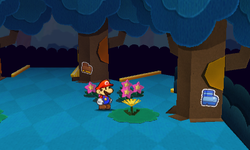
The Bafflewood is the second level of World 3 in Paper Mario: Sticker Star. Mario is required to take a specific path to successfully navigate a maze leading to a Comet Piece. Near each path is a sign that Mario can place stickers on. Taking a wrong path will send Mario back to the beginning. This level is similar to Forever Forest from Paper Mario.
Collecting the Comet Piece at the end opens the path to W3-3, Wiggler's Tree House, on the world map.
Layout[edit]
There is a path which leads into the maze. In the first area of the maze, there are a Recovery Block, two Snifits, and a sign that can change its message. The area splits into 2 direction with the path to the right being the correct way as marked by the Jump sticker on the nearby sign.
In the next area, there is a ? Block that contains a Shiny Line Jump sticker and more enemies. The path splits into 2 directions again with the left path being the correct path. However, both signs are unmarked.
The next area has some flowers and no enemies. The path splits into 3 directions with the path to the right being the correct way.
The next area features a pool of poison that 2 Snifits are walking in. A ? Block floats above the pool that contains a Burnhammer, Baahammer, and Chillhammer stickers. The path splits into 3 directions with the middle and right path being correct ways forward.
If Mario chooses the middle path, it takes him to a large area with some stickers, some enemies, and 5 paths. The left-most path is the correct way. Going down the path brings Mario to an area with a sign from the Bafflewood Management that congratulates him, a ? Block that contains an Ice Flower, and a hill with a dandelion on top. Continuing forward takes Mario to the Comet Piece.
If Mario chooses the path to the right, it takes him to an empty area with 3 paths that lack signs. The correct path is the one to the right which is marked by some flowers in a hexagonal formation. The path takes Mario to an area with many stickers.
After Kamek splits Wiggler into segments, one segment hides in the Bafflewood. A Toad stands near the entrance and tells Mario "something yellow and round passed by here". Mario must travel to the alternate path of the Bafflewood to find it in the area with the many stickers. After it spots Mario, it runs into a fence and knocks itself out, revealing a new path. If Mario approaches the segment, it will start a battle. After beating the segment, it will follow Mario. If Mario brings the segment to the area with the dandelion and uses his hammer to release the dandelion puffs, the segment will jump in joy. This unlocks one of Wiggler's diary entries.
Beyond a fence is another area with 2 Piranha Plants that guard ? Blocks. Unlike most other Piranha Plants, they will not chase Mario if he approaches. In the left ? Block are a Shiny Hopslipper, Shiny Iron Jump, and Shiny Line Jump. In the right ? Block are the three variants of the Shell sticker. Continuing forward is an area with bushes that bear fruit. The next area is a dead end that contains a Bowling Ball or Trophy Thing depending on the player's progress.
Before Gooper Blooper is defeated, Poison Bloopers can be seen swimming in the background. Once Mario beats Gooper Blooper, the Poison Bloopers and the pool of poison disappear.
Enemies[edit]
- Snifits
- Shy Guys
- Piranha Plants
- Paint Guys
- Clip Guys
- Wiggler Segment (Mini-Boss)
Items[edit]
Other items not included here are peelable Stickers and items from sticker upgrade spots.
Blocks[edit]
| Item | Icon | Location | Image |
|---|---|---|---|
| Shiny Line Jump | 
|
In the second scene, in the north. | 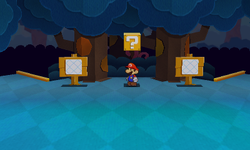
|
| Burnhammer, Baahammer, Chillhammer |   
|
In the fourth scene, in the middle. | 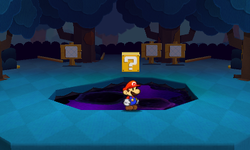
|
| Ice Flower | 
|
In second-to-last scene, near the entrance. | 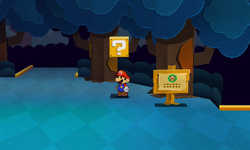
|
| Shiny Iron Jump, Shiny Hopslipper, Shiny Line Jump Shell, Shiny Shell, Flashy Shell |
      |
In the scene reached by going two times right and then north from the fourth scene. Available only after Wiggler Segment from Stump Glade comes here. | 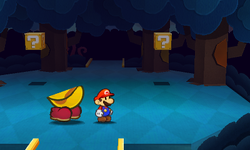
|
Field/Object[edit]
| Item | Icon | Location | Image |
|---|---|---|---|
| Bowling Ball | After the Wiggler Segment from Stump Glade opens up a new path, in the third scene of said path. | 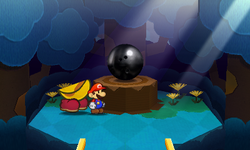
| |
| Heart | After the Wiggler Segment from Stump Glade opens up a new path, in the second scene of said path, in the upper right bush. | 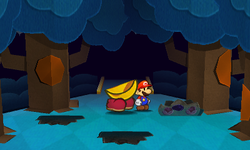
| |
| Trophy | After the Wiggler Segment from Stump Glade opens up a new path, in the third scene of said path. Only available after using Bowling Ball in Strike Lake and then having it in possession. | 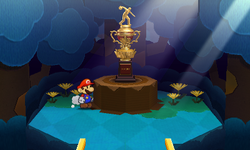
| |
| Violin | In the scene behind the Secret Door. | 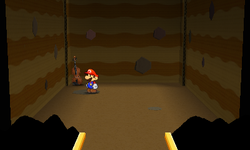
|
Paperization Spots[edit]
| Scrap/Sticker | Icon | Location | Image |
|---|---|---|---|
| Random 1x1 Sticker | N/A | In the scene reached by going right from the fourth scene, above the circle of flowers that can be bloomed by hammering. | 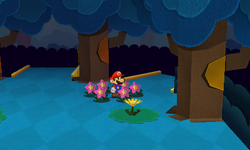
|
| 4 random 1x1 Stickers | N/A | In the scene reached by going north from the fourth scene, found above the circles of flowers thac can be bloomed by hammering in front of every exit but the southwest one. | 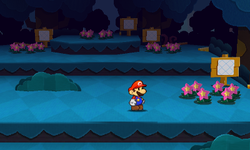
|
| Secret Door | 
|
In the scene reached by going right from the fourth scene, in the southeast. Available only after getting access to Outlook Point and getting Secret Door sticker from there. | 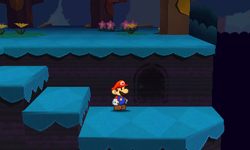
|
Area tattles[edit]
- "We're not walking the right way? You can't be serious. In case I haven't told you, I hate getting lost." (NA)
- "We're not walking the right way? You can't be serious! In case I haven't told you, I hate getting lost." (EU)
Advice[edit]
- For the time being, we should probably go and check Wiggler's house for clues. We HAVE to get through the Bafflewood.
Names in other languages[edit]
| Language | Name | Meaning | Notes |
|---|---|---|---|
| Japanese | マヨエルの森[?] Mayoeru no Mori |
Forest of the Lost | |
| Chinese | 迷途森林[?] Mítú Sēnlín |
Forest of way-losing | |
| French (NOA) | La forêt déroutante[?] | The baffling forest | |
| French (NOE) | Futaie confuse[?] | Confused timberland | |
| German | Wirrwald[?] | Pun on wirrwarr (complex) and wald (woods) | |
| Italian | Bosconfuso[?] | Portmanteau of bosco (forest) and "confuso" (confused) | |
| Spanish (NOA) | Bosque Valladar[?] | Blocker Woods | |
| Spanish (NOE) | Bosques Traviados[?] | Portmanteau of bosques (woods) and extraviados (lost) |
Notes[edit]
- The sign at the entrance of the Bafflewood states, "Be Careful Not to Become That Guy Who Got Baffled [...] Times". The "[...]" represents a number that increases by one each time the player is "baffled". However, if the player gets baffled 100 times, the [...] is replaced with "Any More".
- If Mario sticks an oversized Thing or sticker onto a sign, the sign will snap. This trick can be helpful to remove fake paths.