|
|
| (183 intermediate revisions by 79 users not shown) |
| Line 1: |
Line 1: |
| {{worldbox | | {{italic title|id=yes}} |
| |image=[[File:NSMBW world 1 overworld.png|250px]] | | {{world infobox |
| |app=''[[New Super Mario Bros. Wii]]'' | | |image=[[File:NSMBW World 1 Map.png|250px]] |
| |lev=8 | | |game=''[[New Super Mario Bros. Wii]]'' |
| | |levels=8 |
| |before=<< | | |before=<< |
| |after=[[World 2 (New Super Mario Bros. Wii)|>>]] | | |after=[[World 2 (New Super Mario Bros. Wii)|>>]] |
| | |secret=[[World 5 (New Super Mario Bros. Wii)|**]] |
| | }} |
| | [[File:NSMBW World 1 World Select.png|left|200px|thumb|World 1 on the world-selection screen]] |
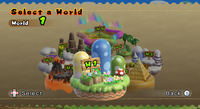
| | '''World 1''' (also known as '''Princess Peach’s Kingdom'''<ref>{{cite|author=Bueno, Fernando|title=''New Super Mario Bros. Wii'' PRIMA Official Game Guide|page=18|date=November 15, 2009|publisher=[[Prima Games]]|language=en-us|isbn=978-0-307-46592-4}}</ref>) is the first world in ''[[New Super Mario Bros. Wii]]''. World 1 is occupied by the first boss, [[Larry|Larry Koopa]]. This world features typical grassy plains with many colorful mushroom hills, similar to ''[[New Super Mario Bros.]]'' It has eight levels, three [[Toad House]]s, and a [[Warp Cannon|cannon]]. Of the three Toad Houses, two are red and one is yellow. It also has a total of nine exits. This world is also home of [[Peach's Castle]]. The [[Enemy Course]] features [[Goomba]]s in three different sizes. |
| | {{br|toc=1}} |
| | ==Levels== |
| | {{content description |
| | |name0={{world link|1|peachcastle|Peach's Castle#New Super Mario Bros. Wii}} |
| | |image0=[[File:NSMBW Peach Castle inside.png|250px]] |
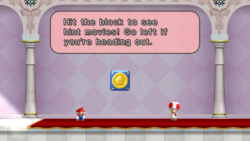
| | |description0=Peach's Castle is the first location in the map. The player can buy and watch [[hint movies]] here. |
| | |name1=[[World 1-1 (New Super Mario Bros. Wii)|World 1-1]] |
| | |image1=[[File:NSMBW World 1-1 Screenshot.png|250px]] |
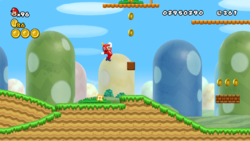
| | |description1=The first level of ''[[New Super Mario Bros. Wii]]''. It introduces the [[Propeller Suit]], [[Goomba]]s and [[Koopa Troopa]]s. ''[[World 1-1 (New Super Mario Bros. Wii)|Read more...]]'' |
| | |name2=[[World 1-2 (New Super Mario Bros. Wii)|World 1-2]] |
| | |image2=[[File:NSMBW World 1-2 Screenshot.png|250px]] |
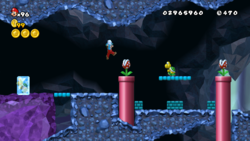
| | |description2=The first underground level of ''[[New Super Mario Bros. Wii]]''. It introduces the [[Ice Flower]] and [[Piranha Plant]]s, and is full of moving crystal blocks and [[Warp Pipe]]s. ''[[World 1-2 (New Super Mario Bros. Wii)|Read more...]]'' |
| | |name3=[[World 1-3 (New Super Mario Bros. Wii)|World 1-3]] |
| | |image3=[[File:NSMBW World 1-3 Screenshot.png|250px]] |
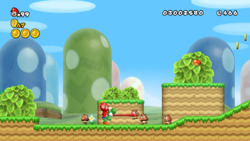
| | |description3=This level introduces [[Yoshi]], [[Venus Fire Trap]]s and the only appearance of [[Hammer Bro]]s. ''[[World 1-3 (New Super Mario Bros. Wii)|Read more...]]'' |
| | |name4={{world|1|cannon}} |
| | |image4=[[File:NSMBW World 1-Cannon Screenshot.png|250px]] |
| | |description4=The [[Warp Cannon]] of World 1, which leads directly to [[World 5 (New Super Mario Bros. Wii)|World 5]]. It is unlocked by finding the [[Goal Pole (secret)|hidden goal]] in World 1-3. |
| | |name5={{world link|1|tower|World 1-Tower (New Super Mario Bros. Wii)}} |
| | |image5=[[File:NSMBW World 1-T Screenshot.png|250px]] |
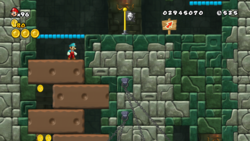
| | |description5=The first [[tower]] level of ''[[New Super Mario Bros. Wii]]''. It has many moving stone blocks and introduces [[Dry Bones]]. The boss is [[Larry|Larry Koopa]]. ''[[World 1-Tower (New Super Mario Bros. Wii)|Read more...]]'' |
| | |name6=[[World 1-4 (New Super Mario Bros. Wii)|World 1-4]] |
| | |image6=[[File:NSMBW World 1-4 Screenshot.png|250px]] |
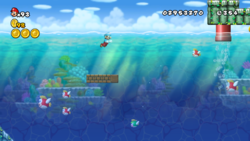
| | |description6=The first underwater level of ''[[New Super Mario Bros. Wii]]''. It introduces [[Cheep Cheep]]s, [[Deep Cheep|Deep-Cheep]]s, [[Eep Cheep]]s, and [[Clampy]]s. ''[[World 1-4 (New Super Mario Bros. Wii)|Read more...]]'' |
| | |name7=[[World 1-5 (New Super Mario Bros. Wii)|World 1-5]] |
| | |image7=[[File:NSMBW World 1-5 Screenshot.png|250px]] |
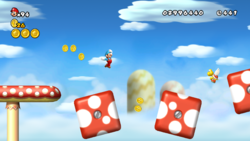
| | |description7=The first athletic level of ''[[New Super Mario Bros. Wii]]''. It contains regular and screw-controlled mushrooms, as well as spinning blocks. ''[[World 1-5 (New Super Mario Bros. Wii)|Read more...]]'' |
| | |name8=[[World 1-6 (New Super Mario Bros. Wii)|World 1-6]] |
| | |image8=[[File:NSMBW World 1-6 Screenshot.png|250px]] |
| | |description8=A grassland level containing many rolling hills. Koopa Troopas and [[Koopa Paratroopa]]s are the principal enemies. ''[[World 1-6 (New Super Mario Bros. Wii)|Read more...]]'' |
| | |name9={{world link|1|castle|World 1-Castle (New Super Mario Bros. Wii)}} |
| | |image9=[[File:NSMBW World 1-C Screenshot.png|250px]] |
| | |description9=The first [[castle]] level of ''[[New Super Mario Bros. Wii]]''. It contains [[lava]] pools, [[Thwomp]]s and giant spinning gears. Its boss is [[Larry|Larry Koopa]] again. ''[[World 1-Castle (New Super Mario Bros. Wii)|Read more...]]'' |
| }} | | }} |
| '''World 1''' is a world in ''[[New Super Mario Bros. Wii]]'' with eight levels. World 1 is owned by [[Larry Koopa]], the first boss to be fought in the game. This world features typical grassy plains with many colorful mushroom hills, similar to ''[[New Super Mario Bros.]]'' and the first world in many other games. It has 3 [[Toad Houses]], a [[Cannon]], and it doesn't have a [[Ghost House]].
| |
|
| |
|
| ==Level Information== | | ==Level previews== |
| ==={{world|1|1}}===
| | <gallery> |
| [[Image:1-1_Grassy_Plains.PNG|200px|thumb|'''World 1-1''']]
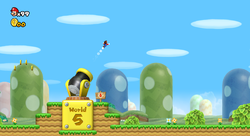
| | NSMBW_world_1_overworld.png|Mario in the world map |
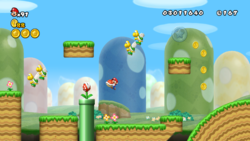
| The first level of the game is a generic grassland level. In the beginning of the stage, just like in ''[[New Super Mario Bros.]]'', [[Princess Peach's Castle]] can be seen in the background. When the player starts, there are three ? Blocks, a few normal blocks, and a Goomba. The highest ? Block holds an item, either a [[Mushroom]] or a [[Propeller Mushroom]]. The player must move to the right to see a moving piece of ground. The first few blocks are in style of the first blocks in ''Super Mario Bros.''. They should move farther ahead to find another moving piece of ground there. It has three platforms above it. It also has a [[Warp Pipe|green Pipe]] in it that moves around with it. The player must jump in it. In the underground area there are blocks, coins, and a P-Switch. The player should hit the P-Switch and collect the coins that were blocks. The P-switch loses its effect and the player can collect the remaining coins and head out the yellow pipe. If they are playing a [[Toad]] Rescue Mission a Toad should be yelling out from the [[Question Block|? Block]] behind them. The player can head forward to find their first checkpoint. Then they should hit the ? Block to get a Propeller Mushroom and get the [[Star Coin]] in the air. Once that is done, the player must go past the two pieces of moving ground and hit the second ? Block for another item. If they spin upwards using the Propeller Mushroom and go through the Red Ring, Red Coins appear for them to grab. At the end of the platform the player should spin to the next platform and then skip the following platform with the red Koopa and collect another Star Coin. They should then jump off the left side of the platform to find the moving piece of ground. A pipe moves around in this piece of ground, and when it comes by, the player should go inside of it. Alternatively, the player can stay in the "compartment" and get three 1-Ups and dozens of coins. If the player goes in the pipe, they should wall kick up, collect the last Star Coin, and head out the yellow pipe. The player is in a hidden area upon exiting. Just before leaving the hidden area there is a block, which they should hit to collect a [[1-Up Mushroom]]. Continuing forward takes the player to the end of the level.
| | NSMBW World 1-1 Level Preview Icon.png|World 1-1 |
| | | NSMBW World 1-2 Level Preview Icon.png|World 1-2 |
| ==={{world|1|2}}===
| | NSMBW World 1-3 Level Preview Icon.png|World 1-3 |
| [[Image:1-2_Creepy_Cave.PNG|200px|thumb|left|'''World 1-2''']]
| | NSMBW World 1-T Level Preview Icon.png|{{world|1|Tower}} |
| This level takes place underground. At the beginning of the level Mario must avoid the [[Goomba]]s and run through a fake wall to a [[Warp Pipe]] which leads to the underground. At the beginning there is an [[Ice Flower]] which can turn Mario in to [[Ice Mario]]. Following that there are many tilting platforms made of crystal that lead up to a [[POW Block]]. There are then a couple of pipes with a [[Koopa Troopa]] bellow them and [[Piranha Plant]]s in them. After that a girder can bring Mario up to another warp pipe so that he can get a [[Star Coin]] and move on to the next area. Finally there is the Halfway Point. Right about where the halfway point is, there is an infinite [[1-Up]] trick. The player must jump down into the space below the ground with a [[Goomba]] in it, grab a [[Star|star]], and defeat all the [[Koopa Troopa]]s and Piranha Plants in the path ahead. After all the enemies are defeated there is another girder with a [[Red Ring]] that brings out eight [[Red Coin]]s for Mario to get. Finally, there is a last Warp Pipe and another girder leading to the ending flag.
| | NSMBW World 1-4 Level Preview Icon.png|World 1-4 |
| | | NSMBW World 1-5 Level Preview Icon.png|World 1-5 |
| ==={{world|1|3}}===
| | NSMBW World 1-6 Level Preview Icon.png|World 1-6 |
| [[Image:1-3_Yoshi_Heights.PNG|200px|thumb|right|'''World 1-3''']]
| | NSMBW World 1-C Level Preview Icon.png|{{world|1|castle}} |
| This is the first level to feature [[Yoshi]], as well as [[Hammer Bro.|Hammer Bros.]] The first [[Star Coin]] is located a after the player finds Yoshi. The best way to get it was to [[Flutter Jump|flutter jump]] off the ground with Yoshi, or just to dash and jump to it. The second coin is found deeper in the level, just after the half point Flag, where there will be three [[Warp Pipe|green Pipe]]s with [[Piranha Plant]]s. Next to the third pipe will be a hidden passage, where this pipe leads down to a underground tunnel. The coin will be found there, and also requires a Flutter Jump or running jump. Outside the exit to the hidden area is a pipe with a [[Venus Fire Trap]] and a few [[Goomba]]s and a [[Koopa Troopa|Koopa]]. The last star coin is after here, way too high for any of the characters to just jump up to unaided. The player should do one of the following: use Yoshi to flutter jump off the nearby pipe, jump with Yoshi under the coin and jump off of him, or wall jump off the aforementioned nearby pipe. The player must then continue down the course, past a few Hammer Bros, until Mario reaches the [[Flagpole]] and completes the [[level]].
| | </gallery> |
| | |
| For the secret entrance, the player should go back just a tad bit before the last star coin, just after the Venus Fire Trap. The player needs to jump to the high cliff edge leading to a hidden passage. Using Yoshi is the best; a Propeller Mushroom also works. Once the player reaches the entrance point, he/she needs to jump over the passage, above the screen, and travel down the path following it. Near the end of this path will be a secret pipe, which will send the player to the secret flagpole. The secret exit will take the player to the World 1 warp cannon, which sends him/her to [[World 5 (New Super Mario Bros. Wii)|World 5]].
| |
| | |
| ==={{world|1|fort}}===
| |
| [[Image:World_1_Fortress.PNG|200px|thumb|left|'''World 1-Fortress''']]
| |
| This is the first stage where [[Larry Koopa]] is fought and defeated. At the beginning of the level there is a rising brown platform which brings Mario up and lets him hit a [[Question Block|? Block]] which releases an [[Ice Flower]]. The flower will change Mario into Ice Mario allowing him to throw snowballs. There is also a [[Dry Bones]] in this area. In the next area there is another rising brown platform for Mario to stand on which will lift him to the first of many swinging platforms. The swinging platforms go back and forth allowing Mario to jump off of one of the two sides. Mario must use this one to jump on to another platform which has two extending brown blocks from the wall which create a staircase for a few moments that Mario must jump up. The next area has another swinging platform with two different ways for Mario to go. The first is the easy way with two platforms and a Dry Bones at the top and the second is the hard way with an extending platform and a [[Star Coin]] (Plus multiple regular [[Coin]]s). In the next area there are three platforms in a line that Mario has to jump up with Dry Bones coming on from the sides. There is once again a fork which forces Mario to either tale the easy way which has several moving platforms creating another staircase or the hard one with multiple immobile platforms for Mario to jump up. At the top of this area is the [[Bowser]] Flag.
| |
| | |
| The next area has a multitude of brown platforms going in and out of the walls creating a staircase for a few seconds before they come together and crush Mario if he is in between them. There is a block with multiple [[List of Power-Ups|Power-Up]]s ([[Propeller Mushroom]], [[Starman]], [[1-Up Mushroom]] and [[Mushroom]]) followed by another swinging platform leading to a fork. Once again the easy path takes Mario to another (dual) swinging platform and the hard one takes him to a prize; in this case a 1-Up Mushroom. If he takes the easy path and is [[Small Mario]] then he can slip through a hole and get the final star coin. The next area is a combination of five swinging platforms with the [[Red Ring]] and the [[Red Coin]]s. To get to the top, and to the door that leads to Larry, Mario must use the extending brown platforms.
| |
| | |
| [[File:NSMBW W1-Tower Larrykoopa.png|200px|thumb|right|Fighting Larry Koopa]]
| |
| When Mario goes through the door that leads to Larry Koopa, Larry will be in the middle of the room. He will see Mario and jump in surprise but then he will attack. Larry attacks by blasting bolts of blue magic from his [[Magic Scepter]] at Mario in an attempt to hit him. Mario must dodge those attacks and get close enough to Larry to jump on his head therefore making him lose a life. Larry will then get into his shell and start spinning around madly trying to hit Mario. He will then try to jump on Mario so Mario must avoid him. If Mario dodges these two attacks then Larry will start shooting magical blasts again and Mario can jump on his head again. Jumping on Larry's head three times defeats him and wins Mario the level.
| |
| | |
| ==={{world|1|4}}===
| |
| [[File:NSMBW W1-4.png|200px|thumb|left|The beginning of the level.]]
| |
| This is the first underwater level in the game. [[Cheep-Cheep]]s, [[Urchin]]s, [[Mega Cheep-Cheep]]s, [[Deep-Cheep]]s, [[Clampy|Clampies]], and [[Spiny Cheep-Cheep]]s appear. At the beginning, there are two [[Question Block|? Blocks]], two [[Goomba]]s, and a [[Warp Pipe]] leading underwater. Here, there are two Cheep-Cheeps that must be frozen so that [[Mario]] can get to the ? Block, which will get him an [[Ice Flower]]. There are many bubbles flying around that can push Mario into walls.
| |
|
| |
|
| The next area also has Deep-Cheeps which must be frozen along with the Cheep-Cheeps. There is also another ? Block with another Ice Flower in case Mario has lost his previous one. Past here, there is a [[Red Ring]], which will make eight [[Red Coin]]s for Mario to collect. There is also a checkpoint flag.
| | ==Level maps== |
| | |
| In the next area there is a roof so Mario must freeze the [[Urchin]] and it will break the roof allowing Mario to get through. There is also a [[Star Coin]] which is guarded by a Mega Cheep-Cheep that Mario must freeze to get past. After here, there is a Star Coing guarded by two pipes that generate a current that keeps the player from getting too close. The Star Coin may be collected if the player freezes a passing Cheep Cheep and stands atop it as it floats up, fighting the current. A similar one is a short distance forward, where an Urchin must be frozen to block the current and allow the player to pass and collect the Star Coin. In the next area there is a Spiny Cheep-Cheep that will follow Mario. He must destroy that Cheep-Cheep and then get the [[1-Up Mushroom]] at the bottom of the screen. There is also a [[Fire Flower]] and a [[Starman]]. Mario must then go through a Red Pipe. Many Cheep-Cheeps populate the next area so Mario has to use his Starman to destroy as many as possible and then go through the [[Warp Pipe|green Pipe]]. Then there is a [[Koopa Paratroopa]] that Mario can use to land on the flag at the end of the level.
| |
| | |
| ===[[Enemy Course]]===
| |
| [[Image:NSMBW Goombalevel.png|right|thumb|Level map of the Goomba enemy course.]]
| |
| *Eight [[Goomba]]s
| |
| *Four [[Grand Goomba]]s
| |
| *Two [[Mega Goomba (species)|Mega Goomba]]s
| |
| | |
| ==={{world|1|5}}===
| |
| [[Image:1-5_Mushroom_Heights.PNG|200px|thumb|left|'''World 1-5''']]
| |
| This is the first aerial world encountered by the [[player]] in the game. It is sparsely populated with [[Koopa Troopa]]s and [[Koopa Paratroopa]]s, but the lack of enemies in this level is made up for by a series of obstacles including large mushroom platforms, small red rotating blocks, huge green rotating blocks, line-guided block loops and jack-screw platforms. The [[Propeller Mushroom]] is definitely the [[List of Power-Ups|Power-Up]] of choice for this level.
| |
| | |
| The first [[Star Coin]] is found in a bonus area, which is accessed via [[Beanstalk]] from a platform above the first set of three line-guided block loops. The second Star Coin appears at the bottom of a pair of closely grouped rotating green blocks. Next, two pairs of jack-screw platforms are encountered. Each pair move up or down in opposition to each other. The movement is conrolled from the first platform in the pair. The player must land atop a metallic bolt head. Once in position, [[Spin]]ning will cause the platform to move up on the first set and down on the second. The platforms will slowly rebound after the Wii Remote is stilled. The higher of two mushroom platforms following this area contains a [[Red Ring]].
| |
| | |
| The player is now at the [[Midway Point]]. After few more obstacles, the player encounters another Red Ring suspended below a mushroom platform. To get this Red Ring, the player must ride a line-guided [[Brick Block]] around the platform. The final Star Coin is located between the fourth and fifth in a series of six rotating red blocks. One last huge rotating green block leads to the [[Flagpole]].
| |
| | |
| ==={{world|1|6}}===
| |
| [[Image:1-6_Donuts.PNG|200px|thumb|right|'''World 1-6''']]
| |
| This is another grassland world composed of rolling green hills. The Rolling Hills are similar to those encountered in world 1-1, except that they move much faster. The [[player]] will have to dash over these hills, otherwise the character will lose ground, fall off the screen and perish.
| |
| | |
| The first [[Star Coin]] is encountered atop the third Rolling Hill. Just after this hill, the player can find a [[Beanstalk]] that will take them up to a bonus area with a random Powerup Block. The second Star Coin is found to the right upon returning to the lower game level. After this the player reaches the [[Midway Point]].
| |
| | |
| There is a hidden [[Warp Pipe]] located below the Midway Point and to its left on the game screen. To access the pipe, the player must drop onto the next Rolling Hill and back-track with a jump into the hidden area. The Warp Pipe sends the player to a sub-terrainean screen with a rolling rock hill. The third Star Coin is located at the opposite side of the Rolling Hill but two Pipes drop numerous [[Goomba]]s into the player's path from above. Timing and skilled jumps are called for here. The player exits from the same Warp Pipe that brought them.
| |
| | |
| Back at the surface, the next Rolling Hill also has a Goomba Pipe above it. Beyond the pipe is a [[Brick Block]] that yields a [[P-Switch]] when hit. The P-Switch exposes small blue coins. At the lower end of this same Rolling Hill is another Brick Block. This block has a [[1-Up Mushroom]] inside. It's a tempting prize; however, the player has to get dangerously close to the "point of no return" in order to hit the block. A series of three larger Rolling Hills comes next just before the [[Flagpole]].
| |
| | |
| ==={{world|1|castle}}===
| |
| [[Image:World_1-Castlensmbwii.PNG|200px|left|thumb|'''World 1-Castle''']]
| |
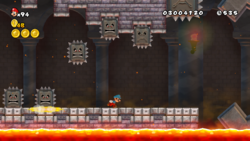
| This is the first Castle level, filled with a lot of lava in the game and features many gear-shaped platforms. Mario has to hide in the holes in the gears to avoid being crushed and thus dying. [[Thwomp]]s and [[Super Thwomp]]s make their only main appearance in this castle. There is a Star Coin that's guarded by a Super Thwomp. If Mario rides one of the gears upward he may find a little area with coins and a [[Propeller Mushroom]]. [[Larry Koopa]] is fought again at the end of the level. In this fight, [[Kamek]] makes five moving platforms. The first, third, and fifth go the opposite way of the second and fourth. Like all other battles (minus the final Bowser battle) it takes three hits to win the battle.
| |
| <br clear=all>
| |
| | |
| ==Level Previews== | |
| <gallery> | | <gallery> |
| Image:NSMBWworld1.PNG|The map
| | NSMBW World 1-1 Map.png|Level 1 |
| File:NSMBW W1-1.png|World 1-1
| | NSMBW World 1-2 Map.png|Level 2 |
| File:NSMBW W1-2.png|World 1-2
| | NSMBW World 1-3 Map.png|Level 3 |
| File:NSMBW W1-3.png|World 1-3
| | NSMBW World 1-Cannon Map.png|Cannon Warp Zone |
| File:NSMBW W1-Fort.png|World 1-Fort
| | NSMBW World 1-T Map.png|Tower |
| File:NSMBW W 1-4.png|World 1-4
| | NSMBW World 1-4 Map.png|Level 4 |
| File:NSMBW W1-5.png|World 1-5
| | NSMBW World 1-5 Map.png|Level 5 |
| File:NSMBW W1-6.png|World 1-6
| | NSMBW World 1-6 Map.png|Level 6 |
| File:NSMBW W1-Castle.png|World 1-Castle
| | NSMBW World 1-C Map.png|Castle |
| </gallery> | | </gallery> |
|
| |
|
| ==Enemies Introduced== | | ==New enemies== |
| *[[Goomba]]s | | *[[Goomba]]s |
| | *[[Hefty Goomba]]s |
| | *[[Big Goomba]]s |
| *[[Koopa Troopa]]s | | *[[Koopa Troopa]]s |
| *[[Koopa Paratroopa]]s | | *[[Koopa Paratroopa]]s |
| *[[Piranha Plant]]s | | *[[Piranha Plant]]s |
| *[[Venus Fire Trap]]s | | *[[Fire Piranha Plant|Venus Fire Trap]]s |
| *[[Hammer Bro.|Hammer Bros.]] | | *[[Hammer Bro]]s. |
| *[[Dry Bones]] | | *[[Dry Bones]] |
| *[[Urchin]]s | | *[[Urchin]]s |
| *[[Cheep-Cheep]]s | | *[[Cheep Cheep]]s |
| *[[Mega Cheep-Cheep]]s | | *[[Big Cheep Cheep|Mega Cheep-Cheep]]s |
| *[[Spiny Cheep-Cheep]]s | | *[[Spiny Cheep Cheep]]s |
| *[[Deep-Cheep]]s | | *[[Deep Cheep|Deep-Cheep]]s |
| *[[Mega Deep-Cheep]]s | | *[[Big Deep Cheep|Mega Deep-Cheep]]s |
| *[[Cheep-Cheep School]]s | | *[[Eep Cheep]]s |
| *[[Clampy|Clampies]] | | *[[Clampy]]s |
| *[[Grand Goomba]]s
| |
| *[[Thwomp]]s | | *[[Thwomp]]s |
| *[[Super Thwomp]]s | | *[[Big Thwomp]]s |
| *[[Mega Goomba (species)|Mega Goomba]]s | | *[[Larry|Larry Koopa]] (Boss) |
| <br clear=all> | | |
| {{NSMB Wii}} | | ==References== |
| [[Category:Places]]
| | <references/> |
| | |
| | {{NSMBW levels}} |
| | {{NSMBW}} |
| [[Category:Grasslands]] | | [[Category:Grasslands]] |
| [[Category:Worlds]] | | [[Category:New Super Mario Bros. Wii worlds]] |
| [[Category:New Super Mario Bros. Wii Trading Cards]] | | [[Category:New Super Mario Bros. Wii trading cards]] |
| | [[de:Welt 1 (New Super Mario Bros. Wii)]] |
| | [[it:Mondo 1 (New Super Mario Bros. Wii)]] |

