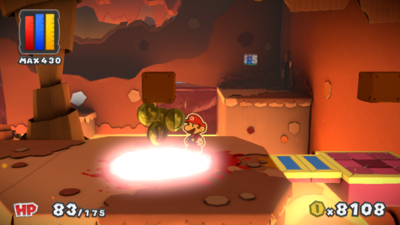
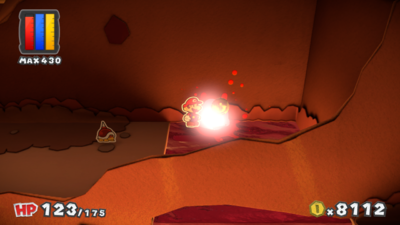
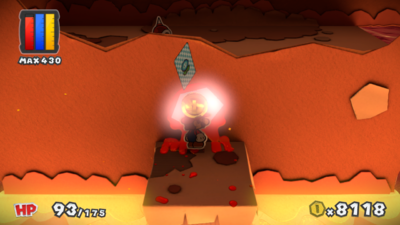
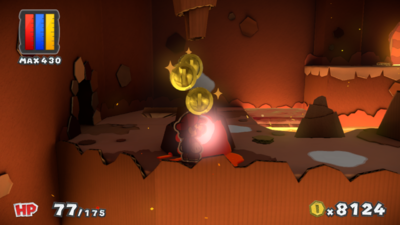
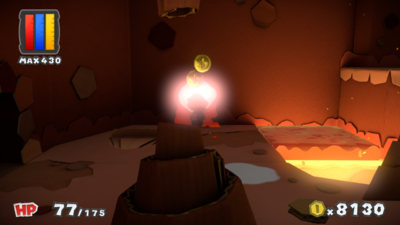
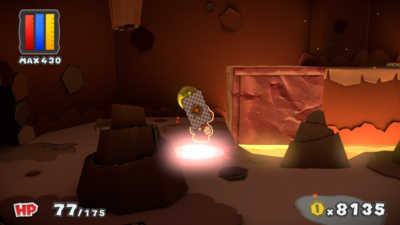
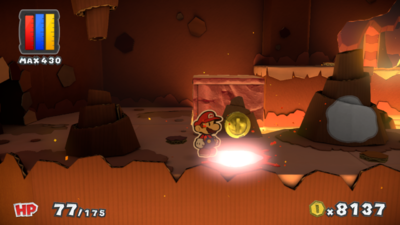
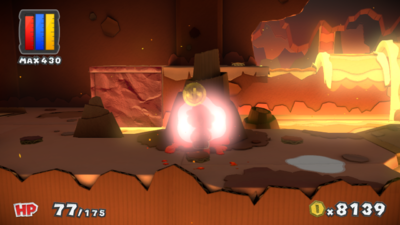
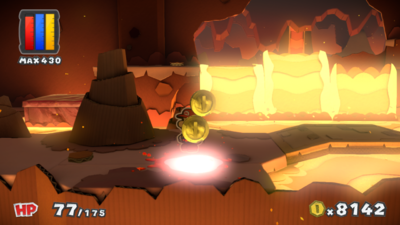
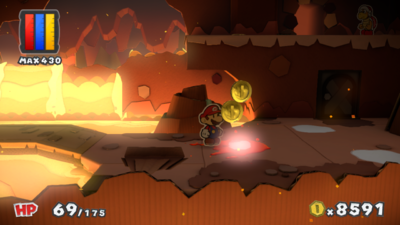
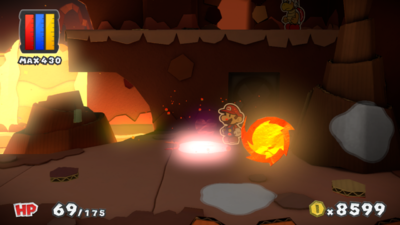
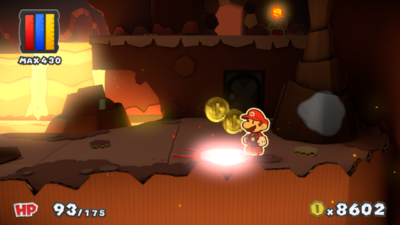
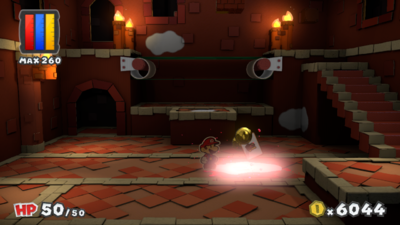
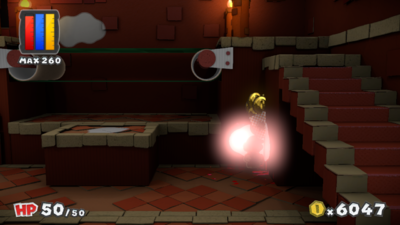
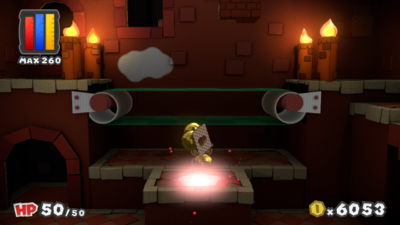
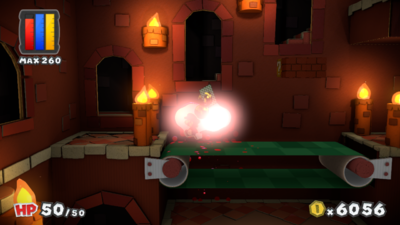
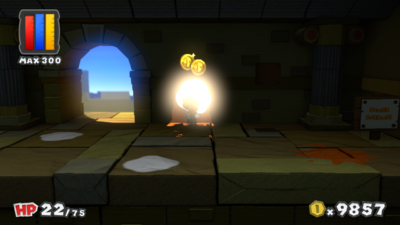
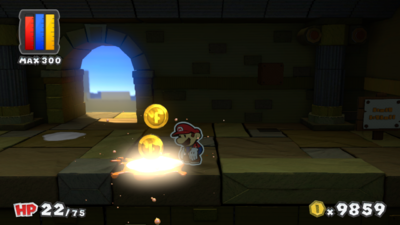
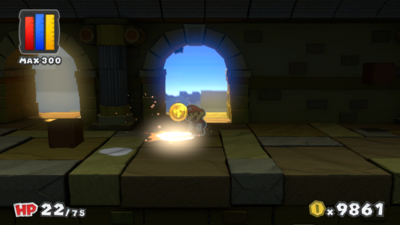
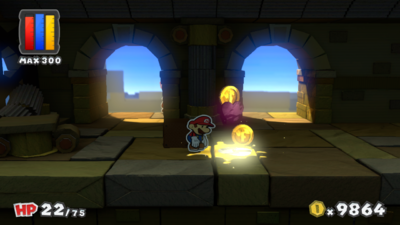
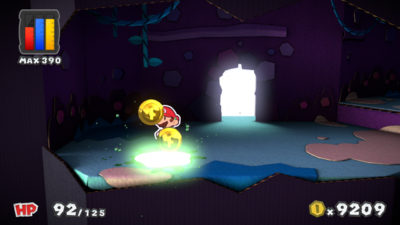
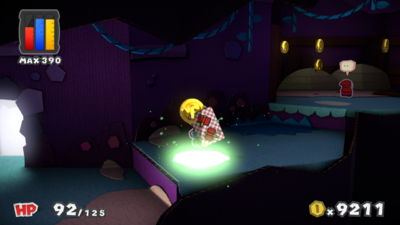
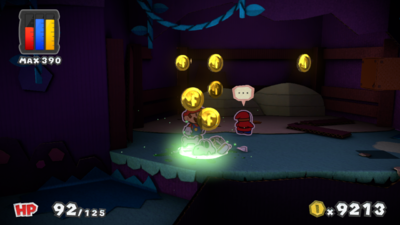
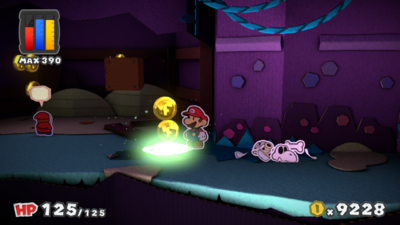
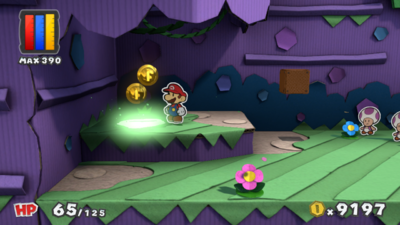
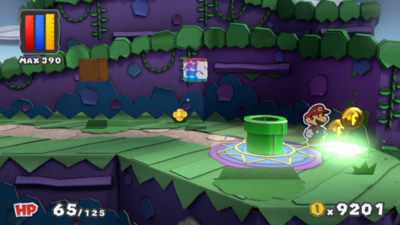
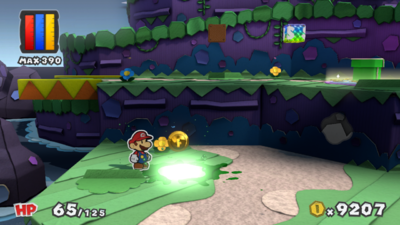
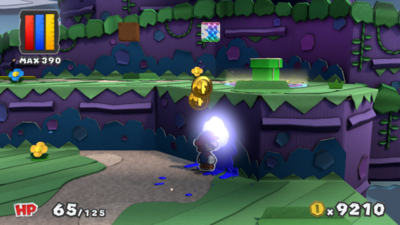
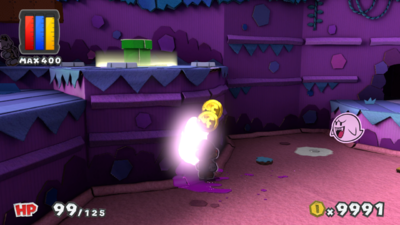
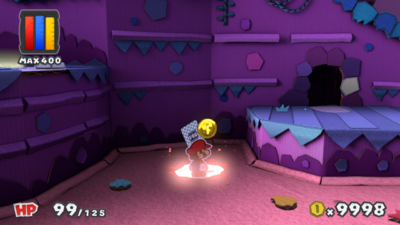
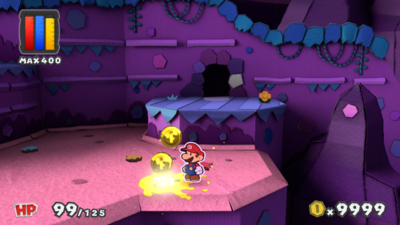
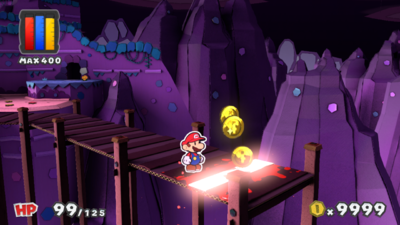
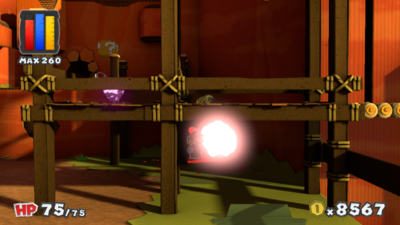
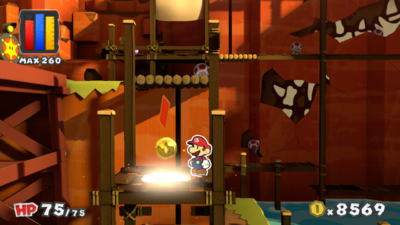
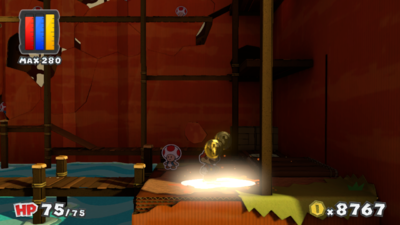
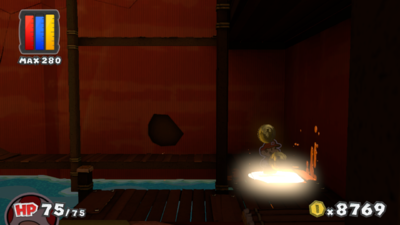
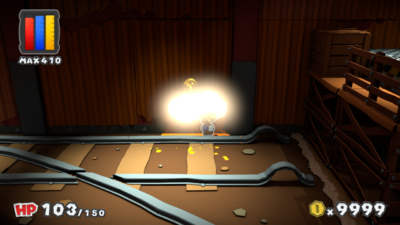
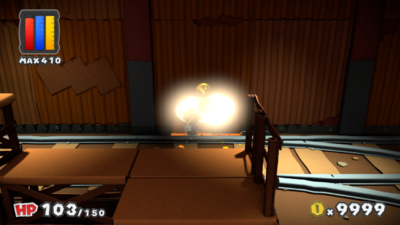
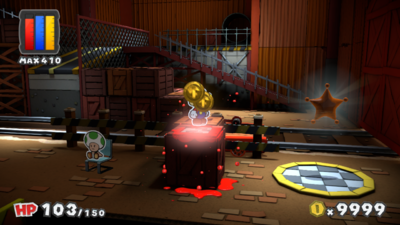
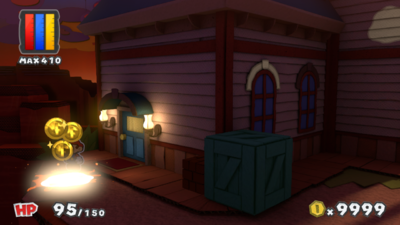
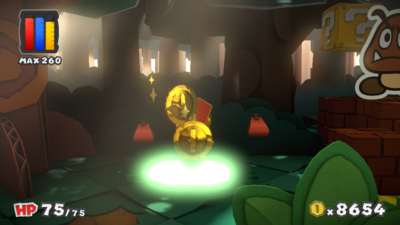
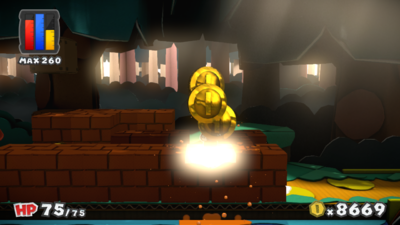
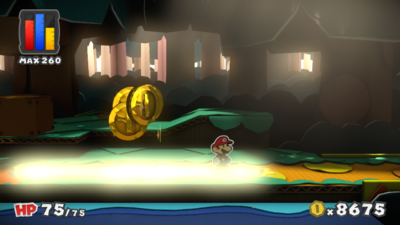
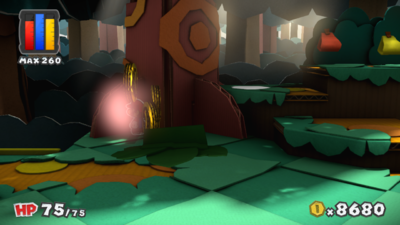
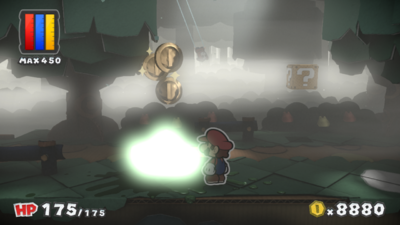
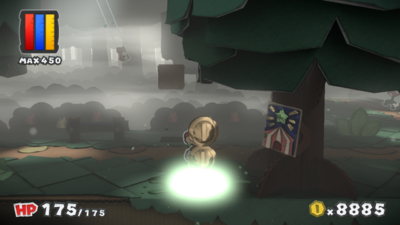
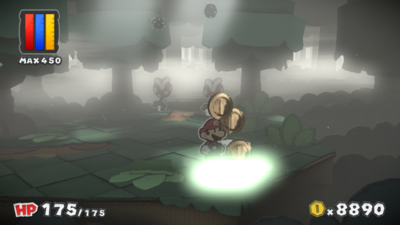
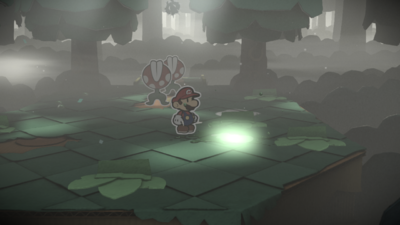
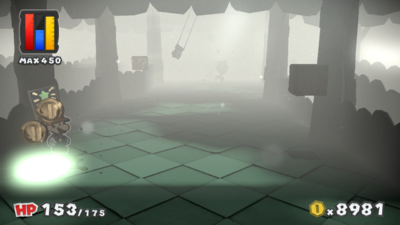
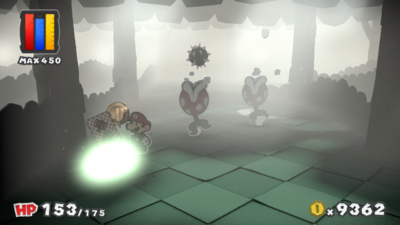
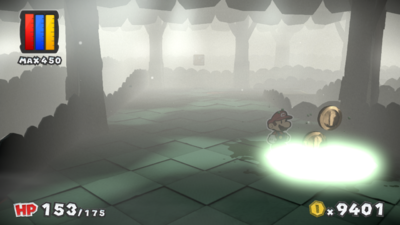
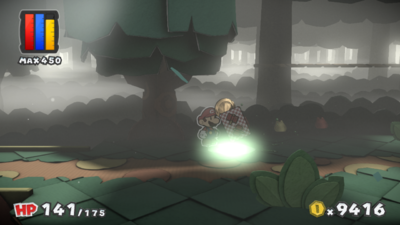
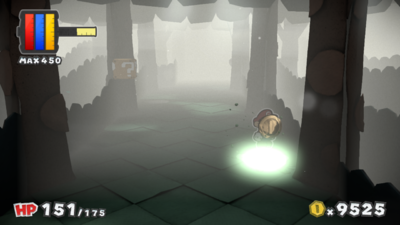
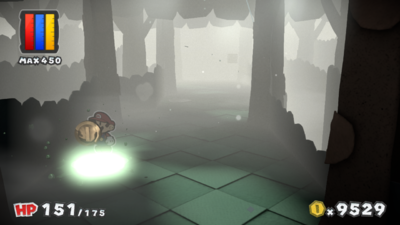
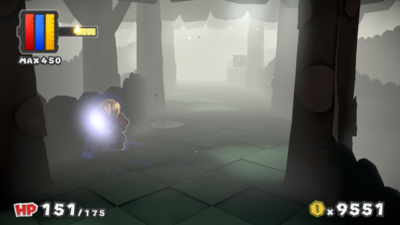
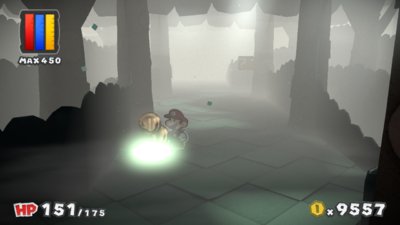
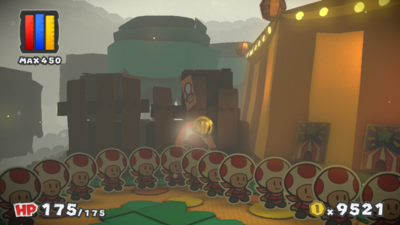
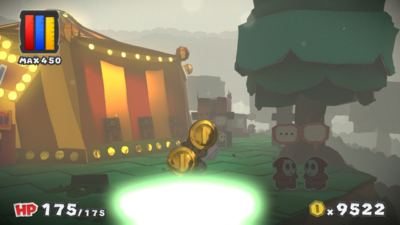
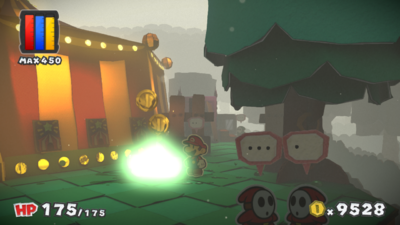
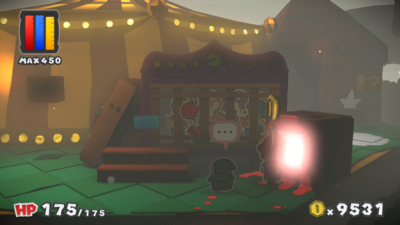
User:Mid188/Sandbox: Difference between revisions
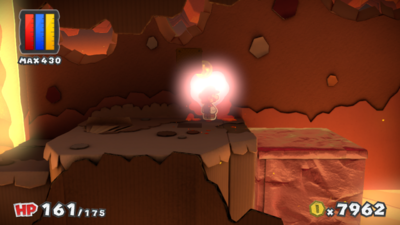
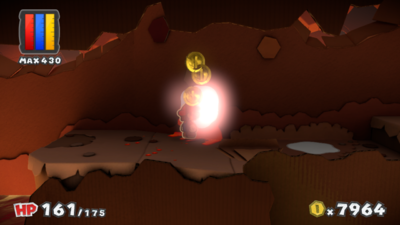
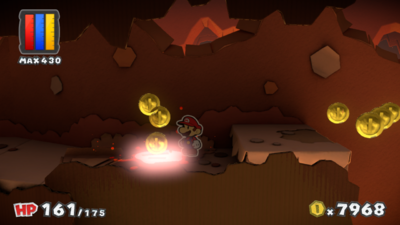
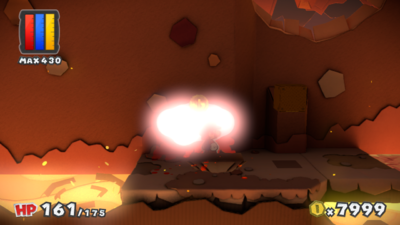
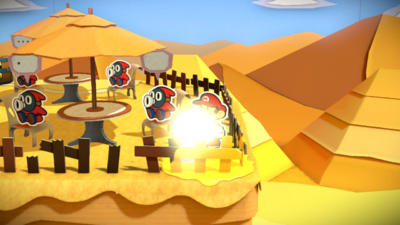
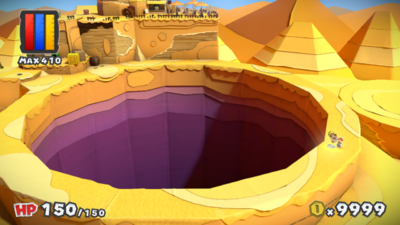
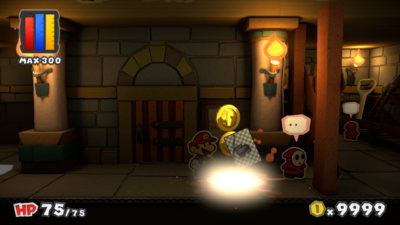
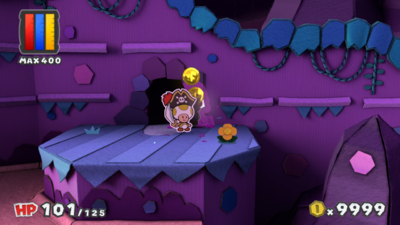
From the Super Mario Wiki, the Mario encyclopedia
Jump to navigationJump to search
mNo edit summary |
(Preparation for when I will start playing Color Splash again to add images of item locations.) |
||
| (64 intermediate revisions by the same user not shown) | |||
| Line 1: | Line 1: | ||
= | =Port Prisma= | ||
==Items== | ==Items== | ||
===Given/ | ===Field/Given/Objects=== | ||
{| | {|border=1 cellpadding=0 style="text-align: center; border-collapse: collapse; border: 1px solid black; width:100%" | ||
!Item | ! style="background:white; height:2em" | Item | ||
!Icon | ! style="background:white; height:2em" | Icon | ||
!Location | ! style="background:white; height:2em" | Location | ||
!Image | ! style="background:white; height:2em" | Location Image | ||
|- | |- | ||
| | | | ||
| | | | ||
| | | | ||
|} | |} | ||
== | ==Colorless spots== | ||
{| | {|border=1 cellpadding=0 style="text-align: center; border-collapse: collapse; border: 1px solid black; width:100%" | ||
! | ! style="background:white; height:2em" | Location | ||
! | ! style="background:white; height:2em" | Drop | ||
!Location | ! style="background:white; height:2em" | Location Image | ||
|- | |- | ||
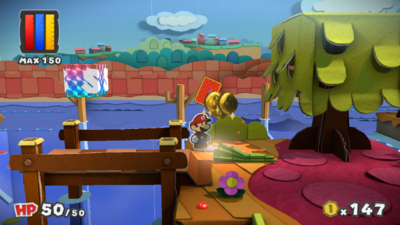
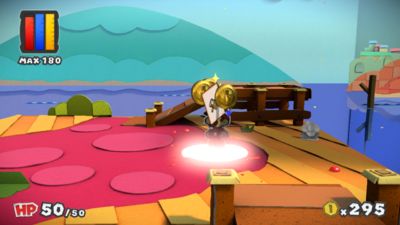
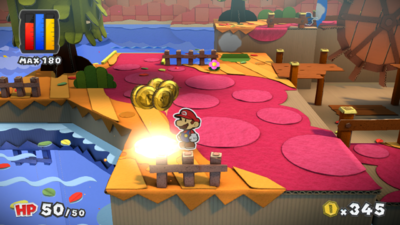
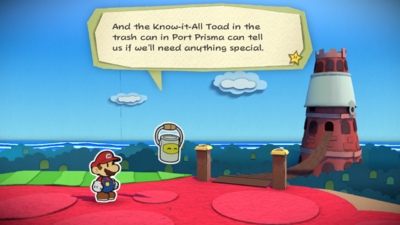
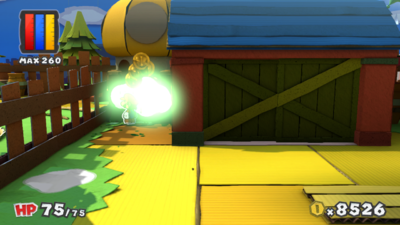
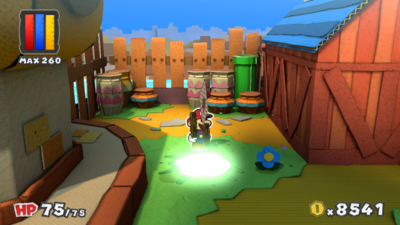
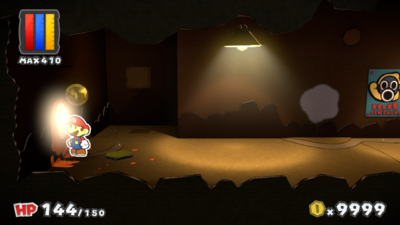
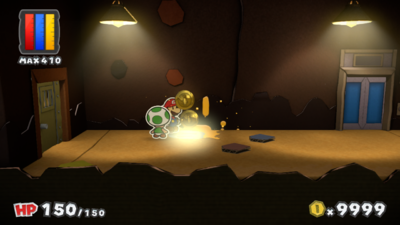
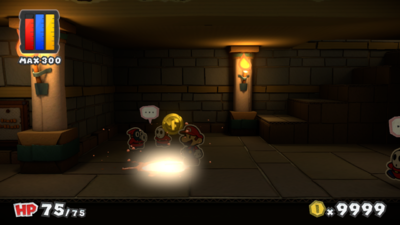
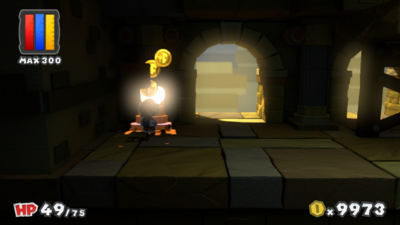
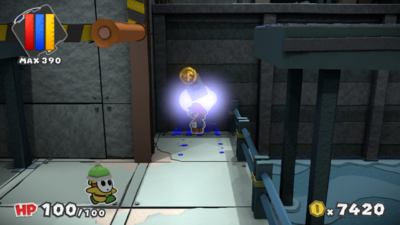
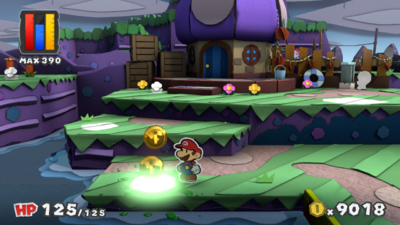
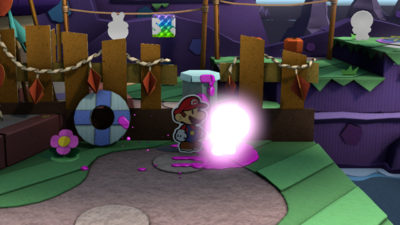
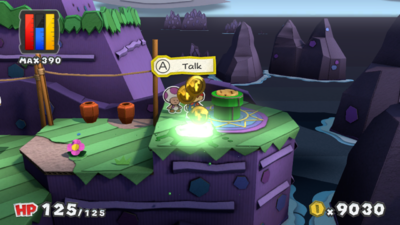
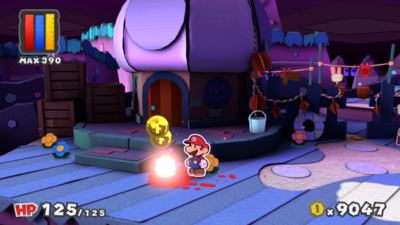
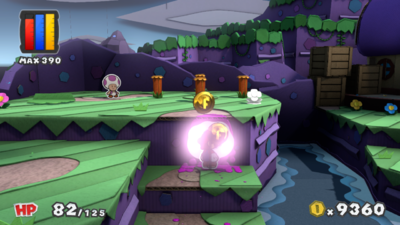
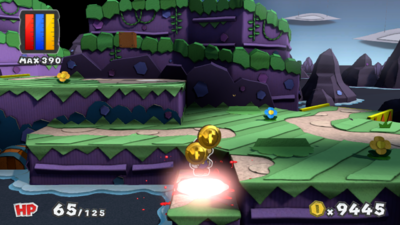
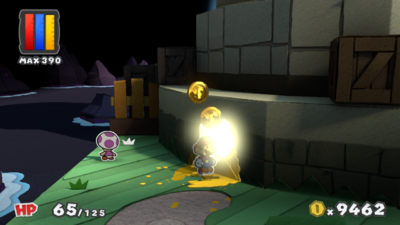
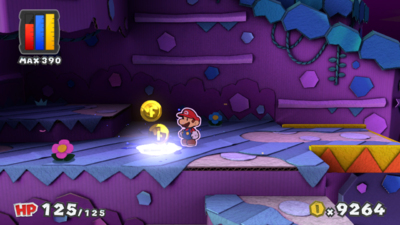
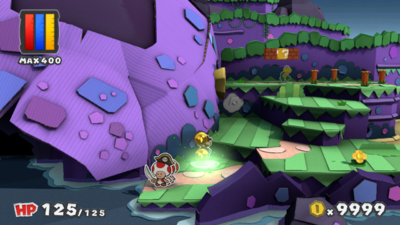
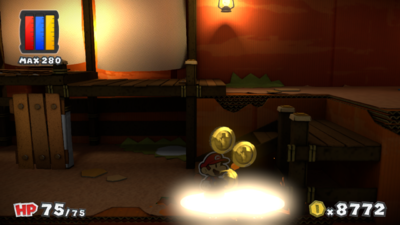
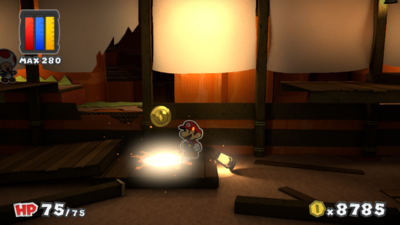
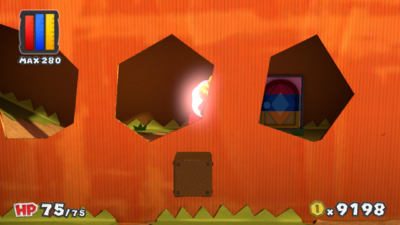
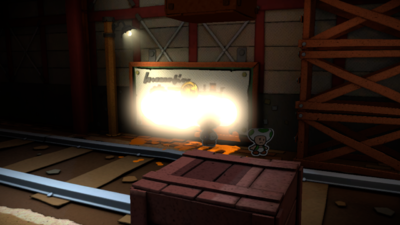
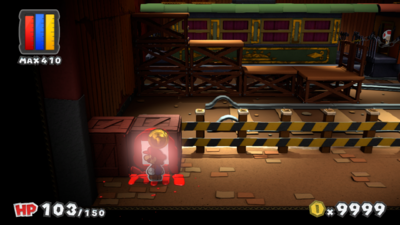
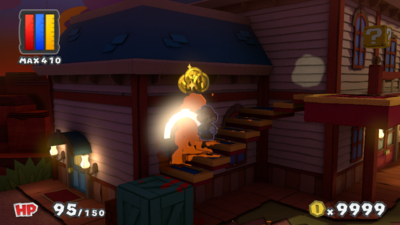
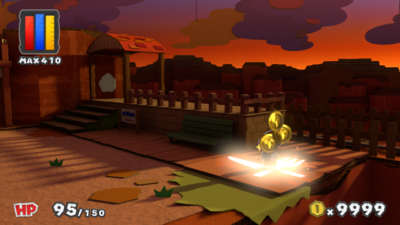
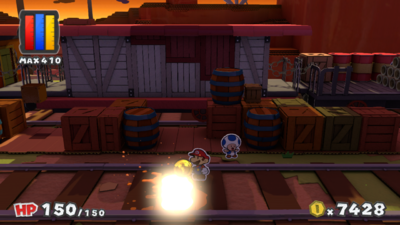
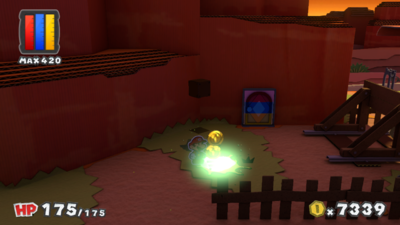
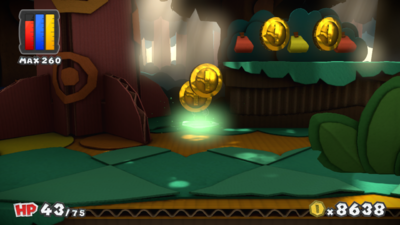
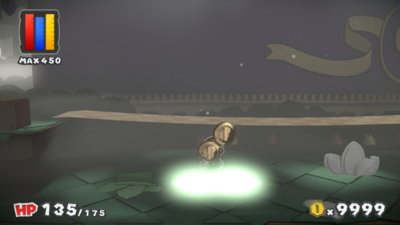
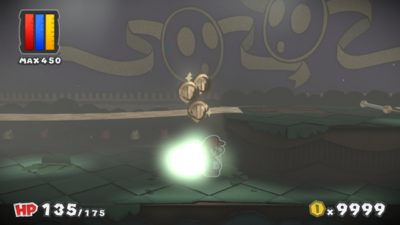
| | |In the yellow district, Toad has his colors drained and must be repainted. | ||
|<br> | |||
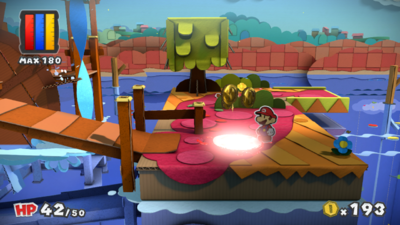
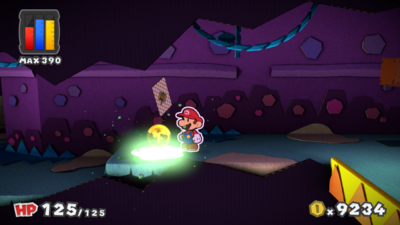
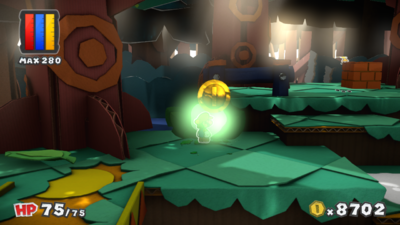
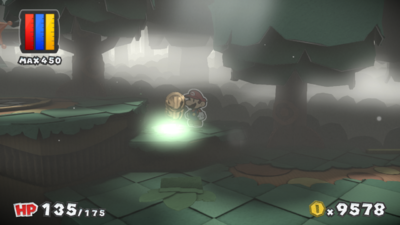
| | |[[File:PMCS Port Prisma colorless spot 1.png|400px]] | ||
|[[File: | |||
|- | |- | ||
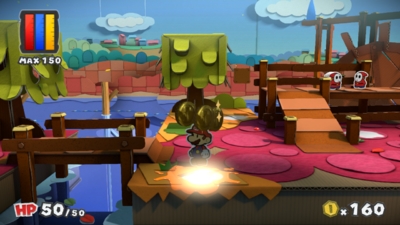
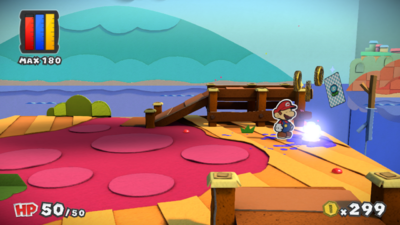
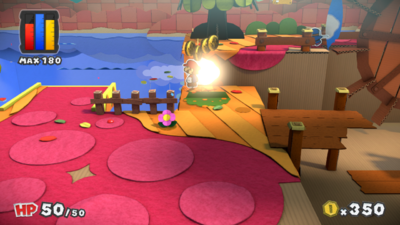
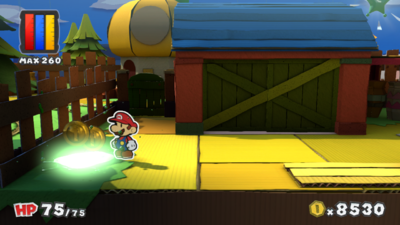
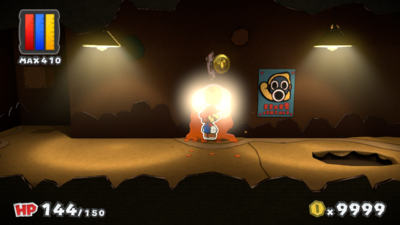
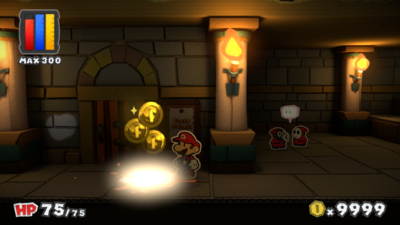
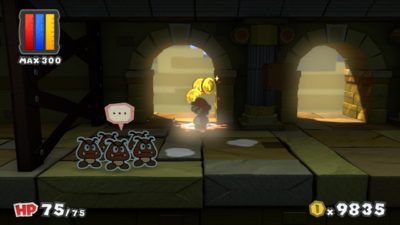
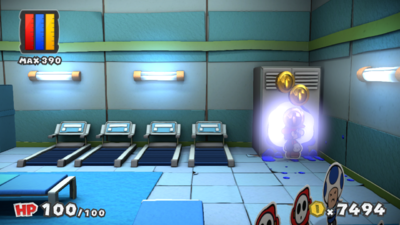
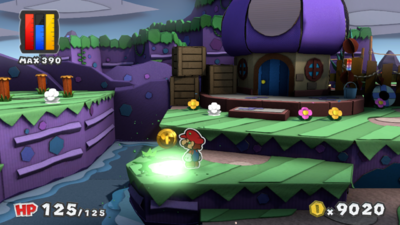
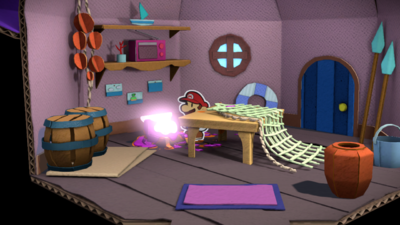
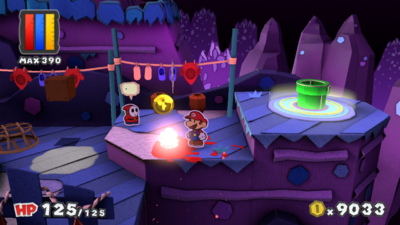
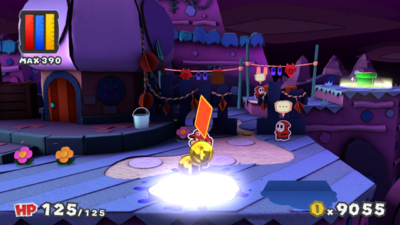
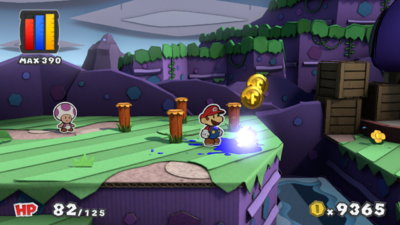
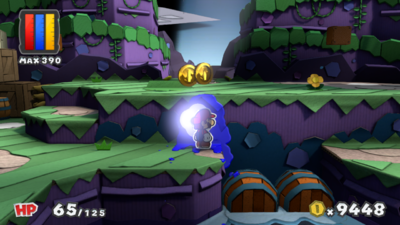
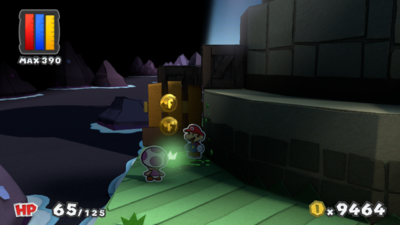
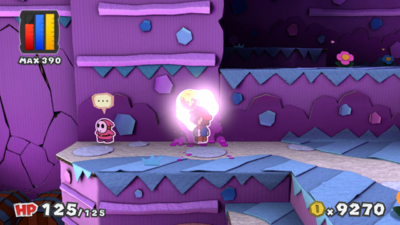
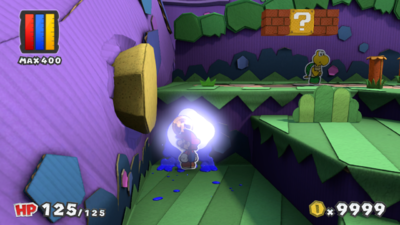
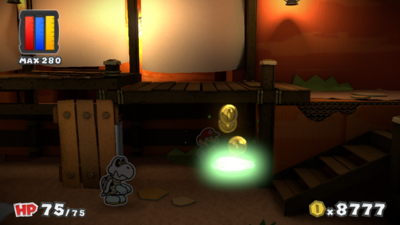
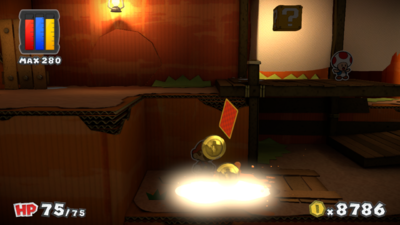
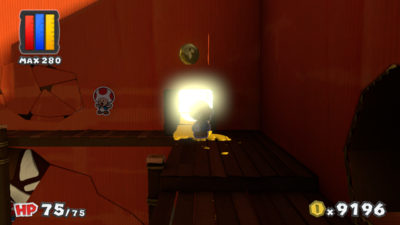
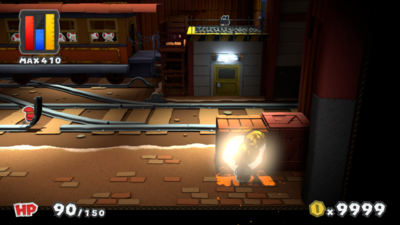
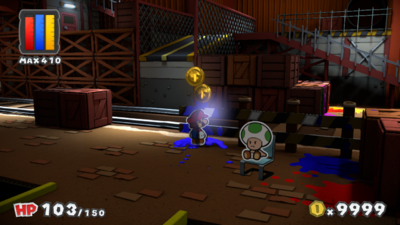
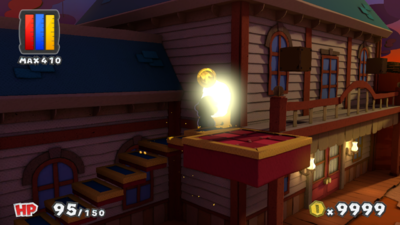
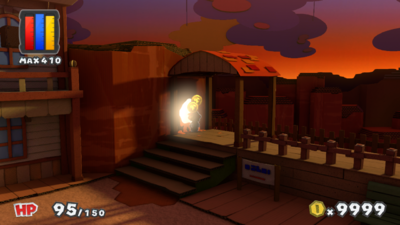
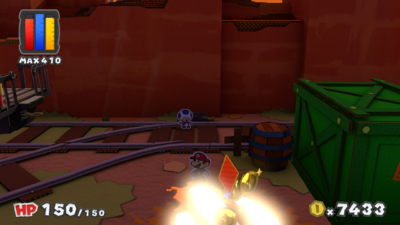
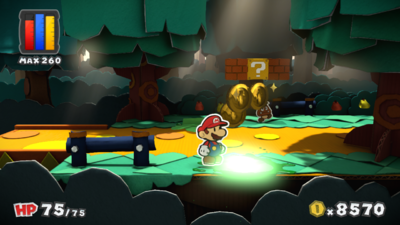
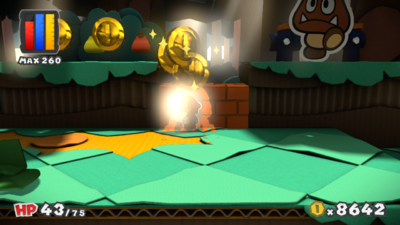
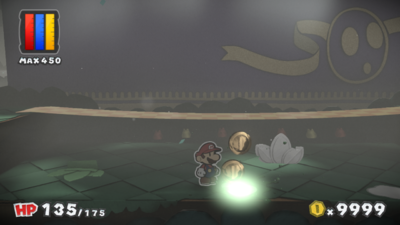
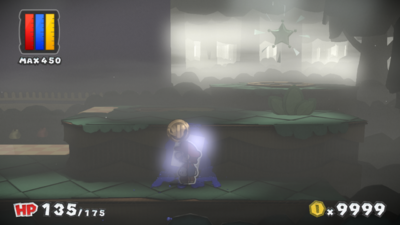
| | |In the yellow district, the [[Prisma Cardware]] shopkeeper Toad has had his colors drained. | ||
|<br> | |||
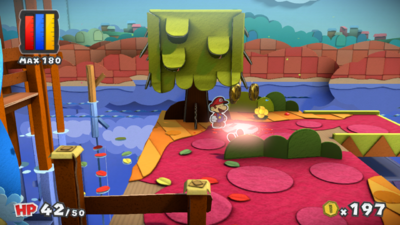
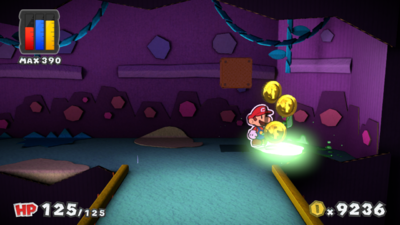
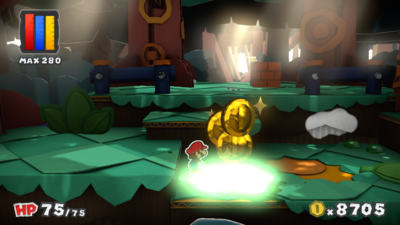
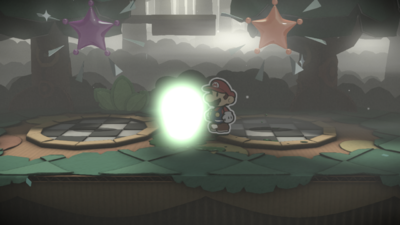
| | |[[File:PMCS Port Prisma colorless spot 2.png|400px]] | ||
|[[File: | |||
|- | |- | ||
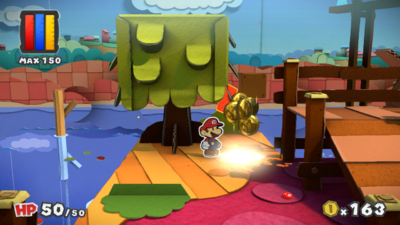
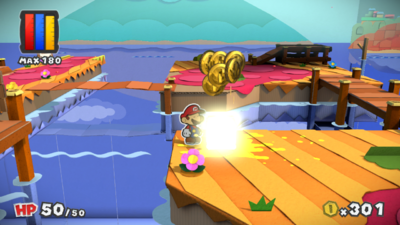
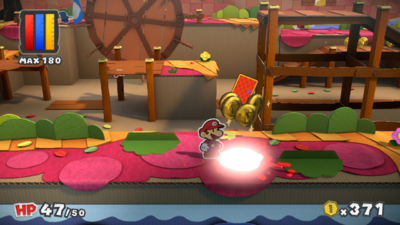
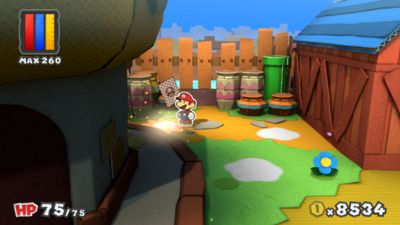
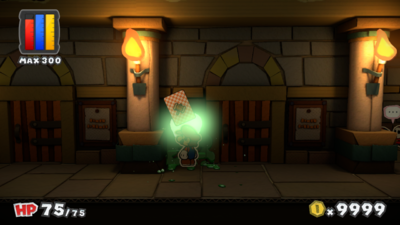
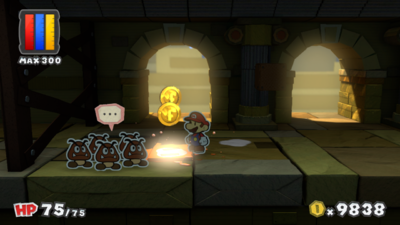
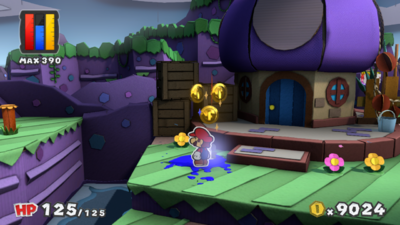
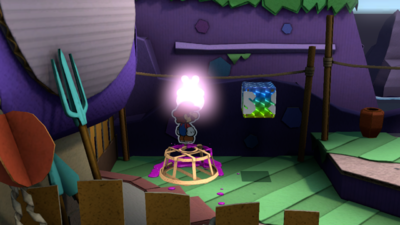
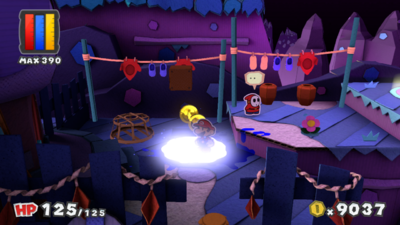
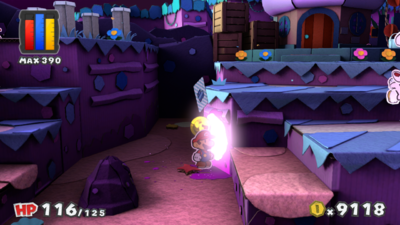
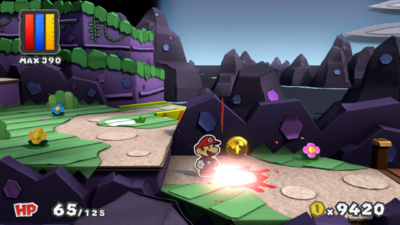
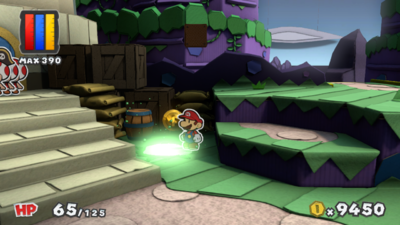
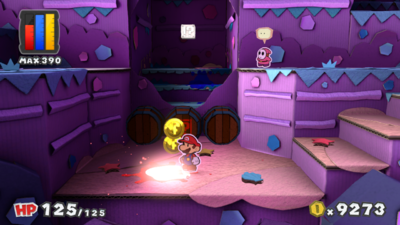
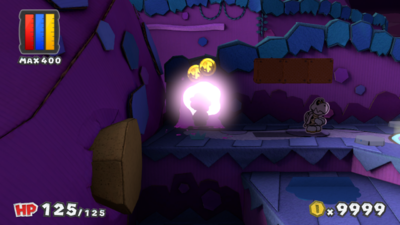
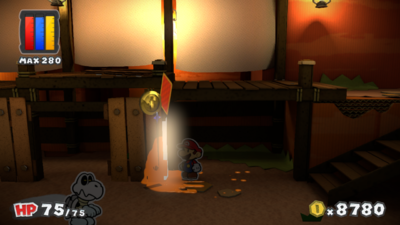
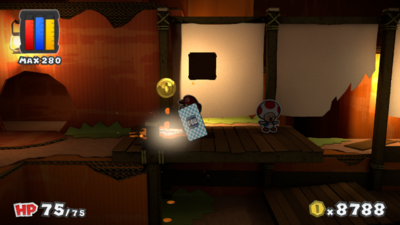
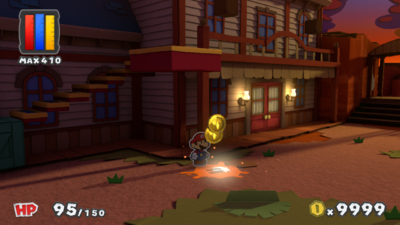
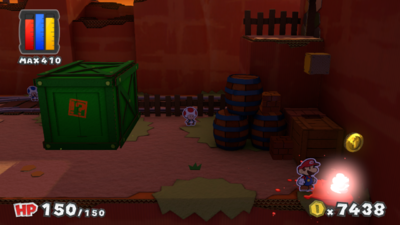
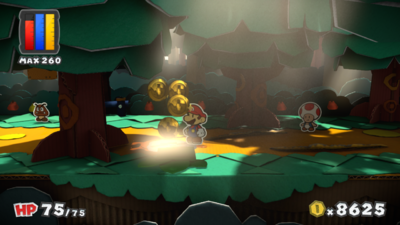
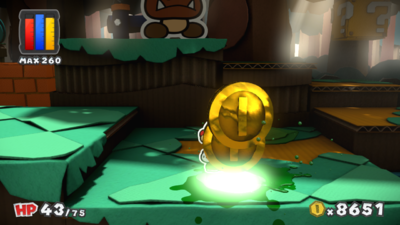
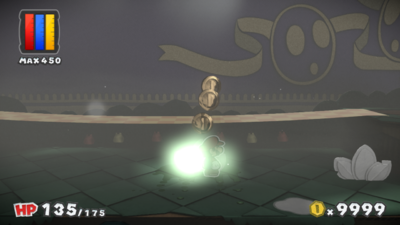
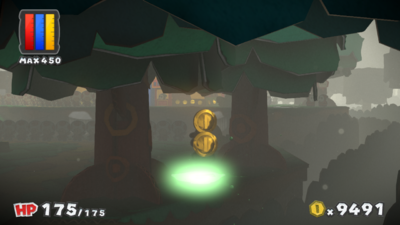
| | |In the fountain district, on the leftmost post. | ||
|<br> | |||
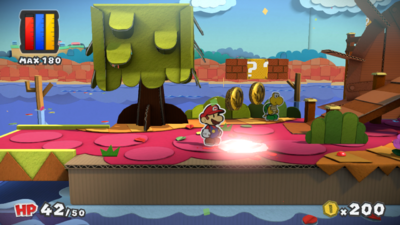
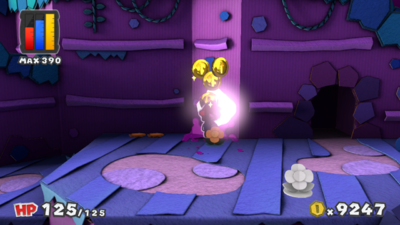
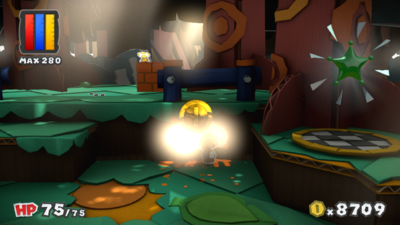
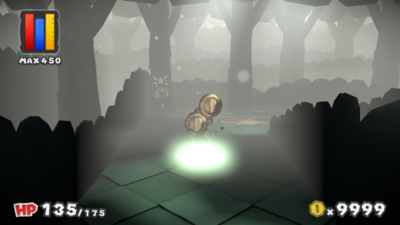
| | |[[File:PMCS Port Prisma colorless spot 3.png|400px]] | ||
|[[File: | |||
|- | |- | ||
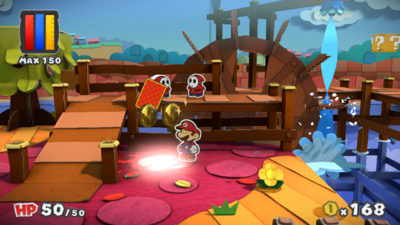
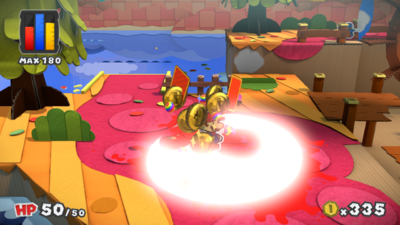
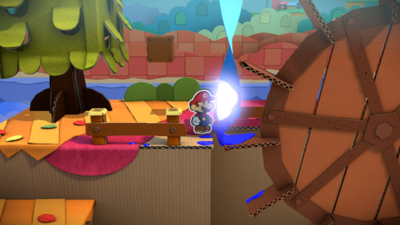
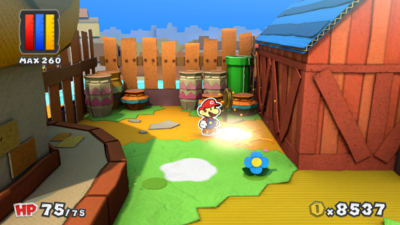
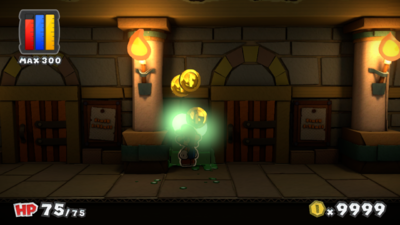
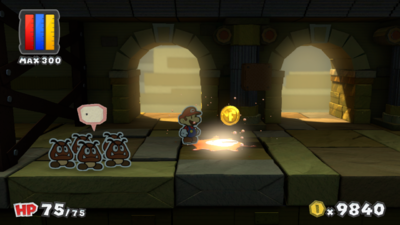
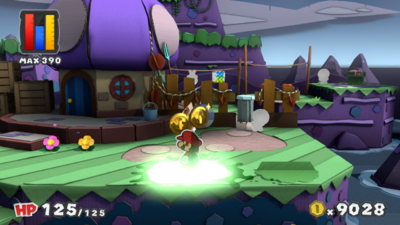
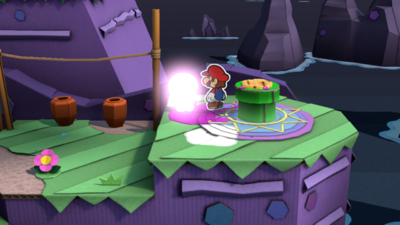
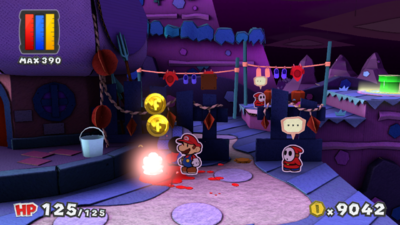
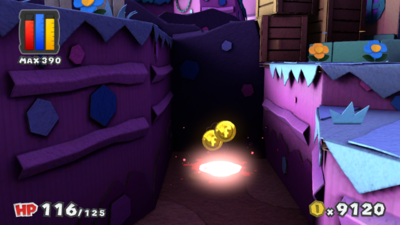
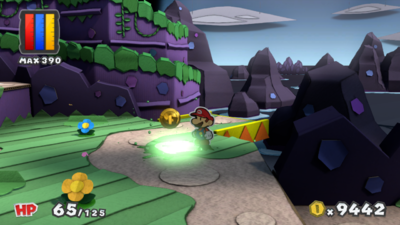
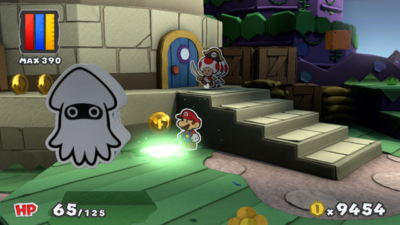
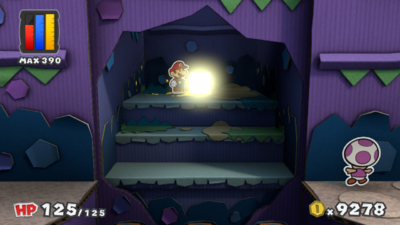
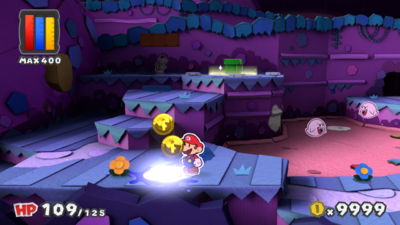
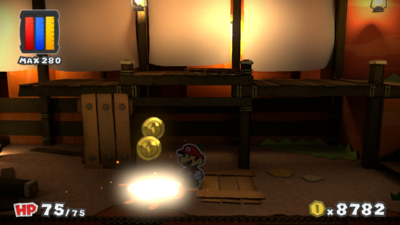
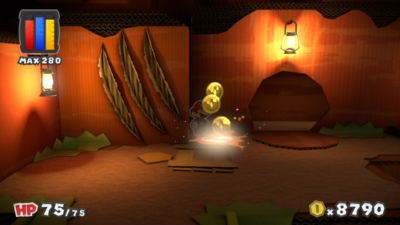
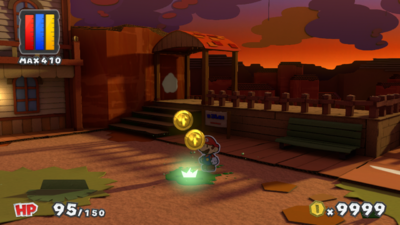
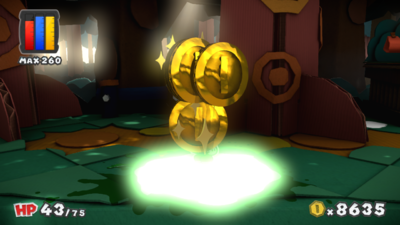
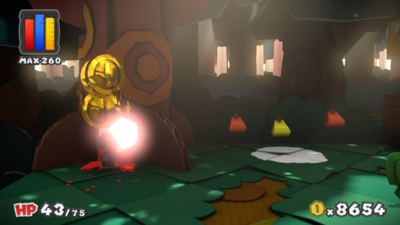
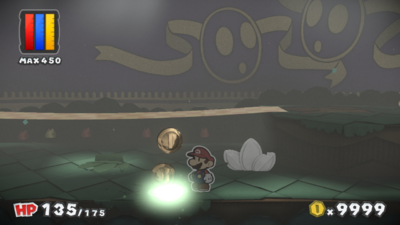
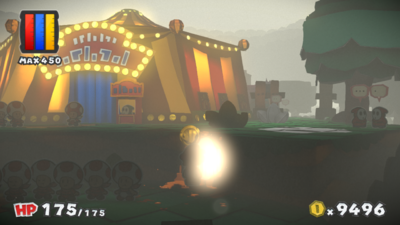
| | |In the fountain district, east of the lower leftmost potted plant. | ||
|[[File: | |<br> | ||
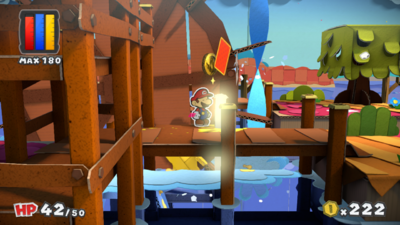
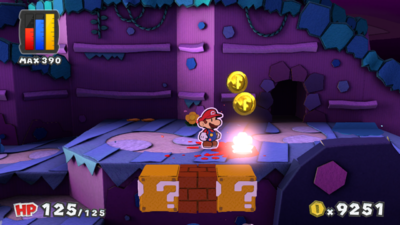
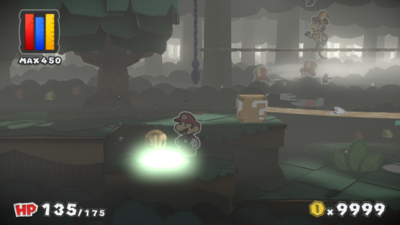
|In the | |[[File:PMCS Port Prisma colorless spot 4.png|400px]] | ||
|[[File: | |- | ||
| | |In the fountain district, west of the leftmost flag. | ||
|<br> | |||
|[[File:PMCS Port Prisma colorless spot 5.png|400px]] | |||
|- | |||
|In the fountain district, on the first step leading to the Red District. | |||
|<br> | |||
|[[File:PMCS Port Prisma colorless spot 6.png|400px]] | |||
|- | |||
|In the fountain district, south of the upper leftmost bench. | |||
|<br> | |||
|[[File:PMCS Port Prisma colorless spot 7.png|400px]] | |||
|- | |||
|In the fountain district, east of the upper leftmost potted plant. | |||
|<br> | |||
|[[File:PMCS Port Prisma colorless spot 8.png|400px]] | |||
|- | |||
|In the fountain district, east of the steps leading to the Red District. | |||
|<br> | |||
|[[File:PMCS Port Prisma colorless spot 9.png|400px]] | |||
|- | |||
|In the fountain district, northeast of the left flower bed. | |||
|<br> | |||
|[[File:PMCS Port Prisma colorless spot 10.png|400px]] | |||
|- | |||
|In the fountain district, south of the left window. | |||
|<br> | |||
|[[File:PMCS Port Prisma colorless spot 11.png|400px]] | |||
|- | |||
|In the fountain district, east of the left window. | |||
|<br> | |||
|[[File:PMCS Port Prisma colorless spot 12.png|400px]] | |||
|- | |||
|In the fountain district, further south of the left window. | |||
|<br> | |||
|[[File:PMCS Port Prisma colorless spot 13.png|400px]] | |||
|- | |||
|In the fountain district, south of the blue Big Paint Star's spot. | |||
|<br> | |||
|[[File:PMCS Port Prisma colorless spot 14.png|400px]] | |||
|- | |||
|In the fountain district, north of the blue Big Paint Star's spot. | |||
|<br> | |||
|[[File:PMCS Port Prisma colorless spot 15.png|400px]] | |||
|- | |||
|In the fountain district, on the wall near the left arch. | |||
|<br> | |||
|[[File:PMCS Port Prisma colorless spot 16.png|400px]] | |||
|- | |||
|In the fountain district, on the steps leading to the exit. | |||
|<br> | |||
|[[File:PMCS Port Prisma colorless spot 17.png|400px]] | |||
|- | |||
|In the fountain district, south of the right arch. | |||
|<br> | |||
|[[File:PMCS Port Prisma colorless spot 18.png|400px]] | |||
|- | |||
|In the fountain district, on the floor east of the right arch. | |||
|<br> | |||
|[[File:PMCS Port Prisma colorless spot 19.png|400px]] | |||
|- | |||
|In the fountain district, west of the right window. | |||
|<br> | |||
|[[File:PMCS Port Prisma colorless spot 20.png|400px]] | |||
|- | |||
|In the fountain district, between the yellow and orange Big Paint Stars' spots. | |||
|<br> | |||
|[[File:PMCS Port Prisma colorless spot 21.png|400px]] | |||
|- | |||
|In the fountain district, east of the entrance. | |||
|<br> | |||
|[[File:PMCS Port Prisma colorless spot 22.png|400px]] | |||
|- | |||
|In the fountain district, east of the yellow Big Paint Star's spot. | |||
|<br> | |||
|[[File:PMCS Port Prisma colorless spot 23.png|400px]] | |||
|- | |||
|In the fountain district, east of the orange Big Paint Star's spot. | |||
|<br> | |||
|[[File:PMCS Port Prisma colorless spot 24.png|400px]] | |||
|- | |||
|In the fountain district, east of the northeast flagpole. | |||
|<br> | |||
|[[File:PMCS Port Prisma colorless spot 25.png|400px]] | |||
|- | |||
|In the fountain district, south of the eastmost window. | |||
|<br> | |||
|[[File:PMCS Port Prisma colorless spot 26.png|400px]] | |||
|- | |||
|In the fountain district, the middle flower on the east flower bed. | |||
|<br> | |||
|[[File:PMCS Port Prisma colorless spot 27.png|400px]] | |||
|- | |||
|In the fountain district, east of the eastmost flagpole. | |||
|<br> | |||
|[[File:PMCS Port Prisma colorless spot 28.png|400px]] | |||
|- | |||
|In the fountain district, east of the second-eastmost flagpole. | |||
|<br> | |||
|[[File:PMCS Port Prisma colorless spot 29.png|400px]] | |||
|- | |||
|In the fountain district, east of the east flower bed. | |||
|<br> | |||
|[[File:PMCS Port Prisma colorless spot 30.png|400px]] | |||
|- | |||
|In the fountain district, on the first step leading to the yellow district. | |||
|<br> | |||
|[[File:PMCS Port Prisma colorless spot 31.png|400px]] | |||
|- | |||
|In the fountain district, north of the steps leading to the yellow district. | |||
|<br> | |||
|[[File:PMCS Port Prisma colorless spot 32.png|400px]] | |||
|- | |||
|In the fountain district, on the southeast bench. | |||
|<br> | |||
|[[File:PMCS Port Prisma colorless spot 33.png|400px]] | |||
|- | |||
|In the fountain district, on one of the posts next to the steps leading to the yellow district. | |||
|<br> | |||
|[[File:PMCS Port Prisma colorless spot 34.png|400px]] | |||
|- | |||
|In the fountain district, on the eastmost wall. | |||
|<br> | |||
|[[File:PMCS Port Prisma colorless spot 35.png|400px]] | |||
|- | |||
|In the fountain district, on the Toad under the west tree. | |||
|<br> | |||
|[[File:PMCS Port Prisma colorless spot 36.png|400px]] | |||
|- | |||
|In the fountain district, on the [[Toadmaster General]], who is near the fountain. | |||
|<br> | |||
|[[File:PMCS Port Prisma colorless spot 37.png|400px]] | |||
|- | |||
|In the fountain district, on the Toad near the east flower bed. | |||
|<br> | |||
|[[File:PMCS Port Prisma colorless spot 38.png|400px]] | |||
|- | |||
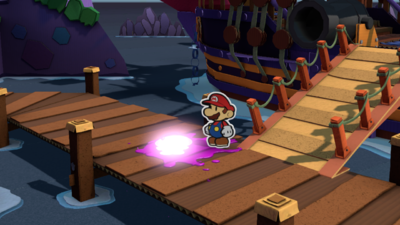
|In the harbor district, on the sign east of the trash can. | |||
|<br> | |||
|[[File:PMCS Port Prisma colorless spot 39.png|400px]] | |||
|- | |||
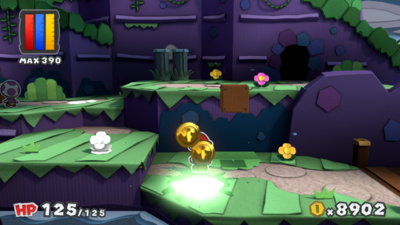
|In the blue district, on the green gate. | |||
|<br> | |||
|[[File:PMCS Port Prisma colorless spot 40.png|400px]] | |||
|- | |||
|In the blue district, on one of the flowers. | |||
|<br> | |||
|[[File:PMCS Port Prisma colorless spot 41.png|400px]] | |||
|- | |||
|In the blue district, west of the flower bed. | |||
|<br> | |||
|[[File:PMCS Port Prisma colorless spot 42.png|400px]] | |||
|- | |||
|In the blue district, south of Prisma Cardware. | |||
|<br> | |||
|[[File:PMCS Port Prisma colorless spot 43.png|400px]] | |||
|- | |||
|In the blue district, on the Toad standing near the bridge. | |||
|<br> | |||
|[[File:PMCS Port Prisma colorless spot 44.png|400px]] | |||
|- | |||
|In Prisma Cardware, the Toad at the west end of the shop. | |||
|<br> | |||
|[[File:PMCS Port Prisma colorless spot 45.png|400px]] | |||
|- | |||
|In Prisma Cardware, north of the entrance. | |||
|<br> | |||
|[[File:PMCS Port Prisma colorless spot 46.png|400px]] | |||
|- | |||
|In Prisma Cardware, west of the shopkeeper Toad. | |||
|<br> | |||
|[[File:PMCS Port Prisma colorless spot 47.png|400px]] | |||
|- | |||
|In the blue district, a Toad on the stairs. | |||
|<br> | |||
|[[File:PMCS Port Prisma colorless spot 48.png|400px]] | |||
|- | |||
|In the blue district, on a wall north of the gate. | |||
|<br> | |||
|[[File:PMCS Port Prisma colorless spot 49.png|400px]] | |||
|- | |||
|In the blue district, on the ground beneath two windows. | |||
|<br> | |||
|[[File:PMCS Port Prisma colorless spot 50.png|400px]] | |||
|- | |||
|In the blue district, the plants next to the Prisma Cardware sign. | |||
|<br> | |||
|[[File:PMCS Port Prisma colorless spot 51.png|400px]] | |||
|- | |||
|In the blue district, on the south part of a bench. | |||
|<br> | |||
|[[File:PMCS Port Prisma colorless spot 52.png|400px]] | |||
|- | |- | ||
|In the blue district, a Toad sitting on the bench. | |||
|<br> | |||
|In the | |[[File:PMCS Port Prisma colorless spot 53.png|400px]] | ||
| | |||
|[[File: | |||
|- | |- | ||
|In the blue district, on the south part of a bench. | |||
|<br> | |||
|In the | |[[File:PMCS Port Prisma colorless spot 54.png|400px]] | ||
| | |||
|[[File: | |||
|- | |- | ||
|In the blue district, on the waterwheel structure. | |||
|<br> | |||
|In the | |[[File:PMCS Port Prisma colorless spot 80.png|400px]] | ||
|[[File: | |||
|- | |- | ||
| | |In the fountain district, on the wall to the west. | ||
|[[File: | |<br> | ||
|[[File:PMCS Port Prisma colorless spot 55.png|400px]] | |||
|- | |- | ||
| | |In the fountain district, south of a bench. | ||
|[[File: | |<br> | ||
|[[File:PMCS Port Prisma colorless spot 56.png|400px]] | |||
|- | |- | ||
|In the fountain district, on the wall in the westmost alcove. | |||
|<br> | |||
|In the | |[[File:PMCS Port Prisma colorless spot 57.png|400px]] | ||
|[[File: | |||
|- | |- | ||
| | |In the fountain district, on the floor in the alcove with the trash can. | ||
|<br> | |||
| | |[[File:PMCS Port Prisma colorless spot 58.png|400px]] | ||
|[[File: | |||
|- | |- | ||
|In the fountain district, on the floor near the toilet paper. | |||
|<br> | |||
|In the | |[[File:PMCS Port Prisma colorless spot 59.png|400px]] | ||
|[[File: | |||
|- | |- | ||
| | |In the fountain district, on the overhang of plants. | ||
|<br> | |||
| | |[[File:PMCS Port Prisma colorless spot 60.png|400px]] | ||
|[[File: | |||
|- | |- | ||
|In the fountain district, a Toad near the toilet paper. | |||
|<br> | |||
|In the | |[[File:PMCS Port Prisma colorless spot 61.png|400px]] | ||
|[[File: | |||
|- | |- | ||
| | |In the fountain district, on the ground east of the toilet paper. | ||
|<br> | |||
|[[File:PMCS Port Prisma colorless spot 62.png|400px]] | |||
|[[File: | |||
|- | |- | ||
|In the fountain district, a Toad at the east end. | |||
|<br> | |||
|In the | |[[File:PMCS Port Prisma colorless spot 63.png|400px]] | ||
|[[File: | |||
|- | |- | ||
|In the fountain district, on the wall to the east. | |||
|<br> | |||
|In the | |[[File:PMCS Port Prisma colorless spot 64.png|400px]] | ||
|[[File: | |||
|- | |- | ||
|In the yellow district, a Toad that is initially being held by a Shy Guy. | |||
|<br> | |||
|In the | |[[File:PMCS Port Prisma colorless spot 65.png|400px]] | ||
|[[File: | |||
|- | |- | ||
| | |In the yellow district, on the roof of Peach's and Toad's guest quarters. | ||
|<br> | |||
| | |[[File:PMCS Port Prisma colorless spot 66.png|400px]] | ||
|[[File: | |||
|- | |- | ||
| | |In the yellow district, on the waterfall. | ||
|[[File: | |<br> | ||
|[[File:PMCS Port Prisma colorless spot 67.png|400px]] | |||
|- | |- | ||
| | |In the yellow district, on the west wall in the area leading to the Mini Paint Star. | ||
|[[File: | |<br> | ||
|[[File:PMCS Port Prisma colorless spot 68.png|400px]] | |||
|- | |- | ||
| | |In the blue district, on the ground shortly after the bridge. | ||
|[[File: | |<br> | ||
|[[File:PMCS Port Prisma colorless spot 69.png|400px]] | |||
|- | |- | ||
| | |In the blue district, on a flower after the bridge. | ||
|[[File: | |<br> | ||
|[[File:PMCS Port Prisma colorless spot 70.png|400px]] | |||
|- | |- | ||
|In the blue district, on the wall of Prisma Postal Toad. | |||
|<br> | |||
|In the | |[[File:PMCS Port Prisma colorless spot 71.png|400px]] | ||
| | |||
| | |||
|- | |- | ||
| | |In the blue district, on the sign outside the cafe. | ||
| | |<br> | ||
|[[File:PMCS Port Prisma colorless spot 72.png|400px]] | |||
|[[File: | |||
|- | |- | ||
|In the blue district, on the westmost overhang. | |||
|<br> | |||
|In the | |[[File:PMCS Port Prisma colorless spot 73.png|400px]] | ||
|[[File: | |||
|- | |- | ||
| | |In the blue district, on the Toad to the right of the Toad with the newspaper. | ||
|<br> | |||
|[[File:PMCS Port Prisma colorless spot 74.png|400px]] | |||
|[[File: | |||
|- | |- | ||
| | |In the blue district, on the Toad with the newspaper. | ||
|<br> | |||
|[[File:PMCS Port Prisma colorless spot 75.png|400px]] | |||
|[[File: | |||
|- | |- | ||
|In the blue district, on the Toad in the cafe. | |||
|<br> | |||
|In the | |[[File:PMCS Port Prisma colorless spot 76.png|400px]] | ||
|[[File: | |||
|- | |- | ||
| | |In the blue district, on the roof of Prisma Postal Toad. | ||
|<br> | |||
|[[File:PMCS Port Prisma colorless spot 77.png|400px]] | |||
|[[File: | |||
|- | |- | ||
|In the blue district, on the roof of Prisma Postal Toad. | |||
|<br> | |||
|In the | |[[File:PMCS Port Prisma colorless spot 78.png|400px]] | ||
|[[File: | |||
|- | |- | ||
| | |In the blue district, on a Toad on the roof of Prisma Postal Toad. | ||
|<br> | |||
|[[File:PMCS Port Prisma colorless spot 79.png|400px]] | |||
|[[File: | |||
|} | |} | ||
= | =Ruddy Road= | ||
==Items== | ==Items== | ||
===Field/Given/Objects=== | ===Field/Given/Objects=== | ||
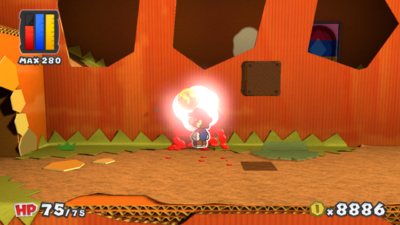
{| | {|border=1 cellpadding=0 style="text-align: center; border-collapse: collapse; border: 1px solid black; width:100%" | ||
!Item | ! style="background:indianred; color:white; height:2em" | Item | ||
!Icon | ! style="background:indianred; color:white; height:2em" | Icon | ||
!Location | ! style="background:indianred; color:white; height:2em" | Location | ||
!Image | ! style="background:indianred; color:white; height:2em" | Location Image | ||
|- | |- | ||
| | | | ||
| | | | ||
| | | | ||
|} | |||
==Colorless Spots== | |||
{|border=1 cellpadding=0 style="text-align: center; border-collapse: collapse; border: 1px solid black; width:100%" | |||
! style="background:indianred; color:white; height:2em" | Location | |||
! style="background:indianred; color:white; height:2em" | Drop | |||
! style="background:indianred; color:white; height:2em" | Location Image | |||
|- | |||
|In the first area, on the ground. | |||
|<br> | |||
|[[File:PMCS Ruddy Road colorless spot 1.png|400px]] | |||
|- | |||
|In the first area, on the second flower. | |||
|<br> | |||
|[[File:PMCS Ruddy Road colorless spot 2.png|400px]] | |||
|- | |||
|In the first area, on the first flower after the bridge. | |||
|<br> | |||
|[[File:PMCS Ruddy Road colorless spot 3.png|400px]] | |||
|- | |||
|In the first area, on the ground east of the bridge. | |||
|<br> | |||
|[[File:PMCS Ruddy Road colorless spot 4.png|400px]] | |||
|- | |||
|In the first area, on the flower west of the house. | |||
|<br> | |||
|[[File:PMCS Ruddy Road colorless spot 5.png|400px]] | |||
|- | |||
|In the first area, on the ground southwest of the house. | |||
|<br> | |||
|[[File:PMCS Ruddy Road colorless spot 6.png|400px]] | |||
|- | |||
|In the first area, on the house. | |||
|<br> | |||
|[[File:PMCS Ruddy Road colorless spot 7.png|400px]] | |||
|- | |||
|In the first area, on the wall. | |||
|<br> | |||
|[[File:PMCS Ruddy Road colorless spot 40.png|400px]] | |||
|- | |||
|In the first area, on a flower south of a [[? Block]]. | |||
|<br> | |||
|[[File:PMCS Ruddy Road colorless spot 8.png|400px]] | |||
|- | |||
|In the first area, on the ground southeast of a ? Block. | |||
|<br> | |||
|[[File:PMCS Ruddy Road colorless spot 9.png|400px]] | |||
|- | |||
|In the first area, on the flower before the bridge. | |||
|<br> | |||
|[[File:PMCS Ruddy Road colorless spot 10.png|400px]] | |||
|- | |||
|In the first area, on the ground. Five [[Slurp Guy]]s can be seen sucking the color out of this spot. | |||
|<br> | |||
|[[File:PMCS Ruddy Road colorless spot 11.png|400px]] | |||
|- | |||
|In the first area, on the ground. A [[Slurp Guy]] is sucking the color out of this spot. | |||
|<br> | |||
|[[File:PMCS Ruddy Road colorless spot 12.png|400px]] | |||
|- | |||
|In the area with the blue Mini Paint Star, in the second circle on the ground. | |||
|<br> | |||
|[[File:PMCS Ruddy Road colorless spot 13.png|400px]] | |||
|- | |||
|In the area with the blue Mini Paint Star, on the ground. | |||
|<br> | |||
|[[File:PMCS Ruddy Road colorless spot 14.png|400px]] | |||
|- | |||
|In the area with the blue Mini Paint Star, on the fifth flower. | |||
|<br> | |||
|[[File:PMCS Ruddy Road colorless spot 15.png|400px]] | |||
|- | |||
|In the area with the blue Mini Paint Star, on the eastmost flower on the lower area. | |||
|<br> | |||
|[[File:PMCS Ruddy Road colorless spot 16.png|400px]] | |||
|- | |- | ||
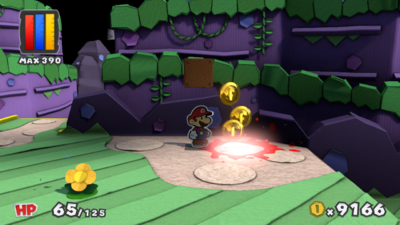
| | |In the second area, on the ground near the sign. | ||
|[[File: | |<br> | ||
|In the | |[[File:PMCS Ruddy Road colorless spot 17.png|400px]] | ||
| | |- | ||
|In the second area, on the first flower. | |||
|<br> | |||
|[[File:PMCS Ruddy Road colorless spot 18.png|400px]] | |||
|- | |||
|In the second area, on a flower. | |||
|<br> | |||
|[[File:PMCS Ruddy Road colorless spot 19.png|400px]] | |||
|- | |||
|In the second area, on a flower. | |||
|<br> | |||
|[[File:PMCS Ruddy Road colorless spot 20.png|400px]] | |||
|- | |- | ||
| | |In the second area, on the ground after the café. | ||
|[[File: | |<br> | ||
|[[File:PMCS Ruddy Road colorless spot 21.png|400px]] | |||
|- | |- | ||
| | |In the second area, on the ground. | ||
|[[File: | |<br> | ||
|[[File:PMCS Ruddy Road colorless spot 22.png|400px]] | |||
|- | |- | ||
| | |In the second area, on the ground. | ||
|[[File: | |<br> | ||
|[[File:PMCS Ruddy Road colorless spot 23.png|400px]] | |||
|- | |- | ||
|In the second area, on the ground. | |||
|<br> | |||
|In the | |[[File:PMCS Ruddy Road colorless spot 24.png|400px]] | ||
|[[File: | |||
|- | |- | ||
| | |In the second area, on the ground behind a bush. | ||
|<br> | |||
| | |[[File:PMCS Ruddy Road colorless spot 25.png|400px]] | ||
|[[File: | |||
|- | |- | ||
|In the second area, on the ground. | |||
|<br> | |||
|In the second | |[[File:PMCS Ruddy Road colorless spot 26.png|400px]] | ||
|[[File: | |||
|- | |- | ||
| | |In the second area, on a flower near the rolled-up platform. | ||
|<br> | |||
| | |[[File:PMCS Ruddy Road colorless spot 27.png|400px]] | ||
|[[File: | |||
|- | |- | ||
|In the second area, on the ground on a raised platform. | |||
|<br> | |||
|In the | |[[File:PMCS Ruddy Road colorless spot 28.png|400px]] | ||
|[[File: | |||
|- | |- | ||
|In the second area, on the ground south of a tree. | |||
|<br> | |||
|In the | |[[File:PMCS Ruddy Road colorless spot 29.png|400px]] | ||
|[[File: | |||
|- | |- | ||
|In the second area, on a flower in a six-flower circle. | |||
|<br> | |||
|In the | |[[File:PMCS Ruddy Road colorless spot 30.png|400px]] | ||
|[[File: | |||
|- | |- | ||
|In the second area, on a flower in a six-flower circle. | |||
|<br> | |||
|In the | |[[File:PMCS Ruddy Road colorless spot 31.png|400px]] | ||
|[[File: | |||
|- | |- | ||
| | |In the second area, on a flower in a six-flower circle. | ||
|<br> | |||
| | |[[File:PMCS Ruddy Road colorless spot 32.png|400px]] | ||
|[[File: | |||
|- | |- | ||
| | |In the second area, on a flower in a six-flower circle. | ||
| | |<br> | ||
|[[File:PMCS Ruddy Road colorless spot 33.png|400px]] | |||
|[[File: | |||
|- | |- | ||
|In the second area, on a flower in a six-flower circle. | |||
|<br> | |||
|In the | |[[File:PMCS Ruddy Road colorless spot 34.png|400px]] | ||
| | |||
|[[File: | |||
|- | |- | ||
|In the second area, on a flower in a six-flower circle. | |||
|<br> | |||
|In the | |[[File:PMCS Ruddy Road colorless spot 35.png|400px]] | ||
| | |||
|[[File: | |||
|- | |- | ||
|In the second area, on an invisible ? Block surrounded by flowers. | |||
|<br> | |||
|In the | |[[File:PMCS Ruddy Road colorless spot 36.png|400px]] | ||
|[[File: | |||
|- | |- | ||
|In the area with the blue Mini Paint Star, on a Toad who can be reached by jumping from a tree. | |||
|<br> | |||
|In the | |[[File:PMCS Ruddy Road colorless spot 37.png|400px]] | ||
|[[File: | |||
|- | |- | ||
|In the area with the blue Mini Paint Star, on a flower. | |||
|<br> | |||
|In the | |[[File:PMCS Ruddy Road colorless spot 38.png|400px]] | ||
|[[File: | |||
|- | |- | ||
|In the area with the blue Mini Paint Star, on a flower. | |||
|<br> | |||
|In the | |[[File:PMCS Ruddy Road colorless spot 39.png|400px]] | ||
|[[File: | |||
|} | |} | ||
= | =Cherry Lake= | ||
==Items== | ==Items== | ||
===Field=== | ===Field/Given/Objects=== | ||
{| | {|border=1 cellpadding=0 style="text-align: center; border-collapse: collapse; border: 1px solid black; width:100%" | ||
!Item | ! style="background:indianred; color:white; height:2em" | Item | ||
!Icon | ! style="background:indianred; color:white; height:2em" | Icon | ||
!Location | ! style="background:indianred; color:white; height:2em" | Location | ||
!Image | ! style="background:indianred; color:white; height:2em" | Location Image | ||
|- | |- | ||
| | | | ||
| | | | ||
| | | | ||
|} | |} | ||
== | ==Colorless spots== | ||
{| | {|border=1 cellpadding=0 style="text-align: center; border-collapse: collapse; border: 1px solid black; width:100%" | ||
! | ! style="background:indianred; color:white; height:2em" | Location | ||
! | ! style="background:indianred; color:white; height:2em" | Drop | ||
!Location | ! style="background:indianred; color:white; height:2em" | Location Image | ||
|- | |- | ||
| | |In the second area, behind a bush. | ||
|<br> | |||
| | |[[File:PMCS Cherry Lake colorless spot 1.png|400px]] | ||
|[[File: | |||
|- | |- | ||
| | |In the second area, south of the tree after the bridge. | ||
| | |<br> | ||
|[[File:PMCS Cherry Lake colorless spot 2.png|400px]] | |||
|[[File: | |||
|- | |- | ||
| | |In the second area, southeast of a tree. | ||
| | |<br> | ||
|[[File:PMCS Cherry Lake colorless spot 3.png|400px]] | |||
|[[File: | |||
|- | |- | ||
|In the second area, near some stairs. | |||
|<br> | |||
|In the | |[[File:PMCS Cherry Lake colorless spot 4.png|400px]] | ||
|[[File: | |||
|- | |- | ||
| | |In the second area, south of Justice Toad's shoes. | ||
|<br> | |||
| | |[[File:PMCS Cherry Lake colorless spot 5.png|400px]] | ||
|[[File: | |||
|- | |- | ||
| | |In the second area, north of Justice Toad's shoes. | ||
|<br> | |||
|[[File:PMCS Cherry Lake colorless spot 6.png|400px]] | |||
|[[File: | |||
|- | |- | ||
|In the third area, south of a Brick Block. | |||
|<br> | |||
|In the | |[[File:PMCS Cherry Lake colorless spot 7.png|400px]] | ||
|[[File: | |||
|- | |- | ||
| | |In the third area, on a post near the waterwheel. | ||
| | |<br> | ||
|[[File:PMCS Cherry Lake colorless spot 8.png|400px]] | |||
|[[File: | |||
|- | |- | ||
|In the third area, near the tree with Justice Toad's pants. | |||
|<br> | |||
|In the third | |[[File:PMCS Cherry Lake colorless spot 9.png|400px]] | ||
|[[File: | |||
|- | |- | ||
|In the third area, south of the tree with Justice Toad's pants. | |||
|<br> | |||
|In the | |[[File:PMCS Cherry Lake colorless spot 10.png|400px]] | ||
| | |||
|[[File: | |||
|- | |- | ||
|In the third area, near the Inner Cherry Lake sign. | |||
|<br> | |||
|In the | |[[File:PMCS Cherry Lake colorless spot 11.png|400px]] | ||
| | |||
|[[File: | |||
|- | |- | ||
|In the third area, south of the Fan Thing. | |||
|<br> | |||
|In the third | |[[File:PMCS Cherry Lake colorless spot 12.png|400px]] | ||
| | |||
|[[File: | |||
|- | |- | ||
|In the third area, on the ground south of the steps. | |||
|<br> | |||
|In the third | |[[File:PMCS Cherry Lake colorless spot 13.png|400px]] | ||
|[[File: | |||
|- | |- | ||
|In the third area, on a flower near the steps. | |||
|<br> | |||
|In the | |[[File:PMCS Cherry Lake colorless spot 14.png|400px]] | ||
|[[File: | |||
|- | |- | ||
|In the third area, on a ? Block. | |||
|<br> | |||
|In the | |[[File:PMCS Cherry Lake colorless spot 15.png|400px]] | ||
|[[File: | |||
|- | |- | ||
|In the fourth area, on the ground in the shape of a Shy Guy mask. | |||
|<br> | |||
|In the | |[[File:PMCS Cherry Lake colorless spot 16.png|400px]] | ||
|[[File: | |||
|- | |- | ||
|In the fourth area, on the ground south of the entrance. | |||
|<br> | |||
|In the | |[[File:PMCS Cherry Lake colorless spot 17.png|400px]] | ||
|[[File: | |||
|- | |- | ||
|In the fourth area, on the wall. | |||
|<br> | |||
|In the | |[[File:PMCS Cherry Lake colorless spot 18.png|400px]] | ||
|[[File: | |||
|- | |- | ||
|In the fourth area, on the ground between two bushes. | |||
|<br> | |||
|In the | |[[File:PMCS Cherry Lake colorless spot 19.png|400px]] | ||
|[[File: | |||
|- | |- | ||
|In the fourth area, on a stream of water. This colorless spot is required to beat the level. | |||
|<br> | |||
|In the | |[[File:PMCS Cherry Lake colorless spot 20.png|400px]] | ||
|[[File: | |||
|- | |- | ||
|In the fourth area, on the ground near a blue crate. | |||
|<br> | |||
|In the | |[[File:PMCS Cherry Lake colorless spot 21.png|400px]] | ||
|[[File: | |||
|- | |- | ||
| | |In the fourth area, on the ground behind a bush. | ||
|[[File: | |<br> | ||
|[[File:PMCS Cherry Lake colorless spot 22.png|400px]] | |||
|- | |- | ||
| | |In the fourth area, on a post that can only be reached from the right side. | ||
|[[File: | |<br> | ||
|[[File:PMCS Cherry Lake colorless spot 23.png|400px]] | |||
|- | |- | ||
| | |In Inner Cherry Lake, on the ground. | ||
|[[File: | |<br> | ||
|[[File:PMCS Cherry Lake colorless spot 24.png|400px]] | |||
|- | |- | ||
| | |In Inner Cherry Lake, on a post. | ||
|[[File: | |<br> | ||
|[[File:PMCS Cherry Lake colorless spot 25.png|400px]] | |||
|- | |- | ||
|In Inner Cherry Lake, on a plank behind the first waterwheel. | |||
|<br> | |||
|In the first | |[[File:PMCS Cherry Lake colorless spot 26.png|400px]] | ||
|[[File: | |||
|- | |- | ||
|In Inner Cherry Lake, on a plank after the second waterwheel. | |||
|<br> | |||
|In the second | |[[File:PMCS Cherry Lake colorless spot 27.png|400px]] | ||
|[[File: | |||
|- | |- | ||
|In Inner Cherry Lake, on a plank after the second waterwheel. | |||
|<br> | |||
|In the second | |[[File:PMCS Cherry Lake colorless spot 28.png|400px]] | ||
|[[File: | |||
|- | |- | ||
|In Inner Cherry Lake, on a plank before the third waterwheel. | |||
|<br> | |||
|In | |[[File:PMCS Cherry Lake colorless spot 29.png|400px]] | ||
|[[File: | |||
|} | |} | ||
= | =Redpepper Volcano= | ||
==Items== | ==Items== | ||
===Field/ | ===Field/Given/Objects=== | ||
{| | {|border=1 cellpadding=0 style="text-align: center; border-collapse: collapse; border: 1px solid black; width:100%" | ||
!Item | ! style="background:indianred; color:white; height:2em" | Item | ||
!Icon | ! style="background:indianred; color:white; height:2em" | Icon | ||
!Location | ! style="background:indianred; color:white; height:2em" | Location | ||
!Image | ! style="background:indianred; color:white; height:2em" | Location Image | ||
|- | |- | ||
| | | | ||
| | | | ||
| | | | ||
|} | |} | ||
== | ==Colorless spots== | ||
{| | {|border=1 cellpadding=0 style="text-align: center; border-collapse: collapse; border: 1px solid black; width:100%" | ||
! | ! style="background:indianred; color:white; height:2em" | Location | ||
! | ! style="background:indianred; color:white; height:2em" | Drop | ||
!Location | ! style="background:indianred; color:white; height:2em" | Location Image | ||
|- | |||
|North of the first area, on the ground. | |||
|<br> | |||
|[[File:PMCS Redpepper Volcano colorless spot 1.png|400px]] | |||
|- | |||
|North of the first area, on the ground. | |||
|<br> | |||
|[[File:PMCS Redpepper Volcano colorless spot 2.png|400px]] | |||
|- | |- | ||
| | |North of the first area, on the ground. | ||
| | |<br> | ||
|[[File:PMCS Redpepper Volcano colorless spot 3.png|400px]] | |||
|[[File: | |||
|- | |- | ||
| | |North of the first area, on the ground. | ||
|<br> | |||
|[[File:PMCS Redpepper Volcano colorless spot 4.png|400px]] | |||
|[[File: | |||
|- | |- | ||
| | |North of the first area, on the ground. | ||
|<br> | |||
|[[File:PMCS Redpepper Volcano colorless spot 5.png|400px]] | |||
|[[File: | |||
|- | |- | ||
| | |North of the first area, on the bridge. | ||
|<br> | |||
| | |[[File:PMCS Redpepper Volcano colorless spot 6.png|400px]] | ||
|[[File: | |||
|- | |- | ||
| | |North of the first area, on the bridge. | ||
|<br> | |||
| | |[[File:PMCS Redpepper Volcano colorless spot 7.png|400px]] | ||
|[[File: | |||
|- | |- | ||
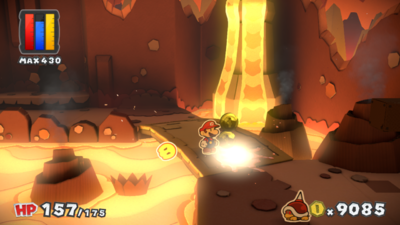
| | |In the Fire Bro area, on the wall. | ||
|<br> | |||
| | |[[File:PMCS Redpepper Volcano colorless spot 8.png|400px]] | ||
|[[File: | |||
|- | |- | ||
|In the Fire Bro area, on the ground. | |||
|<br> | |||
|In the | |[[File:PMCS Redpepper Volcano colorless spot 9.png|400px]] | ||
| | |||
|[[File: | |||
|- | |- | ||
|In the Fire Bro area, on the ground. | |||
|<br> | |||
|In the | |[[File:PMCS Redpepper Volcano colorless spot 10.png|400px]] | ||
| | |||
|[[File: | |||
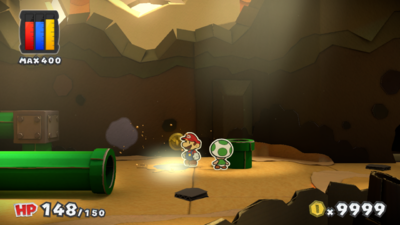
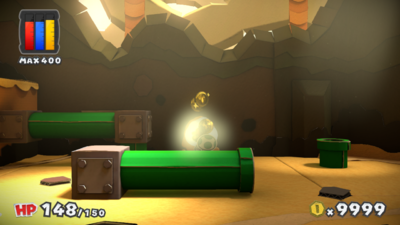
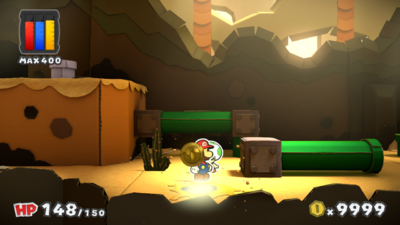
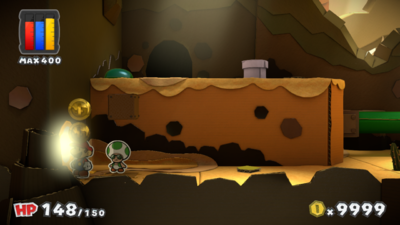
|- | |- | ||
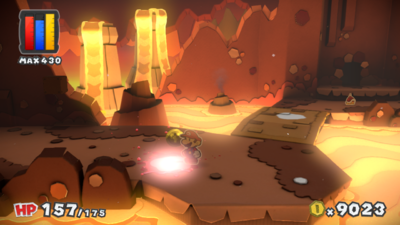
|In the Fire Bro area, on an uncolored path in the lava. | |||
|<br> | |||
|In the | |[[File:PMCS Redpepper Volcano colorless spot 11.png|400px]] | ||
|[[File: | |||
|- | |- | ||
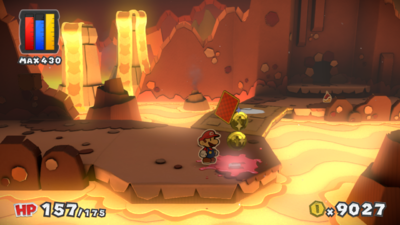
| | |In the Fire Bro area, on an uncolored path in the lava. | ||
|<br> | |||
|[[File:PMCS Redpepper Volcano colorless spot 12.png|400px]] | |||
|[[File: | |||
|- | |- | ||
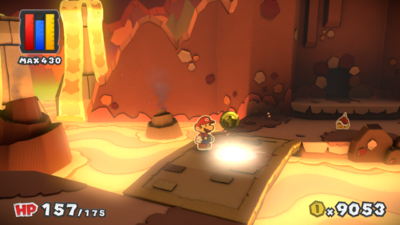
|In the red Mini Paint Star area, on a Warp Pipe. | |||
|<br> | |||
|In the | |[[File:PMCS Redpepper Volcano colorless spot 13.png|400px]] | ||
|[[File: | |||
|} | |} | ||
= | =Redpepper Crater= | ||
==Items== | ==Items== | ||
===Field/Given=== | ===Field/Given/Objects=== | ||
{| | {|border=1 cellpadding=0 style="text-align: center; border-collapse: collapse; border: 1px solid black; width:100%" | ||
!Item | ! style="background:indianred; color:white; height:2em" | Item | ||
!Icon | ! style="background:indianred; color:white; height:2em" | Icon | ||
!Location | ! style="background:indianred; color:white; height:2em" | Location | ||
!Image | ! style="background:indianred; color:white; height:2em" | Location Image | ||
|- | |- | ||
| | | | ||
| | | | ||
| | | | ||
|} | |} | ||
== | ==Colorless spots== | ||
{| | {|border=1 cellpadding=0 style="text-align: center; border-collapse: collapse; border: 1px solid black; width:100%" | ||
! | ! style="background:indianred; color:white; height:2em" | Location | ||
! | ! style="background:indianred; color:white; height:2em" | Drop | ||
!Location | ! style="background:indianred; color:white; height:2em" | Location Image | ||
|- | |- | ||
| | |In the first area, on the ground. | ||
| | |<br> | ||
|[[File:PMCS Redpepper Crater colorless spot 1.png|400px]] | |||
|[[File: | |||
|- | |- | ||
|In the first area, on the wall. | |||
|<br> | |||
|In the | |[[File:PMCS Redpepper Crater colorless spot 2.png|400px]] | ||
|[[File: | |||
|- | |- | ||
| | |In the first area, on the wall. | ||
|<br> | |||
|[[File:PMCS Redpepper Crater colorless spot 3.png|400px]] | |||
|[[File: | |||
|- | |- | ||
| | |In the first area, on the wall. | ||
| | |<br> | ||
|[[File:PMCS Redpepper Crater colorless spot 4.png|400px]] | |||
|[[File: | |||
|- | |- | ||
| | |In the first area, on the ground. | ||
|<br> | |||
| | |[[File:PMCS Redpepper Crater colorless spot 5.png|400px]] | ||
|[[File: | |||
|- | |- | ||
|In the first area, on the wall. | |||
|<br> | |||
|In the | |[[File:PMCS Redpepper Crater colorless spot 6.png|400px]] | ||
|[[File: | |||
|- | |- | ||
| | |In the second area, on the ground. | ||
| | |<br> | ||
|[[File:PMCS Redpepper Crater colorless spot 7.png|400px]] | |||
|[[File: | |||
|- | |- | ||
|In the second area, on a moving platform. | |||
|<br> | |||
|In the | |[[File:PMCS Redpepper Crater colorless spot 8.png|400px]] | ||
|[[File: | |||
|- | |- | ||
|In the second area, on the wall. This spot can be reached by jumping from the above area. | |||
|<br> | |||
|In the | |[[File:PMCS Redpepper Crater colorless spot 9.png|400px]] | ||
|[[File: | |||
|- | |- | ||
| | |In the third area, on a cardboard stalagmite. | ||
| | |<br> | ||
|[[File:PMCS Redpepper Crater colorless spot 10.png|400px]] | |||
|[[File: | |||
|- | |- | ||
| | |In the third area, on the wall. | ||
|<br> | |||
|[[File:PMCS Redpepper Crater colorless spot 11.png|400px]] | |||
|[[File: | |||
|- | |- | ||
| | |In the third area, on the ground. | ||
|<br> | |||
|[[File:PMCS Redpepper Crater colorless spot 12.png|400px]] | |||
|[[File: | |||
|- | |- | ||
|In the third area, on the ground. | |||
|<br> | |||
|In the | |[[File:PMCS Redpepper Crater colorless spot 13.png|400px]] | ||
|[[File: | |||
|- | |- | ||
|In the third area, on a cardboard stalagmite. | |||
|<br> | |||
|In the | |[[File:PMCS Redpepper Crater colorless spot 14.png|400px]] | ||
| | |||
|[[File: | |||
|- | |- | ||
|In the third area, on the ground. | |||
|<br> | |||
|In the | |[[File:PMCS Redpepper Crater colorless spot 15.png|400px]] | ||
|[[File: | |||
|- | |- | ||
|In the third area, on a rock. | |||
|<br> | |||
|In the | |[[File:PMCS Redpepper Crater colorless spot 16.png|400px]] | ||
|[[File: | |||
|- | |- | ||
|In the third area, on the ground. | |||
|<br> | |||
|In the | |[[File:PMCS Redpepper Crater colorless spot 17.png|400px]] | ||
|[[File: | |||
|- | |- | ||
|In the third area, on the ground. | |||
|<br> | |||
|In the | |[[File:PMCS Redpepper Crater colorless spot 18.png|400px]] | ||
|[[File: | |||
|- | |- | ||
|In the third area, on a cardboard stalagmite. | |||
|<br> | |||
|In the | |[[File:PMCS Redpepper Crater colorless spot 19.png|400px]] | ||
|[[File: | |||
|} | |} | ||
= | =The Crimson Tower= | ||
==Items== | ==Items== | ||
===Field/Given=== | ===Field/Given/Objects=== | ||
{| | {|border=1 cellpadding=0 style="text-align: center; border-collapse: collapse; border: 1px solid black; width:100%" | ||
!Item | ! style="background:indianred; color:white; height:2em" | Item | ||
!Icon | ! style="background:indianred; color:white; height:2em" | Icon | ||
!Location | ! style="background:indianred; color:white; height:2em" | Location | ||
!Image | ! style="background:indianred; color:white; height:2em" | Location Image | ||
|- | |- | ||
| | | | ||
| | | | ||
| | | | ||
|} | |} | ||
== | ==Colorless spots== | ||
{| | {|border=1 cellpadding=0 style="text-align: center; border-collapse: collapse; border: 1px solid black; width:100%" | ||
! | ! style="background:indianred; color:white; height:2em" | Location | ||
! style="background:indianred; color:white; height:2em" | Drop | |||
! style="background:indianred; color:white; height:2em" | Location Image | |||
| | |||
|- | |- | ||
|In the first area, on a green Toad. | |||
|<br> | |||
|In the | |[[File:PMCS The Crimson Tower colorless spot 1.png|400px]] | ||
|[[File: | |||
|- | |- | ||
| | |In the first area, on the gate. | ||
|<br> | |||
| | |[[File:PMCS The Crimson Tower colorless spot 2.png|400px]] | ||
|[[File: | |||
|- | |- | ||
| | |In the second area, on the ground. | ||
|<br> | |||
| | |[[File:PMCS The Crimson Tower colorless spot 3.png|400px]] | ||
|[[File: | |||
|- | |- | ||
|In the second area, the Crimson Tower itself. | |||
|<br> | |||
|In the | |[[File:PMCS TheCrimsonTower01.png|400px]] | ||
|[[File: | |||
|- | |- | ||
| | |In the third area, on the ground before the first conveyor belt. | ||
|<br> | |||
| | |[[File:PMCS The Crimson Tower colorless spot 5.png|400px]] | ||
|[[File: | |||
|- | |- | ||
|In the third area, on the wall near the second conveyor belt. | |||
|<br> | |||
|In the | |[[File:PMCS The Crimson Tower colorless spot 6.png|400px]] | ||
|[[File: | |||
|- | |- | ||
| | |In the third area, on the ground before the third conveyor belt. | ||
| | |<br> | ||
|[[File:PMCS The Crimson Tower colorless spot 7.png|400px]] | |||
|[[File: | |||
|- | |- | ||
|In the third area, on the ground before the third conveyor belt. | |||
|<br> | |||
|In the | |[[File:PMCS The Crimson Tower colorless spot 8.png|400px]] | ||
|[[File: | |||
|- | |- | ||
| | |In the third area, on the ground east of the staircase. | ||
| | |<br> | ||
|[[File:PMCS The Crimson Tower colorless spot 9.png|400px]] | |||
|[[File: | |||
|- | |- | ||
| | |In the third area, near the hole Morton leaves in the wall. | ||
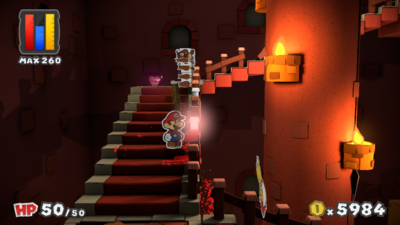
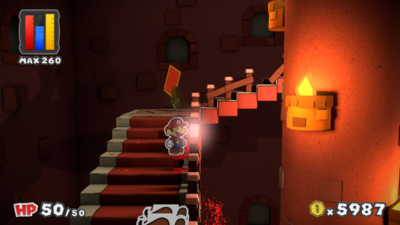
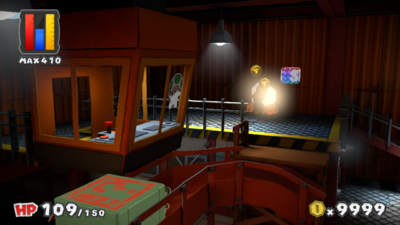
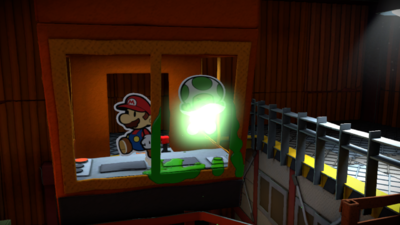
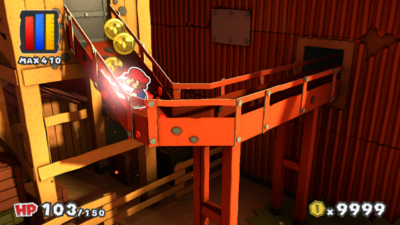
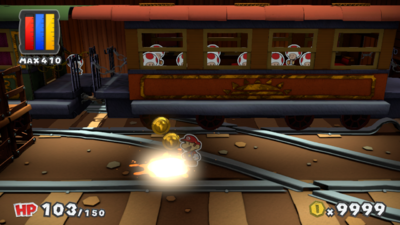
|<br> | |||
|[[File:PMCS The Crimson Tower colorless spot 10.png|400px]] | |||
|[[File: | |||
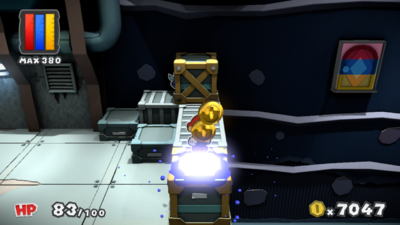
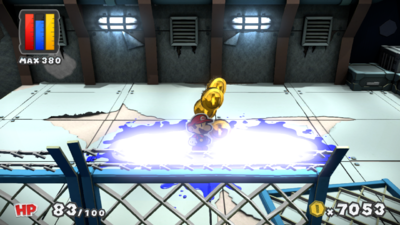
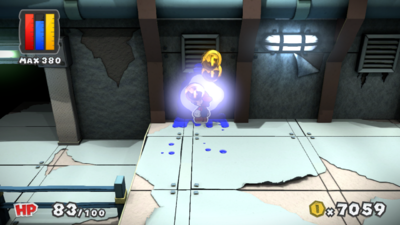
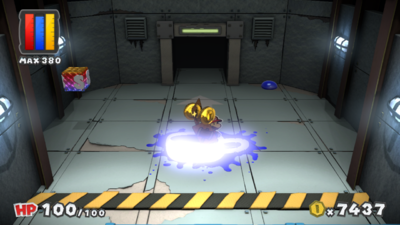
|- | |- | ||
| | |In the third area, to the right of a ? Block. | ||
| | |<br> | ||
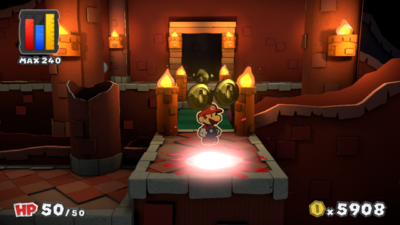
|[[File:PMCS The Crimson Tower colorless spot 11.png|400px]] | |||
|[[File: | |||
|- | |- | ||
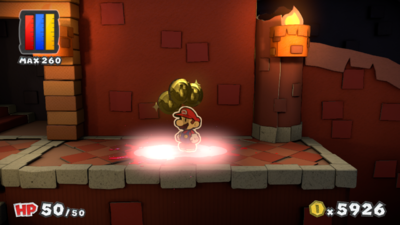
| | |In the fourth area, on a post on the third banister. | ||
|<br> | |||
| | |[[File:PMCS The Crimson Tower colorless spot 12.png|400px]] | ||
|[[File: | |||
|- | |- | ||
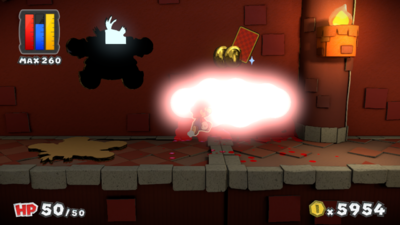
| | |In the fourth area, on a post on the fourth banister. | ||
|<br> | |||
| | |[[File:PMCS The Crimson Tower colorless spot 13.png|400px]] | ||
|[[File: | |||
|- | |- | ||
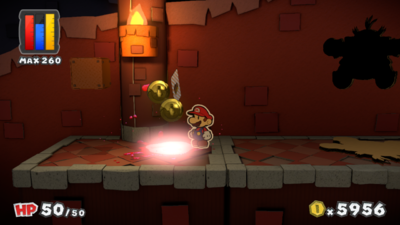
|In the fourth area, on a post on the fourth banister. | |||
|<br> | |||
|In the | |[[File:PMCS The Crimson Tower colorless spot 14.png|400px]] | ||
| | |||
|[[File: | |||
|- | |- | ||
|In the fourth area, on a post on the fifth banister. | |||
|<br> | |||
|In the fourth | |[[File:PMCS The Crimson Tower colorless spot 15.png|400px]] | ||
| | |||
|[[File: | |||
|- | |- | ||
|In the fourth area, on a post on the fifth banister. | |||
|<br> | |||
|In the | |[[File:PMCS The Crimson Tower colorless spot 16.png|400px]] | ||
| | |||
|[[File: | |||
|- | |- | ||
|In the fourth area, on a post on the fifth banister. | |||
|<br> | |||
|In the | |[[File:PMCS The Crimson Tower colorless spot 17.png|400px]] | ||
| | |||
|[[File: | |||
|- | |- | ||
|In the fifth area, on the ground. | |||
|<br> | |||
|In the | |[[File:PMCS The Crimson Tower colorless spot 18.png|400px]] | ||
|[[File: | |||
|- | |- | ||
|In the fifth area, on the ground. | |||
|<br> | |||
|In the | |[[File:PMCS The Crimson Tower colorless spot 19.png|400px]] | ||
|[[File: | |||
|- | |- | ||
| | |In the fifth area, on the ground. | ||
|<br> | |||
|[[File:PMCS The Crimson Tower colorless spot 20.png|400px]] | |||
|[[File: | |||
|- | |- | ||
|In the fifth area, on the wall. | |||
|<br> | |||
|In the fifth | |[[File:PMCS The Crimson Tower colorless spot 21.png|400px]] | ||
|[[File: | |||
|- | |- | ||
|In the fifth area, on the ground after jumping off the conveyor belt. | |||
|<br> | |||
|In the | |[[File:PMCS The Crimson Tower colorless spot 22.png|400px]] | ||
|[[File: | |||
|- | |- | ||
|In the fifth area, on the wall near the conveyor belt. | |||
|<br> | |||
|In the | |[[File:PMCS The Crimson Tower colorless spot 23.png|400px]] | ||
|[[File: | |||
|- | |- | ||
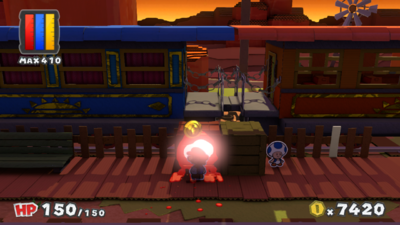
| | |In the fifth area, on a Toad. | ||
|<br> | |||
| | |[[File:PMCS The Crimson Tower colorless spot 24.png|400px]] | ||
|[[File: | |||
|} | |} | ||
= | =Daffodil Peak= | ||
==Items== | ==Items== | ||
===Field/Given=== | ===Field/Given/Objects=== | ||
{| | {|border=1 cellpadding=0 style="text-align: center; border-collapse: collapse; border: 1px solid black; width:100%" | ||
!Item | ! style="background:khaki; height:2em" | Item | ||
!Icon | ! style="background:khaki; height:2em" | Icon | ||
!Location | ! style="background:khaki; height:2em" | Location | ||
!Image | ! style="background:khaki; height:2em" | Location Image | ||
|- | |- | ||
| | | | ||
| | | | ||
| Line 1,106: | Line 959: | ||
|} | |} | ||
== | ==Colorless spots== | ||
{| | {|border=1 cellpadding=0 style="text-align: center; border-collapse: collapse; border: 1px solid black; width:100%" | ||
! | ! style="background:khaki; height:2em" | Location | ||
! | ! style="background:khaki; height:2em" | Drop | ||
!Location | ! style="background:khaki; height:2em" | Location Image | ||
|- | |||
|In the first area, on the ground. | |||
|<br> | |||
|[[File:PMCS Daffodil Peak colorless spot 1.png|400px]] | |||
|- | |||
|In the first area, on the wall. | |||
|<br> | |||
|[[File:PMCS Daffodil Peak colorless spot 2.png|400px]] | |||
|- | |||
|In the first area, on the wall past the gate. | |||
|<br> | |||
|[[File:PMCS Daffodil Peak colorless spot 3.png|400px]] | |||
|- | |||
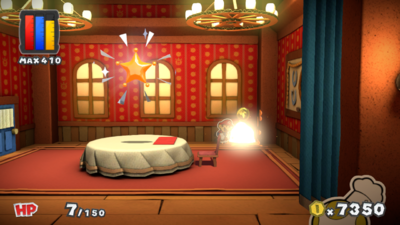
|In the cabin, under the rug. Mario must hammer the rug to flip it over first. | |||
|<br> | |||
|[[File:PMCS Daffodil Peak colorless spot 4.png|400px]] | |||
|- | |||
|In the cabin, between the dresser and the potted plant. | |||
|<br> | |||
|[[File:PMCS Daffodil Peak colorless spot 5.png|400px]] | |||
|- | |||
|In the cabin, on the painting. | |||
|<br> | |||
|[[File:PMCS Daffodil Peak colorless spot 6.png|400px]] | |||
|- | |||
|In the cabin, on the ground. | |||
|<br> | |||
|[[File:PMCS Daffodil Peak colorless spot 7.png|400px]] | |||
|- | |||
|In the cabin, on the fire in the fireplace. | |||
|<br> | |||
|[[File:PMCS Daffodil Peak colorless spot 8.png|400px]] | |||
|- | |||
|In the cabin, on the wall above the fireplace. | |||
|<br> | |||
|[[File:PMCS Daffodil Peak colorless spot 9.png|400px]] | |||
|- | |||
|In the cabin, on the ground. | |||
|<br> | |||
|[[File:PMCS Daffodil Peak colorless spot 10.png|400px]] | |||
|- | |||
|In the cabin, on the clock. | |||
|<br> | |||
|[[File:PMCS Daffodil Peak colorless spot 11.png|400px]] | |||
|- | |||
|In the cabin, past the window. | |||
|<br> | |||
|[[File:PMCS Daffodil Peak colorless spot 12.png|400px]] | |||
|- | |||
|In the cabin, on the chair. | |||
|<br> | |||
|[[File:PMCS Daffodil Peak colorless spot 13.png|400px]] | |||
|- | |||
|In the second area, under the first ? Block. | |||
|<br> | |||
|[[File:PMCS Daffodil Peak colorless spot 14.png|400px]] | |||
|- | |||
|In the second area, south of the pipe entrance. | |||
|<br> | |||
|[[File:PMCS Daffodil Peak colorless spot 15.png|400px]] | |||
|- | |||
|In the second area, south of the exit to the first pipe. | |||
|<br> | |||
|[[File:PMCS Daffodil Peak colorless spot 16.png|400px]] | |||
|- | |||
|In the second area, on the ground behind a bush. | |||
|<br> | |||
|[[File:PMCS Daffodil Peak colorless spot 17.png|400px]] | |||
|- | |||
|In the second area, on the ground. | |||
|<br> | |||
|[[File:PMCS Daffodil Peak colorless spot 18.png|400px]] | |||
|- | |||
|In the second area, on the ground south of the yellow pipe. | |||
|<br> | |||
|[[File:PMCS Daffodil Peak colorless spot 19.png|400px]] | |||
|- | |||
|In the second area, on the ground. | |||
|<br> | |||
|[[File:PMCS Daffodil Peak colorless spot 20.png|400px]] | |||
|- | |||
|In the second area, on the ground, hidden from view until Mario steps onto a lower platform. | |||
|<br> | |||
|[[File:PMCS Daffodil Peak colorless spot 21.png|400px]] | |||
|- | |||
|In the second area, on a flower. | |||
|<br> | |||
|[[File:PMCS Daffodil Peak colorless spot 22.png|400px]] | |||
|- | |||
|In the second area, on top of a rock formation. This spot can be reached by jumping down from the area directly above it. | |||
|<br> | |||
|[[File:PMCS Daffodil Peak colorless spot 23.png|400px]] | |||
|- | |||
|In the second area, on a Toad. This Toad can be found by going behind the mountain and dropping behind it. | |||
|<br> | |||
|[[File:PMCS Daffodil Peak colorless spot 24.png|400px]] | |||
|- | |||
|In the second area, on the wall of the area with the Rescue Squad Toad. | |||
|<br> | |||
|[[File:PMCS Daffodil Peak colorless spot 25.png|400px]] | |||
|- | |||
|In the second area, on the ground and wall of the area with the Rescue Squad Toad. | |||
|<br> | |||
|[[File:PMCS Daffodil Peak colorless spot 26.png|400px]] | |||
|- | |||
|In the second area, on the ground. | |||
|<br> | |||
|[[File:PMCS Daffodil Peak colorless spot 27.png|400px]] | |||
|- | |||
|In the second area, on the wall. | |||
|<br> | |||
|[[File:PMCS Daffodil Peak colorless spot 28.png|400px]] | |||
|- | |||
|In the second area, on the ground. | |||
|<br> | |||
|[[File:PMCS Daffodil Peak colorless spot 29.png|400px]] | |||
|- | |||
|In the third area, on the ground. | |||
|<br> | |||
|[[File:PMCS Daffodil Peak colorless spot 30.png|400px]] | |||
|- | |- | ||
|In the third area, on the ground. | |||
|<br> | |||
|In the | |[[File:PMCS Daffodil Peak colorless spot 31.png|400px]] | ||
|[[File: | |||
|- | |- | ||
|In the third area, on the ground. | |||
|<br> | |||
|In the | |[[File:PMCS Daffodil Peak colorless spot 32.png|400px]] | ||
|[[File: | |||
|- | |- | ||
| | |In the third area, on the ground. | ||
|<br> | |||
|[[File:PMCS Daffodil Peak colorless spot 33.png|400px]] | |||
|[[File: | |||
|- | |- | ||
| | |In the third area, on the ground to the left of the first pipe's exit. | ||
| | |<br> | ||
|[[File:PMCS Daffodil Peak colorless spot 34.png|400px]] | |||
|[[File: | |||
|- | |- | ||
|In the third area, on the ground east of an ? Block. | |||
|<br> | |||
|In the | |[[File:PMCS Daffodil Peak colorless spot 35.png|400px]] | ||
|[[File: | |||
|- | |- | ||
|In the third area, on the wall. | |||
|<br> | |||
|In the third | |[[File:PMCS Daffodil Peak colorless spot 36.png|400px]] | ||
|[[File: | |||
|- | |- | ||
|In the third area, on the wall. | |||
|<br> | |||
|In the | |[[File:PMCS Daffodil Peak colorless spot 37.png|400px]] | ||
|[[File: | |||
|- | |- | ||
|In the third area, on the ground after the unfurled pipe. | |||
|<br> | |||
|In the | |[[File:PMCS Daffodil Peak colorless spot 38.png|400px]] | ||
|[[File: | |||
|- | |- | ||
| | |In the third area, on the ground. | ||
| | |<br> | ||
|[[File:PMCS Daffodil Peak colorless spot 39.png|400px]] | |||
|[[File: | |||
|- | |- | ||
|[[ | |In the third area, near the [[Spinning-Door]]. | ||
|<br> | |||
| | |[[File:PMCS Daffodil Peak colorless spot 40.png|400px]] | ||
|[[File: | |||
|- | |- | ||
| | |In the fourth area, near the rightmost pipe. | ||
|[[File: | |<br> | ||
| | |[[File:PMCS Daffodil Peak colorless spot 41.png|400px]] | ||
|[[File: | |- | ||
| | |In the fourth area, near the rightmost pipe. | ||
|<br> | |||
|[[File:PMCS Daffodil Peak colorless spot 42.png|400px]] | |||
|- | |||
|In the fourth area, on the wall of the area with the Unfurl Block. | |||
|<br> | |||
|[[File:PMCS Daffodil Peak colorless spot 43.png|400px]] | |||
|- | |||
|In the fourth area, on the ground accessible from entering an orange pipe. | |||
|<br> | |||
|[[File:PMCS Daffodil Peak colorless spot 44.png|400px]] | |||
|- | |||
|In the fourth area, on the ground neat the leftmost pipe. | |||
|<br> | |||
|[[File:PMCS Daffodil Peak colorless spot 45.png|400px]] | |||
|- | |||
|In the fourth area, on the ground near the leftmost pipe. | |||
|<br> | |||
|[[File:PMCS Daffodil Peak colorless spot 46.png|400px]] | |||
|- | |||
|In the fourth area, on the ground after entering the leftmost pipe. | |||
|<br> | |||
|[[File:PMCS Daffodil Peak colorless spot 47.png|400px]] | |||
|- | |||
|In the fourth area, on the ground after entering the leftmost pipe. | |||
|<br> | |||
|[[File:PMCS Daffodil Peak colorless spot 48.png|400px]] | |||
|- | |- | ||
|In the fourth area, on an Unfurl Block. | |||
|<br> | |||
|In the | |[[File:PMCS Daffodil Peak colorless spot 49.png|400px]] | ||
| | |||
|[[File: | |||
|- | |- | ||
|In the fourth area, on the ground after entering the middle pipe. | |||
|<br> | |||
|In the | |[[File:PMCS Daffodil Peak colorless spot 50.png|400px]] | ||
| | |||
|[[File: | |||
|- | |- | ||
|In the fourth area, on the ground after entering the middle pipe. | |||
|<br> | |||
|In the | |[[File:PMCS Daffodil Peak colorless spot 51.png|400px]] | ||
|[[File: | |||
|- | |- | ||
|In the fourth area, on the ground after entering the middle pipe. | |||
|<br> | |||
|In the | |[[File:PMCS Daffodil Peak colorless spot 52.png|400px]] | ||
|[[File: | |||
|- | |- | ||
|[[ | |In the first area, on the [[Mountain Sage]]'s head. | ||
|<br> | |||
| | |[[File:PMCS Daffodil Peak colorless spot 53.png|400px]] | ||
|[[File: | |||
|} | |} | ||
= | =Sunglow Ridge= | ||
==Items== | ==Items== | ||
===Field/Given=== | ===Field/Given/Objects=== | ||
{| | {|border=1 cellpadding=0 style="text-align: center; border-collapse: collapse; border: 1px solid black; width:100%" | ||
!Item | ! style="background:khaki; height:2em" | Item | ||
!Icon | ! style="background:khaki; height:2em" | Icon | ||
!Location | ! style="background:khaki; height:2em" | Location | ||
!Image | ! style="background:khaki; height:2em" | Location Image | ||
|- | |- | ||
| | | | ||
| | | | ||
| Line 1,228: | Line 1,192: | ||
|} | |} | ||
== | ==Colorless spots== | ||
{| | {|border=1 cellpadding=0 style="text-align: center; border-collapse: collapse; border: 1px solid black; width:100%" | ||
! | ! style="background:khaki; height:2em" | Location | ||
! | ! style="background:khaki; height:2em" | Drop | ||
!Location | ! style="background:khaki; height:2em" | Location Image | ||
|- | |- | ||
|[[ | |In the first area, on the gate. This spot is repainted after collecting the red [[Big Paint Star]]. | ||
|<br> | |||
| | |[[File:PMCS Sunglow Ridge colorless spot 1.png|400px]] | ||
|[[File: | |||
|- | |- | ||
|In the second area, on a block. | |||
|<br> | |||
|In the | |[[File:PMCS Sunglow Ridge colorless spot 2.png|400px]] | ||
|[[File: | |||
|- | |- | ||
| | |In the second area, on the wall after jumping down from the ledge. | ||
|<br> | |||
|[[File:PMCS Sunglow Ridge colorless spot 3.png|400px]] | |||
|[[File: | |||
|- | |- | ||
| | |In the second area, on the wall. | ||
| | |<br> | ||
|[[File:PMCS Sunglow Ridge colorless spot 4.png|400px]] | |||
|[[File: | |||
|- | |- | ||
| | |In the second area, on the sloped ground. | ||
|<br> | |||
| | |[[File:PMCS Sunglow Ridge colorless spot 5.png|400px]] | ||
|[[File: | |||
|- | |- | ||
| | |In the second area, on the wall. | ||
|<br> | |||
| | |[[File:PMCS Sunglow Ridge colorless spot 6.png|400px]] | ||
|[[File: | |||
|- | |- | ||
|In the second area, on the wall north of the Unfurl Block. | |||
|<br> | |||
|In the | |[[File:PMCS Sunglow Ridge colorless spot 7.png|400px]] | ||
|[[File: | |||
|- | |- | ||
| | |In the second area, on a Toad. Mario must hammer a tree to get the Toad down first. | ||
|<br> | |||
| | |[[File:PMCS Sunglow Ridge colorless spot 8.png|400px]] | ||
|[[File: | |||
|- | |- | ||
|In the second area, on the ground. | |||
|<br> | |||
|In the | |[[File:PMCS Sunglow Ridge colorless spot 9.png|400px]] | ||
|[[File: | |||
|- | |- | ||
| | |In the second area, on the wall. | ||
|<br> | |||
| | |[[File:PMCS Sunglow Ridge colorless spot 10.png|400px]] | ||
|[[File: | |||
|- | |- | ||
|In the second area, on the ground south of the sign. | |||
|<br> | |||
|In the | |[[File:PMCS Sunglow Ridge colorless spot 11.png|400px]] | ||
|[[File: | |||
|- | |- | ||
| | |In the second area, on a Toad south of the sign. | ||
|<br> | |||
| | |[[File:PMCS Sunglow Ridge colorless spot 12.png|400px]] | ||
|[[File: | |||
|- | |- | ||
|[[ | |In the second area, on a flower after the bridge. | ||
|[[File: | |<br> | ||
| | |[[File:PMCS Sunglow Ridge colorless spot 13.png|400px]] | ||
|[[File: | |- | ||
| | |In the third area, on the sign. | ||
|<br> | |||
|[[File:PMCS Sunglow Ridge colorless spot 14.png|400px]] | |||
|- | |||
|In the third area, on the ground. | |||
|<br> | |||
|[[File:PMCS Sunglow Ridge colorless spot 15.png|400px]] | |||
|- | |||
|In the third area, on the bridge. | |||
|<br> | |||
|[[File:PMCS Sunglow Ridge colorless spot 16.png|400px]] | |||
|- | |||
|In the third area, on the ground. | |||
|<br> | |||
|[[File:PMCS Sunglow Ridge colorless spot 17.png|400px]] | |||
|- | |||
|In the third area, on the wall behind a tree. | |||
|<br> | |||
|[[File:PMCS Sunglow Ridge colorless spot 18.png|400px]] | |||
|- | |||
|In the third area, on the wall. | |||
|<br> | |||
|[[File:PMCS Sunglow Ridge colorless spot 19.png|400px]] | |||
|- | |||
|In the third area, on a tree. | |||
|<br> | |||
|[[File:PMCS Sunglow Ridge colorless spot 20.png|400px]] | |||
|- | |||
|In the third area, on a wooden plank on a bridge. | |||
|<br> | |||
|[[File:PMCS Sunglow Ridge colorless spot 21.png|400px]] | |||
|- | |||
|In the fourth area, on the ground behind some grass. | |||
|<br> | |||
|[[File:PMCS Sunglow Ridge colorless spot 22.png|400px]] | |||
|- | |||
|In the fourth area, on the ground. | |||
|<br> | |||
|[[File:PMCS Sunglow Ridge colorless spot 23.png|400px]] | |||
|- | |||
|In the fourth area, on the ground. | |||
|<br> | |||
|[[File:PMCS Sunglow Ridge colorless spot 24.png|400px]] | |||
|- | |||
|In the fourth area, on a Toad. | |||
|<br> | |||
|[[File:PMCS Sunglow Ridge colorless spot 25.png|400px]] | |||
|- | |||
|In the fourth area, on the wall. | |||
|<br> | |||
|[[File:PMCS Sunglow Ridge colorless spot 26.png|400px]] | |||
|- | |||
|In the fourth area, on the wall. | |||
|<br> | |||
|[[File:PMCS Sunglow Ridge colorless spot 27.png|400px]] | |||
|- | |||
|In the fourth area, on the ground. | |||
|<br> | |||
|[[File:PMCS Sunglow Ridge colorless spot 28.png|400px]] | |||
|- | |||
|In the fourth area, on the wooden slope leading to the mill. | |||
|<br> | |||
|[[File:PMCS Sunglow Ridge colorless spot 29.png|400px]] | |||
|- | |||
|In the fourth area, on the wooden slope leading to the mill. | |||
|<br> | |||
|[[File:PMCS Sunglow Ridge colorless spot 30.png|400px]] | |||
|- | |||
|In the fourth area, on the wooden slope leading to the mill. | |||
|<br> | |||
|[[File:PMCS Sunglow Ridge colorless spot 31.png|400px]] | |||
|- | |||
|In the fourth area, on the wooden slope leading to the mill. | |||
|<br> | |||
|[[File:PMCS Sunglow Ridge colorless spot 32.png|400px]] | |||
|- | |||
|In the fourth area, on the wooden slope leading to the mill. | |||
|<br> | |||
|[[File:PMCS Sunglow Ridge colorless spot 33.png|400px]] | |||
|- | |||
|In the fourth area, on the wooden slope leading to the mill. | |||
|<br> | |||
|[[File:PMCS Sunglow Ridge colorless spot 34.png|400px]] | |||
|- | |||
|In the fourth area, on the wooden slope leading to the mill. | |||
|<br> | |||
|[[File:PMCS Sunglow Ridge colorless spot 35.png|400px]] | |||
|- | |||
|In the fourth area, on the wooden slope leading to the mill. | |||
|<br> | |||
|[[File:PMCS Sunglow Ridge colorless spot 36.png|400px]] | |||
|- | |- | ||
|In the fourth area, on the wooden slope leading to the mill. | |||
|<br> | |||
|In the | |[[File:PMCS Sunglow Ridge colorless spot 37.png|400px]] | ||
| | |||
|[[File: | |||
|- | |- | ||
|In the fourth area, on the wooden slope leading to the mill. | |||
|<br> | |||
|In the | |[[File:PMCS Sunglow Ridge colorless spot 38.png|400px]] | ||
| | |||
|[[File: | |||
|- | |- | ||
|In the fourth area, on a Toad in the lumber mill. | |||
|<br> | |||
|In the | |[[File:PMCS Sunglow Ridge colorless spot 39.png|400px]] | ||
| | |||
|[[File: | |||
|- | |- | ||
| | |In the fourth area, on a Toad in the lumber mill. | ||
|<br> | |||
|[[File:PMCS Sunglow Ridge colorless spot 40.png|400px]] | |||
| | |||
|[[File: | |||
|- | |- | ||
| | |In the fifth area, on the guard around the first bridge. | ||
|<br> | |||
|[[File:PMCS Sunglow Ridge colorless spot 41.png|400px]] | |||
| | |||
|[[File: | |||
|- | |- | ||
| | |In the fifth area, on the guard around the first bridge. | ||
|<br> | |||
|[[File:PMCS Sunglow Ridge colorless spot 42.png|400px]] | |||
| | |||
|[[File: | |||
|- | |- | ||
| | |In the fifth area, on the ground. | ||
|<br> | |||
|[[File:PMCS Sunglow Ridge colorless spot 43.png|400px]] | |||
|[[File: | |||
|- | |- | ||
|In the fifth area, on the ground in a cave. | |||
|<br> | |||
|In the | |[[File:PMCS Sunglow Ridge colorless spot 44.png|400px]] | ||
|[[File: | |||
|} | |} | ||
= | =Château Chanterelle= | ||
==Items== | ==Items== | ||
===Field/Given=== | ===Field/Given/Objects=== | ||
{| | {|border=1 cellpadding=0 style="text-align: center; border-collapse: collapse; border: 1px solid black; width:100%" | ||
!Item | ! style="background:khaki; height:2em" | Item | ||
!Icon | ! style="background:khaki; height:2em" | Icon | ||
!Location | ! style="background:khaki; height:2em" | Location | ||
!Image | ! style="background:khaki; height:2em" | Location Image | ||
|- | |- | ||
| | | | ||
| | | | ||
| Line 1,379: | Line 1,389: | ||
|} | |} | ||
== | ==Colorless spots== | ||
{| | {|border=1 cellpadding=0 style="text-align: center; border-collapse: collapse; border: 1px solid black; width:100%" | ||
! | ! style="background:khaki; height:2em" | Location | ||
! | ! style="background:khaki; height:2em" | Drop | ||
!Location | ! style="background:khaki; height:2em" | Location Image | ||
|- | |||
|In front of the house, on the ground. | |||
|<br> | |||
|[[File:PMCS Chateau Chanterelle colorless spot 1.png|400px]] | |||
|- | |||
|In front of the house, on the ground. | |||
|<br> | |||
|[[File:PMCS Chateau Chanterelle colorless spot 2.png|400px]] | |||
|- | |||
|In front of the house, on the ground. | |||
|<br> | |||
|[[File:PMCS Chateau Chanterelle colorless spot 3.png|400px]] | |||
|- | |||
|Behind the house, on the fence near the barn. | |||
|<br> | |||
|[[File:PMCS Chateau Chanterelle colorless spot 4.png|400px]] | |||
|- | |- | ||
| | |Behind the house, on the ground. | ||
|<br> | |||
|[[File:PMCS Chateau Chanterelle colorless spot 5.png|400px]] | |||
| | |||
|[[File: | |||
|- | |- | ||
| | |Behind the house, on the ground. | ||
|<br> | |||
| | |[[File:PMCS Chateau Chanterelle colorless spot 6.png|400px]] | ||
|[[File: | |||
|- | |- | ||
| | |Behind the house, on the ground. | ||
|<br> | |||
| | |[[File:PMCS Chateau Chanterelle colorless spot 7.png|400px]] | ||
|[[File: | |||
|- | |- | ||
| | |Behind the house, on the ground. | ||
|<br> | |||
|[[File:PMCS Chateau Chanterelle colorless spot 8.png|400px]] | |||
|[[File: | |||
|} | |} | ||
= | =Mustard Café= | ||
==Items== | ==Items== | ||
===Field/Given=== | ===Field/Given/Objects=== | ||
{| | {|border=1 cellpadding=0 style="text-align: center; border-collapse: collapse; border: 1px solid black; width:100%" | ||
!Item | ! style="background:khaki; height:2em" | Item | ||
!Icon | ! style="background:khaki; height:2em" | Icon | ||
!Location | ! style="background:khaki; height:2em" | Location | ||
!Image | ! style="background:khaki; height:2em" | Location Image | ||
|- | |- | ||
| | | | ||
| | | | ||
| Line 1,432: | Line 1,442: | ||
|} | |} | ||
== | ==Colorless spots== | ||
{| | {|border=1 cellpadding=0 style="text-align: center; border-collapse: collapse; border: 1px solid black; width:100%" | ||
! | ! style="background:khaki; height:2em" | Location | ||
! | ! style="background:khaki; height:2em" | Drop | ||
!Location | ! style="background:khaki; height:2em" | Location Image | ||
|- | |- | ||
| | |In the first area, on the ground. | ||
|<br> | |||
| | |[[File:PMCS Mustard Cafe colorless spot 1.png|400px]] | ||
|[[File: | |||
|- | |- | ||
| | |In the first area, on the wall north of the giant colorless spot. | ||
|<br> | |||
|[[File:PMCS Mustard Cafe colorless spot 2.png|400px]] | |||
|[[File: | |||
|- | |- | ||
| | |In the first area, on a barrel lid near the pipe to the cafe entrance. | ||
| | |<br> | ||
|[[File:PMCS Mustard Cafe colorless spot 3.png|400px]] | |||
|[[File: | |||
|- | |- | ||
| | |In the first area, on the ground west of the cafe exit pipe. | ||
|<br> | |||
|[[File:PMCS Mustard Cafe colorless spot 4.png|400px]] | |||
|[[File: | |||
|- | |- | ||
|In the first area, on the wall near the cafe entrance. | |||
|<br> | |||
|In the | |[[File:PMCS Mustard Cafe colorless spot 5.png|400px]] | ||
|[[File: | |||
|- | |- | ||
|In the first area, on the ground near the cafe entrance. | |||
|<br> | |||
|In the | |[[File:PMCS Mustard Cafe colorless spot 6.png|400px]] | ||
|[[File: | |||
|- | |- | ||
| | |In the first area, on the giant hole. This spot is repainted by collecting the purple Big Paint Star. | ||
|<br> | |||
|[[File:PMCS MustardCafe01.png|400px]] | |||
|[[File: | |||
|- | |- | ||
|[[ | |In the second area, on a Warp Pipe. | ||
|[[File: | |<br> | ||
|In the | |[[File:PMCS Mustard Cafe colorless spot 8.png|400px]] | ||
|[[File: | |- | ||
| | |In the second area, on the ground. | ||
|<br> | |||
|[[File:PMCS Mustard Cafe colorless spot 9.png|400px]] | |||
|- | |||
|In the second area, on the ground. | |||
|<br> | |||
|[[File:PMCS Mustard Cafe colorless spot 10.png|400px]] | |||
|- | |||
|In the second area, on the wall. | |||
|<br> | |||
|[[File:PMCS Mustard Cafe colorless spot 11.png|400px]] | |||
|- | |||
|In the second area, on the ground. | |||
|<br> | |||
|[[File:PMCS Mustard Cafe colorless spot 12.png|400px]] | |||
|- | |||
|In the second area, on the wall. | |||
|<br> | |||
|[[File:PMCS Mustard Cafe colorless spot 13.png|400px]] | |||
|- | |||
|In the second area, on the ground. | |||
|<br> | |||
|[[File:PMCS Mustard Cafe colorless spot 14.png|400px]] | |||
|- | |||
|In the third area, on the wall. | |||
|<br> | |||
|[[File:PMCS Mustard Cafe colorless spot 15.png|400px]] | |||
|- | |||
|In the third area, on the ground. | |||
|<br> | |||
|[[File:PMCS Mustard Cafe colorless spot 16.png|400px]] | |||
|- | |||
|In the third area, on the ground. | |||
|<br> | |||
|[[File:PMCS Mustard Cafe colorless spot 17.png|400px]] | |||
|- | |||
|In the third area, on the wall. | |||
|<br> | |||
|[[File:PMCS Mustard Cafe colorless spot 18.png|400px]] | |||
|- | |||
|In the third area, on the wall. | |||
|<br> | |||
|[[File:PMCS Mustard Cafe colorless spot 19.png|400px]] | |||
|- | |||
|In the third area, on the wall. | |||
|<br> | |||
|[[File:PMCS Mustard Cafe colorless spot 20.png|400px]] | |||
|- | |||
|In the third area, on a Warp Pipe. | |||
|<br> | |||
|[[File:PMCS Mustard Cafe colorless spot 21.png|400px]] | |||
|- | |||
|In the third area, on the wall. | |||
|<br> | |||
|[[File:PMCS Mustard Cafe colorless spot 22.png|400px]] | |||
|- | |||
|In the third area, on the wall. | |||
|<br> | |||
|[[File:PMCS Mustard Cafe colorless spot 23.png|400px]] | |||
|- | |||
|In the third area, on the wall after jumping down from a higher area. | |||
|<br> | |||
|[[File:PMCS Mustard Cafe colorless spot 24.png|400px]] | |||
|- | |||
|In the fourth area, on the ground. | |||
|<br> | |||
|[[File:PMCS Mustard Cafe colorless spot 25.png|400px]] | |||
|- | |||
|In the fourth area, on the ground. | |||
|<br> | |||
|[[File:PMCS Mustard Cafe colorless spot 26.png|400px]] | |||
|- | |||
|In the fourth area, on the ground. | |||
|<br> | |||
|[[File:PMCS Mustard Cafe colorless spot 27.png|400px]] | |||
|- | |||
|In the fourth area, on a vertical pipe. | |||
|<br> | |||
|[[File:PMCS Mustard Cafe colorless spot 28.png|400px]] | |||
|- | |||
|In the fourth area, on a square pipe section. | |||
|<br> | |||
|[[File:PMCS Mustard Cafe colorless spot 29.png|400px]] | |||
|- | |||
|In the fourth area, on a horizontal pipe. | |||
|<br> | |||
|[[File:PMCS Mustard Cafe colorless spot 30.png|400px]] | |||
|- | |||
|In the fourth area, on the ground. | |||
|<br> | |||
|[[File:PMCS Mustard Cafe colorless spot 31.png|400px]] | |||
|- | |||
|In the fourth area, on the wall. This spot can only be reached after using the Paint Hammer off the edge of the pipe. | |||
|<br> | |||
|[[File:PMCS Mustard Cafe colorless spot 32.png|400px]] | |||
|- | |||
|In the fourth area, on a horizontal pipe. | |||
|<br> | |||
|[[File:PMCS Mustard Cafe colorless spot 33.png|400px]] | |||
|- | |||
|In the fourth area, on a vertical pipe. | |||
|<br> | |||
|[[File:PMCS Mustard Cafe colorless spot 34.png|400px]] | |||
|- | |||
|In the fourth area, on the wall. | |||
|<br> | |||
|[[File:PMCS Mustard Cafe colorless spot 35.png|400px]] | |||
|- | |||
|In the fourth area, on the ground. | |||
|<br> | |||
|[[File:PMCS Mustard Cafe colorless spot 36.png|400px]] | |||
|- | |||
|In the fifth area, on the ground. | |||
|<br> | |||
|[[File:PMCS Mustard Cafe colorless spot 37.png|400px]] | |||
|- | |||
|In the fifth area, on the wall. | |||
|<br> | |||
|[[File:PMCS Mustard Cafe colorless spot 38.png|400px]] | |||
|- | |||
|In the fifth area, on a pipe. | |||
|<br> | |||
|[[File:PMCS Mustard Cafe colorless spot 39.png|400px]] | |||
|- | |||
|In the fifth area, on the ground. | |||
|<br> | |||
|[[File:PMCS Mustard Cafe colorless spot 40.png|400px]] | |||
|- | |||
|In the fifth area, on the wall. | |||
|<br> | |||
|[[File:PMCS Mustard Cafe colorless spot 41.png|400px]] | |||
|- | |||
|In the fifth area, on the ground. | |||
|<br> | |||
|[[File:PMCS Mustard Cafe colorless spot 42.png|400px]] | |||
|- | |||
|In the fifth area, on the wall. | |||
|<br> | |||
|[[File:PMCS Mustard Cafe colorless spot 43.png|400px]] | |||
|- | |||
|In the fifth area, on a pipe. | |||
|<br> | |||
|[[File:PMCS Mustard Cafe colorless spot 44.png|400px]] | |||
|- | |||
|On floor B2, on the wall. | |||
|<br> | |||
|[[File:PMCS Mustard Cafe colorless spot 45.png|400px]] | |||
|- | |- | ||
| | |On floor B2, on the wall. | ||
|<br> | |||
| | |[[File:PMCS Mustard Cafe colorless spot 46.png|400px]] | ||
|[[File: | |||
|- | |- | ||
|On floor B2, on the ground. | |||
|<br> | |||
|On | |[[File:PMCS Mustard Cafe colorless spot 47.png|400px]] | ||
|[[File: | |||
|- | |- | ||
| | |On floor B3, on the wall. | ||
|<br> | |||
| | |[[File:PMCS Mustard Cafe colorless spot 48.png|400px]] | ||
|[[File: | |||
|- | |- | ||
|On floor B3, on the wall. | |||
|<br> | |||
|On | |[[File:PMCS Mustard Cafe colorless spot 49.png|400px]] | ||
|[[File: | |||
|- | |- | ||
|On floor B4, on the wall. | |||
|<br> | |||
|On | |[[File:PMCS Mustard Cafe colorless spot 50.png|400px]] | ||
|[[File: | |||
|- | |- | ||
| | |On floor B4, on the wall. | ||
|<br> | |||
|[[File:PMCS Mustard Cafe colorless spot 51.png|400px]] | |||
|[[File: | |||
|- | |- | ||
| | |On floor B4, on the ground. | ||
|<br> | |||
|[[File:PMCS Mustard Cafe colorless spot 52.png|400px]] | |||
|[[File: | |||
|- | |- | ||
| | |In the first area, on a Toad in the cafe. | ||
|<br> | |||
|[[File:PMCS Mustard Cafe colorless spot 53.png|400px]] | |||
|[[File: | |||
|- | |- | ||
|In the first area, on a rock. | |||
|<br> | |||
|In the first | |[[File:PMCS Mustard Cafe colorless spot 54.png|400px]] | ||
|[[File: | |||
|} | |} | ||
= | =The Golden Coliseum= | ||
==Items== | ==Items== | ||
===Field/Given=== | ===Field/Given/Objects=== | ||
{| | {|border=1 cellpadding=0 style="text-align: center; border-collapse: collapse; border: 1px solid black; width:100%" | ||
!Item | ! style="background:khaki; height:2em" | Item | ||
!Icon | ! style="background:khaki; height:2em" | Icon | ||
!Location | ! style="background:khaki; height:2em" | Location | ||
!Image | ! style="background:khaki; height:2em" | Location Image | ||
|- | |- | ||
| | | | ||
| | | | ||
| Line 1,548: | Line 1,679: | ||
|} | |} | ||
== | ==Colorless spots== | ||
{| | {|border=1 cellpadding=0 style="text-align: center; border-collapse: collapse; border: 1px solid black; width:100%" | ||
! | ! style="background:khaki; height:2em" | Location | ||
! | ! style="background:khaki; height:2em" | Drop | ||
!Location | ! style="background:khaki; height:2em" | Location Image | ||
|- | |||
|In the lobby, on the ground. | |||
|<br> | |||
|[[File:PMCS The Golden Coliseum colorless spot 1.png|400px]] | |||
|- | |||
|In the lobby, on the ground. | |||
|<br> | |||
|[[File:PMCS The Golden Coliseum colorless spot 2.png|400px]] | |||
|- | |||
|In the lobby, on the wall. | |||
|<br> | |||
|[[File:PMCS The Golden Coliseum colorless spot 3.png|400px]] | |||
|- | |||
|In the lobby, on the wall. | |||
|<br> | |||
|[[File:PMCS The Golden Coliseum colorless spot 4.png|400px]] | |||
|- | |||
|In the lobby, on the wall behind a crate. | |||
|<br> | |||
|[[File:PMCS The Golden Coliseum colorless spot 5.png|400px]] | |||
|- | |||
|In the lobby, on the ground. | |||
|<br> | |||
|[[File:PMCS The Golden Coliseum colorless spot 6.png|400px]] | |||
|- | |- | ||
|In the lobby, on the ground. | |||
|<br> | |||
|In the | |[[File:PMCS The Golden Coliseum colorless spot 7.png|400px]] | ||
|[[File: | |||
|- | |- | ||
| | |In the lobby, on the wall. | ||
|<br> | |||
| | |[[File:PMCS The Golden Coliseum colorless spot 8.png|400px]] | ||
|[[File: | |||
|- | |- | ||
|In the lobby, on the wall. | |||
|<br> | |||
|In the | |[[File:PMCS The Golden Coliseum colorless spot 9.png|400px]] | ||
|[[File: | |||
|- | |- | ||
| | |In the 3rd level of the stands, on the wall. | ||
|<br> | |||
|[[File:PMCS The Golden Coliseum colorless spot 10.png|400px]] | |||
|[[File: | |||
|- | |- | ||
|In the 3rd level of the stands, on the ground. | |||
|<br> | |||
|In the | |[[File:PMCS The Golden Coliseum colorless spot 11.png|400px]] | ||
|[[File: | |||
|- | |- | ||
| | |In the 3rd level of the stands, on the ground. | ||
|<br> | |||
|[[File:PMCS The Golden Coliseum colorless spot 12.png|400px]] | |||
|[[File: | |||
|- | |- | ||
|[[ | |In the 3rd level of the stands, on the ground. | ||
|[[File: | |<br> | ||
| | |[[File:PMCS The Golden Coliseum colorless spot 13.png|400px]] | ||
|[[File: | |- | ||
| | |In the 3rd level of the stands, on the wall. | ||
|<br> | |||
|[[File:PMCS The Golden Coliseum colorless spot 14.png|400px]] | |||
|- | |||
|In the 3rd level of the stands, on the ground. | |||
|<br> | |||
|[[File:PMCS The Golden Coliseum colorless spot 15.png|400px]] | |||
|- | |||
|In the 3rd level of the stands, on the ground. | |||
|<br> | |||
|[[File:PMCS The Golden Coliseum colorless spot 16.png|400px]] | |||
|- | |||
|In the 3rd level of the stands, on a pillar. | |||
|<br> | |||
|[[File:PMCS The Golden Coliseum colorless spot 17.png|400px]] | |||
|- | |||
|In the 3rd level of the stands, on the wall. | |||
|<br> | |||
|[[File:PMCS The Golden Coliseum colorless spot 18.png|400px]] | |||
|- | |||
|In the 2nd level of the stands, on the wall. | |||
|<br> | |||
|[[File:PMCS The Golden Coliseum colorless spot 19.png|400px]] | |||
|- | |||
|In the 2nd level of the stands, on the ground. | |||
|<br> | |||
|[[File:PMCS The Golden Coliseum colorless spot 20.png|400px]] | |||
|- | |||
|In the 2nd level of the stands, on a crate. | |||
|<br> | |||
|[[File:PMCS The Golden Coliseum colorless spot 21.png|400px]] | |||
|- | |||
|In the 2nd level of the stands, on the ground. | |||
|<br> | |||
|[[File:PMCS The Golden Coliseum colorless spot 22.png|400px]] | |||
|- | |||
|In the 1st level of the stands, on the wall. | |||
|<br> | |||
|[[File:PMCS The Golden Coliseum colorless spot 23.png|400px]] | |||
|- | |||
|In the 1st level of the stands, on the ground. | |||
|<br> | |||
|[[File:PMCS The Golden Coliseum colorless spot 24.png|400px]] | |||
|- | |||
|In the 1st level of the stands, on the ground. | |||
|<br> | |||
|[[File:PMCS The Golden Coliseum colorless spot 25.png|400px]] | |||
|- | |||
|In the 1st level of the stands, on a pillar. | |||
|<br> | |||
|[[File:PMCS The Golden Coliseum colorless spot 26.png|400px]] | |||
|- | |||
|In the 1st level of the stands, on the ground. | |||
|<br> | |||
|[[File:PMCS The Golden Coliseum colorless spot 27.png|400px]] | |||
|- | |- | ||
|In the 1st level of the stands, on the ground. | |||
|<br> | |||
|In the | |[[File:PMCS The Golden Coliseum colorless spot 28.png|400px]] | ||
| | |||
|[[File: | |||
|- | |- | ||
|In the 1st level of the stands, on the ground. | |||
|<br> | |||
|In the | |[[File:PMCS The Golden Coliseum colorless spot 29.png|400px]] | ||
|[[File: | |||
|- | |- | ||
|In the 1st level of the stands, on the ground. | |||
|<br> | |||
|In the | |[[File:PMCS The Golden Coliseum colorless spot 30.png|400px]] | ||
|[[File: | |||
|- | |- | ||
|In the 1st level of the stands, on the ground. | |||
|<br> | |||
|In the | |[[File:PMCS The Golden Coliseum colorless spot 31.png|400px]] | ||
|[[File: | |||
|} | |} | ||
= | =Indigo Underground= | ||
==Items== | ==Items== | ||
===Field/Given=== | ===Field/Given/Objects=== | ||
{| | {|border=1 cellpadding=0 style="text-align: center; border-collapse: collapse; border: 1px solid black; width:100%" | ||
!Item | ! style="background:steelblue; color:white; height:2em" | Item | ||
!Icon | ! style="background:steelblue; color:white; height:2em" | Icon | ||
!Location | ! style="background:steelblue; color:white; height:2em" | Location | ||
!Image | ! style="background:steelblue; color:white; height:2em" | Location Image | ||
|- | |- | ||
| | | | ||
| | | | ||
| Line 1,644: | Line 1,824: | ||
|} | |} | ||
== | ==Colorless spots== | ||
{| | {|border=1 cellpadding=0 style="text-align: center; border-collapse: collapse; border: 1px solid black; width:100%" | ||
! | ! style="background:steelblue; color:white; height:2em" | Location | ||
! | ! style="background:steelblue; color:white; height:2em" | Drop | ||
!Location | ! style="background:steelblue; color:white; height:2em" | Location Image | ||
|- | |||
|In the first area, south of the fence. | |||
|<br> | |||
|[[File:PMCS Indigo Underground colorless spot 1.png|400px]] | |||
|- | |||
|In the first area, on the sloped ground. | |||
|<br> | |||
|[[File:PMCS Indigo Underground colorless spot 2.png|400px]] | |||
|- | |||
|In the first area, on the sloped ground. | |||
|<br> | |||
|[[File:PMCS Indigo Underground colorless spot 3.png|400px]] | |||
|- | |||
|In the second area, on a square-shaped part of the wall. | |||
|<br> | |||
|[[File:PMCS Indigo Underground colorless spot 4.png|400px]] | |||
|- | |||
|In the second area, before the first moving block. | |||
|<br> | |||
|[[File:PMCS Indigo Underground colorless spot 5.png|400px]] | |||
|- | |||
|In the second area, below the first ? Block. | |||
|<br> | |||
|[[File:PMCS Indigo Underground colorless spot 6.png|400px]] | |||
|- | |||
|In the second area, on the ground near three Swoops. | |||
|<br> | |||
|[[File:PMCS Indigo Underground colorless spot 7.png|400px]] | |||
|- | |||
|In the second area, on the wall near three Swoops. | |||
|<br> | |||
|[[File:PMCS Indigo Underground colorless spot 8.png|400px]] | |||
|- | |||
|In the second area, on the third moving block. | |||
|<br> | |||
|[[File:PMCS Indigo Underground colorless spot 9.png|400px]] | |||
|- | |||
|In the second area, on the ground after the third moving block. | |||
|<br> | |||
|[[File:PMCS Indigo Underground colorless spot 10.png|400px]] | |||
|- | |||
|In the second area, on the wall in a hidden alcove that can be accessed by walking behind the fourth moving block. | |||
|<br> | |||
|[[File:PMCS Indigo Underground colorless spot 11.png|400px]] | |||
|- | |||
|In the second area, on a diamond-shaped spot on the wall. | |||
|<br> | |||
|[[File:PMCS Indigo Underground colorless spot 12.png|400px]] | |||
|- | |||
|In the second area, on the ground. | |||
|<br> | |||
|[[File:PMCS Indigo Underground colorless spot 13.png|400px]] | |||
|- | |||
|In the second area, on the wall and only accessible from the top of green moving block. | |||
|<br> | |||
|[[File:PMCS Indigo Underground colorless spot 14.png|400px]] | |||
|- | |||
|In the second area, in a secret alcove to the right. | |||
|<br> | |||
|[[File:PMCS Indigo Underground colorless spot 15.png|400px]] | |||
|- | |||
|In the third area, on the ground to the far west. | |||
|<br> | |||
|[[File:PMCS Indigo Underground colorless spot 16.png|400px]] | |||
|- | |||
|In the third area, on the wall. | |||
|<br> | |||
|[[File:PMCS Indigo Underground colorless spot 17.png|400px]] | |||
|- | |||
|In the third area, on the ground south of the first moving block. | |||
|<br> | |||
|[[File:PMCS Indigo Underground colorless spot 18.png|400px]] | |||
|- | |||
|In the third area, on the ground below a ? Block. | |||
|<br> | |||
|[[File:PMCS Indigo Underground colorless spot 19.png|400px]] | |||
|- | |||
|In the third area, on the wall. | |||
|<br> | |||
|[[File:PMCS Indigo Underground colorless spot 20.png|400px]] | |||
|- | |||
|In the third area, on the bridge. | |||
|<br> | |||
|[[File:PMCS Indigo Underground colorless spot 21.png|400px]] | |||
|- | |||
|In the third area, on the ground after the bridge. | |||
|<br> | |||
|[[File:PMCS Indigo Underground colorless spot 22.png|400px]] | |||
|- | |||
|In the third area, on the wall. | |||
|<br> | |||
|[[File:PMCS Indigo Underground colorless spot 23.png|400px]] | |||
|- | |||
|In the third area, on the wall near the [[Save Block]]. | |||
|<br> | |||
|[[File:PMCS Indigo Underground colorless spot 24.png|400px]] | |||
|- | |||
|In the fourth area, on the ground. | |||
|<br> | |||
|[[File:PMCS Indigo Underground colorless spot 25.png|400px]] | |||
|- | |||
|In the fourth area, on the ground. | |||
|<br> | |||
|[[File:PMCS Indigo Underground colorless spot 26.png|400px]] | |||
|- | |||
|In the fourth area, on the sloped ground. | |||
|<br> | |||
|[[File:PMCS Indigo Underground colorless spot 27.png|400px]] | |||
|- | |||
|In the fourth area, on the sloped ground. | |||
|<br> | |||
|[[File:PMCS Indigo Underground colorless spot 28.png|400px]] | |||
|- | |||
|In the fourth area, on the ground under a ? Block. | |||
|<br> | |||
|[[File:PMCS Indigo Underground colorless spot 29.png|400px]] | |||
|- | |||
|In the fourth area, on the wall. | |||
|<br> | |||
|[[File:PMCS Indigo Underground colorless spot 30.png|400px]] | |||
|- | |||
|In the fourth area, on a moving block. | |||
|<br> | |||
|[[File:PMCS Indigo Underground colorless spot 31.png|400px]] | |||
|- | |- | ||
|In the fourth area, above a ? Block. This spot can be reached by going down a hole when the moving block has gone up. | |||
|<br> | |||
|In the | |[[File:PMCS Indigo Underground colorless spot 32.png|400px]] | ||
|[[File: | |||
|- | |- | ||
|In the fourth area, on the ground. | |||
|<br> | |||
|In the fourth | |[[File:PMCS Indigo Underground colorless spot 33.png|400px]] | ||
|[[File: | |||
|- | |- | ||
|In the fourth area, on the wall. | |||
|<br> | |||
|In | |[[File:PMCS Indigo Underground colorless spot 34.png|400px]] | ||
|[[File: | |||
|- | |- | ||
| | |In the fourth area, on a green Rescue Squad Toad. | ||
|[[File: | |<br> | ||
|In the | |[[File:PMCS Indigo Underground colorless spot 35.png|400px]] | ||
|[[File: | |- | ||
|In the third area, on a wooden board. | |||
|<br> | |||
|[[File:PMCS Indigo Underground colorless spot 36.png|400px]] | |||
|- | |- | ||
|In the third area, on the wall after the Brick Block. | |||
|<br> | |||
|In the | |[[File:PMCS Indigo Underground colorless spot 37.png|400px]] | ||
|[[File: | |||
|- | |- | ||
|In the third area, on the platform with the Lemon Thing. | |||
|<br> | |||
|In the | |[[File:PMCS Indigo Underground colorless spot 38.png|400px]] | ||
|[[File: | |||
|- | |- | ||
|In the third area, on the wall near the blue Mini Paint Star. | |||
|<br> | |||
|In the | |[[File:PMCS Indigo Underground colorless spot 39.png|400px]] | ||
|[[File: | |||
|} | |} | ||
= | =Bloo Bay Beach= | ||
==Items== | ==Items== | ||
{| | ===Field/Given/Objects=== | ||
!Item | {|border=1 cellpadding=0 style="text-align: center; border-collapse: collapse; border: 1px solid black; width:100%" | ||
!Icon | ! style="background:steelblue; color:white; height:2em" | Item | ||
!Location | ! style="background:steelblue; color:white; height:2em" | Icon | ||
!Image | ! style="background:steelblue; color:white; height:2em" | Location | ||
! style="background:steelblue; color:white; height:2em" | Location Image | |||
|- | |- | ||
| | | | ||
| | | | ||
| Line 1,709: | Line 2,001: | ||
|} | |} | ||
== | ==Colorless spots== | ||
{| | {|border=1 cellpadding=0 style="text-align: center; border-collapse: collapse; border: 1px solid black; width:100%" | ||
! | ! style="background:steelblue; color:white; height:2em" | Location | ||
! | ! style="background:steelblue; color:white; height:2em" | Drop | ||
!Location | ! style="background:steelblue; color:white; height:2em" | Location Image | ||
|- | |||
|In the first area, on the wall near the Toad. | |||
|<br> | |||
|[[File:PMCS Bloo Bay Beach colorless spot 1.png|400px]] | |||
|- | |||
|In the first area, on the ground under the overhang. | |||
|<br> | |||
|[[File:PMCS Bloo Bay Beach colorless spot 2.png|400px]] | |||
|- | |||
|In the first area, on the wall. | |||
|<br> | |||
|[[File:PMCS Bloo Bay Beach colorless spot 3.png|400px]] | |||
|- | |||
|In the first area, on the wall. | |||
|<br> | |||
|[[File:PMCS Bloo Bay Beach colorless spot 4.png|400px]] | |||
|- | |||
|In the first area, on the ground south of a ? Block. | |||
|<br> | |||
|[[File:PMCS Bloo Bay Beach colorless spot 5.png|400px]] | |||
|- | |||
|In the first area, on the wall behind the rock structure. | |||
|<br> | |||
|[[File:PMCS Bloo Bay Beach colorless spot 6.png|400px]] | |||
|- | |||
|In the first area, on the wall behind the rock structure. | |||
|<br> | |||
|[[File:PMCS Bloo Bay Beach colorless spot 7.png|400px]] | |||
|- | |||
|In the first area, on the wall on top of the cliff. | |||
|<br> | |||
|[[File:PMCS Bloo Bay Beach colorless spot 8.png|400px]] | |||
|- | |||
|In the first area, on the ground south-east of a palm tree on the cliff. | |||
|<br> | |||
|[[File:PMCS Bloo Bay Beach colorless spot 9.png|400px]] | |||
|- | |||
|In the first area, on a grain of sand near the ? Block. | |||
|<br> | |||
|[[File:PMCS Bloo Bay Beach colorless spot 10.png|400px]] | |||
|- | |||
|In the first area, on the ground. | |||
|<br> | |||
|[[File:PMCS Bloo Bay Beach colorless spot 11.png|400px]] | |||
|- | |||
|In the first area, on the ground. | |||
|<br> | |||
|[[File:PMCS Bloo Bay Beach colorless spot 12.png|400px]] | |||
|- | |||
|In the second area, on the ground. | |||
|<br> | |||
|[[File:PMCS Bloo Bay Beach colorless spot 13.png|400px]] | |||
|- | |||
|In the second area, on the ground south of the fourth palm tree. | |||
|<br> | |||
|[[File:PMCS Bloo Bay Beach colorless spot 14.png|400px]] | |||
|- | |||
|In the second area, on the ground between the last two palm trees. | |||
|<br> | |||
|[[File:PMCS Bloo Bay Beach colorless spot 15.png|400px]] | |||
|- | |||
|In the second area, on the ground. | |||
|<br> | |||
|[[File:PMCS Bloo Bay Beach colorless spot 16.png|400px]] | |||
|- | |||
|In the second area, on the ground. | |||
|<br> | |||
|[[File:PMCS Bloo Bay Beach colorless spot 17.png|400px]] | |||
|- | |||
|In the second area, on the ground. | |||
|<br> | |||
|[[File:PMCS Bloo Bay Beach colorless spot 18.png|400px]] | |||
|- | |||
|In the second area, on the ground near the exit. | |||
|<br> | |||
|[[File:PMCS Bloo Bay Beach colorless spot 19.png|400px]] | |||
|- | |||
|In the third area, on a cardboard star. | |||
|<br> | |||
|[[File:PMCS Bloo Bay Beach colorless spot 20.png|400px]] | |||
|- | |||
|In the third area, on the ground. | |||
|<br> | |||
|[[File:PMCS Bloo Bay Beach colorless spot 21.png|400px]] | |||
|- | |||
|In the third area, on the ground in the outline of a Toad's head. | |||
|<br> | |||
|[[File:PMCS Bloo Bay Beach colorless spot 22.png|400px]] | |||
|- | |||
|In the third area, on a flower. | |||
|<br> | |||
|[[File:PMCS Bloo Bay Beach colorless spot 23.png|400px]] | |||
|- | |||
|In the third area, on a flower near the fence. | |||
|<br> | |||
|[[File:PMCS Bloo Bay Beach colorless spot 24.png|400px]] | |||
|- | |||
|In the third area, on the fence. | |||
|<br> | |||
|[[File:PMCS Bloo Bay Beach colorless spot 25.png|400px]] | |||
|- | |||
|In the third area, on a planter in the cafe. | |||
|<br> | |||
|[[File:PMCS Bloo Bay Beach colorless spot 26.png|400px]] | |||
|- | |||
|In the third area, on the ground south of [[Luigi]]. | |||
|<br> | |||
|[[File:PMCS Bloo Bay Beach colorless spot 27.png|400px]] | |||
|- | |||
|In the third area, on a shell. | |||
|<br> | |||
|[[File:PMCS Bloo Bay Beach colorless spot 28.png|400px]] | |||
|- | |||
|In the third area, on the ground. | |||
|<br> | |||
|[[File:PMCS Bloo Bay Beach colorless spot 29.png|400px]] | |||
|- | |||
|In Blissful Beach, on the wall on the first rock. | |||
|<br> | |||
|[[File:PMCS Bloo Bay Beach colorless spot 30.png|400px]] | |||
|- | |||
|In Blissful Beach, on the ground. | |||
|<br> | |||
|[[File:PMCS Bloo Bay Beach colorless spot 31.png|400px]] | |||
|- | |||
|In Blissful Beach, on a tile on the ground. | |||
|<br> | |||
|[[File:PMCS Bloo Bay Beach colorless spot 32.png|400px]] | |||
|- | |||
|In Blissful Beach, on an umbrella. | |||
|<br> | |||
|[[File:PMCS Bloo Bay Beach colorless spot 33.png|400px]] | |||
|- | |||
|In Blissful Beach, on a rock wall. | |||
|<br> | |||
|[[File:PMCS Bloo Bay Beach colorless spot 34.png|400px]] | |||
|- | |- | ||
| | |In Blissful Beach, on a rock wall. | ||
|<br> | |||
| | |[[File:PMCS Bloo Bay Beach colorless spot 35.png|400px]] | ||
|[[File: | |||
|- | |- | ||
| | |In Blissful Beach, on a rock wall. | ||
|<br> | |||
| | |[[File:PMCS Bloo Bay Beach colorless spot 36.png|400px]] | ||
|[[File: | |||
|- | |- | ||
| | |In Blissful Beach, on the ground on a raised platform. | ||
|<br> | |||
| | |[[File:PMCS Bloo Bay Beach colorless spot 37.png|400px]] | ||
|[[File: | |||
|- | |- | ||
| | |In Blissful Beach, on the ground on a raised platform. | ||
|<br> | |||
| | |[[File:PMCS Bloo Bay Beach colorless spot 38.png|400px]] | ||
|[[File: | |||
|} | |} | ||
= | =Dark Bloo Inn= | ||
==Items== | ==Items== | ||
===Field/Given=== | ===Field/Given/Objects=== | ||
{| | {|border=1 cellpadding=0 style="text-align: center; border-collapse: collapse; border: 1px solid black; width:100%" | ||
!Item | ! style="background:steelblue; color:white; height:2em" | Item | ||
!Icon | ! style="background:steelblue; color:white; height:2em" | Icon | ||
!Location | ! style="background:steelblue; color:white; height:2em" | Location | ||
!Image | ! style="background:steelblue; color:white; height:2em" | Location Image | ||
|- | |- | ||
| | | | ||
| | | | ||
| Line 1,752: | Line 2,174: | ||
|} | |} | ||
== | ==Colorless spots== | ||
{| | {|border=1 cellpadding=0 style="text-align: center; border-collapse: collapse; border: 1px solid black; width:100%" | ||
! | ! style="background:steelblue; color:white; height:2em" | Location | ||
! | ! style="background:steelblue; color:white; height:2em" | Drop | ||
!Location | ! style="background:steelblue; color:white; height:2em" | Location Image | ||
|- | |||
|Outside the hotel, on [[Bloo]]. | |||
|<br> | |||
|[[File:PMCS Dark Bloo Inn colorless spot 1.png|400px]] | |||
|- | |- | ||
|In the lobby, on the leftmost painting. | |||
|<br> | |||
|In the | |[[File:PMCS Dark Bloo Inn colorless spot 2.png|400px]] | ||
|[[File: | |||
|- | |- | ||
| | |In the lobby, on the ground. | ||
| | |<br> | ||
|[[File:PMCS Dark Bloo Inn colorless spot 3.png|400px]] | |||
|[[File: | |||
|- | |- | ||
| | |In the lobby, on the elevator. | ||
|<br> | |||
| | |[[File:PMCS Dark Bloo Inn colorless spot 4.png|400px]] | ||
|[[File: | |||
|- | |- | ||
| | |On floor 2, on the wall. | ||
|<br> | |||
| | |[[File:PMCS Dark Bloo Inn colorless spot 5.png|400px]] | ||
|[[File: | |||
|- | |- | ||
| | |On floor 2, on the ground. | ||
|<br> | |||
| | |[[File:PMCS Dark Bloo Inn colorless spot 6.png|400px]] | ||
|[[File: | |||
|- | |- | ||
| | |On floor 2, on the ground. | ||
|<br> | |||
|[[File:PMCS Dark Bloo Inn colorless spot 7.png|400px]] | |||
|[[File: | |||
|- | |- | ||
| | |On floor 3, on the wall. | ||
|<br> | |||
|[[File:PMCS Dark Bloo Inn colorless spot 8.png|400px]] | |||
|[[File: | |||
|- | |- | ||
| | |On floor 3, on the ground. | ||
| | |<br> | ||
| | |[[File:PMCS Dark Bloo Inn colorless spot 9.png|400px]] | ||
| | |||
|- | |- | ||
| | |On floor 3, on the ground. | ||
|<br> | |||
| | |[[File:PMCS Dark Bloo Inn colorless spot 10.png|400px]] | ||
|[[File: | |||
|- | |- | ||
|[[ | |In room 302, on the [[Tea Recipe Book]]. | ||
|<br> | |||
| | |[[File:PMCS Dark Bloo Inn colorless spot 11.png|400px]] | ||
|[[File: | |||
|- | |- | ||
|[[ | |In room 303, on the [[Birdcage]]. | ||
| | |<br> | ||
|[[File:PMCS Dark Bloo Inn colorless spot 12.png|400px]] | |||
|[[File: | |||
|- | |- | ||
| | |In the linen closet, on the ground. | ||
|<br> | |||
| | |[[File:PMCS Dark Bloo Inn colorless spot 13.png|400px]] | ||
|[[File: | |||
|- | |- | ||
|In the linen closet, on the ground. | |||
|<br> | |||
|In the | |[[File:PMCS Dark Bloo Inn colorless spot 14.png|400px]] | ||
|[[File: | |||
|} | |} | ||
=== | =Cobalt Base= | ||
{| | ==Items== | ||
!Item | ===Field/Given/Objects=== | ||
!Icon | {|border=1 cellpadding=0 style="text-align: center; border-collapse: collapse; border: 1px solid black; width:100%" | ||
!Location | ! style="background:steelblue; color:white; height:2em" | Item | ||
!Image | ! style="background:steelblue; color:white; height:2em" | Icon | ||
! style="background:steelblue; color:white; height:2em" | Location | |||
! style="background:steelblue; color:white; height:2em" | Location Image | |||
|- | |- | ||
| | | | ||
| | |||
| | |||
| | |||
| | |||
|} | |} | ||
== | ==Colorless spots== | ||
{| | {|border=1 cellpadding=0 style="text-align: center; border-collapse: collapse; border: 1px solid black; width:100%" | ||
! | ! style="background:steelblue; color:white; height:2em" | Location | ||
! | ! style="background:steelblue; color:white; height:2em" | Drop | ||
!Location | ! style="background:steelblue; color:white; height:2em" | Location Image | ||
|- | |- | ||
|In the first area, on the ground. | |||
|<br> | |||
|In the | |[[File:PMCS Cobalt Base colorless spot 1.png|400px]] | ||
|[[File: | |||
|- | |- | ||
| | |In the first area, on the ground. | ||
|[[File: | |<br> | ||
|In the | |[[File:PMCS Cobalt Base colorless spot 2.png|400px]] | ||
|[[File: | |- | ||
|In the first area, on the ground. This colorless spot is in the shape of a [[Bowser]] insignia. | |||
|<br> | |||
|[[File:PMCS Cobalt Base colorless spot 3.png|400px]] | |||
|} | |} | ||
= | =Fort Cobalt= | ||
==Items== | ==Items== | ||
{| | ===Field/Given/Objects=== | ||
!Item | {|border=1 cellpadding=0 style="text-align: center; border-collapse: collapse; border: 1px solid black; width:100%" | ||
!Icon | ! style="background:steelblue; color:white; height:2em" | Item | ||
!Location | ! style="background:steelblue; color:white; height:2em" | Icon | ||
!Image | ! style="background:steelblue; color:white; height:2em" | Location | ||
! style="background:steelblue; color:white; height:2em" | Location Image | |||
|- | |- | ||
| | | | ||
| | | | ||
| Line 1,904: | Line 2,284: | ||
|} | |} | ||
== | ==Colorless spots== | ||
{| | {|border=1 cellpadding=0 style="text-align: center; border-collapse: collapse; border: 1px solid black; width:100%" | ||
! | ! style="background:steelblue; color:white; height:2em" | Location | ||
! | ! style="background:steelblue; color:white; height:2em" | Drop | ||
!Location | ! style="background:steelblue; color:white; height:2em" | Location Image | ||
|- | |||
|In the first area, on the ground. | |||
|<br> | |||
|[[File:PMCS Fort Cobalt colorless spot 1.png|400px]] | |||
|- | |||
|In the first area, on the ground. | |||
|<br> | |||
|[[File:PMCS Fort Cobalt colorless spot 2.png|400px]] | |||
|- | |- | ||
|In the first area, on the wall. | |||
|<br> | |||
|In the | |[[File:PMCS Fort Cobalt colorless spot 3.png|400px]] | ||
|[[File: | |||
|- | |- | ||
|In the first area, on the ground. | |||
|<br> | |||
|In the | |[[File:PMCS Fort Cobalt colorless spot 4.png|400px]] | ||
|[[File: | |||
|- | |- | ||
|In the first area, on the ground. | |||
|<br> | |||
|In the | |[[File:PMCS Fort Cobalt colorless spot 5.png|400px]] | ||
|[[File: | |||
|- | |- | ||
|In the first area, on the crate past the first platform. | |||
|<br> | |||
|In the | |[[File:PMCS Fort Cobalt colorless spot 6.png|400px]] | ||
|[[File: | |||
|- | |- | ||
|In the first area, on the wall. | |||
|<br> | |||
|In the | |[[File:PMCS Fort Cobalt colorless spot 7.png|400px]] | ||
|[[File: | |||
|- | |- | ||
| | |In the first area, on top of a crate. | ||
|<br> | |||
|[[File:PMCS Fort Cobalt colorless spot 8.png|400px]] | |||
|[[File: | |||
|- | |- | ||
| | |In the first area, on the ground. | ||
| | |<br> | ||
|[[File:PMCS Fort Cobalt colorless spot 9.png|400px]] | |||
|[[File: | |||
|- | |- | ||
|In the first area, on the wall. | |||
|<br> | |||
|In the | |[[File:PMCS Fort Cobalt colorless spot 10.png|400px]] | ||
|[[File: | |||
|- | |- | ||
|In the second area, on the ground. | |||
|<br> | |||
|In the | |[[File:PMCS Fort Cobalt colorless spot 11.png|400px]] | ||
|[[File: | |||
|- | |- | ||
|In the second area, on the ground. | |||
|<br> | |||
|In the | |[[File:PMCS Fort Cobalt colorless spot 12.png|400px]] | ||
|[[File: | |||
|- | |- | ||
| | |In the third area, on the ground. | ||
| | |<br> | ||
| | |[[File:PMCS Fort Cobalt colorless spot 13.png|400px]] | ||
|- | |- | ||
|In the third area, on the wall. | |||
|<br> | |||
|In the | |[[File:PMCS Fort Cobalt colorless spot 14.png|400px]] | ||
| | |||
|[[File: | |||
|- | |- | ||
|In the third area, on a railing. | |||
|<br> | |||
|In | |[[File:PMCS Fort Cobalt colorless spot 15.png|400px]] | ||
| | |||
|[[File: | |||
|- | |- | ||
|In the third area, on the ground of the 2nd floor of the café. | |||
|<br> | |||
|In | |[[File:PMCS Fort Cobalt colorless spot 16.png|400px]] | ||
| | |||
|[[File: | |||
|- | |- | ||
|In the third area, on the ground. | |||
|<br> | |||
|In the | |[[File:PMCS Fort Cobalt colorless spot 17.png|400px]] | ||
| | |||
|[[File: | |||
|- | |- | ||
|In the third area, on the wall. | |||
|<br> | |||
|In | |[[File:PMCS Fort Cobalt colorless spot 18.png|400px]] | ||
| | |||
|[[File: | |||
|- | |- | ||
|In the third area, on a rotating platform. | |||
|<br> | |||
|In | |[[File:PMCS Fort Cobalt colorless spot 19.png|400px]] | ||
|[[File: | |||
|- | |- | ||
|In the third area, on the wall. | |||
|<br> | |||
|In the | |[[File:PMCS Fort Cobalt colorless spot 20.png|400px]] | ||
|[[File: | |||
|- | |- | ||
|In the gym, on the cabinet. | |||
|<br> | |||
|In the | |[[File:PMCS Fort Cobalt colorless spot 21.png|400px]] | ||
|[[File: | |||
|} | |} | ||
= | =Plum Park= | ||
==Items== | ==Items== | ||
===Field/Given=== | ===Field/Given/Objects=== | ||
{| | {|border=1 cellpadding=0 style="text-align: center; border-collapse: collapse; border: 1px solid black; width:100%" | ||
!Item | ! style="background:#9966CC; color:white; height:2em" | Item | ||
!Icon | ! style="background:#9966CC; color:white; height:2em" | Icon | ||
!Location | ! style="background:#9966CC; color:white; height:2em" | Location | ||
!Image | ! style="background:#9966CC; color:white; height:2em" | Location Image | ||
|- | |- | ||
| | | | ||
| | | | ||
| Line 2,062: | Line 2,389: | ||
|} | |} | ||
== | ==Colorless spots== | ||
{| | {|border=1 cellpadding=0 style="text-align: center; border-collapse: collapse; border: 1px solid black; width:100%" | ||
! | ! style="background:#9966CC; color:white; height:2em" | Location | ||
! | ! style="background:#9966CC; color:white; height:2em" | Drop | ||
!Location | ! style="background:#9966CC; color:white; height:2em" | Location Image | ||
|- | |||
|In the first area, on the ground. | |||
|<br> | |||
|[[File:PMCS Plum Park colorless spot 1.png|400px]] | |||
|- | |||
|In the first area, on the ground. | |||
|<br> | |||
|[[File:PMCS Plum Park colorless spot 2.png|400px]] | |||
|- | |||
|In the first area, on a fence to the right. | |||
|<br> | |||
|[[File:PMCS Plum Park colorless spot 3.png|400px]] | |||
|- | |||
|In the first area, on the base of the flowers. | |||
|<br> | |||
|[[File:PMCS Plum Park colorless spot 4.png|400px]] | |||
|- | |||
|In the first area, on the ground. | |||
|<br> | |||
|[[File:PMCS Plum Park colorless spot 5.png|400px]] | |||
|- | |||
|To the right of the first area, on a wooden plank. | |||
|<br> | |||
|[[File:PMCS Plum Park colorless spot 6.png|400px]] | |||
|- | |||
|To the right of the first area, on the southmost lily pad. | |||
|<br> | |||
|[[File:PMCS Plum Park colorless spot 7.png|400px]] | |||
|- | |||
|In the second area, on a brick. | |||
|<br> | |||
|[[File:PMCS Plum Park colorless spot 8.png|400px]] | |||
|- | |||
|In the second area, on a brick. | |||
|<br> | |||
|[[File:PMCS Plum Park colorless spot 9.png|400px]] | |||
|- | |||
|In the second area, on a brick. | |||
|<br> | |||
|[[File:PMCS Plum Park colorless spot 10.png|400px]] | |||
|- | |||
|In the second area, on a Toad. | |||
|<br> | |||
|[[File:PMCS Plum Park colorless spot 11.png|400px]] | |||
|- | |||
|In the second area, on three bushes. To access the bushes, Mario must use the Paint Hammer off the left edge of the platform with the sign, revealing a hidden path. | |||
|<br> | |||
|[[File:PMCS Plum Park colorless spot 12.png|400px]] | |||
|- | |||
|In the second area, on a Toad. | |||
|<br> | |||
|[[File:PMCS Plum Park colorless spot 13.png|400px]] | |||
|- | |||
|In the second area, on a brick. | |||
|<br> | |||
|[[File:PMCS Plum Park colorless spot 14.png|400px]] | |||
|- | |||
|In the second area, on a brick. | |||
|<br> | |||
|[[File:PMCS Plum Park colorless spot 15.png|400px]] | |||
|- | |- | ||
|In the second area, on a brick. | |||
|<br> | |||
|In the | |[[File:PMCS Plum Park colorless spot 16.png|400px]] | ||
|[[File: | |||
|- | |- | ||
| | |In the second area, on a brick. | ||
|<br> | |||
| | |[[File:PMCS Plum Park colorless spot 17.png|400px]] | ||
|[[File: | |||
|- | |- | ||
| | |In the second area, on a bush. | ||
|<br> | |||
| | |[[File:PMCS Plum Park colorless spot 18.png|400px]] | ||
|[[File: | |||
|- | |- | ||
|In the second area, on a brick. | |||
|<br> | |||
|In the second | |[[File:PMCS Plum Park colorless spot 19.png|400px]] | ||
|[[File: | |||
|- | |- | ||
| | |In the second area, on a brick. | ||
|<br> | |||
| | |[[File:PMCS Plum Park colorless spot 20.png|400px]] | ||
|[[File: | |||
|- | |- | ||
| | |In the second area, on a brick. | ||
|<br> | |||
| | |[[File:PMCS Plum Park colorless spot 21.png|400px]] | ||
|[[File: | |||
|- | |- | ||
| | |In the second area, on a brick. | ||
|<br> | |||
| | |[[File:PMCS Plum Park colorless spot 22.png|400px]] | ||
|[[File: | |||
|- | |- | ||
|[[ | |In the third area, on the ground. | ||
|[[File: | |<br> | ||
| | |[[File:PMCS Plum Park colorless spot 23.png|400px]] | ||
|[[File: | |- | ||
| | |In the third area, on the ground. | ||
|<br> | |||
|[[File:PMCS Plum Park colorless spot 24.png|400px]] | |||
|- | |||
|In the third area, on a wooden plank. | |||
|<br> | |||
|[[File:PMCS Plum Park colorless spot 38.png|400px]] | |||
|- | |||
|In the third area, on the ground. | |||
|<br> | |||
|[[File:PMCS Plum Park colorless spot 25.png|400px]] | |||
|- | |||
|In the third area, on a wall. | |||
|<br> | |||
|[[File:PMCS Plum Park colorless spot 26.png|400px]] | |||
|- | |||
|In the third area, on a wall. | |||
|<br> | |||
|[[File:PMCS Plum Park colorless spot 27.png|400px]] | |||
|- | |||
|North from the third area, on the ground. This colorless spot is in the shape of a [[Fire Flower]] or [[Ice Flower]]. | |||
|<br> | |||
|[[File:PMCS Plum Park colorless spot 28.png|400px]] | |||
|- | |||
|North from the third area, on a lily pad. | |||
|<br> | |||
|[[File:PMCS Plum Park colorless spot 29.png|400px]] | |||
|- | |||
|North from the third area, on a wall. This colorless spot can only be accessed after [[Petea Piranha]] has been defeated and the fence is knocked down. | |||
|<br> | |||
|[[File:PMCS Plum Park colorless spot 30.png|400px]] | |||
|- | |||
|North from the third area, on a wall. | |||
|<br> | |||
|[[File:PMCS Plum Park colorless spot 31.png|400px]] | |||
|- | |||
|North from the third area, on a wall. | |||
|<br> | |||
|[[File:PMCS Plum Park colorless spot 32.png|400px]] | |||
|- | |||
|North from the third area, on a wall. | |||
|<br> | |||
|[[File:PMCS Plum Park colorless spot 33.png|400px]] | |||
|- | |||
|At the Fountain of Truth, on the Toad. | |||
|<br> | |||
|[[File:PMCS Plum Park colorless spot 34.png|400px]] | |||
|- | |||
|In the third area, on the wall. | |||
|<br> | |||
|[[File:PMCS Plum Park colorless spot 35.png|400px]] | |||
|- | |- | ||
|In the third area, on a crate. | |||
|<br> | |||
|In the | |[[File:PMCS Plum Park colorless spot 36.png|400px]] | ||
|[[File: | |||
|- | |- | ||
|In the concert area, on a lily pad. | |||
|<br> | |||
|In the | |[[File:PMCS Plum Park colorless spot 37.png|400px]] | ||
|[[File: | |||
|} | |} | ||
= | =Violet Passage= | ||
==Items== | ==Items== | ||
===Field/Given=== | ===Field/Given/Objects=== | ||
{| | {|border=1 cellpadding=0 style="text-align: center; border-collapse: collapse; border: 1px solid black; width:100%" | ||
!Item | ! style="background:#9966CC; color:white; height:2em" | Item | ||
!Icon | ! style="background:#9966CC; color:white; height:2em" | Icon | ||
!Location | ! style="background:#9966CC; color:white; height:2em" | Location | ||
!Image | ! style="background:#9966CC; color:white; height:2em" | Location Image | ||
|- | |- | ||
| | | | ||
| | | | ||
| Line 2,143: | Line 2,562: | ||
|} | |} | ||
== | ==Colorless spots== | ||
{| | {|border=1 cellpadding=0 style="text-align: center; border-collapse: collapse; border: 1px solid black; width:100%" | ||
! | ! style="background:#9966CC; color:white; height:2em" | Location | ||
! | ! style="background:#9966CC; color:white; height:2em" | Drop | ||
!Location | ! style="background:#9966CC; color:white; height:2em" | Location Image | ||
|- | |||
|In the first area, on a crate. | |||
|<br> | |||
|[[File:PMCS Violet Passage colorless spot 1.png|400px]] | |||
|- | |- | ||
| | |In the first area, on a crate. | ||
| | |<br> | ||
|[[File:PMCS Violet Passage colorless spot 2.png|400px]] | |||
|[[File: | |||
|- | |- | ||
|In the first area, on a post. | |||
|<br> | |||
|In the | |[[File:PMCS Violet Passage colorless spot 3.png|400px]] | ||
|[[File: | |||
|- | |- | ||
|In the first area, on the ground under a barrel. | |||
|<br> | |||
|In the first | |[[File:PMCS Violet Passage colorless spot 4.png|400px]] | ||
|[[File: | |||
|- | |- | ||
|In the first area, on the ground. This colorless spot is in the shape of a [[Blooper]]. | |||
|<br> | |||
|In the | |[[File:PMCS Violet Passage colorless spot 5.png|400px]] | ||
|[[File: | |||
|- | |- | ||
|In the first area, on the piling. | |||
|<br> | |||
|In the | |[[File:PMCS Violet Passage colorless spot 6.png|400px]] | ||
| | |||
|[[File: | |||
|- | |- | ||
| | |In the first area, on a post. | ||
|<br> | |||
|[[File:PMCS Violet Passage colorless spot 7.png|400px]] | |||
| | |||
|[[File: | |||
|- | |- | ||
|In the first area, on a post. | |||
|<br> | |||
|In the | |[[File:PMCS Violet Passage colorless spot 8.png|400px]] | ||
|[[File: | |||
|- | |- | ||
|In the first area, on the ocean. This colorless spot is repainted after getting the blue [[Big Paint Star]]. | |||
|<br> | |||
|In the first | |[[File:PMCS Violet Passage colorless spot 9.png|400px]] | ||
|[[File: | |||
|- | |- | ||
| | |Below deck, on the treasure chest. | ||
|<br> | |||
|[[File:PMCS Violet Passage colorless spot 10.png|400px]] | |||
|[[File: | |||
|} | |} | ||
= | =Vortex Island= | ||
==Items== | ==Items== | ||
{| | ===Field/Given/Objects=== | ||
!Item | {|border=1 cellpadding=0 style="text-align: center; border-collapse: collapse; border: 1px solid black; width:100%" | ||
!Icon | ! style="background:#9966CC; color:white; height:2em" | Item | ||
!Location | ! style="background:#9966CC; color:white; height:2em" | Icon | ||
!Image | ! style="background:#9966CC; color:white; height:2em" | Location | ||
! style="background:#9966CC; color:white; height:2em" | Location Image | |||
|- | |- | ||
| | | | ||
| | | | ||
| Line 2,230: | Line 2,623: | ||
|} | |} | ||
== | ==Colorless spots== | ||
{| | {|border=1 cellpadding=0 style="text-align: center; border-collapse: collapse; border: 1px solid black; width:100%" | ||
! | ! style="background:#9966CC; color:white; height:2em" | Location | ||
! | ! style="background:#9966CC; color:white; height:2em" | Drop | ||
!Location | ! style="background:#9966CC; color:white; height:2em" | Location Image | ||
|- | |||
|In the first area, on a Toad. | |||
|<br> | |||
|[[File:PMCS Vortex Island colorless spot 1.png|400px]] | |||
|- | |||
|In the first area, on the ground. | |||
|<br> | |||
|[[File:PMCS Vortex Island colorless spot 2.png|400px]] | |||
|- | |||
|In the first area, on a flower. | |||
|<br> | |||
|[[File:PMCS Vortex Island colorless spot 3.png|400px]] | |||
|- | |||
|In the first area, on the ground. | |||
|<br> | |||
|[[File:PMCS Vortex Island colorless spot 4.png|400px]] | |||
|- | |||
|In the first area, on the ground. | |||
|<br> | |||
|[[File:PMCS Vortex Island colorless spot 5.png|400px]] | |||
|- | |||
|In the second area, on the ground. | |||
|<br> | |||
|[[File:PMCS Vortex Island colorless spot 6.png|400px]] | |||
|- | |||
|In the second area, on the ground. | |||
|<br> | |||
|[[File:PMCS Vortex Island colorless spot 7.png|400px]] | |||
|- | |||
|In the second area, on the ground. | |||
|<br> | |||
|[[File:PMCS Vortex Island colorless spot 8.png|400px]] | |||
|- | |||
|In the second area, on the ground. | |||
|<br> | |||
|[[File:PMCS Vortex Island colorless spot 9.png|400px]] | |||
|- | |||
|In the second area, on the ground. | |||
|<br> | |||
|[[File:PMCS Vortex Island colorless spot 10.png|400px]] | |||
|- | |||
|In the second area, on the ground. | |||
|<br> | |||
|[[File:PMCS Vortex Island colorless spot 11.png|400px]] | |||
|- | |||
|In the second area, on the wall. | |||
|<br> | |||
|[[File:PMCS Vortex Island colorless spot 12.png|400px]] | |||
|- | |||
|In the third area, on a flower. | |||
|<br> | |||
|[[File:PMCS Vortex Island colorless spot 13.png|400px]] | |||
|- | |||
|In the third area, on the wall. | |||
|<br> | |||
|[[File:PMCS Vortex Island colorless spot 14.png|400px]] | |||
|- | |||
|In the third area, on the ground. | |||
|<br> | |||
|[[File:PMCS Vortex Island colorless spot 15.png|400px]] | |||
|- | |||
|In the third area, on the ground. | |||
|<br> | |||
|[[File:PMCS Vortex Island colorless spot 16.png|400px]] | |||
|- | |||
|In the third area, on a flower. | |||
|<br> | |||
|[[File:PMCS Vortex Island colorless spot 17.png|400px]] | |||
|- | |||
|In the third area, on the ground. | |||
|<br> | |||
|[[File:PMCS Vortex Island colorless spot 18.png|400px]] | |||
|- | |||
|In the third area, on a Toad. | |||
|<br> | |||
|[[File:PMCS Vortex Island colorless spot 19.png|400px]] | |||
|- | |||
|In the house, on a Toad. | |||
|<br> | |||
|[[File:PMCS Vortex Island colorless spot 20.png|400px]] | |||
|- | |||
|In the third area, on a Toad. | |||
|<br> | |||
|[[File:PMCS Vortex Island colorless spot 21.png|400px]] | |||
|- | |||
|In the third area, on a Toad. | |||
|<br> | |||
|[[File:PMCS Vortex Island colorless spot 22.png|400px]] | |||
|- | |||
|In the third area, on the ground. | |||
|<br> | |||
|[[File:PMCS Vortex Island colorless spot 23.png|400px]] | |||
|- | |||
|In the parallel third area, on a flower. | |||
|<br> | |||
|[[File:PMCS Vortex Island colorless spot 24.png|400px]] | |||
|- | |||
|In the parallel third area, on the ground. | |||
|<br> | |||
|[[File:PMCS Vortex Island colorless spot 25.png|400px]] | |||
|- | |||
|In the parallel third area, on a flower. | |||
|<br> | |||
|[[File:PMCS Vortex Island colorless spot 26.png|400px]] | |||
|- | |||
|In the parallel third area, on a flower. | |||
|<br> | |||
|[[File:PMCS Vortex Island colorless spot 27.png|400px]] | |||
|- | |||
|In the parallel third area, on the ground. | |||
|<br> | |||
|[[File:PMCS Vortex Island colorless spot 28.png|400px]] | |||
|- | |||
|In the parallel third area, on the wall. | |||
|<br> | |||
|[[File:PMCS Vortex Island colorless spot 29.png|400px]] | |||
|- | |- | ||
|[[ | |In the parallel third area, on the ground. | ||
|[[File: | |<br> | ||
|In the | |[[File:PMCS Vortex Island colorless spot 30.png|400px]] | ||
|[[File: | |- | ||
|In the parallel third area, on a flower. | |||
|<br> | |||
|[[File:PMCS Vortex Island colorless spot 31.png|400px]] | |||
|- | |||
|In the parallel third area, on the ground. | |||
|<br> | |||
|[[File:PMCS Vortex Island colorless spot 32.png|400px]] | |||
|- | |||
|In the parallel third area, on a flower. | |||
|<br> | |||
|[[File:PMCS Vortex Island colorless spot 33.png|400px]] | |||
|- | |||
|In the parallel second area, on the wall. | |||
|<br> | |||
|[[File:PMCS Vortex Island colorless spot 34.png|400px]] | |||
|- | |||
|In the parallel second area, on the ground. | |||
|<br> | |||
|[[File:PMCS Vortex Island colorless spot 35.png|400px]] | |||
|- | |||
|In the parallel second area, on the ground. | |||
|<br> | |||
|[[File:PMCS Vortex Island colorless spot 36.png|400px]] | |||
|- | |||
|In the parallel second area, on the ground. | |||
|<br> | |||
|[[File:PMCS Vortex Island colorless spot 37.png|400px]] | |||
|- | |||
|In the parallel second area, on the ground. | |||
|<br> | |||
|[[File:PMCS Vortex Island colorless spot 38.png|400px]] | |||
|- | |||
|In the parallel second area, on the ground. | |||
|<br> | |||
|[[File:PMCS Vortex Island colorless spot 39.png|400px]] | |||
|- | |||
|In the parallel second area, on the ground. | |||
|<br> | |||
|[[File:PMCS Vortex Island colorless spot 40.png|400px]] | |||
|- | |||
|In the parallel first area, on the wall. | |||
|<br> | |||
|[[File:PMCS Vortex Island colorless spot 41.png|400px]] | |||
|- | |||
|In the parallel first area, on a flower. | |||
|<br> | |||
|[[File:PMCS Vortex Island colorless spot 42.png|400px]] | |||
|- | |||
|In the parallel first area, on a wooden plank. | |||
|<br> | |||
|[[File:PMCS Vortex Island colorless spot 43.png|400px]] | |||
|- | |||
|In the parallel first area, on the ground. | |||
|<br> | |||
|[[File:PMCS Vortex Island colorless spot 44.png|400px]] | |||
|- | |||
|In the parallel first area, on the ground. | |||
|<br> | |||
|[[File:PMCS Vortex Island colorless spot 45.png|400px]] | |||
|- | |||
|In the parallel first area, on a starfish. | |||
|<br> | |||
|[[File:PMCS Vortex Island colorless spot 46.png|400px]] | |||
|- | |||
|In the parallel first area, on the wall. | |||
|<br> | |||
|[[File:PMCS Vortex Island colorless spot 47.png|400px]] | |||
|- | |||
|In the parallel first area, on the wall. | |||
|<br> | |||
|[[File:PMCS Vortex Island colorless spot 48.png|400px]] | |||
|- | |||
|In the parallel first area, on a flower. | |||
|<br> | |||
|[[File:PMCS Vortex Island colorless spot 49.png|400px]] | |||
|- | |||
|In the first area, on the wall. This spot is only accessible after the posts have been hammered in the parallel world. | |||
|<br> | |||
|[[File:PMCS Vortex Island colorless spot 50.png|400px]] | |||
|- | |||
|In the first area, on the ground. | |||
|<br> | |||
|[[File:PMCS Vortex Island colorless spot 51.png|400px]] | |||
|- | |||
|In the first area, on the wall. | |||
|<br> | |||
|[[File:PMCS Vortex Island colorless spot 52.png|400px]] | |||
|- | |||
|In the third area, on a flower. | |||
|<br> | |||
|[[File:PMCS Vortex Island colorless spot 53.png|400px]] | |||
|- | |||
|In the third area, on the ground. | |||
|<br> | |||
|[[File:PMCS Vortex Island colorless spot 54.png|400px]] | |||
|- | |||
|In the third area, on the wall. | |||
|<br> | |||
|[[File:PMCS Vortex Island colorless spot 55.png|400px]] | |||
|- | |||
|In the third area, on a flower. | |||
|<br> | |||
|[[File:PMCS Vortex Island colorless spot 56.png|400px]] | |||
|} | |} | ||
= | =Lighthouse Island= | ||
==Items== | ==Items== | ||
===Field/Given=== | ===Field/Given/Objects=== | ||
{| | {|border=1 cellpadding=0 style="text-align: center; border-collapse: collapse; border: 1px solid black; width:100%" | ||
!Item | ! style="background:#9966CC; color:white; height:2em" | Item | ||
!Icon | ! style="background:#9966CC; color:white; height:2em" | Icon | ||
!Location | ! style="background:#9966CC; color:white; height:2em" | Location | ||
!Image | ! style="background:#9966CC; color:white; height:2em" | Location Image | ||
|- | |- | ||
| | | | ||
| | | | ||
| Line 2,258: | Line 2,868: | ||
|} | |} | ||
== | ==Colorless spots== | ||
{| | {|border=1 cellpadding=0 style="text-align: center; border-collapse: collapse; border: 1px solid black; width:100%" | ||
! | ! style="background:#9966CC; color:white; height:2em" | Location | ||
! | ! style="background:#9966CC; color:white; height:2em" | Drop | ||
!Location | ! style="background:#9966CC; color:white; height:2em" | Location Image | ||
|- | |||
|In the first area, on the ground. | |||
|<br> | |||
|[[File:PMCS Lighthouse Island colorless spot 1.png|400px]] | |||
|- | |||
|In the first area, on the ground. | |||
|<br> | |||
|[[File:PMCS Lighthouse Island colorless spot 2.png|400px]] | |||
|- | |||
|In the first area, on the ground. | |||
|<br> | |||
|[[File:PMCS Lighthouse Island colorless spot 3.png|400px]] | |||
|- | |||
|In the first area, on the wall. | |||
|<br> | |||
|[[File:PMCS Lighthouse Island colorless spot 4.png|400px]] | |||
|- | |||
|In the first area, on the ground. | |||
|<br> | |||
|[[File:PMCS Lighthouse Island colorless spot 5.png|400px]] | |||
|- | |||
|In the first area, on the ground. | |||
|<br> | |||
|[[File:PMCS Lighthouse Island colorless spot 6.png|400px]] | |||
|- | |||
|In the first area, on the lighthouse wall. | |||
|<br> | |||
|[[File:PMCS Lighthouse Island colorless spot 7.png|400px]] | |||
|- | |||
|In the first area, on some grass. | |||
|<br> | |||
|[[File:PMCS Lighthouse Island colorless spot 8.png|400px]] | |||
|- | |||
|In the first area, on the ground. | |||
|<br> | |||
|[[File:PMCS Lighthouse Island colorless spot 9.png|400px]] | |||
|- | |||
|At the top of the lighthouse, on the lighthouse keeper. | |||
|<br> | |||
|[[File:PMCS Lighthouse Island colorless spot 10.png|400px]] | |||
|- | |||
|In the second area, on the ground. | |||
|<br> | |||
|[[File:PMCS Lighthouse Island colorless spot 11.png|400px]] | |||
|- | |||
|In the second area, on the ground. | |||
|<br> | |||
|[[File:PMCS Lighthouse Island colorless spot 12.png|400px]] | |||
|- | |||
|In the second area, on the wall. | |||
|<br> | |||
|[[File:PMCS Lighthouse Island colorless spot 13.png|400px]] | |||
|- | |||
|In the second area, on the ground. | |||
|<br> | |||
|[[File:PMCS Lighthouse Island colorless spot 14.png|400px]] | |||
|- | |||
|In the second area, on the ground. | |||
|<br> | |||
|[[File:PMCS Lighthouse Island colorless spot 15.png|400px]] | |||
|- | |||
|In the third area, on the ground. | |||
|<br> | |||
|[[File:PMCS Lighthouse Island colorless spot 16.png|400px]] | |||
|- | |- | ||
|In the third area, on the ground. | |||
|<br> | |||
|In the | |[[File:PMCS Lighthouse Island colorless spot 17.png|400px]] | ||
|[[File: | |||
|- | |- | ||
|In the third area, on the wall. | |||
|<br> | |||
|In the | |[[File:PMCS Lighthouse Island colorless spot 18.png|400px]] | ||
|[[File: | |||
|- | |- | ||
|In the third area, on the ground. | |||
|<br> | |||
|In the | |[[File:PMCS Lighthouse Island colorless spot 19.png|400px]] | ||
|[[File: | |||
|- | |- | ||
| | |In the parallel third area, on the wall. | ||
|<br> | |||
| | |[[File:PMCS Lighthouse Island colorless spot 20.png|400px]] | ||
|[[File: | |||
|- | |- | ||
| | |In the parallel third area, on the ground. | ||
|<br> | |||
| | |[[File:PMCS Lighthouse Island colorless spot 21.png|400px]] | ||
|[[File: | |||
|- | |- | ||
|[[ | |In the parallel third area, on the wall. | ||
|[[File: | |<br> | ||
|In the | |[[File:PMCS Lighthouse Island colorless spot 22.png|400px]] | ||
|[[File: | |- | ||
| | |In the parallel first area, on the ground. | ||
|<br> | |||
|[[File:PMCS Lighthouse Island colorless spot 23.png|400px]] | |||
|- | |||
|In the parallel first area, on the ground. | |||
|<br> | |||
|[[File:PMCS Lighthouse Island colorless spot 24.png|400px]] | |||
|- | |||
|In the parallel first area, on the ground. | |||
|<br> | |||
|[[File:PMCS Lighthouse Island colorless spot 25.png|400px]] | |||
|- | |||
|In the parallel first area, on the wall. | |||
|<br> | |||
|[[File:PMCS Lighthouse Island colorless spot 26.png|400px]] | |||
|- | |||
|In the parallel second area, on the ground. | |||
|<br> | |||
|[[File:PMCS Lighthouse Island colorless spot 27.png|400px]] | |||
|- | |||
|In the parallel second area, on the wall. | |||
|<br> | |||
|[[File:PMCS Lighthouse Island colorless spot 28.png|400px]] | |||
|- | |||
|In the parallel second area, on the ground. | |||
|<br> | |||
|[[File:PMCS Lighthouse Island colorless spot 29.png|400px]] | |||
|- | |||
|In the second area, on a ? Block. | |||
|<br> | |||
|[[File:PMCS Lighthouse Island colorless spot 30.png|400px]] | |||
|- | |||
|In the parallel second area, on the ground. | |||
|<br> | |||
|[[File:PMCS Lighthouse Island colorless spot 31.png|400px]] | |||
|- | |||
|In the parallel first area, on the ground. | |||
|<br> | |||
|[[File:PMCS Lighthouse Island colorless spot 32.png|400px]] | |||
|- | |- | ||
|In the parallel first area, on the ground. | |||
|<br> | |||
|In the first | |[[File:PMCS Lighthouse Island colorless spot 33.png|400px]] | ||
| | |||
|[[File: | |||
|- | |- | ||
|In the parallel first area, on the lighthouse wall. | |||
|<br> | |||
|In the | |[[File:PMCS Lighthouse Island colorless spot 34.png|400px]] | ||
|[[File: | |||
|- | |- | ||
|In the parallel first area, on the side of a crate. | |||
|<br> | |||
|In the | |[[File:PMCS Lighthouse Island colorless spot 35.png|400px]] | ||
|[[File: | |||
|} | |} | ||
= | =Fortune Island= | ||
==Items== | ==Items== | ||
===Field/Given=== | ===Field/Given/Objects=== | ||
{| | {|border=1 cellpadding=0 style="text-align: center; border-collapse: collapse; border: 1px solid black; width:100%" | ||
!Item | ! style="background:#9966CC; color:white; height:2em" | Item | ||
!Icon | ! style="background:#9966CC; color:white; height:2em" | Icon | ||
!Location | ! style="background:#9966CC; color:white; height:2em" | Location | ||
!Image | ! style="background:#9966CC; color:white; height:2em" | Location Image | ||
|- | |- | ||
| | | | ||
| | | | ||
| Line 2,344: | Line 3,029: | ||
|} | |} | ||
== | ==Colorless spots== | ||
{| | {|border=1 cellpadding=0 style="text-align: center; border-collapse: collapse; border: 1px solid black; width:100%" | ||
! | ! style="background:#9966CC; color:white; height:2em" | Location | ||
! | ! style="background:#9966CC; color:white; height:2em" | Drop | ||
!Location | ! style="background:#9966CC; color:white; height:2em" | Location Image | ||
|- | |||
|In the first area, on a post. | |||
|<br> | |||
|[[File:PMCS Fortune Island colorless spot 1.png|400px]] | |||
|- | |||
|In the first area, on the ground. | |||
|<br> | |||
|[[File:PMCS Fortune Island colorless spot 2.png|400px]] | |||
|- | |||
|In the first area, on the wall. | |||
|<br> | |||
|[[File:PMCS Fortune Island colorless spot 3.png|400px]] | |||
|- | |||
|In the first area, on the ground. | |||
|<br> | |||
|[[File:PMCS Fortune Island colorless spot 4.png|400px]] | |||
|- | |||
|In the first area, on the wall. | |||
|<br> | |||
|[[File:PMCS Fortune Island colorless spot 5.png|400px]] | |||
|- | |||
|In the parallel first area, on the wall. | |||
|<br> | |||
|[[File:PMCS Fortune Island colorless spot 6.png|400px]] | |||
|- | |||
|In the parallel first area, on the ground. | |||
|<br> | |||
|[[File:PMCS Fortune Island colorless spot 7.png|400px]] | |||
|- | |||
|In the parallel first area, on the wall. | |||
|<br> | |||
|[[File:PMCS Fortune Island colorless spot 8.png|400px]] | |||
|- | |||
|In the parallel first area, on the ground. | |||
|<br> | |||
|[[File:PMCS Fortune Island colorless spot 9.png|400px]] | |||
|- | |||
|In the parallel first area, on a shell. | |||
|<br> | |||
|[[File:PMCS Fortune Island colorless spot 10.png|400px]] | |||
|- | |||
|In the parallel first area, on a plank. | |||
|<br> | |||
|[[File:PMCS Fortune Island colorless spot 11.png|400px]] | |||
|- | |||
|In the parallel first area, on the wall. | |||
|<br> | |||
|[[File:PMCS Fortune Island colorless spot 12.png|400px]] | |||
|- | |||
|In the parallel first area, on a star. | |||
|<br> | |||
|[[File:PMCS Fortune Island colorless spot 13.png|400px]] | |||
|- | |||
|In the parallel first area, on the ground. | |||
|<br> | |||
|[[File:PMCS Fortune Island colorless spot 14.png|400px]] | |||
|- | |||
|In the parallel second area, on the ground. | |||
|<br> | |||
|[[File:PMCS Fortune Island colorless spot 15.png|400px]] | |||
|- | |||
|In the parallel second area, on the ground. | |||
|<br> | |||
|[[File:PMCS Fortune Island colorless spot 16.png|400px]] | |||
|- | |||
|In the parallel second area, on the wall. | |||
|<br> | |||
|[[File:PMCS Fortune Island colorless spot 17.png|400px]] | |||
|- | |- | ||
|In the second area, on the ground. | |||
|<br> | |||
|In the second | |[[File:PMCS Fortune Island colorless spot 18.png|400px]] | ||
|[[File: | |||
|- | |- | ||
| | |In the second area, on the ground. | ||
|<br> | |||
|[[File:PMCS Fortune Island colorless spot 19.png|400px]] | |||
|[[File: | |||
|- | |- | ||
| | |In the second area, on a shell in the Unfurl Block room. | ||
|[[File: | |<br> | ||
| | |[[File:PMCS Fortune Island colorless spot 20.png|400px]] | ||
|[[File: | |- | ||
|In the area past the Unfurl Block, on a flower. | |||
|<br> | |||
|[[File:PMCS Fortune Island colorless spot 21.png|400px]] | |||
|- | |- | ||
|In the area past the Unfurl Block, on the wall. | |||
|<br> | |||
|In the | |[[File:PMCS Fortune Island colorless spot 22.png|400px]] | ||
| | |||
|[[File: | |||
|- | |- | ||
|In the second area, on a rock on the wall. This spot can only be reached after unfurling the barrel. | |||
|<br> | |||
|In the | |[[File:PMCS Fortune Island colorless spot 23.png|400px]] | ||
|[[File: | |||
|- | |- | ||
|In the third area, on the wall. | |||
|<br> | |||
|In the | |[[File:PMCS Fortune Island colorless spot 24.png|400px]] | ||
|[[File: | |||
|- | |- | ||
|In the third area, on a rock on the ground. | |||
|<br> | |||
|In the | |[[File:PMCS Fortune Island colorless spot 25.png|400px]] | ||
|[[File: | |||
|- | |- | ||
| | |In the fourth area, on a rock on the wall. | ||
| | |<br> | ||
| | |[[File:PMCS Fortune Island colorless spot 26.png|400px]] | ||
| | |||
|- | |- | ||
|In the fourth area, on the wall. | |||
|<br> | |||
|In the | |[[File:PMCS Fortune Island colorless spot 27.png|400px]] | ||
|[[File: | |||
|- | |- | ||
| | |In the fourth area, on the treasure chest. | ||
|<br> | |||
|[[File:PMCS Fortune Island colorless spot 28.png|400px]] | |||
|[[File: | |||
|- | |- | ||
|In the fifth area, on the ground. | |||
|<br> | |||
|In the | |[[File:PMCS Fortune Island colorless spot 29.png|400px]] | ||
|[[File: | |||
|- | |- | ||
|In the first area, on the ground. | |||
|<br> | |||
|In the | |[[File:PMCS Fortune Island colorless spot 30.png|400px]] | ||
|[[File: | |||
|- | |- | ||
| | |In the parallel second area, on a seashell in the Unfurl Block area. | ||
|<br> | |||
|[[File:PMCS Fortune Island colorless spot 31.png|400px]] | |||
|[[File: | |||
|- | |- | ||
|In the parallel second area, on a rock on the wall. | |||
|<br> | |||
|In the | |[[File:PMCS Fortune Island colorless spot 32.png|400px]] | ||
|[[File: | |||
|- | |- | ||
|In the parallel second area, on the ground. | |||
|<br> | |||
|In the | |[[File:PMCS Fortune Island colorless spot 33.png|400px]] | ||
| | |||
|[[File: | |||
|- | |- | ||
|In the parallel third area, on the ground. | |||
|<br> | |||
|In the third | |[[File:PMCS Fortune Island colorless spot 34.png|400px]] | ||
| | |||
|[[File: | |||
|- | |- | ||
| | |In the parallel third area, on a plank on the wall. | ||
|<br> | |||
|[[File:PMCS Fortune Island colorless spot 35.png|400px]] | |||
| | |||
|[[File: | |||
|- | |- | ||
|In the parallel fourth area, on the wall. | |||
|<br> | |||
|In the | |[[File:PMCS Fortune Island colorless spot 36.png|400px]] | ||
| | |||
|[[File: | |||
|- | |- | ||
|In the parallel fourth area, on the ground. | |||
|<br> | |||
|In the | |[[File:PMCS Fortune Island colorless spot 37.png|400px]] | ||
| | |||
|[[File: | |||
|- | |- | ||
|In the parallel fifth area, on the ground. | |||
|<br> | |||
|In the | |[[File:PMCS Fortune Island colorless spot 38.png|400px]] | ||
|[[File: | |||
|- | |- | ||
|In the parallel fifth area, on the ground. | |||
|<br> | |||
|In the | |[[File:PMCS Fortune Island colorless spot 39.png|400px]] | ||
|[[File: | |||
|- | |- | ||
|In the parallel first area, on a rock on the wall. | |||
|<br> | |||
|In the | |[[File:PMCS Fortune Island colorless spot 40.png|400px]] | ||
|[[File: | |||
|- | |- | ||
| | |In the parallel smoke area, on the ground. | ||
|<br> | |||
| | |[[File:PMCS Fortune Island colorless spot 41.png|400px]] | ||
|[[File: | |||
|- | |- | ||
|In the smoke area, on the ground. | |||
|<br> | |||
|In the | |[[File:PMCS Fortune Island colorless spot 42.png|400px]] | ||
|[[File: | |||
|} | |} | ||
= | =Marmalade Valley= | ||
==Items== | ==Items== | ||
===Field/Given=== | ===Field/Given/Objects=== | ||
{| | {|border=1 cellpadding=0 style="text-align: center; border-collapse: collapse; border: 1px solid black; width:100%" | ||
!Item | ! style="background:orange; color:white; height:2em" | Item | ||
!Icon | ! style="background:orange; color:white; height:2em" | Icon | ||
!Location | ! style="background:orange; color:white; height:2em" | Location | ||
!Image | ! style="background:orange; color:white; height:2em" | Location Image | ||
|- | |- | ||
| | | | ||
| | | | ||
| Line 2,545: | Line 3,218: | ||
|} | |} | ||
== | ==Colorless spots== | ||
{| | {|border=1 cellpadding=0 style="text-align: center; border-collapse: collapse; border: 1px solid black; width:100%" | ||
! | ! style="background:orange; color:white; height:2em" | Location | ||
! | ! style="background:orange; color:white; height:2em" | Drop | ||
!Location | ! style="background:orange; color:white; height:2em" | Location Image | ||
|- | |- | ||
|In the first area, on the ground. | |||
|<br> | |||
|In the first | |[[File:PMCS Marmalade Valley colorless spot 1.png|400px]] | ||
|[[File: | |||
|- | |- | ||
|In the first area, on the ground. | |||
|<br> | |||
|In the | |[[File:PMCS Marmalade Valley colorless spot 2.png|400px]] | ||
|[[File: | |||
|- | |- | ||
| | |In the first area, on the ground. | ||
|<br> | |||
| | |[[File:PMCS Marmalade Valley colorless spot 3.png|400px]] | ||
|[[File: | |||
|- | |- | ||
|In the first area, on the railroad tracks. | |||
|<br> | |||
|In the | |[[File:PMCS Marmalade Valley colorless spot 4.png|400px]] | ||
|[[File: | |||
|- | |- | ||
|[[ | |In the first area, on the wall. | ||
|[[File: | |<br> | ||
|In the | |[[File:PMCS Marmalade Valley colorless spot 5.png|400px]] | ||
|[[File: | |- | ||
| | |In the first area, on the wall. | ||
|<br> | |||
|[[File:PMCS Marmalade Valley colorless spot 6.png|400px]] | |||
|- | |||
|In the first area, on a wooden platform. | |||
|<br> | |||
|[[File:PMCS Marmalade Valley colorless spot 7.png|400px]] | |||
|- | |||
|In the first area, on the ground. | |||
|<br> | |||
|[[File:PMCS Marmalade Valley colorless spot 8.png|400px]] | |||
|- | |||
|In the first area, on a wooden platform. | |||
|<br> | |||
|[[File:PMCS Marmalade Valley colorless spot 9.png|400px]] | |||
|- | |||
|In the cave, on the ground. | |||
|<br> | |||
|[[File:PMCS Marmalade Valley colorless spot 10.png|400px]] | |||
|- | |||
|In the cave, on the ground. | |||
|<br> | |||
|[[File:PMCS Marmalade Valley colorless spot 11.png|400px]] | |||
|- | |- | ||
|In the cave, on a pole. | |||
|<br> | |||
|In the | |[[File:PMCS Marmalade Valley colorless spot 12.png|400px]] | ||
| | |||
|[[File: | |||
|- | |- | ||
|In the cave, on the ground. | |||
|<br> | |||
|In the | |[[File:PMCS Marmalade Valley colorless spot 13.png|400px]] | ||
| | |||
|[[File: | |||
|- | |- | ||
| | |In the cave, on a wooden platform. | ||
|<br> | |||
|[[File:PMCS Marmalade Valley colorless spot 14.png|400px]] | |||
| | |||
|[[File: | |||
|- | |- | ||
|In the cave, on the ground. | |||
|<br> | |||
|In the | |[[File:PMCS Marmalade Valley colorless spot 15.png|400px]] | ||
|[[File: | |||
|- | |- | ||
|In the cave, on a wooden platform. | |||
|<br> | |||
|In the | |[[File:PMCS Marmalade Valley colorless spot 16.png|400px]] | ||
|[[File: | |||
|- | |- | ||
| | |In the cave, on the ground behind a wooden block. | ||
|<br> | |||
|[[File:PMCS Marmalade Valley colorless spot 17.png|400px]] | |||
|[[File: | |||
|- | |- | ||
| | |In the first area, on the wall. | ||
|<br> | |||
|[[File:PMCS Marmalade Valley colorless spot 18.png|400px]] | |||
|[[File: | |||
|- | |- | ||
| | |In the second area, on the wall. | ||
|<br> | |||
| | |[[File:PMCS Marmalade Valley colorless spot 19.png|400px]] | ||
|[[File: | |||
|- | |- | ||
|In the second area, on the ground. | |||
|<br> | |||
|In the | |[[File:PMCS Marmalade Valley colorless spot 20.png|400px]] | ||
|[[File: | |||
|- | |- | ||
| | |In the second area, on the wall. | ||
|<br> | |||
|[[File:PMCS Marmalade Valley colorless spot 21.png|400px]] | |||
|[[File: | |||
|- | |- | ||
|In the second area, on the ground. | |||
|<br> | |||
|In the | |[[File:PMCS Marmalade Valley colorless spot 22.png|400px]] | ||
|[[File: | |||
|- | |- | ||
| | |In the second area, on the ground. | ||
|<br> | |||
| | |[[File:PMCS Marmalade Valley colorless spot 23.png|400px]] | ||
|[[File: | |||
|- | |- | ||
| | |In the second area, on the wall. | ||
|<br> | |||
|[[File:PMCS Marmalade Valley colorless spot 24.png|400px]] | |||
| | |||
|[[File: | |||
|- | |- | ||
| | |In the second area, on the wall, accessible from the moving platform. | ||
|<br> | |||
|[[File:PMCS Marmalade Valley colorless spot 25.png|400px]] | |||
| | |||
|[[File: | |||
|- | |- | ||
| | |In the second area, on a wooden platform. | ||
|<br> | |||
|[[File:PMCS Marmalade Valley colorless spot 26.png|400px]] | |||
| | |||
|[[File: | |||
|- | |- | ||
| | |In the third area, on the wall. | ||
|<br> | |||
|[[File:PMCS Marmalade Valley colorless spot 27.png|400px]] | |||
| | |||
|[[File: | |||
|- | |- | ||
| | |In the third area, on the ground. | ||
| | |<br> | ||
|[[File:PMCS Marmalade Valley colorless spot 28.png|400px]] | |||
|[[File: | |||
|- | |- | ||
| | |In the third area, on the ground. | ||
| | |<br> | ||
|[[File:PMCS Marmalade Valley colorless spot 29.png|400px]] | |||
|[[File: | |||
|- | |- | ||
| | |In the third area, on the wall. | ||
| | |<br> | ||
|[[File:PMCS Marmalade Valley colorless spot 30.png|400px]] | |||
|[[File: | |||
|- | |- | ||
|In the first area, on the wall. | |||
|<br> | |||
|In the | |[[File:PMCS Marmalade Valley colorless spot 31.png|400px]] | ||
|[[File: | |||
|- | |- | ||
|In the first area, on a crate. | |||
|<br> | |||
|In the | |[[File:PMCS Marmalade Valley colorless spot 32.png|400px]] | ||
|[[File: | |||
|- | |- | ||
|In the first area, on the wall. | |||
|<br> | |||
|In the first | |[[File:PMCS Marmalade Valley colorless spot 33.png|400px]] | ||
|[[File: | |||
|- | |- | ||
|In the third area, near the Spinning-Door. | |||
|<br> | |||
|In the | |[[File:PMCS Marmalade Valley colorless spot 34.png|400px]] | ||
|[[File: | |||
|- | |- | ||
| | |In the first area, on a crate. | ||
|<br> | |||
| | |[[File:PMCS Marmalade Valley colorless spot 35.png|400px]] | ||
|[[File: | |||
|- | |- | ||
|In the first area, on the Draggadon fossil. This colorless spot is repainted after collecting the orange Big Paint Star. | |||
|<br> | |||
|In | |[[File:PMCS Marmalade Valley colorless spot 36.png|400px]] | ||
|[[File: | |||
|} | |} | ||
= | =Kiwano Temple= | ||
==Items== | ==Items== | ||
{| | ===Field/Given/Objects=== | ||
!Item | {|border=1 cellpadding=0 style="text-align: center; border-collapse: collapse; border: 1px solid black; width:100%" | ||
!Icon | ! style="background:orange; color:white; height:2em" | Item | ||
!Location | ! style="background:orange; color:white; height:2em" | Icon | ||
!Image | ! style="background:orange; color:white; height:2em" | Location | ||
! style="background:orange; color:white; height:2em" | Location Image | |||
|- | |- | ||
| | | | ||
| | | | ||
| Line 2,776: | Line 3,383: | ||
|} | |} | ||
== | ==Colorless spots== | ||
{| | {|border=1 cellpadding=0 style="text-align: center; border-collapse: collapse; border: 1px solid black; width:100%" | ||
! | ! style="background:orange; color:white; height:2em" | Location | ||
! | ! style="background:orange; color:white; height:2em" | Drop | ||
!Location | ! style="background:orange; color:white; height:2em" | Location Image | ||
|- | |- | ||
|In the first area, on a post. | |||
|<br> | |||
|In the first | |[[File:PMCS Kiwano Temple colorless spot 1.png|400px]] | ||
|[[File: | |||
|- | |- | ||
| | |In the first area, on the wall. | ||
|<br> | |||
| | |[[File:PMCS Kiwano Temple colorless spot 2.png|400px]] | ||
|[[File: | |||
|- | |- | ||
|[[ | |In the first area, on the ground. | ||
|[[File: | |<br> | ||
|In the | |[[File:PMCS Kiwano Temple colorless spot 3.png|400px]] | ||
|[[File: | |- | ||
| | |In the first area, on the ground beneath a cardboard tube. | ||
|<br> | |||
|[[File:PMCS Kiwano Temple colorless spot 4.png|400px]] | |||
|- | |||
|In the first area, on a railroad track. If this colorless spot is not repainted before destroying the track with the rickety column, it will be inaccessible until the blue [[Rescue Squad]] is rescued. | |||
|<br> | |||
|[[File:PMCS Kiwano Temple colorless spot 5.png|400px]] | |||
|- | |||
|In the first area, on the ground after crossing the spikes. | |||
|<br> | |||
|[[File:PMCS Kiwano Temple colorless spot 6.png|400px]] | |||
|- | |||
|In the first area, on the wall. Mario must hammer off the ledge to reveal a row of invisible blocks. | |||
|<br> | |||
|[[File:PMCS Kiwano Temple colorless spot 7.png|400px]] | |||
|- | |||
|In the first area, on the wall. | |||
|<br> | |||
|[[File:PMCS Kiwano Temple colorless spot 8.png|400px]] | |||
|- | |||
|In the second area, on the ground. | |||
|<br> | |||
|[[File:PMCS Kiwano Temple colorless spot 9.png|400px]] | |||
|- | |||
|In the second area, on the ground. | |||
|<br> | |||
|[[File:PMCS Kiwano Temple colorless spot 10.png|400px]] | |||
|- | |||
|In the second area, on the ground. | |||
|<br> | |||
|[[File:PMCS Kiwano Temple colorless spot 11.png|400px]] | |||
|- | |||
|In the second area, on the ground. | |||
|<br> | |||
|[[File:PMCS Kiwano Temple colorless spot 12.png|400px]] | |||
|- | |||
|In the second area, on the ground. | |||
|<br> | |||
|[[File:PMCS Kiwano Temple colorless spot 13.png|400px]] | |||
|- | |||
|In the second area, on a flame. | |||
|<br> | |||
|[[File:PMCS Kiwano Temple colorless spot 14.png|400px]] | |||
|- | |||
|In the second area, on a flame. | |||
|<br> | |||
|[[File:PMCS Kiwano Temple colorless spot 15.png|400px]] | |||
|- | |||
|In the second area, on a flame. | |||
|<br> | |||
|[[File:PMCS Kiwano Temple colorless spot 16.png|400px]] | |||
|- | |||
|In the second area, on a flame. | |||
|<br> | |||
|[[File:PMCS Kiwano Temple colorless spot 17.png|400px]] | |||
|- | |||
|In the third area, on a fencepost. | |||
|<br> | |||
|[[File:PMCS Kiwano Temple colorless spot 18.png|400px]] | |||
|- | |||
|In the third area, on the ground. | |||
|<br> | |||
|[[File:PMCS Kiwano Temple colorless spot 19.png|400px]] | |||
|- | |||
|In the third area, on the ground. | |||
|<br> | |||
|[[File:PMCS Kiwano Temple colorless spot 20.png|400px]] | |||
|- | |||
|In the third area, on the ground. | |||
|<br> | |||
|[[File:PMCS Kiwano Temple colorless spot 21.png|400px]] | |||
|- | |||
|In the third area, on the ground. | |||
|<br> | |||
|[[File:PMCS Kiwano Temple colorless spot 22.png|400px]] | |||
|- | |||
|In the third area, on the ground. | |||
|<br> | |||
|[[File:PMCS Kiwano Temple colorless spot 23.png|400px]] | |||
|- | |||
|In the third area, on the ground. | |||
|<br> | |||
|[[File:PMCS Kiwano Temple colorless spot 24.png|400px]] | |||
|- | |||
|In the third area, on the wall. | |||
|<br> | |||
|[[File:PMCS Kiwano Temple colorless spot 25.png|400px]] | |||
|- | |||
|In the third area, on the wall. | |||
|<br> | |||
|[[File:PMCS Kiwano Temple colorless spot 26.png|400px]] | |||
|- | |||
|In the third area, on the ground. | |||
|<br> | |||
|[[File:PMCS Kiwano Temple colorless spot 27.png|400px]] | |||
|- | |||
|In the third area, on the wall. | |||
|<br> | |||
|[[File:PMCS Kiwano Temple colorless spot 28.png|400px]] | |||
|- | |- | ||
| | |In the third area, on a vase. | ||
| | |<br> | ||
| | |[[File:PMCS Kiwano Temple colorless spot 29.png|400px]] | ||
| | |||
|- | |- | ||
| | |In the fourth area, on a column. | ||
| | |<br> | ||
|[[File:PMCS Kiwano Temple colorless spot 30.png|400px]] | |||
|[[File: | |||
|- | |- | ||
|In the fourth area, on the ground. | |||
|<br> | |||
|In the | |[[File:PMCS Kiwano Temple colorless spot 31.png|400px]] | ||
|[[File: | |||
|- | |- | ||
|In the fourth area, on a cardboard wheel. | |||
|<br> | |||
|In the | |[[File:PMCS Kiwano Temple colorless spot 32.png|400px]] | ||
| | |||
|[[File: | |||
|- | |- | ||
|In the fourth area, on a fencepost. | |||
|<br> | |||
|In the | |[[File:PMCS Kiwano Temple colorless spot 33.png|400px]] | ||
|[[File: | |||
|- | |- | ||
|In the fourth area, on a column. | |||
|<br> | |||
|In the | |[[File:PMCS Kiwano Temple colorless spot 34.png|400px]] | ||
|[[File: | |||
|- | |- | ||
| | |In the fourth area, on the wall. | ||
|<br> | |||
| | |[[File:PMCS Kiwano Temple colorless spot 35.png|400px]] | ||
|[[File: | |||
|- | |- | ||
|In the fourth area, on the wall. | |||
|<br> | |||
|In the | |[[File:PMCS Kiwano Temple colorless spot 36.png|400px]] | ||
|[[File: | |||
|- | |- | ||
| | |In the fourth area, on a tipped column. | ||
|<br> | |||
| | |[[File:PMCS Kiwano Temple colorless spot 37.png|400px]] | ||
|[[File: | |||
|} | |} | ||
= | =Toad Trainworks= | ||
==Items== | ==Items== | ||
===Field/Given=== | ===Field/Given/Objects=== | ||
{| | {|border=1 cellpadding=0 style="text-align: center; border-collapse: collapse; border: 1px solid black; width:100%" | ||
!Item | ! style="background:orange; color:white; height:2em" | Item | ||
!Icon | ! style="background:orange; color:white; height:2em" | Icon | ||
!Location | ! style="background:orange; color:white; height:2em" | Location | ||
!Image | ! style="background:orange; color:white; height:2em" | Location Image | ||
|- | |- | ||
| | | | ||
| | | | ||
| Line 2,895: | Line 3,552: | ||
|} | |} | ||
== | ==Colorless spots== | ||
{| | {|border=1 cellpadding=0 style="text-align: center; border-collapse: collapse; border: 1px solid black; width:100%" | ||
! | ! style="background:orange; color:white; height:2em" | Location | ||
! | ! style="background:orange; color:white; height:2em" | Drop | ||
!Location | ! style="background:orange; color:white; height:2em" | Location Image | ||
|- | |||
|In the first area, on the ground. | |||
|<br> | |||
|[[File:PMCS Toad Trainworks colorless spot 1.png|400px]] | |||
|- | |||
|In the first area, on the side of a crate. Mario must hammer nearby to reveal an invisible block, then jump on it to reach the crate. | |||
|<br> | |||
|[[File:PMCS Toad Trainworks colorless spot 2.png|400px]] | |||
|- | |||
|In the second area, on the wall beneath some stairs. | |||
|<br> | |||
|[[File:PMCS Toad Trainworks colorless spot 3.png|400px]] | |||
|- | |||
|In the second area, on a stair. | |||
|<br> | |||
|[[File:PMCS Toad Trainworks colorless spot 4.png|400px]] | |||
|- | |||
|In the second area, on the railing. | |||
|<br> | |||
|[[File:PMCS Toad Trainworks colorless spot 5.png|400px]] | |||
|- | |||
|In the second area, on the wall. | |||
|<br> | |||
|[[File:PMCS Toad Trainworks colorless spot 6.png|400px]] | |||
|- | |- | ||
|In the second area, on the smokestack. | |||
|<br> | |||
|In the | |[[File:PMCS Toad Trainworks colorless spot 7.png|400px]] | ||
|[[File: | |||
|- | |- | ||
| | |In the second area, on the top of a crate. | ||
|<br> | |||
|[[File:PMCS Toad Trainworks colorless spot 8.png|400px]] | |||
|[[File: | |||
|- | |- | ||
| | |In the second area, on the ground. | ||
| | |<br> | ||
|[[File:PMCS Toad Trainworks colorless spot 9.png|400px]] | |||
|[[File: | |||
|- | |- | ||
| | |In the second area, on the train chart. | ||
|<br> | |||
| | |[[File:PMCS Toad Trainworks colorless spot 10.png|400px]] | ||
|[[File: | |||
|- | |- | ||
|In the third area, on a crate. | |||
|<br> | |||
|In the | |[[File:PMCS Toad Trainworks colorless spot 11.png|400px]] | ||
|[[File: | |||
|- | |- | ||
| | |In the cabin, on a post. | ||
|<br> | |||
| | |[[File:PMCS Toad Trainworks colorless spot 12.png|400px]] | ||
|[[File: | |||
|- | |- | ||
| | |In the second area, on the wall beneath some stairs. | ||
| | |<br> | ||
|[[File:PMCS Toad Trainworks colorless spot 13.png|400px]] | |||
|[[File: | |||
|- | |- | ||
| | |In the second area, on the wall. | ||
|<br> | |||
| | |[[File:PMCS Toad Trainworks colorless spot 14.png|400px]] | ||
|[[File: | |||
|- | |- | ||
|In the second area, on the Toad in the crane. | |||
|<br> | |||
|In the | |[[File:PMCS Toad Trainworks colorless spot 15.png|400px]] | ||
|[[File: | |||
|- | |- | ||
|In the first area, on the coal ramp. | |||
|<br> | |||
|In the | |[[File:PMCS Toad Trainworks colorless spot 16.png|400px]] | ||
|[[File: | |||
|- | |- | ||
| | |In the third area, on the ground. | ||
|<br> | |||
| | |[[File:PMCS Toad Trainworks colorless spot 17.png|400px]] | ||
|[[File: | |||
|- | |- | ||
|In the third area, on a railroad plank. | |||
|<br> | |||
|In the | |[[File:PMCS Toad Trainworks colorless spot 18.png|400px]] | ||
|[[File: | |||
|- | |- | ||
| | |In the third area, on a crate. | ||
|<br> | |||
| | |[[File:PMCS Toad Trainworks colorless spot 19.png|400px]] | ||
|[[File: | |||
|- | |- | ||
|In the third area, on the ground. | |||
|<br> | |||
|In the | |[[File:PMCS Toad Trainworks colorless spot 20.png|400px]] | ||
| | |||
|[[File: | |||
|- | |- | ||
|In the third area, on the ground. | |||
|<br> | |||
|In the third | |[[File:PMCS Toad Trainworks colorless spot 21.png|400px]] | ||
| | |||
|[[File: | |||
|- | |- | ||
|In the third area, on the side of a crate. | |||
|<br> | |||
|In the | |[[File:PMCS Toad Trainworks colorless spot 22.png|400px]] | ||
| | |||
|[[File: | |||
|- | |- | ||
|In the second area, on the fence. | |||
|<br> | |||
|In the | |[[File:PMCS Toad Trainworks colorless spot 23.png|400px]] | ||
|[[File: | |||
|- | |- | ||
| | |In the second area, on the fence. | ||
|<br> | |||
|[[File:PMCS Toad Trainworks colorless spot 24.png|400px]] | |||
|[[File: | |||
|- | |- | ||
|In the second area, on the fence. | |||
|<br> | |||
|In the | |[[File:PMCS Toad Trainworks colorless spot 25.png|400px]] | ||
|[[File: | |||
|- | |- | ||
|In the third area, on the wall. | |||
|<br> | |||
|In the | |[[File:PMCS Toad Trainworks colorless spot 26.png|400px]] | ||
|[[File: | |||
|- | |- | ||
|In the third area, on the wall. | |||
|<br> | |||
|In the | |[[File:PMCS Toad Trainworks colorless spot 27.png|400px]] | ||
|[[File: | |||
|- | |- | ||
|In the second area, on the top of a crate. The handcar must be brought over from the third area after the Sunset Express has departed. | |||
|<br> | |||
|In the | |[[File:PMCS Toad Trainworks colorless spot 28.png|400px]] | ||
|[[File: | |||
|} | |} | ||
= | =Tangerino Grill= | ||
==Items== | ==Items== | ||
===Field/Given=== | ===Field/Given/Objects=== | ||
{| | {|border=1 cellpadding=0 style="text-align: center; border-collapse: collapse; border: 1px solid black; width:100%" | ||
!Item | ! style="background:orange; color:white; height:2em" | Item | ||
!Icon | ! style="background:orange; color:white; height:2em" | Icon | ||
!Location | ! style="background:orange; color:white; height:2em" | Location | ||
!Image | ! style="background:orange; color:white; height:2em" | Location Image | ||
|- | |- | ||
| | | | ||
| | | | ||
| Line 3,048: | Line 3,685: | ||
|} | |} | ||
== | ==Colorless spots== | ||
{| | {|border=1 cellpadding=0 style="text-align: center; border-collapse: collapse; border: 1px solid black; width:100%" | ||
! | ! style="background:orange; color:white; height:2em" | Location | ||
! | ! style="background:orange; color:white; height:2em" | Drop | ||
!Location | ! style="background:orange; color:white; height:2em" | Location Image | ||
|- | |||
|In the first area, on the ground. | |||
|<br> | |||
|[[File:PMCS Tangerino Grill colorless spot 1.png|400px]] | |||
|- | |||
|In the first area, on the window. An invisible path must be painted in to reach this spot. | |||
|<br> | |||
|[[File:PMCS Tangerino Grill colorless spot 2.png|400px]] | |||
|- | |||
|In the first area, on the wall. | |||
|<br> | |||
|[[File:PMCS Tangerino Grill colorless spot 3.png|400px]] | |||
|- | |||
|In the first area, on a rock. | |||
|<br> | |||
|[[File:PMCS Tangerino Grill colorless spot 4.png|400px]] | |||
|- | |||
|In the first area, on some grass. | |||
|<br> | |||
|[[File:PMCS Tangerino Grill colorless spot 5.png|400px]] | |||
|- | |||
|In the first area, on the ground. | |||
|<br> | |||
|[[File:PMCS Tangerino Grill colorless spot 6.png|400px]] | |||
|- | |- | ||
|In the first area, on the wall. | |||
|<br> | |||
|In the | |[[File:PMCS Tangerino Grill colorless spot 7.png|400px]] | ||
|[[File: | |||
|- | |- | ||
|In the VIP room, on the wall and ground. | |||
|<br> | |||
|In the | |[[File:PMCS Tangerino Grill colorless spot 8.png|400px]] | ||
|[[File: | |||
|} | |} | ||
= | =Sunset Express= | ||
==Items== | ==Items== | ||
===Field/Given=== | ===Field/Given/Objects=== | ||
{| | {|border=1 cellpadding=0 style="text-align: center; border-collapse: collapse; border: 1px solid black; width:100%" | ||
!Item | ! style="background:orange; color:white; height:2em" | Item | ||
!Icon | ! style="background:orange; color:white; height:2em" | Icon | ||
!Location | ! style="background:orange; color:white; height:2em" | Location | ||
!Image | ! style="background:orange; color:white; height:2em" | Location Image | ||
|- | |- | ||
| | | | ||
| | | | ||
| Line 3,089: | Line 3,738: | ||
|} | |} | ||
== | ==Colorless spots== | ||
{| | {|border=1 cellpadding=0 style="text-align: center; border-collapse: collapse; border: 1px solid black; width:100%" | ||
! | ! style="background:orange; color:white; height:2em" | Location | ||
! | ! style="background:orange; color:white; height:2em" | Drop | ||
!Location | ! style="background:orange; color:white; height:2em" | Location Image | ||
|- | |||
|In the first area, on the side of a crate. | |||
|<br> | |||
|[[File:PMCS Sunset Express colorless spot 1.png|400px]] | |||
|- | |||
|In the first area, on a fencepost. | |||
|<br> | |||
|[[File:PMCS Sunset Express colorless spot 2.png|400px]] | |||
|- | |||
|In the first area, on the ground. | |||
|<br> | |||
|[[File:PMCS Sunset Express colorless spot 3.png|400px]] | |||
|- | |||
|In the first area, on a piece of grass. | |||
|<br> | |||
|[[File:PMCS Sunset Express colorless spot 4.png|400px]] | |||
|- | |||
|In the first area, on the ground. | |||
|<br> | |||
|[[File:PMCS Sunset Express colorless spot 5.png|400px]] | |||
|- | |||
|In the first area, on the ground between two train tracks. | |||
|<br> | |||
|[[File:PMCS Sunset Express colorless spot 6.png|400px]] | |||
|- | |||
|In the first area, on the ground. | |||
|<br> | |||
|[[File:PMCS Sunset Express colorless spot 7.png|400px]] | |||
|- | |||
|In the first area, on a flower. | |||
|<br> | |||
|[[File:PMCS Sunset Express colorless spot 8.png|400px]] | |||
|- | |||
|On top of the train cars, on the roof. | |||
|<br> | |||
|[[File:PMCS Sunset Express colorless spot 9.png|400px]] | |||
|- | |- | ||
| | |On top of the train cars, on the roof. | ||
|<br> | |||
|[[File:PMCS Sunset Express colorless spot 10.png|400px]] | |||
|[[File: | |||
|- | |- | ||
| | |In the Snifit train car, on the left door. | ||
|[[File: | |<br> | ||
|In the | |[[File:PMCS Sunset Express colorless spot 11.png|400px]] | ||
|[[File: | |- | ||
|In the first area, on the train tracks. This spot can only be accessed after the Sunset Express has departed. | |||
|<br> | |||
|[[File:PMCS Sunset Express colorless spot 12.png|400px]] | |||
|- | |- | ||
|In the first area, on the wall. This spot can only be accessed after the Sunset Express has departed. | |||
|<br> | |||
|In the | |[[File:PMCS Sunset Express colorless spot 13.png|400px]] | ||
|[[File: | |||
|- | |- | ||
| | |In the first area, on the ground. This spot can only be accessed after the Sunset Express has departed. | ||
|<br> | |||
|[[File:PMCS Sunset Express colorless spot 14.png|400px]] | |||
|[[File: | |||
|} | |} | ||
= | =Mondo Woods= | ||
==Items== | ==Items== | ||
===Field/Given=== | ===Field/Given/Objects=== | ||
{| | {|border=1 cellpadding=0 style="text-align: center; border-collapse: collapse; border: 1px solid black; width:100%" | ||
!Item | ! style="background:lightgreen; height:2em" | Item | ||
!Icon | ! style="background:lightgreen; height:2em" | Icon | ||
!Location | ! style="background:lightgreen; height:2em" | Location | ||
!Image | ! style="background:lightgreen; height:2em" | Location Image | ||
|- | |- | ||
| | | | ||
| | | | ||
| Line 3,140: | Line 3,815: | ||
|} | |} | ||
== | ==Colorless spots== | ||
{| | {|border=1 cellpadding=0 style="text-align: center; border-collapse: collapse; border: 1px solid black; width:100%" | ||
! | ! style="background:lightgreen; height:2em" | Location | ||
! | ! style="background:lightgreen; height:2em" | Drop | ||
!Location | ! style="background:lightgreen; height:2em" | Location Image | ||
|- | |||
|In the first area, on the ground. | |||
|<br> | |||
|[[File:PMCS Mondo Woods colorless spot 1.png|400px]] | |||
|- | |- | ||
|In the first area, on the ground. | |||
|<br> | |||
|In the | |[[File:PMCS Mondo Woods colorless spot 2.png|400px]] | ||
|[[File: | |||
|- | |- | ||
|In the first area, on the ground. | |||
|<br> | |||
|In the first | |[[File:PMCS Mondo Woods colorless spot 3.png|400px]] | ||
|[[File: | |||
|- | |- | ||
|In the first area, on the ground. | |||
|<br> | |||
|In the | |[[File:PMCS Mondo Woods colorless spot 4.png|400px]] | ||
|[[File: | |||
|- | |- | ||
| | |In the first area, on a Brick Block. | ||
|<br> | |||
| | |[[File:PMCS Mondo Woods colorless spot 5.png|400px]] | ||
|[[File: | |||
|- | |- | ||
| | |In the first area, on the ground. | ||
|<br> | |||
| | |[[File:PMCS Mondo Woods colorless spot 6.png|400px]] | ||
|[[File: | |||
|- | |- | ||
| | |In the second area, on a tree. | ||
| | |<br> | ||
|[[File:PMCS Mondo Woods colorless spot 7.png|400px]] | |||
|[[File: | |||
|- | |- | ||
| | |In the second area, on the ground. | ||
|<br> | |||
| | |[[File:PMCS Mondo Woods colorless spot 8.png|400px]] | ||
|[[File: | |||
|- | |- | ||
| | |In the second area, on top of a Brick Block. | ||
| | |<br> | ||
|[[File:PMCS Mondo Woods colorless spot 9.png|400px]] | |||
|[[File: | |||
|- | |- | ||
| | |In the second area, on the ground beneath a row of Brick Blocks. | ||
|[[File: | |<br> | ||
|In the | |[[File:PMCS Mondo Woods colorless spot 10.png|400px]] | ||
|[[File: | |- | ||
|In the area with the giant coin, on a tree. | |||
|<br> | |||
|[[File:PMCS Mondo Woods colorless spot 11.png|400px]] | |||
|- | |- | ||
|In the area with the giant coin, on a raised platform. | |||
|<br> | |||
|In the | |[[File:PMCS Mondo Woods colorless spot 12.png|400px]] | ||
| | |||
|[[File: | |||
|- | |- | ||
|In the area with the giant coin, on the wall. | |||
|<br> | |||
|In the | |[[File:PMCS Mondo Woods colorless spot 13.png|400px]] | ||
| | |||
|[[File: | |||
|- | |- | ||
| | |In the third area, on the ground. | ||
|<br> | |||
|[[File:PMCS Mondo Woods colorless spot 14.png|400px]] | |||
| | |||
|[[File: | |||
|- | |- | ||
|In the third area, on a tree. | |||
|<br> | |||
|In the | |[[File:PMCS Mondo Woods colorless spot 15.png|400px]] | ||
| | |||
|[[File: | |||
|- | |- | ||
|In the fourth area, on a bush. | |||
|<br> | |||
|In the | |[[File:PMCS Mondo Woods colorless spot 16.png|400px]] | ||
|[[File: | |||
|- | |- | ||
| | |In the fourth area, on the ground. | ||
|<br> | |||
| | |[[File:PMCS Mondo Woods colorless spot 17.png|400px]] | ||
|[[File: | |||
|- | |- | ||
|In the fourth area, on the wall. | |||
|<br> | |||
|In the fourth | |[[File:PMCS Mondo Woods colorless spot 18.png|400px]] | ||
|[[File: | |||
|- | |- | ||
|In the area with the giant coin, on the coin. This colorless spot is repainted after collecting the yellow Big Paint Star. | |||
|<br> | |||
|In the | |[[File:PMCS Mondo Woods colorless spot 19.png|400px]] | ||
|[[File: | |||
|} | |} | ||
= | =Sacred Forest= | ||
==Items== | ==Items== | ||
===Field/Given=== | ===Field/Given/Objects=== | ||
{| | {|border=1 cellpadding=0 style="text-align: center; border-collapse: collapse; border: 1px solid black; width:100%" | ||
!Item | ! style="background:lightgreen; height:2em" | Item | ||
!Icon | ! style="background:lightgreen; height:2em" | Icon | ||
!Location | ! style="background:lightgreen; height:2em" | Location | ||
!Image | ! style="background:lightgreen; height:2em" | Location Image | ||
|- | |- | ||
| | | | ||
| | | | ||
| Line 3,269: | Line 3,912: | ||
|} | |} | ||
== | ==Colorless spots== | ||
{| | {|border=1 cellpadding=0 style="text-align: center; border-collapse: collapse; border: 1px solid black; width:100%" | ||
! | ! style="background:lightgreen; height:2em" | Location | ||
! | ! style="background:lightgreen; height:2em" | Drop | ||
!Location | ! style="background:lightgreen; height:2em" | Location Image | ||
|- | |||
|In the first area, on a tree. | |||
|<br> | |||
|[[File:PMCS Sacred Forest colorless spot 1.png|400px]] | |||
|- | |||
|In the first area, on a Toad hiding behind a bush. | |||
|<br> | |||
|[[File:PMCS Sacred Forest colorless spot 2.png|400px]] | |||
|- | |||
|In the first area, on the ground. | |||
|<br> | |||
|[[File:PMCS Sacred Forest colorless spot 3.png|400px]] | |||
|- | |||
|In the first area, on a tree. | |||
|<br> | |||
|[[File:PMCS Sacred Forest colorless spot 4.png|400px]] | |||
|- | |||
|In the second area, on the ground. | |||
|<br> | |||
|[[File:PMCS Sacred Forest colorless spot 5.png|400px]] | |||
|- | |||
|In the second area, on the ground. | |||
|<br> | |||
|[[File:PMCS Sacred Forest colorless spot 6.png|400px]] | |||
|- | |||
|In the second area, on a tree. | |||
|<br> | |||
|[[File:PMCS Sacred Forest colorless spot 7.png|400px]] | |||
|- | |||
|In the second area, on the ground. | |||
|<br> | |||
|[[File:PMCS Sacred Forest colorless spot 8.png|400px]] | |||
|- | |||
|In the second area, on the ground. | |||
|<br> | |||
|[[File:PMCS Sacred Forest colorless spot 9.png|400px]] | |||
|- | |||
|In the second area, on the ground. | |||
|<br> | |||
|[[File:PMCS Sacred Forest colorless spot 10.png|400px]] | |||
|- | |||
|In the second area, on a tree. | |||
|<br> | |||
|[[File:PMCS Sacred Forest colorless spot 11.png|400px]] | |||
|- | |||
|In the Buzzy Beetle area, on the ground. | |||
|<br> | |||
|[[File:PMCS Sacred Forest colorless spot 12.png|400px]] | |||
|- | |||
|In the Buzzy Beetle area, on the ground. | |||
|<br> | |||
|[[File:PMCS Sacred Forest colorless spot 13.png|400px]] | |||
|- | |||
|In the Buzzy Beetle area, on the ground. | |||
|<br> | |||
|[[File:PMCS Sacred Forest colorless spot 14.png|400px]] | |||
|- | |||
|In the Buzzy Beetle area, on the ground. | |||
|<br> | |||
|[[File:PMCS Sacred Forest colorless spot 15.png|400px]] | |||
|- | |||
|In the Buzzy Beetle area, on the ground. | |||
|<br> | |||
|[[File:PMCS Sacred Forest colorless spot 16.png|400px]] | |||
|- | |||
|In the Buzzy Beetle area, on the ground. | |||
|<br> | |||
|[[File:PMCS Sacred Forest colorless spot 17.png|400px]] | |||
|- | |||
|In the Buzzy Beetle area, on the ground. | |||
|<br> | |||
|[[File:PMCS Sacred Forest colorless spot 18.png|400px]] | |||
|- | |||
|In the Buzzy Beetle area, on the ground. Three pieces of [[Bowser Tape]] must be pulled to reveal this spot. | |||
|<br> | |||
|[[File:PMCS Sacred Forest colorless spot 19.png|400px]] | |||
|- | |||
|In the Old Sacred Tree area, on the ground. | |||
|<br> | |||
|[[File:PMCS Sacred Forest colorless spot 20.png|400px]] | |||
|- | |||
|In the Old Sacred Tree area, on the ground. | |||
|<br> | |||
|[[File:PMCS Sacred Forest colorless spot 21.png|400px]] | |||
|- | |||
|In the Old Sacred Tree area, on the ground. | |||
|<br> | |||
|[[File:PMCS Sacred Forest colorless spot 22.png|400px]] | |||
|- | |||
|In the Old Sacred Tree area, on the ground. | |||
|<br> | |||
|[[File:PMCS Sacred Forest colorless spot 23.png|400px]] | |||
|- | |||
|In the Old Sacred Tree area, on the ground. | |||
|<br> | |||
|[[File:PMCS Sacred Forest colorless spot 24.png|400px]] | |||
|- | |||
|In the Old Sacred Tree area, on the ground. | |||
|<br> | |||
|[[File:PMCS Sacred Forest colorless spot 25.png|400px]] | |||
|- | |||
|In the Old Sacred Tree area, on the ground. | |||
|<br> | |||
|[[File:PMCS Sacred Forest colorless spot 26.png|400px]] | |||
|- | |- | ||
|In the Old Sacred Tree area, on the ground. | |||
|<br> | |||
|In the | |[[File:PMCS Sacred Forest colorless spot 27.png|400px]] | ||
|[[File: | |||
|- | |- | ||
| | |In the Old Sacred Tree area, on the ground. | ||
|<br> | |||
| | |[[File:PMCS Sacred Forest colorless spot 28.png|400px]] | ||
|[[File: | |||
|- | |- | ||
| | |In the Old Sacred Tree area, on the ground. | ||
|<br> | |||
| | |[[File:PMCS Sacred Forest colorless spot 29.png|400px]] | ||
|[[File: | |||
|- | |- | ||
| | |In the Old Sacred Tree area, on the ground. | ||
|<br> | |||
| | |[[File:PMCS Sacred Forest colorless spot 30.png|400px]] | ||
|[[File: | |||
|- | |- | ||
|In the Old Sacred Tree area, on the ground. | |||
|<br> | |||
|In the | |[[File:PMCS Sacred Forest colorless spot 31.png|400px]] | ||
|[[File: | |||
|- | |- | ||
|In the Old Sacred Tree area, on the ground. | |||
|<br> | |||
|In the | |[[File:PMCS Sacred Forest colorless spot 32.png|400px]] | ||
|[[File: | |||
|- | |- | ||
| | |In the Old Sacred Tree area, on the ground. | ||
|<br> | |||
| | |[[File:PMCS Sacred Forest colorless spot 33.png|400px]] | ||
|[[File: | |||
|- | |- | ||
|In the Old Sacred Tree area, on the ground. | |||
|<br> | |||
|In the | |[[File:PMCS Sacred Forest colorless spot 34.png|400px]] | ||
|[[File: | |||
|- | |- | ||
|In the Old Sacred Tree area, on the ground. | |||
|<br> | |||
|In the | |[[File:PMCS Sacred Forest colorless spot 35.png|400px]] | ||
|[[File: | |||
|- | |- | ||
| | |In the Old Sacred Tree area, on the ground. | ||
|<br> | |||
| | |[[File:PMCS Sacred Forest colorless spot 36.png|400px]] | ||
|[[File: | |||
|- | |- | ||
| | |In the Old Sacred Tree area, on the ground. | ||
|<br> | |||
| | |[[File:PMCS Sacred Forest colorless spot 37.png|400px]] | ||
|[[File: | |||
|- | |- | ||
| | |In the Old Sacred Tree area, on the ground. | ||
|<br> | |||
| | |[[File:PMCS Sacred Forest colorless spot 38.png|400px]] | ||
|[[File: | |||
|- | |- | ||
| | |In the Old Sacred Tree area, on the ground. | ||
|[[File: | |<br> | ||
|In the | |[[File:PMCS Sacred Forest colorless spot 39.png|400px]] | ||
|[[File: | |- | ||
|In the Old Sacred Tree area, on the ground. | |||
|<br> | |||
|[[File:PMCS Sacred Forest colorless spot 40.png|400px]] | |||
|- | |- | ||
|In the Old Sacred Tree area, on the ground. | |||
|<br> | |||
|In the | |[[File:PMCS Sacred Forest colorless spot 41.png|400px]] | ||
|[[File: | |||
|- | |- | ||
| | |In the Old Sacred Tree area, on the ground. | ||
|<br> | |||
|[[File:PMCS Sacred Forest colorless spot 42.png|400px]] | |||
|[[File: | |||
|- | |- | ||
| | |In the Old Sacred Tree area, on the ground. | ||
| | |<br> | ||
|[[File:PMCS Sacred Forest colorless spot 43.png|400px]] | |||
|[[File: | |||
|- | |- | ||
| | |In the Small Goomba Gang area, on the ground. | ||
| | |<br> | ||
|[[File:PMCS Sacred Forest colorless spot 44.png|400px]] | |||
|[[File: | |||
|- | |- | ||
|In the Small Goomba Gang area, on the ground. | |||
|<br> | |||
|In the | |[[File:PMCS Sacred Forest colorless spot 45.png|400px]] | ||
|[[File: | |||
|- | |- | ||
|In the Buzzy Beetle area, on the ground. | |||
|<br> | |||
|In the | |[[File:PMCS Sacred Forest colorless spot 46.png|400px]] | ||
|[[File: | |||
|- | |- | ||
| | |In the Buzzy Beetle area, underneath the bridge. | ||
|<br> | |||
|[[File:PMCS Sacred Forest colorless spot 47.png|400px]] | |||
|[[File: | |||
|} | |} | ||
= | =Green Energy Plant= | ||
==Items== | ==Items== | ||
===Field/Given=== | ===Field/Given/Objects=== | ||
{| | {|border=1 cellpadding=0 style="text-align: center; border-collapse: collapse; border: 1px solid black; width:100%" | ||
!Item | ! style="background:lightgreen; height:2em" | Item | ||
!Icon | ! style="background:lightgreen; height:2em" | Icon | ||
!Location | ! style="background:lightgreen; height:2em" | Location | ||
!Image | ! style="background:lightgreen; height:2em" | Location Image | ||
|- | |- | ||
| | | | ||
| | |||
| | |||
|} | |||
==Colorless spot== | |||
{|border=1 cellpadding=0 style="text-align: center; border-collapse: collapse; border: 1px solid black; width:100%" | |||
! style="background:lightgreen; height:2em" | Location | |||
! style="background:lightgreen; height:2em" | Drop | |||
! style="background:lightgreen; height:2em" | Location Image | |||
|- | |||
|In the third ''Super Mario Bros. 3'' area, on a cloud's eyes. | |||
|<br> | |||
|[[File:PMCS Green Energy Plant colorless spot 1.png|400px]] | |||
|} | |||
=Mossrock Theater= | |||
==Items== | |||
===Field/Given/Objects=== | |||
{|border=1 cellpadding=0 style="text-align: center; border-collapse: collapse; border: 1px solid black; width:100%" | |||
! style="background:lightgreen; height:2em" | Item | |||
! style="background:lightgreen; height:2em" | Icon | |||
! style="background:lightgreen; height:2em" | Location | |||
! style="background:lightgreen; height:2em" | Location Image | |||
|- | |||
| | | | ||
| | | | ||
| Line 3,400: | Line 4,147: | ||
|} | |} | ||
== | ==Colorless spots== | ||
{| | {|border=1 cellpadding=0 style="text-align: center; border-collapse: collapse; border: 1px solid black; width:100%" | ||
! | ! style="background:lightgreen; height:2em" | Location | ||
! | ! style="background:lightgreen; height:2em" | Drop | ||
!Location | ! style="background:lightgreen; height:2em" | Location Image | ||
|- | |||
|In the first area, on some grass. | |||
|<br> | |||
|[[File:PMCS Mossrock Theater colorless spot 1.png|400px]] | |||
|- | |||
|In the first area, on the ground. | |||
|<br> | |||
|[[File:PMCS Mossrock Theater colorless spot 2.png|400px]] | |||
|- | |||
|In the first area, on the ground. | |||
|<br> | |||
|[[File:PMCS Mossrock Theater colorless spot 3.png|400px]] | |||
|- | |||
|In the first area, on a Toad. | |||
|<br> | |||
|[[File:PMCS Mossrock Theater colorless spot 4.png|400px]] | |||
|- | |||
|In the first area, on the ground behind some grass. | |||
|<br> | |||
|[[File:PMCS Mossrock Theater colorless spot 5.png|400px]] | |||
|- | |||
|In the second area, on the ground. | |||
|<br> | |||
|[[File:PMCS Mossrock Theater colorless spot 6.png|400px]] | |||
|- | |||
|In the second area, on the ground. | |||
|<br> | |||
|[[File:PMCS Mossrock Theater colorless spot 7.png|400px]] | |||
|- | |||
|In the second area, on the ground. | |||
|<br> | |||
|[[File:PMCS Mossrock Theater colorless spot 8.png|400px]] | |||
|- | |||
|In the second area, on the ground. | |||
|<br> | |||
|[[File:PMCS Mossrock Theater colorless spot 9.png|400px]] | |||
|- | |||
|In the second area, on the ground. | |||
|<br> | |||
|[[File:PMCS Mossrock Theater colorless spot 10.png|400px]] | |||
|- | |||
|In the second area, on the ground. | |||
|<br> | |||
|[[File:PMCS Mossrock Theater colorless spot 11.png|400px]] | |||
|- | |||
|In the third area, on the ground. | |||
|<br> | |||
|[[File:PMCS Mossrock Theater colorless spot 12.png|400px]] | |||
|- | |||
|In the third area, on the ground. | |||
|<br> | |||
|[[File:PMCS Mossrock Theater colorless spot 13.png|400px]] | |||
|- | |||
|In the third area, on the ground. | |||
|<br> | |||
|[[File:PMCS Mossrock Theater colorless spot 14.png|400px]] | |||
|- | |||
|In the third area, on the ground. | |||
|<br> | |||
|[[File:PMCS Mossrock Theater colorless spot 15.png|400px]] | |||
|- | |||
|In the third area, on the ground. | |||
|<br> | |||
|[[File:PMCS Mossrock Theater colorless spot 16.png|400px]] | |||
|- | |||
|In the third area, on some grass. | |||
|<br> | |||
|[[File:PMCS Mossrock Theater colorless spot 17.png|400px]] | |||
|- | |||
|In the third area, on a Toad. | |||
|<br> | |||
|[[File:PMCS Mossrock Theater colorless spot 18.png|400px]] | |||
|- | |||
|In the fourth area, on the ground. | |||
|<br> | |||
|[[File:PMCS Mossrock Theater colorless spot 19.png|400px]] | |||
|- | |||
|In the fourth area, on a tree. | |||
|<br> | |||
|[[File:PMCS Mossrock Theater colorless spot 20.png|400px]] | |||
|- | |||
|In the fourth area, on the ground. | |||
|<br> | |||
|[[File:PMCS Mossrock Theater colorless spot 21.png|400px]] | |||
|- | |||
|In the fourth area, on the ground. | |||
|<br> | |||
|[[File:PMCS Mossrock Theater colorless spot 22.png|400px]] | |||
|- | |||
|In the fourth area, on the wall. | |||
|<br> | |||
|[[File:PMCS Mossrock Theater colorless spot 23.png|400px]] | |||
|- | |||
|In the fourth area, on the ground. | |||
|<br> | |||
|[[File:PMCS Mossrock Theater colorless spot 24.png|400px]] | |||
|- | |- | ||
|In the area with two Mini Paint Stars, on the ground. | |||
|<br> | |||
|In the | |[[File:PMCS Mossrock Theater colorless spot 25.png|400px]] | ||
|[[File: | |||
|- | |- | ||
|In the area with two Mini Paint Stars, on a Toad. | |||
|<br> | |||
|In the | |[[File:PMCS Mossrock Theater colorless spot 26.png|400px]] | ||
|[[File: | |||
|- | |- | ||
| | |In the fourth area, on the ground. | ||
|<br> | |||
| | |[[File:PMCS Mossrock Theater colorless spot 27.png|400px]] | ||
|[[File: | |||
|- | |- | ||
| | |In the fifth area, on the ground. | ||
| | |<br> | ||
|[[File:PMCS Mossrock Theater colorless spot 28.png|400px]] | |||
|[[File: | |||
|- | |- | ||
| | |In the fifth area, on the ground. | ||
| | |<br> | ||
|[[File:PMCS Mossrock Theater colorless spot 29.png|400px]] | |||
|[[File: | |||
|- | |- | ||
| | |In the fifth area, on the ground. | ||
|<br> | |||
|[[File:PMCS Mossrock Theater colorless spot 30.png|400px]] | |||
|[[File: | |||
|- | |- | ||
| | |In the fifth area, on some grass. | ||
|<br> | |||
|[[File:PMCS Mossrock Theater colorless spot 31.png|400px]] | |||
|[[File: | |||
|- | |- | ||
|In the fifth area, on the ground. | |||
|<br> | |||
|In the | |[[File:PMCS Mossrock Theater colorless spot 32.png|400px]] | ||
| | |||
|[[File: | |||
|- | |- | ||
|In the fifth area, on some grass. | |||
|<br> | |||
|In the | |[[File:PMCS Mossrock Theater colorless spot 33.png|400px]] | ||
|[[File: | |||
|- | |- | ||
| | |In the fifth area, on the poster. | ||
|<br> | |||
| | |[[File:PMCS Mossrock Theater colorless spot 34.png|400px]] | ||
|[[File: | |||
|} | |} | ||
= | =The Emerald Circus= | ||
==Items== | ==Items== | ||
===Field/Given=== | ===Field/Given/Objects=== | ||
{| | {|border=1 cellpadding=0 style="text-align: center; border-collapse: collapse; border: 1px solid black; width:100%" | ||
!Item | ! style="background:lightgreen; height:2em" | Item | ||
!Icon | ! style="background:lightgreen; height:2em" | Icon | ||
!Location | ! style="background:lightgreen; height:2em" | Location | ||
!Image | ! style="background:lightgreen; height:2em" | Location Image | ||
|- | |- | ||
| | | | ||
| | | | ||
| Line 3,500: | Line 4,304: | ||
|} | |} | ||
== | ==Colorless spots== | ||
{| | {|border=1 cellpadding=0 style="text-align: center; border-collapse: collapse; border: 1px solid black; width:100%" | ||
! | ! style="background:lightgreen; height:2em" | Location | ||
! | ! style="background:lightgreen; height:2em" | Drop | ||
!Location | ! style="background:lightgreen; height:2em" | Location Image | ||
|- | |||
|In the first area, on the ground. | |||
|<br> | |||
|[[File:PMCS The Emerald Circus colorless spot 1.png|400px]] | |||
|- | |||
|In the first area, on the wall. | |||
|<br> | |||
|[[File:PMCS The Emerald Circus colorless spot 2.png|400px]] | |||
|- | |||
|In the first area, on the wall. | |||
|<br> | |||
|[[File:PMCS The Emerald Circus colorless spot 3.png|400px]] | |||
|- | |||
|In the first area, on the ground. | |||
|<br> | |||
|[[File:PMCS The Emerald Circus colorless spot 4.png|400px]] | |||
|- | |||
|In the first area, on the ground. | |||
|<br> | |||
|[[File:PMCS The Emerald Circus colorless spot 5.png|400px]] | |||
|- | |||
|In the first area, on a fencepost. | |||
|<br> | |||
|[[File:PMCS The Emerald Circus colorless spot 6.png|400px]] | |||
|- | |- | ||
|In the first area, on a fencepost. | |||
|<br> | |||
|In the first | |[[File:PMCS The Emerald Circus colorless spot 7.png|400px]] | ||
|[[File: | |||
|- | |- | ||
| | |In the first area, on the ground. | ||
| | |<br> | ||
|[[File:PMCS The Emerald Circus colorless spot 8.png|400px]] | |||
|[[File: | |||
|- | |- | ||
|In the first area, on some grass. | |||
|<br> | |||
|In the | |[[File:PMCS The Emerald Circus colorless spot 9.png|400px]] | ||
|[[File: | |||
|- | |- | ||
|In the first area, on a crate. | |||
|<br> | |||
|In the | |[[File:PMCS The Emerald Circus colorless spot 10.png|400px]] | ||
|[[File: | |||
|- | |- | ||
|In the first area, on the ground. | |||
|<br> | |||
|In the first | |[[File:PMCS The Emerald Circus colorless spot 11.png|400px]] | ||
|[[File: | |||
|- | |- | ||
|In the first area, on the wall. | |||
|<br> | |||
|In the | |[[File:PMCS The Emerald Circus colorless spot 12.png|400px]] | ||
|[[File: | |||
|} | |} | ||
=Bowser's | =Black Bowser's Castle= | ||
== | ==Items== | ||
{| | ===Field/Given/Objects=== | ||
!Item | {|border=1 cellpadding=0 style="text-align: center; border-collapse: collapse; border: 1px solid black; width:100%" | ||
!Icon | ! style="background:black; color:white; height:2em" | Item | ||
!Location | ! style="background:black; color:white; height:2em" | Icon | ||
!Image | ! style="background:black; color:white; height:2em" | Location | ||
! style="background:black; color:white; height:2em" | Location Image | |||
|- | |- | ||
| | | | ||
| | | | ||
| | | | ||
|} | |} | ||
=Roshambo Temples= | |||
==1== | |||
<gallery> | |||
</gallery> | |||
==2== | |||
<gallery> | |||
</gallery> | |||
==3== | |||
<gallery> | |||
</gallery> | |||
==4== | |||
<gallery> | |||
</gallery> | |||
==5== | |||
<gallery> | |||
</gallery> | |||
==6== | |||
<gallery> | |||
</gallery> | |||
==7== | |||
<gallery> | |||
</gallery> | |||
==8== | |||
<gallery> | |||
</gallery> | |||
Latest revision as of 13:30, April 24, 2025
Port Prisma
Items
Field/Given/Objects
| Item | Icon | Location | Location Image |
|---|---|---|---|
Colorless spots
| Location | Drop | Location Image |
|---|---|---|
| In the yellow district, Toad has his colors drained and must be repainted. | 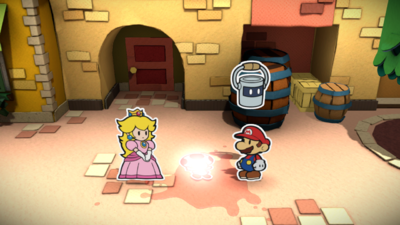
| |
| In the yellow district, the Prisma Cardware shopkeeper Toad has had his colors drained. | 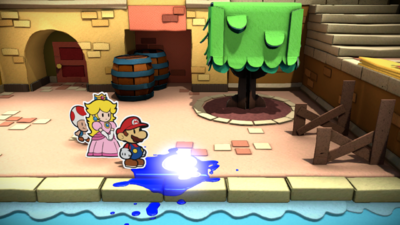
| |
| In the fountain district, on the leftmost post. | 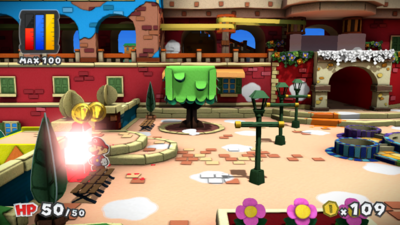
| |
| In the fountain district, east of the lower leftmost potted plant. | 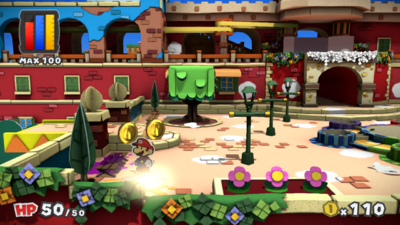
| |
| In the fountain district, west of the leftmost flag. | 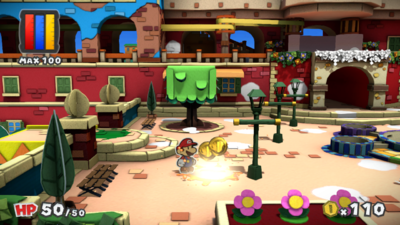
| |
| In the fountain district, on the first step leading to the Red District. | 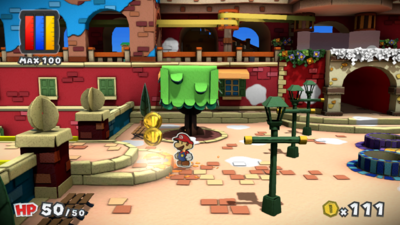
| |
| In the fountain district, south of the upper leftmost bench. | 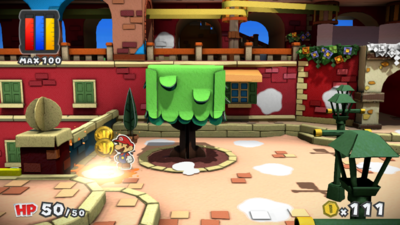
| |
| In the fountain district, east of the upper leftmost potted plant. | 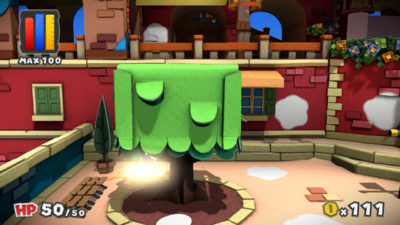
| |
| In the fountain district, east of the steps leading to the Red District. | 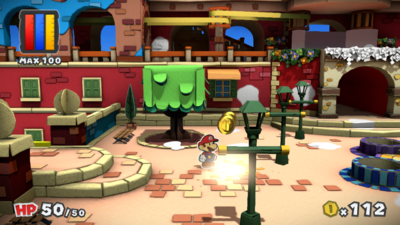
| |
| In the fountain district, northeast of the left flower bed. | 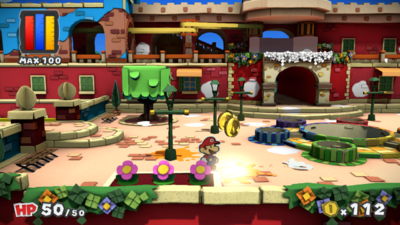
| |
| In the fountain district, south of the left window. | 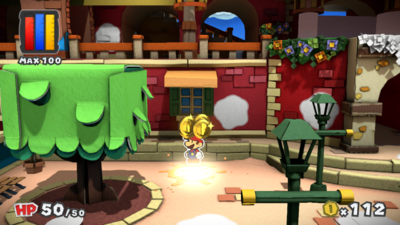
| |
| In the fountain district, east of the left window. | 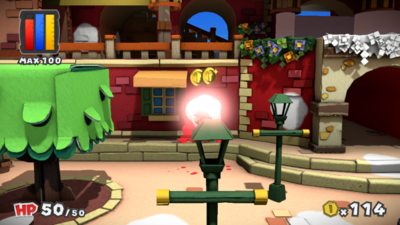
| |
| In the fountain district, further south of the left window. | 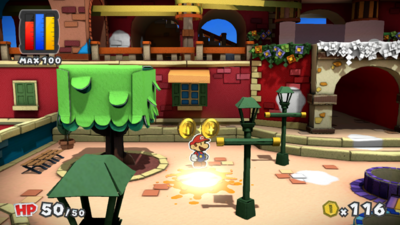
| |
| In the fountain district, south of the blue Big Paint Star's spot. | 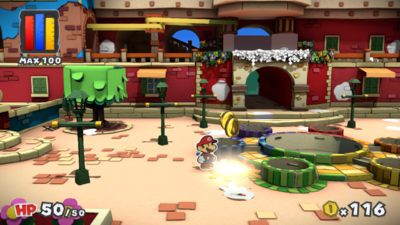
| |
| In the fountain district, north of the blue Big Paint Star's spot. | 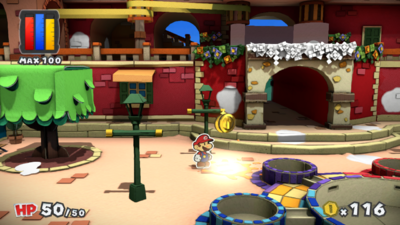
| |
| In the fountain district, on the wall near the left arch. | 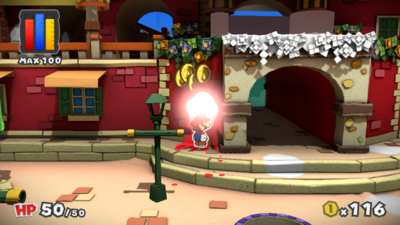
| |
| In the fountain district, on the steps leading to the exit. | 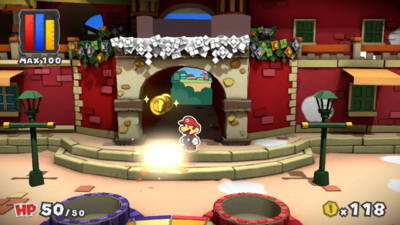
| |
| In the fountain district, south of the right arch. | 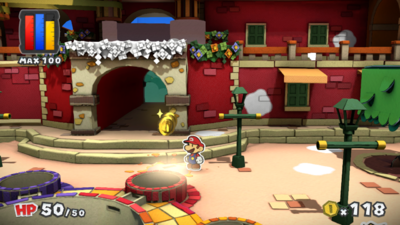
| |
| In the fountain district, on the floor east of the right arch. | 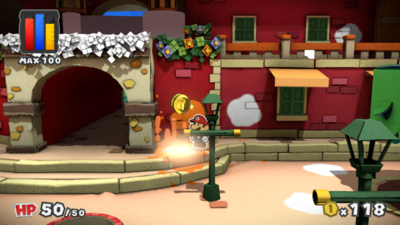
| |
| In the fountain district, west of the right window. | 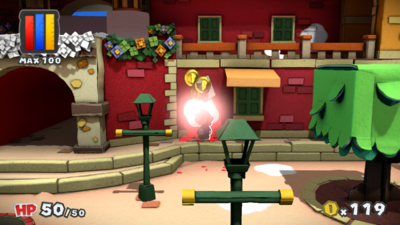
| |
| In the fountain district, between the yellow and orange Big Paint Stars' spots. | 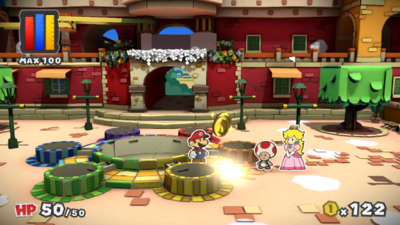
| |
| In the fountain district, east of the entrance. | 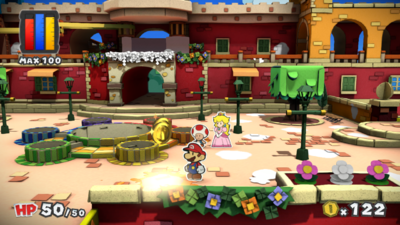
| |
| In the fountain district, east of the yellow Big Paint Star's spot. | 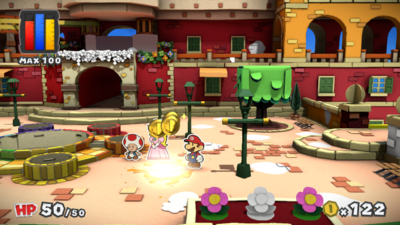
| |
| In the fountain district, east of the orange Big Paint Star's spot. | 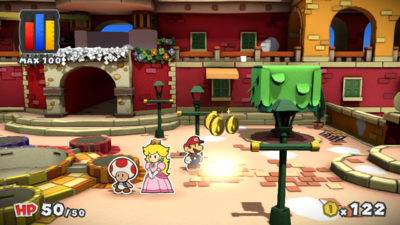
| |
| In the fountain district, east of the northeast flagpole. | 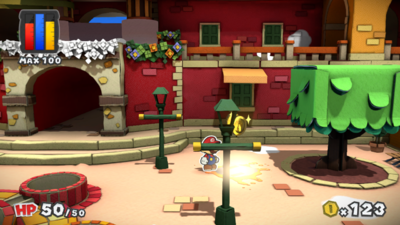
| |
| In the fountain district, south of the eastmost window. | 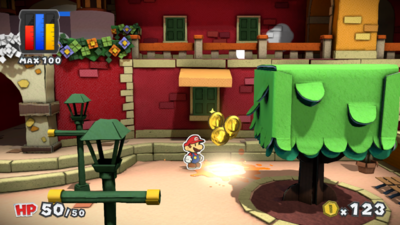
| |
| In the fountain district, the middle flower on the east flower bed. | 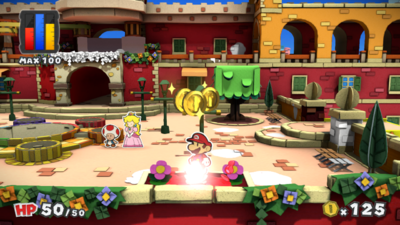
| |
| In the fountain district, east of the eastmost flagpole. | 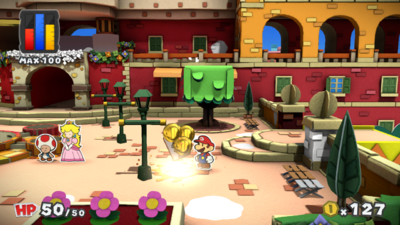
| |
| In the fountain district, east of the second-eastmost flagpole. | 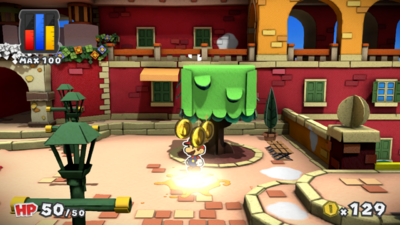
| |
| In the fountain district, east of the east flower bed. | 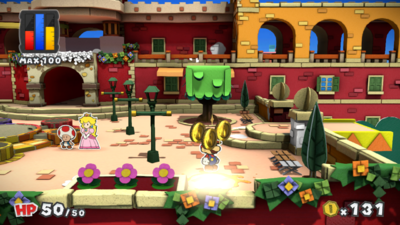
| |
| In the fountain district, on the first step leading to the yellow district. | 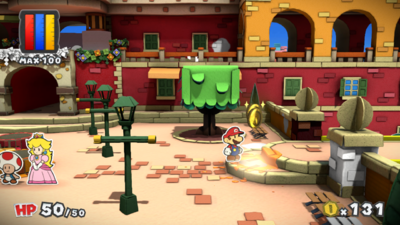
| |
| In the fountain district, north of the steps leading to the yellow district. | 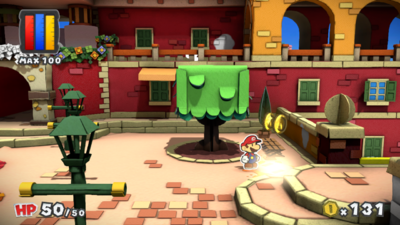
| |
| In the fountain district, on the southeast bench. | 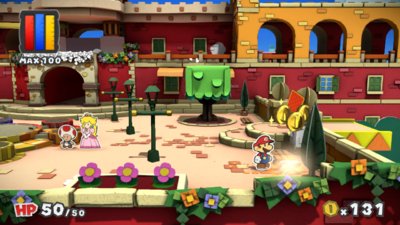
| |
| In the fountain district, on one of the posts next to the steps leading to the yellow district. | 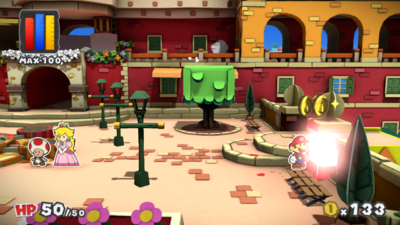
| |
| In the fountain district, on the eastmost wall. | 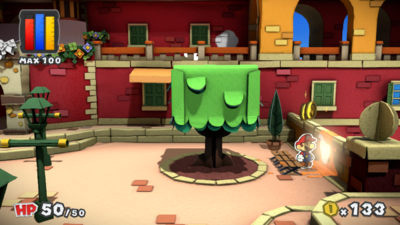
| |
| In the fountain district, on the Toad under the west tree. | 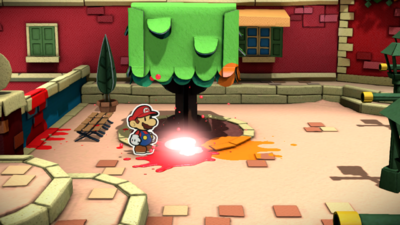
| |
| In the fountain district, on the Toadmaster General, who is near the fountain. | 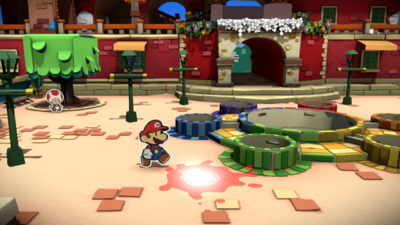
| |
| In the fountain district, on the Toad near the east flower bed. | 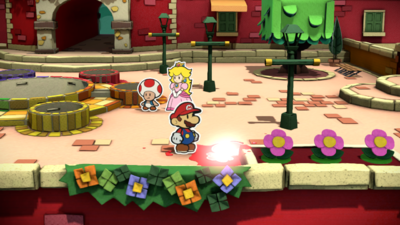
| |
| In the harbor district, on the sign east of the trash can. | 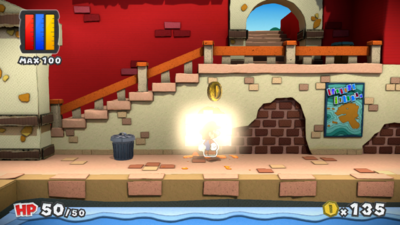
| |
| In the blue district, on the green gate. | 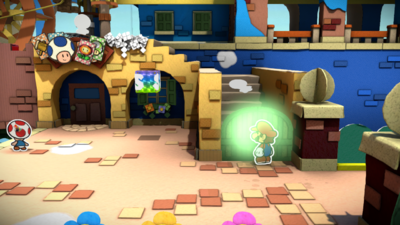
| |
| In the blue district, on one of the flowers. | 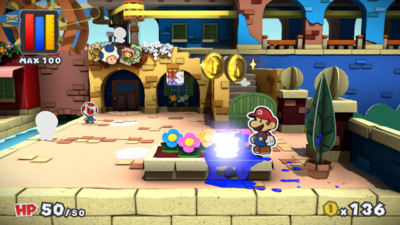
| |
| In the blue district, west of the flower bed. | 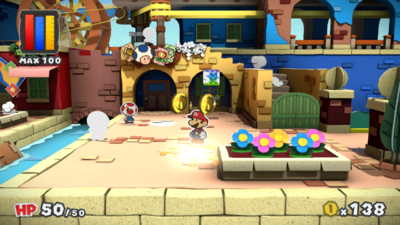
| |
| In the blue district, south of Prisma Cardware. | 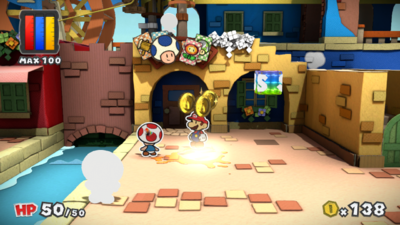
| |
| In the blue district, on the Toad standing near the bridge. | 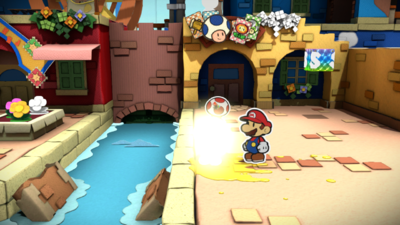
| |
| In Prisma Cardware, the Toad at the west end of the shop. | 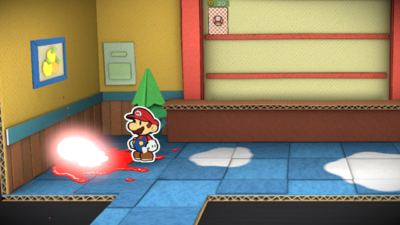
| |
| In Prisma Cardware, north of the entrance. | 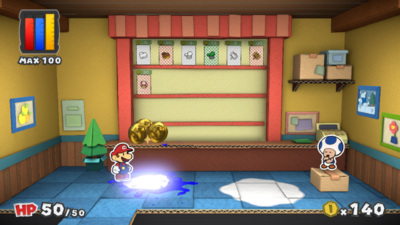
| |
| In Prisma Cardware, west of the shopkeeper Toad. | 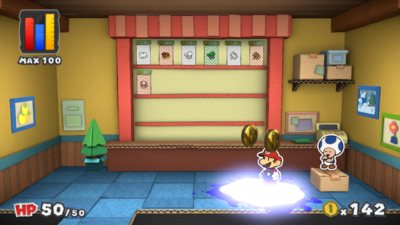
| |
| In the blue district, a Toad on the stairs. | 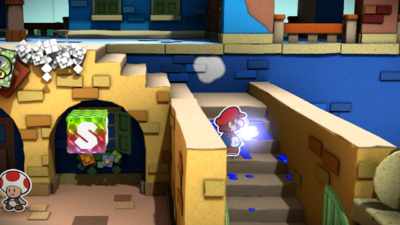
| |
| In the blue district, on a wall north of the gate. | 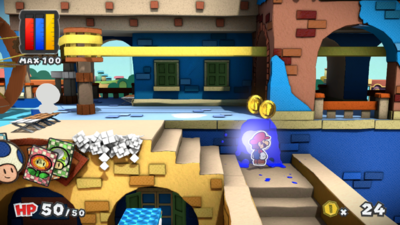
| |
| In the blue district, on the ground beneath two windows. | 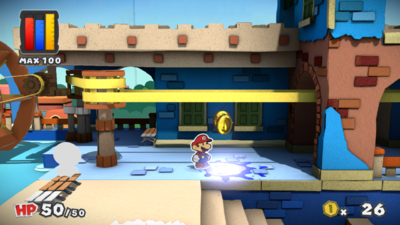
| |
| In the blue district, the plants next to the Prisma Cardware sign. | 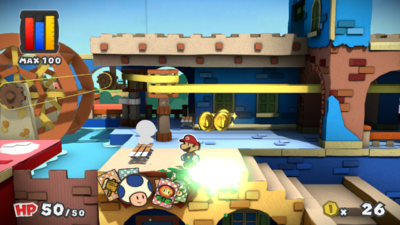
| |
| In the blue district, on the south part of a bench. | 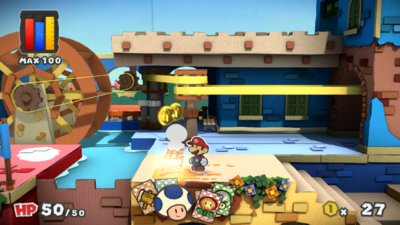
| |
| In the blue district, a Toad sitting on the bench. | 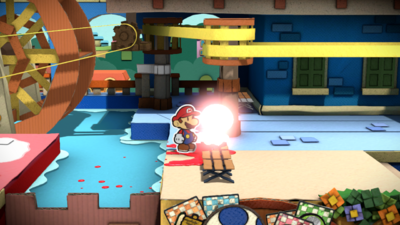
| |
| In the blue district, on the south part of a bench. | 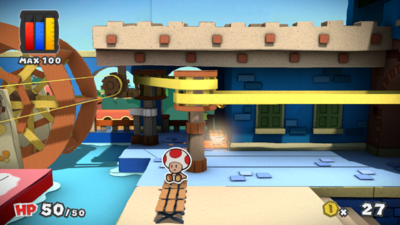
| |
| In the blue district, on the waterwheel structure. | 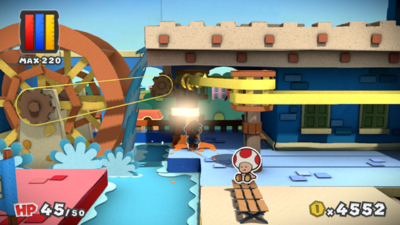
| |
| In the fountain district, on the wall to the west. | 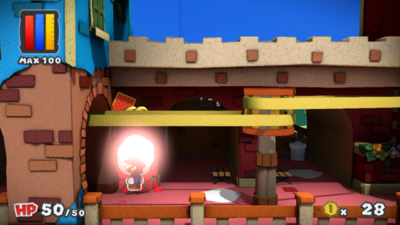
| |
| In the fountain district, south of a bench. | 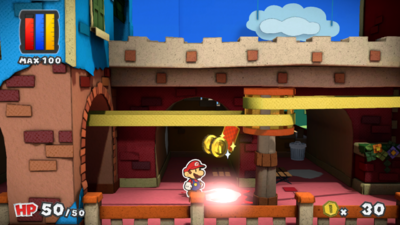
| |
| In the fountain district, on the wall in the westmost alcove. | 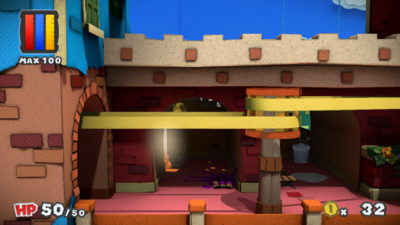
| |
| In the fountain district, on the floor in the alcove with the trash can. | 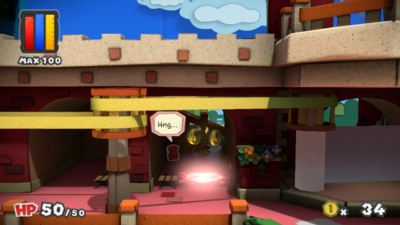
| |
| In the fountain district, on the floor near the toilet paper. | 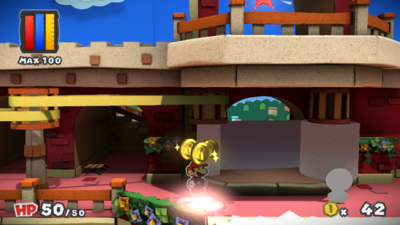
| |
| In the fountain district, on the overhang of plants. | 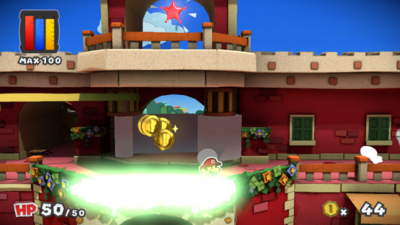
| |
| In the fountain district, a Toad near the toilet paper. | 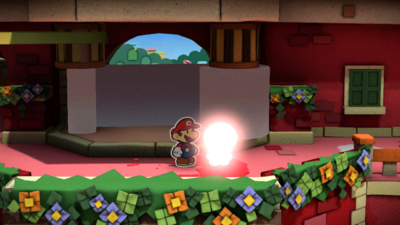
| |
| In the fountain district, on the ground east of the toilet paper. | 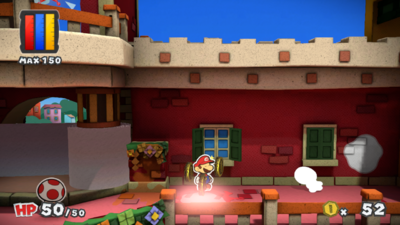
| |
| In the fountain district, a Toad at the east end. | 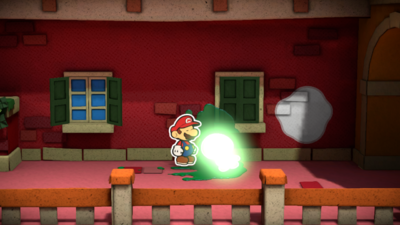
| |
| In the fountain district, on the wall to the east. | 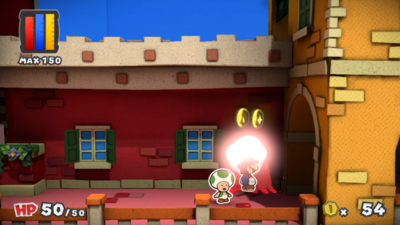
| |
| In the yellow district, a Toad that is initially being held by a Shy Guy. | 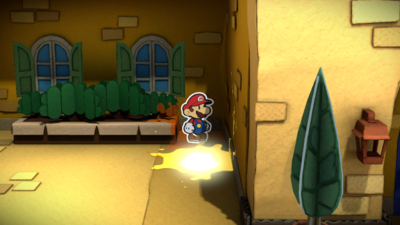
| |
| In the yellow district, on the roof of Peach's and Toad's guest quarters. | 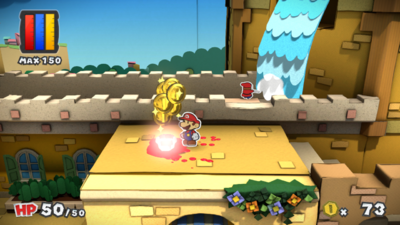
| |
| In the yellow district, on the waterfall. | 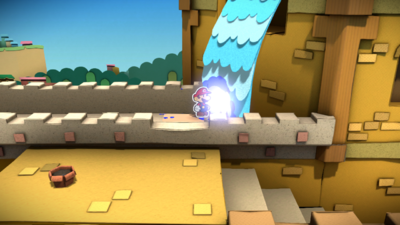
| |
| In the yellow district, on the west wall in the area leading to the Mini Paint Star. | 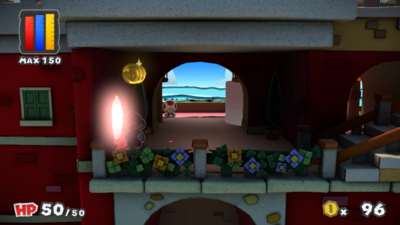
| |
| In the blue district, on the ground shortly after the bridge. | 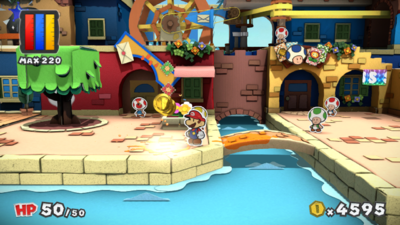
| |
| In the blue district, on a flower after the bridge. | 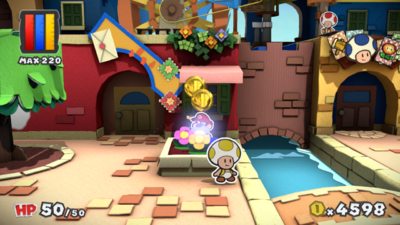
| |
| In the blue district, on the wall of Prisma Postal Toad. | 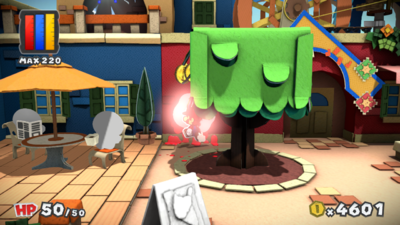
| |
| In the blue district, on the sign outside the cafe. | 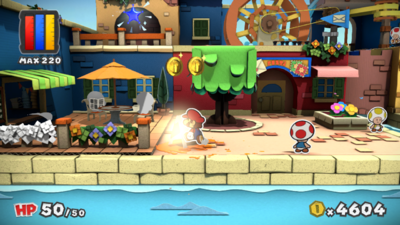
| |
| In the blue district, on the westmost overhang. | 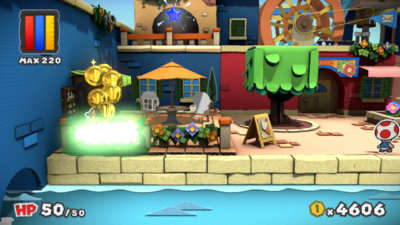
| |
| In the blue district, on the Toad to the right of the Toad with the newspaper. | 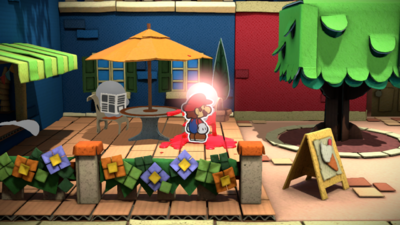
| |
| In the blue district, on the Toad with the newspaper. | 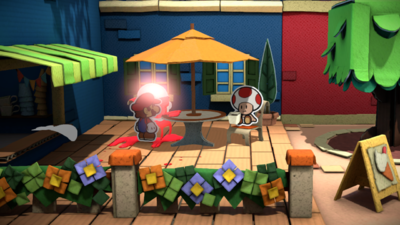
| |
| In the blue district, on the Toad in the cafe. | 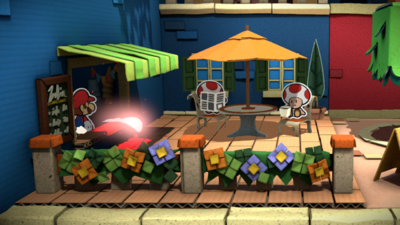
| |
| In the blue district, on the roof of Prisma Postal Toad. | 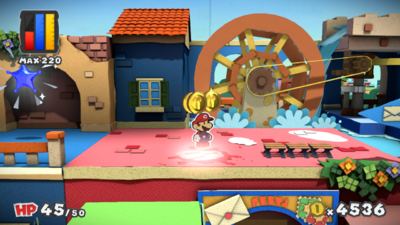
| |
| In the blue district, on the roof of Prisma Postal Toad. | 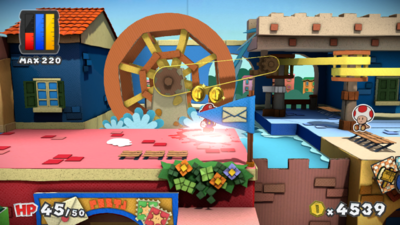
| |
| In the blue district, on a Toad on the roof of Prisma Postal Toad. | 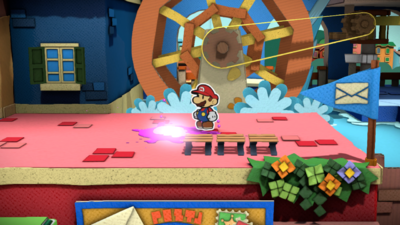
|
Ruddy Road
Items
Field/Given/Objects
| Item | Icon | Location | Location Image |
|---|---|---|---|
Colorless Spots
| Location | Drop | Location Image |
|---|---|---|
| In the first area, on the ground. | 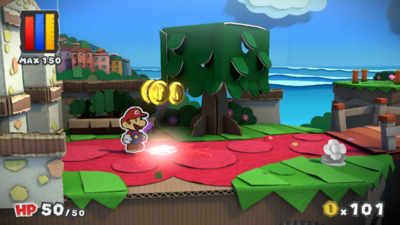
| |
| In the first area, on the second flower. | 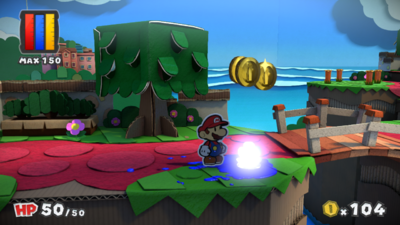
| |
| In the first area, on the first flower after the bridge. | 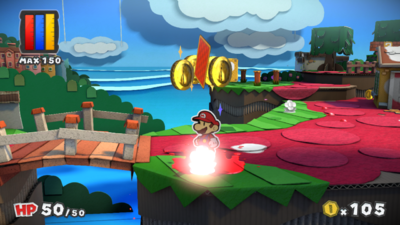
| |
| In the first area, on the ground east of the bridge. | 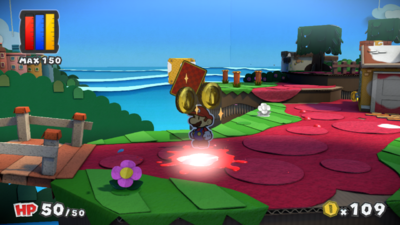
| |
| In the first area, on the flower west of the house. | 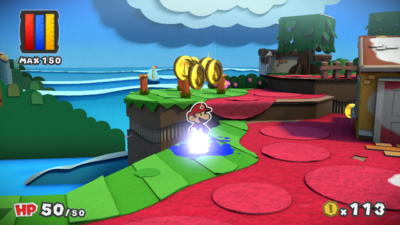
| |
| In the first area, on the ground southwest of the house. | 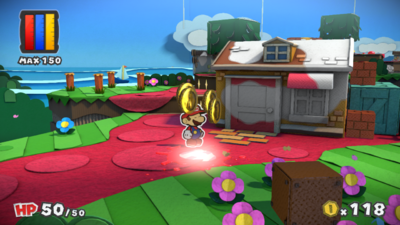
| |
| In the first area, on the house. | 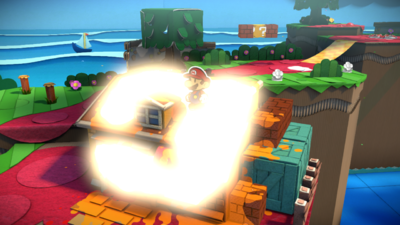
| |
| In the first area, on the wall. | 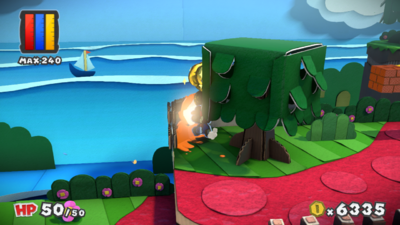
| |
| In the first area, on a flower south of a ? Block. | 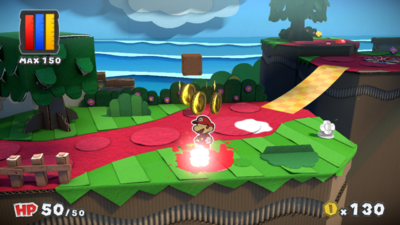
| |
| In the first area, on the ground southeast of a ? Block. | 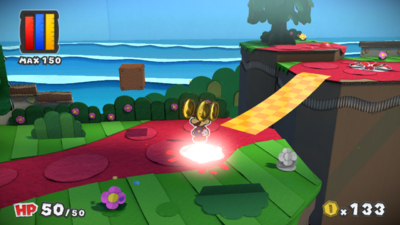
| |
| In the first area, on the flower before the bridge. | 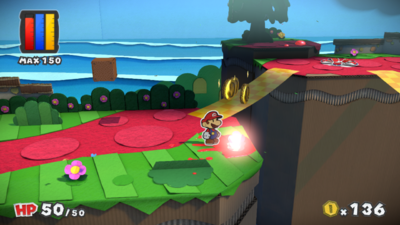
| |
| In the first area, on the ground. Five Slurp Guys can be seen sucking the color out of this spot. | 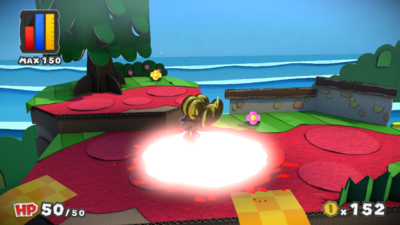
| |
| In the first area, on the ground. A Slurp Guy is sucking the color out of this spot. | 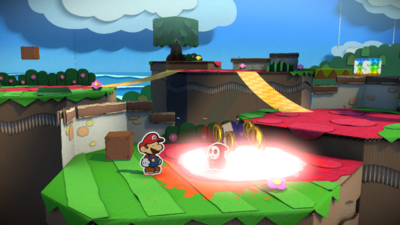
| |
| In the area with the blue Mini Paint Star, in the second circle on the ground. | 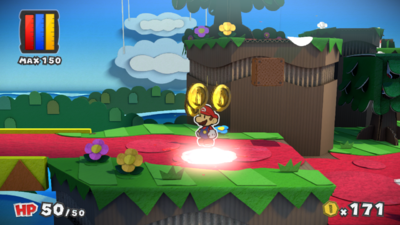
| |
| In the area with the blue Mini Paint Star, on the ground. | 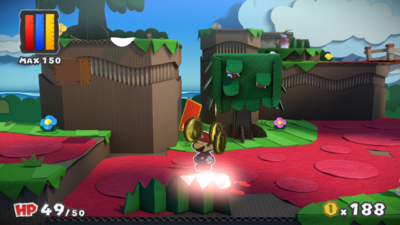
| |
| In the area with the blue Mini Paint Star, on the fifth flower. | 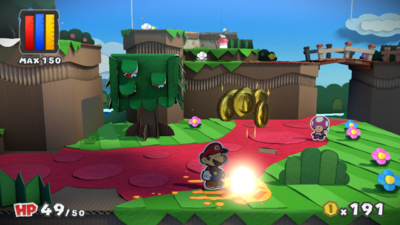
| |
| In the area with the blue Mini Paint Star, on the eastmost flower on the lower area. | 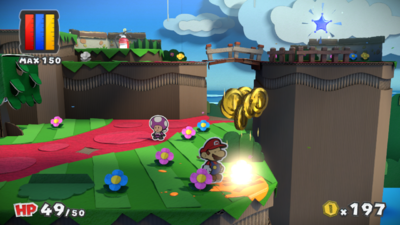
| |
| In the second area, on the ground near the sign. | 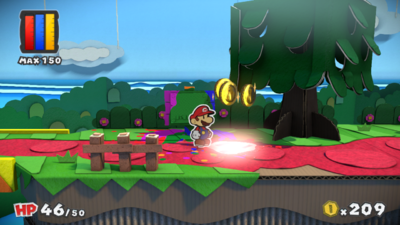
| |
| In the second area, on the first flower. | 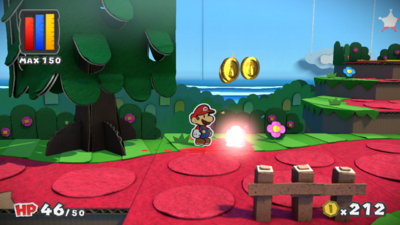
| |
| In the second area, on a flower. | 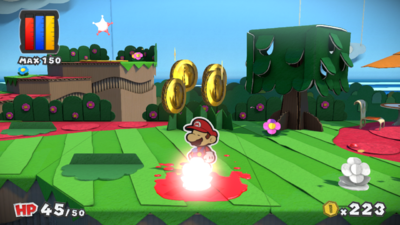
| |
| In the second area, on a flower. | 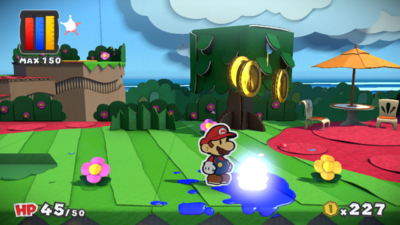
| |
| In the second area, on the ground after the café. | 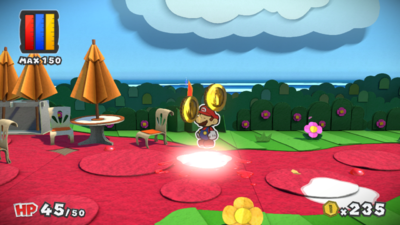
| |
| In the second area, on the ground. | 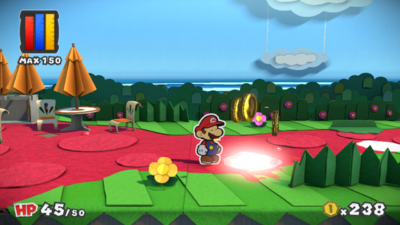
| |
| In the second area, on the ground. | 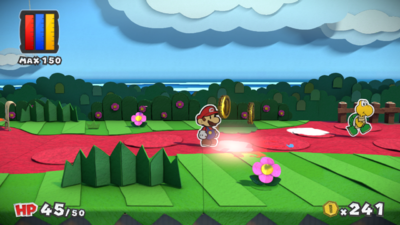
| |
| In the second area, on the ground. | 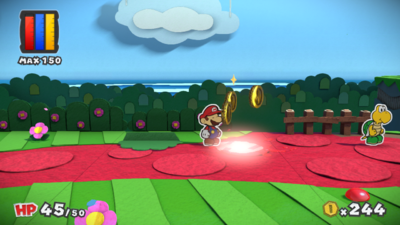
| |
| In the second area, on the ground behind a bush. | 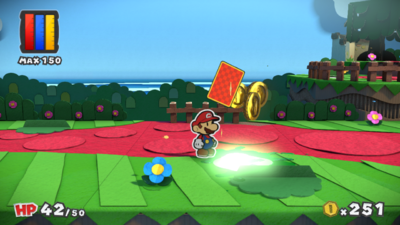
| |
| In the second area, on the ground. | 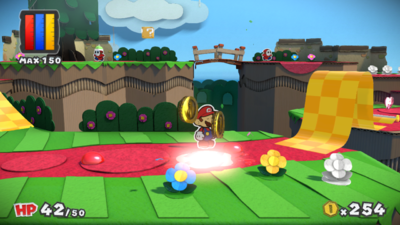
| |
| In the second area, on a flower near the rolled-up platform. | 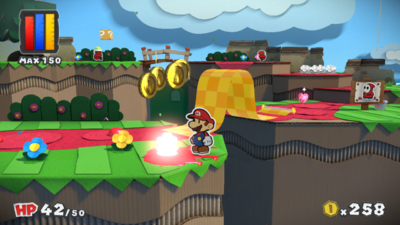
| |
| In the second area, on the ground on a raised platform. | 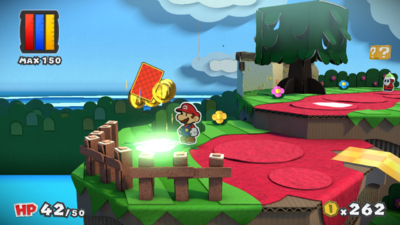
| |
| In the second area, on the ground south of a tree. | 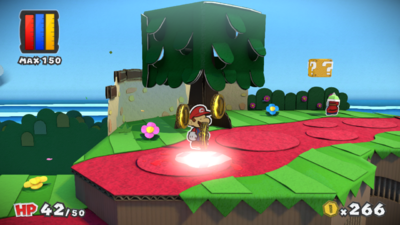
| |
| In the second area, on a flower in a six-flower circle. | 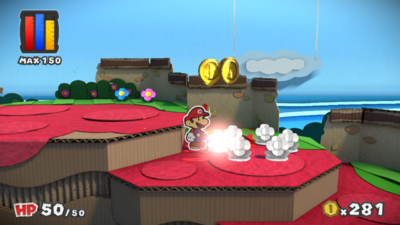
| |
| In the second area, on a flower in a six-flower circle. | 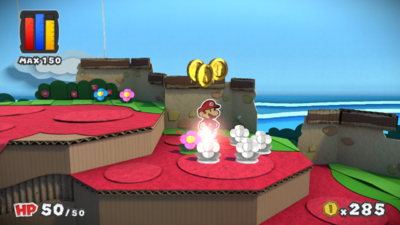
| |
| In the second area, on a flower in a six-flower circle. | 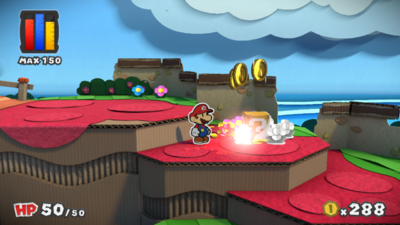
| |
| In the second area, on a flower in a six-flower circle. | 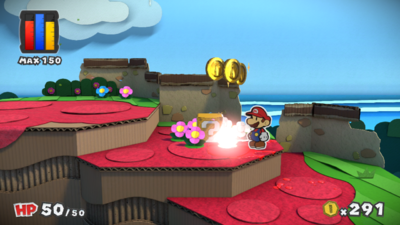
| |
| In the second area, on a flower in a six-flower circle. | 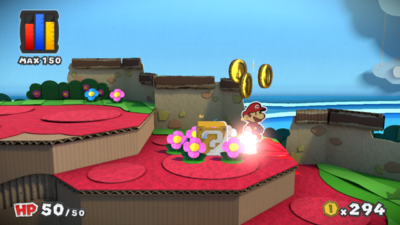
| |
| In the second area, on a flower in a six-flower circle. | 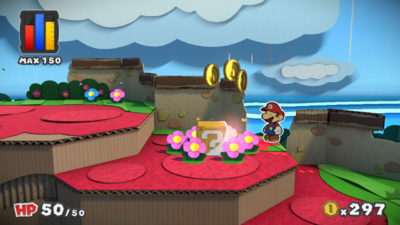
| |
| In the second area, on an invisible ? Block surrounded by flowers. | 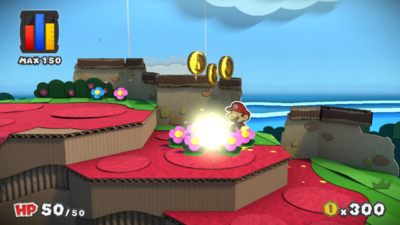
| |
| In the area with the blue Mini Paint Star, on a Toad who can be reached by jumping from a tree. | 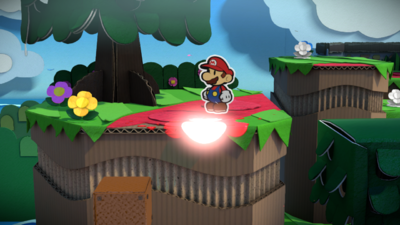
| |
| In the area with the blue Mini Paint Star, on a flower. | 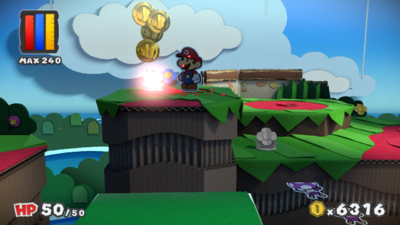
| |
| In the area with the blue Mini Paint Star, on a flower. | 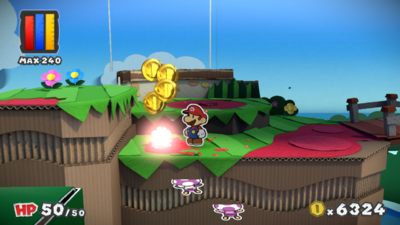
|
Cherry Lake
Items
Field/Given/Objects
| Item | Icon | Location | Location Image |
|---|---|---|---|
Colorless spots
Redpepper Volcano
Items
Field/Given/Objects
| Item | Icon | Location | Location Image |
|---|---|---|---|
Colorless spots
Redpepper Crater
Items
Field/Given/Objects
| Item | Icon | Location | Location Image |
|---|---|---|---|
Colorless spots
The Crimson Tower
Items
Field/Given/Objects
| Item | Icon | Location | Location Image |
|---|---|---|---|
Colorless spots
Daffodil Peak
Items
Field/Given/Objects
| Item | Icon | Location | Location Image |
|---|---|---|---|
Colorless spots
| Location | Drop | Location Image |
|---|---|---|
| In the first area, on the ground. | 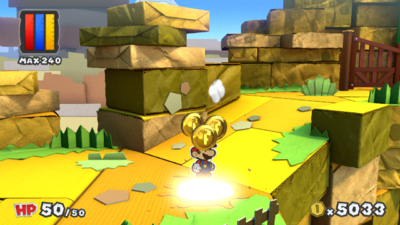
| |
| In the first area, on the wall. | 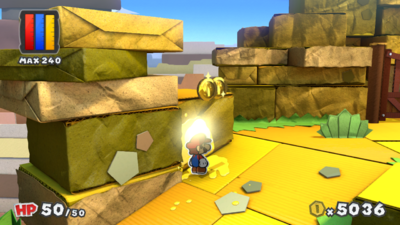
| |
| In the first area, on the wall past the gate. | 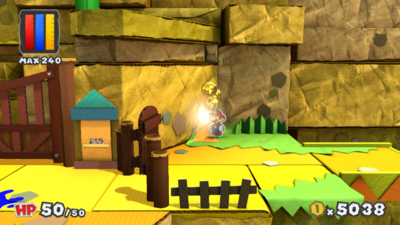
| |
| In the cabin, under the rug. Mario must hammer the rug to flip it over first. | 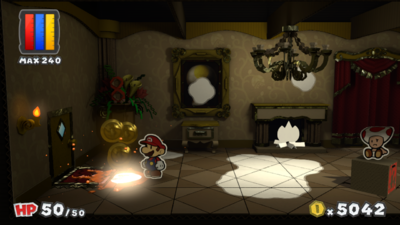
| |
| In the cabin, between the dresser and the potted plant. | 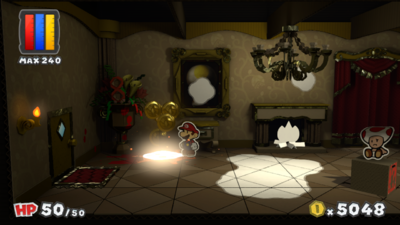
| |
| In the cabin, on the painting. | 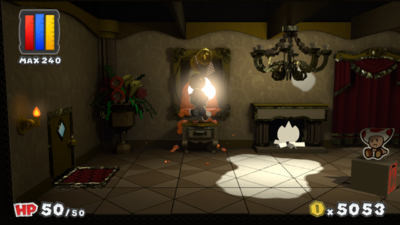
| |
| In the cabin, on the ground. | 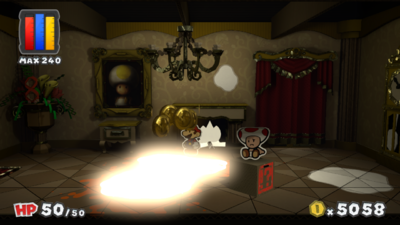
| |
| In the cabin, on the fire in the fireplace. | 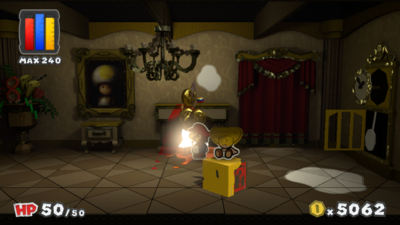
| |
| In the cabin, on the wall above the fireplace. | 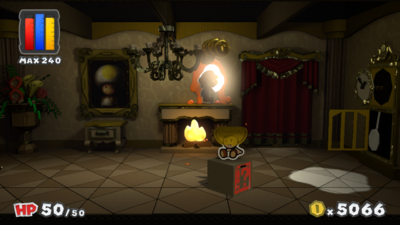
| |
| In the cabin, on the ground. | 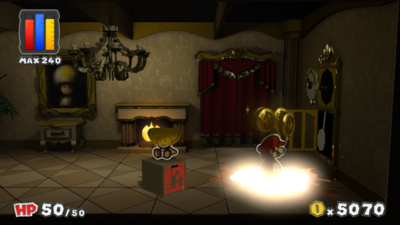
| |
| In the cabin, on the clock. | 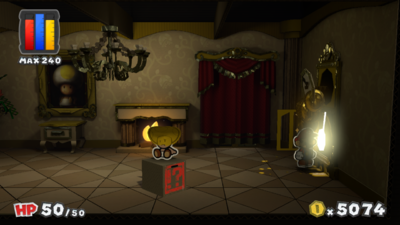
| |
| In the cabin, past the window. | 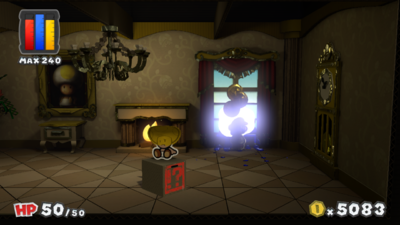
| |
| In the cabin, on the chair. | 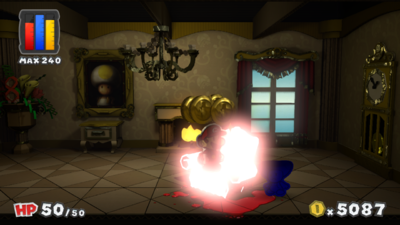
| |
| In the second area, under the first ? Block. | 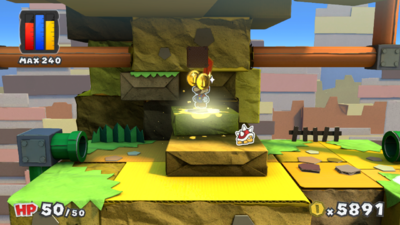
| |
| In the second area, south of the pipe entrance. | 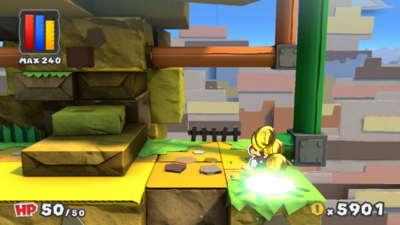
| |
| In the second area, south of the exit to the first pipe. | 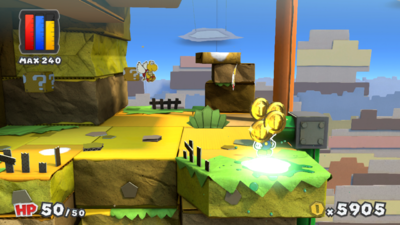
| |
| In the second area, on the ground behind a bush. | 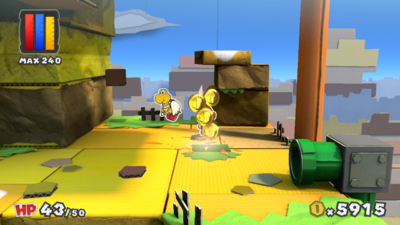
| |
| In the second area, on the ground. | 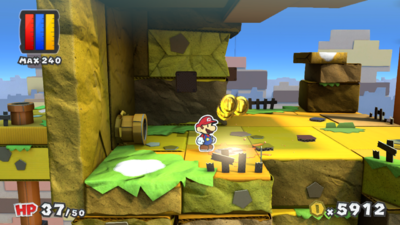
| |
| In the second area, on the ground south of the yellow pipe. | 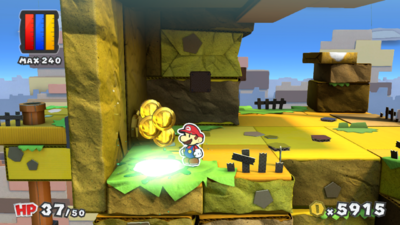
| |
| In the second area, on the ground. | 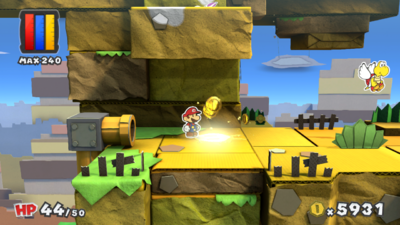
| |
| In the second area, on the ground, hidden from view until Mario steps onto a lower platform. | 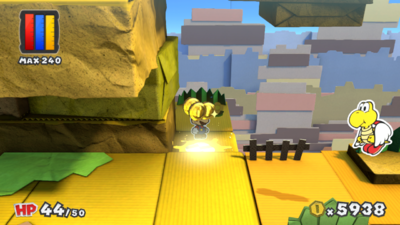
| |
| In the second area, on a flower. | 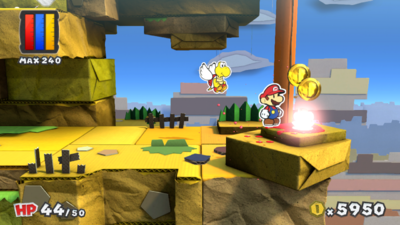
| |
| In the second area, on top of a rock formation. This spot can be reached by jumping down from the area directly above it. | 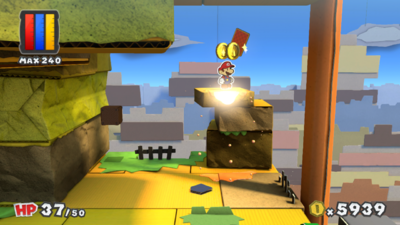
| |
| In the second area, on a Toad. This Toad can be found by going behind the mountain and dropping behind it. | 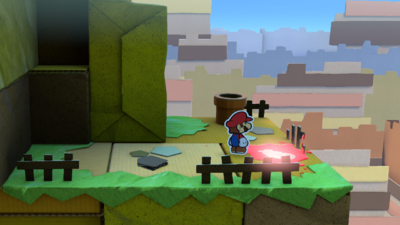
| |
| In the second area, on the wall of the area with the Rescue Squad Toad. | 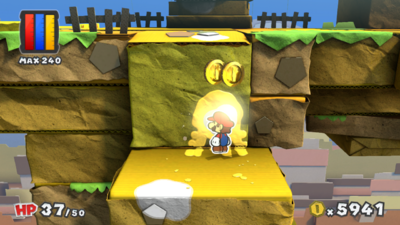
| |
| In the second area, on the ground and wall of the area with the Rescue Squad Toad. | 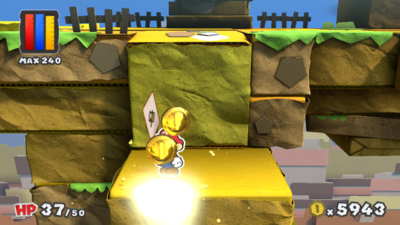
| |
| In the second area, on the ground. | 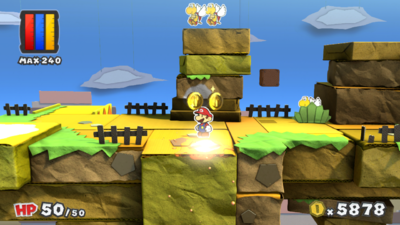
| |
| In the second area, on the wall. | 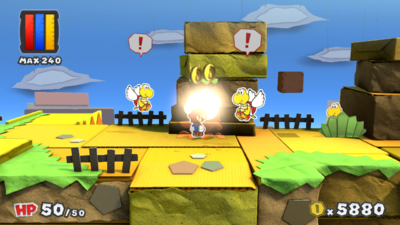
| |
| In the second area, on the ground. | 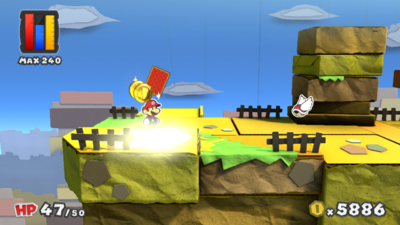
| |
| In the third area, on the ground. | 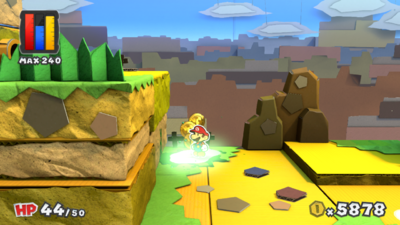
| |
| In the third area, on the ground. | 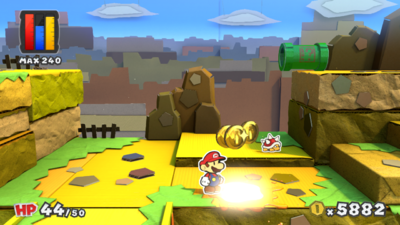
| |
| In the third area, on the ground. | 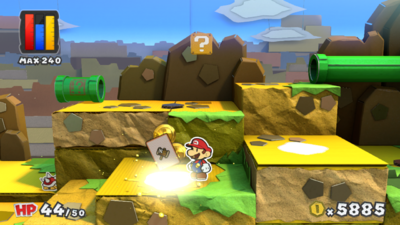
| |
| In the third area, on the ground. | 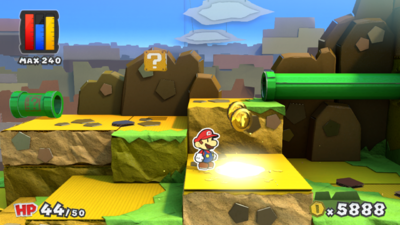
| |
| In the third area, on the ground to the left of the first pipe's exit. | 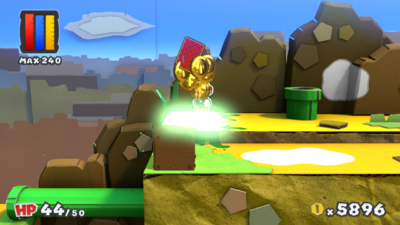
| |
| In the third area, on the ground east of an ? Block. | 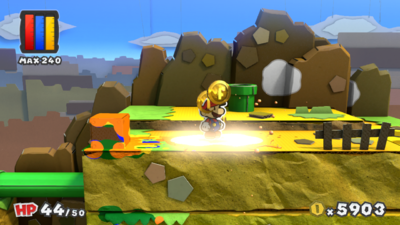
| |
| In the third area, on the wall. | 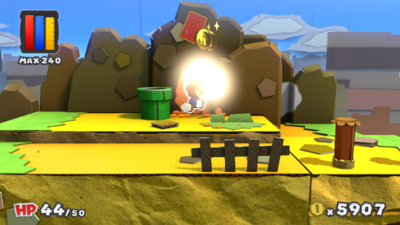
| |
| In the third area, on the wall. | 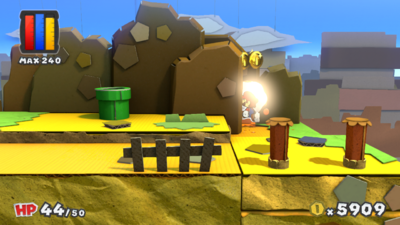
| |
| In the third area, on the ground after the unfurled pipe. | 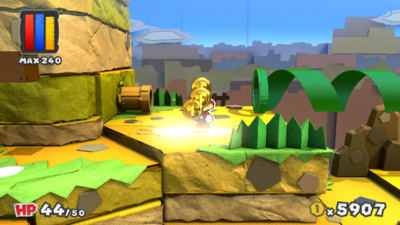
| |
| In the third area, on the ground. | 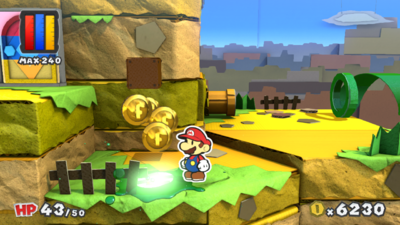
| |
| In the third area, near the Spinning-Door. | 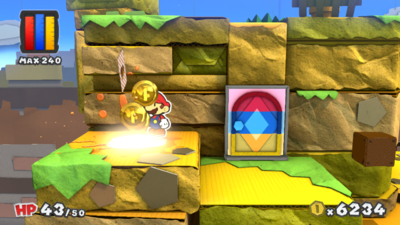
| |
| In the fourth area, near the rightmost pipe. | 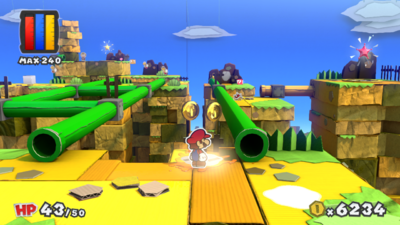
| |
| In the fourth area, near the rightmost pipe. | 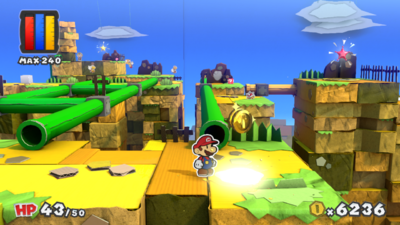
| |
| In the fourth area, on the wall of the area with the Unfurl Block. | 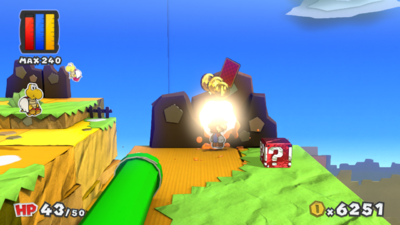
| |
| In the fourth area, on the ground accessible from entering an orange pipe. | 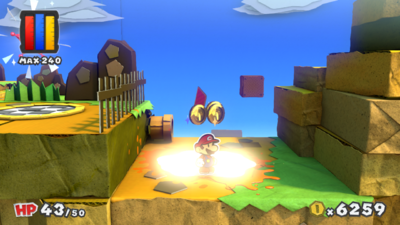
| |
| In the fourth area, on the ground neat the leftmost pipe. | 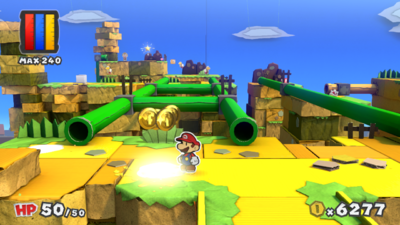
| |
| In the fourth area, on the ground near the leftmost pipe. | 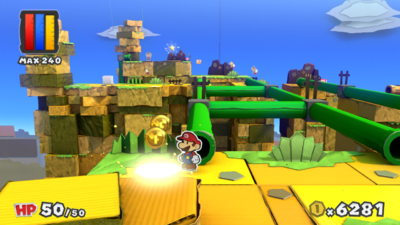
| |
| In the fourth area, on the ground after entering the leftmost pipe. | 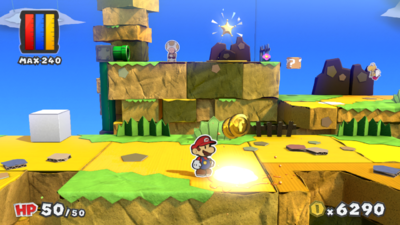
| |
| In the fourth area, on the ground after entering the leftmost pipe. | 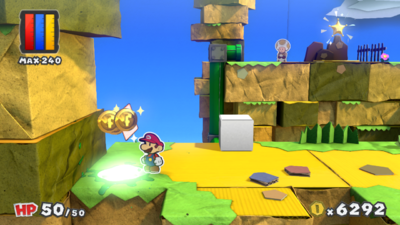
| |
| In the fourth area, on an Unfurl Block. | 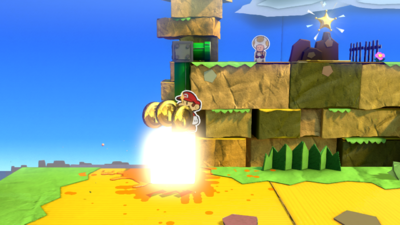
| |
| In the fourth area, on the ground after entering the middle pipe. | 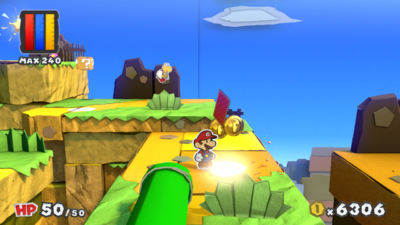
| |
| In the fourth area, on the ground after entering the middle pipe. | 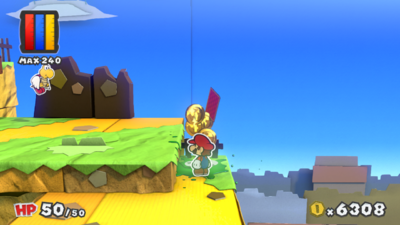
| |
| In the fourth area, on the ground after entering the middle pipe. | 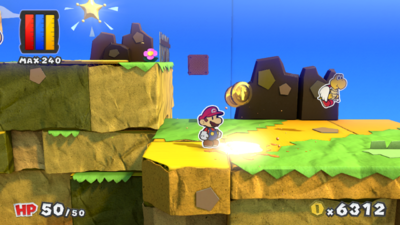
| |
| In the first area, on the Mountain Sage's head. | 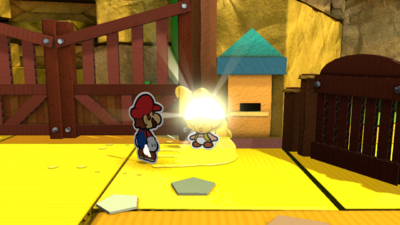
|
Sunglow Ridge
Items
Field/Given/Objects
| Item | Icon | Location | Location Image |
|---|---|---|---|
Colorless spots
| Location | Drop | Location Image |
|---|---|---|
| In the first area, on the gate. This spot is repainted after collecting the red Big Paint Star. | 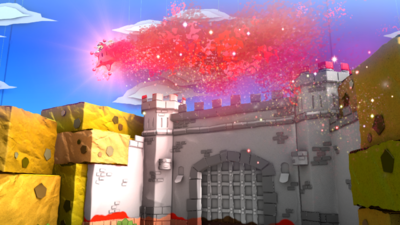
| |
| In the second area, on a block. | 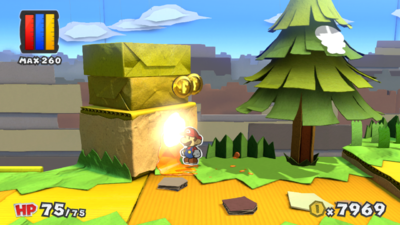
| |
| In the second area, on the wall after jumping down from the ledge. | 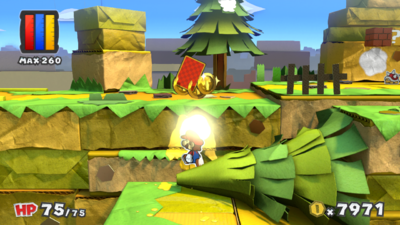
| |
| In the second area, on the wall. | 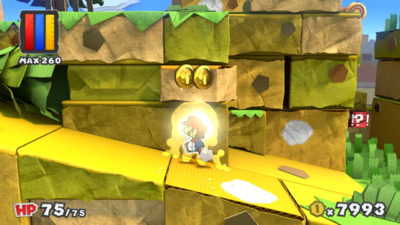
| |
| In the second area, on the sloped ground. | 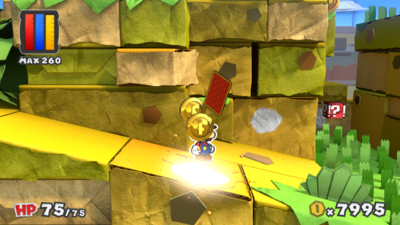
| |
| In the second area, on the wall. | 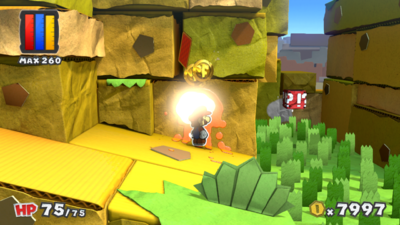
| |
| In the second area, on the wall north of the Unfurl Block. | 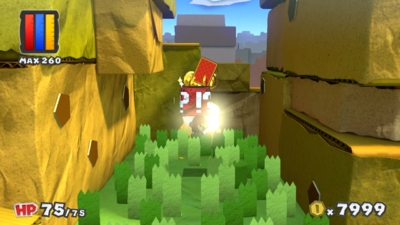
| |
| In the second area, on a Toad. Mario must hammer a tree to get the Toad down first. | 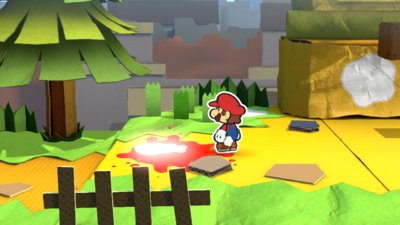
| |
| In the second area, on the ground. | 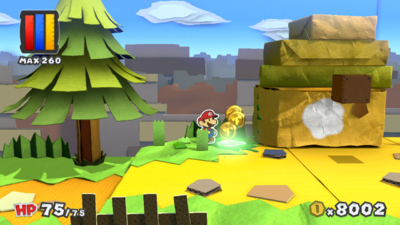
| |
| In the second area, on the wall. | 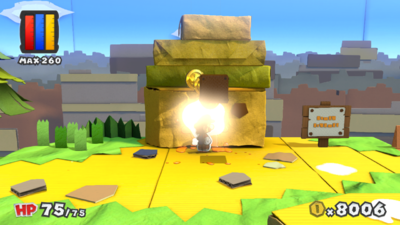
| |
| In the second area, on the ground south of the sign. | 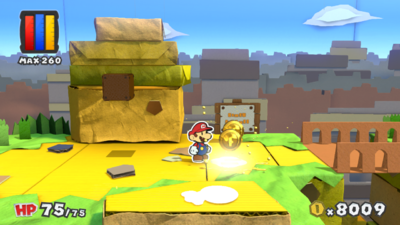
| |
| In the second area, on a Toad south of the sign. | 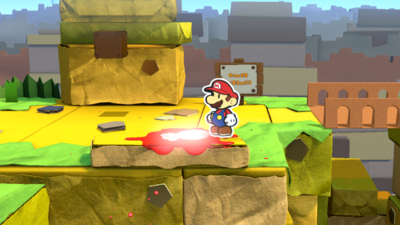
| |
| In the second area, on a flower after the bridge. | 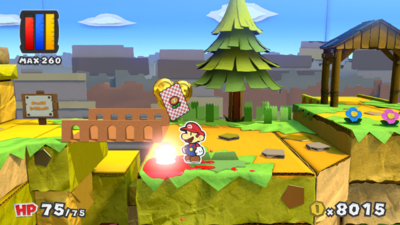
| |
| In the third area, on the sign. | 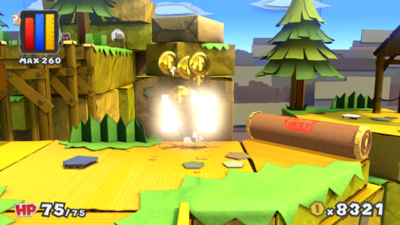
| |
| In the third area, on the ground. | 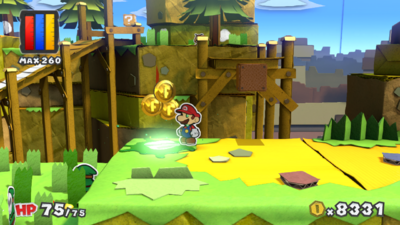
| |
| In the third area, on the bridge. | 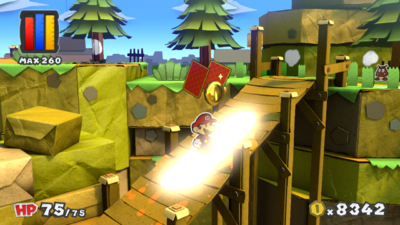
| |
| In the third area, on the ground. | 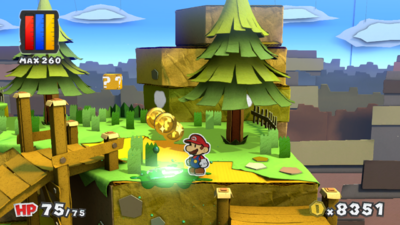
| |
| In the third area, on the wall behind a tree. | 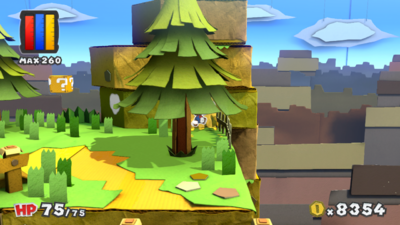
| |
| In the third area, on the wall. | 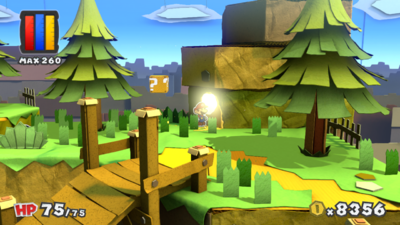
| |
| In the third area, on a tree. | 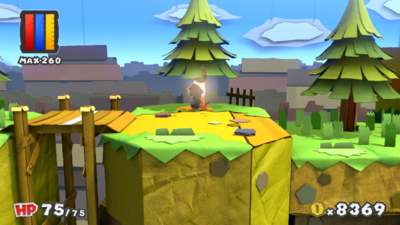
| |
| In the third area, on a wooden plank on a bridge. | 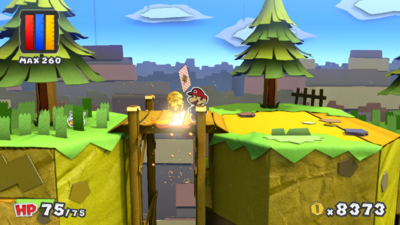
| |
| In the fourth area, on the ground behind some grass. | 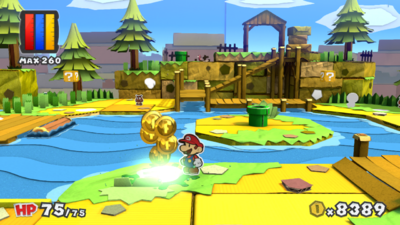
| |
| In the fourth area, on the ground. | 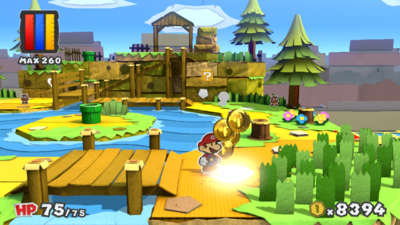
| |
| In the fourth area, on the ground. | 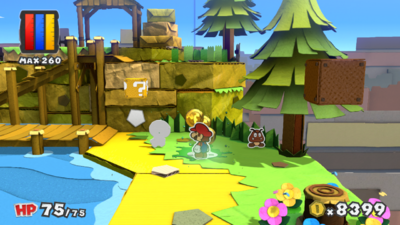
| |
| In the fourth area, on a Toad. | 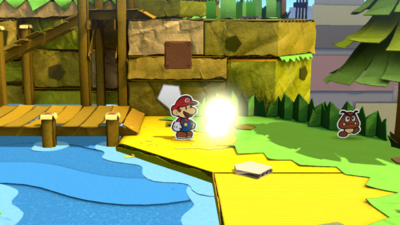
| |
| In the fourth area, on the wall. | 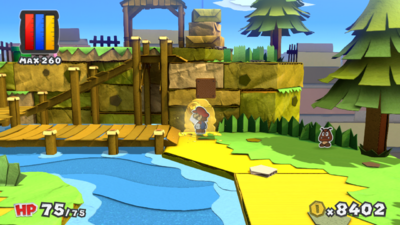
| |
| In the fourth area, on the wall. | 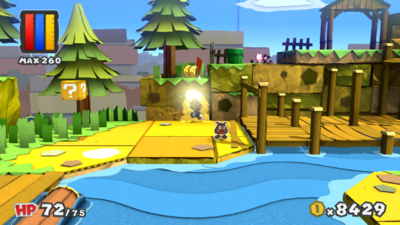
| |
| In the fourth area, on the ground. | 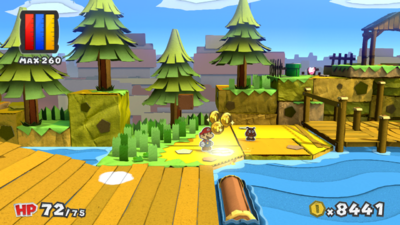
| |
| In the fourth area, on the wooden slope leading to the mill. | 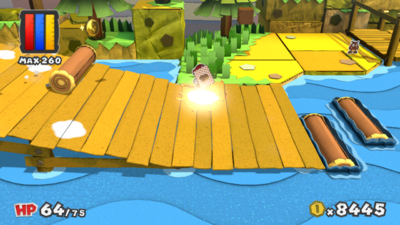
| |
| In the fourth area, on the wooden slope leading to the mill. | 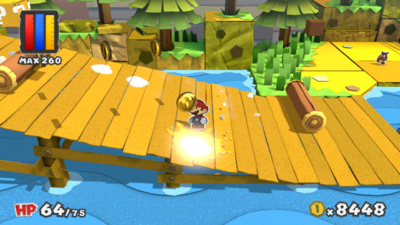
| |
| In the fourth area, on the wooden slope leading to the mill. | 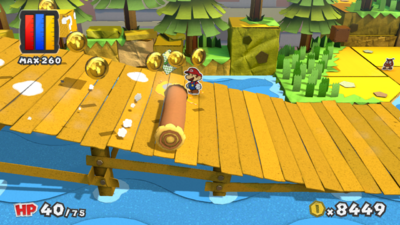
| |
| In the fourth area, on the wooden slope leading to the mill. | 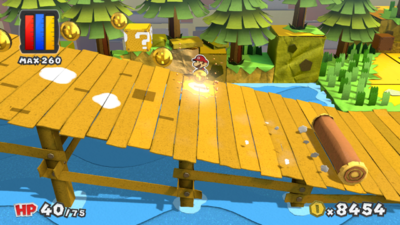
| |
| In the fourth area, on the wooden slope leading to the mill. | 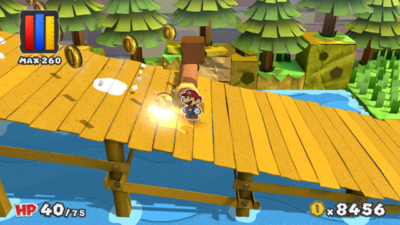
| |
| In the fourth area, on the wooden slope leading to the mill. | 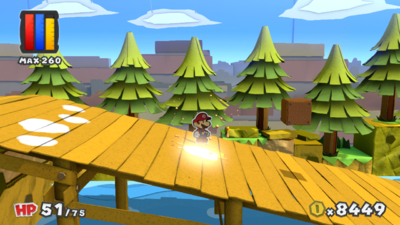
| |
| In the fourth area, on the wooden slope leading to the mill. | 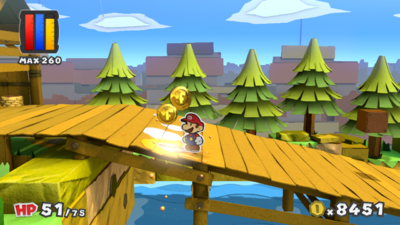
| |
| In the fourth area, on the wooden slope leading to the mill. | 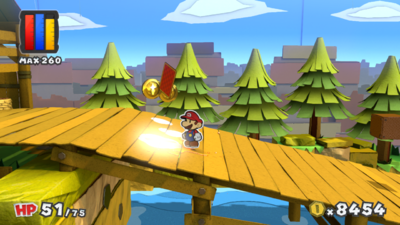
| |
| In the fourth area, on the wooden slope leading to the mill. | 
| |
| In the fourth area, on the wooden slope leading to the mill. | 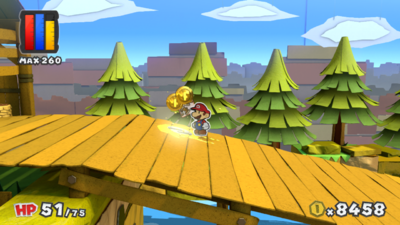
| |
| In the fourth area, on a Toad in the lumber mill. | 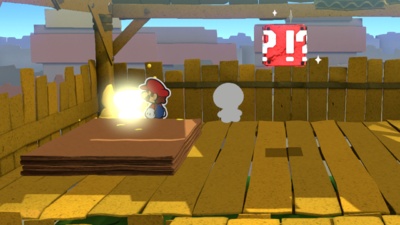
| |
| In the fourth area, on a Toad in the lumber mill. | 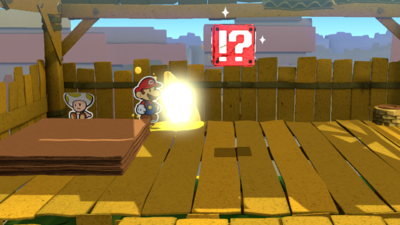
| |
| In the fifth area, on the guard around the first bridge. | 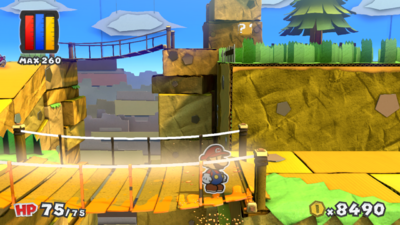
| |
| In the fifth area, on the guard around the first bridge. | 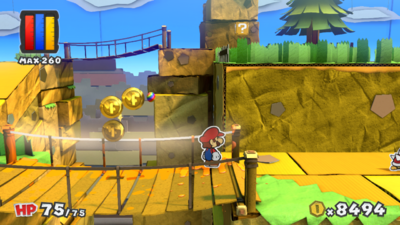
| |
| In the fifth area, on the ground. | 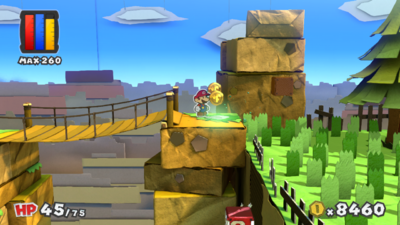
| |
| In the fifth area, on the ground in a cave. | 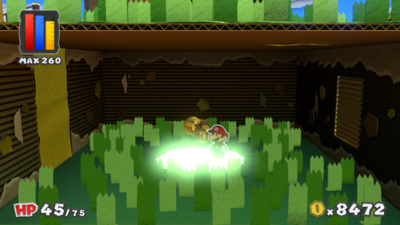
|
Château Chanterelle
Items
Field/Given/Objects
| Item | Icon | Location | Location Image |
|---|---|---|---|
Colorless spots
Mustard Café
Items
Field/Given/Objects
| Item | Icon | Location | Location Image |
|---|---|---|---|
Colorless spots
The Golden Coliseum
Items
Field/Given/Objects
| Item | Icon | Location | Location Image |
|---|---|---|---|
Colorless spots
Indigo Underground
Items
Field/Given/Objects
| Item | Icon | Location | Location Image |
|---|---|---|---|
Colorless spots
| Location | Drop | Location Image |
|---|---|---|
| In the first area, south of the fence. | 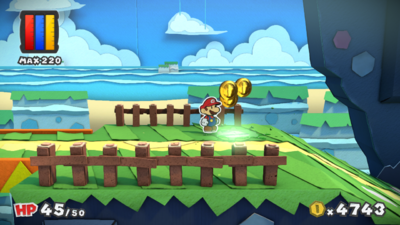
| |
| In the first area, on the sloped ground. | 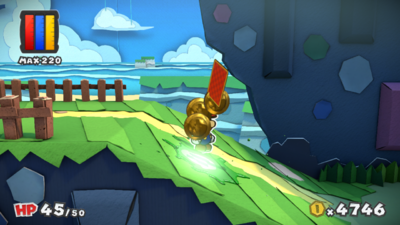
| |
| In the first area, on the sloped ground. | 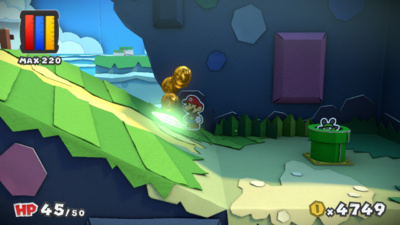
| |
| In the second area, on a square-shaped part of the wall. | 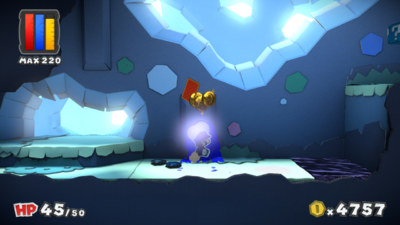
| |
| In the second area, before the first moving block. | 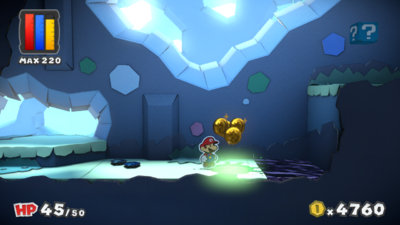
| |
| In the second area, below the first ? Block. | 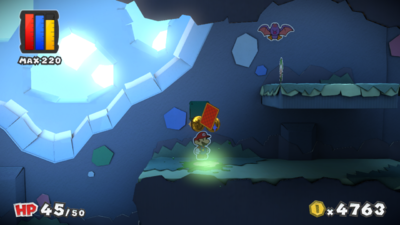
| |
| In the second area, on the ground near three Swoops. | 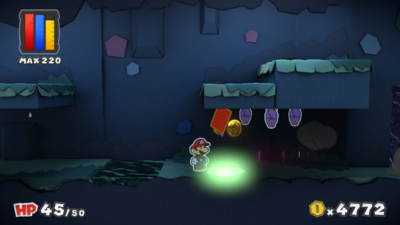
| |
| In the second area, on the wall near three Swoops. | 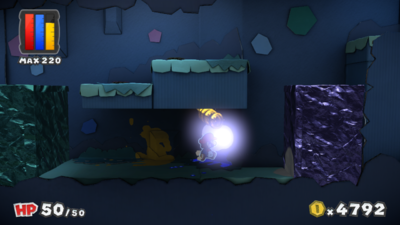
| |
| In the second area, on the third moving block. | 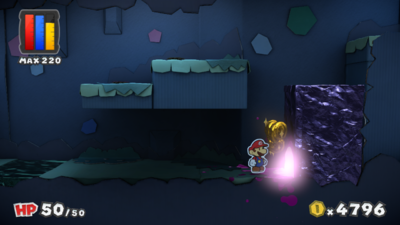
| |
| In the second area, on the ground after the third moving block. | 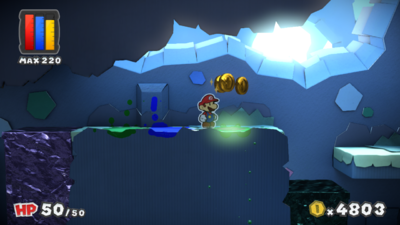
| |
| In the second area, on the wall in a hidden alcove that can be accessed by walking behind the fourth moving block. | 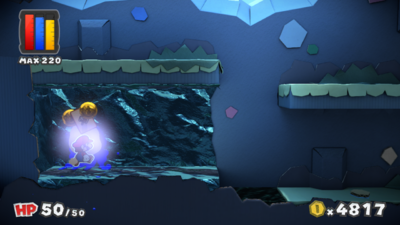
| |
| In the second area, on a diamond-shaped spot on the wall. | 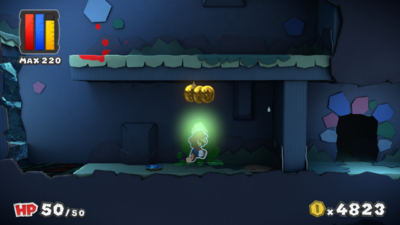
| |
| In the second area, on the ground. | 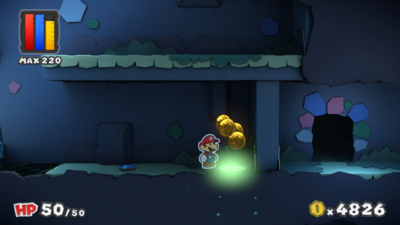
| |
| In the second area, on the wall and only accessible from the top of green moving block. | 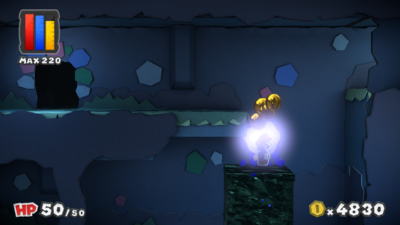
| |
| In the second area, in a secret alcove to the right. | 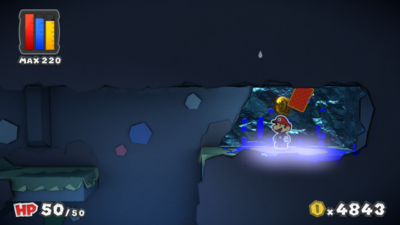
| |
| In the third area, on the ground to the far west. | 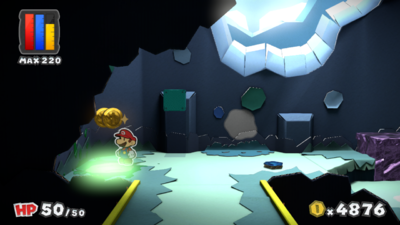
| |
| In the third area, on the wall. | 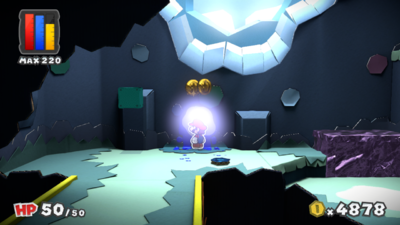
| |
| In the third area, on the ground south of the first moving block. | 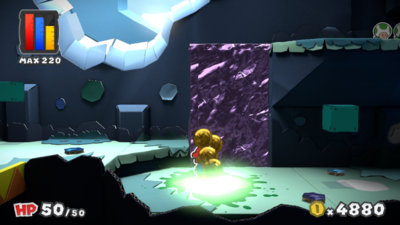
| |
| In the third area, on the ground below a ? Block. | 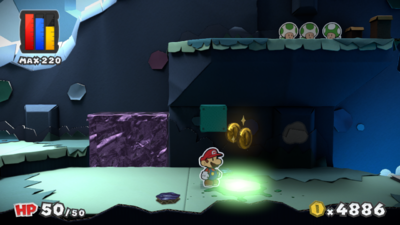
| |
| In the third area, on the wall. | 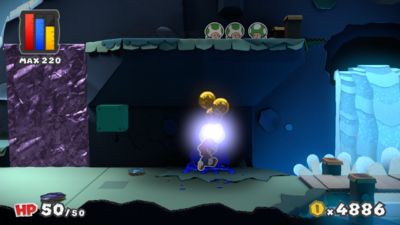
| |
| In the third area, on the bridge. | 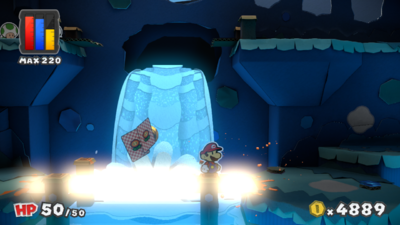
| |
| In the third area, on the ground after the bridge. | 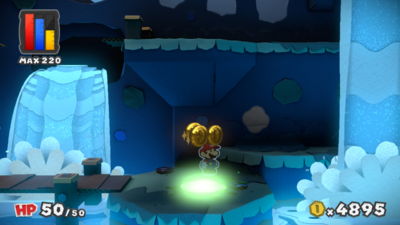
| |
| In the third area, on the wall. | 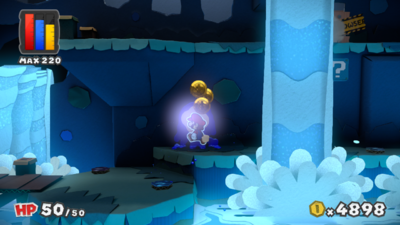
| |
| In the third area, on the wall near the Save Block. | 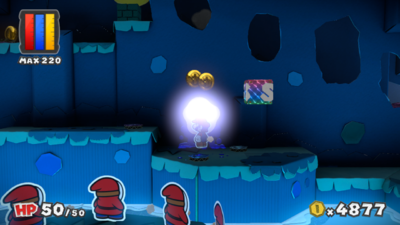
| |
| In the fourth area, on the ground. | 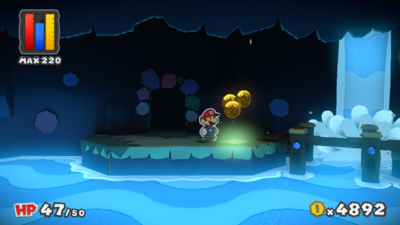
| |
| In the fourth area, on the ground. | 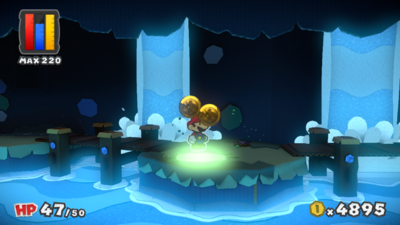
| |
| In the fourth area, on the sloped ground. | 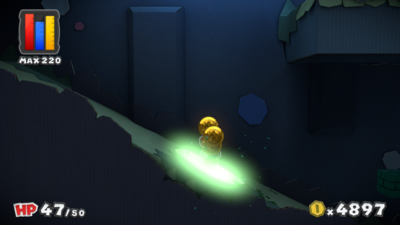
| |
| In the fourth area, on the sloped ground. | 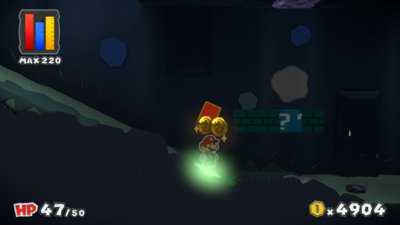
| |
| In the fourth area, on the ground under a ? Block. | 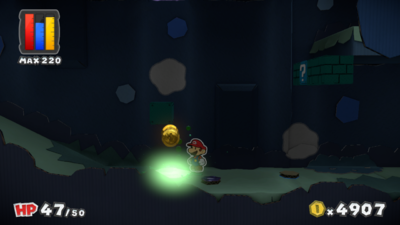
| |
| In the fourth area, on the wall. | 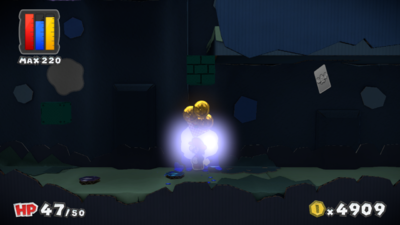
| |
| In the fourth area, on a moving block. | 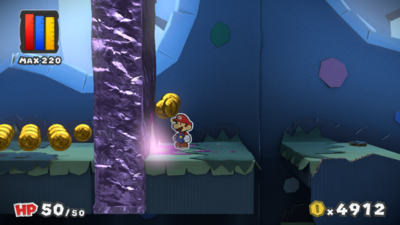
| |
| In the fourth area, above a ? Block. This spot can be reached by going down a hole when the moving block has gone up. | 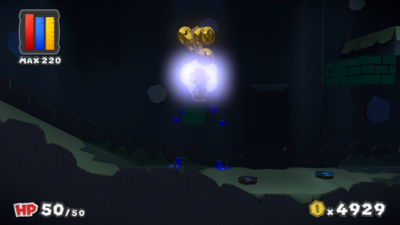
| |
| In the fourth area, on the ground. | 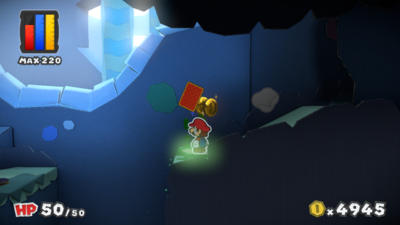
| |
| In the fourth area, on the wall. | 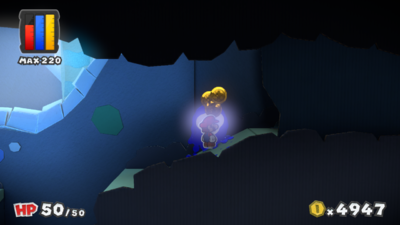
| |
| In the fourth area, on a green Rescue Squad Toad. | 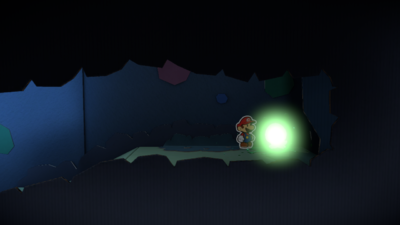
| |
| In the third area, on a wooden board. | 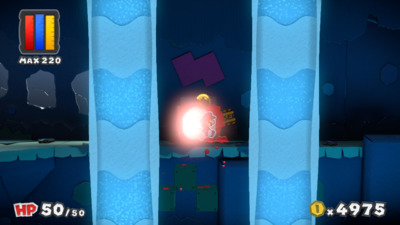
| |
| In the third area, on the wall after the Brick Block. | 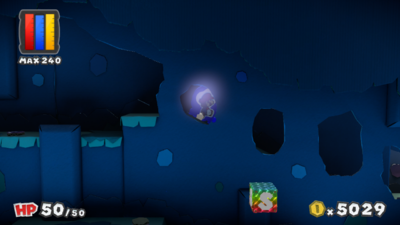
| |
| In the third area, on the platform with the Lemon Thing. | 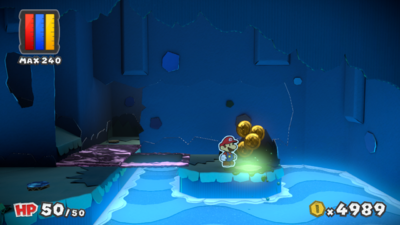
| |
| In the third area, on the wall near the blue Mini Paint Star. | 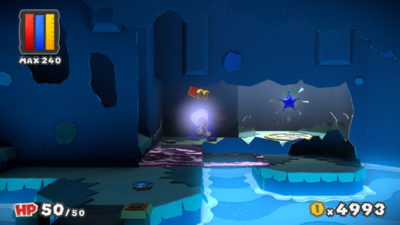
|
Bloo Bay Beach
Items
Field/Given/Objects
| Item | Icon | Location | Location Image |
|---|---|---|---|
Colorless spots
| Location | Drop | Location Image |
|---|---|---|
| In the first area, on the wall near the Toad. | 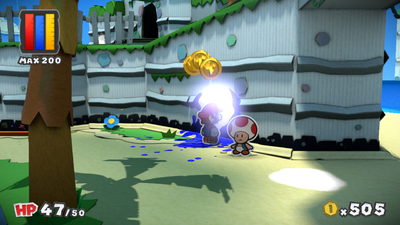
| |
| In the first area, on the ground under the overhang. | 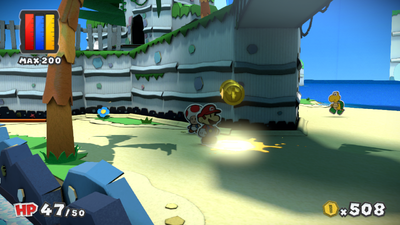
| |
| In the first area, on the wall. | 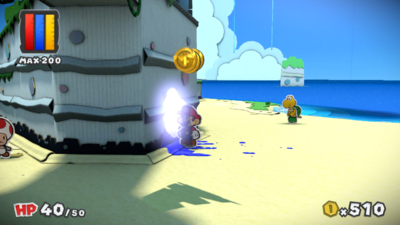
| |
| In the first area, on the wall. | 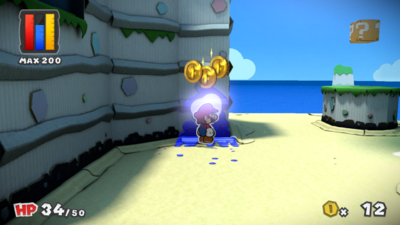
| |
| In the first area, on the ground south of a ? Block. | 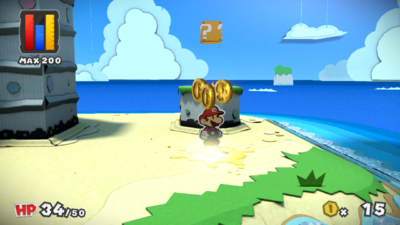
| |
| In the first area, on the wall behind the rock structure. | 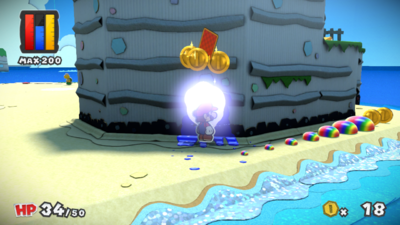
| |
| In the first area, on the wall behind the rock structure. | 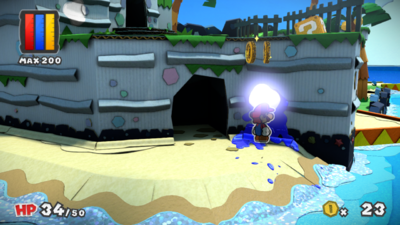
| |
| In the first area, on the wall on top of the cliff. | 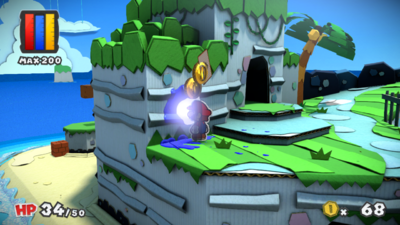
| |
| In the first area, on the ground south-east of a palm tree on the cliff. | 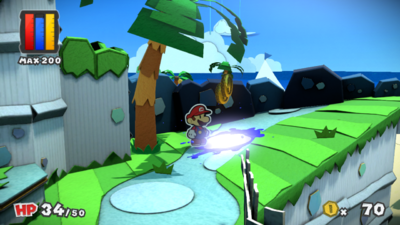
| |
| In the first area, on a grain of sand near the ? Block. | 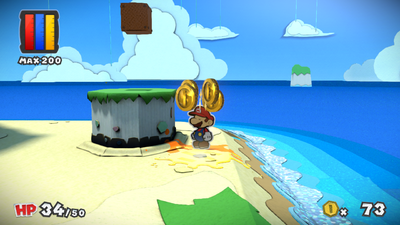
| |
| In the first area, on the ground. | 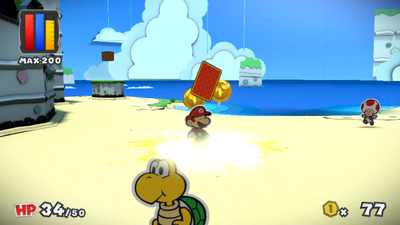
| |
| In the first area, on the ground. | 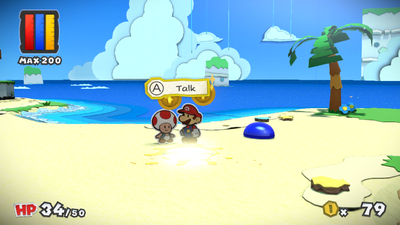
| |
| In the second area, on the ground. | 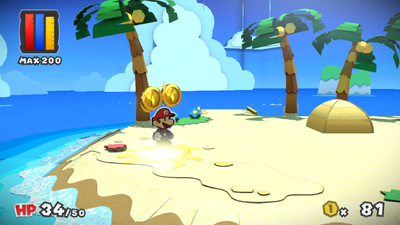
| |
| In the second area, on the ground south of the fourth palm tree. | 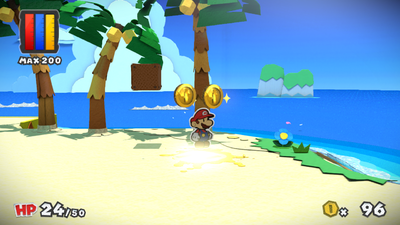
| |
| In the second area, on the ground between the last two palm trees. | 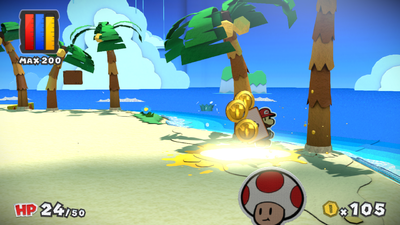
| |
| In the second area, on the ground. | 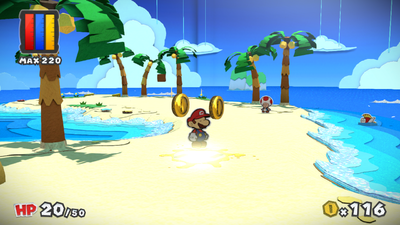
| |
| In the second area, on the ground. | 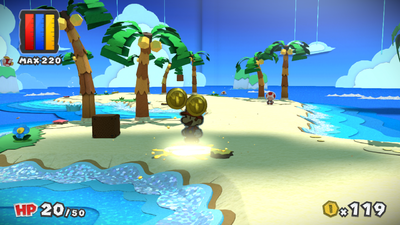
| |
| In the second area, on the ground. | 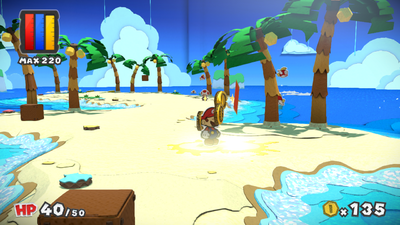
| |
| In the second area, on the ground near the exit. | 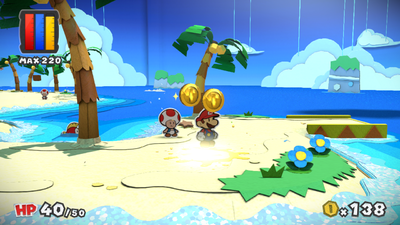
| |
| In the third area, on a cardboard star. | 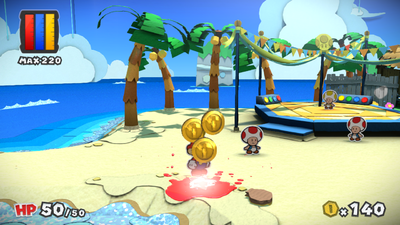
| |
| In the third area, on the ground. | 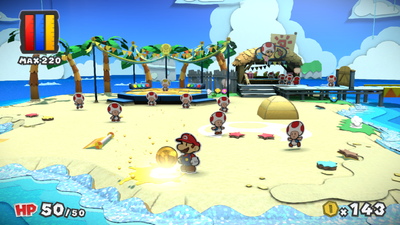
| |
| In the third area, on the ground in the outline of a Toad's head. | 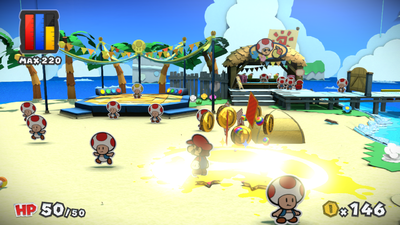
| |
| In the third area, on a flower. | 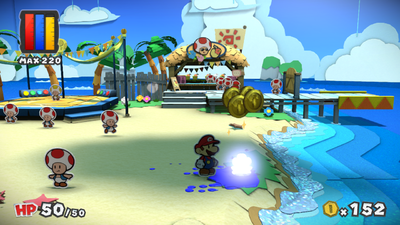
| |
| In the third area, on a flower near the fence. | 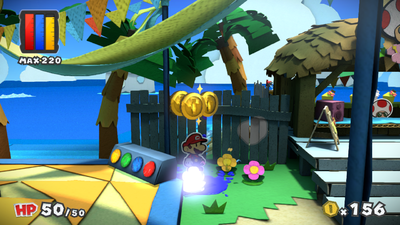
| |
| In the third area, on the fence. | 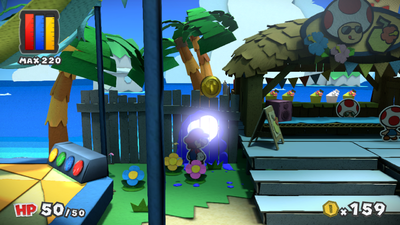
| |
| In the third area, on a planter in the cafe. | 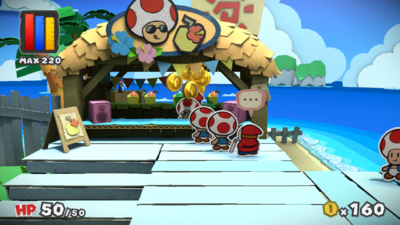
| |
| In the third area, on the ground south of Luigi. | 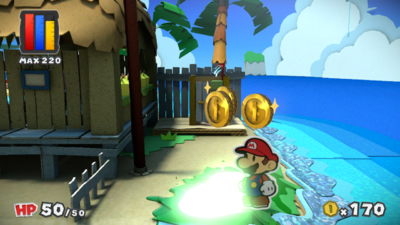
| |
| In the third area, on a shell. | 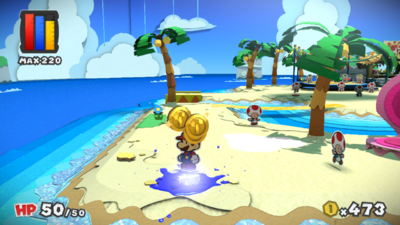
| |
| In the third area, on the ground. | 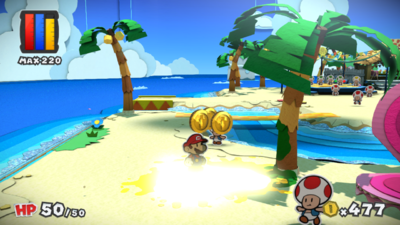
| |
| In Blissful Beach, on the wall on the first rock. | 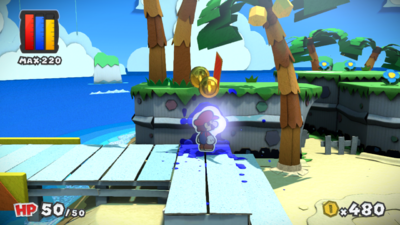
| |
| In Blissful Beach, on the ground. | 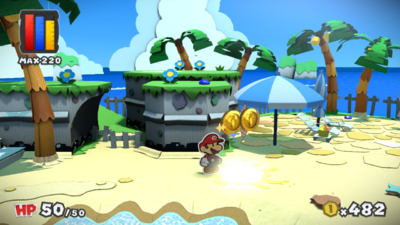
| |
| In Blissful Beach, on a tile on the ground. | 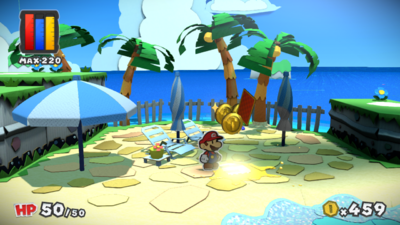
| |
| In Blissful Beach, on an umbrella. | 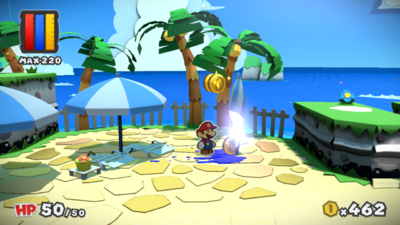
| |
| In Blissful Beach, on a rock wall. | 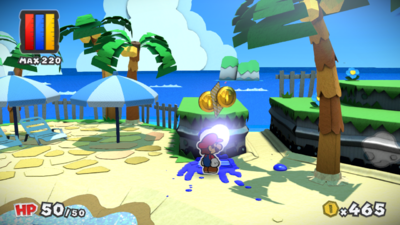
| |
| In Blissful Beach, on a rock wall. | 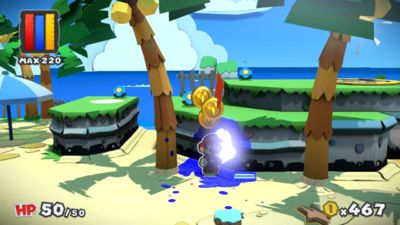
| |
| In Blissful Beach, on a rock wall. | 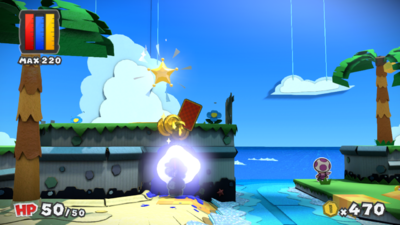
| |
| In Blissful Beach, on the ground on a raised platform. | 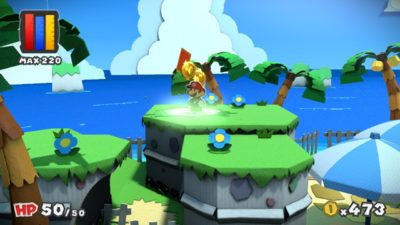
| |
| In Blissful Beach, on the ground on a raised platform. | 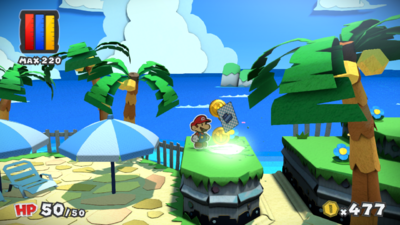
|
Dark Bloo Inn
Items
Field/Given/Objects
| Item | Icon | Location | Location Image |
|---|---|---|---|
Colorless spots
| Location | Drop | Location Image |
|---|---|---|
| Outside the hotel, on Bloo. | 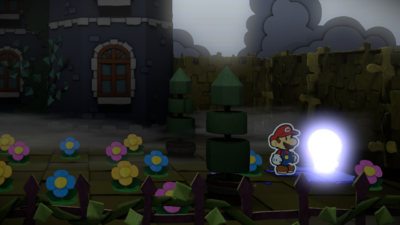
| |
| In the lobby, on the leftmost painting. | 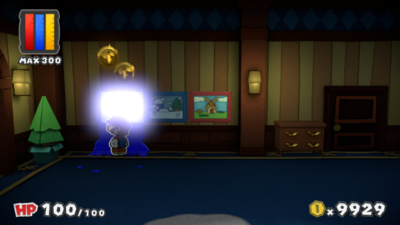
| |
| In the lobby, on the ground. | 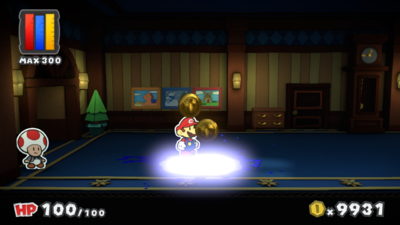
| |
| In the lobby, on the elevator. | 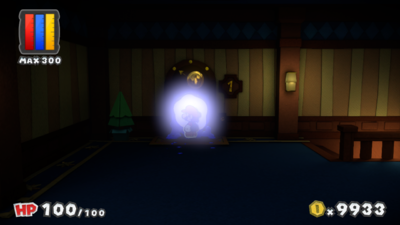
| |
| On floor 2, on the wall. | 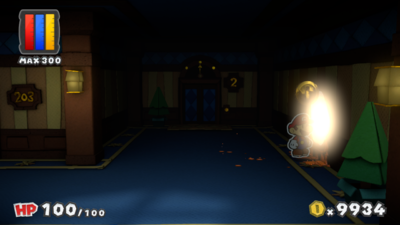
| |
| On floor 2, on the ground. | 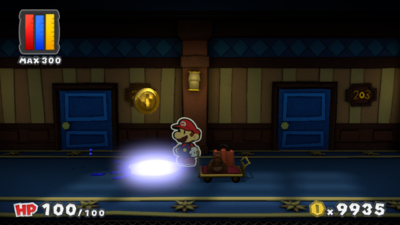
| |
| On floor 2, on the ground. | 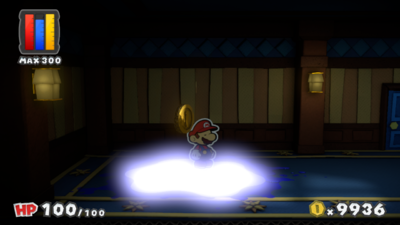
| |
| On floor 3, on the wall. | 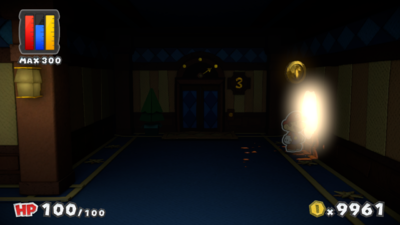
| |
| On floor 3, on the ground. | 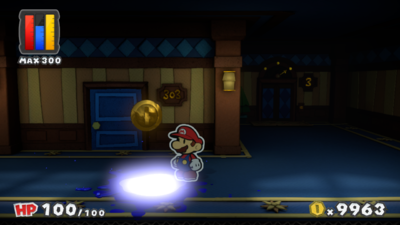
| |
| On floor 3, on the ground. | 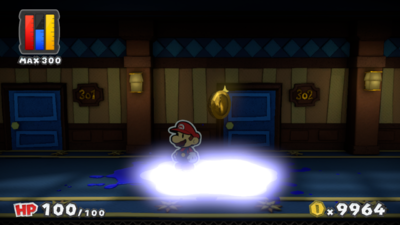
| |
| In room 302, on the Tea Recipe Book. | 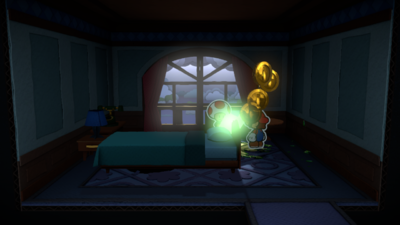
| |
| In room 303, on the Birdcage. | 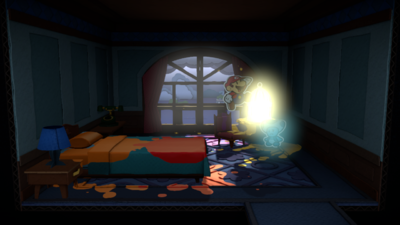
| |
| In the linen closet, on the ground. | 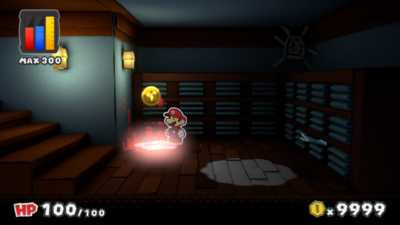
| |
| In the linen closet, on the ground. | 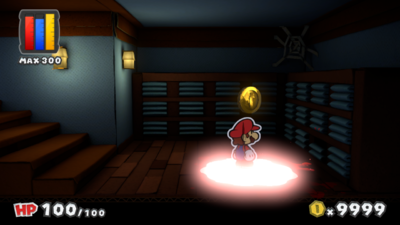
|
Cobalt Base
Items
Field/Given/Objects
| Item | Icon | Location | Location Image |
|---|---|---|---|
Colorless spots
| Location | Drop | Location Image |
|---|---|---|
| In the first area, on the ground. | 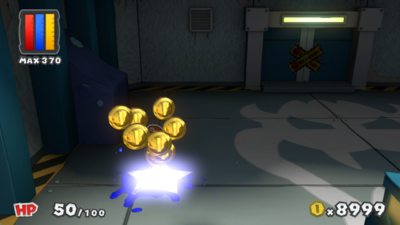
| |
| In the first area, on the ground. | 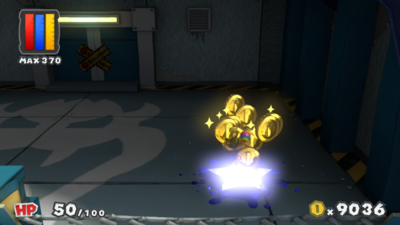
| |
| In the first area, on the ground. This colorless spot is in the shape of a Bowser insignia. | 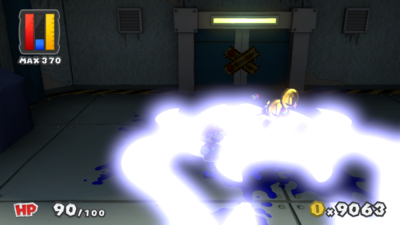
|
Fort Cobalt
Items
Field/Given/Objects
| Item | Icon | Location | Location Image |
|---|---|---|---|
Colorless spots
Plum Park
Items
Field/Given/Objects
| Item | Icon | Location | Location Image |
|---|---|---|---|
Colorless spots
| Location | Drop | Location Image |
|---|---|---|
| In the first area, on the ground. | 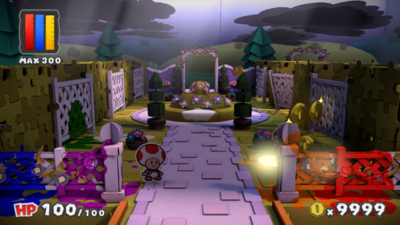
| |
| In the first area, on the ground. | 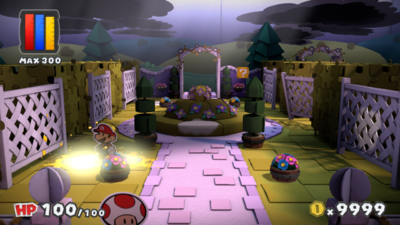
| |
| In the first area, on a fence to the right. | 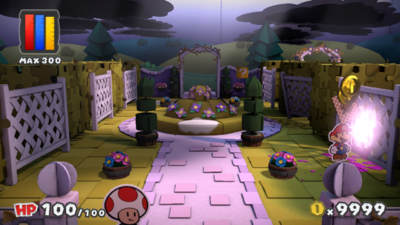
| |
| In the first area, on the base of the flowers. | 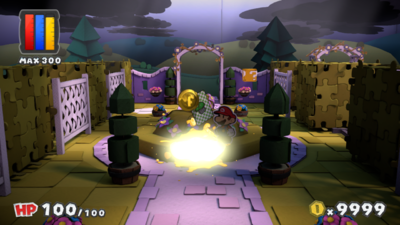
| |
| In the first area, on the ground. | 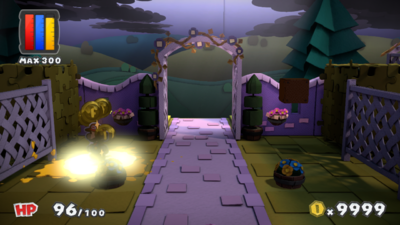
| |
| To the right of the first area, on a wooden plank. | 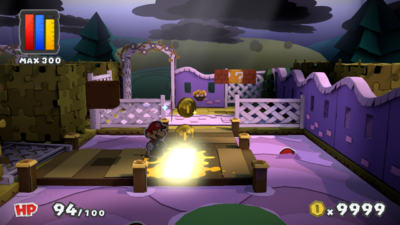
| |
| To the right of the first area, on the southmost lily pad. | 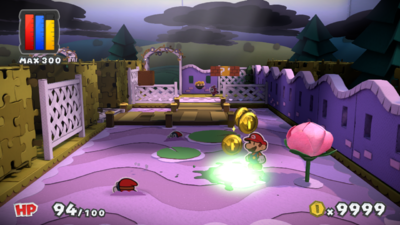
| |
| In the second area, on a brick. | 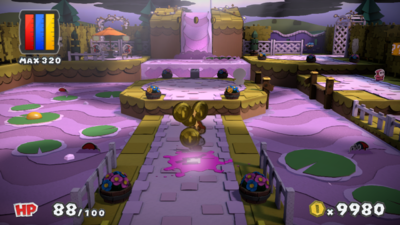
| |
| In the second area, on a brick. | 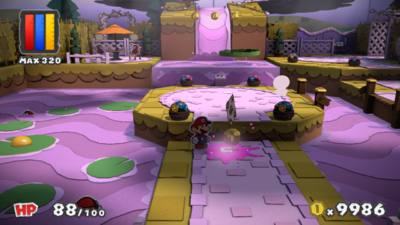
| |
| In the second area, on a brick. | 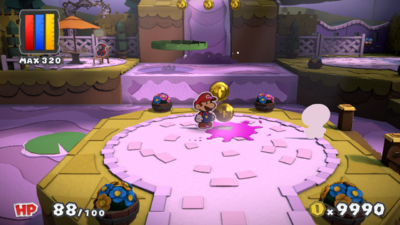
| |
| In the second area, on a Toad. | 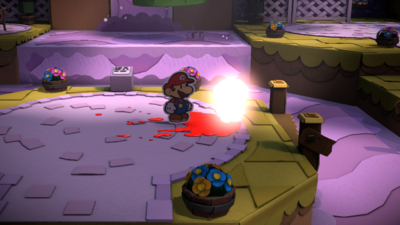
| |
| In the second area, on three bushes. To access the bushes, Mario must use the Paint Hammer off the left edge of the platform with the sign, revealing a hidden path. | 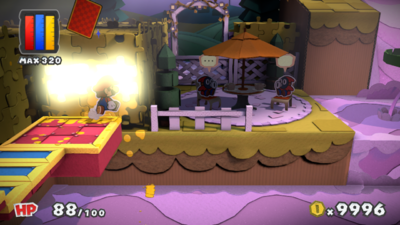
| |
| In the second area, on a Toad. | 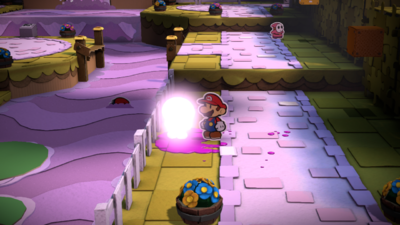
| |
| In the second area, on a brick. | 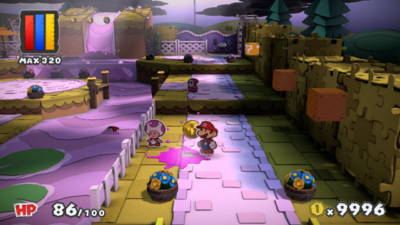
| |
| In the second area, on a brick. | 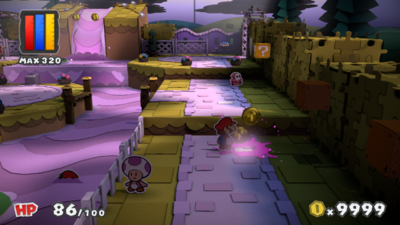
| |
| In the second area, on a brick. | 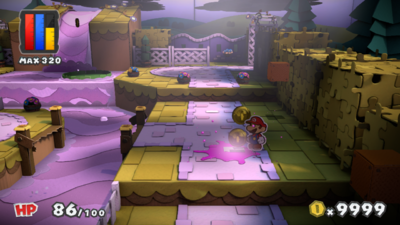
| |
| In the second area, on a brick. | 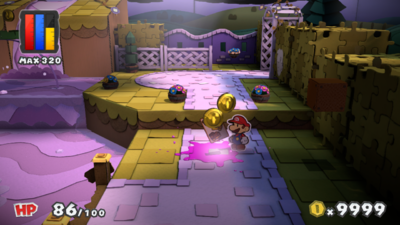
| |
| In the second area, on a bush. | 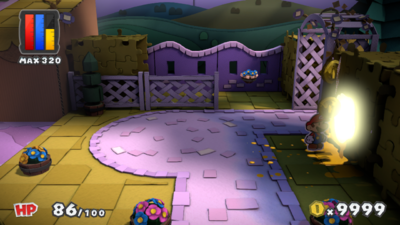
| |
| In the second area, on a brick. | 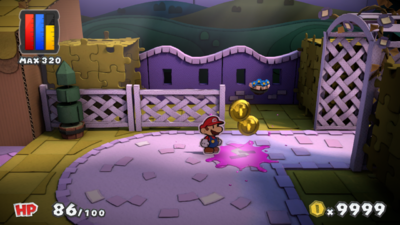
| |
| In the second area, on a brick. | 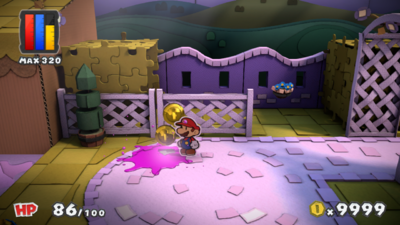
| |
| In the second area, on a brick. | 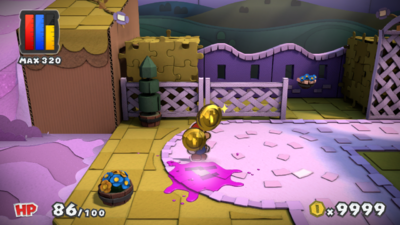
| |
| In the second area, on a brick. | 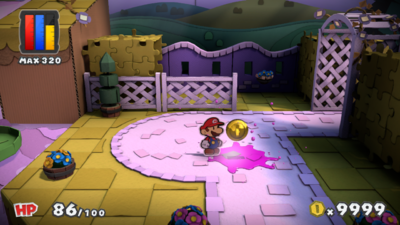
| |
| In the third area, on the ground. | 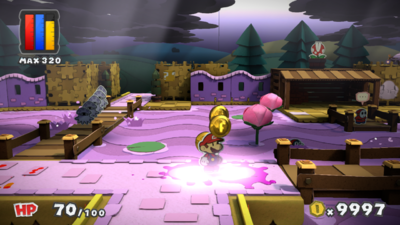
| |
| In the third area, on the ground. | 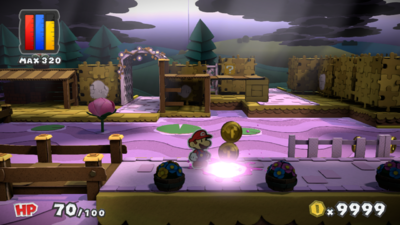
| |
| In the third area, on a wooden plank. | 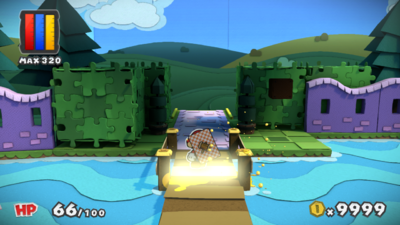
| |
| In the third area, on the ground. | 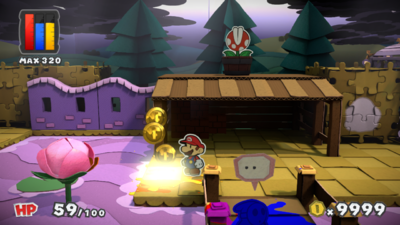
| |
| In the third area, on a wall. | 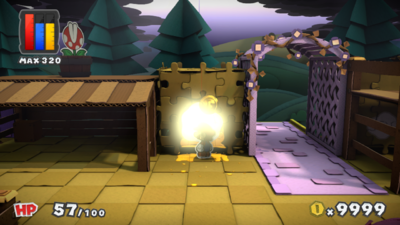
| |
| In the third area, on a wall. | 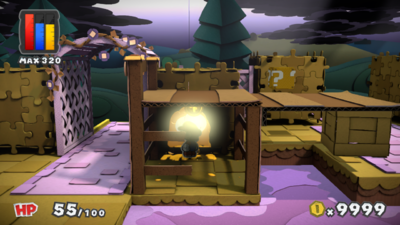
| |
| North from the third area, on the ground. This colorless spot is in the shape of a Fire Flower or Ice Flower. | 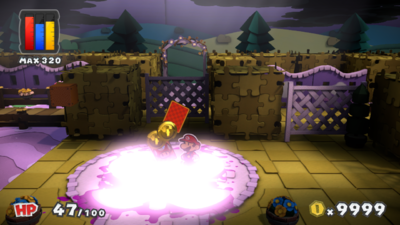
| |
| North from the third area, on a lily pad. | 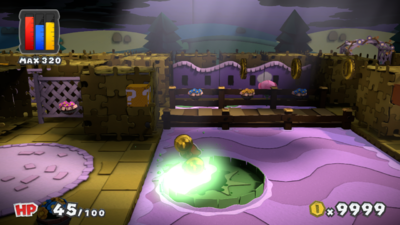
| |
| North from the third area, on a wall. This colorless spot can only be accessed after Petea Piranha has been defeated and the fence is knocked down. | 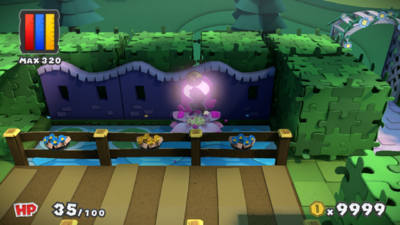
| |
| North from the third area, on a wall. | 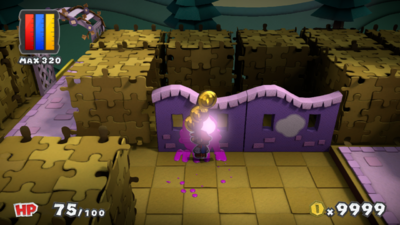
| |
| North from the third area, on a wall. | 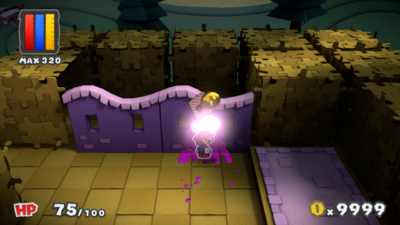
| |
| North from the third area, on a wall. | 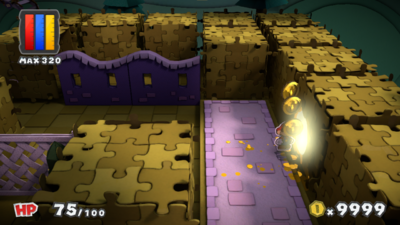
| |
| At the Fountain of Truth, on the Toad. | 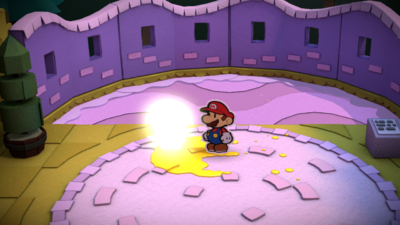
| |
| In the third area, on the wall. | 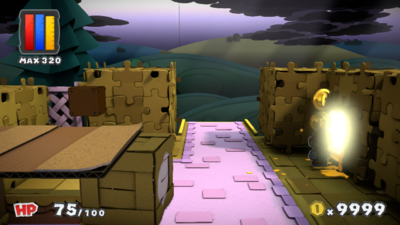
| |
| In the third area, on a crate. | 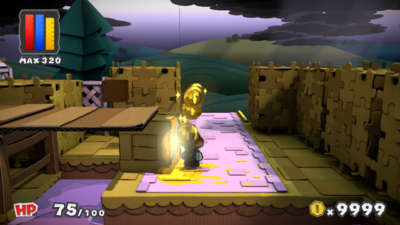
| |
| In the concert area, on a lily pad. | 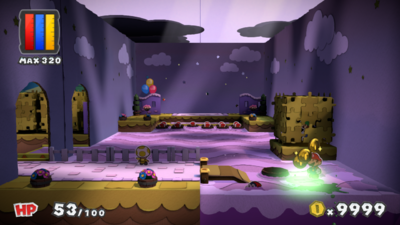
|
Violet Passage
Items
Field/Given/Objects
| Item | Icon | Location | Location Image |
|---|---|---|---|
Colorless spots
| Location | Drop | Location Image |
|---|---|---|
| In the first area, on a crate. | 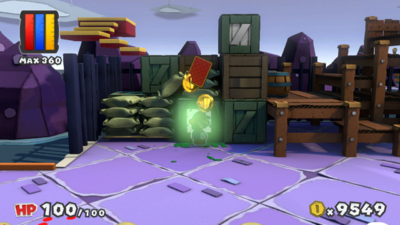
| |
| In the first area, on a crate. | 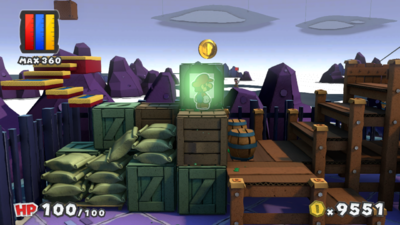
| |
| In the first area, on a post. | 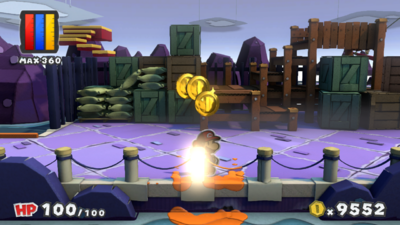
| |
| In the first area, on the ground under a barrel. | 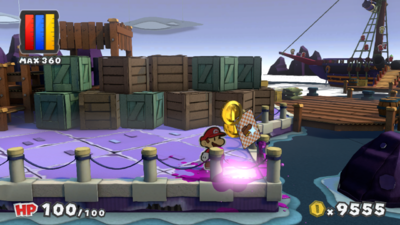
| |
| In the first area, on the ground. This colorless spot is in the shape of a Blooper. | 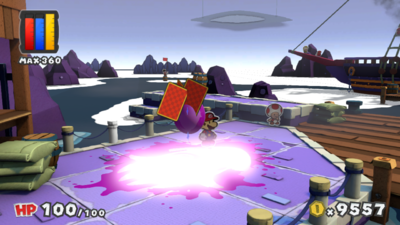
| |
| In the first area, on the piling. | 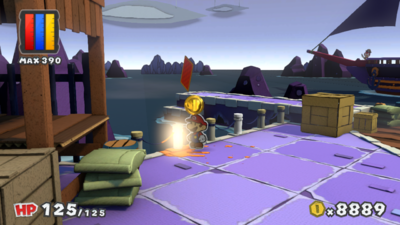
| |
| In the first area, on a post. | 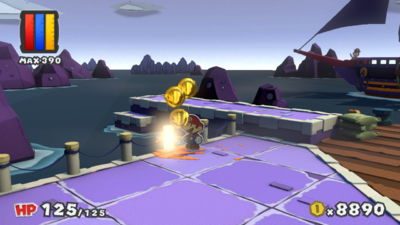
| |
| In the first area, on a post. | 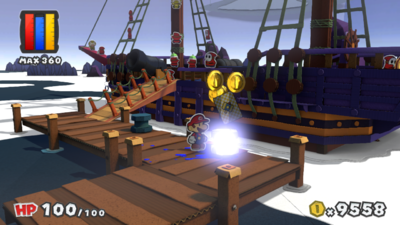
| |
| In the first area, on the ocean. This colorless spot is repainted after getting the blue Big Paint Star. | 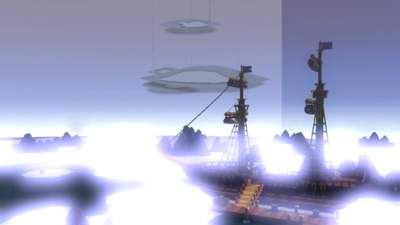
| |
| Below deck, on the treasure chest. | 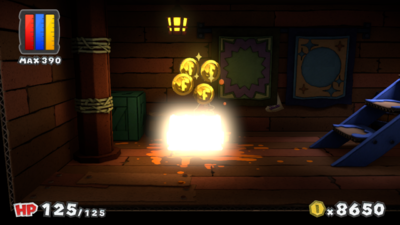
|
Vortex Island
Items
Field/Given/Objects
| Item | Icon | Location | Location Image |
|---|---|---|---|
Colorless spots
Lighthouse Island
Items
Field/Given/Objects
| Item | Icon | Location | Location Image |
|---|---|---|---|
Colorless spots
Fortune Island
Items
Field/Given/Objects
| Item | Icon | Location | Location Image |
|---|---|---|---|
Colorless spots
Marmalade Valley
Items
Field/Given/Objects
| Item | Icon | Location | Location Image |
|---|---|---|---|
Colorless spots
Kiwano Temple
Items
Field/Given/Objects
| Item | Icon | Location | Location Image |
|---|---|---|---|
Colorless spots
| Location | Drop | Location Image |
|---|---|---|
| In the first area, on a post. | 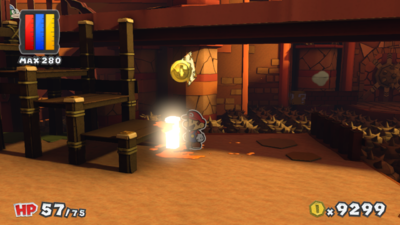
| |
| In the first area, on the wall. | 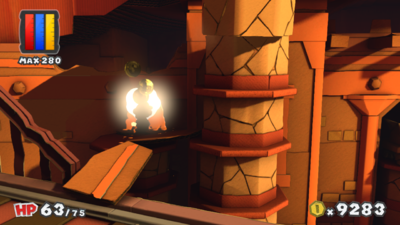
| |
| In the first area, on the ground. | 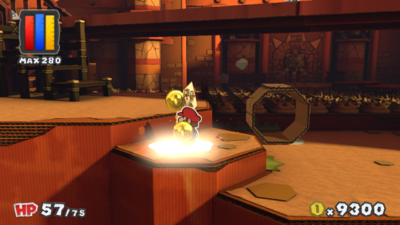
| |
| In the first area, on the ground beneath a cardboard tube. | 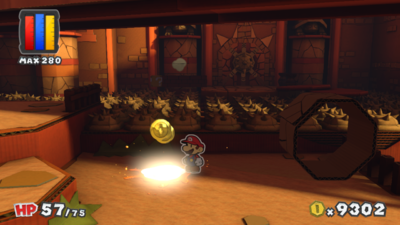
| |
| In the first area, on a railroad track. If this colorless spot is not repainted before destroying the track with the rickety column, it will be inaccessible until the blue Rescue Squad is rescued. | 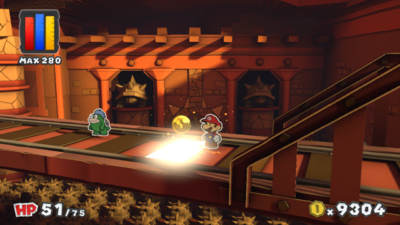
| |
| In the first area, on the ground after crossing the spikes. | 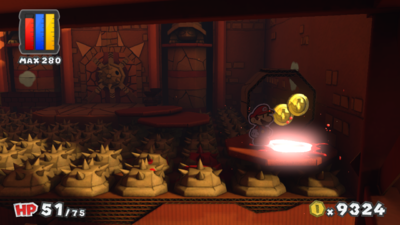
| |
| In the first area, on the wall. Mario must hammer off the ledge to reveal a row of invisible blocks. | 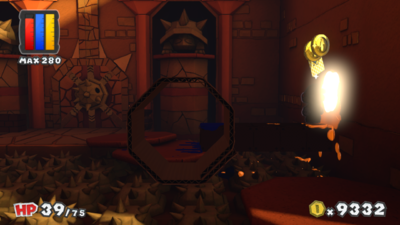
| |
| In the first area, on the wall. | 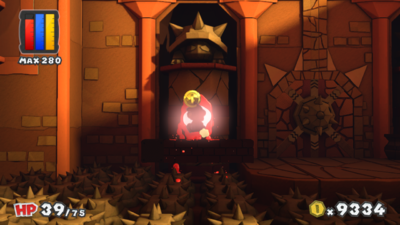
| |
| In the second area, on the ground. | 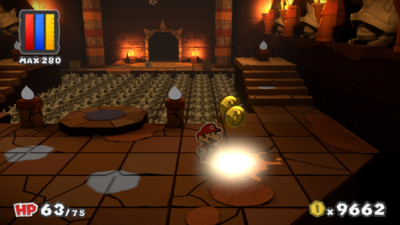
| |
| In the second area, on the ground. | 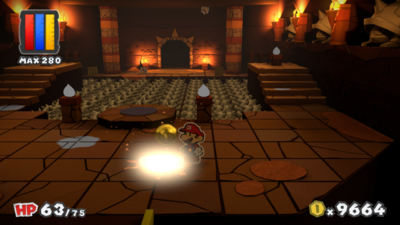
| |
| In the second area, on the ground. | 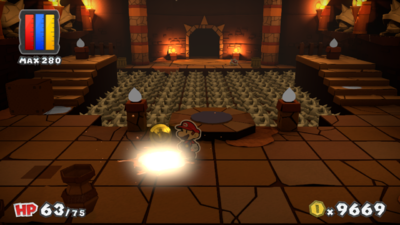
| |
| In the second area, on the ground. | 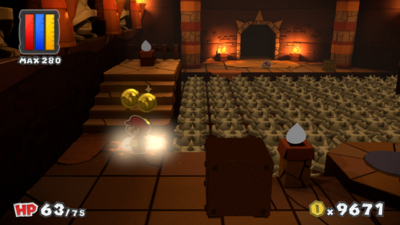
| |
| In the second area, on the ground. | 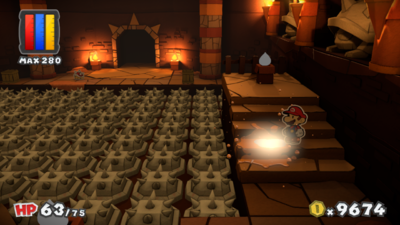
| |
| In the second area, on a flame. | 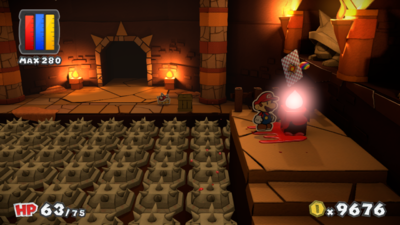
| |
| In the second area, on a flame. | 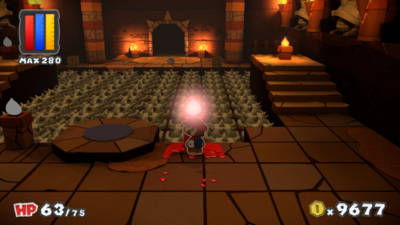
| |
| In the second area, on a flame. | 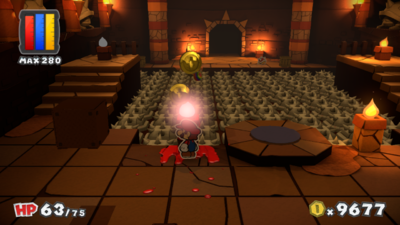
| |
| In the second area, on a flame. | 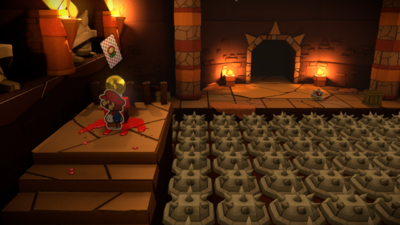
| |
| In the third area, on a fencepost. | 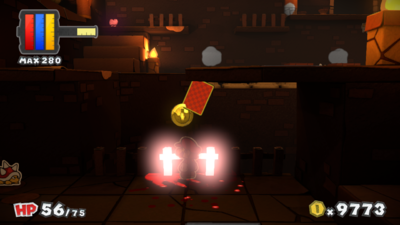
| |
| In the third area, on the ground. | 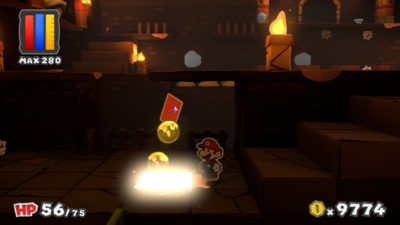
| |
| In the third area, on the ground. | 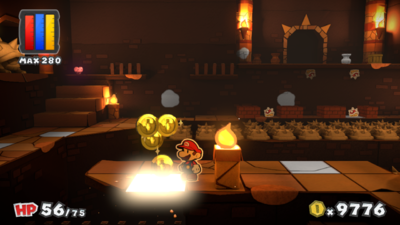
| |
| In the third area, on the ground. | 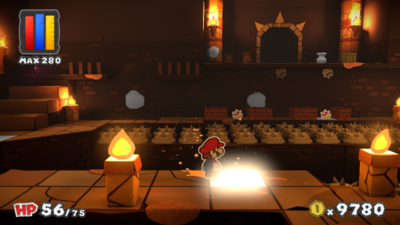
| |
| In the third area, on the ground. | 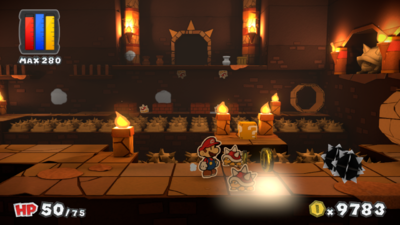
| |
| In the third area, on the ground. | 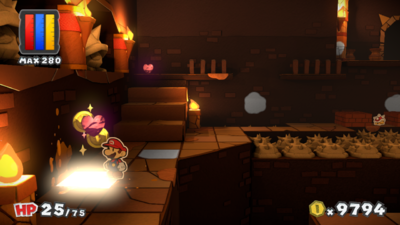
| |
| In the third area, on the ground. | 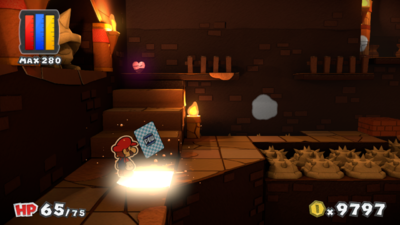
| |
| In the third area, on the wall. | 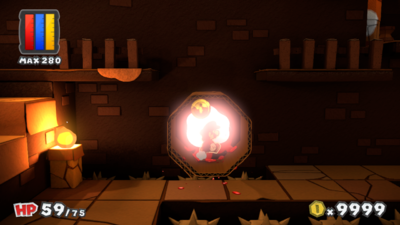
| |
| In the third area, on the wall. | 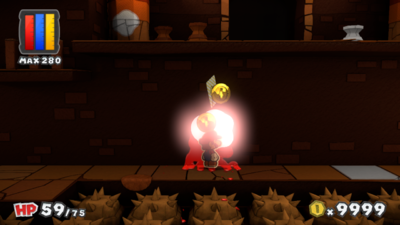
| |
| In the third area, on the ground. | 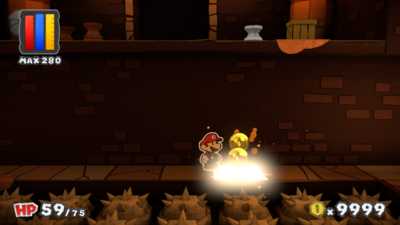
| |
| In the third area, on the wall. | 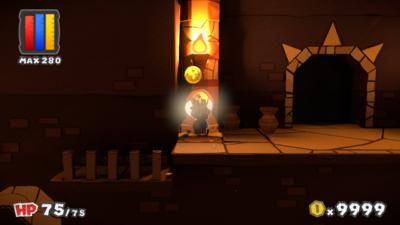
| |
| In the third area, on a vase. | 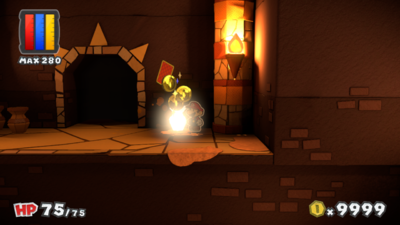
| |
| In the fourth area, on a column. | 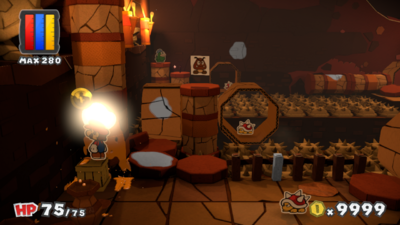
| |
| In the fourth area, on the ground. | 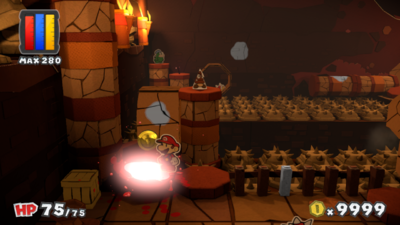
| |
| In the fourth area, on a cardboard wheel. | 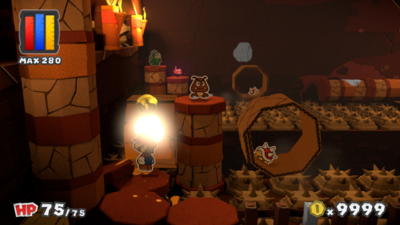
| |
| In the fourth area, on a fencepost. | 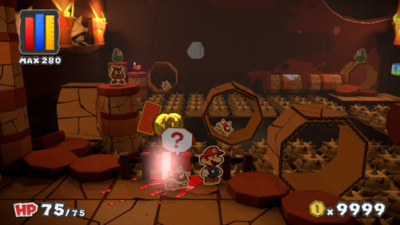
| |
| In the fourth area, on a column. | 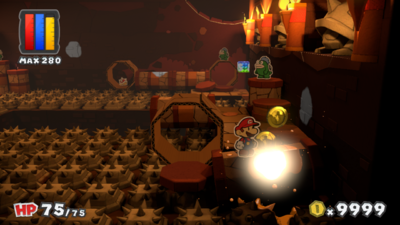
| |
| In the fourth area, on the wall. | 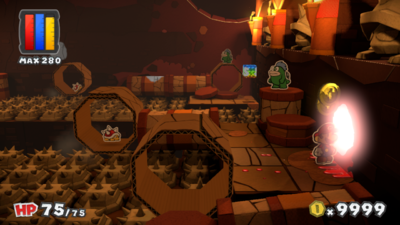
| |
| In the fourth area, on the wall. | 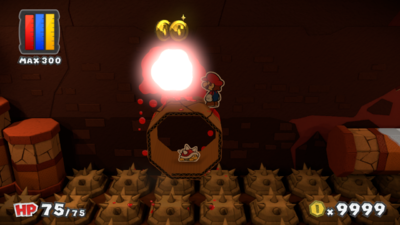
| |
| In the fourth area, on a tipped column. | 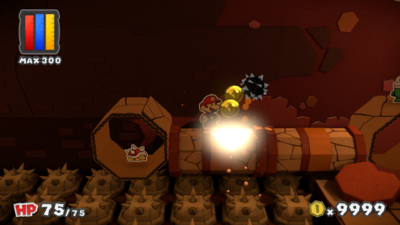
|
Toad Trainworks
Items
Field/Given/Objects
| Item | Icon | Location | Location Image |
|---|---|---|---|
Colorless spots
Tangerino Grill
Items
Field/Given/Objects
| Item | Icon | Location | Location Image |
|---|---|---|---|
Colorless spots
Sunset Express
Items
Field/Given/Objects
| Item | Icon | Location | Location Image |
|---|---|---|---|
Colorless spots
Mondo Woods
Items
Field/Given/Objects
| Item | Icon | Location | Location Image |
|---|---|---|---|
Colorless spots
Sacred Forest
Items
Field/Given/Objects
| Item | Icon | Location | Location Image |
|---|---|---|---|
Colorless spots
| Location | Drop | Location Image |
|---|---|---|
| In the first area, on a tree. | 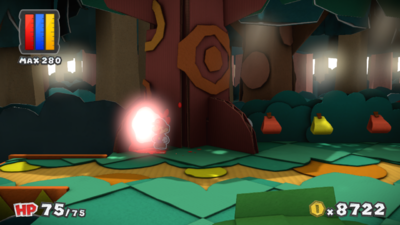
| |
| In the first area, on a Toad hiding behind a bush. | 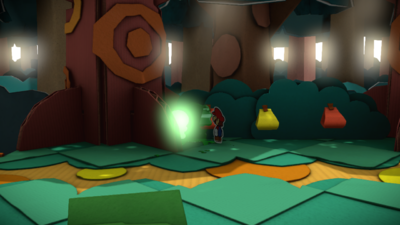
| |
| In the first area, on the ground. | 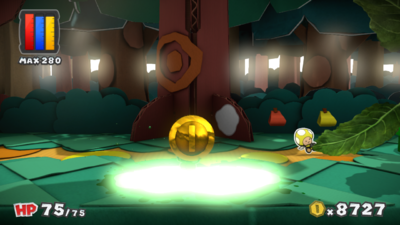
| |
| In the first area, on a tree. | 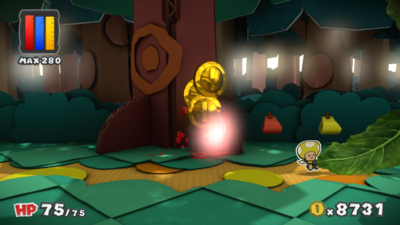
| |
| In the second area, on the ground. | 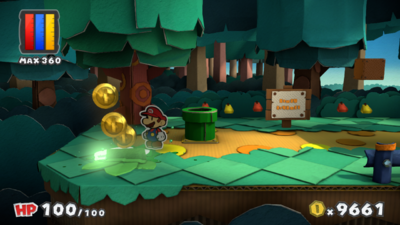
| |
| In the second area, on the ground. | 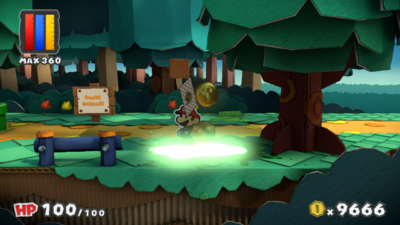
| |
| In the second area, on a tree. | 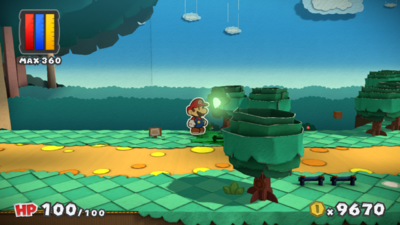
| |
| In the second area, on the ground. | 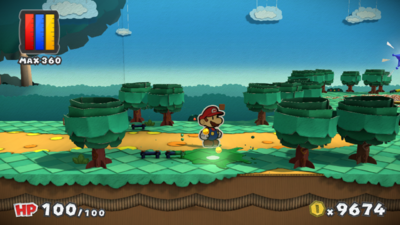
| |
| In the second area, on the ground. | 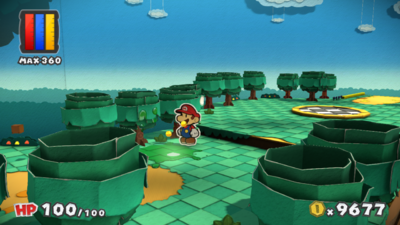
| |
| In the second area, on the ground. | 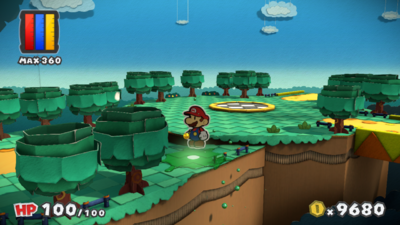
| |
| In the second area, on a tree. | 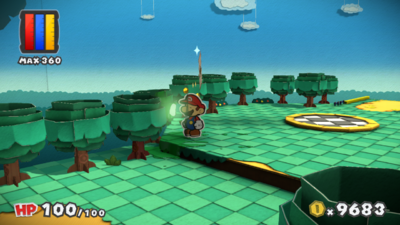
| |
| In the Buzzy Beetle area, on the ground. | 
| |
| In the Buzzy Beetle area, on the ground. | 
| |
| In the Buzzy Beetle area, on the ground. | 
| |
| In the Buzzy Beetle area, on the ground. | 
| |
| In the Buzzy Beetle area, on the ground. | 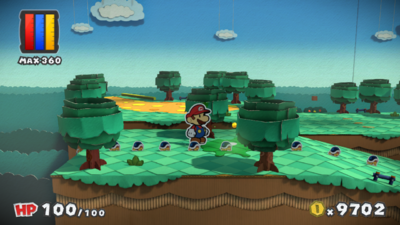
| |
| In the Buzzy Beetle area, on the ground. | 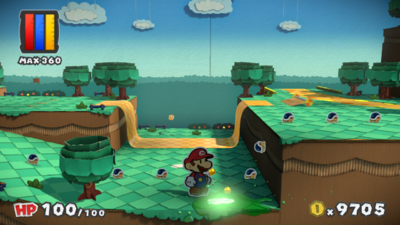
| |
| In the Buzzy Beetle area, on the ground. | 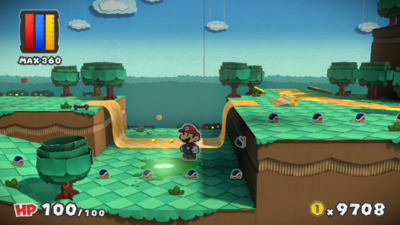
| |
| In the Buzzy Beetle area, on the ground. Three pieces of Bowser Tape must be pulled to reveal this spot. | 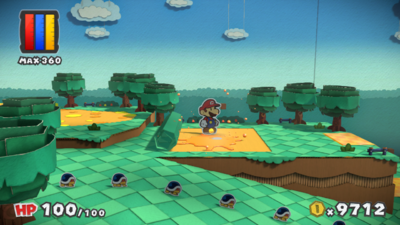
| |
| In the Old Sacred Tree area, on the ground. | 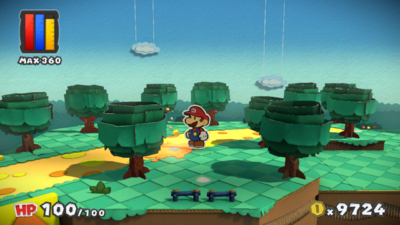
| |
| In the Old Sacred Tree area, on the ground. | 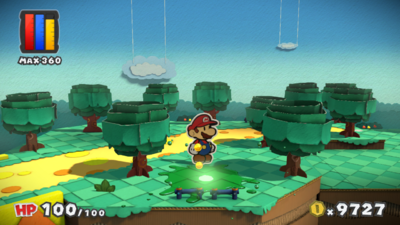
| |
| In the Old Sacred Tree area, on the ground. | 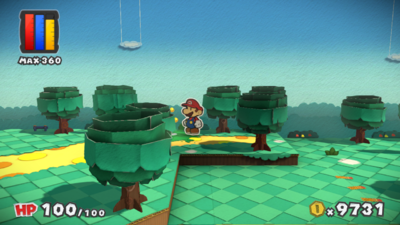
| |
| In the Old Sacred Tree area, on the ground. | 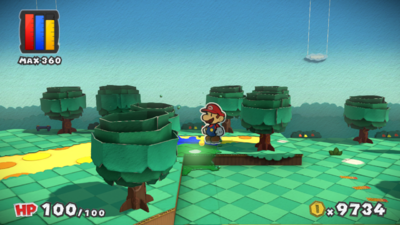
| |
| In the Old Sacred Tree area, on the ground. | 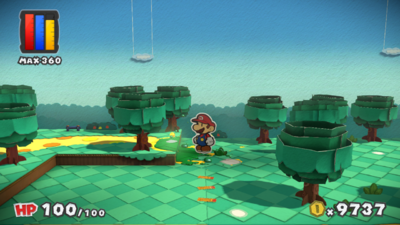
| |
| In the Old Sacred Tree area, on the ground. | 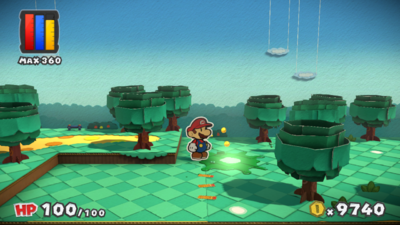
| |
| In the Old Sacred Tree area, on the ground. | 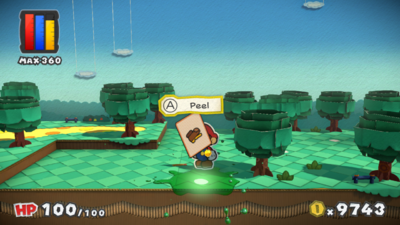
| |
| In the Old Sacred Tree area, on the ground. | 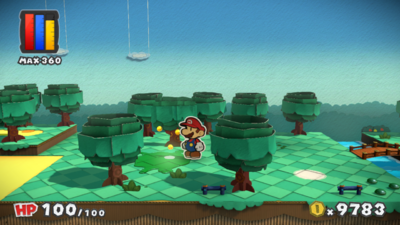
| |
| In the Old Sacred Tree area, on the ground. | 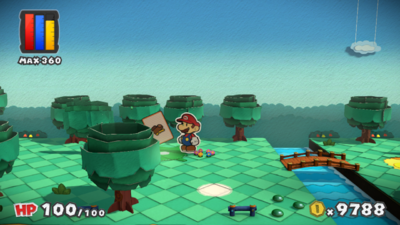
| |
| In the Old Sacred Tree area, on the ground. | 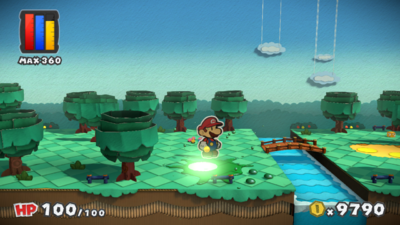
| |
| In the Old Sacred Tree area, on the ground. | 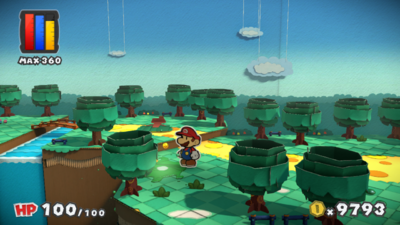
| |
| In the Old Sacred Tree area, on the ground. | 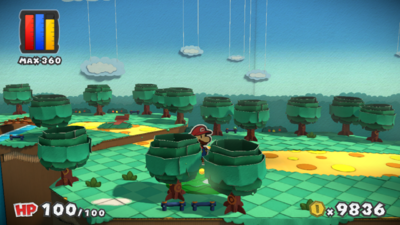
| |
| In the Old Sacred Tree area, on the ground. | 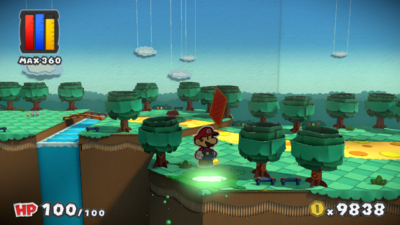
| |
| In the Old Sacred Tree area, on the ground. | 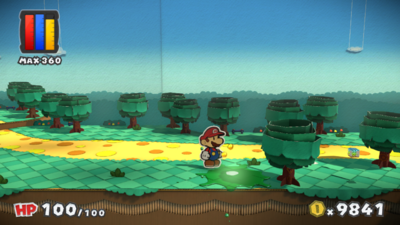
| |
| In the Old Sacred Tree area, on the ground. | 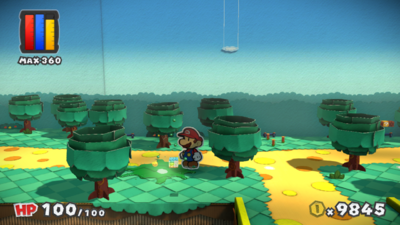
| |
| In the Old Sacred Tree area, on the ground. | 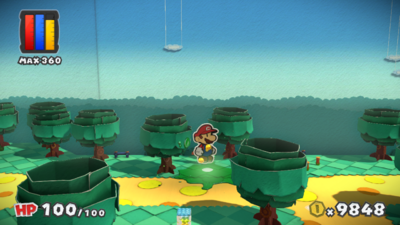
| |
| In the Old Sacred Tree area, on the ground. | 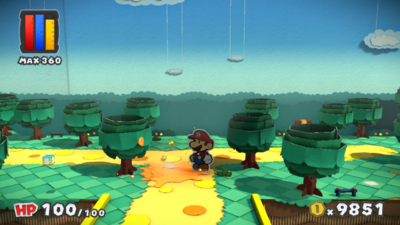
| |
| In the Old Sacred Tree area, on the ground. | 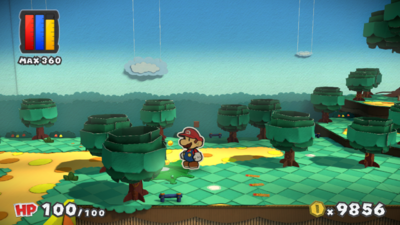
| |
| In the Old Sacred Tree area, on the ground. | 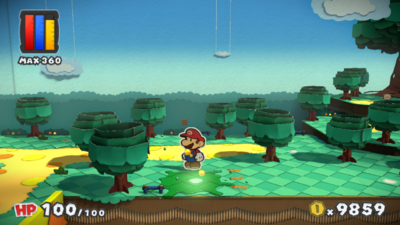
| |
| In the Old Sacred Tree area, on the ground. | 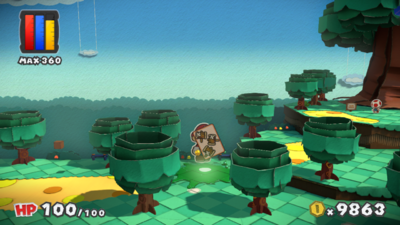
| |
| In the Old Sacred Tree area, on the ground. | 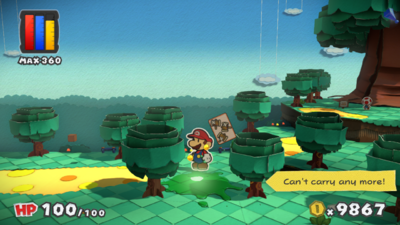
| |
| In the Old Sacred Tree area, on the ground. | 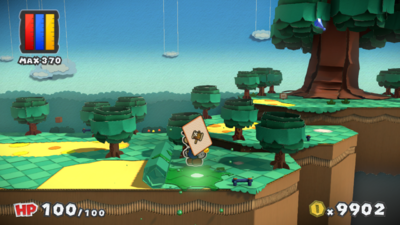
| |
| In the Old Sacred Tree area, on the ground. | 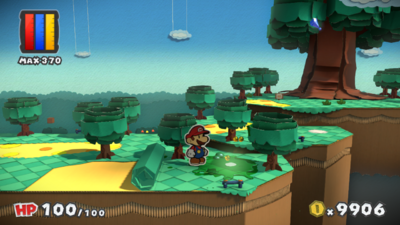
| |
| In the Old Sacred Tree area, on the ground. | 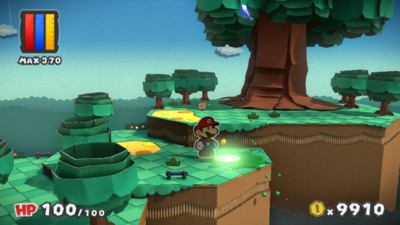
| |
| In the Small Goomba Gang area, on the ground. | 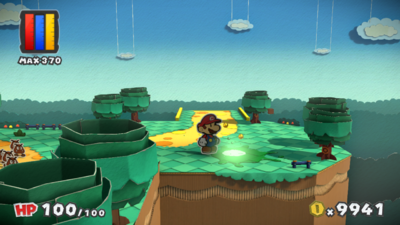
| |
| In the Small Goomba Gang area, on the ground. | 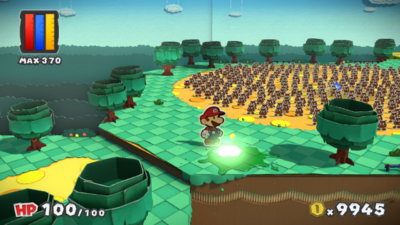
| |
| In the Buzzy Beetle area, on the ground. | 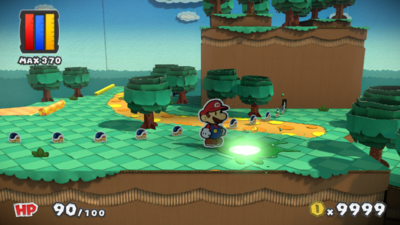
| |
| In the Buzzy Beetle area, underneath the bridge. | 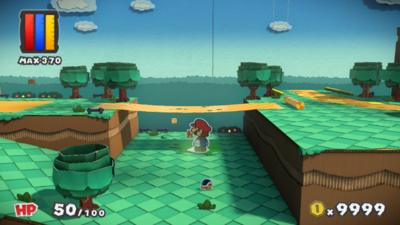
|
Green Energy Plant
Items
Field/Given/Objects
| Item | Icon | Location | Location Image |
|---|---|---|---|
Colorless spot
| Location | Drop | Location Image |
|---|---|---|
| In the third Super Mario Bros. 3 area, on a cloud's eyes. | 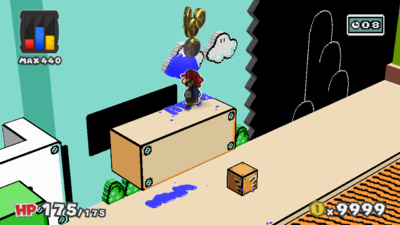
|
Mossrock Theater
Items
Field/Given/Objects
| Item | Icon | Location | Location Image |
|---|---|---|---|
Colorless spots
The Emerald Circus
Items
Field/Given/Objects
| Item | Icon | Location | Location Image |
|---|---|---|---|
Colorless spots
Black Bowser's Castle
Items
Field/Given/Objects
| Item | Icon | Location | Location Image |
|---|---|---|---|
