User:Stone Pokey/sandbox: Difference between revisions
From the Super Mario Wiki, the Mario encyclopedia
Jump to navigationJump to search
Stone Pokey (talk | contribs) No edit summary |
Stone Pokey (talk | contribs) |
||
| (19 intermediate revisions by the same user not shown) | |||
| Line 1: | Line 1: | ||
==Super Mario World == | |||
<gallery> | |||
DoorSMW.png|Door | |||
SMW-PWarpDoor.png|P-Door | |||
SMWbetadoor.png|Small Door (unused) | |||
BossDoor-SMW.png|Boss Door | |||
BossDoorBrown-SMW.png|Boss Door (Chocolate Fortress) | |||
</gallery> | |||
====Worlds and Levels==== | |||
{|align=center class="wikitable"style="text-align:center;margin:0 auto 1em auto" | |||
|- | |||
|colspan="1"style="background:#80FF80"|[[File:SMW Yoshi's House.png|100px]]{{br}}[[File:SMW MapIcon YoshisHouse.png]][[Yoshi's House|Yoshi's]]{{br}}[[Yoshi's House|House]] | |||
|colspan="1"style="background:#80FF80"|[[File:YoshisIsland1.png|100px]]{{br}}[[File:SMW MapIcon Level1.gif]][[Yoshi's Island 1|Yoshi's]]{{br}}[[Yoshi's Island 1|Island 1]] | |||
|colspan="1"style="background:#8080FF"|[[File:YellowSwitchPalace.png|100px]]{{br}}[[File:SMW MapIcon SwitchPalace-Yellow.png]][[Yellow Switch Palace|Yellow]]{{br}}[[Yellow Switch Palace|Switch Palace]] | |||
|colspan="1"style="background:#00C000"|[[File:YoshisIsland2.png|100px]]{{br}}[[File:SMW MapIcon Level1.gif]][[Yoshi's Island 2|Yoshi's]]{{br}}[[Yoshi's Island 2|Island 2]] | |||
|colspan="1"style="background:#FFC080"|[[File:YoshisIsland3.png|100px]]{{br}}[[File:SMW MapIcon Level1.gif]][[Yoshi's Island 3|Yoshi's]]{{br}}[[Yoshi's Island 3|Island 3]] | |||
|colspan="1"style="background:#80E0FF"|[[File:Yoshi's Island 4.png|100px]]{{br}}[[File:SMW MapIcon LevelPond1.gif]][[Yoshi's Island 4|Yoshi's]]{{br}}[[Yoshi's Island 4|Island 4]] | |||
|colspan="1"style="background:#C0C0C0"|[[File:Iggy's Castle Gate.png|100px]]{{br}}[[File:SMW MapIcon Castle.png]][[1 Iggy's Castle|#1 Iggy's]]{{br}}[[1 Iggy's Castle|Castle]] | |||
|colspan="1"style="background:#FFFFFF"|[[File:Yoshi'sIslandSMW.png|100px]]{{br}}World 1:{{br}}[[Yoshi's Island (location)#Super Mario World|Yoshi's Island]] | |||
|colspan="4"style="background:#FFFFFF"|[[File:Dinosaur Land SMW map.png|100px]]{{br}}[[Dinosaur Land]] | |||
|- | |||
|colspan="1"style="background:#80FF80"|[[File:Donut Plains 1.png|100px]]{{br}}[[File:SMW MapIcon Level2.gif]][[Donut Plains 1|Donut]]{{br}}[[Donut Plains 1|Plains 1]] | |||
|colspan="1"style="background:#808080"|[[File:Donut Plains 2.png|100px]]{{br}}[[File:SMW MapIcon Cave2.gif]][[Donut Plains 2|Donut]]{{br}}[[Donut Plains 2|Plains 2]] | |||
|colspan="1"style="background:#C080FF"|[[File:Donut Ghost House.png|100px]]{{br}}[[File:SMW MapIcon GhostHouse.png]][[Donut Ghost House|Donut]]{{br}}[[Donut Ghost House|Ghost House]] | |||
|colspan="1"style="background:#00C000"|[[File:Donut Plains 3.png|100px]]{{br}}[[File:SMW MapIcon Level1.gif]][[Donut Plains 3|Donut]]{{br}}[[Donut Plains 3|Plains 3]] | |||
|colspan="1"style="background:#80FF80"|[[File:DonutPlains4.png|100px]]{{br}}[[File:SMW MapIcon Level1.gif]][[Donut Plains 4|Donut]]{{br}}[[Donut Plains 4|Plains 4]] | |||
|colspan="1"style="background:#C0C0C0"|[[File:SMW 2 Mortons Castle.png|100px]]{{br}}[[File:SMW MapIcon Castle.png]][[2 Morton's Castle|#2 Morton's]]{{br}}[[2 Morton's Castle|Castle]] | |||
|colspan="1"style="background:#FFFFFF"|[[File:DonutPlains.png|100px]]{{br}}World 2:{{br}}[[Donut Plains]] | |||
|colspan="1"style="background:#80C0FF"|[[File:Donut Secret 1.png|100px]]{{br}}[[File:SMW MapIcon LevelPond2.gif]][[Donut Secret 1|Donut]]{{br}}[[Donut Secret 1|Secret 1]] | |||
|colspan="1"style="background:#8080FF"|[[File:Green Switch Palace.png|100px]]{{br}}[[File:SMW MapIcon SwitchPalace-Green.png]][[Green Switch Palace|Green]]{{br}}[[Green Switch Palace|Switch Palace]] | |||
|colspan="1"style="background:#00C000"|[[File:SMW Top Secret Area.png|100px]]{{br}}[[File:SMW MapIcon Level1.gif]][[Top Secret Area|Top]]{{br}}[[Top Secret Area|Secret Area]] | |||
|colspan="1"style="background:#C080FF"|[[File:Donut Secret House SMW.png|100px]]{{br}}[[File:SMW MapIcon GhostHouse.png]][[Donut Secret House]] | |||
|colspan="1"style="background:#F0F0F0"|[[File:DonutSecret2.png|100px]]{{br}}[[File:SMW MapIcon Level1.gif]][[Donut Secret 2|Donut]]{{br}}[[Donut Secret 2|Secret 2]] | |||
|- | |||
|colspan="1"style="background:#808080"|[[File:Vannila1.png|100px]]{{br}}[[File:SMW MapIcon LevelLarge2.gif]] [[Vanilla Dome 1|Vanilla]]{{br}}[[Vanilla Dome 1|Dome 1]] | |||
|colspan="1"style="background:#808080"|[[File:VanillaDome2.png|100px]]{{br}}[[File:SMW MapIcon LevelPond2.gif]] [[Vanilla Dome 2|Vanilla]]{{br}}[[Vanilla Dome 2|Dome 2]] | |||
|colspan="1"style="background:#C080FF"|[[File:VanillaGhostHouse.png|100px]]{{br}}[[File:SMW MapIcon GhostHouse.png]] [[Vanilla Ghost House|Vanilla]]{{br}}[[Vanilla Ghost House|Ghost House]] | |||
|colspan="1"style="background:#808080"|[[File:SMW_Vanilla_Dome_3.png|100px]]{{br}}[[File:SMW MapIcon LevelLarge1.gif]] [[Vanilla Dome 3|Vanilla]]{{br}}[[Vanilla Dome 3|Dome 3]] | |||
|colspan="1"style="background:#80E0FF"|[[File:Vanilla Dome 4.png|100px]]{{br}}[[File:SMW MapIcon Level1.gif]] [[Vanilla Dome 4|Vanilla]]{{br}}[[Vanilla Dome 4|Dome 4]] | |||
|colspan="1"style="background:#C0C0C0"|[[File:Lemmy's Castle.png|100px]]{{br}}[[File:SMW MapIcon Castle.png]] [[3 Lemmy's Castle|#3 Lemmy's]]{{br}}[[3 Lemmy's Castle|Castle]] | |||
|colspan="1"style="background:#FFFFFF"|[[File:VanillaDome.png|100px]]{{br}}World 3:{{br}}[[Vanilla Dome]] | |||
|colspan="1"style="background:#808080"|[[File:Vanilla Secret 1.png|100px]]{{br}}[[File:SMW MapIcon Level2.gif]] [[Vanilla Secret 1|Vanilla]]{{br}}[[Vanilla Secret 1|Secret 1]] | |||
|colspan="1"style="background:#8080FF"|[[File:SMW SwitchPalaceRed.png|100px]]{{br}}[[File:SMW MapIcon SwitchPalace-Red.png]] [[Red Switch Palace|Red]]{{br}}[[Red Switch Palace|Switch Palace]] | |||
|colspan="1"style="background:#FFC080"|[[File:Vanilla Secret 2.png|100px]]{{br}}[[File:SMW MapIcon Level1.gif]] [[Vanilla Secret 2|Vanilla]]{{br}}[[Vanilla Secret 2|Secret 2]] | |||
|colspan="1"style="background:#80E0FF"|[[File:Vanilla Secret 3.png|100px]]{{br}}[[File:SMW MapIcon LevelPond1.gif]] [[Vanilla Secret 3|Vanilla]]{{br}}[[Vanilla Secret 3|Secret 3]] | |||
|colspan="1"style="background:#C0C0C0"|[[File:VanillaFortress.png|100px]]{{br}}[[File:SMW MapIcon Fortress.png]] [[Vanilla Fortress|Vanilla]]{{br}}[[Vanilla Fortress|Fortress]] | |||
|- | |||
|colspan="1"style="background:#80FFFF"|[[File:Cheese Bridge Area.png|100px]]{{br}}[[File:SMW MapIcon Level2.gif]] [[Cheese Bridge Area]] | |||
|colspan="1"style="background:#80FF80"|[[File:Cookie Mountain end.png|100px]]{{br}}[[File:SMW MapIcon Level1.gif]] [[Cookie Mountain]] | |||
|colspan="1"style="background:#FFFFFF"|[[File:SMW Twin Bridges map.png|100px]]{{br}}World 4:{{br}}[[Twin Bridges]]{{br}}(Cheese path) | |||
|colspan="1"style="background:#80FFFF"|[[File:Butter Bridge 1.png|100px]]{{br}}[[File:SMW MapIcon Level1.gif]] [[Butter Bridge 1]] | |||
|colspan="1"style="background:#80FFFF"|[[File:Butter Bridge 2.png|100px]]{{br}}[[File:SMW MapIcon Level1.gif]] [[Butter Bridge 2]] | |||
|colspan="1"style="background:#FFFFFF"|[[File:SMW Twin Bridges map.png|100px]]{{br}}World 4:{{br}}[[Twin Bridges]]{{br}}(Butter path) | |||
|colspan="1"style="background:#C0C0C0"|[[File:SMW LudwigCastle.png|100px]]{{br}}[[File:SMW MapIcon Castle.png]] [[4 Ludwig's Castle|#4 Ludwig's Castle]] | |||
|colspan="1"style="background:#FFFFFF"|[[File:SMW Twin Bridges map.png|100px]]{{br}}World 4:{{br}}[[Twin Bridges]]{{br}}(Paths converge) | |||
|colspan="1"style="background:#80C0FF"|[[File:Soda Lake.png|100px]]{{br}}[[File:SMW MapIcon LevelPond1.gif]] [[Soda Lake]] | |||
|colspan="3"style="background:#FFFFFF"|Above:{{br}}[[File:VanillaDomeB.png|100px]]{{br}}World 3:{{br}}[[Vanilla Dome]] (Outside area) | |||
|- | |||
|colspan="1"style="background:#008000"|[[File:Forest of Illusion 1 SMW.png|100px]]{{br}}[[File:SMW MapIcon LevelLarge2.gif]] [[Forest of Illusion 1]] | |||
|colspan="1"style="background:#80C0FF"|[[File:Forest of Illusion 2.png|100px]]{{br}}[[File:SMW MapIcon LevelPond2.gif]] [[Forest of Illusion 2]] | |||
|colspan="1"style="background:#008000"|[[File:Forest of Illusion 3.png|100px]]{{br}}[[File:SMW MapIcon Level2.gif]] [[Forest of Illusion 3]] | |||
|colspan="1"style="background:#C080FF"|[[File:Forest Ghost House.png|100px]]{{br}}[[File:SMW MapIcon GhostHouse.png]] [[Forest Ghost House]] | |||
|colspan="1"style="background:#00C000"|[[File:Forest of Illusion 4.png|100px]]{{br}}[[File:SMW MapIcon Level2.gif]] [[Forest of Illusion 4]] | |||
|colspan="1"style="background:#C0C0C0"|[[File:SMW RoyCastle.png|100px]]{{br}}[[File:SMW MapIcon Castle.png]] [[5 Roy's Castle|#5 Roy's Castle]] | |||
|colspan="1"style="background:#FFFFFF"|[[File:ForestOfIllusion.png|100px]]{{br}}World 5:{{br}}[[Forest of Illusion]] | |||
|colspan="1"style="background:#8080FF"|[[File:Blue Switch Palace.png|100px]]{{br}}[[File:SMW MapIcon SwitchPalace-Blue.png]] [[Blue Switch Palace]] | |||
|colspan="1"style="background:#008000"|[[File:ForestSecretArea.png|100px]]{{br}}[[File:SMW MapIcon Level1.gif]] [[Forest Secret Area]] | |||
|colspan="1"style="background:#C0C0C0"|[[File:SMW Forest Fortress.png|100px]]{{br}}[[File:SMW MapIcon Fortress.png]] [[Forest Fortress]] | |||
|colspan="2"style="background:#FFFFFF"|[[File:ForestOfIllusionOutside.png|100px]]{{br}}World 5:{{br}}[[Forest of Illusion]]{{br}}(Outside area) | |||
|- | |||
|colspan="1"style="background:#FFFFFF"|[[File:W6icon.png|100px]]{{br}}World 6 | |||
|colspan="1"style="background:#FFFFFF"|[[File:W6icon.png|100px]]{{br}}World 6 | |||
|colspan="1"style="background:#FFFFFF"|[[File:W6icon.png|100px]]{{br}}World 6 | |||
|colspan="1"style="background:#FFFFFF"|[[File:W6icon.png|100px]]{{br}}World 6 | |||
|colspan="1"style="background:#FFFFFF"|[[File:W6icon.png|100px]]{{br}}World 6 | |||
|colspan="1"style="background:#FFFFFF"|[[File:W6icon.png|100px]]{{br}}World 6 | |||
|colspan="1"style="background:#FFFFFF"|[[File:W6icon.png|100px]]{{br}}World 6 | |||
|colspan="1"style="background:#FFFFFF"|[[File:W6icon.png|100px]]{{br}}World 6 | |||
|colspan="1"style="background:#FFFFFF"|[[File:W6icon.png|100px]]{{br}}World 6 | |||
|colspan="3"style="background:#FFFFFF"|[[File:W6icon.png]]{{br}}World 6 | |||
|- | |||
|colspan="1"style="background:#FFFFFF"|[[File:W8icon.png|100px]]{{br}}World 7 | |||
|colspan="1"style="background:#FFFFFF"|[[File:W8icon.png|100px]]{{br}}World 7 | |||
|colspan="1"style="background:#FFFFFF"|[[File:W8icon.png|100px]]{{br}}World 7 | |||
|colspan="1"style="background:#FFFFFF"|[[File:W8icon.png|100px]]{{br}}World 7 | |||
|colspan="1"style="background:#FFFFFF"|[[File:W8icon.png|100px]]{{br}}World 7 | |||
|colspan="1"style="background:#FFFFFF"|[[File:W8icon.png|100px]]{{br}}World 7 | |||
|colspan="1"style="background:#FFFFFF"|[[File:W8icon.png|100px]]{{br}}World 7 | |||
|colspan="1"style="background:#FFFFFF"|[[File:W8icon.png|100px]]{{br}}World 7 | |||
|colspan="1"style="background:#FFFFFF"|[[File:W8icon.png|100px]]{{br}}World 7 | |||
|colspan="1"style="background:#FFFFFF"|[[File:W8icon.png|100px]]{{br}}World 7 | |||
|colspan="1"style="background:#FFFFFF"|[[File:W7icon.png]]{{br}}World 7 | |||
|colspan="1"style="background:#FFFFFF"|[[File:W8icon.png]]{{br}}World 8 | |||
|- | |||
|colspan="1"style="background:#FFFFFF"|[[File:W7icon.png|100px]]{{br}}World 8 | |||
|colspan="1"style="background:#FFFFFF"|[[File:W7icon.png|100px]]{{br}}World 8 | |||
|colspan="1"style="background:#FFFFFF"|[[File:W7icon.png|100px]]{{br}}World 8 | |||
|colspan="1"style="background:#FFFFFF"|[[File:W7icon.png|100px]]{{br}}World 8 | |||
|colspan="1"style="background:#FFFFFF"|[[File:W7icon.png|100px]]{{br}}World 8 | |||
|colspan="1"style="background:#FFFFFF"|[[File:W7icon.png|100px]]{{br}}World 8 | |||
|colspan="1"style="background:#FFFFFF"|[[File:W7icon.png|100px]]{{br}}World 8 | |||
|colspan="1"style="background:#FFFFFF"|[[File:W7icon.png|100px]]{{br}}World 8 | |||
|colspan="1"style="background:#FFFFFF"|[[File:W7icon.png|100px]]{{br}}World 8 | |||
|colspan="1"style="background:#FFFFFF"|[[File:W7icon.png|100px]]{{br}}World 8 | |||
|colspan="1"style="background:#FFFFFF"|[[File:W7icon.png|100px]]{{br}}World 8 | |||
|colspan="1"style="background:#FFFFFF"|[[File:W7icon.png|100px]]{{br}}World 8 | |||
|} | |||
==New Super Mario Bros.== | ==New Super Mario Bros.== | ||
<gallery> | <gallery> | ||
| Line 6: | Line 115: | ||
Bowser Castle NSMB.png|[[Bowser's Castle]] | Bowser Castle NSMB.png|[[Bowser's Castle]] | ||
Cannon NSMB.png|[[Warp Cannon]] | Cannon NSMB.png|[[Warp Cannon]] | ||
PipeIcon.png|[[Warp Pipe]] | |||
DoorNSMB.png|Door | DoorNSMB.png|Door | ||
Castle Door.png|Tower/Castle boss door | Castle Door.png|Tower/Castle boss door | ||
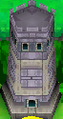
NSMB Tower.png|A Tower | NSMB Tower.png|A Tower | ||
CastleNSMB.png|A Castle | CastleNSMB.png|A Castle | ||
| Line 14: | Line 123: | ||
Bowsercastlensmb.png|Bowser's Castle | Bowsercastlensmb.png|Bowser's Castle | ||
CannonNSMB.png|A Warp Cannon | CannonNSMB.png|A Warp Cannon | ||
NSMB Warp Pipe Map.png|A Warp Pipe | |||
Mario enters a door.png|Mario enters a door | |||
BowserBossDoorNSMB.png|Final boss door | |||
</gallery> | </gallery> | ||
== | ====Minibosses and Bosses==== | ||
{|align=center class="wikitable"style="text-align:center;margin:0 auto 1em auto" | |||
|- | |||
!colspan="1"style="font-size:125%;text-align:center;background:#9C6936"|World 1 | |||
!colspan="1"style="font-size:125%;text-align:center;background:#9C6936"|World 2 | |||
!colspan="1"style="font-size:125%;text-align:center;background:#9C6936"|World 3 | |||
!colspan="1"style="font-size:125%;text-align:center;background:#9C6936"|World 4 | |||
!colspan="1"style="font-size:125%;text-align:center;background:#9C6936"|World 5 | |||
!colspan="2"style="font-size:125%;text-align:center;background:#9C6936"|World 6 | |||
!colspan="1"style="font-size:125%;text-align:center;background:#9C6936"|World 7 | |||
!colspan="2"style="font-size:125%;text-align:center;background:#9C6936"|World 8 | |||
|- | |||
|colspan="1"style="background:wheat"|[[File:BowserJrDS1.png|120px]]{{br}}[[Bowser Jr.]] | |||
|colspan="1"style="background:#FFF8DC"|[[File:BowserJrDS2.png|120px]]{{br}}Bowser Jr. | |||
|colspan="1"style="background:wheat"|[[File:BowserJrDS3.png|120px]]{{br}}Bowser Jr. | |||
|colspan="1"style="background:#FFF8DC"|[[File:BowserJrDS4.png|120px]]{{br}}Bandana Jr. | |||
|colspan="1"style="background:wheat"|[[File:BowserJrDS5.png|120px]]{{br}}Bowser Jr. | |||
|colspan="1"style="background:#FFF8DC"|[[File:BowserJrDS6.png|120px]]{{br}}Bowser Jr. | |||
|colspan="1"style="background:wheat"|[[File:BowserJrDS7.png|120px]]{{br}}Bandana Jr. | |||
|colspan="1"style="background:#FFF8DC"|[[File:BowserJrDS8.png|120px]]{{br}}Bandana Jr. | |||
|colspan="1"style="background:wheat"|[[File:BowserJrDS9.png|120px]]{{br}}Bandana Jr. | |||
|colspan="1"style="background:#FFF8DC"|[[File:BowserJrDS10.png|120px]]{{br}}Bandana Jr. | |||
|- | |||
|colspan="1"style="background:wheat"|[[File:Vs-brsr.png|120px]]{{br}}[[Bowser]] | |||
|colspan="1"style="background:#FFF8DC"|[[File:Mummipokey.png|120px]]{{br}}[[Mummipokey]] | |||
|colspan="1"style="background:wheat"|[[File:NSMBDS Cheepskipper Screenshot.png|120px]]{{br}}[[Cheepskipper]] | |||
|colspan="1"style="background:#FFF8DC"|[[File:Megagoomba.png|120px]]{{br}}[[Mega Goomba]] | |||
|colspan="1"style="background:wheat"|[[File:PeteyPiranhaNSMB.png|120px]]{{br}}[[Petey Piranha]] | |||
|colspan="2"style="background:#FFF8DC"|[[File:NSMB MontyTank.png|120px]][[File:NSMBDS Fire Luigi and Monty Tank.png|120px]]{{br}}[[Monty Tank]] | |||
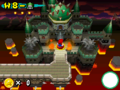
|colspan="1"style="background:wheat"|[[File:NSMB W7-Castle.png|120px]]{{br}}[[Lakithunder]] | |||
|colspan="1"style="background:#FFF8DC"|[[File:World8-CastleNSMB.png|120px]]{{br}}[[Dry Bowser]] | |||
|colspan="1"style="background:wheat"|[[File:NSMB7.png|120px]]{{br}}[[Giant Bowser]] | |||
|} | |||
====Levels==== | |||
{|align=center class="wikitable"style="text-align:center;margin:0 auto 1em auto" | |||
|colspan="1"style="background:#80FF80"|[[File:NSMB 1-1.png|100px]]{{br}}World 1-1 | |||
|colspan="1"style="background:#8080FF"|[[File:World1-2NSMB.png|100px]]{{br}}World 1-2 | |||
|colspan="1"style="background:#80FFFF"|[[File:World1-3NSMB.png|100px]]{{br}}World 1-3 | |||
|colspan="1"style="background:#C0C0C0"|[[File:NSMB1-Tower.png|100px]]{{br}}{{World|1|towern}} | |||
|colspan="1"style="background:#80FF80"|[[File:NSMB 1-4.png|100px]]{{br}}World 1-4 | |||
|colspan="1"style="background:#80FFFF"|[[File:NSMB 1-5.png|100px]]{{br}}World 1-5 | |||
|colspan="1"style="background:#80C0FF"|[[File:NSMB W1-A.png|100px]]{{br}}World 1-A | |||
|colspan="1"style="background:#C0C0C0"|[[File:NSMB W1-Castle.png|100px]]{{br}}{{World|1|castlen}} | |||
|- | |||
|colspan="1"style="background:#FFC080"|[[File:NSMB 2-1.png|100px]]{{br}}World 2-1 | |||
|colspan="1"style="background:#FFFF80"|[[File:NSMB W2-2.png|100px]]{{br}}World 2-2 | |||
|colspan="1"style="background:#00C000"|[[File:2-3 Maze Area NSMB.png|100px]]{{br}}World 2-3 | |||
|colspan="1"style="background:#FFFF80"|[[File:NSMB W2-A.png|100px]]{{br}}World 2-A | |||
|colspan="1"style="background:#FFC080"|[[File:NSMB W2-4.png|100px]]{{br}}World 2-4 | |||
|colspan="1"style="background:#C0C0C0"|[[File:NSMB W2-Tower.png|100px]]{{br}}{{World|2|towern}} | |||
|colspan="1"style="background:#FFC080"|[[File:NSMBWorld2-5.png|100px]]{{br}}World 2-5 | |||
|colspan="1"style="background:#80FFFF"|[[File:NSMB W2-6.png|100px]]{{br}}World 2-6 | |||
|colspan="1"style="background:#C0C0C0"|[[File:NSMBDS Giant Spiked Ball Screenshot.png|100px]]{{br}}{{World|2|castlen}} | |||
|- | |||
|colspan="1"style="background:#80C0FF"|[[File:3-1 NSMB.png|100px]]{{br}}World 3-1 | |||
|colspan="1"style="background:#80E0FF"|[[File:3-A NSMB.png|100px]]{{br}}World 3-A | |||
|colspan="1"style="background:#80FFFF"|[[File:3-2 NSMB.png|100px]]{{br}}World 3-2 | |||
|colspan="1"style="background:#80FFFF"|[[File:3-B NSMB.png|100px]]{{br}}World 3-B | |||
|colspan="1"style="background:#80E0FF"|[[File:3-C NSMB.png|100px]]{{br}}World 3-C | |||
|colspan="1"style="background:#C0C0C0"|[[File:3-Tower NSMB.png|100px]]{{br}}{{World|3|towern}} | |||
|colspan="1"style="background:#80C0FF"|[[File:3-3 NSMB.png|100px]]{{br}}World 3-3 | |||
|colspan="1"style="background:#C080FF"|[[File:NSMB 3-GhostHouse.png|100px]]{{br}}{{World|3|ghostn}} | |||
|colspan="1"style="background:#C0C0C0"|[[File:NSMBDS Big Whomp Screenshot.png|100px]]{{br}}{{World|3|castlen}} | |||
|- | |||
|colspan="1"style="background:#008000"|[[File:4-1 NSMB.png|100px]]{{br}}World 4-1 | |||
|colspan="1"style="background:#80FFFF"|[[File:4-2 NSMB.png|100px]]{{br}}World 4-2 | |||
|colspan="1"style="background:#80C0FF"|[[File:NSMB MegaUnagi.png|100px]]{{br}}World 4-3 | |||
|colspan="1"style="background:#C0C0C0"|[[File:NSMB 4-Tower.png|100px]]{{br}}{{World|4|towern}} | |||
|colspan="1"style="background:#008000"|[[File:4-A NSMB.png|100px]]{{br}}World 4-A | |||
|colspan="1"style="background:#008000"|[[File:4-4 NSMB.png|100px]]{{br}}World 4-4 | |||
|colspan="1"style="background:#C080FF"|[[File:4-GH NSMB.png|100px]]{{br}}{{World|4|ghostn}} | |||
|colspan="1"style="background:#8080FF"|[[File:4-5 NSMB.png|100px]]{{br}}World 4-5 | |||
|colspan="1"style="background:#008000"|[[File:4-6 NSMB.png|100px]]{{br}}World 4-6 | |||
|colspan="1"style="background:#C0C0C0"|[[File:World4CastleNSMB.png|100px]]{{br}}{{World|4|castlen}} | |||
|- | |||
|colspan="1"style="background:#F0F0F0"|[[File:5-1 NSMB.png|100px]]{{br}}World 5-1 | |||
|colspan="1"style="background:#8080FF"|[[File:Spike tops.PNG|100px]]{{br}}World 5-2 | |||
|colspan="1"style="background:#80FFFF"|[[File:5-A NSMB.png|100px]]{{br}}World 5-A | |||
|colspan="1"style="background:#C0C0C0"|[[File:5-Tower NSMB.png|100px]]{{br}}{{World|5|towern}} | |||
|colspan="1"style="background:#F0F0F0"|[[File:5-3 NSMB.png|100px]]{{br}}World 5-3 | |||
|colspan="1"style="background:#C080FF"|[[File:5-GH NSMB.png|100px]]{{br}}{{World|5|ghostn}} | |||
|colspan="1"style="background:#F0F0F0"|[[File:Snailicorn.png|100px]]{{br}}World 5-B | |||
|colspan="1"style="background:#8080FF"|[[File:Broozershot.png|100px]]{{br}}World 5-C | |||
|colspan="1"style="background:#80FFFF"|[[File:5-4 NSMB.png|100px]]{{br}}World 5-4 | |||
|colspan="1"style="background:#C0C0C0"|[[File:SuperDryBones.png|100px]]{{br}}{{World|5|castlen}} | |||
|- | |||
|colspan="1"style="background:#808080"|[[File:6-1 NSMB.png|100px]]{{br}}World 6-1 | |||
|colspan="1"style="background:#FFC080"|[[File:6-A NSMB.png|100px]]{{br}}World 6-A | |||
|colspan="1"style="background:#80E0FF"|[[File:6-2 NSMB.png|100px]]{{br}}World 6-2 | |||
|colspan="1"style="background:#C0C0C0"|[[File:6-Tower NSMB.png|100px]]{{br}}{{World|6|towern}} | |||
|colspan="1"style="background:#008000"|[[File:NSMB W6-3.png|100px]]{{br}}World 6-3 | |||
|colspan="1"style="background:#808080"|[[File:6-4 NSMB.png|100px]]{{br}}World 6-4 | |||
|colspan="1"style="background:#C0C0C0"|[[File:6-Tower2 NSMB.png|100px]]{{br}}{{World|6|towern}}2 | |||
|colspan="1"style="background:#80C0FF"|[[File:6-5NSMB.png|100px]]{{br}}World 6-5 | |||
|colspan="1"style="background:#F0F0F0"|[[File:6-B NSMB.png|100px]]{{br}}World 6-B | |||
|colspan="1"style="background:#808080"|[[File:6-6 NSMB.png|100px]]{{br}}World 6-6 | |||
|colspan="1"style="background:#C0C0C0"|[[File:NSMB W6-Castle.png|100px]]{{br}}{{World|6|castlen}} | |||
|- | |||
|colspan="1"style="background:#80FFFF"|[[File:7-1 NSMB.png|100px]]{{br}}World 7-1 | |||
|colspan="1"style="background:#C080FF"|[[File:7-Ghost House NSMB.png|100px]]{{br}}{{World|7|ghostn}} | |||
|colspan="1"style="background:#80FFFF"|[[File:7-2 NSMB.png|100px]]{{br}}World 7-2 | |||
|colspan="1"style="background:#80FFFF"|[[File:7-3 NSMB.png|100px]]{{br}}World 7-3 | |||
|colspan="1"style="background:#C0C0C0"|[[File:NSMB W7-Tower.png|100px]]{{br}}{{World|7|towern}} | |||
|colspan="1"style="background:#80FFFF"|[[File:World 7-4 NSMB.png|100px]]{{br}}World 7-4 | |||
|colspan="1"style="background:#80FF80"|[[File:World 7-5 NSMB.png|100px]]{{br}}World 7-5 | |||
|colspan="1"style="background:#80FFFF"|[[File:World 7-6 NSMB.png|100px]]{{br}}World 7-6 | |||
|colspan="1"style="background:#80FFFF"|[[File:World 7-7 NSMB.png|100px]]{{br}}World 7-7 | |||
|colspan="1"style="background:#00C000"|[[File:NSMB World 7-A.png|100px]]{{br}}World 7-A | |||
|colspan="1"style="background:#C0C0C0"|[[File:NSMB Snake Block.png|100px]]{{br}}{{World|7|castlen}} | |||
|- | |||
|colspan="1"style="background:#E080FF"|[[File:NSMB World 8-1.png|100px]]{{br}}World 8-1 | |||
|colspan="1"style="background:#8080FF"|[[File:NSMB World 8-2.png|100px]]{{br}}World 8-2 | |||
|colspan="1"style="background:#C0C0C0"|[[File:NSMB World 8-Tower 1.png|100px]]{{br}}{{World|8|towern}} | |||
|colspan="1"style="background:#FFC080"|[[File:NSMB World 8-3.png|100px]]{{br}}World 8-3 | |||
|colspan="1"style="background:#A05000"|[[File:NSMB ScuttleBug.png|100px]]{{br}}World 8-4 | |||
|colspan="1"style="background:#C0C0C0"|[[File:NSMB World 8-Castle.png|100px]]{{br}}{{World|8|castlen}} | |||
|colspan="1"style="background:#FF4040"|[[File:NSMB World 8-5.png|100px]]{{br}}World 8-5 | |||
|colspan="1"style="background:#FF8080"|[[File:NSMB World 8-6.png|100px]]{{br}}World 8-6 | |||
|colspan="1"style="background:#808080"|[[File:NSMB World 8-7.png|100px]]{{br}}World 8-7 | |||
|colspan="1"style="background:#606060"|[[File:NSMB World 8-8.png|100px]]{{br}}World 8-8 | |||
|colspan="1"style="background:#C0C0C0"|[[File:NSMB World 8-Tower 2.png|100px]]{{br}}{{World|8|towern}}2 | |||
|colspan="1"style="background:#C0C0C0"|[[File:World8BowsersCastleNSMB.png|100px]]{{br}}{{World|8|bowsern}} | |||
|} | |||
====Regular Levels==== | |||
{|align=center class="wikitable"style="text-align:center;margin:0 auto 1em auto" | |||
|colspan="1"style="background:#80FF80"|[[File:NSMB 1-1.png|100px]]{{br}}World 1-1 | |||
|colspan="1"style="background:#8080FF"|[[File:World1-2NSMB.png|100px]]{{br}}World 1-2 | |||
|colspan="1"style="background:#80FFFF"|[[File:World1-3NSMB.png|100px]]{{br}}World 1-3 | |||
|colspan="1"style="background:#C0C0C0"|[[File:NSMB1-Tower.png|100px]]{{br}}{{World|1|towern}} | |||
|colspan="1"style="background:#80FF80"|[[File:NSMB 1-4.png|100px]]{{br}}World 1-4 | |||
|colspan="1"style="background:#80FFFF"|[[File:NSMB 1-5.png|100px]]{{br}}World 1-5 | |||
|colspan="1"style="background:#C0C0C0"|[[File:NSMB W1-Castle.png|100px]]{{br}}{{World|1|castlen}} | |||
|colspan="5"style="background:#FFFFFF"|[[File:W1icon.png]]{{br}}World 1 | |||
|- | |||
|colspan="1"style="background:#FFC080"|[[File:NSMB 2-1.png|100px]]{{br}}World 2-1 | |||
|colspan="1"style="background:#FFFF80"|[[File:NSMB W2-2.png|100px]]{{br}}World 2-2 | |||
|colspan="1"style="background:#00C000"|[[File:2-3 Maze Area NSMB.png|100px]]{{br}}World 2-3 | |||
|colspan="1"style="background:#FFC080"|[[File:NSMB W2-4.png|100px]]{{br}}World 2-4 | |||
|colspan="1"style="background:#C0C0C0"|[[File:NSMB W2-Tower.png|100px]]{{br}}{{World|2|towern}} | |||
|colspan="1"style="background:#FFC080"|[[File:NSMBWorld2-5.png|100px]]{{br}}World 2-5 | |||
|colspan="1"style="background:#80FFFF"|[[File:NSMB W2-6.png|100px]]{{br}}World 2-6 | |||
|colspan="1"style="background:#C0C0C0"|[[File:NSMBDS Giant Spiked Ball Screenshot.png|100px]]{{br}}{{World|2|castlen}} | |||
|colspan="4"style="background:#FFFFFF"|[[File:W2icon.png]]{{br}}World 2 | |||
|- | |||
|colspan="1"style="background:#80C0FF"|[[File:3-1 NSMB.png|100px]]{{br}}World 3-1 | |||
|colspan="1"style="background:#80FFFF"|[[File:3-2 NSMB.png|100px]]{{br}}World 3-2 | |||
|colspan="1"style="background:#C0C0C0"|[[File:3-Tower NSMB.png|100px]]{{br}}{{World|3|towern}} | |||
|colspan="1"style="background:#80C0FF"|[[File:3-3 NSMB.png|100px]]{{br}}World 3-3 | |||
|colspan="1"style="background:#C080FF"|[[File:NSMB 3-GhostHouse.png|100px]]{{br}}{{World|3|ghostn}} | |||
|colspan="1"style="background:#C0C0C0"|[[File:NSMBDS Big Whomp Screenshot.png|100px]]{{br}}{{World|3|castlen}} | |||
|colspan="6"style="background:#FFFFFF"|[[File:W3icon.png]]{{br}}World 3 | |||
|- | |||
|colspan="1"style="background:#008000"|[[File:4-1 NSMB.png|100px]]{{br}}World 4-1 | |||
|colspan="1"style="background:#80FFFF"|[[File:4-2 NSMB.png|100px]]{{br}}World 4-2 | |||
|colspan="1"style="background:#80C0FF"|[[File:NSMB MegaUnagi.png|100px]]{{br}}World 4-3 | |||
|colspan="1"style="background:#C0C0C0"|[[File:NSMB 4-Tower.png|100px]]{{br}}{{World|4|towern}} | |||
|colspan="1"style="background:#008000"|[[File:4-4 NSMB.png|100px]]{{br}}World 4-4 | |||
|colspan="1"style="background:#C080FF"|[[File:4-GH NSMB.png|100px]]{{br}}{{World|4|ghostn}} | |||
|colspan="1"style="background:#8080FF"|[[File:4-5 NSMB.png|100px]]{{br}}World 4-5 | |||
|colspan="1"style="background:#008000"|[[File:4-6 NSMB.png|100px]]{{br}}World 4-6 | |||
|colspan="1"style="background:#C0C0C0"|[[File:World4CastleNSMB.png|100px]]{{br}}{{World|4|castlen}} | |||
|colspan="3"style="background:#FFFFFF"|[[File:W4icon.png]]{{br}}World 4 | |||
|- | |||
|colspan="1"style="background:#F0F0F0"|[[File:5-1 NSMB.png|100px]]{{br}}World 5-1 | |||
|colspan="1"style="background:#8080FF"|[[File:Spike tops.PNG|100px]]{{br}}World 5-2 | |||
|colspan="1"style="background:#C0C0C0"|[[File:5-Tower NSMB.png|100px]]{{br}}{{World|5|towern}} | |||
|colspan="1"style="background:#F0F0F0"|[[File:5-3 NSMB.png|100px]]{{br}}World 5-3 | |||
|colspan="1"style="background:#C080FF"|[[File:5-GH NSMB.png|100px]]{{br}}{{World|5|ghostn}} | |||
|colspan="1"style="background:#80FFFF"|[[File:5-4 NSMB.png|100px]]{{br}}World 5-4 | |||
|colspan="1"style="background:#C0C0C0"|[[File:SuperDryBones.png|100px]]{{br}}{{World|5|castlen}} | |||
|colspan="5"style="background:#FFFFFF"|[[File:W5icon.png]]{{br}}World 5 | |||
|- | |||
|colspan="1"style="background:#808080"|[[File:6-1 NSMB.png|100px]]{{br}}World 6-1 | |||
|colspan="1"style="background:#80E0FF"|[[File:6-2 NSMB.png|100px]]{{br}}World 6-2 | |||
|colspan="1"style="background:#C0C0C0"|[[File:6-Tower NSMB.png|100px]]{{br}}{{World|6|towern}} | |||
|colspan="1"style="background:#008000"|[[File:NSMB W6-3.png|100px]]{{br}}World 6-3 | |||
|colspan="1"style="background:#808080"|[[File:6-4 NSMB.png|100px]]{{br}}World 6-4 | |||
|colspan="1"style="background:#C0C0C0"|[[File:6-Tower2 NSMB.png|100px]]{{br}}{{World|6|towern}}2 | |||
|colspan="1"style="background:#80C0FF"|[[File:6-5NSMB.png|100px]]{{br}}World 6-5 | |||
|colspan="1"style="background:#808080"|[[File:6-6 NSMB.png|100px]]{{br}}World 6-6 | |||
|colspan="1"style="background:#C0C0C0"|[[File:NSMB W6-Castle.png|100px]]{{br}}{{World|6|castlen}} | |||
|colspan="3"style="background:#FFFFFF"|[[File:W6icon.png]]{{br}}World 6 | |||
|- | |||
|colspan="1"style="background:#80FFFF"|[[File:7-1 NSMB.png|100px]]{{br}}World 7-1 | |||
|colspan="1"style="background:#C080FF"|[[File:7-Ghost House NSMB.png|100px]]{{br}}{{World|7|ghostn}} | |||
|colspan="1"style="background:#80FFFF"|[[File:7-2 NSMB.png|100px]]{{br}}World 7-2 | |||
|colspan="1"style="background:#80FFFF"|[[File:7-3 NSMB.png|100px]]{{br}}World 7-3 | |||
|colspan="1"style="background:#C0C0C0"|[[File:NSMB W7-Tower.png|100px]]{{br}}{{World|7|towern}} | |||
|colspan="1"style="background:#80FFFF"|[[File:World 7-4 NSMB.png|100px]]{{br}}World 7-4 | |||
|colspan="1"style="background:#80FF80"|[[File:World 7-5 NSMB.png|100px]]{{br}}World 7-5 | |||
|colspan="1"style="background:#80FFFF"|[[File:World 7-6 NSMB.png|100px]]{{br}}World 7-6 | |||
|colspan="1"style="background:#80FFFF"|[[File:World 7-7 NSMB.png|100px]]{{br}}World 7-7 | |||
|colspan="1"style="background:#C0C0C0"|[[File:NSMB Snake Block.png|100px]]{{br}}{{World|7|castlen}} | |||
|colspan="1"style="background:#FFFFFF"|[[File:W7icon.png]]{{br}}World 7 | |||
|colspan="1"style="background:#FFFFFF"|[[File:W8icon.png]]{{br}}World 8 | |||
|- | |||
|colspan="1"style="background:#E080FF"|[[File:NSMB World 8-1.png|100px]]{{br}}World 8-1 | |||
|colspan="1"style="background:#8080FF"|[[File:NSMB World 8-2.png|100px]]{{br}}World 8-2 | |||
|colspan="1"style="background:#C0C0C0"|[[File:NSMB World 8-Tower 1.png|100px]]{{br}}{{World|8|towern}} | |||
|colspan="1"style="background:#FFC080"|[[File:NSMB World 8-3.png|100px]]{{br}}World 8-3 | |||
|colspan="1"style="background:#A05000"|[[File:NSMB ScuttleBug.png|100px]]{{br}}World 8-4 | |||
|colspan="1"style="background:#C0C0C0"|[[File:NSMB World 8-Castle.png|100px]]{{br}}{{World|8|castlen}} | |||
|colspan="1"style="background:#FF4040"|[[File:NSMB World 8-5.png|100px]]{{br}}World 8-5 | |||
|colspan="1"style="background:#FF8080"|[[File:NSMB World 8-6.png|100px]]{{br}}World 8-6 | |||
|colspan="1"style="background:#808080"|[[File:NSMB World 8-7.png|100px]]{{br}}World 8-7 | |||
|colspan="1"style="background:#606060"|[[File:NSMB World 8-8.png|100px]]{{br}}World 8-8 | |||
|colspan="1"style="background:#C0C0C0"|[[File:NSMB World 8-Tower 2.png|100px]]{{br}}{{World|8|towern}}2 | |||
|colspan="1"style="background:#C0C0C0"|[[File:World8BowsersCastleNSMB.png|100px]]{{br}}{{World|8|bowsern}} | |||
|} | |||
====Secret Levels==== | |||
{|align=center class="wikitable"style="text-align:center;margin:0 auto 1em auto" | |||
|colspan="1"style="background:#80C0FF"|[[File:NSMB W1-A.png|100px]]{{br}}World 1-A | |||
|colspan="1"style="background:#FFFF80"|[[File:NSMB W2-A.png|100px]]{{br}}World 2-A | |||
|colspan="1"style="background:#80E0FF"|[[File:3-A NSMB.png|100px]]{{br}}World 3-A | |||
|colspan="1"style="background:#80FFFF"|[[File:3-B NSMB.png|100px]]{{br}}World 3-B | |||
|colspan="1"style="background:#80E0FF"|[[File:3-C NSMB.png|100px]]{{br}}World 3-C | |||
|colspan="1"style="background:#008000"|[[File:4-A NSMB.png|100px]]{{br}}World 4-A | |||
|colspan="1"style="background:#80FFFF"|[[File:5-A NSMB.png|100px]]{{br}}World 5-A | |||
|colspan="1"style="background:#F0F0F0"|[[File:Snailicorn.png|100px]]{{br}}World 5-B | |||
|colspan="1"style="background:#8080FF"|[[File:Broozershot.png|100px]]{{br}}World 5-C | |||
|colspan="1"style="background:#FFC080"|[[File:6-A NSMB.png|100px]]{{br}}World 6-A | |||
|colspan="1"style="background:#F0F0F0"|[[File:6-B NSMB.png|100px]]{{br}}World 6-B | |||
|colspan="1"style="background:#00C000"|[[File:NSMB World 7-A.png|100px]]{{br}}World 7-A | |||
|} | |||
==Diddy Kong Racing: Stone Pokey Sandbox== | |||
====Characters and Stats==== | |||
<div style="display:flex;flex-flow:row wrap;"> | |||
<div style="min-width:16em; padding:0.5em; border: 1px solid silver; background:wheat;">[[File:Diddy0.png|60px|right]] | |||
;[[Diddy Kong]] | |||
*Weight group: Middle | |||
*Acceleration: 3/5 | |||
*Turning: 3/5 | |||
*Top Speed: 3/5 | |||
*Vehicle Color: Dark Blue</div> | |||
<div style="min-width:16em; padding:0.5em; border: 1px solid silver; background:#FFF8DC;">[[File:Tiptup2.png|60px|right]] | |||
;[[Tiptup]] | |||
*Weight group: Light | |||
*Acceleration: 5/5 | |||
*Turning: 4/5 | |||
*Top Speed: 2/5 | |||
*Vehicle Color: Light Blue</div> | |||
<div style="min-width:16em; padding:0.5em; border: 1px solid silver; background:wheat;">[[File:pipsy0.png|60px|right]] | |||
;[[Pipsy]] | |||
*Weight group: Light | |||
*Acceleration: 5/5 | |||
*Turning: 5/5 | |||
*Top Speed: 1/5 | |||
*Vehicle Color: Pink</div> | |||
<div style="min-width:16em; padding:0.5em; border: 1px solid silver; background:#FFF8DC;">[[File:Bumper0.png|63px|right]] | |||
;[[Bumper (character)|Bumper]] | |||
*Weight group: Middle | |||
*Acceleration: 4/5 | |||
*Turning: 2/5 | |||
*Top Speed: 3/5 | |||
*Vehicle Color: Yellow</div> | |||
<div style="min-width:16em; padding:0.5em; border: 1px solid silver; background:wheat;">[[File:Conker DKR front art.png|66px|right]] | |||
;[[Conker the Squirrel|Conker]] | |||
*Weight group: Middle | |||
*Acceleration: 2/5 | |||
*Turning: 2/5 | |||
*Top Speed: 4/5 | |||
*Vehicle Color: White</div> | |||
<div style="min-width:16em; padding:0.5em; border: 1px solid silver; background:#FFF8DC;">[[File:Timber.png|66px|right]] | |||
;[[Timber]] | |||
*Weight group: Middle | |||
*Acceleration: 3/5 | |||
*Turning: 3/5 | |||
*Top Speed: 3/5 | |||
*Vehicle Color: Dark Green</div> | |||
<div style="min-width:16em; padding:0.5em; border: 1px solid silver; background:wheat;">[[File:Banjo0.png|60px|right]] | |||
;[[Banjo]] | |||
*Weight group: Heavy | |||
*Acceleration: 1/5 | |||
*Turning: 2/5 | |||
*Top Speed: 5/5 | |||
*Vehicle Color: Light Green</div> | |||
<div style="min-width:16em; padding:0.5em; border: 1px solid silver; background:#FFF8DC;">[[File:Krunch1.png|66px|right]] | |||
;[[Krunch]] | |||
*Weight group: Heavy | |||
*Acceleration: 1/5 | |||
*Turning: 1/5 | |||
*Top Speed: 5/5 | |||
*Vehicle Color: Orange</div> | |||
<div style="min-width:16em; padding:0.5em; border: 1px solid silver; background:wheat;">[[File:DDR Drumstick.jpg|66px|right]] | |||
;[[Drumstick (character)|Drumstick]] | |||
*Weight group: Heavy | |||
*Acceleration: 1/5 | |||
*Turning: 3/5 | |||
*Top Speed: 5/5 | |||
*Vehicle Color: Red</div> | |||
<div style="min-width:16em; padding:0.5em; border: 1px solid silver; background:#FFF8DC;">[[File:TickTock.jpg|66px|right]] | |||
;[[T.T.]] | |||
*Weight group: Middle | |||
*Acceleration: 5/5 | |||
*Turning: 4/5 | |||
*Top Speed: 5/5 | |||
*Vehicle Color: Silver</div> | |||
<div style="min-width:16em; padding:0.5em; border: 1px solid silver; background:wheat;">[[File:Taj the Genie.png|66px|right]] | |||
;[[Taj]] | |||
*The Genie of the Island | |||
*Distributes Golden Balloons | |||
*Races you on his magic carpet</div> | |||
<div style="min-width:16em; padding:0.5em; border: 1px solid silver; background:#FFF8DC;">[[File:WizpigPink.png|66px|right]] | |||
;[[Wizpig]] | |||
*The Invader of the Island | |||
*Races you on foot | |||
*Races you on his rocket</div> | |||
</div> | |||
====Bosses==== | |||
{|align=center class="wikitable"style="text-align:center;margin:0 auto 1em auto" | |||
|- | |||
!colspan="18"style="font-size:125%;text-align:center;background:#9C6936"|Bosses | |||
|- | |||
!colspan="12"style="font-size:125%;text-align:center;background:#9C6936"|Island Guardians | |||
!colspan="6"style="font-size:125%;text-align:center;background:#9C6936"|Wizpig | |||
|- | |||
|colspan="3"style="background:wheat"|[[File:DKR Trickythetriceratops.png|150px]]{{br}}[[Tricky]] | |||
|colspan="3"style="background:#FFF8DC"|[[File:Bluey Artwork - Diddy Kong Racing.png|150px]]{{br}}[[Bluey]] | |||
|colspan="3"style="background:wheat"|[[File:Bubbler DKR.png|150px]]{{br}}[[Bubbler]] | |||
|colspan="3"style="background:#FFF8DC"|[[File:Smokey DKR.png|150px]]{{br}}[[Smokey]] | |||
|colspan="3"style="background:wheat"|[[File:Wizpig.jpg|150px]]{{br}}[[Wizpig]] (Race 1) | |||
|colspan="3"style="background:#FFF8DC"|[[File:Wizpig 2.png|150px]]{{br}}[[Wizpig]] (Race 2) | |||
|} | |||
====Tracks==== | |||
{|align=center class="wikitable"style="text-align:center;margin:0 auto 1em auto" | {|align=center class="wikitable"style="text-align:center;margin:0 auto 1em auto" | ||
|- | |- | ||
!colspan=" | !colspan="18"style="font-size:125%;text-align:center;background:#9C6936"|Dino Domain | ||
!colspan="12"style="font-size:125%;text-align:center;background:#9C6936"| | |- | ||
!colspan="12"style="font-size:125%;text-align:center;background:#9C6936"|Track Races | |||
!colspan="3"style="font-size:125%;text-align:center;background:#9C6936"|Boss Race | |||
!colspan="3"style="font-size:125%;text-align:center;background:#9C6936"|Challenge Level | |||
|- | |- | ||
|colspan="3"style="background:wheat"|[[File:DKR-AncientLake.png|150px]]{{br}}[[Ancient Lake]] | |colspan="3"style="background:wheat"|[[File:DKR-AncientLake.png|150px]]{{br}}[[Ancient Lake]] | ||
| Line 27: | Line 471: | ||
|colspan="3"style="background:wheat"|[[File:DKR-JungleFalls.png|150px]]{{br}}[[Jungle Falls (Diddy Kong Racing)|Jungle Falls]] | |colspan="3"style="background:wheat"|[[File:DKR-JungleFalls.png|150px]]{{br}}[[Jungle Falls (Diddy Kong Racing)|Jungle Falls]] | ||
|colspan="3"style="background:#FFF8DC"|[[File:DKR-HotTopVolcano.png|150px]]{{br}}[[Hot Top Volcano]] | |colspan="3"style="background:#FFF8DC"|[[File:DKR-HotTopVolcano.png|150px]]{{br}}[[Hot Top Volcano]] | ||
|colspan="3"style="background:wheat"|[[File:Tricky's Course DKR.png|150px]]{{br}}[[Tricky Challenge]] | |||
|colspan="3"style="text-align:center;background:#FFF8DC"|[[File:DKR-FireMountain.png|150px]]{{br}}[[Fire Mountain (battle course)|Fire Mountain]] | |||
|- | |||
{{DKR vehicle|intable=y|car=d|hover=y|plane=y|bg=wheat}} {{DKR vehicle|intable=y|car=d|hover=y|plane=y|bg=#FFF8DC}} {{DKR vehicle|intable=y|car=d|hover=y|plane=y|bg=wheat}} {{DKR vehicle|intable=y|car=n|hover=y|plane=d|bg=#FFF8DC}} {{DKR vehicle|intable=y|car=d|hover=n|plane=n|bg=wheat}} {{DKR vehicle|intable=y|car=n|hover=n|plane=d|bg=#FFF8DC}} | |||
|} | |||
{|align=center class="wikitable"style="text-align:center;margin:0 auto 1em auto" | |||
|- | |||
!colspan="18"style="font-size:125%;text-align:center;background:#9C6936"|Snowflake Mountain | |||
|- | |||
!colspan="12"style="font-size:125%;text-align:center;background:#9C6936"|Track Races | |||
!colspan="3"style="font-size:125%;text-align:center;background:#9C6936"|Boss Race | |||
!colspan="3"style="font-size:125%;text-align:center;background:#9C6936"|Challenge Level | |||
|- | |||
|colspan="3"style="background:wheat"|[[File:DKR-EverfrostPeak.png|150px]]{{br}}[[Everfrost Peak]] | |colspan="3"style="background:wheat"|[[File:DKR-EverfrostPeak.png|150px]]{{br}}[[Everfrost Peak]] | ||
|colspan="3"style="background:#FFF8DC"|[[File:DKR-WalrusCove.png|150px]]{{br}}[[Walrus Cove]] | |colspan="3"style="background:#FFF8DC"|[[File:DKR-WalrusCove.png|150px]]{{br}}[[Walrus Cove]] | ||
|colspan="3"style="background:wheat"|[[File:DKR-SnowballValley.png|150px]]{{br}}[[Snowball Valley]] | |colspan="3"style="background:wheat"|[[File:DKR-SnowballValley.png|150px]]{{br}}[[Snowball Valley]] | ||
|colspan="3"style="background:#FFF8DC"|[[File:DKR-FrostyVillage.png|150px]]{{br}}[[Frosty Village]] | |colspan="3"style="background:#FFF8DC"|[[File:DKR-FrostyVillage.png|150px]]{{br}}[[Frosty Village]] | ||
|colspan="3"style="background:wheat"|[[File:Bluey's Course.png|150px]]{{br}}[[Bluey Challenge]] | |||
|colspan="3"style="text-align:center;background:#FFF8DC"|[[File:DKR-IciclePyramid.png|150px]]{{br}}[[Icicle Pyramid]] | |||
|- | |- | ||
{{DKR vehicle|intable=y|car= | {{DKR vehicle|intable=y|car=y|hover=y|plane=d|bg=wheat}} {{DKR vehicle|intable=y|car=d|hover=y|plane=n|bg=#FFF8DC}} {{DKR vehicle|intable=y|car=d|hover=y|plane=n|bg=wheat}} {{DKR vehicle|intable=y|car=d|hover=y|plane=y|bg=#FFF8DC}} {{DKR vehicle|intable=y|car=n|hover=d|plane=n|bg=wheat}} {{DKR vehicle|intable=y|car=d|hover=n|plane=n|bg=#FFF8DC}} | ||
|} | |} | ||
{|align=center class="wikitable"style="text-align:center;margin:0 auto 1em auto" | {|align=center class="wikitable"style="text-align:center;margin:0 auto 1em auto" | ||
|- | |- | ||
!colspan=" | !colspan="18"style="font-size:125%;text-align:center;background:#9C6936"|Sherbet Island | ||
!colspan="12"style="font-size:125%;text-align:center;background:#9C6936"| | |- | ||
!colspan="12"style="font-size:125%;text-align:center;background:#9C6936"|Track Races | |||
!colspan="3"style="font-size:125%;text-align:center;background:#9C6936"|Boss Race | |||
!colspan="3"style="font-size:125%;text-align:center;background:#9C6936"|Challenge Level | |||
|- | |- | ||
|colspan="3"style="background:wheat"|[[File:DKR-WhaleBay.png|150px]]{{br}}[[Whale Bay]] | |colspan="3"style="background:wheat"|[[File:DKR-WhaleBay.png|150px]]{{br}}[[Whale Bay]] | ||
| Line 44: | Line 507: | ||
|colspan="3"style="background:wheat"|[[File:DKR-CrescentIsland.png|150px]]{{br}}[[Crescent Island]] | |colspan="3"style="background:wheat"|[[File:DKR-CrescentIsland.png|150px]]{{br}}[[Crescent Island]] | ||
|colspan="3"style="background:#FFF8DC"|[[File:DKR-TreasureCaves.png|150px]]{{br}}[[Treasure Caves]] | |colspan="3"style="background:#FFF8DC"|[[File:DKR-TreasureCaves.png|150px]]{{br}}[[Treasure Caves]] | ||
|colspan="3"style="background:wheat"|[[File: | |colspan="3"style="background:wheat"|[[File:Bubbler's Course.png|150px]]{{br}}[[Bubbler Challenge]] | ||
|colspan="3"style=" | |colspan="3"style="text-align:center;background:#FFF8DC"|[[File:DKR-DarkwaterBeach.png|150px]]{{br}}[[Darkwater Beach]] | ||
|- | |- | ||
{{DKR vehicle|intable=y|car=n|hover=d|plane=n|bg=wheat}} {{DKR vehicle|intable=y|car=n|hover=d|plane=n|bg=#FFF8DC}} {{DKR vehicle|intable=y|car=d|hover=y|plane=n|bg=wheat}} {{DKR vehicle|intable=y|car=d|hover=y|plane=y|bg=#FFF8DC}} {{DKR vehicle|intable=y|car=n|hover=d|plane=n|bg=wheat}} {{DKR vehicle|intable=y|car | {{DKR vehicle|intable=y|car=n|hover=d|plane=n|bg=wheat}} {{DKR vehicle|intable=y|car=n|hover=d|plane=n|bg=#FFF8DC}} {{DKR vehicle|intable=y|car=d|hover=y|plane=n|bg=wheat}} {{DKR vehicle|intable=y|car=d|hover=y|plane=y|bg=#FFF8DC}} {{DKR vehicle|intable=y|car=n|hover=d|plane=n|bg=wheat}} {{DKR vehicle|intable=y|car=n|hover=d|plane=n|bg=#FFF8DC}} | ||
|} | |} | ||
{|align=center class="wikitable"style="text-align:center;margin:0 auto 1em auto" | {|align=center class="wikitable"style="text-align:center;margin:0 auto 1em auto" | ||
|- | |- | ||
!colspan=" | !colspan="18"style="font-size:125%;text-align:center;background:#9C6936"|Dragon Forest | ||
|- | |- | ||
|colspan="3"style="text-align:center;background:wheat"|[[File:DKR- | !colspan="12"style="font-size:125%;text-align:center;background:#9C6936"|Track Races | ||
|colspan="3"style=" | !colspan="3"style="font-size:125%;text-align:center;background:#9C6936"|Boss Race | ||
|colspan="3"style=" | !colspan="3"style="font-size:125%;text-align:center;background:#9C6936"|Challenge Level | ||
|- | |||
|colspan="3"style="background:wheat"|[[File:DKR-BoulderCanyon.png|150px]]{{br}}[[Boulder Canyon]] | |||
|colspan="3"style="background:#FFF8DC"|[[File:DKR-GreenwoodVillage.png|150px]]{{br}}[[Greenwood Village]] | |||
|colspan="3"style="background:wheat"|[[File:DKR-WindmillPlains.png|150px]]{{br}}[[Windmill Plains]] | |||
|colspan="3"style="background:#FFF8DC"|[[File:DKR-HauntedWoods.png|150px]]{{br}}[[Haunted Woods]] | |||
|colspan="3"style="background:wheat"|[[File:Smokey's Course.png|150px]]{{br}}[[Smokey Challenge]] | |||
|colspan="3"style="text-align:center;background:#FFF8DC"|[[File:DKR-SmokeyCastle.png|150px]]{{br}}[[Smokey Castle]] | |colspan="3"style="text-align:center;background:#FFF8DC"|[[File:DKR-SmokeyCastle.png|150px]]{{br}}[[Smokey Castle]] | ||
|- | |- | ||
{{DKR vehicle|intable=y|car=n|hover=d|plane=n|bg=wheat}} {{DKR vehicle|intable=y|car=d|hover=y|plane=n|bg=#FFF8DC}} {{DKR vehicle|intable=y|car=y|hover=y|plane=d|bg=wheat}}{{DKR vehicle|intable=y|car=d|hover=y|plane=n|bg=#FFF8DC}} {{DKR vehicle|intable=y|car=n|hover=n|plane=d|bg=wheat}} {{DKR vehicle|intable=y|car=d|hover=n|plane=n|bg=#FFF8DC}} | |||
|} | |} | ||
{|align=center class="wikitable"style="text-align:center;margin:0 auto 1em auto" | |||
{|class=" | |||
|- | |- | ||
!colspan="3"style="font-size:125%;text-align:center;background:#9C6936"|Wizpig Head | |||
| | !colspan="15"style="font-size:125%;text-align:center;background:#9C6936"|Future Fun Land | ||
|- | |- | ||
| | !colspan="3"style="font-size:125%;text-align:center;background:#9C6936"|Boss Race | ||
| | !colspan="12"style="font-size:125%;text-align:center;background:#9C6936"|Track Races | ||
!colspan="3"style="font-size:125%;text-align:center;background:#9C6936"|Boss Race | |||
|- | |- | ||
|[[File:Wizpig. | |colspan="3"style="background:wheat"|[[File:Wizpig's First Strike.png|150px]]{{br}}[[Wizpig's First Strike]] | ||
| | |colspan="3"style="background:#FFF8DC"|[[File:DKR-SpacedustAlley.png|150px]]{{br}}[[Spacedust Alley]] | ||
|colspan="3"style="background:wheat"|[[File:DKR-DarkmoonCaverns.png|150px]]{{br}}[[Darkmoon Caverns]] | |||
|colspan="3"style="background:#FFF8DC"|[[File:DKR-StarCity.png|150px]]{{br}}[[Star City]] | |||
|colspan="3"style="background:wheat"|[[File:DKR-SpaceportAlpha.png|150px]]{{br}}[[Spaceport Alpha]] | |||
|colspan="3"style="background:#FFF8DC"|[[File:Wizpig Strikes Back.png|150px]]{{br}}[[Wizpig Strikes Back]] | |||
|- | |- | ||
| | {{DKR vehicle|intable=y|car=d|hover=n|plane=n|bg=wheat}} {{DKR vehicle|intable=y|car=y|hover=y|plane=d|bg=#FFF8DC}} {{DKR vehicle|intable=y|car=d|hover=y|plane=n|bg=wheat}} {{DKR vehicle|intable=y|car=d|hover=y|plane=y|bg=#FFF8DC}} {{DKR vehicle|intable=y|car=y|hover=y|plane=d|bg=wheat}} {{DKR vehicle|intable=y|car=n|hover=n|plane=d|bg=#FFF8DC}} | ||
| | |||
|} | |} | ||
Latest revision as of 21:55, February 12, 2025
Super Mario World

Door

P-Door

Small Door (unused)

Boss Door

Boss Door (Chocolate Fortress)


Worlds and Levels


New Super Mario Bros.

Door

Tower/Castle boss door
A Tower

A Castle

A Ghost House
Bowser's Castle

A Warp Cannon

A Warp Pipe

Mario enters a door

Final boss door


Minibosses and Bosses
| World 1 | World 2 | World 3 | World 4 | World 5 | World 6 | World 7 | World 8 | ||
|---|---|---|---|---|---|---|---|---|---|
 Bowser Jr. Bowser Jr.
|
 Bowser Jr. Bowser Jr.
|
 Bowser Jr. Bowser Jr.
|
 Bandana Jr. Bandana Jr.
|
 Bowser Jr. Bowser Jr.
|
 Bowser Jr. Bowser Jr.
|
 Bandana Jr. Bandana Jr.
|
 Bandana Jr. Bandana Jr.
|
 Bandana Jr. Bandana Jr.
|
 Bandana Jr. Bandana Jr.
|
 Bowser Bowser
|
 Mummipokey Mummipokey
|
 Cheepskipper Cheepskipper
|
 Mega Goomba Mega Goomba
|
 Petey Piranha Petey Piranha
|
  Monty Tank Monty Tank
|
 Lakithunder Lakithunder
|
 Dry Bowser Dry Bowser
|
 Giant Bowser Giant Bowser
| |
Levels
 World 1-1 World 1-1
|
 World 1-2 World 1-2
|
 World 1-3 World 1-3
|
 World 1- World 1- |
 World 1-4 World 1-4
|
 World 1-5 World 1-5
|
 World 1-A World 1-A
|
 World 1- World 1- | ||||
 World 2-1 World 2-1
|
 World 2-2 World 2-2
|
 World 2-3 World 2-3
|
 World 2-A World 2-A
|
 World 2-4 World 2-4
|
 World 2- World 2- |
 World 2-5 World 2-5
|
 World 2-6 World 2-6
|
 World 2- World 2- | |||
 World 3-1 World 3-1
|
 World 3-A World 3-A
|
 World 3-2 World 3-2
|
 World 3-B World 3-B
|
 World 3-C World 3-C
|
 World 3- World 3- |
 World 3-3 World 3-3
|
 World 3- World 3- |
 World 3- World 3- | |||
 World 4-1 World 4-1
|
 World 4-2 World 4-2
|
 World 4-3 World 4-3
|
 World 4- World 4- |
 World 4-A World 4-A
|
 World 4-4 World 4-4
|
 World 4- World 4- |
 World 4-5 World 4-5
|
 World 4-6 World 4-6
|
 World 4- World 4- | ||
 World 5-1 World 5-1
|
 World 5-2 World 5-2
|
 World 5-A World 5-A
|
 World 5- World 5- |
 World 5-3 World 5-3
|
 World 5- World 5- |
 World 5-B World 5-B
|
 World 5-C World 5-C
|
 World 5-4 World 5-4
|
 World 5- World 5- | ||
 World 6-1 World 6-1
|
 World 6-A World 6-A
|
 World 6-2 World 6-2
|
 World 6- World 6- |
 World 6-3 World 6-3
|
 World 6-4 World 6-4
|
 World 6- World 6- |
 World 6-5 World 6-5
|
 World 6-B World 6-B
|
 World 6-6 World 6-6
|
 World 6- World 6- | |
 World 7-1 World 7-1
|
 World 7- World 7- |
 World 7-2 World 7-2
|
 World 7-3 World 7-3
|
 World 7- World 7- |
 World 7-4 World 7-4
|
 World 7-5 World 7-5
|
 World 7-6 World 7-6
|
 World 7-7 World 7-7
|
 World 7-A World 7-A
|
 World 7- World 7- | |
 World 8-1 World 8-1
|
 World 8-2 World 8-2
|
 World 8- World 8- |
 World 8-3 World 8-3
|
 World 8-4 World 8-4
|
 World 8- World 8- |
 World 8-5 World 8-5
|
 World 8-6 World 8-6
|
 World 8-7 World 8-7
|
 World 8-8 World 8-8
|
 World 8- World 8- |
 World 8- World 8- |
Regular Levels
| World 1-1
|
World 1-2
|
World 1-3
|
World 1- |
World 1-4
|
World 1-5
|
World 1- |
|||||
| World 2-1
|
World 2-2
|
World 2-3
|
World 2-4
|
World 2- |
World 2-5
|
World 2-6
|
World 2- |
||||
| World 3-1
|
World 3-2
|
World 3- |
World 3-3
|
World 3- |
World 3- |
||||||
| World 4-1
|
World 4-2
|
World 4-3
|
World 4- |
World 4-4
|
World 4- |
World 4-5
|
World 4-6
|
World 4- |
|||
| World 5-1
|
World 5-2
|
World 5- |
World 5-3
|
World 5- |
World 5-4
|
World 5- |
|||||
| World 6-1
|
World 6-2
|
World 6- |
World 6-3
|
World 6-4
|
World 6- |
World 6-5
|
World 6-6
|
World 6- |
|||
| World 7-1
|
World 7- |
World 7-2
|
World 7-3
|
World 7- |
World 7-4
|
World 7-5
|
World 7-6
|
World 7-7
|
World 7- |
||
| World 8-1
|
World 8-2
|
World 8- |
World 8-3
|
World 8-4
|
World 8- |
World 8-5
|
World 8-6
|
World 8-7
|
World 8-8
|
World 8- |
World 8- |
Secret Levels
| World 1-A
|
World 2-A
|
World 3-A
|
World 3-B
|
World 3-C
|
World 4-A
|
World 5-A
|
World 5-B
|
World 5-C
|
World 6-A
|
World 6-B
|
World 7-A
|
Diddy Kong Racing: Stone Pokey Sandbox
Characters and Stats

- Weight group: Middle
- Acceleration: 3/5
- Turning: 3/5
- Top Speed: 3/5
- Vehicle Color: Dark Blue


Bosses
| Bosses | |||||||||||||||||
|---|---|---|---|---|---|---|---|---|---|---|---|---|---|---|---|---|---|
| Island Guardians | Wizpig | ||||||||||||||||
 Tricky Tricky
|
 Bluey Bluey
|
 Bubbler Bubbler
|
 Smokey Smokey
|
 Wizpig (Race 1) Wizpig (Race 1)
|
 Wizpig (Race 2) Wizpig (Race 2)
| ||||||||||||
Tracks
| Dino Domain | |||||||||||||||||
|---|---|---|---|---|---|---|---|---|---|---|---|---|---|---|---|---|---|
| Track Races | Boss Race | Challenge Level | |||||||||||||||
 Ancient Lake Ancient Lake
|
 Fossil Canyon Fossil Canyon
|
 Jungle Falls Jungle Falls
|
 Hot Top Volcano Hot Top Volcano
|
 Tricky Challenge Tricky Challenge
|
 Fire Mountain Fire Mountain
| ||||||||||||
| Snowflake Mountain | |||||||||||||||||
|---|---|---|---|---|---|---|---|---|---|---|---|---|---|---|---|---|---|
| Track Races | Boss Race | Challenge Level | |||||||||||||||
 Everfrost Peak Everfrost Peak
|
 Walrus Cove Walrus Cove
|
 Snowball Valley Snowball Valley
|
 Frosty Village Frosty Village
|
 Bluey Challenge Bluey Challenge
|
 Icicle Pyramid Icicle Pyramid
| ||||||||||||
| Sherbet Island | |||||||||||||||||
|---|---|---|---|---|---|---|---|---|---|---|---|---|---|---|---|---|---|
| Track Races | Boss Race | Challenge Level | |||||||||||||||
 Whale Bay Whale Bay
|
 Pirate Lagoon Pirate Lagoon
|
 Crescent Island Crescent Island
|
 Treasure Caves Treasure Caves
|
 Bubbler Challenge Bubbler Challenge
|
 Darkwater Beach Darkwater Beach
| ||||||||||||
| Dragon Forest | |||||||||||||||||
|---|---|---|---|---|---|---|---|---|---|---|---|---|---|---|---|---|---|
| Track Races | Boss Race | Challenge Level | |||||||||||||||
 Boulder Canyon Boulder Canyon
|
 Greenwood Village Greenwood Village
|
 Windmill Plains Windmill Plains
|
 Haunted Woods Haunted Woods
|
 Smokey Challenge Smokey Challenge
|
 Smokey Castle Smokey Castle
| ||||||||||||
| Wizpig Head | Future Fun Land | ||||||||||||||||
|---|---|---|---|---|---|---|---|---|---|---|---|---|---|---|---|---|---|
| Boss Race | Track Races | Boss Race | |||||||||||||||
 Wizpig's First Strike Wizpig's First Strike
|
 Spacedust Alley Spacedust Alley
|
 Darkmoon Caverns Darkmoon Caverns
|
 Star City Star City
|
 Spaceport Alpha Spaceport Alpha
|
 Wizpig Strikes Back Wizpig Strikes Back
| ||||||||||||