User:Stone Pokey/sandbox
From the Super Mario Wiki, the Mario encyclopedia
Jump to navigationJump to search
Super Mario World

Door

P-Door

Small Door (unused)

Boss Door

Boss Door (Chocolate Fortress)


Worlds and Levels


New Super Mario Bros.

Door

Tower/Castle boss door
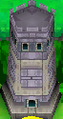
A Tower

A Castle

A Ghost House
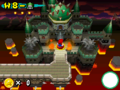
Bowser's Castle

A Warp Cannon

A Warp Pipe

Mario enters a door

Final boss door


Minibosses and Bosses
| World 1 | World 2 | World 3 | World 4 | World 5 | World 6 | World 7 | World 8 | ||
|---|---|---|---|---|---|---|---|---|---|
 Bowser Jr. Bowser Jr.
|
 Bowser Jr. Bowser Jr.
|
 Bowser Jr. Bowser Jr.
|
 Bandana Jr. Bandana Jr.
|
 Bowser Jr. Bowser Jr.
|
 Bowser Jr. Bowser Jr.
|
 Bandana Jr. Bandana Jr.
|
 Bandana Jr. Bandana Jr.
|
 Bandana Jr. Bandana Jr.
|
 Bandana Jr. Bandana Jr.
|
 Bowser Bowser
|
 Mummipokey Mummipokey
|
 Cheepskipper Cheepskipper
|
 Mega Goomba Mega Goomba
|
 Petey Piranha Petey Piranha
|
  Monty Tank Monty Tank
|
 Lakithunder Lakithunder
|
 Dry Bowser Dry Bowser
|
 Giant Bowser Giant Bowser
| |
Levels
 World 1-1 World 1-1
|
 World 1-2 World 1-2
|
 World 1-3 World 1-3
|
 World 1- World 1- |
 World 1-4 World 1-4
|
 World 1-5 World 1-5
|
 World 1-A World 1-A
|
 World 1- World 1- | ||||
 World 2-1 World 2-1
|
 World 2-2 World 2-2
|
 World 2-3 World 2-3
|
 World 2-A World 2-A
|
 World 2-4 World 2-4
|
 World 2- World 2- |
 World 2-5 World 2-5
|
 World 2-6 World 2-6
|
 World 2- World 2- | |||
 World 3-1 World 3-1
|
 World 3-A World 3-A
|
 World 3-2 World 3-2
|
 World 3-B World 3-B
|
 World 3-C World 3-C
|
 World 3- World 3- |
 World 3-3 World 3-3
|
 World 3- World 3- |
 World 3- World 3- | |||
 World 4-1 World 4-1
|
 World 4-2 World 4-2
|
 World 4-3 World 4-3
|
 World 4- World 4- |
 World 4-A World 4-A
|
 World 4-4 World 4-4
|
 World 4- World 4- |
 World 4-5 World 4-5
|
 World 4-6 World 4-6
|
 World 4- World 4- | ||
 World 5-1 World 5-1
|
 World 5-2 World 5-2
|
 World 5-A World 5-A
|
 World 5- World 5- |
 World 5-3 World 5-3
|
 World 5- World 5- |
 World 5-B World 5-B
|
 World 5-C World 5-C
|
 World 5-4 World 5-4
|
 World 5- World 5- | ||
 World 6-1 World 6-1
|
 World 6-A World 6-A
|
 World 6-2 World 6-2
|
 World 6- World 6- |
 World 6-3 World 6-3
|
 World 6-4 World 6-4
|
 World 6- World 6- |
 World 6-5 World 6-5
|
 World 6-B World 6-B
|
 World 6-6 World 6-6
|
 World 6- World 6- | |
 World 7-1 World 7-1
|
 World 7- World 7- |
 World 7-2 World 7-2
|
 World 7-3 World 7-3
|
 World 7- World 7- |
 World 7-4 World 7-4
|
 World 7-5 World 7-5
|
 World 7-6 World 7-6
|
 World 7-7 World 7-7
|
 World 7-A World 7-A
|
 World 7- World 7- | |
 World 8-1 World 8-1
|
 World 8-2 World 8-2
|
 World 8- World 8- |
 World 8-3 World 8-3
|
 World 8-4 World 8-4
|
 World 8- World 8- |
 World 8-5 World 8-5
|
 World 8-6 World 8-6
|
 World 8-7 World 8-7
|
 World 8-8 World 8-8
|
 World 8- World 8- |
 World 8- World 8- |
Regular Levels
| World 1-1
|
World 1-2
|
World 1-3
|
World 1- |
World 1-4
|
World 1-5
|
World 1- |
|||||
| World 2-1
|
World 2-2
|
World 2-3
|
World 2-4
|
World 2- |
World 2-5
|
World 2-6
|
World 2- |
||||
| World 3-1
|
World 3-2
|
World 3- |
World 3-3
|
World 3- |
World 3- |
||||||
| World 4-1
|
World 4-2
|
World 4-3
|
World 4- |
World 4-4
|
World 4- |
World 4-5
|
World 4-6
|
World 4- |
|||
| World 5-1
|
World 5-2
|
World 5- |
World 5-3
|
World 5- |
World 5-4
|
World 5- |
|||||
| World 6-1
|
World 6-2
|
World 6- |
World 6-3
|
World 6-4
|
World 6- |
World 6-5
|
World 6-6
|
World 6- |
|||
| World 7-1
|
World 7- |
World 7-2
|
World 7-3
|
World 7- |
World 7-4
|
World 7-5
|
World 7-6
|
World 7-7
|
World 7- |
||
| World 8-1
|
World 8-2
|
World 8- |
World 8-3
|
World 8-4
|
World 8- |
World 8-5
|
World 8-6
|
World 8-7
|
World 8-8
|
World 8- |
World 8- |
Secret Levels
| World 1-A
|
World 2-A
|
World 3-A
|
World 3-B
|
World 3-C
|
World 4-A
|
World 5-A
|
World 5-B
|
World 5-C
|
World 6-A
|
World 6-B
|
World 7-A
|
Diddy Kong Racing: Stone Pokey Sandbox
Characters and Stats

- Weight group: Middle
- Acceleration: 3/5
- Turning: 3/5
- Top Speed: 3/5
- Vehicle Color: Dark Blue


Bosses
| Bosses | |||||||||||||||||
|---|---|---|---|---|---|---|---|---|---|---|---|---|---|---|---|---|---|
| Island Guardians | Wizpig | ||||||||||||||||
 Tricky Tricky
|
 Bluey Bluey
|
 Bubbler Bubbler
|
 Smokey Smokey
|
 Wizpig (Race 1) Wizpig (Race 1)
|
 Wizpig (Race 2) Wizpig (Race 2)
| ||||||||||||
Tracks
| Dino Domain | |||||||||||||||||
|---|---|---|---|---|---|---|---|---|---|---|---|---|---|---|---|---|---|
| Track Races | Boss Race | Challenge Level | |||||||||||||||
 Ancient Lake Ancient Lake
|
 Fossil Canyon Fossil Canyon
|
 Jungle Falls Jungle Falls
|
 Hot Top Volcano Hot Top Volcano
|
 Tricky Challenge Tricky Challenge
|
 Fire Mountain Fire Mountain
| ||||||||||||
| Snowflake Mountain | |||||||||||||||||
|---|---|---|---|---|---|---|---|---|---|---|---|---|---|---|---|---|---|
| Track Races | Boss Race | Challenge Level | |||||||||||||||
 Everfrost Peak Everfrost Peak
|
 Walrus Cove Walrus Cove
|
 Snowball Valley Snowball Valley
|
 Frosty Village Frosty Village
|
 Bluey Challenge Bluey Challenge
|
 Icicle Pyramid Icicle Pyramid
| ||||||||||||
| Sherbet Island | |||||||||||||||||
|---|---|---|---|---|---|---|---|---|---|---|---|---|---|---|---|---|---|
| Track Races | Boss Race | Challenge Level | |||||||||||||||
 Whale Bay Whale Bay
|
 Pirate Lagoon Pirate Lagoon
|
 Crescent Island Crescent Island
|
 Treasure Caves Treasure Caves
|
 Bubbler Challenge Bubbler Challenge
|
 Darkwater Beach Darkwater Beach
| ||||||||||||
| Dragon Forest | |||||||||||||||||
|---|---|---|---|---|---|---|---|---|---|---|---|---|---|---|---|---|---|
| Track Races | Boss Race | Challenge Level | |||||||||||||||
 Boulder Canyon Boulder Canyon
|
 Greenwood Village Greenwood Village
|
 Windmill Plains Windmill Plains
|
 Haunted Woods Haunted Woods
|
 Smokey Challenge Smokey Challenge
|
 Smokey Castle Smokey Castle
| ||||||||||||
| Wizpig Head | Future Fun Land | ||||||||||||||||
|---|---|---|---|---|---|---|---|---|---|---|---|---|---|---|---|---|---|
| Boss Race | Track Races | Boss Race | |||||||||||||||
 Wizpig's First Strike Wizpig's First Strike
|
 Spacedust Alley Spacedust Alley
|
 Darkmoon Caverns Darkmoon Caverns
|
 Star City Star City
|
 Spaceport Alpha Spaceport Alpha
|
 Wizpig Strikes Back Wizpig Strikes Back
| ||||||||||||