Yōsei no Mori: Difference between revisions
Megadardery (talk | contribs) mNo edit summary |
m (Text replacement - "(\| *)Jap([RMCN\d]* *=)" to "$1Jpn$2") |
||
| (55 intermediate revisions by 15 users not shown) | |||
| Line 1: | Line 1: | ||
{{ | {{another language}} | ||
''' | {{world infobox | ||
|title=Yōsei no Mori | |||
|image=[[File:M&WLevel1.png]] | |||
|game=''[[Mario & Wario]]'' | |||
|levels=10 | |||
|before=<< | |||
|after=[[Yosu Ko|>>]] | |||
}} | |||
'''Yōsei no Mori''' is the first stage found in ''[[Mario & Wario]]''. According to the game's storyline, [[Mario]], [[Luigi]], [[Princess Peach]] and [[Yoshi]] all came to this legendary forest to meet its supposed fairy of fortune, but they met only misfortune when they got lost and encountered [[Wario]], prompting the reclusive fairy named [[Wanda]] to take action.<ref>{{cite|page={{file link|WarioToMonogatari.png|2}}|title=''Mario & Wario'' instruction booklet|date=1993|publisher=Nintendo|language=ja}}</ref> A [[Wiggler]] watches Wanda's progress from the trees in the background. As it is the first stage, there are not many traps. Every course is single-screen, and there are no [[Star (Mario & Wario)|Star]]s to collect. Wario drops a [[bucket]] with a flipped purple "M" on the character's head. | |||
==Level 1-1 | ==Levels== | ||
[[File: | {| style="text-align: center" class=wikitable | ||
The first | !width="1%"|Level | ||
!width="1%"|Image | |||
!width="10%"|Description | |||
!width="1%"|Enemies and obstacles | |||
|- | |||
|[[Level 1-1 (Mario & Wario)|Level 1-1]] | |||
|[[File:M&W Level 1-1 Map.png|200px]] | |||
|The first course is a very simple puzzle designed like a tutorial. All the player has to do is guide the character by using the [[Flip-Flop Block]]s as [[Wanda]]. This course introduces the player to the [[elevator]] object, which looks like an automated [[ladder]]. | |||
|N/A | |||
|- | |||
|[[Level 1-2 (Mario & Wario)|Level 1-2]] | |||
|[[File:M&W Level 1-2 Map.png|200px]] | |||
|This course introduces spikes. Again, the layout is simple as the player only needs to use Flip-Flop Blocks to help guide the character to the goal. | |||
|[[Spike Trap|Spikes]] | |||
|- | |||
|[[Level 1-3 (Mario & Wario)|Level 1-3]] | |||
|[[File:M&W Level 1-3 Map.png|200px]] | |||
|[[Coin Block]]s first appear, which allow Wanda to gather coins as much as the player can. The layout is still simple. | |||
|Spikes | |||
|- | |||
|[[Level 1-4 (Mario & Wario)|Level 1-4]] | |||
|[[File:M&W Level 1-4 Map.png|200px]] | |||
|This course does not introduce anything new. The correct path involves a sort of zigzag in which the player must use the Flip-Flops Blocks at the appropriate time when the character climbs the ladders. | |||
|Spikes | |||
|- | |||
|[[Level 1-5 (Mario & Wario)|Level 1-5]] | |||
|[[File:M&W Level 1-5 Map.png|200px]] | |||
|The course introduces [[Timer Block]]s. These panels disappear after a short time. | |||
|Spikes | |||
|- | |||
|[[Level 1-6 (Mario & Wario)|Level 1-6]] | |||
|[[File:M&W Level 1-6 Map.png|200px]] | |||
|The next course introduces [[Rock Block]]s that block the character from proceeding to get to the goal. Wanda must break them with her wand so that the character can proceed. Additionally, there are spikes that can hurt the character if the player does not protect it. Use the Timer Blocks to help the character to go on, or use Wanda's wand on the character while the character is in the elevator as the character switches the side to walk to. Repeat this method and the character reaches the goal faster. | |||
|Spikes | |||
|- | |||
|[[Level 1-7 (Mario & Wario)|Level 1-7]] | |||
|[[File:M&W Level 1-7 Map.png|200px]] | |||
|The course basically contains more practice when using the Timer Blocks to prevent the character to fall down onto the Spikes. Additionally, there is a row of Coin Blocks the player can use to gather a full set of [[coin]]s. | |||
|Spikes | |||
|- | |||
|[[Level 1-8 (Mario & Wario)|Level 1-8]] | |||
|[[File:M&W Level 1-8 Map.png|200px]] | |||
|The next course is very similar to Level 1-4, but with Timer Blocks rather than Flip-Flop Blocks. As such, it requires focus and timing. | |||
|Spikes | |||
|- | |||
|[[Level 1-9]] | |||
|[[File:M&W Level 1-9 Map.png|200px]] | |||
|Basically more practice with those Timer Blocks. This time, when the character gets up into the top of the elevator; the character walks near to where the spikes are. As said, use the Timer Blocks to help the character pass with the tricky addition of elevators. | |||
|Spikes | |||
|- | |||
|[[Level 1-10]] | |||
|[[File:M&W Level 1-10 Map.png|200px]] | |||
|This course starts out with the character above a big pile of Rock Blocks. This course also introduces the first enemy, Guriguri, in one space that moves around the Rock Blocks. It hurts the character if it touches the character. To weaken the enemy, use Wanda's wand on the enemy to weaken it. Once done, the enemy moves slowly, making it easier to clear the course. After that, break the Rock Blocks to make a passage to the goal. | |||
|[[Guriguri]] | |||
|} | |||
== | ==Media== | ||
{{media table | |||
|file1=MW Woods.oga | |||
|title1=Woods | |||
}} | |||
== | ==Names in other languages== | ||
{{foreign names | |||
|Jpn={{ruby|妖精|ようせい}}の{{ruby|森|もり}}<ref>{{cite|language=ja|publisher=Nintendo|title=''Mario & Wario'' instruction booklet|page=12|date=1993}}</ref> | |||
|JpnR=Yōsei no Mori | |||
|JpnM=Fairy's Forest | |||
}} | |||
== | ==References== | ||
<references/> | |||
< | |||
{{M&W}} | |||
[[ | [[Category:Forests]] | ||
[[Category:Mario & Wario worlds]] | |||
[[Category:Mario & Wario | |||
Latest revision as of 16:47, January 7, 2025
The title of this article is official, but it comes from a non-English source. If an acceptable English name is found, then the article should be moved to the new title.
| Yōsei no Mori | |
|---|---|

| |
| Game | Mario & Wario |
| Level(s) | 10 |
| << List of worlds >> | |
Yōsei no Mori is the first stage found in Mario & Wario. According to the game's storyline, Mario, Luigi, Princess Peach and Yoshi all came to this legendary forest to meet its supposed fairy of fortune, but they met only misfortune when they got lost and encountered Wario, prompting the reclusive fairy named Wanda to take action.[1] A Wiggler watches Wanda's progress from the trees in the background. As it is the first stage, there are not many traps. Every course is single-screen, and there are no Stars to collect. Wario drops a bucket with a flipped purple "M" on the character's head.
Levels[edit]
| Level | Image | Description | Enemies and obstacles |
|---|---|---|---|
| Level 1-1 | 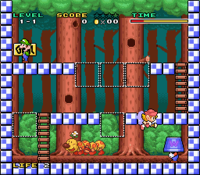
|
The first course is a very simple puzzle designed like a tutorial. All the player has to do is guide the character by using the Flip-Flop Blocks as Wanda. This course introduces the player to the elevator object, which looks like an automated ladder. | N/A |
| Level 1-2 | 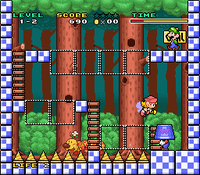
|
This course introduces spikes. Again, the layout is simple as the player only needs to use Flip-Flop Blocks to help guide the character to the goal. | Spikes |
| Level 1-3 | 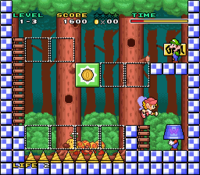
|
Coin Blocks first appear, which allow Wanda to gather coins as much as the player can. The layout is still simple. | Spikes |
| Level 1-4 | 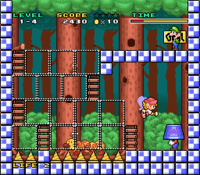
|
This course does not introduce anything new. The correct path involves a sort of zigzag in which the player must use the Flip-Flops Blocks at the appropriate time when the character climbs the ladders. | Spikes |
| Level 1-5 | 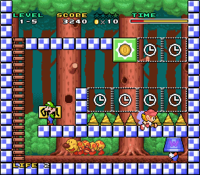
|
The course introduces Timer Blocks. These panels disappear after a short time. | Spikes |
| Level 1-6 | 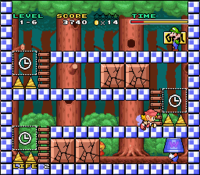
|
The next course introduces Rock Blocks that block the character from proceeding to get to the goal. Wanda must break them with her wand so that the character can proceed. Additionally, there are spikes that can hurt the character if the player does not protect it. Use the Timer Blocks to help the character to go on, or use Wanda's wand on the character while the character is in the elevator as the character switches the side to walk to. Repeat this method and the character reaches the goal faster. | Spikes |
| Level 1-7 | 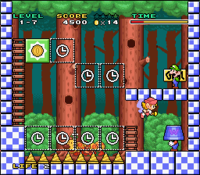
|
The course basically contains more practice when using the Timer Blocks to prevent the character to fall down onto the Spikes. Additionally, there is a row of Coin Blocks the player can use to gather a full set of coins. | Spikes |
| Level 1-8 | 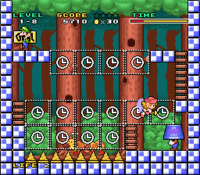
|
The next course is very similar to Level 1-4, but with Timer Blocks rather than Flip-Flop Blocks. As such, it requires focus and timing. | Spikes |
| Level 1-9 | 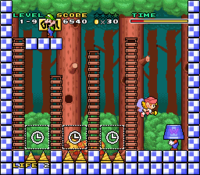
|
Basically more practice with those Timer Blocks. This time, when the character gets up into the top of the elevator; the character walks near to where the spikes are. As said, use the Timer Blocks to help the character pass with the tricky addition of elevators. | Spikes |
| Level 1-10 | 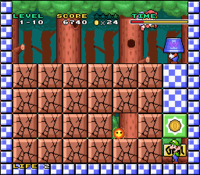
|
This course starts out with the character above a big pile of Rock Blocks. This course also introduces the first enemy, Guriguri, in one space that moves around the Rock Blocks. It hurts the character if it touches the character. To weaken the enemy, use Wanda's wand on the enemy to weaken it. Once done, the enemy moves slowly, making it easier to clear the course. After that, break the Rock Blocks to make a passage to the goal. | Guriguri |
Media[edit]
| File info |
Names in other languages[edit]
| Language | Name | Meaning | Notes |
|---|---|---|---|
| Japanese | Yōsei no Mori |
Fairy's Forest |
References[edit]
| Mario & Wario | ||||
|---|---|---|---|---|
| Main characters | Luigi • Mario • Princess Peach • Wanda • Wario • Yoshi | |||
| Enemies | Dodorigesu Jr. • Guriguri • Komorin • Tsubōn • Unibo | |||
| Stages | Yōsei no Mori • Yosu Ko • Kumotori Yama • Kōri no Dōkutsu • Honō no Dōkutsu • Pukupuku Kai • Balloon Bridge • Karakara Sabaku • Wario no Niwa • Wario Tei • EXTRA | |||
| Items & obstacles | 1-Up Mushroom • Bucket • Coin Block • Elevator • Flip-Flop Block • Fūsen Block • Hammer • Jump Block • Magic Wand • Nebaneba Block • Rock Block • Star • Switch Block • Time Kinoko • Timer Block • Toge Block | |||
| Other | Bulldog • Staff • Gallery • Media | |||