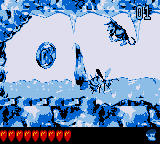
Black Ice Battle (Donkey Kong Land 2): Difference between revisions
No edit summary |
m (Text replacement - "(\| *)Jap([RMCN\d]* *=)" to "$1Jpn$2") |
||
| (33 intermediate revisions by 15 users not shown) | |||
| Line 1: | Line 1: | ||
{{ | {{italic title|id=yes}} | ||
{{level infobox | |||
|image=[[File:Black Ice Battle DKL2.png]] | |||
{{level | |||
|image=[[File:Black Ice Battle | |||
|code=7 - 2 | |code=7 - 2 | ||
|world=[[Lost World (Donkey Kong Country 2)|Lost World]] | |||
|game=''[[Donkey Kong Land 2]]'' | |game=''[[Donkey Kong Land 2]]'' | ||
| | |track=In a Snow-bound Land | ||
|before=[[Jungle Jinx (Donkey Kong Land 2)|<<]] | |before=[[Jungle Jinx (Donkey Kong Land 2)|<<]] | ||
|after=[[Fiery Furnace (Donkey Kong Land 2)|>>]] | |after=[[Fiery Furnace (Donkey Kong Land 2)|>>]] | ||
}} | }} | ||
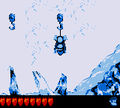
'''Black Ice Battle''' is the thirty- | '''Black Ice Battle''' is the thirty-sixth [[level]] in ''[[Donkey Kong Land 2]]'' and the second level of the [[Lost World (Donkey Kong Country 2)|Lost World]]. It takes place inside of an ice cavern, meaning that the ground is icy and slippery, and [[Diddy Kong|Diddy]] and [[Dixie Kong|Dixie]] have to make their way down the level. [[Zinger]]s are the main obstacle of the level. | ||
==Layout== | |||
From the start of the level, the monkeys must walk along the rigid ice and defeat all the Klampons they encounter. Soon, they will have to jump over a Zinger and drop down into a small gap. It will take them atop a slightly flattened slope, and the Kongs will need to dodge a few more Zingers and Klampons here. They will then slide down a steeper slope and fall through another abyss. When they get to the lower floor, they must journey a few steps ahead and fall through another one. The gap is not too long, and they must go a little bit farther, carefully jumping over Zingers, to reach another gap. Dropping down this will take them down another floor. Here, they will have to hop over a Zinger and a Spiny to progress through the level and get to the next gap. It will take them down farther into the level, where they need to walk east and defeat a few more enemies. The heroes must fall through another gap after this, followed by another one past a lone Zinger. When they get to the floor below, they will be at a fork-in-the-road. Both ways, however, will take them to the same point at the same time, where they must dodge some Zingers and drop down into another abyss. As they fall though here, they will land into a barrel, and it will shoot them down a little bit farther through the level. They will then end up at another fork-in-the-road. Still, though, both will make them go through the same obstacles, falling through two gaps and dodging some Zingers, and meet up at the same point. They will end up at a small gap. Dropping down will take them to a floor with the Star Barrel. | |||
Halfway through the level, the heroes must drop down another gap and travel to the far east part of the floor. Then, the Kongs should follow the [[banana]] trail down wards and jump over several groups of dangerous Zingers. Once they make it to the western part of the area, they must fall through the next gap and land on a lower floor. Here, they will need to jump over several more Zingers. Soon, though, they will get to another gap, and drop down it to reach another floor. They must jump over a lone Zinger here, and journey down the platform, making a turn to the right. As they walk in this direction, they must beware of the Klobber behind them, and make it down to the next floor. At this point, they need to simply beat a lone Klampons, and fall to the bottom floor. The group must then walk along the icy path going east, and jump over a Zinger to find a spring. It will take them out of the level when jumped on. | |||
==Enemies== | |||
*[[Flitter]]s | |||
*[[Klampon]]s | |||
*[[Klobber]]s | |||
*[[Spiny (Donkey Kong Country 2)|Spinies]] | |||
*[[Zinger]]s | |||
==Items and objects== | |||
The following items and objects appear in the following quantities: | |||
== | *[[Banana Bunch]]: 4 | ||
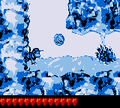
*[[Banana Coin]]: 2 | |||
*[[DK Barrel]]: 3 | |||
===KONG Letters=== | |||
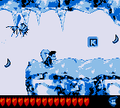
*K: East of a Zinger flying vertically and a lone [[banana]] in midair | |||
*O: At a fork in the path with Spiny enemies left and right, taking the left path leads to the letter O | |||
*N: Beneath the Star Barrel, the "N" Letter is in a pit near a Klampon | |||
*G: Above a Klobber | |||
==Bonus Level== | |||
[[File:Black Ice Battle DKL2 Bonus Level.png|thumb|The Bonus Level of Black Ice Battle]] | |||
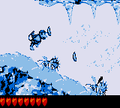
*'''Find the Token!''': Beyond the letter K, west of a Zinger and above a Spiny, Diddy or Dixie must jump northwest off the hill east of the Spiny to grab on an invisible hook. They must jump from a few hooks to go up to a [[Bonus Barrel]]. In the [[Bonus Level]], the Kongs have 15 seconds to descend an icy path, avoiding Zingers along the way, and collect the [[DK Coin|Video Game Hero Coin]] at the end. | |||
== | ==Gallery== | ||
<gallery> | |||
BlackIceBattle-DKL2-K.png|The letter K | |||
Black Ice Battle DKL2 Banana Coin.png|Diddy finds a Banana Coin near a Spiny | |||
Black Ice Battle DKL2 Zingers.png|Diddy jumps over a Zinger | |||
Black Ice Battle DKL2 hooks.png|Diddy climbing across hooks to the Bonus Level | |||
</gallery> | |||
==Names in other languages== | ==Names in other languages== | ||
{{ | {{foreign names | ||
| | |Jpn=アイスドームタンゴ | ||
| | |JpnR=Aisu Dōmu Tango | ||
| | |JpnM=Ice Dome Tango | ||
}} | }} | ||
{{DKL2}} | {{DKL2}} | ||
[[Category:Crocodile Isle]] | [[Category:Crocodile Isle]] | ||
[[Category:Secret | [[Category:Secret levels]] | ||
[[Category: | [[Category:Ice caves]] | ||
[[Category: | [[Category:Donkey Kong Land 2 levels]] | ||
Latest revision as of 10:54, January 7, 2025
| Level | |
|---|---|
| Black Ice Battle | |
| |
| Level code | 7 - 2 |
| World | Lost World |
| Game | Donkey Kong Land 2 |
| Music track | In a Snow-bound Land |
| << Directory of levels >> | |
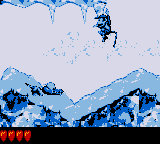
Black Ice Battle is the thirty-sixth level in Donkey Kong Land 2 and the second level of the Lost World. It takes place inside of an ice cavern, meaning that the ground is icy and slippery, and Diddy and Dixie have to make their way down the level. Zingers are the main obstacle of the level.
Layout[edit]
From the start of the level, the monkeys must walk along the rigid ice and defeat all the Klampons they encounter. Soon, they will have to jump over a Zinger and drop down into a small gap. It will take them atop a slightly flattened slope, and the Kongs will need to dodge a few more Zingers and Klampons here. They will then slide down a steeper slope and fall through another abyss. When they get to the lower floor, they must journey a few steps ahead and fall through another one. The gap is not too long, and they must go a little bit farther, carefully jumping over Zingers, to reach another gap. Dropping down this will take them down another floor. Here, they will have to hop over a Zinger and a Spiny to progress through the level and get to the next gap. It will take them down farther into the level, where they need to walk east and defeat a few more enemies. The heroes must fall through another gap after this, followed by another one past a lone Zinger. When they get to the floor below, they will be at a fork-in-the-road. Both ways, however, will take them to the same point at the same time, where they must dodge some Zingers and drop down into another abyss. As they fall though here, they will land into a barrel, and it will shoot them down a little bit farther through the level. They will then end up at another fork-in-the-road. Still, though, both will make them go through the same obstacles, falling through two gaps and dodging some Zingers, and meet up at the same point. They will end up at a small gap. Dropping down will take them to a floor with the Star Barrel.
Halfway through the level, the heroes must drop down another gap and travel to the far east part of the floor. Then, the Kongs should follow the banana trail down wards and jump over several groups of dangerous Zingers. Once they make it to the western part of the area, they must fall through the next gap and land on a lower floor. Here, they will need to jump over several more Zingers. Soon, though, they will get to another gap, and drop down it to reach another floor. They must jump over a lone Zinger here, and journey down the platform, making a turn to the right. As they walk in this direction, they must beware of the Klobber behind them, and make it down to the next floor. At this point, they need to simply beat a lone Klampons, and fall to the bottom floor. The group must then walk along the icy path going east, and jump over a Zinger to find a spring. It will take them out of the level when jumped on.
Enemies[edit]
Items and objects[edit]
The following items and objects appear in the following quantities:
- Banana Bunch: 4
- Banana Coin: 2
- DK Barrel: 3
KONG Letters[edit]
- K: East of a Zinger flying vertically and a lone banana in midair
- O: At a fork in the path with Spiny enemies left and right, taking the left path leads to the letter O
- N: Beneath the Star Barrel, the "N" Letter is in a pit near a Klampon
- G: Above a Klobber
Bonus Level[edit]
- Find the Token!: Beyond the letter K, west of a Zinger and above a Spiny, Diddy or Dixie must jump northwest off the hill east of the Spiny to grab on an invisible hook. They must jump from a few hooks to go up to a Bonus Barrel. In the Bonus Level, the Kongs have 15 seconds to descend an icy path, avoiding Zingers along the way, and collect the Video Game Hero Coin at the end.
Gallery[edit]
Names in other languages[edit]
| Language | Name | Meaning | Notes |
|---|---|---|---|
| Japanese | アイスドームタンゴ[?] Aisu Dōmu Tango |
Ice Dome Tango |
