Trick Trap Tower: Difference between revisions
(→Names in other languages: Italian name added) |
|||
| (39 intermediate revisions by 22 users not shown) | |||
| Line 1: | Line 1: | ||
{{ | {{level infobox | ||
|title=Trick Trap Tower | |title=Trick Trap Tower | ||
|image=[[File: | |image=[[File:SM3DW Trick Trap Tower.jpg|250px]] | ||
|code={{world|castle|5}} | |code={{world|castle|5}} | ||
|world=[[World Castle]] | |world=[[World Castle]] | ||
|game=''[[Super Mario 3D World]]'' | |game=''[[Super Mario 3D World]]''<br>''[[Super Mario 3D World + Bowser's Fury]]'' | ||
|limit=400 seconds | |limit=400 seconds | ||
|before=[[ | |before=[[Brolder Blockade Is Back|<<]] | ||
|after=[[Simmering Lava Lake|>>]] [[Captain Toad Gets Thwomped|>>]] | |after=[[Simmering Lava Lake|>>]] [[Captain Toad Gets Thwomped|>>]] | ||
}} | }} | ||
'''Trick Trap Tower''', or '''{{world|castle|5}}''', is the fifth course in the seventh world of ''[[Super Mario 3D World]]'', [[World Castle]]. It becomes accessible by beating [[ | '''Trick Trap Tower''', or '''{{world|castle|5}}''', is the fifth course in the seventh world of ''[[Super Mario 3D World]]'' and its Nintendo Switch port ''[[Super Mario 3D World + Bowser's Fury]]'', [[World Castle]]. It becomes accessible by beating [[Brolder Blockade Is Back]], and completing either this level or [[Rammerhead Reef]] unlocks [[Simmering Lava Lake]] and [[Captain Toad Gets Thwomped]]. | ||
==Layout== | ==Layout== | ||
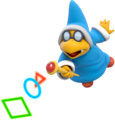
This level starts on a tower with a [[Thwomp]] and a [[Parabones]] nearby. After avoiding several of the aforementioned enemies and navigating some moving platforms, the player reaches the top of the first tower guarded by three [[ | This level starts on a tower with a [[Thwomp]] and a [[Parabones]] nearby. After avoiding several of the aforementioned enemies and navigating some moving platforms, the player reaches the top of the first tower guarded by three [[Magikoopa]]s. A nearby [[zipline lift]] takes the player to the [[Checkpoint Flag]] and a [[Warp Box (With Key)|Warp Box]] which requires five [[Key Coin]]s to open. The player must climb the [[Fizzlit]]-infested tower in order to collect all the Key Coins. After the Key Coin at the top of the tower is collected, a mass of [[poison fog]] appears at the top of the tower and chases the player out of the tower, where the now unlocked Warp Box which leads to the [[Goal Pole]] waits. At the same time, once the poisonous fog reaches the bottom, it will sink into the lava, causing it to rise. | ||
==[[Green Star]]s== | ==Collectables== | ||
===[[Green Star]]s=== | |||
{| class="wikitable" style="text-align: center" | |||
!Image | |||
!Location | |||
|- | |||
|[[File:SM3DW WC-5 1st Green Star.jpg|150px]] | |||
|The player must use the [[Cat Mario|cat form]] to climb a wall nearby the second elevator to find the Green Star. | |||
|- | |||
|[[File:SM3DW WC-5 2nd Green Star.jpg|150px]] | |||
|On the top of the first tower, the player must defeat all three [[Magikoopa]]s to reveal the Green Star. | |||
|- | |||
|[[File:SM3DW WC-5 3rd Green Star.jpg|150px]] | |||
|In the second tower, the player must use either the cat form or the rolling move to destroy [[Brick Block]]s in order to reveal a passage to the Green Star. | |||
|} | |||
==[[ | ===[[List of Super Mario 3D World stamps|Stamp]]=== | ||
[[File:SM3DW | {{Multiple image | ||
|align=right | |||
|direction=horizontal | |||
|width=100 | |||
|image1=SM3DW-MagikoopaStamp.png | |||
|alt1=Wii U version | |||
|image2=SM3DW_BF_MagikoopaStamp.png | |||
|alt2=Switch version | |||
}} | |||
{| class="wikitable" style="text-align: center" | |||
!Image | |||
!Location | |||
|- | |||
|[[File:SM3DW Trick Trap Tower stamp.jpg|150px]] | |||
|After the player reaches the top of the first tower, they should drop off the left side of it to find a cloud platform holding a stamp. Otherwise, the player can also climb the wall directly above the first green star using a [[Super Bell]]. The stamp is a [[Magikoopa]]. | |||
|} | |||
==Enemies== | ==Enemies== | ||
<gallery> | |||
Para Dry Bones Artwork - Super Mario 3D World.png|[[Parabones]] | |||
Thwomp SM3DW Prima.jpg|[[Thwomp]]s | |||
Magikoopa Artwork - Super Mario 3D World.png|[[Magikoopa]]s | |||
Fizzlit SM3DW Prima.jpg|[[Fizzlit]]s | |||
</gallery> | |||
==Names in other languages== | ==Names in other languages== | ||
{{ | {{foreign names | ||
|Jap=スケルトンタワーのワナ | |Jap=スケルトンタワーのワナ | ||
|JapR=Sukeruton tawā no wana | |JapR=Sukeruton tawā no wana | ||
|JapM=Skeleton Tower's Trap | |JapM=Skeleton Tower's Trap | ||
|Fre=Tour aux traquenards | |||
|FreM=Traps Tower | |||
|Spa=Las torres de las trampas | |Spa=Las torres de las trampas | ||
|SpaM=The | |SpaM=The traps' towers | ||
|Dut=Hete hinderlaag | |Dut=Hete hinderlaag | ||
|DutM=Hot ambush | |DutM=Hot ambush | ||
| Line 42: | Line 72: | ||
|Ita=Torrione delle chiavi | |Ita=Torrione delle chiavi | ||
|ItaM=Keys' defensive tower | |ItaM=Keys' defensive tower | ||
|Por=Torre traiçoeira | |||
|PorM=Treacherous tower | |||
|Rus=Подъем по прозрачной башне | |||
|RusR=Podyom po prozrachnoy bashne | |||
|RusM=Transperent tower climb | |||
|Chi=骨架塔的陷阱 | |||
|ChiR=Gǔjiàtǎ de Xiànjǐng | |||
|ChiM=Traps of the Skeleton Tower | |||
|Kor=스켈레톤 타워의 함정 | |||
|KorR=Seukelleton Tawo-ui Hamjeong | |||
|KorM=Trap of Skeleton Tower | |||
}} | }} | ||
{{SM3DW levels}} | |||
{{SM3DW}} | [[Category:Volcanic areas]] | ||
[[Category:Towers]] | |||
[[Category: | [[Category:Super Mario 3D World levels]] | ||
[[Category:Super Mario 3D World | [[de:Der Klarsichtturm]] | ||
Revision as of 09:46, December 12, 2024
| Level | |
|---|---|
| Trick Trap Tower | |
| |
| Level code | World |
| World | World Castle |
| Game | Super Mario 3D World Super Mario 3D World + Bowser's Fury |
| Time limit | 400 seconds |
| << Directory of levels >> >> | |
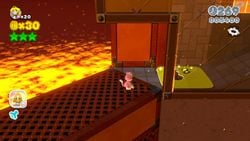
Trick Trap Tower, or World ![]() Castle-5, is the fifth course in the seventh world of Super Mario 3D World and its Nintendo Switch port Super Mario 3D World + Bowser's Fury, World Castle. It becomes accessible by beating Brolder Blockade Is Back, and completing either this level or Rammerhead Reef unlocks Simmering Lava Lake and Captain Toad Gets Thwomped.
Castle-5, is the fifth course in the seventh world of Super Mario 3D World and its Nintendo Switch port Super Mario 3D World + Bowser's Fury, World Castle. It becomes accessible by beating Brolder Blockade Is Back, and completing either this level or Rammerhead Reef unlocks Simmering Lava Lake and Captain Toad Gets Thwomped.
Layout
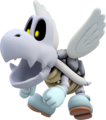
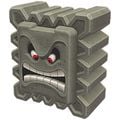
This level starts on a tower with a Thwomp and a Parabones nearby. After avoiding several of the aforementioned enemies and navigating some moving platforms, the player reaches the top of the first tower guarded by three Magikoopas. A nearby zipline lift takes the player to the Checkpoint Flag and a Warp Box which requires five Key Coins to open. The player must climb the Fizzlit-infested tower in order to collect all the Key Coins. After the Key Coin at the top of the tower is collected, a mass of poison fog appears at the top of the tower and chases the player out of the tower, where the now unlocked Warp Box which leads to the Goal Pole waits. At the same time, once the poisonous fog reaches the bottom, it will sink into the lava, causing it to rise.
Collectables
Green Stars
| Image | Location |
|---|---|

|
The player must use the cat form to climb a wall nearby the second elevator to find the Green Star. |

|
On the top of the first tower, the player must defeat all three Magikoopas to reveal the Green Star. |

|
In the second tower, the player must use either the cat form or the rolling move to destroy Brick Blocks in order to reveal a passage to the Green Star. |
Stamp
| Image | Location |
|---|---|

|
After the player reaches the top of the first tower, they should drop off the left side of it to find a cloud platform holding a stamp. Otherwise, the player can also climb the wall directly above the first green star using a Super Bell. The stamp is a Magikoopa. |
Enemies
Names in other languages
| Language | Name | Meaning | Notes |
|---|---|---|---|
| Japanese | スケルトンタワーのワナ[?] Sukeruton tawā no wana |
Skeleton Tower's Trap | |
| Chinese | 骨架塔的陷阱[?] Gǔjiàtǎ de Xiànjǐng |
Traps of the Skeleton Tower | |
| Dutch | Hete hinderlaag[?] | Hot ambush | |
| French | Tour aux traquenards[?] | Traps Tower | |
| German | Der Klarsichtturm[?] | The clear sight tower | |
| Italian | Torrione delle chiavi[?] | Keys' defensive tower | |
| Korean | 스켈레톤 타워의 함정[?] Seukelleton Tawo-ui Hamjeong |
Trap of Skeleton Tower | |
| Portuguese | Torre traiçoeira[?] | Treacherous tower | |
| Russian | Подъем по прозрачной башне[?] Podyom po prozrachnoy bashne |
Transperent tower climb | |
| Spanish | Las torres de las trampas[?] | The traps' towers |
