User:LadySophie17/WreckingCrewList: Difference between revisions
From the Super Mario Wiki, the Mario encyclopedia
Jump to navigationJump to search
LadySophie17 (talk | contribs) (Its that time of the day again) |
LadySophie17 (talk | contribs) No edit summary |
||
| Line 891: | Line 891: | ||
|[[File:WC Ladder.png|32px]] [[Ladder]] x 1 | |[[File:WC Ladder.png|32px]] [[Ladder]] x 1 | ||
|- | |- | ||
!colspan=2|Phase 41 | |||
|- | |||
|rowspan=6|[[File:WC Phase 41.png]] | |||
![[Wall (Wrecking Crew series)|Walls]] | |||
|- | |||
|[[File:WC Ladder Wall Tile.png|30px]] Ladder wall x 10 | |||
|- | |||
!Enemies | |||
|- | |||
|[[File:WC Red Gotchawrench.png|16px]] [[Gotchawrench|Red Gotchawrench]] x 3 | |||
|- | |||
!Objects | |||
|- | |||
|[[File:WC Ladder.png|32px]] [[Ladder]] x 2, [[File:WC Bomb Tile.png|30px]][[Bomb]] x 1, [[File:WC Drum.png|28px]] [[Drum (Wrecking Crew)|Drum]] x 11, [[File:WC Pillar.png|28px]] [[Pillar (Wrecking Crew)|Pillar]] x 1 | |||
|- | |||
!colspan=2|Phase 42 | |||
|- | |||
|rowspan=6|[[File:WC Phase 42.png]] | |||
![[Wall (Wrecking Crew series)|Walls]] | |||
|- | |||
|[[File:WC Wall Tile.png|30px]] Wall x 10, [[File:WC Ladder Wall Tile.png|30px]] Ladder wall x 12, [[File:WC Brick Wall Tile.png|30px]] Brick wall x 21 | |||
|- | |||
!Enemies | |||
|- | |||
|[[File:WC Red Gotchawrench.png|16px]] [[Gotchawrench|Red Gotchawrench]] x 2, [[File:WC Purple Gotchawrench.png|16px]] [[Gotchawrench|Purple Gotchawrench]] x 2, [[File:WC Eggplant Man.png|16px]] [[Gotchawrench|Eggplant Man]] x 2, [[File:WCForemanSpikeSprite.png|30px]] [[Foreman Spike]] x 1 | |||
|- | |||
!Objects | |||
|- | |||
|[[File:WC Bomb Tile.png|30px]][[Bomb]] x 6, [[File:WC Pillar.png|28px]] [[Pillar (Wrecking Crew)|Pillar]] x 12 | |||
|- | |||
!colspan=2|Phase 43 | |||
|- | |||
|rowspan=8|[[File:WC Phase 43.png]] | |||
![[Wall (Wrecking Crew series)|Walls]] | |||
|- | |||
|[[File:WC Ladder Wall Tile.png|30px]] Ladder wall x 45 | |||
|- | |||
!Enemies | |||
|- | |||
|[[File:WC Purple Gotchawrench.png|16px]] [[Gotchawrench|Purple Gotchawrench]] x 4, [[File:WCForemanSpikeSprite.png|30px]] [[Foreman Spike]] x 1 | |||
|- | |||
!Objects | |||
|- | |||
|[[File:WC Bomb Tile.png|30px]][[Bomb]] x 6, [[File:WC Pillar.png|28px]] [[Pillar (Wrecking Crew)|Pillar]] x 12 | |||
|- | |||
![[Letter (Wrecking Crew)|Letter]] locations | |||
|- | |||
|style="text-align:left"|'''M''' - On the second brick wall tile from the right on the fourth highest platform.<br>'''A''' - On the fourth brick wall tile from the left on the sixth highest platform.<br>'''R''' - On the brick wall tile to the left of the '''A''' letter.<br>'''I''' - On the brick wall tile to the left of the '''R''' letter.<br>'''O''' - On the brick wall tile to the right of the '''M''' letter. | |||
|- | |||
!colspan=2|Phase 44 | |||
|- | |||
|rowspan=8|[[File:WC Phase 44.png]] | |||
![[Wall (Wrecking Crew series)|Walls]] | |||
|- | |||
|[[File:WC Dark Brick Wall Tile.png|30px]] Darker brick wall x 23 | |||
|- | |||
!Enemies | |||
|- | |||
|[[File:WC Purple Gotchawrench.png|16px]] [[Gotchawrench|Purple Gotchawrench]] x 4 | |||
|- | |||
!Objects | |||
|- | |||
|[[File:WC Ladder.png|32px]] [[Ladder]] x 5, [[File:WC Bomb Tile.png|30px]][[Bomb]] x 3, [[File:WC Drum.png|28px]] [[Drum (Wrecking Crew)|Drum]] x 36, [[File:WC Pillar.png|28px]] [[Pillar (Wrecking Crew)|Pillar]] x 2 | |||
|- | |||
![[Letter (Wrecking Crew)|Letter]] locations | |||
|- | |||
|style="text-align:left"|'''M''' - On the fourth dark brick wall tile from the right on the highest platform.<br>'''A''' - On the first brick wall tile from the left on the highest platform.<br>'''R''' - On the right dark brick wall tile on the sixth highest platform.<br>'''I''' - On the third dark brick wall tile from the left on the seventh highest platform.<br>'''O''' - On the dark brick wall tile to the left of the '''O''' letter. | |||
|- | |||
!colspan=2|Bonus Stage 11 | |||
|- | |||
|rowspan=6|[[File:WC Bonus Stage 11.png]] | |||
![[Wall (Wrecking Crew series)|Walls]] | |||
|- | |||
|[[File:WC Wall Tile.png|30px]] Wall x 16 | |||
|- | |||
!Enemies | |||
|- | |||
|[[File:WCForemanSpikeSprite.png|30px]] [[Foreman Spike]] x 1 | |||
|- | |||
!Objects | |||
|- | |||
|[[File:WC Ladder.png|32px]] [[Ladder]] x 1 | |||
|- | |||
|} | |} | ||
Revision as of 10:15, November 24, 2022
| Phase 01 | |
|---|---|
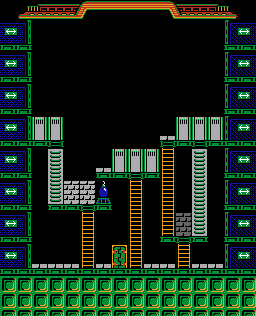
|
Walls |
| Enemies | |
| Objects | |
| Letter locations | |
| M - On the brick wall tile next to the bomb. A - On the single dark brick wall tile. R - On the brick wall tile to the left of the M letter. I - On the wall tile above the ladder in the middle of the stage. O - On the wall tile to the left of the I letter. | |
| Phase 02 | |
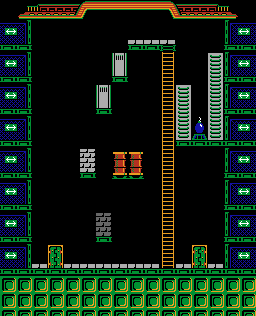
|
Walls |
| Enemies | |
| Objects | |
| Phase 03 | |
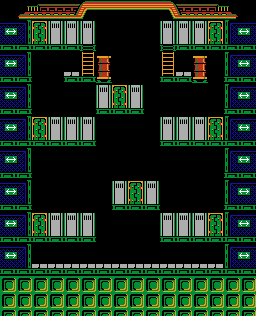
|
Walls |
| Enemies | |
| Objects | |
| Phase 04 | |
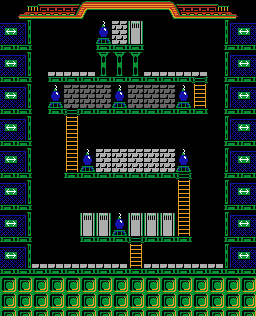
|
Walls |
| Enemies | |
| Objects | |
| Letter locations | |
| M - On the brick wall tile on the far left of the middle platform. A - On the second dark brick wall tile from the left on the highest platform. R - On the wall tile to the left of the bomb on the lowest platform. I - On the second brick wall tile from the right on the middle platform. O - On the wall tile to the left of the R letter. | |
| Bonus Stage 1 | |
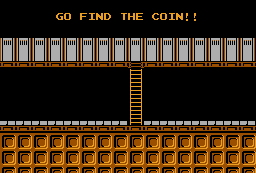
|
Walls |
| Enemies | |
| Objects | |
| Phase 05 | |
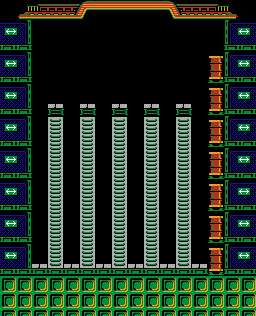
|
Walls |
| Enemies | |
| Objects | |
| Phase 06 | |
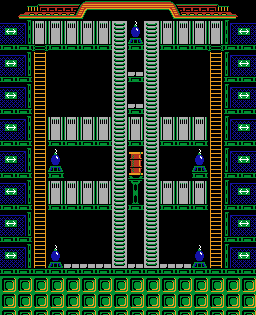
|
Walls |
| Enemies | |
| Objects | |
| Letter locations | |
| M - On the second wall tile from the right on the lower left platform. A - On the second wall tile from the right on the upper right platform. R - On the first wall tile from the left on the lower left platform. I - On the wall tile to the left of the A letter. O - On the wall tile to the right of the A letter. | |
| Phase 07 | |
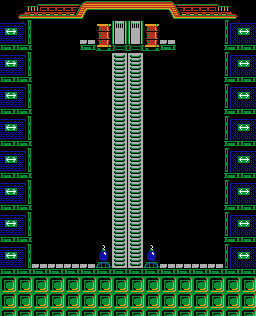
|
Walls |
| Enemies | |
| Objects | |
| Phase 08 | |
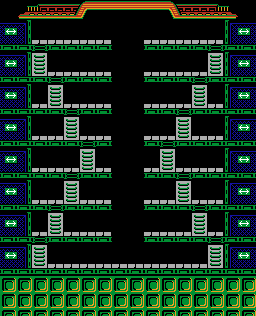
|
Walls |
| Enemies | |
| Objects | |
| - | |
| Bonus Stage 2 | |
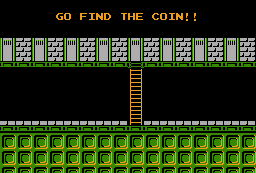
|
Walls |
| Enemies | |
| Objects | |
| Phase 09 | |
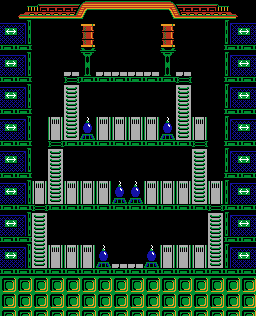
|
Walls |
| Enemies | |
| Objects | |
| Letter locations | |
| M - On the second wall tile from the left on the ground platform. A - On the wall tile to the left of the upper right bomb. R - On the wall tile to the right of the upper right ladder tile. I - On the wall tile to the right of the M letter. O - On the wall tile to the left of the lower right ladder tile. | |
| Phase 10 | |
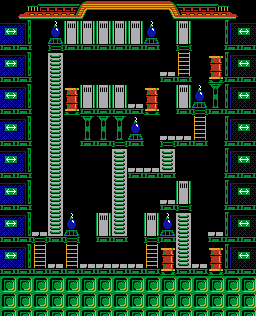
|
Walls |
| Enemies | |
| Objects | |
| Letter locations | |
| M - On the wall tile to the left of the upper right bomb. A - On the single wall tile on the lower right platform reached by a ladder tile. R - On the single wall tile on the upper right platform. I - On the wall tile to the left of the lower right bomb. O - On the wall tile to the right of the ladder tile in the lower middle platform. | |
| Phase 11 | |
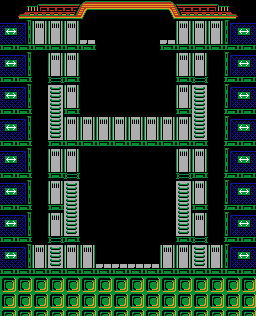
|
Walls |
| Enemies | |
| Objects | |
| - | |
| Phase 12 | |
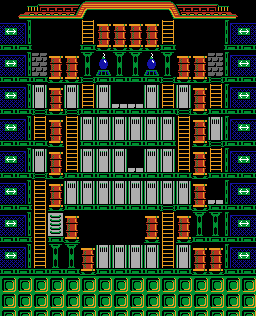
|
Walls |
| Enemies | |
| Objects | |
| Bonus Stage 3 | |
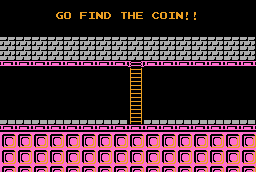
|
Walls |
| Enemies | |
| Objects | |
| Phase 13 | |
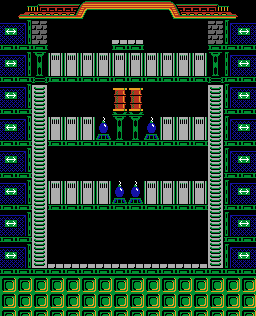
|
Walls |
| Enemies | |
| Objects | |
| Letter locations | |
| M - On the wall tile to the left of the upper right pillar. A - On the wall tile to the right of the upper left pillar. R - On the far right wall tile on the middle platform. I - On the far left wall tile on the lower platform. O - On the wall tile to the left of the M letter. | |
| Phase 14 | |
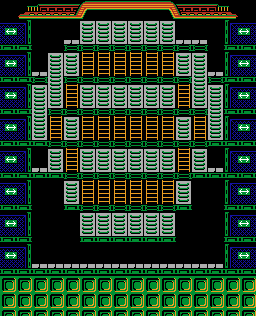
|
Walls |
| Enemies | |
| Objects | |
| Phase 15 | |
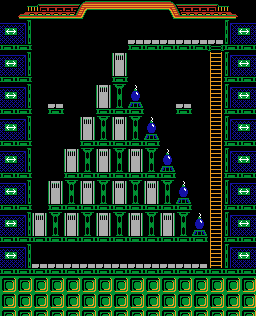
|
Walls |
| Enemies | |
| Objects | |
| Letter locations | |
| M - On the second wall tile to the left on the second lowest platform. A - On the first wall tile to the right on the middle platform. R - On the single wall tile on the highest platform. I - On the single wall tile on the second highest platform. O - On the first wall tile to the right on the lowest platform. | |
| Phase 16 | |
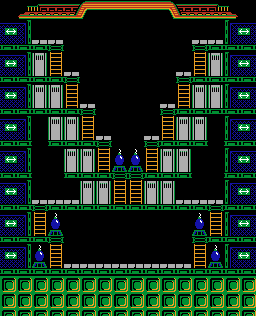
|
Walls |
| Enemies | |
| Objects | |
| Letter locations | |
| M - On the single wall tile on the left highest platform. A - On the single wall tile on the right highest platform. R - On the first wall tile to the left on the lowest platform. I - On the wall tile directly below the A letter. O - On the first wall tile to the right on the second lowest platform. | |
| Bonus Stage 4 | |
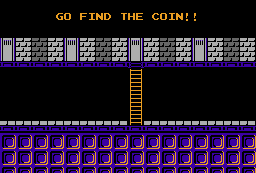
|
Walls |
| Enemies | |
| Objects | |
| Phase 17 | |
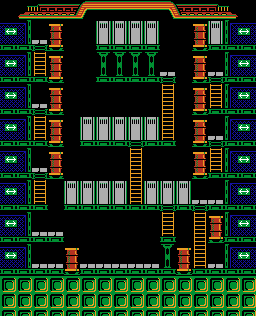
|
Walls |
| Enemies | |
| Objects | |
| Phase 18 | |
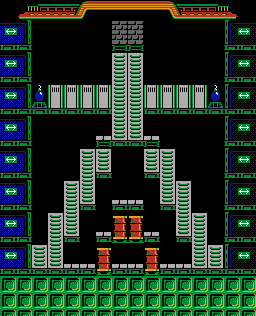
|
Walls |
| Enemies | |
| Objects | |
| Letter locations | |
| M - On the third wall tile to the right of the left bomb. A - On the wall tile to the left of the M letter. R - On the left darker brick wall tile on the highest platform. I - On the wall tile to the left of the A letter. O - On the right darker brick wall tile on the highest platform. | |
| Phase 19 | |
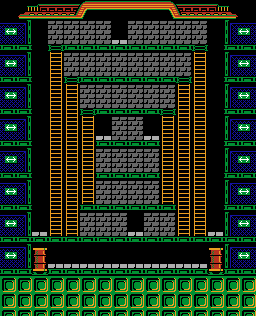
|
Walls |
| Enemies | |
| Objects | |
| Letter locations | |
| M - On the third darker brick wall tile from the left on the third highest platform. A - On the first darker brick wall tile from the left on the highest platform. R - On the third darker brick wall tile from the left on the third lowest platform. I - On the fourth darker brick wall tile from the right on the highest platform. O - On the second darker brick wall tile from the left tile on the second highest platform. | |
| Phase 20 | |
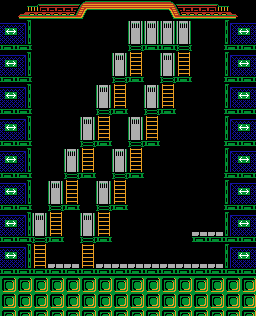
|
Walls |
| Enemies | |
| Objects | |
| Letter locations | |
| M - On the left wall tile on the fourth platform. A - On the first wall tile from the right on the highest platform. R - On the first wall tile from the left on the highest platform. I - On the wall tile to the left of the A letter. O - On the right wall tile on the lowest platform. | |
| Bonus Stage 5 | |
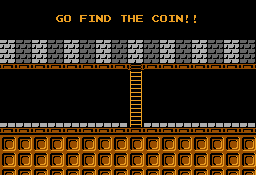
|
Walls |
| Enemies | |
| Objects | |
| Phase 21 | |
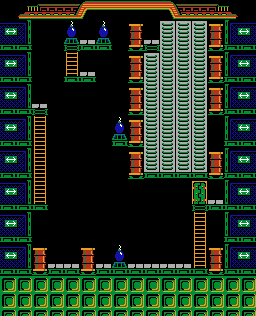
|
Walls |
| Enemies | |
| Objects | |
| Phase 22 | |
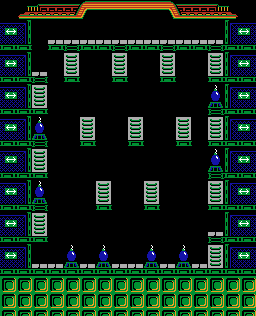
|
Walls |
| Enemies | |
| Objects | |
| Phase 23 | |
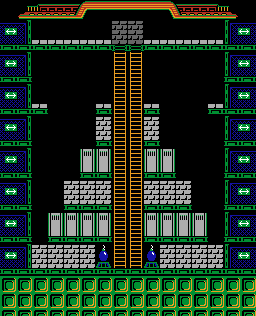
|
Walls |
| Enemies | |
| Objects | |
| Letter locations | |
| M - On the brick wall tile to the left of the left bomb. A - On the brick wall tile to the left of the M letter. R - On the first wall tile from the left on the lowest platform. I - On the left brick wall tile on the second highest platform. O - On the first brick wall tile from the right on the third lowest platform. | |
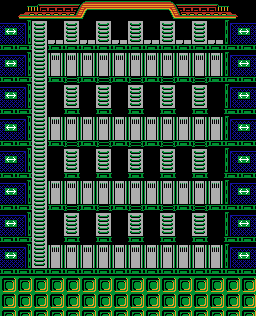
| Phase 24 | |
|
Walls |
| Enemies | |
| Objects | |
| - | |
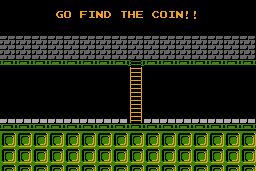
| Bonus Stage 6 | |
|
Walls |
| Enemies | |
| Objects | |
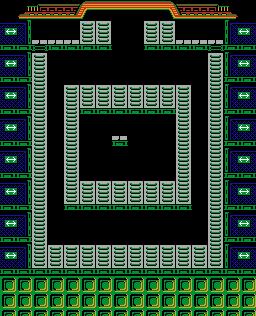
| Phase 25 | |
|
Walls |
| Enemies | |
| Objects | |
| - | |
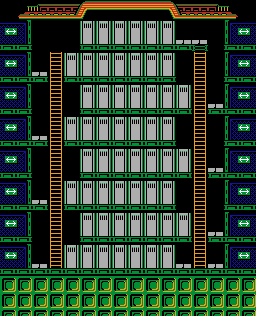
| Phase 26 | |
|
Walls |
| Enemies | |
| Objects | |
| Letter locations | |
| M - On the second wall tile from the left on the fourth highest platform. A - On the second wall tile from the right on the fourth lowest platform. R - On the first wall tile from the right on the third highest platform. I - On the third wall tile from the right on the second lowest platform. O - On the wall tile to the left of the R letter. | |
| Phase 27 | |
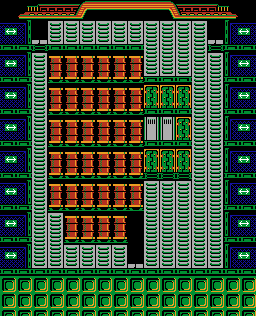
|
Walls |
| Enemies | |
| Objects | |
| Phase 28 | |
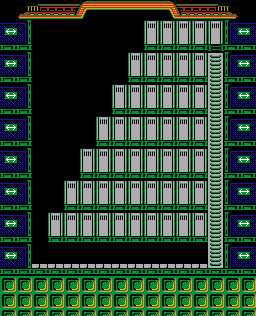
|
Walls |
| Enemies | |
| Objects | |
| - | |
| Letter locations | |
| M - On the first wall tile from the left on the third lowest platform. A - On the fifth wall tile from the left on the second lowest platform. R - On the wall tile to the left of the A letter. I - On the first wall tile from the left on the third highest platform. O - On the first wall tile from the right on the fourth lowest platform. | |
| Bonus Stage 7 | |
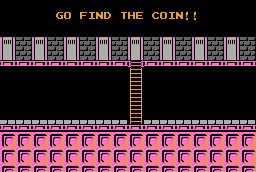
|
Walls |
| Enemies | |
| Objects | |
| Phase 29 | |
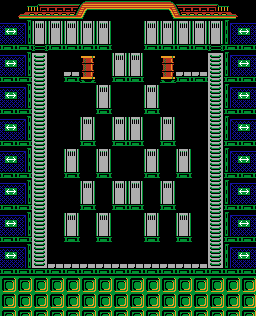
|
Walls |
| Enemies | |
| Objects | |
| Letter locations | |
| M - On the second wall tile from the right on the third lowest platform. A - On the first wall tile from the left on the second lowest platform. R - On the second wall tile from the left on the second lowest platform. I - On the first wall tile from the right on the second lowest platform. O - On the first wall tile from the left on the right highest platform. | |
| Phase 30 | |
|
Walls |
| Enemies | |
| Objects | |
| Letter locations | |
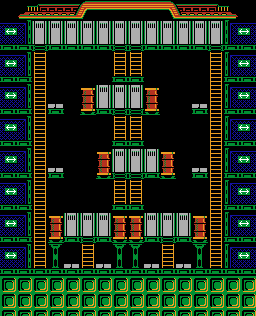
| M - On the second wall tile from the right on the third lowest platform. A - On the first wall tile from the left on the second lowest platform. R - On the second wall tile from the left on the second lowest platform. I - On the first wall tile from the right on the second lowest platform. O - On the first wall tile from the left on the right highest platform. | |
| Phase 31 | |
|
Walls |
| Enemies | |
| Objects | |
| Phase 32 | |
|
Walls |
| Enemies | |
| Objects | |
| Letter locations | |
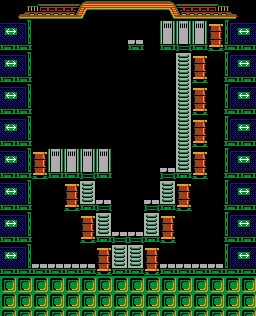
| M - On the first wall tile from the right on the highest platform. A - On the first wall tile from the left on the second highest platform. R - On the wall tile to the left of the M letter. I - On the wall tile to the left of the R letter. O - On the first wall tile from the right on the second highest platform. | |
| Bonus Stage 8 | |
|
Walls |
| Enemies | |
| Objects | |
| Phase 33 | |
|
Walls |
| Enemies | |
| Objects | |
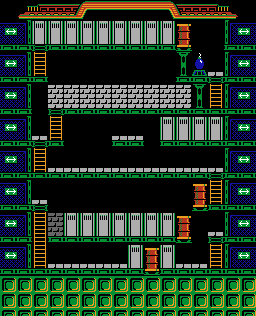
| Letter locations | |
| M - On the second wall tile from the left on the highest platform. A - On the second wall tile from the right on the fourth highest platform. R - On the third brick wall tile from the left on the third highest platform. I - On the wall tile to the left of the A letter. O - On the wall tile to the left of the M letter. | |
| Phase 34 | |
|
Walls |
| Enemies | |
| Objects | |
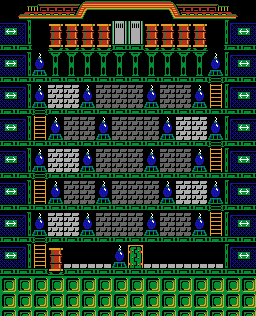
| Letter locations | |
| M - On the middle darker brick wall tile of the trio in the third highest platform. A - On the right brick wall tile of the pair on the fifth highest platform. R - On the right brick wall tile of the pair on the second lowest platform. I - On the right darker brick wall tile of the pair on the third lowest platform. O - On the right brick wall tile of the pair on the third highest platform. | |
| Phase 35 | |
|
Walls |
| Enemies | |
| Objects | |
| Phase 36 | |
|
Walls |
| Enemies | |
| Objects | |
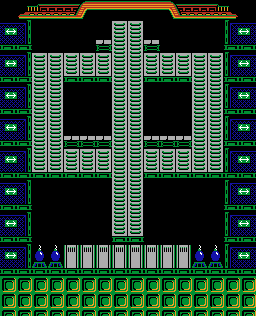
| Letter locations | |
| M - On the fourth wall tile from the right. A - On the first wall tile from the left. R - On the first wall tile from the right. I - On the second wall tile from the left. O - On the third wall tile from the right. | |
| Bonus Stage 9 | |
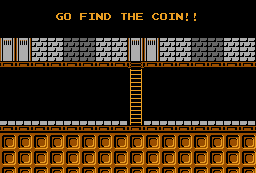
|
Walls |
| Enemies | |
| Objects | |
| Phase 37 | |
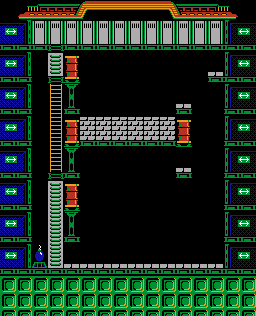
|
Walls |
| Enemies | |
| Objects | |
| Letter locations | |
| M - On the first wall tile from the left. A - On the fourth wall tile from the left. R - On the second wall tile from the left. I - On the sixth wall tile from the left. O - On the first brick wall tile from the left. | |
| Phase 38 | |
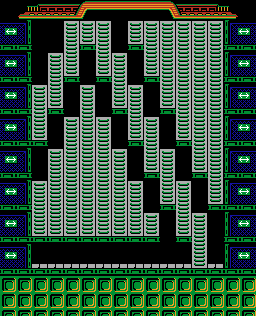
|
Walls |
| Enemies | |
| Objects | |
| - | |
| Phase 39 | |
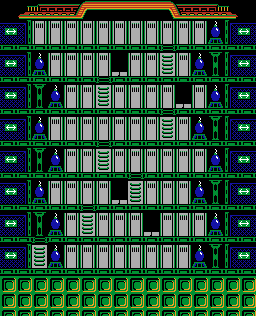
|
Walls |
| Enemies | |
| Objects | |
| Letter locations | |
| M - On the second wall tile from the right on the lowest platform. A - On the fourth wall tile from the right on the lowest platform. R - On the wall tile to the left of the A letter. I - On the wall tile to the left of the R letter. O - On the sixth wall tile from the left on the highest platform. | |
| Phase 40 | |
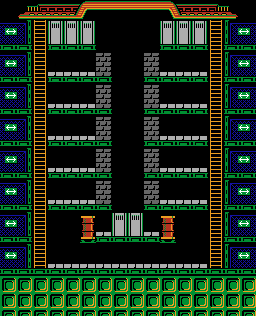
|
Walls |
| Enemies | |
| Objects | |
| Letter locations | |
| M - On the middle wall tile on the highest platform to the left. A - On the middle wall tile on the highest platform to the right. R - On the wall tile to the right of the A letter. I - On the wall tile to the left of the R letter. O - On the lowest darker wall tile on the left. | |
| Bonus Stage 10 | |
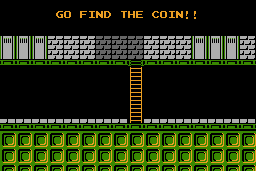
|
Walls |
| Enemies | |
| Objects | |
| Phase 41 | |
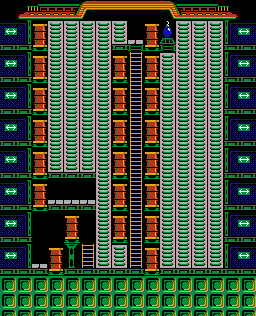
|
Walls |
| Enemies | |
| Objects | |
| Phase 42 | |
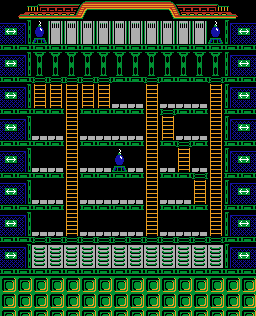
|
Walls |
| Enemies | |
| Objects | |
| Phase 43 | |
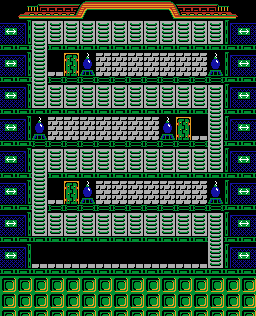
|
Walls |
| Enemies | |
| Objects | |
| Letter locations | |
| M - On the second brick wall tile from the right on the fourth highest platform. A - On the fourth brick wall tile from the left on the sixth highest platform. R - On the brick wall tile to the left of the A letter. I - On the brick wall tile to the left of the R letter. O - On the brick wall tile to the right of the M letter. | |
| Phase 44 | |
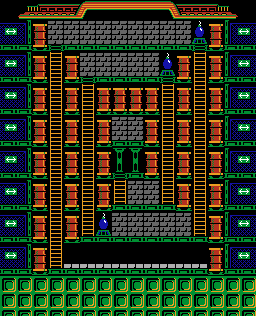
|
Walls |
| Enemies | |
| Objects | |
| Letter locations | |
| M - On the fourth dark brick wall tile from the right on the highest platform. A - On the first brick wall tile from the left on the highest platform. R - On the right dark brick wall tile on the sixth highest platform. I - On the third dark brick wall tile from the left on the seventh highest platform. O - On the dark brick wall tile to the left of the O letter. | |
| Bonus Stage 11 | |

|
Walls |
| Enemies | |
| Objects | |