Windy Well (Donkey Kong Land 2): Difference between revisions
m (Bot: Automated text replacement (-\| *title *= *[A-Z0-9][^\n\|\[\]{}<>\/\(\)]+\n +)) |
m (Bot: Automated text replacement (-(\|[\n ]*)song([\n ]*=) +\1track\2)) |
||
| Line 5: | Line 5: | ||
|world=[[K. Rool's Keep]] | |world=[[K. Rool's Keep]] | ||
|game=''[[Donkey Kong Land 2]]'' | |game=''[[Donkey Kong Land 2]]'' | ||
| | |track=Hot Head Bop | ||
|before=[[Arctic Abyss (Donkey Kong Land 2)|<<]] | |before=[[Arctic Abyss (Donkey Kong Land 2)|<<]] | ||
|after=[[Dungeon Danger|>>]] | |after=[[Dungeon Danger|>>]] | ||
Revision as of 18:37, May 5, 2022
| Level | |
|---|---|
| Windy Well | |
| |
| Level code | 5 - 2 |
| World | K. Rool's Keep |
| Game | Donkey Kong Land 2 |
| Music track | Hot Head Bop |
| << Directory of levels >> | |
Windy Well is the twenty-ninth level of Donkey Kong Land 2 and the second level of K. Rool's Keep.
Summary
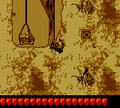
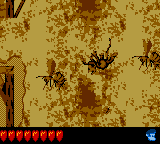
Windy Well takes place in a mine shaft where a strong wind blows Diddy Kong and Dixie Kong through the level vertically, unlike Gusty Glade, which has a strong wind that carries the Kongs either left or right. The active Kong must often jump to trigger the wind to blow. As either Kong ascends, they can move either left or right, and the player can increase or slow their ascent by respectively pressing Up or Down on the directional pad. Zingers are the main and most common enemy of the level, and the Kongs must avoid hitting them as they go up the level. Between the wind segments are some ground platforms that Diddy or Dixie can walk across and is where they must avoid Neeks, Spinies, and Kannons.
Layout
At the beginning of this mine shaft level, the Kongs must jump up to the platform to the right and jump again. The wind will suddenly begin to pull them upwards. When they land on the platform above, they must hop to a few more platforms and jump again. This time, they will be lifted into an area filled with a few Zingers. They should carefully maneuver around the wasps and get to the next platform, then grab onto a hook nearby. When they jump off of the hook, the wind will pick them up again and drag them farther up the shaft. After they get around the several Zingers in the air, the monkeys must climb up a few more platforms, while beating some Neeks.
Soon, the wind will pull them upwards again, and they will need to watch out for even more Zingers. Once at the next platform, the heroes must climb a little higher and jump to catch a gust of wind. This wind won't take them very far upwards, but it can help them get over a large gap to the left. As they travel, though, there are a few Zingers in their path that they will have to slip under. After that, they should cling onto some hooks and make their way to a higher are, where they will need to lift off and wind-travel to the right, where they will grab onto another hook. Once the Kongs jump off of this hook, they will be lifted up at a far distance through the air. Many Zingers are swarming through the area, too, and they will stop at nothing to beat the heroes. Eventually, the monkeys will stop at a platform and be able to break open the Star Barrel.
From there, the group will have to jump and be dragged by the wind to another area. Here, they must jump up a few other platforms and watch out for a few enemies, including a lone Kannon. The must then lift off to a few higher platforms and dodge several Zingers on the way. Soon, they will be at a long platform, where they must grab onto a hook and leap off to be pulled upward by the wind again. The heroes must travel east through the air and sneak under a Zinger to get to the next platform, which has another hook that will need to be jumped off of to catch the wind. This time, the wind will again, not take them too far upwards. Therefore, the monkeys must get under a lone Zinger, and finally get on a nearby platform. They should hop up the platforms above this and follow a banana trail to the last platform of that area, where they will have to life off into the air again.
The monkeys will have to avoid some more Zingers as they go up, until they get to the letter N, and the wind lets them go. At this point, the group must make their way up a few platforms to get to a hook. When they jump off of this, the wind will pick them up again, and lead them into a Zinger-filled area. They will have to maneuver around all of them, until finally ascending to the very top platform of the level. Here, they will see a spring, and it will let them exit the level with hit.
Enemies
Items and objects
- Banana Bunch Coins: 3
- DK Barrels: 3
K-O-N-G Letters
- K: Between two platforms shorty after the first DK Barrel.
- O: Between two Zingers as the wind raises Diddy or Dixie.
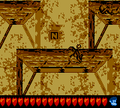
- N: Found on a platform in the middle of the screen as the active Kong goes over a Spiny.
- G: To the very right of the End of Level Target.
DK Coin
| Image | Location |
|---|---|
|
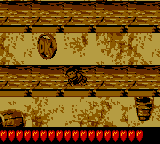
After the Kongs pass the Star Barrel, they must jump and let the wind carry them up to the next platform. From there, they must jump up a few long platforms to the left. A Spiny and the DK Coin is on the second platform up. |
Bonus Level
| Image | Type and description |
|---|---|
|
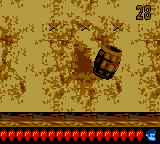
Collect the Stars! After the Kongs are lifted to an area by the third gust of wind, they must walk up to a lone banana floating to the right of the platform they are on. They must fall off the platform and continue right to find the hidden Bonus Barrel. In the Bonus Level, Diddy or Dixie have 30 seconds to collect 27 stars, which are divided into three groups of nine stars that are each above the respective three rotating Barrel Cannons. When the Kongs collect all the stars, the Kremkoin appears. |
