Picking the Pharaoh's Brains!: Difference between revisions
m (Text replacement - "(\|[\n ]*)keyitems([\n ]*=)" to "$1key_items$2") |
|||
| Line 76: | Line 76: | ||
!Chest color | !Chest color | ||
!Treasure | !Treasure | ||
!Description | !Description | ||
!Worth | !Worth | ||
| Line 83: | Line 82: | ||
|[[File:WMoDPurpleChest.png]] | |[[File:WMoDPurpleChest.png]] | ||
|Pyramid Map | |Pyramid Map | ||
|N/A | |N/A | ||
|N/A | |N/A | ||
| Line 89: | Line 87: | ||
|- | |- | ||
|[[File:WMoDGreenChest.png]] | |[[File:WMoDGreenChest.png]] | ||
|[[File:GeniusMasteryGem.png]] | |[[File:GeniusMasteryGem.png]] | ||
Genius [[Mastery Gem]] | |||
|N/A | |N/A | ||
|N/A | |N/A | ||
| Line 96: | Line 94: | ||
|- | |- | ||
|[[File:WMoDRedChest.png]] | |[[File:WMoDRedChest.png]] | ||
|[[File:Jigsaw Puzzle Solver WMoD.png]] | |[[File:Jigsaw Puzzle Solver WMoD.png]] | ||
Jigsaw Puzzle Solver | |||
|''This device solves any jigsaw puzzle in mere moments. Now you can finally put all of your puzzle-savvy friends in their rightful place... Last place!'' | |''This device solves any jigsaw puzzle in mere moments. Now you can finally put all of your puzzle-savvy friends in their rightful place... Last place!'' | ||
|$3,201 | |$3,201 | ||
| Line 103: | Line 101: | ||
|- | |- | ||
|[[File:WMoDGreenChest.png]] | |[[File:WMoDGreenChest.png]] | ||
|[[Vita Mighty]] | |[[File:VitaMighty.png|80px]] | ||
[[Vita Mighty]] | |||
|N/A | |N/A | ||
|N/A | |N/A | ||
| Line 110: | Line 108: | ||
|- | |- | ||
|[[File:WMoDRedChest.png]] | |[[File:WMoDRedChest.png]] | ||
|[[File:Fusty Golden Candle WMoD.png]] | |[[File:Fusty Golden Candle WMoD.png]] | ||
Fusty Golden Candle | |||
|''This candle's gold wax may impress all your rich friends, but we highly recommend against lighting it. The thing smells like rendered hog fat.'' | |''This candle's gold wax may impress all your rich friends, but we highly recommend against lighting it. The thing smells like rendered hog fat.'' | ||
|$10,073 | |$10,073 | ||
| Line 117: | Line 115: | ||
|- | |- | ||
|[[File:WMoDRedChest.png]] | |[[File:WMoDRedChest.png]] | ||
|[[File:Telemarketer's Bane WMoD.png]] | |[[File:Telemarketer's Bane WMoD.png]] | ||
Telemarketer's Bane | |||
|''This phone autodials telemarketers to ask if their refrigerators are running, then laughs maniacally and hangs up. Hilarious!'' | |''This phone autodials telemarketers to ask if their refrigerators are running, then laughs maniacally and hangs up. Hilarious!'' | ||
|$60 | |$60 | ||
| Line 124: | Line 122: | ||
|- | |- | ||
|[[File:WMoDRedChest.png]] | |[[File:WMoDRedChest.png]] | ||
|[[File:Somewhat-Useless Morphing Belt WMoD.png]] | |[[File:Somewhat-Useless Morphing Belt WMoD.png]] | ||
Somewhat-Useless Morphing Belt | |||
|''A belt with the ability to transform into other shapes. But once altered, it can never go back to its true belt form. Use with caution.'' | |''A belt with the ability to transform into other shapes. But once altered, it can never go back to its true belt form. Use with caution.'' | ||
|$308 | |$308 | ||
| Line 131: | Line 129: | ||
|- | |- | ||
|[[File:WMoDRedChest.png]] | |[[File:WMoDRedChest.png]] | ||
|[[File:Has-Been Celebrity Photo WMoD.png]] | |[[File:Has-Been Celebrity Photo WMoD.png]] | ||
Has-Been Celebrity Photo | |||
|''A magical photo of a washed-up celebrity that has the power to make even sleepy accountants scream like little girls.'' | |''A magical photo of a washed-up celebrity that has the power to make even sleepy accountants scream like little girls.'' | ||
|$368 | |$368 | ||
| Line 138: | Line 136: | ||
|- | |- | ||
|[[File:WMoDRedChest.png]] | |[[File:WMoDRedChest.png]] | ||
|[[File:Celebrity of the Hour Poster WMoD.png]] | |[[File:Celebrity of the Hour Poster WMoD.png]] | ||
Celebrity of the Hour Poster | |||
|''This poster exudes sassiness and confidence! But it will also be the subject of gossip and fall out of style in less than six months. Such is fame.'' | |''This poster exudes sassiness and confidence! But it will also be the subject of gossip and fall out of style in less than six months. Such is fame.'' | ||
|$210 | |$210 | ||
|- | |- | ||
|[[File:WMoDRedChest.png]] | |[[File:WMoDRedChest.png]] | ||
|[[File:Sandals of Infamy WMoD.png]] | |[[File:Sandals of Infamy WMoD.png]] | ||
Sandals of Infamy | |||
|''These sandals hold the soul of a famous artist. Wearing them will make you twice as popular as you were before, especially with snobby art-types.'' | |''These sandals hold the soul of a famous artist. Wearing them will make you twice as popular as you were before, especially with snobby art-types.'' | ||
|$79 | |$79 | ||
| Line 151: | Line 149: | ||
|- | |- | ||
|[[File:WMoDPurpleChest.png]] | |[[File:WMoDPurpleChest.png]] | ||
|[[File:WMODRoyalFlail.png]] | |[[File:WMODRoyalFlail.png]] | ||
[[Royal Flail]] | |||
|''"I got a royal flail made of jade and gold. How dashing!"'' | |''"I got a royal flail made of jade and gold. How dashing!"'' | ||
|N/A | |N/A | ||
| Line 158: | Line 156: | ||
|- | |- | ||
|[[File:WMoDRedChest.png]] | |[[File:WMoDRedChest.png]] | ||
|[[File:False Beard of Might WMoD.png]] | |[[File:False Beard of Might WMoD.png]] | ||
False Beard of Might | |||
|''A stick-on beard that lends class to even the plainest face. However, the glue is so powerful that it can never be removed, so make the first attempt count!'' | |''A stick-on beard that lends class to even the plainest face. However, the glue is so powerful that it can never be removed, so make the first attempt count!'' | ||
|$139 | |$139 | ||
| Line 165: | Line 163: | ||
|- | |- | ||
|[[File:WMoDRedChest.png]] | |[[File:WMoDRedChest.png]] | ||
|[[File:Ab Annihilator WMoD.png]] | |[[File:Ab Annihilator WMoD.png]] | ||
Ab Annihilator | |||
|''This device will give you rock-hard abs in only seconds a day. Then you can hit them with a sledgehammer while friends and co-workers stare in awe.'' | |''This device will give you rock-hard abs in only seconds a day. Then you can hit them with a sledgehammer while friends and co-workers stare in awe.'' | ||
|$140 | |$140 | ||
| Line 172: | Line 170: | ||
|- | |- | ||
|[[File:WMoDRedChest.png]] | |[[File:WMoDRedChest.png]] | ||
|[[File:Formal Salmon Lure WMoD.png]] | |[[File:Formal Salmon Lure WMoD.png]] | ||
Formal Salmon Lure | |||
|''A fishing lure with a natty cummerbund. This spinning lure snags only the classiest of fish, like salmon and carp.'' | |''A fishing lure with a natty cummerbund. This spinning lure snags only the classiest of fish, like salmon and carp.'' | ||
|$239 | |$239 | ||
| Line 179: | Line 177: | ||
|- | |- | ||
|[[File:WMoDRedChest.png]] | |[[File:WMoDRedChest.png]] | ||
|[[File:Homework-O-Matic WMoD.png]] | |[[File:Homework-O-Matic WMoD.png]] | ||
Homework-O-Matic | |||
|''A hat that does your homework for you. Unfortunately, a design flaw causes it to occasionally slip the phrase "by the great beard of mighty Zeus!" into essay questions.'' | |''A hat that does your homework for you. Unfortunately, a design flaw causes it to occasionally slip the phrase "by the great beard of mighty Zeus!" into essay questions.'' | ||
|$5,891 | |$5,891 | ||
| Line 186: | Line 184: | ||
|- | |- | ||
|[[File:WMoDPurpleChest.png]] | |[[File:WMoDPurpleChest.png]] | ||
|[[File:WMODRoyalGoldMedallion.png]] | |[[File:WMODRoyalGoldMedallion.png]] | ||
[[Royal Gold Medallion]] | |||
|''"It's a gold medal! Just look at that king's face shine!"'' | |''"It's a gold medal! Just look at that king's face shine!"'' | ||
|N/A | |N/A | ||
| Line 193: | Line 191: | ||
|- | |- | ||
|[[File:WMoDRedChest.png]] | |[[File:WMoDRedChest.png]] | ||
|[[File:Back Massage Coupon WMoD.png]] | |[[File:Back Massage Coupon WMoD.png]] | ||
Back Massage Coupon | |||
|''A fine, fine gift from a loved one, but a terrible, terrible gift from anyone else. If a stranger gives you one, it's probably a scam. Best to run away.'' | |''A fine, fine gift from a loved one, but a terrible, terrible gift from anyone else. If a stranger gives you one, it's probably a scam. Best to run away.'' | ||
|$736 | |$736 | ||
| Line 200: | Line 198: | ||
|- | |- | ||
|[[File:WMoDPurpleChest.png]] | |[[File:WMoDPurpleChest.png]] | ||
|[[File:WMODRoyalSilverMedallion.png]] | |[[File:WMODRoyalSilverMedallion.png]] | ||
[[Royal Silver Medallion]] | |||
|''"This medal looks kind of cheap. It seems to have the king's face on it."'' | |''"This medal looks kind of cheap. It seems to have the king's face on it."'' | ||
|N/A | |N/A | ||
| Line 207: | Line 205: | ||
|- | |- | ||
|[[File:WMoDRedChest.png]] | |[[File:WMoDRedChest.png]] | ||
|[[File:Queenly Ear Hair WMoD.png]] | |[[File:Queenly Ear Hair WMoD.png]] | ||
Queenly Ear Hair | |||
|''The ear hair that launched a thousand ships and turned brother against brother. It shines with a waxy brilliance when blown by the wind.'' | |''The ear hair that launched a thousand ships and turned brother against brother. It shines with a waxy brilliance when blown by the wind.'' | ||
|$5,456 | |$5,456 | ||
Revision as of 02:58, May 3, 2022
| Wario: Master of Disguise episode | |||
|---|---|---|---|
| Picking the Pharaoh's Brains! | |||
| |||
| Location | Poobah the Pharaoh's Pyramid | ||
| Boss | Poobah the Pharaoh | ||
| Key items | |||
| Guise/Mastery Gems | |||
| |||
| << List of episodes >> | |||
- “The Wishstone is going to LOVE you. What honesty! So pure! But I do wonder... Are you worthy of the Wishstone?”
- —Poobah the Pharaoh, Wario: Master of Disguise
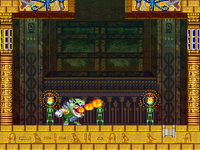
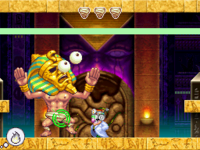
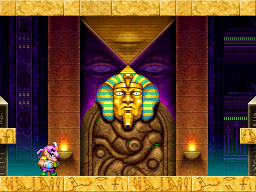
Picking the Pharaoh's Brains! is the fifth episode of Wario: Master of Disguise. In this episode, Wario and Goodstyle explore Poobah the Pharaoh's Pyramid hoping to find the Pharaoh, as well as the third Wishstone piece. Throughout the pyramid, Wario must use Dragon Wario's flames to light torches that reveal hidden doors, ladders, and platforms. Some of the doors and platforms are invisible, requiring Genius Wario to see them.
Plot
After learning that the third piece of the Wishstone was supposedly buried alongside the Pharaoh in his pyramid, Wario comes to the pyramid to search for the Pharaoh. He eventually reaches the bottom of the pyramid and almost gets to the Pharaoh's room, but the royal gatekeeper will only let him pass if he can find two royal medallions. He finds them, and the gatekeeper lets him through, but before Wario enters the Pharaoh's room, Count Cannoli shows up. He tries to take Goodstyle back, but Wario just jumps on Cannoli, injuring him. Wario leaves Cannoli behind and goes to see the Pharaoh.
Upon meeting the Pharaoh, Wario and Goodstyle ask him about the Wishstone, but the Pharaoh wishes to test Wario's worth first and challenges him to a battle. Wario wins, but the Pharaoh reveals that the Wishstone piece is not inside the pyramid at all. He tells Wario that if anyone can find the Wishstone piece, it's him, then teleports him away.
Meanwhile, Cannoli starts to lose hope because of his continuous failures and considers giving up entirely, but a mysterious voice speaks to him and tells him that he can help him get revenge on Wario if he does exactly as he says. Cannoli agrees and forms an alliance with the unseen person.
Layout
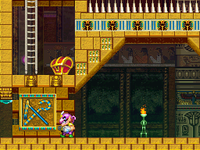
In the first room of the pyramid, Wario must light the torch in the middle to make a ladder appear. It leads to an apparent dead end, but transforming into Genius Wario reveals a hidden door. On the other side is a room with many ladders and blocks with Anubis faces on them. By climbing up the first two ladders on the left and the second two on the right, Wario can reach a purple treasure chest, where he will find a map of the pyramid. A pathway on the left leads to a room where Wario must drop through a Semisolid Platform and encounter a pair of Bombats. There are two torches on the ceiling, but only one is lit. Lighting the other one reveals a door, which leads to a room with three more Bombats and a series of ladders that take Wario to a green chest. It contains the Genius Mastery Gem, which gives Genius Wario an extendable boxing glove weapon. Directly to the left of the chest is a hidden door. It leads to a series of rooms that eventually bring Wario back to the starting area, where he can use his new power to break through a wall. On a ledge on the right is a moneybag, and right next to it is a pit leading into the next room. Down here, Wario can go to the left to find three platforms over a bed of spikes. An unlit torch on one of the platforms will open a gate to a dark room with a Vita Mighty inside when lit. Another torch below the gate spawns a ladder, allowing Wario to access a red chest with the Telemarketer's Bane inside. A series of Semisolid Platforms lead down to a Sarcopha Guy. By drawing two blocks next to the wall, Wario can crawl through a narrow passage and find two more Sarcopha Guys and a mural with a missing piece. A hidden passage on the right leads to a room with a red chest containing the Somewhat-Useless Morphing Belt. A normal passage right above it leads to a dark room.
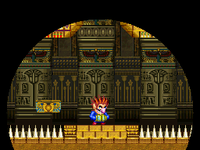
Inside the dark room, Wario can jump over a spike pit to find a door. It leads to a tall room with a moving platform. Wario can light two torches to make two more moving platforms appear, then turn into Genius Wario to reveal a fourth one. Lighting a third torch makes another platform spawn, and Wario can climb to the top of the room, where he will find a moneybag. Next to the moneybag is an invisible door leading to a room with three moneybags and two red chests. The chests contain the Has-Been Celebrity Photo and the Celebrity of the Hour Poster. Back in the dark room, Wario can jump over two spike pits to the right to find a K9 Cannon. By continuing to the right and going up, he will reach another dark room with a K9 Cannon, as well as a chest holding the Sandals of Infamy. To the left is a room with two Scare-Ohs!, which will spawn a purple chest when defeated. It contains the Royal Flail. A crumbling floor on the left takes Wario back to the first dark room.
The Royal Flail is the missing piece from the mural. Putting it back opens the way forward. The next room is dark and features four moving platforms close together and a red chest with the False Beard of Might in it. A ladder on the left leads down into a room with multiple platforms over a bed of spikes. There are two invisible doors in here, each leading to different parts of the same room: one with a big heart, and one with two moneybags and a red chest containing the Formal Salmon Lure. A torch on the left reveals a door when lit; it leads to another portion of the aforementioned room with a moneybag, a hat switch, and a red chest with the Ab Annihilator in it. Another torch on the right also spawns a door, but since Dragon Wario cannot stand on Semisolid Platforms, a block must be drawn for him to stand on while he lights it. This door leads to yet another portion of the room where Wario must destroy a red block and jump over an Anubis head block to reach another door, which takes Wario to the top-left corner of a large room where he will encounter a Sphinx Jr. This room has two large slanted floors with a pit in the middle. The pit leads to a dark room with pathways leading left and right. Both paths have a spike bed with a moving platform above it. The right path leads to the Pharaoh's room, but the royal gatekeeper will not let Wario through until he retrieves two medallions.
The left path takes Wario to a large room where he will first encounter two Sarcopha Guys. Wario must now ascend to the top of the room by lighting torches and making moving platforms appear so he can cross a spike bed with a Bombat flying above it. The torch hanging from the top-right corner will make a ladder appear so Wario can move from the top to the bottom of the room more easily, but he should avoid lighting the one directly to the left of it, or it will make one of the moving platforms disappear. From the top-right corner, Wario can jump across two fast moving platforms, each of which has a Bombat flying over it, to reach a red chest containing the Homework-O-Matic. He can go to the right to find the purple chest where the Royal Gold Medallion is. Lighting a torch reveals a ladder, allowing Wario to quickly return to the area above the pit leading into the dark room. By jumping over the pit and getting across the spikes on the other side, Wario will reach a path leading into another room. A hidden moneybag can be found by climbing down the ladder in this room and going through the hidden passage on the left. To the right is a bed of spikes with crumbling blocks above them. Wario must light torches to create moving platforms necessary to traverse the area. After making them appear, he must turn into Genius Wario to see the remaining platforms that will take him to the pathway on the upper-right corner.
The next room has walls that Genius Wario's boxing glove can break as well as a red chest with the Back Massage Coupon in it. The ladders in here lead up to a dark room two beds of spikes and a Blamses in between them. On the left side of the room is the purple chest containing the Royal Silver Medallion. The ladder next to it leads to a pair of moneybags and an invisible door. After going through the door, Wario must destroy a red block, then drawing a block in between another red block and some crumbing blocks to cross a spike pit and find a large heart. There are two torches in the room that can be lit to spawn moving platforms. Across another spike pit and underneath a ledge is a red block concealing a red chest, which contains the Queenly Ear Hair. Above the chest is an invisible door that takes Wario to the upper right section of the room with the pit that leads to the royal gatekeeper's room. There is a hat switch nearby.
With both royal medallions, the royal gatekeeper will let Wario enter the Pharaoh's room. Upon meeting the Pharaoh, he will challenge Wario to a fight. However, after Wario wins, the Pharaoh reveals that the Wishstone is not in the pyramid and sends him to the Ancient Waterworks.
Enemies
| Sprite | Name | Count |
|---|---|---|
| Bombat | 8 | |
| Sarcopha Guy | 5 | |
| K9 Cannon | 2* | |
| Scare-Oh! | 2 | |
| Sphinx Jr. | 1* | |
| Blamses | 1 | |
| Treasure Pest | 1 |
* - Additional K9 Cannons and Sphinx Jrs. are spawned by Poobah the Pharaoh during his boss battle.
Treasure chest locations
A Treasure Pest will appear in place of one of the red chests, making it unobtainable on the first run.
| Chest color | Treasure | Description | Worth | Location |
|---|---|---|---|---|
| Pyramid Map | N/A | N/A | In the room accessed from the first invisible door. | |
Genius Mastery Gem |
N/A | N/A | In the backwards L-shaped room at the top-left corner of the pyramid near an invisible door. | |
Jigsaw Puzzle Solver |
This device solves any jigsaw puzzle in mere moments. Now you can finally put all of your puzzle-savvy friends in their rightful place... Last place! | $3,201 | Replaces the Genius Mastery Gem during subsequent runs of the episode. | |

|
N/A | N/A | In a dark room on the far left of the middle section of the pyramid. | |
Fusty Golden Candle |
This candle's gold wax may impress all your rich friends, but we highly recommend against lighting it. The thing smells like rendered hog fat. | $10,073 | Replaces the Vita Mighty during subsequent runs of the episode. | |
Telemarketer's Bane |
This phone autodials telemarketers to ask if their refrigerators are running, then laughs maniacally and hangs up. Hilarious! | $60 | Obtained by lighting a torch in the upper-left corner of the large central room, revealing a ladder. | |
Somewhat-Useless Morphing Belt |
A belt with the ability to transform into other shapes. But once altered, it can never go back to its true belt form. Use with caution. | $308 | In a room accessed via a hidden passage in the bottom-right of the large central room. | |
Has-Been Celebrity Photo |
A magical photo of a washed-up celebrity that has the power to make even sleepy accountants scream like little girls. | $368 | In a room hidden behind an invisible door, accessed via the tall room with torch-triggered horizontally moving platforms. | |
Celebrity of the Hour Poster |
This poster exudes sassiness and confidence! But it will also be the subject of gossip and fall out of style in less than six months. Such is fame. | $210 | ||
Sandals of Infamy |
These sandals hold the soul of a famous artist. Wearing them will make you twice as popular as you were before, especially with snobby art-types. | $79 | In the dark upper-right area that extends outside the pyramid itself. | |
| "I got a royal flail made of jade and gold. How dashing!" | N/A | Obtained in the room to the left of where the Sandals of Infamy are by defeating the two Scare-Ohs! | ||
False Beard of Might |
A stick-on beard that lends class to even the plainest face. However, the glue is so powerful that it can never be removed, so make the first attempt count! | $139 | On the upper-right corner of the room to the left of where the Royal Flail is used. | |
Ab Annihilator |
This device will give you rock-hard abs in only seconds a day. Then you can hit them with a sledgehammer while friends and co-workers stare in awe. | $140 | Obtained by lighting a torch on the left side of the room below the one where the False Beard of Might is, revealing a hidden door. | |
Formal Salmon Lure |
A fishing lure with a natty cummerbund. This spinning lure snags only the classiest of fish, like salmon and carp. | $239 | Obtained by entering an invisible door on the bottom right of the room below the one where the False Beard of Might is. | |
Homework-O-Matic |
A hat that does your homework for you. Unfortunately, a design flaw causes it to occasionally slip the phrase "by the great beard of mighty Zeus!" into essay questions. | $5,891 | On a high ledge in the room in the bottom-left corner of the pyramid. | |
| "It's a gold medal! Just look at that king's face shine!" | N/A | In an isolated area accessed from a ledge on the upper-right corner of the room where the Homework-O-Matic is. | ||
Back Massage Coupon |
A fine, fine gift from a loved one, but a terrible, terrible gift from anyone else. If a stranger gives you one, it's probably a scam. Best to run away. | $736 | In the small room on the far right of the pyramid above the boss room. | |
| "This medal looks kind of cheap. It seems to have the king's face on it." | N/A | In the dark room above where the Back Massage Coupon is obtained. | ||
Queenly Ear Hair |
The ear hair that launched a thousand ships and turned brother against brother. It shines with a waxy brilliance when blown by the wind. | $5,456 | In the room with the torch-activated moving platforms accessed by continuing from where the Royal Silver Medallion is, hidden behind a red block. |
Names in other languages
| Language | Name | Meaning | Notes |
|---|---|---|---|
| German | Nachhaken beim Pharao![?] | Follow up with the Pharaoh! | |
| Italian | Quello spaccone del Faraone[?] | That braggart Pharaoh | |
| Spanish | Si el faraón hablara...[?] | If the pharaoh were to speak... |
