Category:Wario Land 4 screenshots
From the Super Mario Wiki, the Mario encyclopedia
Jump to navigationJump to search
This category contains screenshots from Wario Land 4.
Media in category "Wario Land 4 screenshots"
The following 200 files are in this category, out of 261 total.
(previous page) (next page) 40 Below Fridge.png 240 × 160; 25 KB
 Apple Bomb In Action.png 240 × 160; 26 KB
 Big Fist WL4 screenshot.png 240 × 160; 24 KB
 Black Dog In Action.png 240 × 160; 25 KB
 Black Dragon WL4 usage.png 240 × 160; 12 KB
 Blast Cannon In Action.png 240 × 160; 27 KB
 Bugle In Action.png 240 × 160; 27 KB
 Catbat WL4 boss fight.png 240 × 160; 26 KB
 Crescent Moon Village WL4 screenshot.png 240 × 160; 5 KB
 Cuckoo Condor WL4 eggs.png 240 × 160; 17 KB
 Cuckoo Condor WL4 grabbing Wario.png 240 × 160; 23 KB
 Deburina Screenshot.png 240 × 160; 12 KB
 Diamond WL4 Screenshot.png 240 × 160; 13 KB
 Domino Row.png 240 × 160; 6 KB
 Emerald Passage.png 240 × 160; 5 KB
 Ending picture Wario and Hoggus Wario Land 4.png 240 × 120; 4 KB
 Entry Passage.png 240 × 160; 5 KB
 Fiery Cavern WL4 screenshot.png 240 × 160; 24 KB
 FlamingWario WL4.png 240 × 160; 6 KB
 Golden Pyramid Passage.png 240 × 160; 5 KB
 Hoggus1.png 480 × 320; 9 KB
 Homerun WL4.png 240 × 160; 8 KB
 Hotel Horror WL4 screenshot.png 240 × 160; 4 KB
 Itemshop WL4.png 240 × 160; 9 KB
 Large Lips In Action.png 240 × 160; 24 KB
 Large Lips WL4.png 28 × 34; 298 bytes
 Monsoon Jungle.png 240 × 160; 14 KB
 Mystic Lake.png 240 × 160; 6 KB
 Octopus.png 240 × 160; 6 KB
 Onomi-Arabian-Night-WL4.png 240 × 160; 8 KB
 Palm Tree Paradise.png 239 × 157; 9 KB
 Pinball Zone WL4 screenshot.png 240 × 160; 3 KB
 PyramidWario.png 192 × 160; 4 KB
 Ruby Passage.png 240 × 160; 5 KB
 Sapphire Passage.png 240 × 160; 5 KB
 Soundroom.png 240 × 160; 11 KB
 The Curious Factory WL4 screenshot.png 240 × 160; 7 KB
 The Toxic Landfill WL4 screenshot.png 240 × 160; 19 KB
 TheBigBoard WL4.png 240 × 160; 4 KB
 Togerobo WL4.png 32 × 35; 430 bytes
 Topaz Passage.png 240 × 160; 5 KB
 Toy Block Tower.png 240 × 160; 3 KB
 Vizorman In Action.png 240 × 160; 25 KB
 Wario land 4 500 coin.png 240 × 160; 15 KB
 Wario Land 4 Beginning Level.png 240 × 160; 18 KB
 Wario Land 4 Doodle Woods.png 240 × 160; 13 KB
 WarioSmallAni.gif 42 × 42; 4 KB
 WildflowerFields.png 240 × 160; 8 KB
 WL4 - Flashback Bonus 1.png 240 × 120; 7 KB
 WL4 - Flashback Bonus 2.png 248 × 120; 4 KB
 WL4 - Flashback Bonus 3.png 256 × 120; 5 KB
 WL4 - Shokora Ending2.png 240 × 160; 4 KB
 WL4 - Shokora Ending3.png 240 × 160; 4 KB
 WL4 - Shokora Ending4.png 240 × 160; 4 KB
 WL4 40 Below Fridge Puzzle Room 1.png 380 × 190; 39 KB
 WL4 40 Below Fridge Puzzle Room 2.png 557 × 313; 70 KB
 WL4 40BelowFridge Map.png 3,132 × 1,417; 731 KB
 WL4 Aerodent Battle.png 240 × 160; 21 KB
 WL4 Aerodent Map.png 480 × 323; 28 KB
 WL4 Arabian Night Puzzle Room 1.png 333 × 252; 47 KB
 WL4 Arabian Night Puzzle Room 2.png 411 × 202; 40 KB
 WL4 ArabianNight Map.png 2,598 × 1,964; 651 KB
 WL4 Catbat Map.png 480 × 323; 29 KB
 WL4 Chinese Title Screen.png 240 × 160; 7 KB
 WL4 Cractus Map.png 480 × 323; 29 KB
 WL4 CrescentMoonVillage Map.png 5,833 × 1,334; 548 KB
 WL4 CuckooCondor Map.png 480 × 323; 28 KB
 WL4 CuriousFactory Map.png 4,699 × 1,883; 614 KB
 WL4 Debug Level Section.png 240 × 160; 993 bytes
 WL4 Debug Passage.png 234 × 159; 5 KB
 WL4 Diamond Piece.png 240 × 160; 7 KB
 WL4 DominoRow Map.png 4,367 × 1,689; 632 KB
 WL4 DoodleWoods Map.png 2,950 × 1,964; 455 KB
 WL4 Entry Passage Map Screen.png 240 × 160; 7 KB
 Wl4 entrypassage.png 240 × 160; 7 KB
 WL4 Fiery Cavern and Iwao.png 240 × 160; 8 KB
 WL4 FieryCavern Map.png 4,348 × 2,164; 1.71 MB
 WL4 Game Over The Wario Hop.png 240 × 160; 3 KB
 WL4 Game Over Wario's Homerun Derby.png 240 × 160; 553 bytes
 WL4 Game Over Wario's Roulette.png 240 × 160; 8 KB
 WL4 Glitch Invisible Object.png 240 × 160; 6 KB
 WL4 GoldenDiva Map.png 480 × 323; 32 KB
 WL4 GoldenPassage Map.png 7,758 × 1,008; 580 KB
 WL4 HallofHieroglyphs Map.png 4,314 × 726; 293 KB
 WL4 HotelHorror Map.png 3,276 × 1,382; 385 KB
 WL4 invisible Frog Blocks.png 240 × 160; 13 KB
 WL4 MonsoonJungle Map.png 4,561 × 2,110; 1.31 MB
 WL4 MysticLake Map.png 5,026 × 1,878; 856 KB
 WL4 Old Man Frame.png 240 × 160; 5 KB
 WL4 PalmTreeParadise Map.png 4,826 × 675; 333 KB
 WL4 PinballZone Map.png 2,668 × 1,769; 461 KB
 WL4 Prerelease 40 Below Fridge.png 240 × 159; 98 KB
 WL4 Prerelease Arabian Night.jpg 240 × 160; 11 KB
 WL4 Prerelease Fiery Cavern.png 240 × 160; 10 KB
 WL4 Prerelease Hotel Horror.jpg 240 × 160; 13 KB
 WL4 Prerelease Palm Tree Paradise.png 240 × 160; 88 KB
 WL4 Prerelease Spoiled Rotten.jpg 240 × 160; 13 KB
 WL4 Prerelease The Curious Factory.png 240 × 160; 83 KB
 WL4 Prerelease Utsuboanko.png 240 × 160; 5 KB
 WL4 Prerelease Wildflower Fields.png 240 × 160; 9 KB
 WL4 Ringosuki Screenshot.png 240 × 160; 31 KB
 WL4 Screenshot Arewo Stein Escaping.png 240 × 160; 5 KB
 WL4 Screenshot Cractus Without Crown Hack.png 240 × 160; 11 KB
 WL4 Screenshot First Man Wario.png 240 × 160; 6 KB
 WL4 Screenshot Game Mode Selection.png 240 × 160; 3 KB
 WL4 Screenshot Golden Diva True Form.png 240 × 160; 13 KB
 WL4 Screenshot Keyzer Taken.png 83 × 67; 2 KB
 WL4 Screenshot Pre-release - Cractus.png 240 × 160; 11 KB
 WL4 Screenshot Pre-release - Crescent Moon Village.png 240 × 160; 5 KB
 WL4 Screenshot Pre-release - Monsoon Jungle.png 240 × 160; 15 KB
 WL4 Screenshot Section - Arewo Stein.png 32 × 40; 562 bytes
 WL4 Screenshot Section - Shokora Portrait.png 56 × 64; 2 KB
 WL4 Screenshot The Wario Hop.png 240 × 160; 3 KB
 WL4 Screenshot Wario Hovercar.png 240 × 160; 3 KB
 WL4 Screenshot Wario Truck.png 240 × 160; 4 KB
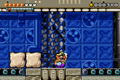
 WL4 solid Frog Blocks.png 240 × 160; 15 KB
 WL4 SpoiledRotten Map.png 480 × 323; 29 KB
 WL4 Starting File Select Background.png 240 × 160; 3 KB
 WL4 Super Ram Screenshot.png 240 × 160; 24 KB
 WL4 TheBigBoard Map.png 6,824 × 1,030; 375 KB
 WL4 ToxicLandfill Map.png 2,601 × 3,199; 1.72 MB
 WL4 ToyBlockTower Map.png 3,369 × 1,660; 336 KB
 WL4 Unlockable File Select Background.png 240 × 160; 919 bytes
 WL4 Unused Cave.png 640 × 192; 64 KB
 WL4 Wario Kiss Bad Ending.png 240 × 160; 7 KB
 WL4 Wario Kiss Good Ending.png 240 × 160; 6 KB
 WL4 Wario Kiss True Ending.png 240 × 160; 7 KB
 WL4 Wario Kiss Ugly Ending.png 240 × 160; 7 KB
 WL4 Wario's Homerun Derby.png 240 × 160; 2 KB
 WL4 Warios Roulette Screenshot.png 240 × 160; 15 KB
 WL4 WildflowerFields Map.png 3,850 × 2,018; 837 KB
 WL4-500 CD.png 240 × 160; 6 KB
 WL4-Big Ball Battle.png 240 × 160; 29 KB
 WL4-Big Flower.png 240 × 160; 15 KB
 WL4-Black Cat Battle.png 240 × 160; 25 KB
 WL4-Black Cat Pyramid.png 239 × 159; 12 KB
 WL4-Black Duck Battle.png 240 × 160; 27 KB
 WL4-BlackCat2.gif 240 × 160; 340 KB
 WL4-Blue Fish.png 240 × 160; 24 KB
 WL4-Blue Spike Cannon.png 240 × 160; 9 KB
 WL4-Boss Door.png 239 × 159; 13 KB
 WL4-Bow Balloon.png 240 × 160; 7 KB
 WL4-Bubble Wario.png 240 × 160; 14 KB
 WL4-Butatabi.png 240 × 160; 8 KB
 WL4-Button Missed Screenshot.png 240 × 160; 5 KB
 WL4-Chandelier Screenshot.png 240 × 160; 6 KB
 WL4-Coughing.png 240 × 160; 24 KB
 WL4-Cractus Battle.png 240 × 160; 25 KB
 WL4-Credits.png 240 × 160; 8 KB
 WL4-Crescent Moon Village Puzzle Room1.png 428 × 233; 70 KB
 WL4-Crescent Moon Village Puzzle Room2.png 237 × 156; 38 KB
 WL4-Decompressor.png 143 × 84; 8 KB
 WL4-Dice Men.png 240 × 160; 10 KB
 WL4-Diva Lips Battle.png 240 × 160; 22 KB
 WL4-Diva Map.png 239 × 162; 7 KB
 WL4-Domino Button Screenshot.png 240 × 160; 4 KB
 WL4-Domino Row Puzzle Room1.png 235 × 251; 63 KB
 WL4-Domino Row Puzzle Room2.png 478 × 396; 101 KB
 WL4-Doodle Woods Puzzle Room1.png 729 × 444; 177 KB
 WL4-Doodle Woods Puzzle Room2.png 1,483 × 189; 112 KB
 WL4-Eggplant Warrior Screenshot.png 240 × 160; 18 KB
 WL4-Electric Spark Screenshot.png 240 × 160; 5 KB
 WL4-Ending Treasure.png 240 × 160; 63 KB
 WL4-Fiery Cavern Puzzle Room1.png 253 × 650; 63 KB
 WL4-Fiery Cavern Puzzle Room2.png 365 × 283; 102 KB
 WL4-Firefly.png 240 × 160; 23 KB
 WL4-Flashback1.png 240 × 119; 11 KB
 WL4-Flashback2.png 240 × 121; 11 KB
 WL4-Flashback3.png 241 × 120; 9 KB
 WL4-Flashback4.png 239 × 120; 8 KB
 WL4-Flashback5.png 238 × 120; 10 KB
 WL4-Flashback7.png 241 × 120; 15 KB
 WL4-Flashback8.png 238 × 122; 9 KB
 WL4-Flashback9.png 239 × 120; 8 KB
 WL4-Flashback10.png 240 × 121; 8 KB
 WL4-Flat Wario.png 240 × 160; 15 KB
 WL4-Frog Block.png 36 × 16; 378 bytes
 WL4-Frog Door.png 240 × 160; 8 KB
 WL4-Frog Switch HoH.png 240 × 160; 19 KB
 WL4-Game Bots.png 240 × 160; 17 KB
 WL4-Get a Goal.png 240 × 160; 7 KB
 WL4-Golden Diva Battle.png 240 × 160; 12 KB
 WL4-Golden Diva Stone.png 84 × 79; 3 KB
 WL4-Golden Passage Switch.png 240 × 160; 11 KB
 WL4-Golden Passage.png 240 × 160; 18 KB
 WL4-Golden Pyramid Sprite.png 131 × 100; 3 KB
 WL4-Green Spike Cannon.png 240 × 160; 9 KB
 WL4-Harimen Screenshot.png 240 × 160; 12 KB
 WL4-Harimenzetto Screenshot.png 240 × 160; 7 KB
 WL4-Heart Box Screenshot.png 239 × 161; 14 KB
 WL4-Hotel Horror Puzzle Room1.png 508 × 362; 109 KB
 WL4-Hotel Horror Puzzle Room2.png 607 × 206; 49 KB
 WL4-Hotel Map.png 73 × 63; 3 KB
 WL4-Ice Switch.png 240 × 160; 20 KB
 WL4-Item Shop Entrance.png 255 × 162; 11 KB
 WL4-Japanese Title Screen.png 240 × 160; 17 KB
 WL4-Keyzer Door Unlock.png 240 × 120; 7 KB
 WL4-Lunar Flashback.png 240 × 120; 16 KB
 WL4-Marumen Screenshot.png 240 × 161; 13 KB
 WL4-Mayu Bird.png 240 × 160; 14 KB


