The 'Shroom:Issue 207/Strategy Wing
Director's Notes
Written by: Hooded Pitohui (talk)
Hello, all you readers of The 'Shroom. June is here, which means it's time for Awards voting! What's that mean? That means, once you're all finished reading Strategy Wing (or part of it, if you're the type to stretch out each issue), you're going to go to this link here, and you're going to cast votes in all the Mario and Fail Awards. If you get told you've already voted, you may have voted in this past week, but just wait for a week to pass since the time you cast your votes, and you can get one more round of voting in! Then, you're going to head to the Community Awards and cast your votes for them. We have a lot of 'Shroom writers and sections nominated for awards this year, including a number from the Strategy Wing team, so be sure to go give 'em your support!
Speaking of your support, thanks to you, loyal readers, after a journey lasting over a year and a half, this month, we finally restore File City to its full glory in File City Files! That's right, the saga of Shoey (talk) and his loyal Digimon partners (Vomm, GBA, and Turb) comes to an end in this issue. We're about to say goodbye to the Hawkeye State's number one guide to PlayStation game, Digimon World. We've broken into houses, beat up amnesiac computer operators, swiped treasures from a cave, used fish to swindle traders out of endless amounts of money, and... uhhh, y'know, uh, probably done some heroic things, too... It all comes to an end this month, though, as we recruit the final Digimon. My thanks go to Shoey for taking us on this journey and giving us insight into one of his favorite games, and to all of you for following along! Here's to hoping you'll join the team and show off your favorite games if you have that are as near and dear to you as Digimon World is to Shoey!
Another sections reaches its conclusion this month, too, as Sparks (talk) ventures into Dr. Wily's fortress to take down the mad scientist himself. We're at the end of An Overly Detailed and Funny Walkthrough of Mega Man, so be sure to get the tips you need on beating the Yellow Devil and more! Send Sparks some of your thanks, too, and maybe some weapon energy for that final battle.
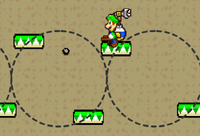
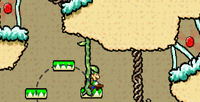
While we have a few sections reaching finales this month, the rest of the Strategy Wing slate of sections move along at a steady page! Waluigi Time (talk) will have more platforming that could be precarious if cheesing it with Luigi weren't an option in Shine Get, we walk the Beep Block Skyway in Four Steps for a 3D World, and Shoey (talk) investigates the mysterious Glow Pikmin in The Anatomy of a Pikmin. All this and more await! Read, vote, and, if you feel so inclined, send an application to join the Strategy Wing team. We always have a spot for anyone who wants to write about their favorite games.
Section of the Month
Well, well, it seems that the brief and to-the-point tips from Sparks (talk) on helping the Blue Bomber overcome Fire Man, Elec Man, and Ice Man went over well! Congratulations on claiming victory over both the Robot Masters and SOTM last month, Sparks! May your final battle against Dr. Wily this month go just as well! Taking a joint second place with a guide on raising a Rampardos, Waluigi Time (talk) succeeded in making reading about Lethal Lava Land in Super Mario 63 a cool experience despite the level's heat. Do you think he'll miss that warmth as he goes mountain climbing this month?
Well, there's only one way to find out. Go on and read! When you're done, be sure to toss a vote at the section you liked most in the poll at the bottom of the page, and if you really want to make a writer's day, and give their section a shout-out in Poochy's Picks!
| STRATEGY WING SECTION OF THE MONTH | ||||
|---|---|---|---|---|
| Place | Section | Votes | % | Writer |
| 1st | An Overly Detailed and Funny Walkthrough of Mega Man | 5 | 21.74% | Sparks (talk) |
| 1st | Four Steps for a 3D World | 5 | 21.74% | Hooded Pitohui (talk) |
| 2nd | Shine Get | 4 | 17.39% | Waluigi Time (talk) |
| 2nd | Pitohui's Pokemon Academy | 4 | 17.39% | Hooded Pitohui (talk) |
File City Files
Hello, and welcome to File City Files, the 29th state's number one guidebook for the PlayStation 1 hit, Digimon World. Folks, I'm sorry to report this will be the final File City Files. It's been a long journey, over a year and half from start to finish, but this month we'll be recruiting the last few recruitable Digimon and finally destroying Analogman's evil!
The traders of The Arctic
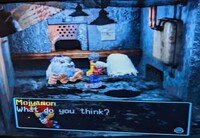
Now that we've recruited Veggiemon, we can return to the frozen ice caps of Freezeland where we met Whamon. As you'll remember, in Freezeland there are three Mojyamon who spend their days trading collecting and trading items. Well, this time, we won't be trading them fish! Instead, we're going to finally complete their trading quest!
So as stated, there are 3 Mojyamon, each wanting different items. The southeastern Mojaymon will trade:
- A Digimushroom for a Medium Recovery
- A Happymushroom for a Hair Grower
- A SuperCarrot for an Omnipotent
The one located straight south from the ice caps will trade:
- Giant Meat for an Auto-Pilot
- A High Speed Disk for Medicine
- A Black Trout for a Revive
Finally, the one located in the southwest portion of the ice caps will trade you:
- An Omnipotent for Special Speed Disks
- Digi-Anchovies for Special Offense Disks
- Medium Recoveries for Special Defense Disks
Most of these items are pretty easy to find, with Medium Recoveries and High Speed Disks being available in the item shop.
Digi-Anchovies can be caught in Dragon Eye Lake and are the fish closest to the beach. Black Trout can also be caught in Dragon Eye Lake and they're the medium-sized fish near the piping. Digimushrooms are found literally over the place. Happymushrooms can be found throughout the Native Forest. Giant Meat can be obtained from Patamon, but if you've already upgraded to Veggiemon and don't have any Giant Meat, Giant Meat can also be obtained from the Secret Item Shop, as a runner-up prize from a Champion-level tournament, or (at a 10% drop chance) as a drop from the J-Moyamon of the Tropical Jungle. SuperCarrots can be acquired for 500 bits from Veggiemon. Finally, Omnipotent can be obtained from the town shop when Patamon is working there or through the SuperCarrot trade. If you do this quest over time instead of all at once, any item you've already traded will be represented by a small yellow line before its name.
Once you finish trading all the items, the final Mojyamon you trade with will join the city. The other two will remain in the Arctic and you can continue trading with them. My advice is to make sure you don't finish with the one trading Digi-Anchovies, because then you can keep using the fish money exploit!
Purpose in City: Mojyamon, already an experienced item collector with a wealth of trading experience, joins the Secret Item Shop. There, he sells two very interesting items, those being the Rest Pillow and the Health Shoes.
These are both items that will be active as long as they're in your inventory. The Rest Pillow increases the amount of tiredness you'll lose after resting with Centaurmon or Punimon.
The Health Shoes are the more interesting of the two and involve a mechanic that I don't think has any other purpose. The Health Shoes cause your Digimon to recover health and MP when you are walking. Now, I specify "walking" for an important reason. The only way to walk is to hold the R1 trigger. Holding that trigger, you will walk instead of run. As long as you're holding that trigger, you'll regain health and MP. This is a very good item because it will allow you to recover strength passively outside of battle!
The Egg on the Mountain
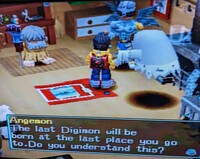
With that, there is only one Digimon left to recruit. But where is it, you might ask? Well, if we ask Angemon, he gives us a hint… although it's more of a riddle. He basically tells us to go to the last place we were at. If you think about that, it's a terrible hint!
What it actually means is, despite the fact that we watched Mt. Infinity explode, we actually need to go through the mountain again!
Since we're about to go into an enemy-infested area, this a good time to issue a correction on the Enemy Repel and Enemy Lure! When I covered them before, I didn't quite have a full understanding of what the two do. First off, both of these items are like the Health Shoes and Rest Pillow in the sense that they work as long as they're in your inventory. The Enemy Lure makes it more likely that, when you encounter multiple Digimon onscreen, all will stay for the fight. You might be asking why you would want to fight more enemies, but there are a few reasons. The first is that every enemy you fight adds to your fight counter, which can be important for certain Digivolutions. The next is that most Digimon have an item drop, and some of those item drops are really good. Take, for example, Sage Fruit. This is an item that permanently boosts Brains by 20 points. This item is dropped by Mt. Infinity's own Piddomon, who has a 10% chance of dropping it. The item drop chance applies individually to every Digimon you fight, so the more you fight, the better your chance of getting an item drop! Finally, while it is only a small boost, every fight you win does net you more money and does increase your Digimon's stats by a small amount. Taking all of that together, you can see why keeping the Enemy Lure on you has its use.
The Enemy Repel, on the other hand, is much simpler to explain. When you encounter multiple Wild Digimon on the screen, it increases the chances that the ones you didn't touch will run away. This is represented in kind of a cute way. If an enemy has a red angry face above them, that means they'll stay and fight. If they have a blue sad face above them, they run away. This is obviously useful, because it means you'll spend less time fighting wild Digimon and you'll have to spend fewer resources to get through a dungeon like Mt. Infinity. With those corrections, you can see both items have their uses; although, I prefer the Enemy Repel over the Enemy Lure.
Getting back to our task, not much has changed in Mt. Infinity. in fact, the only thing that's changed is that rooms that once had recruitable Digimon now have wild Digimon. Eventually, you make your way to where we fought Machinedramon and find… an egg?
We speculate that this egg might be the rebirth of Machinedramon, but then the egg suddenly comes to life, bouncing around before attacking us! This is Digitamamon, an Ultimate-level Digimon. The reborn spirit of Machinedramon, apparently the process of being reborn made him much stronger, because Digitamamon has some of the highest stats in the game! He has max health (9,999) and max offense (999). His defense is 720, his speed is 700, and his brains (his lowest stat!) is 500! Although, I don't actually know how the brains stat affects NPC data since you're not issuing them commands. Regardless, he hits like a brick and has some of the strongest moves in the game! His moves are:
- Meltdown - 400 base power with a chance to stun.
- Thunder Justice - 586 base power with a chance to stun.
- Confused Storm – 225 base power with a chance to confuse
Confused Storm is a somewhat weaker move, one help in this grueling battle, but I swear it was like every move he made did some sort of status to my precious Turb! This is a very long, very tough fight because he can just tank everything. I had over 500 in offense and an attack that did 586 base power, and yet I was only doing like 400-500 HP a hit! I would recommend bringing some in-battle stat-boosting disks to boost your in-battle stats to move things along.
Eventually, after a long and difficult fight, we defeat Digitamamon, who, after dropping a Quick Chip and 9999 bits, runs off without a word to join the city!
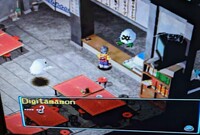
Purpose in the City: Digitamamon takes a job in the restaurant, becoming a chef specializing in egg dishes. Which… That is kind of messed up if you think about it! Digitamamon, like Vademon, doesn't have a set schedule, instead appearing at random times.
Let's dive into that random schedule. The way it works is actually based on a random number generator in the game's code. If the generator spits out 0 or 9 when you enter the restaurant, Digitamamon will appear behind the counter. He serves one of three egg-based dishes. Even the dishes have a pretty interesting mechanic behind them. When a meal purchased when your Digimon is hungry, it activates another random number generator. If it spits out 0, you boost HP, offense, and speed. If it rolls 1, it boosts MP, defense, and brains. Finally (and the one you want to get), if it spits out 2, it does the following depending on which meal you ordered:
- Boiled Egg – cost of 1,000 bits – raises HP and MP by twenty. Raises offense, defense, speed, and brains by two. Raises happiness and discipline while also lowering tiredness.
- Omelet – cost of 2,500 bits – raises HP and MP by 30. All other stats increase by 3. Raises happiness and discipline while also lowering tiredness.
- Egg Bowl – cost of 6,000 bits –raises HP and MP by 40. All other stats increase by 4. Raises happiness and discipline while also lowering tiredness.
Digitamamon is easily the best chef, not only because his dishes offer the largest stat increases, but also because of a glitch (I know! I'm surprised, too!). Digitamamon's dishes fill your Digimon up, but, unlike the other chefs, this doesn't stop you from buying more meals after you fill up! Because of this, if you have enough money, you can actually easily get perfect stats just from force-feeding your Digimon! This is easily the best (and kind of the only) way to get the max stats medal!
With Digitamamon recruited to the city, we now have reached 100 Prosperity Points! It's been a long and difficult journey, but File City has finally been restored to its previous glory. Talking to Jijimon, he congratulates us, telling us we've succeeded beyond his wildest dreams. He then gives us a medal for recruiting every Digimon, which raises our tamer level! But despite the city being complete, there's still one thing left to do…
The Final Curse of Analogman
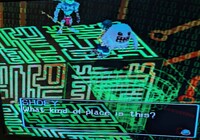
The only thing left for us to do now is to put an end to Analogman's evil once and for all! Every month before day 25, you can talk to Jijimon, who will tell you that he can feel Analogman's evil again. This is where things get a little weird, because you aren't given any hints on where to go from there. Luckily, dear readers, you have me, Digimon World expert! So, what happens is, when you talk to Jijimon, a special dungeon opens up. This dungeon can be accessed from three areas of the game, its entrance rotating between them. The three areas are Ogremon's Fortress, Greylord Mansion, and the Ice Sanctuary. Again, there's no hint that tells you about this, and there's no, like, way to know which one is the correct entrance in a given month. But when you find the correct one, entering it will take you to the mysterious Back Dimension!
The Back Dimension is essentially a smaller version of Mt. Infinity consisting of only three rooms. No unique Digimon can be found here. This time, each room has upgraded versions of Digimon that can found elsewhere. The first room contains a PC with a Ray Gun, which is the Digivolution item for Vademon. The second contains multiple PCs which contain different stat-boosting chips. Finally, the third room contains two PCs that also contain stat-boosting chips. These PCs are guarded by powerful Champion-level or Ultimate-level Digimon, and there is one of each chip in the dungeon per visit.
After you find the warp in the third room, you teleport to the final room of the original area, where you come face to face with Analogman and his dreaded Machinedramon! Analogman quickly disappears and we're left to face off against Machinedramon!
This version of Machinedramon is much tougher than the previous form. With max HP, max offense and every other stat is at 800, this Machinedramon is seriously tough. Machinedramon no longer uses the pathetic Megaton Punch, instead swapping that out for the best buffing move in the game, Full Potential.
This fight is very difficult, especially with Machinedramon's high power, but eventually we defeat this new version of Machinedramon, who, upon being defeated, falls. Then it is revealed that there wasn't really a Machinedramon at all! Instead, the Back Dimension, as well this Machinedramon, are simply the remnants of the hacker Analogman's hatred and his attempts to conquer the Digital World. These remnants corrupt a portion of the Digital World, creating the Back Dimension.
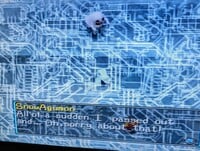
Upon being defeated, the corrupted Machinedramon reveals its true identity, which can be one of three Digimon. It'll be a SnowAgumon if in the ice Sanctuary, a Muchomon if in Ogremon's Fortress, and a Soulmon if in Greylord Mansion. The confused Digimon apologizes for what happened, explaining that it suddenly passed out.
Thanking us for freeing it, the Digimon apologizes for what happened before running off. We speculate if this is the curse of Analogman before expressing a weirdly high amount of disinterest in the whole thing. After this, the area returns to normal and we teleport to File City. Talking to Jijimon, he will thank us for defeating Machinedramon and give us a Chain Melon. This is a very useful item because it boosts a Digimon's total lifespan by 20 hours! Unfortunately for File Island, this isn't actually the end of Analogman's curse. Instead, the curse will return every month, taking over either the Ice Sanctuary, Ogremon's Fortress, or Greylord Mansion. That means that every month you can head to one of those areas and defeat his evil, winning yourself another Chain Melon in the process!
With that, File City Files is finished. It's been a long ride. It seems like only yesterday we defeated that Agumon and opened up the Item Bank. But no matter how quickly it went by, it is over. With File City restored and Analogman's evil scattered away, this section is finished. I'd like to thank you all for reading; this has probably been my favorite section I've ever written. While I finish this section, I hope you are all looking forward to my next Strategy Wing sections. Soon, we'll have the return of Shoeyball: Gridiron Conquest and a truly new section about my favorite N64 RPG (out of like three total), Ogre Battle 64.
Four Steps for a 3D World
Written by: Hooded Pitohui (talk)
Hello, all you readers of The 'Shroom, and welcome back to Four Steps for a 3D World, a section in which we look at levels from a selection of 3D Super Mario titles through the lens of a design philosophy Koichi Hayashida discussed in an interview.
In brief, 3D Mario game levels in certain titles are designed around an introduction that lets a player learn a mechanic in a safe environment, further development that builds on what the player is learning and introduces more complicated aspects of a mechanic, a twist that adds some kind of significant wrinkle or challenge to force players to consider the mechanic from a new angle, and a conclusion which gives players one final satisfying chance to show they've mastered the mechanic. We look at 3D Mario levels and see if they conform to this model while trying to get some insight on how a good level is constructed.
I'm cooking up some new ideas related to this section, but they're not quite ready yet, and next month we have the The Thousand-Year Door special, so wait a bit longer for those, if you would please. In the meantime, we're hopping into Super Mario 3D World once again to take a look at Beep Block Skyway! Platforming to a rhythm has been a feature of the Mario series for quite some time, though the earliest instance I can think of off the top of my head was the Beat Block Galaxy in Super Mario Galaxy 2. I could have that wrong, but I do know for certain that Super Mario Bros. Wonder put rhythmic platforming front and center in a fair few levels. Let's delve into the middle of that timeline and see how Beep Block Skyway builds a level around platforming to a beat!
Wrapping it up, we have a fairly by-the-book level if you break down Beep Block Skyway according to Hayashida's four steps. Maybe you could argue that the last bit of the first area better belongs with the Development step, but, even then, everything is in place and in order according to the four step structure. Beep Block Skyway is a well-designed, memorable, fun level that shows how to use this four step structure effectively. Take a central gimmick and mechanic like the Beep Blocks, arrange them to encourage some enjoyable and sometimes-risky jumps, and try to find another mechanic (here, the Double Cherry) to layer on top of the core mechanic without taking attention away from it. Do that, build the level according to the four steps, and you have a solid level!
That's all for this month! With four clones required for that platform near the checkpoint, three + Clocks hanging out by the Warp Pipe at the top of the slide, two colors of blocks alternating, and one steady beat, this has been Four Steps for a 3D World!
Shine Get
Written by: Waluigi Time (talk)
Hello there, 'Shroom readers! Welcome back to Shine Get, the number one 'Shroom section written in 2024 about mountain climbing. If you have no interest in climbing an actual mountain, that's okay because I'm only doing it in Super Mario 63. That's right, it's Tall Tall Mountain time! As always, I've brought my trusty green plumber Luigi so this will probably take about ten seconds. Also, the apocalypse is now about two months behind schedule!
Mission 1: Scale the Mountain
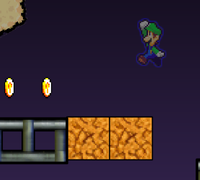
Very self-explanatory. Instead of going on ahead, turn left to grab the first Star Coin by jumping off the edge of the cliff! Thankfully, there's a wind gust so you don't actually die by doing this. Time to actually move ahead now. There's a sign with a map on it, showing that this is the front side of the mountain (crudely written in Flash-drawn text). Not very important for now, but will probably be useful for the obligatory Red Coin mission. Immediately after this, there's the second Star Coin underneath a mushroom in between some elevator platforms. Unfortunately, F.L.U.D.D. hasn't shown up yet, so this is going to be tricky. I think the idea is that you have to jump off the elevator to the left at its lowest point to grab the Star Coin and land on the elevator to the right as it comes down. Or you can do what I ended up doing and fail to jump at all, walk off the edge, grab the Star Coin, and sacrifice Luigi to the void! Eh, it's fine...
After that, it's just the usual platforming. Moving stuff, non-moving stuff... This is the thirteenth edition of Shine Get and it's all pretty much been the same since I started! After ignoring a couple of Red Coins, I reach the next screen with another map for the back side of the mountain. After crossing a seesaw platform, there's a maze-like area with a bunch of Red Coins in it, which will once again be ignored for now. The important thing is that this is how we scale the mountain, but unfortunately, I did it wrong! I stuck to the right side which leads to a higher level of the mountain's front side, where I found a lake and the Turbo Nozzle. There's no way forward from here, though! You're actually supposed to stick to the left side of the maze. After some sets of spinning platforms, there's a hill with iron balls rolling down it on the next screen. I was able to avoid turning Luigi into a pancake and got past those to a set of rotating platforms. This is actually right above where the Turbo Nozzle area was! Anyway, more platforming, then jump up a set of moving platforms that retract into the mountainside to reach the next screen.
And finally, I'm reunited with Hover F.L.U.D.D.! About time. It's right by a wind gust, and from here, go to the left until you reach the next screen, not the right. The right section is a Silver Star area which we'll be visiting later. The next screen is (almost) the top of the mountain, and oh boy, the Luigi cheese is absolutely overflowing here. For the sake of writing this, I'm completing it the "correct" way, but just know that a combination of Luigi jumps and Hover F.L.U.D.D. was able to get me pretty close to the Shine Sprite while bypassing most of the platforming. I don't actually recommend this for one reason, though, and as you might be able to guess, that reason is a Star Coin! Fairly early in the climb, there's two platforms moving back and forth underneath a waterfall. The third Star Coin is just above them and can be reached with F.L.U.D.D., and it's hard to miss because it's right under a bridge that you'll cross later. After that, it's just the usual platforming upwards, and can safely be cheesed if you want to. By collecting the Shine Sprite at the peak, I'm considering the mountain conquered and the rest of its treasure are now rightfully mine.
Mission 2: Silver Stars in the Skies
Well, that makes writing this easy. Take the path to the mountain peak again until reaching the Hover Nozzle Box, then go into the area with clouds and spinning platforms to the right. F.L.U.D.D. makes this a lot quicker, thankfully! The first Silver Star is directly above an up arrow, and the wind gust should take you right there. I decided to go to the left across some falling log platforms and terrain to reach a Sling Star, leading to a cloudy area with another Sling Star. The second Silver Star is in a box above the second Sling Star, but you have to time it right because a moving platform underneath blocks the entrance sometimes. Up and to the right, there's a Wing Cap, for some reason. You don't need to use this, I don't know why it exists! After that there's a large section of an upward wind gust, with the third and fourth Silver Stars found in it. I guess the Wing Cap is meant for this, but you can just use F.L.U.D.D. and the natural momentum of the wind. At the end of the gust section, drop down to get a Star Coin. This is my 48th, so I get a special prize! More on that later. Directly below the Star Coin, there's a Rocket Nozzle box, and this is actually right back where we started! If you want, you could go straight for the Rocket Nozzle and the Star Coin, then take the path that I did backwards by crossing some cloud platforms in the wind gust. It doesn't really matter which path you take to get all the Silver Stars, but I like going to the left first and looping around. Anyway, the fifth Silver Star is in a wind gust just to the right. The Shine Sprite spawns nearby just over to the left, and that's another one for the books!
Secret Course: The 48 Star Coin Prize
Back to the Level Designer hallway for the next Star Coin prize! Last time we unlocked Luigi, and this time... it's just back to another Shine Sprite. Kind of a letdown, but it brings me closer to completing the game, I guess. This one is just hanging out in a void of darkness above the room where the 16 Star Coin Prize was, and you fall into it when grabbing that. Maybe a nice reminder in case you never grabbed it, although the door layout doesn't make sense at all!
And once again, this room (if you can call it that) is an entire secret course, apparently.
Mission 3: Blast off to the Lonely Mushroom
We haven't directly encountered this area yet, but it's an easy find. Just stick to the bottom of the level head all the way to the right until you find an arrow pointing into the ground. Hop in and blast off in the cannon over to the next screen! There's a Rocket Nozzle here if you didn't grab it last time or you're doing the missions out of order. Despite the mission title, the Shine Sprite is nowhere to be found here, the titular lonely mushroom is just the beginning! The beginning of another platforming section that I don't want to talk about in excruciating detail, that is. It's simple stuff, if it looks like you can rocket upward, then do it! If you can't, just move ahead. Towards the end, there's some constantly rotating yellow blocks. Once you get past those, rocket up and to the left to get another Star Coin. The Shine Sprite is just over to the right, so you can either hover over or just jump back down and rocket up again. There's some falling platforms just before the final mushroom platforms which can be kind of tricky, because if you push the hover button too late they pull you down with them somehow. Kind of weird. Anyway, I reached the Shine Sprite, but there's something weird here... two mushroom platforms! Neither of these are lonely! Either the mission title makes no sense or it's named after a single unimportant platform that you don't even technically blast off to. I'm onto your games, game. The fun part is that once you grab the Shine Sprite you get to watch Luigi (or Mario, I guess) harmlessly fall for a while.
Mission 4: The Red Coins of the Mountainside
Red Coin time, thankfully this one is pretty easy! There's two Red Coins on the first screen before reaching the maze. The first one is on a moving platform near a Fly Guy, and the second one is underneath a mushroom inside a circle of spinning platforms. Unless you're being extremely acrobatic with F.L.U.D.D., you shouldn't miss these. Now in the maze, two of these are in plain sight by the location where the Shine Sprite spawns, one to the left and one to the right. Once you grab the one on the right (we'll call this number four), a fifth one comes into view in an alcove just a little more right! For the last few, keep heading upward. The sixth and seventh are once again on opposite directions of a set of spinning platforms. Finally, at the very top of the maze, there's a stationary platform that moves to the right when you step on it. At the end, an arc of coins with the eighth Red Coin in the center along with a Star Coin at the end comes into view. Grab both of those (you should have enough time to correct with F.L.U.D.D. after the Shine Sprite spawn animation), and go back to the beginning of the maze to grab the Shine! Probably the easiest Red Coin mission in the entire game, they're really easy to find and in a pretty small area.
Mission 5: The Secret of the Mountainside
I've covered pretty much all of the mountain now, so it's time for a secret area to hide the last Shine Sprite! The mission description hints that it's near a waterfall. There's several places in this level where you encounter a waterfall, though! Don't worry, that's what I'm here for. The secret is found on the same screen as the mountain peak, so you can either go back up there normally or just use the Rocket Nozzle to follow the waterfall upward! Once you reach the peak, there's a small piece of terrain to the right that you can land on. If you climbed the mountain regularly, you can reach it by dropping down from the area with the rotating blocks where the third Star Coin was. After hopping over a gap to the right, there's a cave entrance!
This area plays around with power-ups a lot! Starting in a cage, there's an Invisibility Cap to drop down with. The path ahead is made out of alternating cage blocks and breakable boxes. While the Invisibility Cap is in effect, you'll want to only hop on the boxes, because Luigi will fall through the cages to certain death! At the end of this stretch of platforms is that weird unexplained power-up from way back in Snowman's Land again that turns you invincible and defeats enemies on contact. While the Invisibility Cap is still technically active, instead of being inverted, it just puts a blue gradient around Luigi. The important part is Luigi is now solid and can stand on the cages, but instantly breaks the boxes (and defeats enemies on contact, too!). This makes for an interesting reversal where now you have to go back the way you came while using the opposite set of platforms. Pretty neat! Back at the start, you can now walk through some fire that was previously blocking a Sling Star. The Sling Star flings Luigi through another Invisibility Cap, which wears off by the time you reach solid ground, automatically collecting a Silver Star. Yep, this level has two Silver Star missions for some reason!
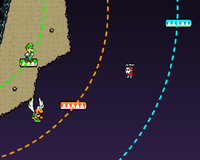
The rest of the area centers around differently colored platforms orbiting around the center. The second Silver Star is at the end of a set of rotating platforms to the left. The rest of them are in orbit, two are on the light blue track and one is on the green track. It's pretty simple, but the presentation makes it cool! The Shine Sprite spawns in the center, and with that, Tall Tall Mountain is officially conquered!
With the 48th Shine Sprite under my belt, a message pops up that I've collected 75% of the Shne[sic] Sprites in the game, complete with a celebratory W00T in proper 2008 style. And now I'm thinking about how long it's been since I last heard someone say "woot". Didn't expect to be finishing things up this month with a nostalgia trip thanks to one word, but here we are! Ah, what a time capsule of a game this is... Anyway, next time we're in for some more story progress (gasp), and the apocalypse will be about three months late instead of two! See you then!
Pitohui's Pokémon Academy
Written by: Hooded Pitohui (talk)
Welcome and good day, class! I trust you all are keeping up with your studies even through the summer season? Well, between myself and yourselves... if you take a short break from your studies to escape this infernal weather with a trip to the mountains or to the ocean, I'll understand. Myself, I'll be escaping the blazing sun by tucking myself away in the shade of an old sewer soon. The dean has informed me that, as part of our partnership with The 'Shroom, I'm required to make arrangements for a trip to a "Shwonk Fortress" in "Petal Meadows" or somesuch.
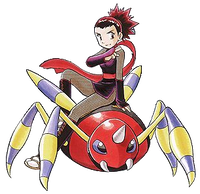
That said, that's neither here nor there! As I was planning the expedition, naturally, my thoughts drifted to fields of flowers and groves of trees, and from there proceeded to the insects and arachnids which inhabit them. Thinking on this subject, I thought, in the spirit of the summer season, we might cover an arachnid dear to me. For that reason, we'll be discussing one way in which you might raise an Ariados this month!
Before we proceed, allow me to remind those of you who are just joining us to take a look at our course policies in the first box below. If you need to review the most commonly-used terms in this class, open up the second box.
First, a Smogon University course, this course is not. No, this academy's lessons are designed to get trainers of any stripe thinking about how they can raise their Pokémon, and, as a result, aren't designed to keep up with the widely-accepted metagame for the series. In some cases, the way I've raised my Pokémon may even flies in the face of conventional wisdom. If you're looking for top-tier strategies, do check out Smogon, but if you merely want to get a little deeper into raising Pokémon while still doing things your own way, feel free to use this section as a reference.
Since we all know the importance of citing our sources, I also need to credit the design of some of the tables used in these lectures to Crocodile Dippy, author of the Pocket Handbook which can be found in early editions of Strategy Wing.Base Stats: Base stats are the values associated with a particular Pokémon species, and are the same across every individual Pokémon of a given species. You have no influence on them. You can think of them as traits tied to a species. A chimp isn't ever going to be able to get as good as digging as a mole will be, and, likewise, an Abra is never going to have the defensive prowess a Shuckle has.
Individual Values (IVs): Individual values, as their name implies, are associated with individual Pokémon. They range from 0 to 31 in each stat, with 31 being considered a "perfect" IV and higher numbers corresponding to different stats. Magikarp A and Magikarp B will have the same base stats, but they may very well have different IVs. To stick with the animal analogy, one mole may be born with larger claws than another mole, and that first mole is probably going to have an easier time digging through dirt than the latter. Individual values are set in stone, strictly speaking, but you can use Hyper Training (from Generation VII onwards) to functionally get a perfect IV in a stat.
Effort Values (EVs): Effort values are the one thing you can easily change. A Pokémon can earn, primarily through battling, but also through means like the use of certain items or mechanics like Super Training, up to a total of 510 effort values, with up to 252 in any given stat. To finish off the animal analogy, no matter what kind of claws a mole is born with, moles who have more experience digging are probably going to be better at digging than moles which have never dug.
Nature: A Pokémon's nature is, more or a less, a stat modifier with a name meant to make it sound like a Pokémon has some personality. Natures will raise one stat by ten percent and lower another stat by ten percent. Some natures raise and lower the same stat, canceling out the effect and leaving stats unchanged. Natures can be functionally changed with the use of special mint items from Generation VIII onwards.
STAB: STAB stands for Same-Type Attack Bonus, and refers to the boosted power of moves that match the type of the move's user. To illustrate this, consider the case of a Lombre, a dual-type Pokémon which is both a Water-type and a Grass-type. Any Water-type moves Lombre uses will have their power boosted by 1.5x, and any Grass-type moves Lombre uses will, likewise, have their power boosted by 1.5x. (There are circumstances where this does not apply, and, while the 1.5x multiplier is typical, some games use other multipliers.)
Now, what you should immediately notice is Ariados's respectable attack stat, but I suspect you may first try to assess the overall picture here. Let's get any possible misconception cleared up now. I am aware that Ariados is not particularly viable or useful Pokémon insofar as high-level competition is concerned. I will remind you, however, that this is the same course in which we covered Luvdisc. We will do what we can with what we are given and we will try to have fun with it.
Returning to looking at Ariados's stats in isolation, we see it has respectable attack, middling defensive stats which are even across the board, special attack which we can afford to ignore, and poor speed. Why, I believe this calls for one of my favorite moves! It's time to make use of Trick Room! Though, we're going to need to envision Ariados being on a team that can provide the Trick Room, as Ariados itself does not have access to the move.
As a reminder, Trick Room inverts the order in which Pokémon attack. The exact mechanics are worth exploring in your own time, but, as a simplification, saying that slower Pokémon move earlier and faster Pokémon move later will be sufficient for our purposes. Just note that priority moves - that is, moves that let a slower Pokémon move before a faster Pokémon, such as Quick Attack - still take precedent over Trick Room. Quick Attack, used in Trick Room, will still launch before, say, Flamethrower, regardless of the speed of the two clashing Pokémon.
What we're going to do, then, is assume we can get a Pokémon to set up Trick Room for Ariados. This will give Ariados a means of outspeeding many of the foes it encounters, allowing it to make the most out of its physical attack. We'll invest heavily in physical attack, giving it a full 252 EVs, and, since all of Ariados's defensive stats are equal, we'll choose one to focus on. For reasons that will become clearer when we get into Ariados's moveset, I've elected to focus on its physical defense. We'll invest a full 252 into that, spend the rest in HP, and we have our stats settled upon!

|
Name: | Ariados | Base HP: | 70 | |
| Species: | Long Leg | Base Attack: | 90 | ||
| Type: | Bug | Poison | Base Defense: | 70 | |
| Abilities: | Swarm | Base Special Attack: | 60 | ||
| Insomnia | Base Special Defense: | 70 | |||
| Sniper | Base Speed: | 40 | |||
Now, as a final note with stats, you'll notice that we have two "dump stats" this month. Special attack, you can ignore entirely, but you don't want to treat speed as completely forgettable. To get the most out of Trick Room, you should actively aim for as low a speed stat as possible. It's not going to be disastrous if you're pressed for time and can't get a zero IV in speed, but you should aim for it if you have the time! To further minimize speed, we're going to want a speed-lowering Nature, and, since we're emphasizing physical attack above all else and we want a nature which boosts it, we'll be breeding a Brave Ariados.
Before we can proceed to building a moveset, we need to choose one of Ariados's abilities. Now, we have a rare scenario here; all of Ariados' abilities arguably have reasonable use cases. For that reason, we're going to briefly go through all of them and talk about why you might use them.
Ariados's Hidden Ability, Sniper, boosts the power of critical hits by 50%. If you're willing to test your luck, you could consider arming Ariados with a Scope Lens and teaching it Night Slash and Cross Poison. These two moves have a higher chance of scoring critical hits, and the Scope Lens also boosts the chance Ariados will land a critical hit. It's not the most reliable of methods, but you can be assured that a Sniper-boosted Ariados will deal major damage whenever it does score a critical hit. If you plan to incorporate these two moves, Sniper may actually be a reasonable option.
Insomnia prevents Ariados from falling asleep, which is... pretty useful all situations, all things considered. Falling asleep is awful for a battling Pokémon, leaving them vulnerable to multiple attacks in a row, unable to fight back. With Ariados's middling defenses, if it falls asleep, it's unlikely to wake before it gets KO'd, and it won't be able to fulfill its purpose of striking hard. All that said, if you're running Trick Room, this is slightly less of a concern because ideally Ariados will be able to knock out opponents before they can use a sleep-inducing move. Things won't always play out ideally, so there is an argument to be made for Insomnia, but I think Insomnia is more useful for non-Trick Room uses of Ariados, like having it lead a team to set up Toxic Thread and Sticky Web.
Finally, we have Swarm, an ability that only activates when Ariados has less than a third of its HP remaining. Honestly... while it sounds somewhat situational, and it can end up useless if an attack KO's Ariados when it's at, say, half health, it's reasonably useful for our purposes. If Ariados's middling defenses begin to crumple and it finds itself backed into a corner, its attacks get the extra push they need to ensure it can KO its foes before they can KO it. While I can make an argument for Insomnia and would encourage all of you to experiment with it when you raise your own Ariados, for our powerhouse Trick Room spider, I've chosen Swarm.
With Ariados's abilities settled upon, we can turn to a moveset. Before we get too deep, though, I do want to acknowledge Ariados's signature move, Toxic Thread. It's, if you'll excuse the informality, pretty cool! Unfortunately, because it lowers the opponent's speed and reduces the effectiveness of our Trick Room, and because we have a plethora of other options at our disposal when it comes to poisoning foes, we're going to forego using it.
Instead, we're first going to search for two STAB moves with a good mix of respectable base power and reliable accuracy. What we find are Lunge, a Bug-type move with a very respectable 80 base power, and Poison Jab, a Poison-type move with the same power. These moves, which will be the core of Ariados' arsenal, also have useful added effects. Poison Jab has a 30% chance to poison opponents, helping to chip away at their health, while Lunge lowers a foe's physical attack. This is why I chose to invest in physical defense. To the extent that it's possible, we'll have Ariados battle physically-oriented foes and keep it away from specially-oriented opponents. Lunge will help to further bolster its defense by helping it to take a hit if it fails to KO an opponent.
With two STAB moves in place, we can address the lurking threat of priority moves. We have Trick Room to help Ariados outspeed opponents, but what if they come in with a move such as Ice Shard or Extreme Speed that will allow them to strike first even under Trick Room conditions? What happens if Ariados is forced to spend a turn outside of the Trick Room? Well, luckily, Ariados has a few priority moves of its own in its learnset. It has access to both Shadow Sneak, a base 40 power Ghost-type move, and Sucker Punch, a base 70 power Dark-type move. Both of these could be useful (and give Ariados a handy counter for Psychic-types), but going on power alone, the clear choice here is Sucker Punch. The only drawback Sucker Punch has is that it will fail if the opponent is using a status move rather than a damaging attack. While there are times this may happen and you could consider Shadow Sneak if that's a concern for you, I will use Sucker Punch and take that small risk.
For a fourth and final move, you have a range of options and I encourage you to get experimental. That said, so as not to drag things out too long, I'll put forward only two options. The first is Toxic Spikes. Since Ariados is not running Toxic Thread, you could have Ariados come into battle and put down a layer of Toxic Spikes to cause any (non-flying, non-levitating, non-immune) Pokémon entering battle on the opponent's side of the field to get poisoned immediately. It'd be even better if you could put down two layers. It's not impossible that you'd have a good opportunity to do this if you can anticipate your opponent switching out, but I do think it's unlikely and it distracts from Ariados's main purpose, which is, again, to come out and hit hard.
For that reason, I actually suggest trying out Fell Stinger. It's a weaker move, with just 50 base power before STAB, but it will greatly boost Ariados's attack power if it KO's an opponent. Consider this scenario. Ariados uses Lunge and heavily damages an opponent, the attack drop helping Ariados to hold fast through their subsequent attack. With the opponent weakened, Ariados uses Fell Stinger to finish them off, and gets a big attack power boost that helps it to OHKO the next opponent with Lunge or Poison Jab. You can see the potential, yes? If Ariados is brought down to less than a third of its health by that initial attack and Swarm activates, all the better. As long as Trick Room lasts, Ariados can freely hit its foes like a truck.
| Lunge | 
|
The user makes a lunge at the target, attacking with full force. This also lowers the target's Attack stat. |
| Poison Jab | 
|
The target is stabbed with a tentacle, an arm, or the like steeped in poison. This may also poison the target. |
| Sucker Punch | 
|
This move enables the user to attack first. This move fails if the target is not readying an attack. |
| Fell Stinger | 
|
When the user knocks out a target with this move, the user's Attack stat is boosted drastically. |
Ah, well, we've finished the moveset now, and I went on for quite a bit this session, didn't I? Well, I won't hold you up any longer. I'm certain you all are eager to get out and enjoy the... oppressive heat... Since I'll be preparing for that expedition, I'll give you all a break on any assignments before our next class, but if you feel inspired, do try raising an Ariados in your own time!
The Anatomy of a Pikmin
Written by: Shoey (talk) Hello, and welcome back to The Anatomy of a Pikmin, a section where I, Pikmin mega fan Shoey, go through the various Pikmin types as found in the Pikmin franchise. Sadly, this will be, at least in this format, the last The Anatomy of a Pikmin. You see, this month, we're covering the final Pikmin type (not counting, like, Mushroom Pikmin), the strange nocturnal Glow Pikmin, who make their debut in Pikmin 4.
The Mysterious Workers of the Night
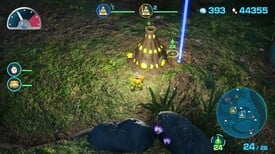
Little ghost-like Pikmin found only during Pikmin 4's Night Expedition mode, Glow Pikmin are by far the strangest of all the Pikmin types. They're so strange, in fact, that according to Captain Olimar, while Glow Pikmin share many similarities with other Pikmin, they might actually not be Pikmin at all! To top off their bizarreness, according to Louie, Glow Pikmin don't smell alive!
While similar to other Pikmin at a base level, the Glow Pikmin have a number of differences. For starters, Glow Pikmin don't have Onions! Instead, Glow Pikmin live inside strange mounds called Lumiknolls. These mounds only appear at night, and, since they aren't Onions, Glow Pikmin don't reproduce via gathering Pellets and corpses. Rather, things killed by Glow Pikmin turn into Glow Pellets. Glow Pikmin reproduce by bringing Glow Pellets to the Lumiknoll, with three Glow Pellets producing one Glow Pikmin.
Also unique to Glow Pikmin are Tricknolls. These smaller mounds secrete chemicals that attract enemies at night, serving as a distraction to aid in protecting the Lumiknoll, and, like their larger counterparts, they also produce Glow Pikmin when Glow Pellets are brought to them. This makes Glow Pikmin the only Pikmin type with multiple Onion-equivalents that can produce them!
One final major difference is the fact that Glow Pikmin, when they have finished turning a pile of Glow Pellets into more Glow Pikmin, automatically teleport to their captain. If you change between the player character and Oatchi, they likewise automatically teleport to whoever you're controlling, something none of the other Pikmin could even think about doing! Oh, also, Glow Pikmin float in the air sort of like Winged Pikmin. Unlike Winged Pikmin, though, they don't have different pathfinding, so Glow Pikmin take standard routes. But like Winged Pikmin, the Glow Pikmin are immune to being thrown in the abyss. If you throw them into an abyss, they float for a few seconds before returning to you.
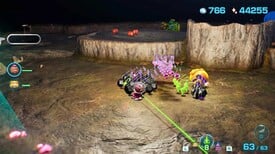
In combat, Glow Pikmin, for the most part, act like regular Pikmin with only some key differences. While Glow Pikmin attack with basic strength, and you can use the Ultra-Spicy Spray on them, but nectar has no effect on Glow Pikmin. This is because, unlike regular Pikmin, Glow Pikmin mature into flowers naturally throughout the night. Glow Pikmin are also immune to all hazards, making them quite a bit like Bulbmin from Pikmin 2.
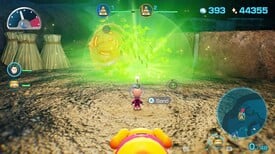
Setting Glow Pikmin apart in combat, Glow Pikmin have something that no other Pikmin type has, that being a charge attack like Oatchi. In this charge attack, the Glow Pikmin basically create the Spirit Bomb; when finished charging and released, the Glow Pikmin explode into light. This light not only stuns the enemy, but also, in the process, allows the Glow Pikmin to swarm the enemy, attacking them while they're stunned. It's a really cool attack and I love the idea of the Spirit Bomb basically being added to Pikmin.
At the end of the night, Glow Pikmin return to the Lumiknoll and hibernate, and you're given some Glow Seeds based on how many Glow Pikmin you produced during the night. Now, unlike every other Pikmin type, Glow Pikmin don't transfer over from level to level. At the beginning of the night, you aren't able to pull out your Glow Pikmin from a Lumiknoll. Rather, you start each level with a set amount of Glow Pikmin. But here's the thing! Those Glow Seeds you get allow you to produce Glow Pikmin inside caves! This is the secondary use of Glow Pikmin.
Spelunking With Glow Pikmin!
Inside caves, Glow Pikmin serve basically Pikmin 4's version of Bulbmin, but I'd argue that, while I love Bulbmin, the Glow Pikmin are far more useful for what I'd argue are two minor reasons and a major one. Bulbmin and Glow Pikmin have the same stats, but Bulbmin start as enemies. While, yes, it's true you're unlikely to lose any Pikmin to a mature Bulbmin, the fact is that inside caves, where you have a limited amount of Pikmin, Glow Pikmin, who do not start as enemies, are superior because there's no chance of losing any Pikmin to the Glow Pikmin :P.
The other two reasons are basically tied together. On a blind run of Pikmin 2, you wouldn't really have any way of knowing which caves have Bulbmin in them. This means that you can easily bring 100 Pikmin into one of the few caves with Bulbmin and it's possible that you won't be able to get any Bulbmin. If you have max Pikmin when entering the floor the Bulbmin is on, no Bulbmin will be available for you to collect. But Glow Pikmin, on the other hand, can be used at any time as long as you have Glow Seeds. Say you lose 15 of your Pikmin on level five of a cave; well, you can use 15 Glow Seeds to replenish your army. Meanwhile, with the Bulbmin, say you had 100 Blue Pikmin all the way through level four of Submerged Castle. You wouldn't be able to get any Bulbmin at all.
Or say through those four levels that you only lost 5 Blue Pikmin; you'd only be able to get 5 Bulbmin. Glow Pikmin are just an all-around more convenient version of Bulbmin because, as long as you have Glow Seeds and space in your party, you can always produce them! So those are the two other reasons. Glow Pikmin are harder to miss out on and more convenient to use when you need them. Much like Bulbmin, Glow Pikmin can be thrown inside Candypop Buds to make other Pikmin, and, just like Bulbmin, the Glow Pikmin can't leave caves. Instead, they stay behind as you leave. I like to think that they live good lives in the caves after you leave, but nobody really knows.
Glow Pikmin are very interesting. In a lot of ways, they're Bulbmin done right. Instead of making sparing appearances and being limited to three caves, Glow Pikmin provide far more use as a backup Pikmin, as kind of a "break glass in case of emergency" type of Pikmin. Simply by being usable in every cave as long as you have Glow Seeds, they establish a useful niche for themselves. From that angle, they're very useful, and, honestly, that's probably going to be a death knell for Bulbmin ever reappearing. Not only do Glow Pikmin have their own kind of niche in caves, but they also have their own game mode. If nighttime expeditions ever return, Glow Pikmin will return along with it. For that reason, I think of all the Pikmin that have been introduced since Pikmin 2, Glow Pikmin probably easily have the most staying power. They've got a niche that's very useful and they've got their own gimmick mode that can easily be brought back in future games, so I expect they'll be returning.
That's all for this month, and all for now, as we have covered all of the Pikmin types! Keep an eye out in the future and see what happens!
An Overly Detailed and Funny Walkthrough of Mega Man
It's time for the finale! Now we can go through the final stages and battle the final boss!
Dr. Wily stage 1
Breaching the fortress
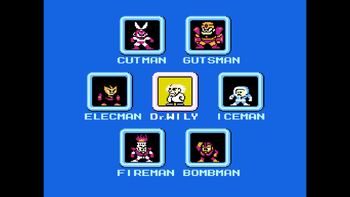
Now that all of the Robot Masters have been defeated, it's time to go after the mastermind himself: Dr. Wily!
No matter what, Dr. Wily is always worth 200000 points. He enters his pink UFO and takes off for his fortress!
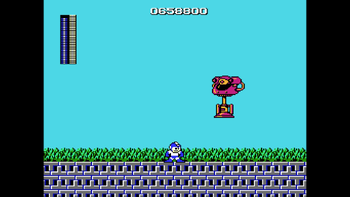
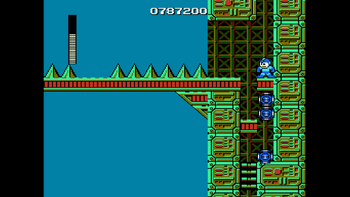
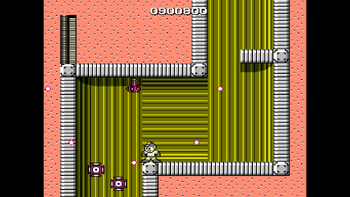
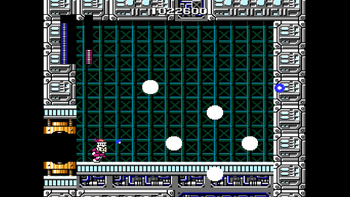
Entering the stage, we start in a grassy area outside the fortress. The path ahead isn't easy however – there are three cyclops mechs one after the other! The best way to get past them is by using Ice Man's weapon to freeze them while they are high up in the air. This will allow you to run below them safely.
The third one is close to stair-like formations, so you might not even need the ice!
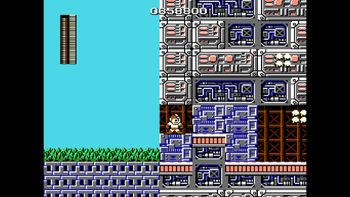
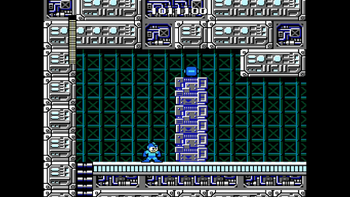
At the end of the path are blocks that (haha) block the way. The only way past them is by using Guts Man's ability to grab and throw them away.
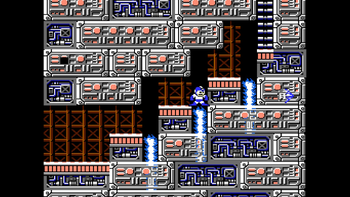
Now we have to make some tricky jumps while avoiding fire. These jumps can be made easier if we freeze the fire.
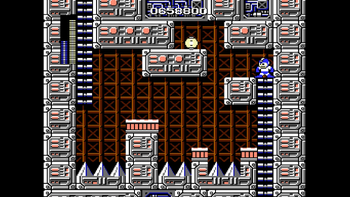
After climbing up a ladder, the next area has spikes. Jump safely across them to reach the ladder over on the left. Are you brave enough to get that power-up?
After climbing up the ladder, you will either be spared or be sent back down the ladder because of pink jumping enemies. If they jump a short distance, you're spared, but if they jump a large distance, then down you go! I used Elec Man's weapon to get rid of them to prevent this from happening. The area also has more blocks that must be removed so that we can use a ladder to descend. A big health power-up is at the top of the area behind blocks, but would you get it?
Return of the Flying Platform Craziness
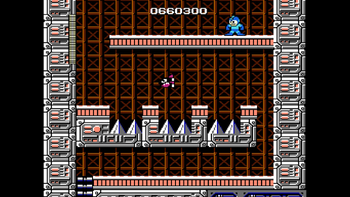
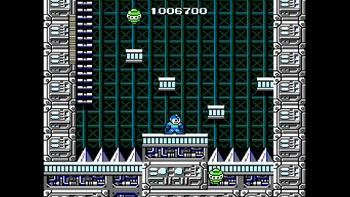
The next area has spikes with Bullet Bills that spawn. Just be careful and take your time.
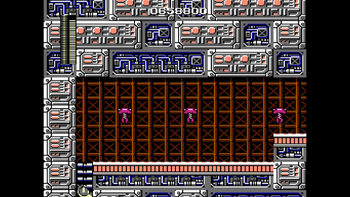
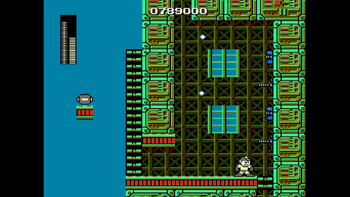
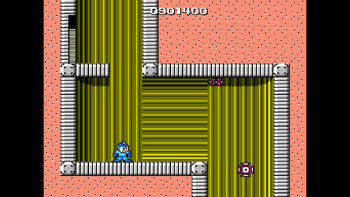
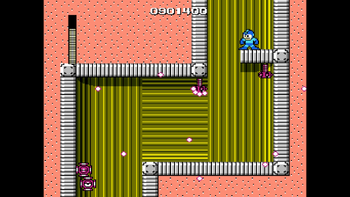
The next area is the worst in the entire game. Remember those random shooting platforms in Ice Man's stage? Well they're back, and it's even worse than before! There are spikes at the ceiling and ground so you can't be too high or too low. Just use the "M" power-up to get through, okay?
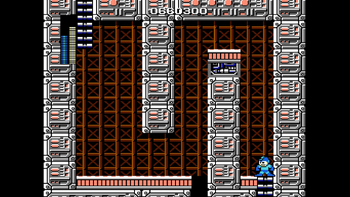
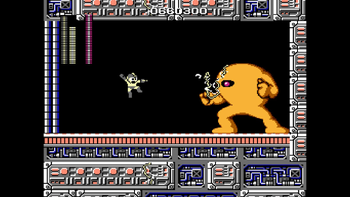
After climbing another ladder, we're at an area where we MUST use the "M" power-up! We must traverse uneven ground to reach a ladder. If you happen to run out of energy, there's a hole you can fall through. The only way to restore it is by defeating the Bullet Bills or by getting a game over. Once at the top, there's a short area leading to the boss. This boss is probably most infamous boss in the series: the Yellow Devil!
A Boss that Lives Up to Its Name
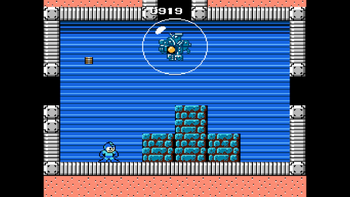
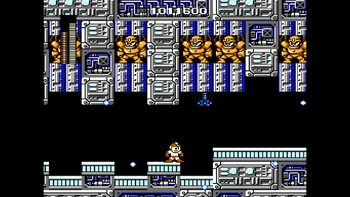
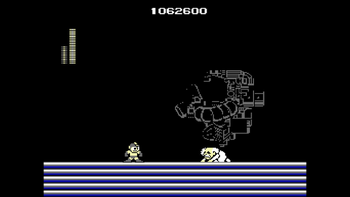
Oh boy, this boss. So the Yellow Devil attacks you by splitting up into smaller pieces and by "teleporting" to the other side of the room, one piece at a time. You must dodge him while he's doing so, and once he's fully complete, he'll fire a Rainbow Dash-fast bullet at you before starting the teleportation process again. While he fires, his eye is visible, which is the only time you can attack him! He's weak to Elec Man's weapon, and it takes off four health from him every time, so seven shots will do the trick.
His teleportation pattern is always the same, so if you memorize it, you'll pull through eventually. I will give you his pattern. The pieces he breaks into will be given numbers from 1 to 5. 1 means the lowest to the ground, while 5 is the highest. With that system, here is the order in which the pieces go across the screen:
2, 3, 1, 4, 3, 2, 4, 5, 1, 2, 3, 5, 4, 2, 4, 3, 5, 1, 3.
There's also a trick where you fire electricity at the boss and then pause the game, and once you unpause the same electricity will hurt him again. This has been called "the pause trick", but I don't use that! I beat him normally! Now it's time for the second stage!
Dr. Wily stage 2
Familiar Faces
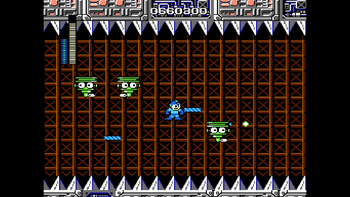
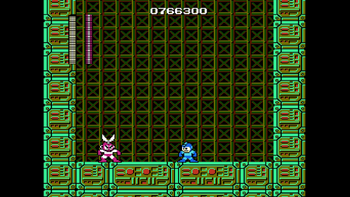
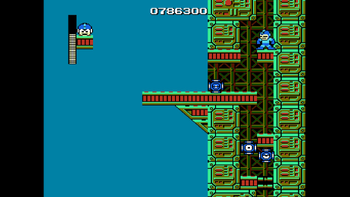
This stage takes place in the sky. We have to get past some smiling green flying enemies while jumping across gaps. Also, weapon energy will not refill between Dr. Wily stages! Use your energy wisely! At the right of the path looks to be a dead end, but there is fake ground you can fall through! Falling will lead you to a room where Cut Man is!
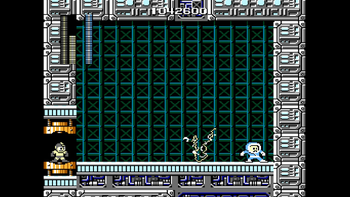
Cut Man is exactly the same as he was before, but there are no blocks here. Just shoot him with the Mega Buster until he's gone. I took no damage! There is then more fake ground to the left which will lead you to the next area.
This next area is similar to the first area of the stage, but instead of green flying smiling enemies, there are red variants of the screw enemies that can really mess up your jumps. If you don't like them, use special weapons to attack them, as they are below you. The right of this area has more fake ground leading to a rematch with Elec Man!
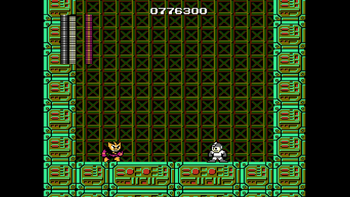
With a flat surface similar to Cut Man's rematch, it might be easier or harder to defeat him depending on your playstyle. Just use Cut Man's weapon as you avoid his devastating attacks. Fake ground to the left will lead you to the next area.
Now moving to another similar area, this time there are red variants of the bomb enemies from Bomb Man's stage. Carefully time your jumps as you make your way to the end, where a ladder will escort you to the next area.
Going Down!
Time to descend! We have to avoid blue eye blocks while we do so. Because of the tight spaces, it's safer to use special weapons like Elec Man's or Fire Man's weapons to deal with the eyes. There's also a 1-Up if you have "M" energy left! Just don't fall because, well… spikes.
The next area has more eyes. Oh man, here we go again… the area afterwards has more eyes, but in a wider space. These ones fly at you, so use a special weapon to defeat them before they do so!
The next area has four blue turrets lined up on the right wall. For a satisfying attack, use Elec Man's weapon to get rid of them! There's weapon energy at the left if you need it, too! Up next is another room, this time combining both eyes and turrets! There are three eyes and one turret here. A ladder will take you to the boss below!
Mirror Match
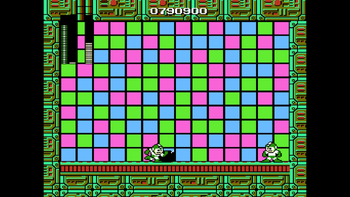
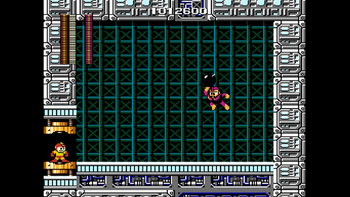
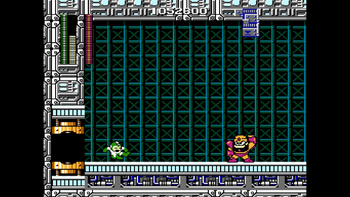
This next room is very colorful, but also dangerous! Machines scan Mega Man and create an evil copy of him he has to fight against! This copy of Mega Man is much stronger than you are, but fear not! He's not very smart. He copies whatever ability you currently have though, but I found a strategy to beat him! I used Bomb Man's weapon and stayed in a corner while he just kept running around. The bombs themselves do no damage, but the explosions do! They deal two points of damage to the boss. I won the fight with 1 HP remaining! Now we go to the third stage!
Dr. Wily stage 3
Despite Being a Sewer, It's Not That Gross
This next stage is very short. The starting area has red eye blocks that are easily avoided. Words of advice though: immediately go left after landing to avoid taking damage from an eye above! This area is like a sewage pipe, and there's only one day to go – down!
The next area has more eyes and also a red screw enemy on the ceiling! They're no problem.
The following area has more of the same. Just defeat them and move on.
The area afterwards has more of them. There are two screws at least, so it's unique if you think about it.
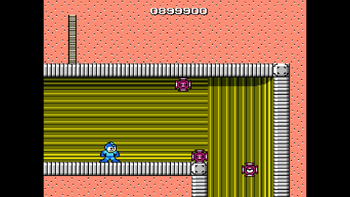
After going down some more, there's a long pipe that leads to the boss. Not long after walking into it, water will fill the pipe and push you forwards. Along the way, there are penguins and Bullet Bills that will spawn from the right. Behold another farming area! Just stand still and shoot. You'll get lots of energy in no time!
Sewer showdown
After entering the boss area, we encounter the boss, CWU-01P, a series of robots that move around the screen in a clockwise direction in bubbles, getting faster with each one defeated. They also shoot at you. There are seven of them total, and they enter the screen from either the left, right, or top. The best way to win this fight is to stay in the bottom-left corner and fire at them when they approach. Eventually they'll become so fast that you'll be overpowered. After defeating three or four, use Guts Man's ability to grab the blocks and use them to get rid of the remaining ones. Only one more stage to go!
Dr. Wily stage 4
The Path to the Boss Rush
This is it, the last level! We must be really deep into Dr. Wily's fortress now, right? The first room has some platforming over spikes to reach a ladder on the left, while those green lightning enemies from Elec Man's stage ambush us! Try to get rid of them before going for the ladder. The ladder extends even higher, so you'll have to deal with more of those lightning enemies.
Once at the top, we encounter a wall of blocks with weapon energy on top of them. Using Guts Man's ability, we can bypass this and grab more energy!
The path ahead has blue screw enemies both on the ceiling and ground. At the top of this area you can see "prototypes" of Guts Man. Anyway, back to the level! There are ladders we'll have to climb up to reach to an area where there is a sea of spikes, with a pink version of the unstable platforms from Guts Man's stage.
Of course I said "Nope!" and used the "M" power-up to get by.
At the end of the path is a teleporter, with a 1-Up and a "fan" power-up next to it. This fan power-up will completely restore EVERYTHING, so you have to grab it! The teleporter here will lead you to a boss rush with the remaining Robot Masters, starting with Bomb Man!
Boss Rush!
I have Fire Man's weapon now, so I can use it to defeat Bomb Man easily! After he's defeated, go to the teleporter and it will lead you to Fire Man!
Fire Man is still so weird! He actually destroyed me this time! I don't know what's happening with him. Thankfully there's a checkpoint where Bomb Man is. When I got back to Fire Man, I just spammed. What else could I have done? Anyways, up next is Ice Man, who's probably the easiest one here.
Just stand in the teleporter and fire lightning at him! Make sure to equip Elec Man's weapon before entering. Because you'll be in the teleporter, you'll be brought to Guts Man right away!
Honestly, it's better to use the Mega Buster rather than Bomb Man's weapon because of how slow it is. The ground is also flat, so you can just shoot him until he's defeated. Just don't let him constantly jump towards you.
After heading into the teleporter one last time, you'll be brought to the boss door, where you'll find weapon energy. I'd recommend recharging either Fire Man's weapon or Elec Man's weapon for this final fight…
The Final Battle!
Oof. Because I had so little health left after that boss rush, I was defeated pretty easily. Thankfully there is a checkpoint before this fight! The weapon energy also respawns, so that's nice! Now to the fight!
Dr. Wily combines his UFO with a large flying machine that fires bullets in an arc. You must attack the gun to hurt the boss. Use Fire Man's weapon to destroy the boss in seconds, as it is weak to it. But that was only the first phase…
In the second phase of the battle, the boss only attacks by shooting out counterclockwise spinning bullets towards you. If you run to the right, you just might be able to dodge them! I'd recommend using Elec Man's weapon because it deals multiple "hits" to the boss, plus it has a wide range. Use this weapon to whomp Wily!
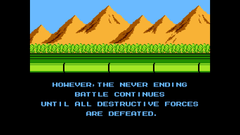
After destroying the machine, Dr. Wily gets on the ground and begs you to spare him, claiming that he'll be a good person from here on out. If you've played the other games, you know that's not the case! But our adventure has been completed! Now it's time for an ending message from the game, followed by the credits:
Ending
The credits play while Mega Man walks back home to the left. While he does so, the sun sets, and Mega Man transforms back into Rock.
Credits:
Planner: A. K
Character Designers: Yasukichi, Tom Pon, Inafking, A. K
Programmer: H. M. D.
Sound Programmers: Chanchacorin Manami, Yuukichan's Papa
An Octet Gazette
Written by: Museful Traveler (talk) I cannot say that I have felt at ease at all times in this land. Though comforts and reminders of home I have found, so too have I found my attention preoccupied by those lurking in shadowed corners of the great metropolises of this land. That thieves thrives wherever humankind settles is nothing of note. To draw attention to that observation is no more useful than to observe that plants thrive wherever water pools. No, what is of note is the methods of this land's thieves. The thieves from whence I hail were more brazen in their methods, more willing to resort to violence when their wrongdoings were exposed. Here, thieves move about crowds unnoticed, valuing swift steps and silent footfalls above all else when confronted. I should wonder if the many alleyways, sewer passageways, and empty buildings in which they can hide embolden them to flee rather than to fight...
Welcome back to An Octet Gazette, readers of The 'Shroom! Believe it or not, I am, for now, out of mechanics to cover! We'll cover more game mechanics when we get to character-specific traits and abilities and as we continue from there into miscellaneous changes between the two games, but, for now, we're going to proceed straightaway with a look at the differences in the Thief job class between the two games.
Stealing a Glance at the Thief
As always, let's begin with a quick look at what weapons thieves can wield.
Much like the Merchant job class, the Thief Job class provides access to two weapons. Thieves get daggers and swords as their tools of the trade, and that holds across both games.
On the whole, the Thief job is a job for speedsters capable of softening an enemy up to make it easier to outlast foes. This means that thieves get a bit of a mix of supporting skills and offensive skills, with offense and support even overlapping at times. To better demonstrate that, let's turn our attention to the skills of the Thief Job in the first game!
At a glance, you'll probably notice that the first game puts a thumb on the "soften up enemies and outlast them" side of the scale. Outside of Wildfire, which is the Thief job's standard elemental attack skill, and Aeber's Reckoning, every skill that the thief gets in the first game relates to that purpose. Armor Corrosive and Shackle Foe are the most straightforward examples here, applying debuffs to make it easier to take (non-magical) hits from foes and making it easier to dish out damage so you can wrap up battles quickly.
Steal is, of course, just about the most standard "thief class in an RPG" move possible. As expected, it steals an item from an enemy. How this synergizes with the rest of the Thief job's moveset may not be as immediately apparent, but it slots in pretty well. After all, any extra healing items you obtain by using it should help you in outlasting enemies. That said, I never found it useful enough to use often.
On the other end of the usefulness spectrum, we have HP Thief and Steal SP, which combine party-supporting abilities with direct offense. These two moves are incredibly useful. Not only do they extend the longevity of the party member using them, but they also strike twice, making them great for whittling down the shields of any enemy or boss with a weakness to daggers. These two moves are representative of the Thief job's main focus in the first game, softening up opponents by whittling down their shields and HP while topping off the Thief. Share SP, unless used against a foe with only a sliver of HP left, will almost always pay its own SP cost while netting you a tidy SP profit, and, combined with Share SP allowing thieves to hand those ill-gotten gains to another party member, allows you to restore SP without wasting an opportunity to dish out damage. I can't emphasize enough how useful Steal SP is. It's truly the cornerstone of the Thief job's moveset.
Going back just a bit, we can look at Aeber's Reckoning a little more closely. It's a straightforward move. Spend three BP so that a thief can use it, and you get an attack that hits all enemies, its power scaling with the speed of the thief. There isn't a lot to it, but I bring it to attention to highlight that, while taking a backseat here, the "thieves are speedsters" element of the Thief job does exist in the first game.
Now, given the phrasing used up to this point, if you're guessing that the second game shifts the balance between the two elements of the Thief job, you're guessing correctly! Let's take a look and see what has changed.
Fleet of Foot: Scurrying Thieves in the Sequel
To get one difference out of the way, the Thief job is one of the base jobs that has had its magic type shuffled around! Since the dancers took wind from the merchants and the merchants took fire from the thieves, the thieves have completed the triangle and taken darkness from the dancers. Despite the swap in element, Darkest Night is functionally the same as Wildfire, serving as the basic single-target elemental damage attack for thieves.
More interestingly, thieves have lost Share SP and Steal SP! I know, I know. You may need a moment to mourn Steal SP. I can understand why they made the swap here. Steal SP was far and away the best move in the Thief job's arsenal, and it may have, perhaps, even been too good. Additionally, dropping these two moves allowed for better balancing of the two elements that go into the Thief job, which seems to have been the intent considering that their replacements both relate to speed.
Surprise Attack is a worthy successor for Steal SP, at least, still fitting that role of dishing out damage while pairing well with a support-focused move in the thief's arsenal. With the right set up to raise the speed and offenses of a thief, it can slash through a sizeable chunk of a boss's HP. It's nice that, like Steal SP synergized directly with Share SP, Surprise Attack synergizes directly with Swift Step, and having a sword skill to take advantage of the other weapon wielded by thieves is a boon, too. While not as useful as Share SP, Swift Step also has the benefit of boosting Aeber's Reckoning, giving it two moves it pairs with which it pairs well.
All in all, what we have here are a few simple swaps and a rebalancing of the two elements emphasized by the Thief job. Thieves in Octopath II still have plenty of tools for softening up and outlasting opponents, but they've gained a few new tricks to better take advantage of their higher speed. With that said, let's this up by looking at the Support Skills thieves have across the two games!
Support Skills
| Name | Effect |
|---|---|
| Incidental Attack | Have a 50% chance to strike a foe with the most recently used weapon when using non-damaging skills |
| Fleetfoot | Increase the equipping character's speed stat by 50 |
| Snatch | Receive double the items or money when using Steal or Collect |
| Insult to Injury | Debuffs and status ailments inflicted by the equipping character last one turn longer |
This set of Support Skills pairs quite well with the Thief job's two main focuses. In fact, this set is more consistent with its associated job than any other we've covered so far, at least speaking for the first game. Incidental attack ties into the thief's role of softening up foes, and allows Armor Corrosive and Shackle foe to function a bit more like HP Thief and Steal SP. Meanwhile, Insult to Injury buffs those two skills. Fleetfoot boosts up Aeber's Reckoning, and is the other hint towards the job's emphasis on speed in the first game.
Snatch is the closest thing to an odd one out here, applying to both the Thief job and, oddly, the Merchant job. Even with that oddity, it aligns with that goal of outlasting opponents, making Steal even more effective at providing healing items able to boost the longevity of thieves. This set of Support Skills, unlike the others we've seen, probably could have gone untweaked in the sequel. There were nevertheless some tweaks, so let's look at those.
| Name | Effect |
|---|---|
| Incidental Attack | Have a 50% chance to strike a foe with the most recently used weapon when using non-damaging skills |
| Fleetfoot | Increase the equipping character's speed stat by 50 |
| Ensnare | Have a 50% chance to apply a debuff to an enemy after taking physical damage |
| Life in the Shadows | Gain extra JP and EXP at the end of battles taking place at night |
Incidental Attack and Fleetfoot remain unchanged, but the somewhat odd Snatch ability has been swapped out for Ensnare. Ensnare works even better with the "softening up enemies" role of thieves, I would say. It almost becomes a counterpart to Incidental Attack. While Incidental Attack allows thieves to still dish out damage while casting debuffs, Ensnare allows thieves to focus on dealing damage while having a chance to passively cast debuffs. It works well, and, unlike Snatch, it benefits all job classes, so I'd call it a good swap.
Insult to Injury has also been replaced, and this swap, I'm more ambivalent towards. Insult to Injury fit nicely into the Thief job's niche, while Life in the Shadows is... unrelated. That said, Life in the Shadows isn't bad, and is a useful Support Skill, especially if, like me, you choose to fight almost all of your battles at night. It's not a bad swap, but it does make this a rare case where Octopath II has a set of Support Skills that feels less attuned to a job class than the first game's set was. At least Fleetfoot becomes even more useful with Surprise Attack added to the thief moveset, though!
All things considered, the Thief class already had a strong sense of direction in the first game. What we saw in the second game was mostly a rebalancing of the class to better meld its two main focuses. RIP Steal SP all the same, though. Along with these small tweaks, the traveler that starts with the Thief job naturally changed between the two games, as well. In the first game, Therion is the initial thief, while that dubious honor goes to Throné Anguis in the second game. We'll look at them in more detail later, though. For now, since I already used the Thief job even though it would have tied in to Rogueport well, join me next month as we we look at the Warrior job and pretend it relates to the Glitz Pit!
| The 'Shroom: Issue 207 | |
|---|---|
| Staff sections | Staff Notes • The 'Shroom Spotlight • Poochy's Picks • Credits |
| Features | Fake News • Fun Stuff • Palette Swap • Pipe Plaza • Critic Corner • Strategy Wing |
| Specials | Community Awards Dossier |
