The 'Shroom:Issue 166/Strategy Wing
Director Notes
Written by: Hooded Pitohui (talk)
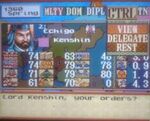
Hello and welcome, all you readers of The 'Shroom out there, to Strategy Wing's first appearance in 2021! We have some exciting content to start your year off right! Unfortunately, we don't have Parallax this month, but it is slated to return in the future. We do, however, have the return of a section that's been missing for quite a time now. Be sure to check out Shoey's tips on conquering Japan (in Nobunaga's Ambition) in So You Want to Conquer Japan?
Other than that, I don't have much in the way of new announcements for you. Do be sure to vote in Mach Speed Mayhem, to determine which F-Zero driver will be covered in February. If nothing else, maybe you can steal the best joke about the racer of choice for the month from Perch before he can steal it from me (like he did this month!).
As always, if you have any topic you'd like to write in detail about, take a look at our Sign-up page! We'd be happy to have you join us as a member of the Strategy Wing Team! Whether you want to follow Parallax's example and provide a guide on a topic you know well or you would like to make your own version of Mach Speed Mayhem to teach us everything about some obscure interest you have, we can find a place for you.
Section of the Month
An old standby and a new section take a joint Section of the Month victory to end 2020! Thank you all for your votes for the debut edition of Kingdom Battle Ramble by ZelenPixel (talk) and for the look at Baby Park's staff kart provided by Yoshi876 (talk). Please do keep your votes and support for our writers coming this year.
| STRATEGY WING SECTION OF THE MONTH | ||||
|---|---|---|---|---|
| Place | Section | Votes | % | Writer |
| 1st | Racing Like the Staff | 5 | 33.33% | Yoshi876 |
| 1st | Kingdom Battle Ramble | 5 | 33.33% | ZelenPixel |
| 3rd | Mach Speed Mayhem | 3 | 20.00% | Superchao |
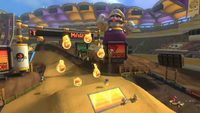
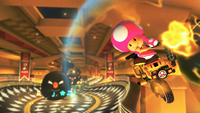
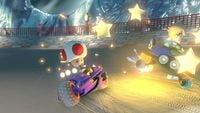
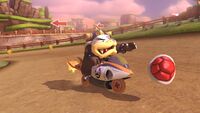
Does the Bounder bound through these Mario Kart 8 courses with ease?
[read more]
Kingdom Battle Ramble
Written by: ZelenPixel (talk)
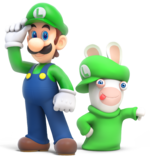
Ya girl Zelen here, and happy New Year!!! So we're starting off 2021 with some Luigi, huh? As I really love green, I gotta say I'm enjoying this a lot! I don't have as much to say here as in the previous issue, as Rabbid Peach honestly took up most of that one, but I hope you enjoy still! Now, time for Luigi and Rabbid Luigi!
Rabbid Luigi
Here is an even greener guy! He's also called a wizard, since he makes particular usage of the Super Effects! His personality seems a bit inconsistent, but I think we can gather he's cautious, a bit of a coward, and surprisingly nice for a Rabbid. He also seems to take note of the not-Rabbids' reactions to things, quickly making sure his own reaction is actually appropriate for the situation, if that makes sense. Not exactly everything fits with that, like the victory animations and other animations in-battle where he just decides to scream like a generic Rabbid for some reason, but what can ya do? Story-wise, Rabbid Luigi just shows up at the start of the game when Mario arrives in Ancient Gardens and joins the team, with no appearances in the intro previously, and he also doesn't do much after that either. He does do some minor little things, such as clapping to the Rabbids building things around Peach's castle early on in the game, but that's about it. Rabbid Peach does allow him to look at cool pics at the end of Ancient Gardens, so there's that!
Battle
| Health Points:* | 200-280 |
|---|---|
| Area of Movement: | 6-8 Cells |
| Pipe Exit Range: | 3-5 Cells |
| Vamp Dash: | 30-160 DMG |
| Team Jump: | 6-7 Cells |
| Primary weapon: | Bworb |
| Secondary weapon: | Rocket |
| Super Barrier: | -20-60% WPN/-20-50% MOV Cooldown 2-1 Turns |
| Weaken: | -20-70% DMG Cooldown 2-1 Turns |
| *Maximum HP doesn't account for global health upgrades throughout the game | |
The in-game description states: "Rabbid Luigi is a defensive specialist who can leverage the unpredictable elemental forces that surround us all to great strategic effect." At the very start of the game, he's honestly not the best character to use, but by the late game and postgame he becomes quite useful, especially being a really good healer!
An important note first, I just realised the stats don't account for the health upgrade every character gets every once in a while, so the maximum health isn't too accurate on all the stats, and this also applies to the previous issue! I'm sorry!!! Just keep that in mind. I've added a note to the stats table, just in case. Anyway, Rabbid Luigi's HP is a little below average, and the shield is the weakest one in terms of defending against damage (it's got another trait I'll get to), but he does make up for it with potential free healing on every turn! Otherwise he has average movement, and has pretty good offense thanks to specialising on Super Effects, and also another thing I'll get to just now!
Rabbid Luigi's Team Jump isn't much to speak of, as usual for the Rabbids, but his Dash is the strongest one in the game! The Vamp Dash can be upgraded to deal up to a whopping 160 damage per hit, making it stronger than anyone else's movement attacks, and it can also be used on two separate foes! But the most important thing is that it drains the enemy's HP, up to 100% of the damage dealt, and also leaves them with the Vamp Super Effect! So if he's close enough to some enemies, just the dashes alone can heal a hefty chunk of his HP! The enemy keeps Vamp, too, letting the rest of your team take advantage of it! You can use the free Vamp to get your other teammates out of a tricky situation, if the other healing abilities are inaccessible at the moment.
Rabbid Luigi's primary weapon is the Bworb, and he is the only character to have it. At first it just seems like a weaker Blaster with a higher chance of dealing critical damage, and thus a Super Effect, but late-game the Super Effects used become some of the best ones in the game, and the two postgame Bworbs have a 100% critical hit chance, making for a guaranteed Super Effect! At first, his Bworbs alternate between having Push, which, as mentioned before, pushes enemies around and potentially into each other and/or off the battlefield, and Burn. An enemy or ally inflicted with Burn will frantically run around for a few seconds and inflict Burn on the other enemies or allies they touch. That does mean, however, that if you inflict an enemy with Burn, your team members may get affected if they're close by! About halfway through the game, however, the Bworbs also start alternating between Stone and Vamp, which are also the Super Effects of the postgame Bworbs with the 100% crit chance. Stone prevents an enemy from doing anything at all for the turn, and Vamp, as mentioned earlier, will recover a percent of the damage that was dealt to the foe, which the rest of your team can take advantage of as well. They are both incredibly useful, and it's up to you which one will you use! (For the record, I personally use Vamp, plus the 100% crit Vamp weapon has a fun and ridiculously gaudy design!!)
His secondary weapon is the Rocket. It fires at one enemy, and explodes, dealing damage to nearby enemies or allies as well. It's actually not that strong, even being weaker than a Blaster (but a little stronger than a Bworb), but is pretty good for damaging a group of enemies! Unlike Sentries, you can use it on any enemy in a group, meanwhile Sentries will only blow up the nearest enemies in its path, if that makes sense. Rockets aren't too useful for Super Effects, only having a crit chance up to 60%, and only alternating between the Push and Burn effects, which I've already covered.
Rabbid Luigi's first technique is the Super Barrier, which is kinda weak against damage as I mentioned, but, to trade off, it completely negates any Super Effects inflicted on him! That trait can be particularly useful in trickier situations where you'd want to avoid having a status, especially in certain challenges. The shield is a little better for defending against weapon-based damage. The second technique is Weaken, which lowers the damage of the enemies' weapons within a certain range. It can nerf up to 70% of their damage! Note that it, like all Techniques, only lasts a turn. Both techniques can be used together with Vamp Dash to restore HP and/or inflict Vamp and escape relatively unscathed.
Luigi
It's Louis! Lyle! Llewellyn! Just kidding! Let's just get this out of the way quickly - yes, Luigi does dab in this game. He may do it after deploying a Sentry. It may actually be a little hard to notice if you don't pay attention, though! For some reason, Luigi doesn't seem to be much of a coward in this game, and neither does he act too cautious. It feels like they mostly focused on his... memey aspects. They referenced the famous death stare too! What is fun, however, is how he's the only character to make a noise when you exit a pipe, and he makes a funny noise pretty much every time! Story-wise, Luigi is first heard halfway through Ancient Gardens, where he calls out for Mario. Soon after, Spawny just gets startled and fuses Pirabbid Plant into existence, who proceeds to bully the unfortunate Luigi. He joins the party after the mid-boss is defeated, and then Beep-0 just proceeds to forget Luigi's name entirely. He never has any trouble remembering Rabbid Luigi's name, by the way. Not much happens after that, but Rabbid Peach does not allow Luigi to look at cool pics at the end of Ancient Gardens. As if that's gonna stop him from peeking!
Battle
| Health Points:* | 130-200 |
|---|---|
| Area of Movement: | 6-9 Cells |
| Pipe Exit Range: | 3-6 Cells |
| Dash: | 20-90 DMG |
| Double Jump: | 6-10 Cells |
| Primary weapon: | Precision |
| Secondary weapon: | Sentry |
| Steely Stare: | 50-70% DMG Cooldown 2-1 Turns |
| Itchy Feet: | +1-3 Cells Cooldown 2-1 Turns |
| *Maximum HP doesn't account for global health upgrades throughout the game | |
The in-game description states: "A master of long-range attacks (due to his fear of the front lines) Luigi has bravely led many 'fighting retreats' thanks to his advanced mobility." He's got insane movement options and range, helping him stay far away from the enemies - and he needs that, since he's quite the glass cannon!
And Luigi has... a pretty bad health stat to say the least. Even when fully upgraded, his HP is 70 points below the character with the second worst fully-upgraded HP, who is an old man, by the way!!! But yeah, that's for balancing reasons - Luigi has great offense and movement, but has to trade his defense for it. So a glass cannon. He's super frail, so be careful with him!
Luigi has a singular, very average Dash. His Double Jump, however, gives him another great movement option by letting him Team Jump on two allies in a turn instead of just one! Coupled with the biggest Team Jump range and the right positioning of the team, as well as the Itchy Feet technique, he can cover an insane amount of space in one turn!
Luigi's primary weapon is Precision, which is also entirely unique to him. It has insane range, up to 17 cells (versus 12 cells max on the Blasters), and also has pretty good damage! And I just realised there doesn't seem to be things it does worse than the Blaster, so there's that, I guess! Luigi's secondary weapon is the Sentry. As covered in the previous issue, it chases an enemy and explodes. Both weapons' effects alternate between Ink, which prevents an enemy from using their weapons for a turn, and Bounce, which launches them, potentially off the battlefield for an extra 30 damage.
His first technique is Steely Stare, which is the death stare reference I mentioned, and is a line-of-sight technique. It allows him to attack any enemy that moves within range. His can only do up to 70% damage of his primary weapon, but he can use it up to three times! Accounting for total damage, it is a little weaker than Mario's Hero Sight, but it has much longer range! Plus, like, three tries is pretty useful. Luigi's second technique is Itchy Feet, which boosts the Area of Movement for Luigi and all team members in range. It only boosts their movement range up to 3 cells when fully upgraded, but even that's a pretty big boost! That also means Luigi's max movement range can be 12 cells, which is also boosted by all the other movement options the game offers, like Team Jumps and pipes!! You can really tell Luigi is heavily specialised on staying as far away from the enemies as possible! That also makes him great for the Reach Area objectives. You can use Itchy Feet to boost the movement of the escort characters during their missions, which should prove really useful, considering just how slow their movement is!
Here's a bit of a fun fact! It seems that, back in 2010, one Ubisoft guy asked Nintendo "can we please make a Mario and Rabbids crossover" and Nintendo said "no", then some six-seven years later another Ubisoft guy showed up and asked "can we please make a Mario and Rabbids crossover" and Nintendo actually said "yes" this time! And that's how this game happened! So there were just two unrelated attempts at the same ridiculous crossover, huh! I just thought that was really funny. Anyway, next issue I'm gonna be covering Rabbid Mario and Peach, which actually kind of a reverse of my first issue!
Racing Like the Staff
Hello readers and welcome to Racing Like the Staff, a section where I do 150cc on different Mario Kart games, but the twist is, I take on the Grand Prix by using the combination that a staff and expert staff member used in that Cup. If you're still a little confused, by this I mean if the track is in the Mushroom Cup, then that's the Cup that I race in. Unfortunately, I don't have copies of the Mario Kart games before Mario Kart 7, so it's only that, 8 and Deluxe that will be getting this treatment.
And we're back to the longer sections this month, and we're also going to be getting a little bit chilly. Although I have been unlucky enough to miss all of the snow that is currently happening across my country, I can at least still experience the weather with a quick trip around Sherbet Land on Mario Kart 8 Deluxe, and we even get to playing as some of the Koopalings, who I honestly don't mind filling out seven slots within the roster, I'd rather be getting rid of palette swaps like Pink Gold Peach or Tanooki Mario.
The combination for the staff for Sherbet Land is Lemmy with the Bounder, Normal tyres and the Super Glider, and the stats are as follows:
- Speed – Two and a half bars
- Acceleration – Just under four bars
- Weight – Two bars
- Handling – Just under five bars
- Grip – Three bars
Wario Stadium
I didn't have the best of starts, as one of the heavier characters, I believe it was Pink Gold Peach – shows me to besmirch her name in the opening of the section – hit me into a wall and I lost all momentum, meaning I only got to fifth by the first Item Boxes. Although I managed to get past Pink Gold Peach and the Male Villager, driving into the back of Larry while he had a Red Shell did allow the Male Villager past. It wasn't until he missed a boost ahead of the anti-gravity section that I got myself past him, but getting ahead of Larry and King Boo proved trickier, with me only able to make a move before the first jump on the second lap after Larry took out King Boo with a Red Shell, and I got rid of Larry with a Green Shell. But despite having to fight hard for my lead, I didn't end up having to defend it, and victory was easy enough.
Sherbet Land
Although snow can produce a lot of fun, this was an easy race. I managed to prevent King Boo from taking the lead at the start, and ended the race a quarter of a lap ahead of second place.
Melody Motorway
Again, it was a mostly boring race. This time, Larry did get me on the start, but he was overtaken on the piano, and then I set about increasing my lead, and it was only a Red Shell and getting squished by a Bouncing Note on the final lap that allowed Larry to come anywhere close to me, although I still took the win.
Yoshi Valley
Larry got a way better start than me and rocketed ahead, and I had to fend off Shy Guy on the narrow bridge, and although he passed me, I didn't fall off, which was a very good thing; especially as once I got past Shy Guy, I was able to hit Larry with a Red Shell and claim first place. Unfortunately, a Spiny Shell hit me at the end of the lap, and a Green Shell also clocked me after the Item Boxes, putting me down to fourth. Lightning then struck, as I was up into third and when I re-grew, I was larger than Shy and Larry and promptly squished them, and although another Spiny Shell hit me at the end of the second lap, we were safe and we went on to win.
This combination was brilliant for extending a lead and practically left everyone in my dust, but where it really struggled was with catching up to people. Wario Stadium was a nightmare for doing so, and perhaps the large amounts of corners and high-speed sections contributed to that, but even on Yoshi Valley it was mostly items doing the heavy lifting on that front instead of this combination. I don't necessarily think it's a bad one, but it might be one I avoid in the future.
The combination for the expert staff for Sherbet Land is Iggy with the Bone Rattler, Monster tyres and the Bowser Kite, and the stats are as follows:
- Speed – Just under four bars
- Acceleration – Two and a half bars
- Weight – Four and a half bars
- Handling – Two and a half bars
- Grip – Three and a half bars
Wario Stadium
I remember hating the Bone Rattler last time I used it, and while it's still not my favourite, I was able to handle it a lot better this time. Although, like with the Bounder I was only up into fifth place by the first set of Item Boxes, and this time I wasn't jettisoned into the barriers. I made quick work of everyone else, though, up to the lead, and took Ludwig out with a Green Shell just at the end of the anti-gravity section. A Red Shell just before the mud jumps nearly allowed him into contention, but I just squeaked the lead before he began falling away and I took home another victory.
Sherbet Land
Like last race, I had a challenger at the start that went nowhere, and then sailed onto a victory, although I will admit that it was not as dominant as with the Bounder – a Spiny Shell could've changed the outcome, although I think it more than likely would've just made the race a lot closer.
Melody Motorway
It was Daisy who ended up shooting past me at the start, and although I was lining her up with a Red Shell, her Green Shell put me on the backfoot and allowed Ludwig and slip-streaming Link to get past me. Thankfully, Link and Ludwig worked on taking themselves out, and although my Red Shell was still set on Daisy, she decided to drive into a Bouncing Note meaning I didn't need it. Some poor driving just before the gliding section on the second lap allowed Daisy back past, but this worked in my favour as the incoming Spiny Shell swapped its attention to her, and I got past and took another victory, though once again it was more dominant with the Bounder.
Yoshi Valley
On Sherbet Land, Link attempted to go for the lead, and this time he was successful, but as went our separate ways, I easily retook the lead. The Item gods shone favourably on me and granted me a lot of Bananas, which was handy as second place always seemed to get a Red Shell from the Item Boxes, and ultimately I took another win, but – and forgive me if you've read this before – it wasn't as dominant as with the Bounder.
Seven words sum up this combination “wasn't as dominant as with the Bounder” and that's really it. I couldn't find a lot to complain about, although I do feel I hit more walls than I should have, but the mini-map doesn't lie, and the racers were a lot closer with me whenever I was in the Bone Rattler than when I was in the Bounder, and so I'd recommend the Bounder a lot more than the Bone Rattler.
So you Want to Conquer Japan?
Written by: Chester Alan Arthur (talk)
Welcome back. It's been a while! Let's see... I haven't written this section since… let's see… APRIL 21ST, 2018! That's a long time but, uh, you know... Wars are long and stuff…
So, just as a little refresher, Nobunaga's Ambition is a Super Nintendo historical simulation strategy game where the goal is to conquer Japan. In our last two sections we picked our fief and we defeated our first enemy, who statistically speaking was probably fief three. And after that taste of battle you might be thinking that it's time to take the war to their doorstep, for you have a taste for blood. But let's hold off on that for now. For the first few years of our conquest, we need to bide our time, build our fief, and grow our army.
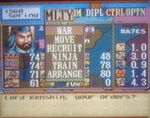
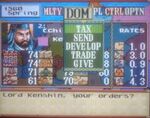
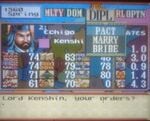
So the first three to seven years of Nobunaga's Ambition is essentially going to be broken down into a cycle where during the fall (when you get that sweet, sweet tax money) you're either going to spend time conscripting (the game calls it recruiting but, please, in 1500s Japan you're totally forcing them) troops into your army, or you're going to be spending that money building up your town (which helps generate tax revenue), or investing in produce to expand rice yields. Now, when you recruit troops both their loyalty and their training go down. Troop loyalty is important because during a battle your enemy can attempt to bribe your troops into deserting your army. Low troop morale can also cause your troops to rebel and attempt to seize control of the fief they're in (and if they seize control of your fief with your Daimyo in it, then it's game over). Now, luckily, you can boost troop loyalty the same way you boost peasant loyalty -- by bribing the shit out of them with rice or gold! Troop loyalty also plays a role in training your troops, because the more loyal the soldiers you have, the better the results of training will be. Training your troops is important; the higher their training, the more effective they are in combat and the fewer troops you need to win a war. There is a cap on how skilled your soldiers can get, and once you hit it the game wont let you train the soldiers in that fief anymore. I believe this cap is based on your drive stat, but I'm not actually entirely sure.In the springtime you'll want to at first give rice to the peasants, because this will boost their happiness, and that, combined with your town level, is what's going to determine how much tax money you get. Once summer rolls around, we're going to go ahead and train our troops again. Now, we'll mostly stick to this cycle for the first few years, but there will be a few deviations. One of those deviations is checking if the merchant is in town. If the merchant is in town there's a few options you have, but the two most important ones are selling rice and buying arms. Right now, we aren't going to be in a position to sell rice. Trust me, though, once we get a few fiefs under our belts, rice is going to be making us some big dollars for big projects. For now, arms (guns) is what we're going to focus on. We want to buy as many rifles as possible, because, the more rifles you have, the more people you can assign the rifle unit. That's valuable because the rifle unit is the hardest hitting unit.
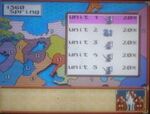
Speaking of rifle units, the other important deviation is going to be arranging our army into the optimal formation. When you start the game your army will consist of five units (three infantry, one cavalry, and one rifle), and each of those units will be divided evenly (with each unit having twenty percent of all troops.) Personally, I think that's a sub-optimal setup, so at the earliest convenience I prefer to set up my units as so:
General Unit (infantry with your general/Daimyo) - 20%: This unit, while functionally the same as any other infantry unit, has the army's general in it, you lose the battle if it falls. So it's important to keep a decent amount of troops in it.
Cavalry - 35%: The reason I like to keep this one so high is because it attacks at two times the strength of an infantry units and they don't require anything extra like rifle units do. Because of these advantages, I tend to give the cavalry unit the highest percentage of troops because they still hit hard while not requiring you to keep buying guns.
Rifle - 22-30%: The rifle unit has the highest attack in the game, with 3x the strength of an infantry unit (turns out guns are very effective in war), but the drawback to them is that they require you to buy arms from the merchant. I believe you need as many guns as you have rifle soldiers, so, in order to set your rifle unit to thirty percent, you'd need to have an amount of guns equal to thirty percent of whatever your current troop strength is. This also means that, as your army grows. the amount of guns you need to keep the rifle unit at its set strength goes up, and if you don't have enough guns your rifle unit will shrink in relation to total troops.
Infantry - Remainder: The game gives you two extra infantry units by default, but I typically cut one of those units so that I can move its soldiers into the rifle and cavalry units. Because of this, the extra infantry unit is mostly going to be an afterthought, one mostly used to protect the Daimyo if I accidentally separate the Daimyo from the rifle and cavalry unit on a map. In other words... the basic infantry unit is basically just a meat shield. Now, you might be thinking "well, why not just cut the infantry and maybe even the rifle unit and just use the cavalry?". The reason is that you only have one turn per unit. If you only have two units on the field, you're only going to be able to attack one enemy unit per round. Depending on the map you're on, it's entirely possible to have the unit with your Daimyo overwhelmed and wiped out before you can even do much damage with the cavalry unit.
With that sorted out, our life will be a little slow for a while as we cycle through recruitment, development, training, and morale boosting to build our army. As a tip for when we eventually start warring, you'll want about double the amount of soldiers an enemy fief you want to conquer has in it.
I believe that will do it for this issue. Join me next month when we will finally be going on the offensive in our quest to conquer Japan!
Mach Speed Mayhem
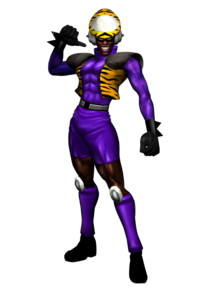
Hello, 'Shroom readers, and welcome to this edition of Mach Speed Mayhem! Today, we'll be covering the last of the single-digit racers (well, if you don't count the leading zero) - #04: Baba! This young rookie might still be in the early phases of his career, but there's a solid future ahead of him... well, if it ever gets another game!
Main Series
Like so many others, Baba made his first appearance in F-Zero X, to help bring the roster up to 30. And... there's honestly quite little about his X incarnation! He's a rookie, he's got good intuition and flexibility, and he trained a lot. In short, he's a new racer. Yep. F-Zero GX, however, decided to massively expand upon Baba's information, giving him one of the more detailed bios in the game. Born and raised on the planet Giant, Baba grew up with sweeping, lush green lands all around him, and was blessed with both incredible instincts and a powerful physique. One day, the F-Zero Pilot Selection Committee sent someone to the planet, in their usual search for new talent to join the F-Zero Grand Prix. Baba was quickly scouted, and the young man was more than interested enough - and that's how he was added to the F-Zero lineup!
Unfortunately, he wasn't able to win. So, Baba went off on a spiritual journey to discover himself and his way to win! The good news is, he's a lot stronger now. The bad news is, it also amped up his confidence and braggadocio to annoying levels. Well, you take the good with the bad, huh? His interviews with Mr. Zero actually do bear this out; he denies that he has a biggest rival because nobody can keep up with him, and declares that the importance of his victory is that for once, there's a good-looking winner! Beyond that, though, he shows himself to be in this for the fun of it. Baba invites everyone to join his victory parade, gives a shoutout to his colorful fans (they'll be back next time he wins!), and describes himself as graceful, yet masculine, when it comes to his tiger print style. He also chalks up his win to the power of love! The love he's got for his beautiful machine, his love of the sport - the only worthy recipient - and ensuring no racer he sets his eyes on escapes... or passes him.
Notably, a couple of his questions were cut for the English release! Namely, calling himself the F-Zero goddess after winning the expert class, and declaring that people should never underestimate a man in drag. It's unsurprising that they met the chopping block, considering that the concept of drag was definitely not something NoA would allow to pass muster in the mid-2000s. Still, at least they left us the important information that Baba is an excellent dancer! In the F-Zero GX story mode, Baba makes two appearances; neither of them is very special, though. He's one of the twelve racers to fill out the field of Chapter 3's BET race, and one of the thirty to join Chapter 7's big race. Other than that, no story mode appearances from Baba.
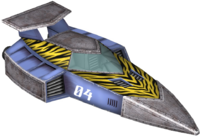
Next, his machine! Designed and developed by the Machine Design Committee of the Pilot Training School, the Iron Tiger is built to be friendly for a still-young rookie driver like Baba, the pilot project wanting a machine that could go all the way to winning championships. It's got a stable operation, matching perfectly with Baba's daring driving style. With the machine to keep him on course and his own style to ensure shots at victory, Baba's got a great shot at winning! In F-Zero X, the Iron Tiger's listed stats are B Body, D Boost, and A Grip, and those line up with performance. With no real speed, Baba isn't the best pick for high level races, but a good beginner-friendly machine when early on. GX changes it up - the body has been somewhat decreased to trade off for the boost, with a still high top speed and grip. Sharp turns are something of a hassle, but on the courses with big long stretches and wide turns? Baba is right at home, able to sail through them. His machine comes out pretty well in both games, really!
GP Legend series
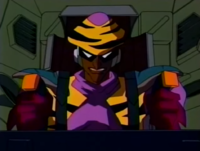
Hoo boy. Baba makes his appearance in the anime as a card-carrying member of Dark Million, their elite spy, for no real reason. He just shows up in the series, already a bad guy gleefully working for Zoda, without even the usual "all aliens in the anime are evil to some extent" reasoning. He also doesn't really... do much, honestly. Octoman and Bio Rex carry the main comic relief weight, and The Skull gets a few cases of using his Dark Magic (TM), but primarily being an extra body for Dark Million and acting as a gofer for Zoda, Baba only gets two appearances of any substance - heck, he's one of the only two racers to never get any of the pilot + machine eyecatches that show before and after commercial breaks. Because we needed to give twelve of those to Rick, of course.
Baba's first tour of duty comes in episode 3, which primarily serves as an introduction to Lucy Liberty once she's decided to pursue a new career in F-Zero. His main job is made clear, the guy keeping a close eye on Rick without tipping off that Dark Million is following him around. He ends up competing with Lucy instead, deciding to throw her around because she's a girl. He even succeeds in wrecking her, though he gets his comeuppance when his attempt to win the race of the day is foiled at the last minute by Dr. Stewart. Thanks, doc! After that, Baba pretty much appears only to either provide information or be the extra body I mentioned, though a much later episode gives him one more critical appearance, even if Jack Levin and Michael Chain are the focus. He's the one to help Michael Chain in his plan to try and force Jack out of the Mobile Task Force, primarily by supplying information (and bigging up his own importance to Zoda), but also by helping Michael during the race of the day. After that, he continues to only appear as Dark Million manpower for the rest of the series. Poor guy.
Surprisingly, while the GP Legend game for GBA doesn't do anything special with him, F-Zero Climax actually bothers to justify why he's a villain, in one of the most important uses of the Climax bios yet! You see, Baba - once again an offworlder - arrived to Mute City as a young, naive man who had no idea how the world worked outside of his rural home planet. Zoda proceeded to swoop in and teach him all the wrong things, ensuring that Baba got misdirected into serving the evils of Dark Million rather than becoming a good guy. I'll give Climax this - it's a solid reason for someone to be a bad guy in this show. ...Now, couldn't you have shown this in the show itself?
Other Information
Surprisingly, while he isn't mentioned in any prior installment, Baba shows up as a spirit battle in Super Smash Bros. Ultimate. He's portrayed by Captain Falcon in his Blood Falcon outfit, and said Falcon's main gimmick is higher speed, lining up with Baba's physical acuity and training. Heck, as a spirit, Baba even boosts your speed as well. What a guy!
In F-Zero X, there are generic fall-off-the-course yells from all characters in two types; male voice clip and female voice clip. Baba is given the latter; combined with the cut questions from GX, it's clear that he's being portrayed as uniquely effeminate. As Baba says, never underestimate a man in drag.
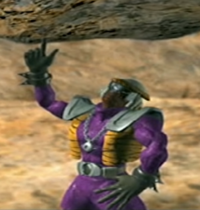
To finish this off, one more interesting oddity - In Baba's F-Zero GX pilot profile movie, Baba's design is somewhat different from his in-game design for GX both in artwork and 3D model. His pilot movie design has a different belt, a pendant not seen elsewhere, and differently colored shoulderpads... all of which were aspects of his X design. Did they plan to change back to his X design and didn't change the in-game stuff, or did they make the pilot profile movie before deciding to alter his design? We don't know, so that ends Baba's article. Join me in the thread to help me decide who to cover in February!
| The 'Shroom: Issue 166 | |
|---|---|
| Staff sections | Staff Notes • The 'Shroom Spotlight • 'Shroomfest Highlights • Directorial Address |
| Features | Fake News • Fun Stuff • Palette Swap • Pipe Plaza • Critic Corner • Strategy Wing |


