The 'Shroom:Issue 64/From the Mushroom Vaults
HI! I'm your marvelous Statistics Manager, Tucayo; and for this issue I'll be writing From The Mushroom Vaults. You probably haven't even heard of this section, so I'll give you all a brief introduction. Once a quintessential section of The 'Shroom, FTMV has been gone for 27 issues. In this section, one of the original sections of The 'Shroom, readers could get tips and cheats on Mario games. But, as Marioguy1 would say, it had faded into obscurity. Until now.
So, to follow this issue's theme, I'll be telling you how to get the 15 Castle's Secret Stars in Super Mario 64. Let’s-a-go!
I assume you already have enough stars to access every part of the castle, but in case you don’t I’ll be listing them from the star you can get first to the last you can get.
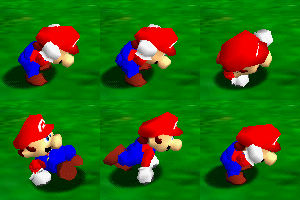
- Stars 1 and 2: You need one star to get these two, so unless you just started, you should be able to get them. These first stars are in The Princess's Secret Slide. For the first one you just have to get to end, while for the second one you’ll need to finish the slide in less than 21 seconds. The easiest way to finish in the required time is to slide on Mario’s belly (run,
 +
+  ). It's OK if you fail to do so on your first try, since you'll still be able get the first star. You can only grab one star, so you'll have to slide at least twice.
- Star 3: This star is located in the same room as Jolly Roger Bay, in the alcove in the wall to the right (you can get a 1-up in the left one). To get this star you just have to swim and collect the 8 red coins. But, since there is no way to the surface, you have to use the coins to replenish your health, unless you want to die.
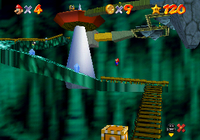
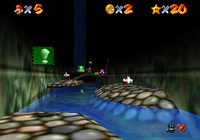
- Star 4: More red coins fun, the 4th Secret Star can be found in the Bowser in the Dark World level. Even though you only need 8 stars to get here, it is recommended you already visited the Metal Cap Switch, otherwise you risk getting burned.
- For the first two coins you have to press the purple switch, which will make some wooden platforms appear. Coin #1 is opposite to the flamethrower, coin #2 is right in the beginning of the level.
- Coin #3 is really easy to spot; it’s in the area with the crystals. Needless to say, you have to watch out for the Amps circling above the crystals.
- The terrible camera the game has may make you miss coin #4. This coin is on the yellow platform that goes back and forth.
- Now, there is no way you could possibly miss coin #5. Just stand still in the corner of the blue moving platform and you should have no problem getting it.
- For coin #6, go to the path opposite to the teeter-totters (the one to the island). It’s a narrow path, so, if you feel like you could fall, crawling is the option. But that is boring as hell, so take some risks and run, otherwise your life will be forever boring. The coin is in plain sight. Again, watch out for the Amp.
- Use the second teeter-totter to get to the top ledges. Once you’re there, long jump to the first ledge. Coin #7 is there.
- And the last coin, coin #8 is on the skinny ledge between the last two top ledges. Search around with Lakitu, otherwise you’ll miss it. After getting this coin, the star will appear behind the pipe leading to Bowser.
- Star 5: World-famous Tower of the Wing Cap! Once again, you have to get the eight red coins. If you don’t know how to enter the tower, you’re disappointing me. Just stand on the rug at the entrance and look straight up. The coins are placed in a downward spiral, so if you follow the path you shouldn’t have any trouble. But let’s be honest, you won’t get the eight on your first try. If you miss some of the top-most coins, you’ll have to restart the level, since you won’t be able to fly that high again. If you missed some of the bottom-most coins, then just land on the tower, get the winged cap and fly again.
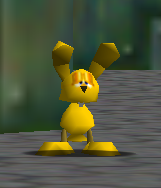
- Star 6 and 7: Moving up to the castle’s basement, we have MIPS. That’s right, the rabbit. You’ll have to catch him in order to get the stars. He’s a slick mammal, so it’s easier to corner him. You can get the first star out of him after you have 15 stars, and the second one after getting 50. Yeah, you have to catch him twice.
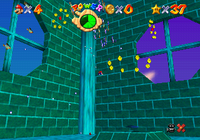
- Star 8: More red coins. This time, it’s the Vanish Cap Under the Moat level. To access this level, you have to drain the water. And don’t tell me you don’t know how to do that, because it’s a must-know. But in case you don’t, you have to pound the two pillars you find in the basement.
- 4 coins are on ledges in the hill at the beginning. You can try to jump from one to another, but there’s the risk you’ll miss one and you won’t be able to go back, so the safe choice here is to crawl from one to another. Use the camera to see where the next coin is. After getting those four coins, slide or crawl to the bottom, but if you slide you’ll have to jump to make sure you don’t fall into a bottomless pit.
- Keep walking and you’ll find the 5th and 6th coins on the second teeter-totter. There’s no way you can miss these two.
- Coin #7 is on the second-to-last lift. Stay on it until you grab the coin, and jump to the next lift before it flips you over.
- Hit the switch and grab the coin. The star will appear behind a fence, but since you can get the invisible cap now, there is no problem with that.
- Star 9: Probably one of the easiest to get. Just talk to the Toad standing by the Hazy Mazy Cave pool-like thing and he’ll give you the star. Yeah, as simple as that; no need for violence.
- Star 10: The only Secret Star you’ll find by entering one of the regular 15 courses. This star is found in the Cavern of the Metal Cap, which is accessed through Hazy Mazy Cave. To get here, you have to go to the underground lake and then drive Dorrie (an effing nightmare) towards the double doors. Once you’re there, you’ll find another of the pool-like thingies. Jump in it and voilà! You are there! The best thing to do first is to press the green switch, because the water will drag you out of the castle if you’re not Metal Mario. And it’s a real pain to get back to this place.
- On your way to the switch, you’ll find coins #1 and #2, behind two pillars on your right.
- Coins #3 and #4 are next to the switch.
- Get the metal cap and fall into the water surrounding the switch. Coins #5-#8 are around the pillar. The star will also appear there.
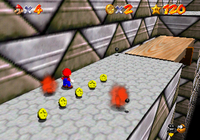
- Star 11: The last of the basement stars is in the Bowser in the Fire Sea level. To get to his level, you need to have at least 30 stars and after that you’ll have to get the first star in Dire, Dire Docks. And yes, you guessed correctly, this star is a red coins star.
- Passing the first bully you find, you’ll see a ramp. Follow that path; the red coin will be at the end.
- Continue the level until you get to the pole that leads you to the teeter-totters, the second coin will be on the first one.
- Another pole will take you to a yellow and purple room (horrible combination of colors, I know). Coin #3 is in the far right corner.
- Step on the elevator and get back to the purple room. The elevator will go up, and you’ll be able to see coin #4 right under it. Just jump down to get it. And then get all the way back to where you were.
- The elevator will take you to the second floor, if you want to call it that way. Keep moving on until you get to the pyramid thing. Take the yellow path on top of the pyramid; it will lead you to coin #5.
- Walk until you get to the yellow ramps. You’ll notice these platforms expand and contract. The 6th coin is on the second-to-last platform, you can get it when the platforms are fully expanded.
- Moving to the third floor, coin #7 is right in front of the second flamethrower.
- Coin #8 is in the building with the poles, right above the last pole. The star will appear on top of this building, use the first pole and your wall jump to get to it.
- Star 12: The next stars are in the second and third floors of the castle. For this star you just have to talk to the Toad by the stairs leading to the third floor.
- Star 13: You need 50 stars to get the last of the simple Secret Stars. Once again, a Toad will give you the star. This time it’s the Toad by the Tick Tock Clock.
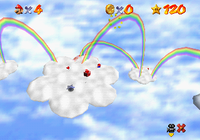
- Star 14: For me, this was the most difficult star to get. Wing Mario Over the Rainbow. This course is in the alcove opposite to the one that leads to Rainbow Ride. When you fall off course, you’ll be aggressively thrown into the lake outside the Castle, so it’s a pain to get back.
- Coin #1 will be on the cloud you landed on.
- Look around and you’ll see a cloud between two pink islands, fly to it and there you’ll find coin #2. Oh, and grab the Wing Cap again.
- From that cloud, fly to the pink island below it (the one with the Bob-Omb Buddy). Coin #3 will be there. Talk to the Bob-Omb to open the cannons.
- Aim towards the sun, that should take you to the top-most pink island, which has another cannon. Using that cannon, try to aim to the bluish cloud. Coin #4 is inside that cloud.
- Fly around to a cloud connected by 2 rainbows. Coin #5 is there, as well as another Wing Cap.
- Get back to the cannon island, since you need it to get to the higher clouds. Same procedure, aims towards the sun to get to the other cannon. Aim above the cloud with the poles. If you land above it, grab coins #6 and #7.
- Fly around the cloud so that you get to the poles below it. Once you’re there, grab coin #8. The star appears on the main cloud.
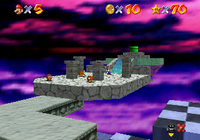
- Star 15: The last star. And guess where it is. That’s right, in the Bowser in the Sky level. You need 70 stars to get here. But I highly recommend this is the last star you get (the 120th), because if you battle Bowser then, he’ll give you a different speech. And that’s a nice detail on his part.
- For the first coin, you’ll have to push the big crate to the edge above the moving platform. Get on top of the crate and jump for the coin. Jump when the platform is out; otherwise you’ll fall into the purple sky.
- Go up the ramp, across the stone bridge and past the spinning island. Coin #2 is in plain sight.
- Fall off the teeter-totter and use the camera to look around the far edge of the platform. Coin #3 will be on a small step, so be careful when you get it.
- Make your way to the metal ramp. The fourth coin will be on the topmost part.
- Coin #5 is a tough one, since it’s on top of a diamond-shaped block and it can make you slide off course. Get on the moving platform and when you get to the diamond block, the best thing is to backflip, but this can be hard to do. If you don’t feel like backflipping, simply jump over the block and pray for the best.
- Coin #6 is on the first spinning island. Pretty easy to get, but the camera may make you miss it.
- The seventh coin is on top of the pole between the orange moving platforms.
- And the last coin is before getting to the pipe leading to the final battle. It’s below the blue stairs taking to the pipe. After getting it, the star will appear next to the pipe.
