K. Kruizer III Engine: Difference between revisions
PaperSplash (talk | contribs) No edit summary |
m (Text replacement - "{{[Ll]evelbox" to "{{level infobox") |
||
| Line 1: | Line 1: | ||
{{ | {{level infobox | ||
|image=[[File:K Kruizer III Engine.png|240px]] | |image=[[File:K Kruizer III Engine.png|240px]] | ||
|world=[[K. Kruizer III]] | |world=[[K. Kruizer III]] | ||
Revision as of 15:45, April 19, 2022
| Level | |
|---|---|
| K. Kruizer III Engine | |

| |
| World | K. Kruizer III |
| Game | DK: King of Swing |
| << Directory of levels >> | |
K. Kruizer III Engine is a level of the K. Kruizer III in DK: King of Swing. It is the twentieth and last regular level in the game, and it takes place just before the boss fight against King K. Rool.
Summary
This level takes place inside the K. Kruizer III. There are no enemies in the level but there are obstacles such as cannons, mines, and spikes that line the walls. The Kong must also hit many Question Barrels to alter the surroundings. Other obstacles include switches, pegs that move back and forth, Barrel Cannons, and Booster Barrels.
Unlike other levels, K. Kruizer III Engine only has two sections. The first section involves the Kong climbing across a few large sets of Peg Boards. They must break Question Barrels in a sequence while avoiding fireballs shot by cannons and revolving mines. Breaking one Question Barrel reveals another elsewhere, until eventually all are broken and the Kongs can go up a pathway leading to a Switch Peg. The second section has Donkey Kong climbing above and across individual pegs and some Peg Boards to the top while avoiding mines along the way. A large abyss is at the bottom of both sections, and a platform is only found at the start and at the end of each section. Like the first section, Donkey Kong must pull a Switch Peg to open the exit.
Layout
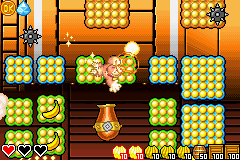
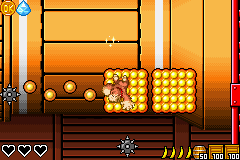
At the start, the Kong can find a large set of Peg Boards. Cannons are placed in spaces between the many peg boards, and they shoot fireballs at the primate. Additionally, many moving peg boards are around the cannons, while bananas stand between them and mines hover around the area. A barrel is located on the first few of the peg boards here, but when it is destroyed, another one appears next to it. When this is broken, another barrel appears at the top of the area, creating two more peg boards above. The peg boards can be used to reach a second large group of peg boards, which are set of similarly to the previous set, still having bananas, cannons, and mines.
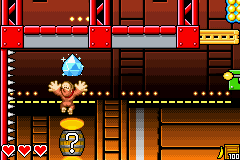
A fourth barrel lies at the top of the second group of spikes, creating a barrel farther down when destroyed. This new barrel is placed between the two peg board groups, and mines surround it. A barrel is revealed in the bottom corner of the first peg group when this is destroyed. If the Kong breaks this barrel, another appears across from it on the other side of the area. Upon breaking this barrel, another appears above the second set of peg boards, and when it is destroyed, the final barrel appears above the middle-top of the nearby peg boards. Two small peg boards form ahead when the barrel is broken, helping the primate reach a switch that he can pull down with both hands. A barrel sits in the air to the left of here that can be destroyed with the hero's "Going Bananas" move to reveal a Crystal Coconut. Once the switch is pulled, a gate opens above, opening the path to the second area.
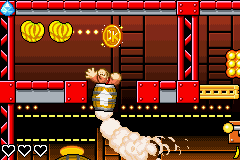
In this area, the hero can find a large gap ahead with a line of pegs above it that he must use to cross. The pegs move up and down, with each peg moving away from each other and then back. Two peg boards are placed after the pegs. Two pairs of pegs are above them, with each two pegs moving back and forth horizontally. A mine is after each pair, and then following all of them are two peg boards. Some more pegs that move up and down are to the left of here, but this time a few mines are between some of the pegs. If the hero manages to pass all of the sharp obstacles, he can reach a peg board with more pegs above it. The pegs shake up and down. A mine is between some of them. A Barrel Cannon is at the top of the area that can blast the Kong across the section and onto some more unstable pegs. A pair of pegs is near them higher up, which the primate can use to reach a set of three more pegs nearby. Two of these pegs move in vertical paths. There is a Booster Barrel to the right of all of these pegs, which can fly the hero into an alcove nearby that holds two large Banana Bunches and the gold medal. A switch is also above the pegs that can open a gate blocking the Kong's path to a ledge with a path that leads out of the level.
Collectibles
| Item | Location |
|---|---|
 Crystal Coconut |
In a barrel above a Question Barrel at the uppermost left corner of the first section. Donkey Kong can stand on the Question Barrel to charge into the wooden barrel and reveal the Crystal Coconut. |
 Gold medal |
In the second section, Donkey Kong must enter a Booster Barrel to the upper-right under the level exit. They must go left and up into a small alcove to get a gold medal and two 10-count Banana Bunches. |
Names in other languages
| Language | Name | Meaning | Notes |
|---|
