User:Ninelevendo/Work: Difference between revisions
Ninelevendo (talk | contribs) |
Ninelevendo (talk | contribs) No edit summary |
||
| Line 20: | Line 20: | ||
{{MPT}} | {{MPT}} | ||
<nowiki>[[Category:Mario Power Tennis Special Moves|*]]</nowiki> | <nowiki>[[Category:Mario Power Tennis Special Moves|*]]</nowiki> | ||
<nowiki> | |||
{{articleabout|the Power Shots that appear in the ''Mario Tennis'' series|the Power Shots that appear in ''Mario Superstar Baseball]]''|[[Power Shot (Mario Superstar Baseball|here]]}} | |||
'''Power Shots''' are special moves that appear in two games in the [[Mario Tennis (series)|''Mario Tennis'' series]], being ''[[Mario Power Tennis]]'' and ''[[Mario Tennis: Power Tour]]''. There are two different types of Power Shots; [[Offensive Power Shot]]s and [[Defesive Power Shot]]s | |||
[[File:Thunder Cast Shot.jpg|thumb|203px|right|''[[Mario Power Tennis]]'''s '''Power Shots''', the [[Thunder Cast Shot]].]] | |||
In ''Mario Power Tennis'', there are two types of Power Shots; [[Offensive Power Shot]]s and [[Defensive Power Shot]]s. All players have their own distinctive power shots. The offensive power shot is used when the ball is near the player. These come with special effects to confuse the opponent(s). Defensive shots are used when the ball is out of the player's reach. These shots are very helpful by returning shots that couldn't normally be saved. In fact, Defensive Power Shots can also negate the added effects from Offensive Power Shots. | |||
Power Shots are also a prominent feature in ''[[Mario Tennis: Power Tour]]'', where part of the game's story revolves around the player and other characters in the game's RPG mode developing Power Shots. Power Shots can be earned by completing minigames at the [[Tennis Academy Training Center]], and the player can then assign any offensive or defensive Power Shot available to them, to [[Ace]] or to [[Clay]]. Additionally, there is a Power Shot under the name [[Power Shot (Offensive Power Shot)|Power Shot]] in the game. | |||
==Power Shots== | |||
There are 44 [[Power Shot]]s in ''Mario Tennis: Power Tour'', with half of them being [[Offensive Power Shot|Offensive]] and the other half being [[Defensive Power Shot|Defensive]], although 12 of these are exclusive to the Mario characters. These first become first available after reaching Senior level, however only Varsity and Island Open opponents actually use them. To unlock a Power Shot, certain levels need to be reached in the PS Minigames. The Power Shots that Ace and Clay can use and the requirements for each are listed below. To use a Power Shot in the game, the Power Shot meter must be fully charged. When it is, a yellow-orange ring will appear around the players character. Hold {{button|gba|R}} and press {{button|gba|A}} for an Offensive Power Shot, and hold {{button|gba|R}} and press {{button|gba|B}} for a Defensive Power Shot. | |||
{| width=750px border=1 style="text-align:center; border-collapse:collapse;background:white; margin: 0 auto;" | |||
|- bgcolor=#dedede | |||
!Name | |||
!Image | |||
!Type | |||
!Unlock Conditions | |||
!Description | |||
|- | |||
|[[Power Shot (Offensive Power Shot)|Power Shot]] | |||
|[[File:PowerShot.PNG|100px]] | |||
|Offensive | |||
|L1 Muscle | |||
|A powerful shot that sends opponents flying. | |||
|- | |||
|[[High-Power Shot]] | |||
|[[File:High-Power Shot.PNG|100px]] | |||
|Offensive | |||
|L3 Muscle | |||
|An intense Power Shot with a little added oomph. | |||
|- | |||
|[[Curve Shot]] | |||
|[[File:CurveShot.PNG|100px]] | |||
|Offensive | |||
|L1 Spin | |||
|A curving shot that sends opponents reeling. | |||
|- | |||
|[[Slider Shot]] | |||
|[[File:Slider Shot.PNG|100px]] | |||
|Offensive | |||
|L3 Spin | |||
|A powerful Curve Shot with an even tighter curve. | |||
|- | |||
|[[Control Shot]] | |||
|[[File:Control Shot.PNG|100px]] | |||
|Offensive | |||
|L1 Balance | |||
|A commanding shot that sends the ball right into the corner. | |||
|- | |||
|[[Flashflop Shot]] | |||
|[[File:FlashflopShot.png|100px]] | |||
|Offensive | |||
|L3 Balance | |||
|A drop shot that uses a bright light to blind opponents. | |||
|- | |||
|[[Tackle Shot]] | |||
|[[File:TackleShot.png|100px]] | |||
|Offensive | |||
|L1 Body | |||
|An aggresive shot that tackles the ball and sends foes flying | |||
|- | |||
|[[Stunner Shot]] | |||
|[[File:StunnerShot.png|100px]] | |||
|Offensive | |||
|L3 Body | |||
|A shot that stuns foes with a ball masked as a giant fist. | |||
|- | |||
|[[Flying Shot]] | |||
|[[File:Flying Shot.png|100px]] | |||
|Offensive | |||
|L4 Muscle + L2 Jump | |||
|A powerful shot that blows foes away with a flame-cloaked ball. | |||
|- | |||
|[[Gyro Shot]] | |||
|[[File:GyroShot.png|100px]] | |||
|Offensive | |||
|L5 Spin + L2 Balance | |||
|A speedy lob shot that spins fiercely, like a top. | |||
|- | |||
|[[Dragon Shot]] | |||
|[[File:DragonShot2.png|100px]] | |||
|Offensive | |||
|L5 Muscle + L2 Body | |||
|A powerful shot that pounds foes with a dragon-flame fueled ball. | |||
|- | |||
|[[Sonic Shot]] | |||
|[[File:SonicShot.png|100px]] | |||
|Offensive | |||
|L6 Spin + L4 ESP | |||
|A shot that stuns opponents with a dazzling melody. | |||
|- | |||
|[[Blizzard Shot]] | |||
|[[File:BlizzardShot.png|100px]] | |||
|Offensive | |||
|L6 Speed + L6 Response + L7 Spin | |||
|A shot that freezes opponents in a bitter-cold flurry. | |||
|- | |||
|[[Summoner Shot]] | |||
|[[File:Summoner Shot (Charging).png|100px]] | |||
|Offensive | |||
|L7 Muscle + L7 Response + L5 Balance | |||
|A shot that confuses opponents with a magic circle. | |||
|- | |||
|[[Specter Shot]] | |||
|[[File:MTPT Specter Shot.png|100px]] | |||
|Offensive | |||
|L8 Spin + L6 Balance + L6 ESP | |||
|A spooky shot that will leave foes paralyzed with fear. | |||
|- | |||
|[[Volcano Shot]] | |||
|[[File:VolcanoShot.png|100px]] | |||
|Offensive | |||
|L10 Jump + L10 Muscle + L10 Balance + L10 Body | |||
|The ultimate lob shot. Ride a pillar of fire! | |||
|- | |||
|[[Running Save]] | |||
|[[File:RunningSave.png|100px]] | |||
|Defensive | |||
|L1 Speed | |||
|A save that can save the ball from a short distance away. | |||
|- | |||
|[[Superswift Save]] | |||
|[[File:SuperswiftSave.png|100px]] | |||
|Defensive | |||
|L3 Speed | |||
|An enhanced Running Save that can reach distant balls. | |||
|- | |||
|[[Lunging Save]] | |||
|[[File:LungingSave.jpg|100px]] | |||
|Defensive | |||
|L1 Jump | |||
|A save that allows you to jump into the air to return high balls. | |||
|- | |||
|[[High-Jump Save]] | |||
|[[File:High-JumpSave.jpg|100px]] | |||
|Defensive | |||
|L3 Jump | |||
|A powerful Lunging Save that can reach balls higher up. | |||
|- | |||
|[[Quick Save]] | |||
|[[File:Quick Save.jpg|100px]] | |||
|Defensive | |||
|L1 Response | |||
|A save which increases response after returning the ball. | |||
|- | |||
|[[Quick-Step Save]] | |||
|[[File:Quick-StepSave.jpg|100px]] | |||
|Defensive | |||
|L3 Response | |||
|A powerful Quick Save that increases response even more. | |||
|- | |||
|[[Hand-Power Save]] | |||
|[[File:Hand-Power Save.jpg|100px]] | |||
|Defensive | |||
|L1 ESP | |||
|A save that brings in balls from far away using hand power. | |||
|- | |||
|[[Psychic Save]] | |||
|[[File:PyschicSave.jpg|100px]] | |||
|Defensive | |||
|L4 ESP | |||
|A powerful Hand Save that reaches even farther. | |||
|- | |||
|[[Typhoon Save]] | |||
|[[File:TyphoonSave2.jpg|100px]] | |||
|Defensive | |||
|L4 Jump + L2 Spin | |||
|A spinning save that creates a tornado to return the ball with. | |||
|- | |||
|[[Bubble Save]] | |||
|[[File:BubbleSave.jpg|100px]] | |||
|Defensive | |||
|L4 Spin + L3 Speed | |||
|Blow bubbles to bring the ball in close enough to save. | |||
|- | |||
|[[Illusory Save]] | |||
|[[File:IllusionarySave.jpg|100px]] | |||
|Defensive | |||
|L5 Speed + L4 Response | |||
|Save the ball with an illusion that spreads out either side. | |||
|- | |||
|[[Spider Save]] | |||
|[[File:SpiderSave.jpg|100px]] | |||
|Defensive | |||
|L5 Response + L4 Balance | |||
|Use a spiderweb to bring the ball in. | |||
|- | |||
|[[Falcon-Dive Save]] | |||
|[[File:FalconSave.jpg|100px]] | |||
|Defensive | |||
|L5 Response + L5 ESP | |||
|Move at high speed, and save the ball with your afterimage. | |||
|- | |||
|[[Shark-Bite Save]] | |||
|[[File:MTPT Shark-Bite Save.png|100px]] | |||
|Defensive | |||
|L8 Speed + L8 Response + L4 Body | |||
|Turn into a shark and bite down on the ball. | |||
|- | |||
|[[Shooting-Star Save]] | |||
|[[File:MTPT Shooting-Star Save.png|100px]] | |||
|Defensive | |||
|L10 Response + L10 Jump + L9 ESP | |||
| | |||
|- | |||
|[[Rainbow Save]] | |||
|[[File:Rainbow Save (Airbourne).png|100px]] | |||
|Defensive | |||
|L10 Speed + L10 ESP + L10 Spin + L8 Balance | |||
| | |||
|} | |||
{{BoxTop}} | |||
{{MPT}} | |||
{{MTPT}} | |||
[[Category:Mario Tennis: Power Tour Power Shots]] | |||
[[Category:Mario Power Tennis Power Shots]]</nowiki> | |||
==MLDT Stuff== | ==MLDT Stuff== | ||
Revision as of 08:46, August 24, 2016
Welcome to my workspace! Feel free to look and comment and stuff, but please no copying.
To-Do List: Power Shot Offensive Power Shot Defensive Power Shot Fix Power Shot articles and images. Grass Court and other tennis courts
An Offensive Power Shot can be used by any character in Mario Power Tennis and many characters in Mario Tennis: Power Tour. The Offensive Power Shot makes the ball more difficult to receive, and receiving it usually gives hindering effects. For example, when Bowser's Offensive Power Shot is hit by any receivers, the receiver is pushed back by the massive force of the flaming ball. Other Offensive Power Shots can also make the player move slow for a short amount of time. These added effects are negated if receivers use their Defensive Power Shot.
List of Power Shots
Mario Power Tennis
Iron Hammer • Squeaky Mallet • Super Peach Spin • Wonder Flower • Thunder Cast Shot • Whirluigi • Fire Breath • Magic Paint • Barrel Cannon Blast • Acrobatic Banana • Rainbow Flutter • Water Bomb • Boo Blast • Lightning Spear • Tornado Twist • Energy Ball • Anger Management • Sludge Racket
Mario Tennis: Power Tour
[[Category:Mario Power Tennis Special Moves|*]]
{{articleabout|the Power Shots that appear in the ''Mario Tennis'' series|the Power Shots that appear in ''Mario Superstar Baseball]]''|[[Power Shot (Mario Superstar Baseball|here]]}} '''Power Shots''' are special moves that appear in two games in the [[Mario Tennis (series)|''Mario Tennis'' series]], being ''[[Mario Power Tennis]]'' and ''[[Mario Tennis: Power Tour]]''. There are two different types of Power Shots; [[Offensive Power Shot]]s and [[Defesive Power Shot]]s [[File:Thunder Cast Shot.jpg|thumb|203px|right|''[[Mario Power Tennis]]'''s '''Power Shots''', the [[Thunder Cast Shot]].]] In ''Mario Power Tennis'', there are two types of Power Shots; [[Offensive Power Shot]]s and [[Defensive Power Shot]]s. All players have their own distinctive power shots. The offensive power shot is used when the ball is near the player. These come with special effects to confuse the opponent(s). Defensive shots are used when the ball is out of the player's reach. These shots are very helpful by returning shots that couldn't normally be saved. In fact, Defensive Power Shots can also negate the added effects from Offensive Power Shots. Power Shots are also a prominent feature in ''[[Mario Tennis: Power Tour]]'', where part of the game's story revolves around the player and other characters in the game's RPG mode developing Power Shots. Power Shots can be earned by completing minigames at the [[Tennis Academy Training Center]], and the player can then assign any offensive or defensive Power Shot available to them, to [[Ace]] or to [[Clay]]. Additionally, there is a Power Shot under the name [[Power Shot (Offensive Power Shot)|Power Shot]] in the game. ==Power Shots== There are 44 [[Power Shot]]s in ''Mario Tennis: Power Tour'', with half of them being [[Offensive Power Shot|Offensive]] and the other half being [[Defensive Power Shot|Defensive]], although 12 of these are exclusive to the Mario characters. These first become first available after reaching Senior level, however only Varsity and Island Open opponents actually use them. To unlock a Power Shot, certain levels need to be reached in the PS Minigames. The Power Shots that Ace and Clay can use and the requirements for each are listed below. To use a Power Shot in the game, the Power Shot meter must be fully charged. When it is, a yellow-orange ring will appear around the players character. Hold {{button|gba|R}} and press {{button|gba|A}} for an Offensive Power Shot, and hold {{button|gba|R}} and press {{button|gba|B}} for a Defensive Power Shot. {| width=750px border=1 style="text-align:center; border-collapse:collapse;background:white; margin: 0 auto;" |- bgcolor=#dedede !Name !Image !Type !Unlock Conditions !Description |- |[[Power Shot (Offensive Power Shot)|Power Shot]] |[[File:PowerShot.PNG|100px]] |Offensive |L1 Muscle |A powerful shot that sends opponents flying. |- |[[High-Power Shot]] |[[File:High-Power Shot.PNG|100px]] |Offensive |L3 Muscle |An intense Power Shot with a little added oomph. |- |[[Curve Shot]] |[[File:CurveShot.PNG|100px]] |Offensive |L1 Spin |A curving shot that sends opponents reeling. |- |[[Slider Shot]] |[[File:Slider Shot.PNG|100px]] |Offensive |L3 Spin |A powerful Curve Shot with an even tighter curve. |- |[[Control Shot]] |[[File:Control Shot.PNG|100px]] |Offensive |L1 Balance |A commanding shot that sends the ball right into the corner. |- |[[Flashflop Shot]] |[[File:FlashflopShot.png|100px]] |Offensive |L3 Balance |A drop shot that uses a bright light to blind opponents. |- |[[Tackle Shot]] |[[File:TackleShot.png|100px]] |Offensive |L1 Body |An aggresive shot that tackles the ball and sends foes flying |- |[[Stunner Shot]] |[[File:StunnerShot.png|100px]] |Offensive |L3 Body |A shot that stuns foes with a ball masked as a giant fist. |- |[[Flying Shot]] |[[File:Flying Shot.png|100px]] |Offensive |L4 Muscle + L2 Jump |A powerful shot that blows foes away with a flame-cloaked ball. |- |[[Gyro Shot]] |[[File:GyroShot.png|100px]] |Offensive |L5 Spin + L2 Balance |A speedy lob shot that spins fiercely, like a top. |- |[[Dragon Shot]] |[[File:DragonShot2.png|100px]] |Offensive |L5 Muscle + L2 Body |A powerful shot that pounds foes with a dragon-flame fueled ball. |- |[[Sonic Shot]] |[[File:SonicShot.png|100px]] |Offensive |L6 Spin + L4 ESP |A shot that stuns opponents with a dazzling melody. |- |[[Blizzard Shot]] |[[File:BlizzardShot.png|100px]] |Offensive |L6 Speed + L6 Response + L7 Spin |A shot that freezes opponents in a bitter-cold flurry. |- |[[Summoner Shot]] |[[File:Summoner Shot (Charging).png|100px]] |Offensive |L7 Muscle + L7 Response + L5 Balance |A shot that confuses opponents with a magic circle. |- |[[Specter Shot]] |[[File:MTPT Specter Shot.png|100px]] |Offensive |L8 Spin + L6 Balance + L6 ESP |A spooky shot that will leave foes paralyzed with fear. |- |[[Volcano Shot]] |[[File:VolcanoShot.png|100px]] |Offensive |L10 Jump + L10 Muscle + L10 Balance + L10 Body |The ultimate lob shot. Ride a pillar of fire! |- |[[Running Save]] |[[File:RunningSave.png|100px]] |Defensive |L1 Speed |A save that can save the ball from a short distance away. |- |[[Superswift Save]] |[[File:SuperswiftSave.png|100px]] |Defensive |L3 Speed |An enhanced Running Save that can reach distant balls. |- |[[Lunging Save]] |[[File:LungingSave.jpg|100px]] |Defensive |L1 Jump |A save that allows you to jump into the air to return high balls. |- |[[High-Jump Save]] |[[File:High-JumpSave.jpg|100px]] |Defensive |L3 Jump |A powerful Lunging Save that can reach balls higher up. |- |[[Quick Save]] |[[File:Quick Save.jpg|100px]] |Defensive |L1 Response |A save which increases response after returning the ball. |- |[[Quick-Step Save]] |[[File:Quick-StepSave.jpg|100px]] |Defensive |L3 Response |A powerful Quick Save that increases response even more. |- |[[Hand-Power Save]] |[[File:Hand-Power Save.jpg|100px]] |Defensive |L1 ESP |A save that brings in balls from far away using hand power. |- |[[Psychic Save]] |[[File:PyschicSave.jpg|100px]] |Defensive |L4 ESP |A powerful Hand Save that reaches even farther. |- |[[Typhoon Save]] |[[File:TyphoonSave2.jpg|100px]] |Defensive |L4 Jump + L2 Spin |A spinning save that creates a tornado to return the ball with. |- |[[Bubble Save]] |[[File:BubbleSave.jpg|100px]] |Defensive |L4 Spin + L3 Speed |Blow bubbles to bring the ball in close enough to save. |- |[[Illusory Save]] |[[File:IllusionarySave.jpg|100px]] |Defensive |L5 Speed + L4 Response |Save the ball with an illusion that spreads out either side. |- |[[Spider Save]] |[[File:SpiderSave.jpg|100px]] |Defensive |L5 Response + L4 Balance |Use a spiderweb to bring the ball in. |- |[[Falcon-Dive Save]] |[[File:FalconSave.jpg|100px]] |Defensive |L5 Response + L5 ESP |Move at high speed, and save the ball with your afterimage. |- |[[Shark-Bite Save]] |[[File:MTPT Shark-Bite Save.png|100px]] |Defensive |L8 Speed + L8 Response + L4 Body |Turn into a shark and bite down on the ball. |- |[[Shooting-Star Save]] |[[File:MTPT Shooting-Star Save.png|100px]] |Defensive |L10 Response + L10 Jump + L9 ESP | |- |[[Rainbow Save]] |[[File:Rainbow Save (Airbourne).png|100px]] |Defensive |L10 Speed + L10 ESP + L10 Spin + L8 Balance | |} {{BoxTop}} {{MPT}} {{MTPT}} [[Category:Mario Tennis: Power Tour Power Shots]] [[Category:Mario Power Tennis Power Shots]]
MLDT Stuff
Characters
Playable
- Mario & Luigi: Bowser's Inside Story Luigi Stand.png
Supporting
- Broque Monsieur BiS.png
- *Three members of Bowser's army:
- Princess Lipid.gif
- Doctor Toadley Sprite.PNG
Antagonists
Characters
Playable
Starlow (Dream World)
Antagonists
- Private Goomp.PNG
- Corporal Paraplonk.PNG
Others
- BedsmithSprite.png
- Dreambunny.png
- ZeekeeperSprite.png
- Shelltops.gif
- BeanishMLDT.png
- HooskiMLDT.png
- Lil massif.png
- DreamStoneSpirit.png
- Seadring.png
Playable
- Mario
- Luigi
- Dreamy Luigi
- Starlow (Dream World)
Antagonists
Others
- Princess Peach
- Toadsworth
- Toads
- Yoshis
- Starlow
- Pi'illos
- Dreambunny
- Dr. Snoozemore
- Brocks
- Zeekeeper
- Shelltops
- Beanish
- Hooskis
- Dream Stone Soul
- Seadrings
- Kylie Koopa
- Popple
- Wiggler
- Pi'illoper
- Nommons
Enemies
Layer-Cake Desert (golf course) (current project)
Template:Golf Course Layer Cake Desert is a golf course that appears in the Nintendo 3DS game Mario Golf: World Tour. It is based upon 'Shy Guy Desert from Mario Golf, with the same course layout, with modern changes in the music and design, looking like Layer-Cake Desert from New Super Mario Bros. U. It is similar to Shifting Sands and Dunes as it is a desert-based golf course, with sand being a main obstacle. It must be bought with actual money in the Flower Pack, which also comes with Sparkling Waters and Nabbit. The course is an eighteen hole Par 72 course.
Holes
| Hole | Image | Par | Front Tee | Back Tee | Tournament Tee | Description |
|---|---|---|---|---|---|---|
| Hole 1 | 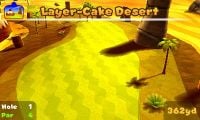
|
Par 4 | 362 yards | 386 yards | yards | A hole with some trees in the Fairway, which is split into two sections by the rough. It features one bunker near the green. |
| Hole 2 | 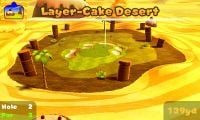
|
Par 3 | 139 yards | 170yards | yards | A short hole with many bunkers surrounding it. |
| Hole 3 | 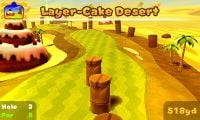
|
Par 5 | 518 yards | yards | yards | A long hole with sections of grassland split up by rough and some pillars that serve as obstacles. |
| Hole 4 | 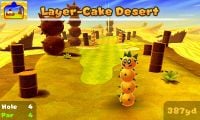
|
Par 4 | 387 yards | yards | yards | A hole with many Pokeys, Pokey Statues and bunkers. It has a large crater in the Fairway that heavily curves. |
| Hole 5 | 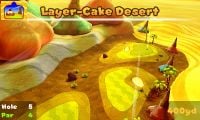
|
Par 4 | 400 yards | yards | yards | A hole that's Fairway is divided into four sections, with a curvature in it due to over spilling quicksand which causes an O.B.. |
| Hole 6 | 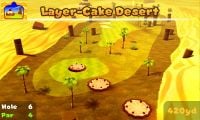
|
Par 4 | 420 yards | yards | yards | A hole with many bunkers around the green and on the left side of the Fairway. The right side of the fairway slopes toward the right side into the Rough. |
| Hole 7 | 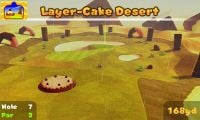
|
Par 3 | 168 yards | yards | yards | A short hole with a huge bunker to the left side of the green. |
| Hole 8 | 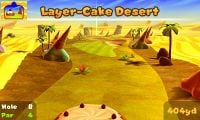
|
Par 4 | 404 yards | yards | yards | A hole with many bunkers in the left and right sides of the Fairway. |
| Hole 9 | 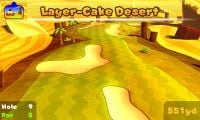
|
Par 5 | 551 yards | yards | yards | |
| Hole 10 | File:LayerCakeDesert10.jpg | Par | yards | yards | yards | |
| Hole 11 | File:LayerCakeDesert11.jpg | Par | yards | yards | yards | |
| Hole 12 | File:Layer-CakeDesert12.jpg | Par | yards | yards | yards | |
| Hole 13 | File:LayerCakeDesert13.jpg | Par | yards | yards | yards | A hole |
| Hole 14 | File:LayerCakeDesert14.jpg | Par | yards | yards | yards | A hole |
| Hole 15 | File:Layer-CakeDesert15.jpg | Par | yards | yards | yards | |
| Hole 16 | File:Layer-CakeDeseert16.jpg | Par | yards | yards | yards | |
| Hole 17 | File:Layer-CakeDesert17.jpg | Par | yards | yards | yards | |
| Hole 18 | File:Layer-CakeDeseert.jpg | Par | yards | yards | yards |
{{BoxTop}}
{{MGWT}}
[[Category:Golf Courses]]
[[Category:Bodies of Water]]
[[Category:Mario Golf: World Tour]]
Tiny-Tots
The Windy Valley Special Hole is an area in the Mario Golf for the Game Boy Color. . The sign outside the hole reads: "Your challenge: Hit the target!".
{{MGGBC}}
[[Category:Places]]
[[Category:Sport Courses]]
[[Category:Mario Golf GBC]]
Bubbles
| Character/Place | Image | Type | Unlock Criteria |
|---|---|---|---|
| Mario | Voice | Avaliable Initially | |
| Luigi | Voice | Avaliable Initially | |
| Peach | Voice | Avaliable Initially | |
| Daisy | Voice | Avaliable Initially |
Characters
| white | Template:Color-link-piped | white | white | ||||
|---|---|---|---|---|---|---|---|
| File:MGMario2.PNG | File:MGPeach.PNG | 
|
File:AzaleoRetro.PNG | ||||
| File:MarioATStats.jpg | |||||||
Characters
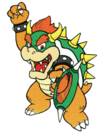
There are a total of 29 playable characters in Mario Tennis, with nine of them being Mario characters. All characters have different statistics, making each of them unique. They are classified into different skill types, which represent their primary statistics. These include Speed, Power, All-around, Technical and Tricky. Most characters need to be unlocked by beating them in the Mario Tour. Some Mario characters need to be unlocked by a N64 Transfer Pak. Below is a full list of all of the characters in the game.
Mario Characters
| Character | Skill Type | Unlock Condition |
|---|---|---|
 red |
All-Around | Beat in Singles |
 Template:Color-link-piped |
Technique | Beat in Doubles |
 green |
All-Around | Initially Playable |
 brown |
Power | Initially Playable |
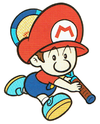 red |
Speed | Initially Playable |
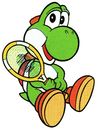 lightgreen |
Speed | N64 Transfer Pak |
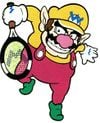 magenta |
Power | N64 Transfer Pak |
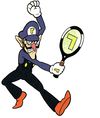 purple |
Technique | N64 Transfer Pak |
 darkgreen |
Power | N64 Transfer Pak |
Mario Tour Characters
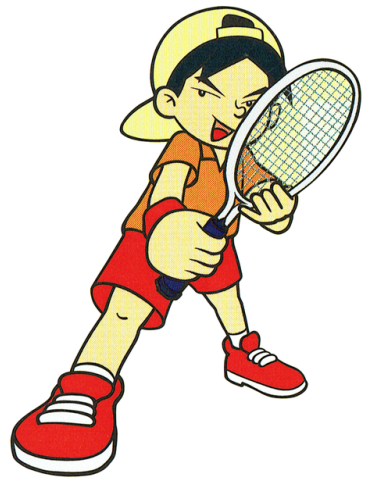
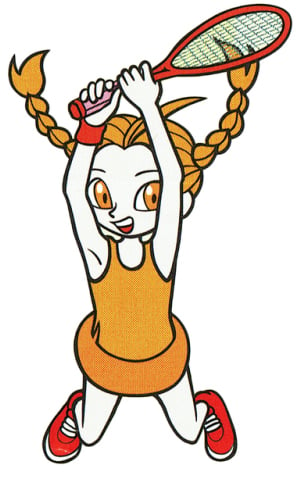
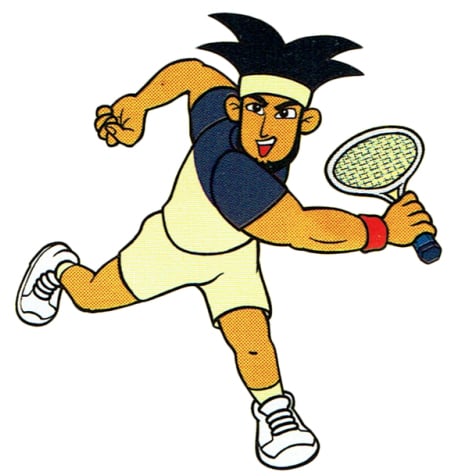
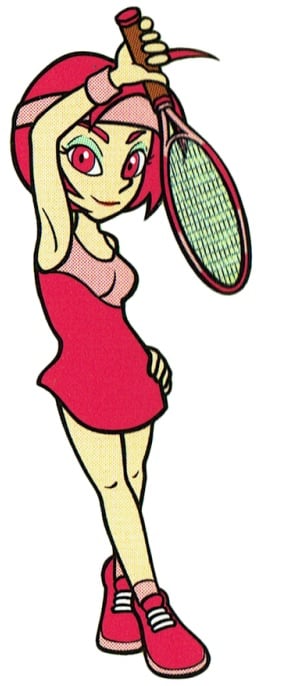
These characters must be created before they are usable.
| red | orange | darkblue | |||||
|---|---|---|---|---|---|---|---|
|
|
|
| ||||
| Bonuses: | +1 Stroke +2 Dash | Bonuses: | +1 Placement +1 Reaction | Bonuses: | +1 Top +1 Angle +2 Serve +1 Speed | Bonuses: | +1 Slice +2 Angle +1 Serve +1 Dash |
| Story Role | Player | Story Role | Player | Story Role | Player's Partner | Story Role | Player's Partner |
Unlockable Mario Tour Characters
| Character | Tennis Affliction | Skill Type | Unlock Condition |
|---|---|---|---|
| File:Allie.PNG Allie |
Royal Tennis Academy | Speed | Default |
| File:Joy.PNG Joy |
Royal Tennis Academy | Technique | Default |
 Brian |
Royal Tennis Academy | All-Around | Default |
| File:Pam.PNG Pam |
Royal Tennis Academy | All-Around | Beat in Junior Class |
| File:Bob.PNG Bob |
Royal Tennis Academy | Power | Beat in Junior Class |
| File:Beth.PNG Beth |
Royal Tennis Academy | Speed | Beat in Junior Class |
| File:Fay.PNG Fay |
Royal Tennis Academy | Power | Beat in Senior Class |
| File:Curt.PNG Curt |
Royal Tennis Academy | Tricky | Beat in Senior Class |
 Sammi |
Union | Technique | Beat in first round of Island Open |
 Spike |
Empire | All-Around | Defeat in second round the Island Open |
- Mark (All-Around) (Defeat him in Mario Tour by Doubles in Varsity Squad)
- Sammi (Techinique) (Defeat her in Mario Tour by Singles or Doubles in Island Open)
- Sean (All-Around) (Defeat him in Mario Tour by Doubles in Island Open)
- Spike (All-Around) (Defeat him in Mario Tour by Singles or Doubles in Island Open)
- Elden (Speed) (Defeat him in Mario Tour by Doubles in Island Open)
- Emily (Speed) (Defeat her in Mario Tour by Singles in Island Open)
- A. Coz (Tricky) (Defeat him in Mario Tour by Singles or Doubles in Island Open)
- B. Coz (Power) (Defeat him in Mario Tour by Doubles in Island Open)
Non-Playable Characters
Mario Characters
N64 Status Icon Cameos
Notable Members
Cheep Cheep Falls
| Hole | Par | Yardage | Description | |||
|---|---|---|---|---|---|---|
| Hole 1 | Par 4 | 394 Yards | This hole is situated near a large waterfall. A few bunkers are placed around the edges of the fairway, and the course is rather bumpy. However, there are no other hazards in the path to the green. | |||
| Hole 2 | 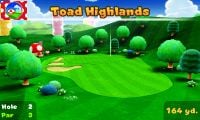
|
Par 3 | 164 Yards | 177 Yards | 194 Yards | A short hole with some bunkers. Also features a Toad House. |
| Hole 3 | 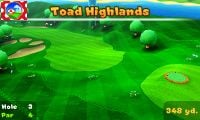
|
Par 4 | 348 Yards | 378 Yards | 418 Yards | A hole that bends slightly to the left and contains some bunkers. |
| Hole 4 | 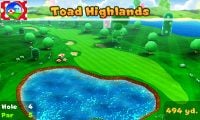
|
Par 5 | 494 Yards | 523 Yards | 552 Yards | A long hole holding a lake and some bunkers. It ends with the green on a small slope. |
| Hole 5 | 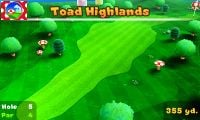
|
Par 4 | 355 Yards | 380 Yards | 407 Yards | A simple hole that bends slightly to the right. Contains a Toad House near the green. |
| Hole 6 | 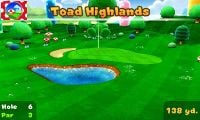
|
Par 3 | 138 Yards | 168 Yards | 198 Yards | A short hole with a water hazard and bunker near the green. |
| Hole 7 | 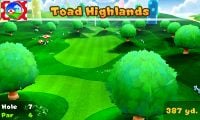
|
Par 4 | 387 Yards | 412 Yards | 437 Yards | A hole that contains several trees on hills with bunkers scattered around them. |
| Hole 8 | 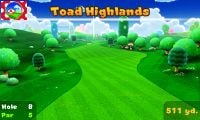
|
Par 5 | 511 Yards | 541 Yards | 572 Yards | A long, straightforward hole with a rise halfway through and several bunks near the green. |
| Hole 9 | 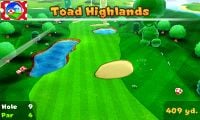
|
Par 4 | 409 Yards | 435 Yards | 461 Yards | A hole scattered with bunkers and water hazards. |
| Hole 10 | 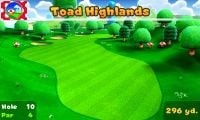
|
Par 4 | 296 Yards | 322 Yards | 346 Yards | A hole with many bunkers that curves to the right. Another Toad-shaped hedge is present and a Toad House is hidden behind a tree near the green. |
| Hole 11 | 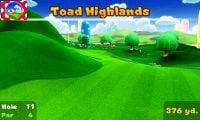
|
Par 4 | 376 Yards | 401 Yards | 426 Yards | A hole that curves to the right around a big hill with some bunkers beside the green. |
| Hole 12 | 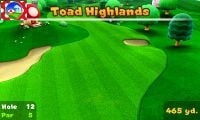
|
Par 5 | 465 Yards | 495 Yards | 535 Yards | A course that bends left around a Toad House and subsequently right towards the green. This hole contains many bunkers. |
| Hole 13 | 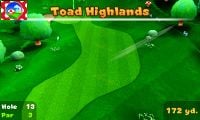
|
Par 3 | 172 Yards | 182 Yards | 193 Yards | A short hole that curves around a tree to the left. A bunker is present slightly beyond the green. |
| Hole 14 | 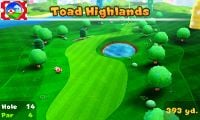
|
Par 4 | 393 Yards | 418 Yards | 445 Yards | A hole with several bunkers scattered throughout it that bends around a water hazard to the right. |
| Hole 15 | 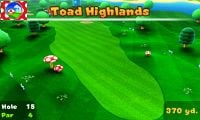
|
Par 5 | 370 Yards | 394 Yards | 418 Yards | A simple hole that bends to the left around a tree with some bunkers and a Toad House. |
| Hole 16 | 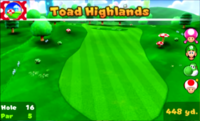
|
Par 5 | 448 Yards | 473 Yards | 498 Yards | A long hole with a gorge in between the green and the tee box area. Several trees sit on top of the two peaks with rough patches nearby. |
| Hole 17 | 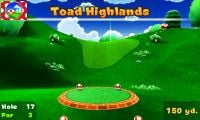
|
Par 3 | 150 Yards | 160 Yards | 170 Yards | A short hole with a small hill in front of the tee box area. There are two bunkers adjacent to the green's front and back sides. |
| Hole 18 | 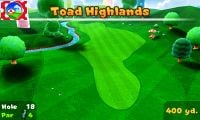
|
Par 4 | 400 Yards | 430 Yards | 460 Yards | A diagonally straight hole with a stream running along the western side of the fairway. Another Toad-shaped hedge is present on the other side of the stream. |
Holes
- Hole 2 (Par 4, 328 yards): Just like the previous hole, this course is mostly straight but a little bumpy. A small river runs to the right of the rough, but it is unlikely that players will hit it there, as it is far from the fairway. A few bunkers are located around the green as well.
- Hole 3 (Par 3, 187 yards): This small course is home to a long river that stretches across the area. The green is on the other end of this river, and a few bunkers surround it. The fairway is also surrounded by pine trees.
- Hole 4 (Par 5, 528 yards): Being a par 5 course, this course is longer than other holes in Cheep Cheep Falls. The fairway is surrounded by thinks forests of pine trees, and a large lake is placed to the left of it as well farther into the course. Occasionally, bunkers can be seen on the edges of the fairway, although only one of these obstacles are around the green. Some pine trees are also located in the middle of the fairway.
- Hole 5 (Par 4, 402 yards): The beginning of this course it placed between a large lake and several pine trees. Three bunker can be found on the edge of the fairway on the first curve, along with a few more of these hazards around the green.
- Hole 6 (Par 4, 359 yards): The fairway in this course is cluttered with several round bunkers and pine trees. The fairway curves to the right around a group of trees at the center point of the course, leading to the green.
- Hole 7 (Par 3, 146 yards): This course is rather basic; It features a small lake of its right side and a forest of pine trees on the left. Two bunkers are also around the right side of the mostly-flat green.
- Hole 8 (Par 4, 351 yards): This rugged course is outline by three bunkers on its right side. A tree is also placed near the beginning of the stage on the fairway. Some more bunkers can be seen around the bottom portion of the green.
- Hole 9 (Par 5, 554 yards): This large course features a wide fairway with a hill on it. While a few bunkers surround the edges of the fairway, a river cuts through the center part of the stage. The green, which is outlined by more bunkers, is slightly tilted to make the course more challenging.
- Hole 10 (Par 4, 405 yards): The beginning of this course is set around a series of pine trees. A small lake is to the left edge of the fairway, and several round bunkers are placed on a hill on the eastern side of the path. More bunkers are located around the rather flat green as well.
- Hole 11 (Par 3, 175 yards): This course is quite small, and player can easily hit the ball towards the green in one shot. The green is located on a large area of land between two rivers. The rugged green is also surrounded by several bunkers.
- Hole 12 (Par 4, 370 yards): A narrow river cuts through the beginning of this course, coming from a large lake found to the right of the area. The fairway here is wide, but a little bumpy, however, the green is mostly flat.
- Hole 13 (Par 5, 514 yards): This course is full of hills, along with small, round lakes that are all occupied by a single island with a lone tree on it. Two large bunkers are placed around the green, and a few others are on the outside edges of the rugged fairway.
- Hole 14 (Par 4, 377 yards): This course is a little bumpy, but mostly straight. A body of water is located on the eastern side of the fairway, while a forest of trees is on the other side. The green is surrounded by several bunkers, and a large tree stands in front to it.
- Hole 15 (Par 3, 159 yards): A large lake cuts through the center of this course. On the other side of the lake is a giant area of land with the green present on it. The flat green is surrounded by a few bunkers to faze players.
- Hole 16 (Par 4, 386 yards): As with the previous hole, a body of water cuts through the center of this course. Bunkers are also located in the middle of the fairway, and a few trees can also get in the player's way. The green is almost completely flat, but a large bunker is placed to the left of it.
- Hole 17 (Par 5, 502 yards): This course features a few curves. A large forest of pine trees surrounds the fairway, with is cluttered with a few large bunkers. The course also features a large hill and a rather rugged green surrounded by bunkers.
- Hole 18 (Par 4, 381 yards): This hole is set near a large group of waterfalls. A river runs through the center of the course; To the left of the river is the green, which is surrounded by bunkers, and the side of the right of the river features some hills, trees, and additional bunkers. A small bridge can be seen stretching across the river.
Character Guideline Inclusion for New Articles Policy
Seeing as we've had a numerous amount of proposals concerning splitting or merging pages, not just now but over the lifelong course of the wiki, I think that it's time that we should make some small guidelines to what pages should and shouldn't exist regarding characters. This would go in the New Articles Policy. The following should enter the page, however without the examples I have put in, and likely better grammar and wording. The examples are there for your understanding.
Characters
If the character is unintended to be distinguished as their real character, for a long period of time, than they deserve an article. (Shadow Mario, Mr. Pipe) If they are the same character simply in a disguise and revealed early in the game, then it is merged, (The Goodwill Ambassador) Unless it involves characterstic changes, such as a different personality. (Mr. L, Rookie) If a character appears as a separate form that isn't a mere power-up and displays a different personality, they deserve an article. (Metal Mario (character), Dr. Mario) If the character comes from a different point in time to the other character it's based off, it gets an article. (Baby Mario, Toadsworth the younger) Different versions of characters in RPG games (such as "X" or "R" versions) receive their own articles. (Shy Guy Airtub R)Also, be aware of page traffic. If people are going to look up something, a redirect will not help, and just because they have a spot in a roster doesn't particularly mean that they deserve an article.
Template Thing
Seaside Course
Challenges
Forest Course | |||||
|---|---|---|---|---|---|
| Name | In-game Description | Star Coin Challenge | Moon Coin Challenge | ||
| Star Coin Collector 1 | Collect Star Coins while achieving par. | Hole: 6 | Par: 5 | Hole: 12 | Par: 5 |
| Star Coin Collector 2 | Collect Star Coins while achieving par. | Hole: 10 | Par: 4 | Hole: 15 | Par: 4 |
| Ring Master 1 | Shoot through all the rings and complete holes in par. | Hole: 9 | Par: 3 | Hole: 8 | Par: 4 |
| Ring Master 2 | Shoot through all the rings and complete holes in par. | Hole: 13 | Par: 4 | Hole: 18 | Par: 4 |
| Ring Master 3 | Shoot through all the rings and complete holes in par. | Hole: 5 | Par: 4 | Hole: 16 | Par: 5 |
| 100 Coins | Try to collect 100 coins over three holes. | Holes: 4/7/17 | Coins: 100 | Holes: 1/12/14 | Coins: 100 |
| Score Attack | Complete nine holes with an overall score of - 3 or better. | Holes: 1~9 | Total: - 3 | Holes: 10~18 | Total: - 8 |
| Character Match | Challenge Daisy to a round of match play. | Holes: 1~9 | Opponent: Daisy | Holes: 1~9 | Opponent: Star Daisy |
| Time Attack | Complete three holes in 130 seconds. | Holes: 3/11/16 | Time: 02:10.00 | Holes: 2/6/17 | Time: 02:00.00 |
| Point Challenge | Play three holes using Club Slots and earn 6 points. | Holes: 6/14/18 | Total: 6 points | Holes: 4/9/13 | Total: 9 points |
| Name | In-game Description | Star Coin Challenge | Moon Coin Challenge | ||
| Star Coin Collector 1 | Collect Star Coins while achieving par. | Hole: 1 | Par: 4 | Hole: 18 | Par: 3 |
| Star Coin Collector 2 | Collect Star Coins while achieving par. | Hole: 9 | Par: 5 | Hole: 13 | Par: 4 |
| Ring Master 1 | Shoot through all the rings and complete holes in par. | Hole: 15 | Par: 4 | Hole: 8 | Par: 4 |
| Ring Master 2 | Shoot through all the rings and complete holes in par. | Hole: 14 | Par: 5 | Hole: 16 | Par: 4 |
| 100 Coins | Try to collect 100 coins over three holes. | Holes: 3/12/17 | Coins: 100 | Holes: 5/7/10 | Coins: 100 |
| Score Attack | Complete nine holes with an overall score of - 5 or better. | Holes: 1~9 | Total: - 5 | Holes: 10~18 | Total: - 7 |
| Character Match 1 | Challenge Wario to a round of match play. | Holes: 1~9 | Opponent: Wario | Holes: 1~9 | Opponent: Star Wario |
| Character Match 2 | Challenge Waluigi to a round of match play. | Holes: 10~18 | Opponent: Waluigi | Holes: 10~18 | Opponent: Star Waluigi |
| Time Attack | Complete three holes in 120 seconds. | Holes: 2/5/16 | Time: 02:00.00 | Holes: 4/12/14 | Time: 02:00.00 |
| Point Challenge | Play three holes using Club Slots and earn 6 points. | Holes: 11/14/18 | Total: 6 points | Holes: 2/6/17 | Total: 8 points |
| Mountain Course | |||||
| Name | In-game Description | Star Coin Challenge | Moon Coin Challenge | ||
| Star Coin Collector 1 | Collect Star Coins while achieving par. | Hole: 13 | Par: 4 | Hole: 2 | Par: 4 |
| Star Coin Collector 2 | Collect Star Coins while achieving par. | Hole: 17 | Par: 4 | Hole: 18 | Par: 5 |
| Ring Master 1 | Shoot through all the rings and complete holes in par. | Hole: 9 | Par: 4 | Hole: 5 | Par: 4 |
| Ring Master 2 | Shoot through all the rings and complete holes in par. | Hole: 14 | Par: 5 | Hole: 12 | Par: 4 |
| 100 Coins | Try to collect 100 coins over three holes. | Holes: 2/8/18 | Coins: 100 | Holes: 7/10/16 | Coins: 100 |
| Score Attack | Complete nine holes with an overall score of - 6 or better. | Holes: 1~9 | Total: - 6 | Holes: 10~18 | Total: - 7 |
| Character Match 1 | Challenge Boo to a round of match play. | Holes: 1~9 | Opponent: Boo | Holes: 1~9 | Opponent: Star Boo |
| Character Match 2 | Challenge Bowser Jr. to a round of match play. | Holes: 10~18 | Opponent: Bowser Jr. | Holes: 10~18 | Opponent: Star Bowser Jr. |
| Time Attack | Complete three holes in 120 seconds. | Holes: 7/12/16 | Time: 02:00.00 | Holes: 6/15/18 | Time: 02:00.00 |
| Point Challenge | Play three holes using Club Slots and earn 7 points. | Holes: 1/4/11 | Total: 7 points | Holes: 3/14/17 | Total: 8 points |
| Sky Island | |||||
| Name | In-game Description | Star Coin Challenge | Moon Coin Challenge | ||
| Star Coin Collector 1 | Collect Star Coins while achieving par. | Hole: 10 | Par: 3 | Hole: 2 | Par: 3 |
| Star Coin Collector 2 | Collect Star Coins while achieving par. | Hole: 7 | Par: 3 | Hole: 18 | Par: 3 |
| Ring Master 1 | Shoot through all the rings and complete holes in par. | Hole: 3 | Par: 3 | Hole: 12 | Par: 3 |
| Ring Master 2 | Shoot through all the rings and complete holes in par. | Hole: 8 | Par: 3 | Hole: 11 | Par: 3 |
| Ring Master 3 | Shoot through all the rings and complete holes in par. | Hole: 5 | Par: 3 | Hole: 13 | Par: 3 |
| One-On, One-Putt Challenge | Complete nine holes with two strokes each: one shot and one putt. | Holes: 1~9 | One-On, One-Putt | Holes: 10~18 | One-On, One-Putt |
| Score Attack | Complete nine holes with an overall score of - 9 or better. | Holes: 1~9 | Total: - 9 | Holes: 10~18 | Total: - 9 |
| Character Match | Challenge Diddy Kong to a round of match play. | Holes: 1~9 | Opponent: Diddy Kong | Holes: 1~9 | Opponent: Star Diddy Kong |
| Time Attack | Complete three holes in 60 seconds. | Holes: 1/4/14 | Time: 01:00.00 | Holes: 9/6/15 | Time: 01:10.00 |
| Point Challenge | Play three holes using Club Slots and earn 9 points. | Holes: 2/12/11 | Total: 9 points | Holes: 7/16/17 | Total: 9 points |
| Peach Gardens | |||||
| Name | In-game Description | Star Coin Challenge | Moon Coin Challenge | ||
| Star Coin Collector 1 | Collect Star Coins while achieving par. | Hole: 1 | Par: 4 | Hole: 6 | Par: 4 |
| Star Coin Collector 2 | Collect Star Coins while achieving par. | Hole: 9 | Par: 5 | Hole: 2 | Par: 5 |
| Ring Master 1 | Shoot through all the rings and complete holes in par. | Hole: 8 | Par: 4 | Hole: 3 | Par: 4 |
| Ring Master 2 | Shoot through all the rings and complete holes in par. | Hole: 2 | Par: 5 | Hole: 4 | Par: 3 |
| Ring Master 3 | Shoot through all the rings and complete holes in par. | Hole: 7 | Par: 3 | Hole: 5 | Par: 4 |
| 100 Coins | Try to collect 100 coins over three holes. | Holes: 2/6/4 | Coins: 100 | Holes: 1/7/9 | Coins: 100 |
| Score Attack | Complete nine holes with an overall score of - 1 or better. | Holes: 1~9 | Total: - 1 | Holes: 1~9 | Total: - 8 |
| Character Match | Challenge Peach to a round of match play. | Holes: 1~9 | Opponent: Peach | Holes: 1~9 | Opponent: Star Peach |
| Time Attack | Complete three holes in 150 seconds. | Holes: 7/5/9 | Time: 02:30.00 | Holes: 2/4/8 | Time: 02:00.00 |
| Point Challenge | Play three holes using Club Slots and earn 6 points. | Holes: 2~4 | Total: 6 points | Holes: 1/7/9 | Total: 9 points |
| Yoshi Lake | |||||
| Name | In-game Description | Star Coin Challenge | Moon Coin Challenge | ||
| Star Coin Collector 1 | Collect Star Coins while achieving par. | Hole: 8 | Par: 4 | Hole: 9 | Par: 5 |
| Star Coin Collector 2 | Collect Star Coins while achieving par. | Hole: 1 | Par: 5 | Hole: 5 | Par: 4 |
| Ring Master 1 | Shoot through all the rings and complete holes in par. | Hole: 5 | Par: 4 | Hole: 6 | Par: 3 |
| Ring Master 2 | Shoot through all the rings and complete holes in par. | Hole: 4 | Par: 4 | Hole: 3 | Par: 4 |
| Ring Master 3 | Shoot through all the rings and complete holes in par. | Hole: 9 | Par: 5 | Hole: 2 | Par: 3 |
| 100 Coins | Try to collect 100 coins over three holes. | Holes: 2/3/9 | Coins: 100 | Holes: 1/6/7 | Coins: 100 |
| Score Attack | Complete nine holes with an overall score of - 3 or better. | Holes: 1~9 | Total: - 3 | Holes: 1~9 | Total: - 7 |
| Character Match | Challenge Yoshi to a round of match play. | Holes: 1~9 | Opponent: Yoshi | Holes: 1~9 | Opponent: Star Yoshi |
| Time Attack | Complete three holes in 140 seconds. | Holes: 1/6/7 | Time: 02:20.00 | Holes: 2/8/9 | Time: 02:10.00 |
| Point Challenge | Play three holes using Club Slots and earn 6 points. | Holes: 1/4/6 | Total: 6 points | Holes: 2/5/9 | Total: 8 points |
| Wiggler Park | |||||
| Name | In-game Description | Star Coin Challenge | Moon Coin Challenge | ||
| Star Coin Collector 1 | Collect Star Coins while achieving par. | Hole: 1 | Par: 4 | Hole: 2 | Par: 4 |
| Star Coin Collector 2 | Collect Star Coins while achieving par. | Hole: 9 | Par: 3 | Hole: 8 | Par: 5 |
| Ring Master 1 | Shoot through all the rings and complete holes in par. | Hole: 7 | Par: 4 | Hole: 5 | Par: 3 |
| Ring Master 2 | Shoot through all the rings and complete holes in par. | Hole: 8 | Par: 5 | Hole: 6 | Par: 4 |
| Ring Master 3 | Shoot through all the rings and complete holes in par. | Hole: 4 | Par: 4 | Hole: 3 | Par: 5 |
| 100 Coins | Try to collect 100 coins over three holes. | Holes: 2/3/5 | Coins: 100 | Holes: 1/8/9 | Coins: 100 |
| Score Attack | Complete nine holes with an overall score of - 4 or better. | Holes: 1~9 | Total: - 4 | Holes: 1~9 | Total: - 6 |
| Character Match | Challenge Mario to a round of match play. | Holes: 1~9 | Opponent: Mario | Holes: 1~9 | Opponent: Star Mario |
| Time Attack | Complete three holes in 140 seconds. | Holes: 3/6/9 | Time: 02:20.00 | Holes: 4/5/8 | Time: 02:00.00 |
| Point Challenge | Play three holes using Club Slots and earn 7 points. | Holes: 1/5/8 | Total: 7 points | Holes: 3/7/9 | Total: 8 points |
| Cheep Cheep Lagoon | |||||
| Name | In-game Description | Star Coin Challenge | Moon Coin Challenge | ||
| Star Coin Collector 1 | Collect Star Coins while achieving par. | Hole: 9 | Par: 5 | Hole: 1 | Par: 4 |
| Star Coin Collector 2 | Collect Star Coins while achieving par. | Hole: 8 | Par: 4 | Hole: 2 | Par: 3 |
| Ring Master 1 | Shoot through all the rings and complete holes in par. | Hole: 1 | Par: 4 | Hole: 7 | Par: 3 |
| Ring Master 2 | Shoot through all the rings and complete holes in par. | Hole: 5 | Par: 4 | Hole: 6 | Par: 4 |
| Ring Master 3 | Shoot through all the rings and complete holes in par. | Hole: 3 | Par: 4 | Hole: 4 | Par: 5 |
| 100 Coins | Try to collect 100 coins over three holes. | Holes: 2/4/6 | Coins: 100 | Holes: 3/7/9 | Coins: 100 |
| Score Attack | Complete nine holes with an overall score of - 5 or better. | Holes: 1~9 | Total: - 5 | Holes: 1~9 | Total: - 5 |
| Character Match | Challenge Luigi to a round of match play. | Holes: 1~9 | Opponent: Luigi | Holes: 1~9 | Opponent: Star Luigi |
| Time Attack | Complete three holes in 150 seconds. | Holes: 3/7/9 | Time: 02:30.00 | Holes: 2/4/8 | Time: 02:10.00 |
| Point Challenge | Play three holes using Club Slots and earn 6 points. | Holes: 1/4/7 | Total: 6 points | Holes: 2/5/9 | Total: 8 points |
| DK Jungle | |||||
| Name | In-game Description | Star Coin Challenge | Moon Coin Challenge | ||
| Star Coin Collector 1 | Collect Star Coins while achieving par. | Hole: 1 | Par: 5 | Hole: 8 | Par: 3 |
| Star Coin Collector 2 | Collect Star Coins while achieving par. | Hole: 2 | Par: 4 | Hole: 5 | Par: 4 |
| Ring Master 1 | Shoot through all the rings and complete holes in par. | Hole: 8 | Par: 3 | Hole: 3 | Par: 3 |
| Ring Master 2 | Shoot through all the rings and complete holes in par. | Hole: 4 | Par: 4 | Hole: 7 | Par: 5 |
| Ring Master 3 | Shoot through all the rings and complete holes in par. | Hole: 6 | Par: 4 | Hole: 9 | Par: 4 |
| 100 Coins | Try to collect 100 coins over three holes. | Holes: 3/5/7 | Coins: 100 | Holes: 1/6/8 | Coins: 100 |
| Score Attack | Complete nine holes with an overall score of - 6 or better. | Holes: 1~9 | Total: - 6 | Holes: 1~9 | Total: - 5 |
| Character Match | Challenge Donkey Kong to a round of match play. | Holes: 1~9 | Opponent: Donkey Kong | Holes: 1~9 | Opponent: Star Donkey Kong |
| Time Attack | Complete three holes in 130 seconds. | Holes: 1/2/8 | Time: 02:10.00 | Holes: 3/7/9 | Time: 02:10.00 |
| Point Challenge | Play three holes using Club Slots and earn 7 points. | Holes: 3/7/9 | Total: 7 points | Holes: 1/4/8 | Total: 8 points |
| Bowser's Castle | |||||
| Name | In-game Description | Star Coin Challenge | Moon Coin Challenge | ||
| Star Coin Collector 1 | Collect Star Coins while achieving par. | Hole: 3 | Par: 4 | Hole: 4 | Par: 3 |
| Star Coin Collector 2 | Collect Star Coins while achieving par. | Hole: 8 | Par: 4 | Hole: 9 | Par: 5 |
| Ring Master 1 | Shoot through all the rings and complete holes in par. | Hole: 5 | Par: 5 | Hole: 1 | Par: 4 |
| Ring Master 2 | Shoot through all the rings and complete holes in par. | Hole: 4 | Par: 3 | Hole: 2 | Par: 4 |
| Ring Master 3 | Shoot through all the rings and complete holes in par. | Hole: 9 | Par: 5 | Hole: 7 | Par: 3 |
| 100 Coins | Try to collect 100 coins over three holes. | Holes: 7/6/9 | Coins: 100 | Holes: 5/4/8 | Coins: 100 |
| Score Attack | Complete nine holes with an overall score of - 6 or better. | Holes: 1~9 | Total: - 6 | Holes: 1~9 | Total: - 5 |
| Character Match | Challenge Bowser to a round of match play. | Holes: 1~9 | Opponent: Bowser | Holes: 1~9 | Opponent: Star Bowser |
| Time Attack | Complete three holes in 120 seconds. | Holes: 2/5/4 | Time: 02:00.00 | Holes: 7/6/9 | Time: 02:10.00 |
| Point Challenge | Play three holes using Club Slots and earn 7 points. | Holes: 1/7/9 | Total: 7 points | Holes: 5/4/8 | Total: 8 points |
| Toad Highlands | |||||
| Name | In-game Description | Star Coin Challenge | Moon Coin Challenge | ||
| Star Coin Collector 1 | Collect Star Coins while achieving par. | Hole: 9 | Par: 4 | Hole: 11 | Par: 4 |
| Star Coin Collector 2 | Collect Star Coins while achieving par. | Hole: 10 | Par: 4 | Hole: 4 | Par: 5 |
| Ring Master 1 | Shoot through all the rings and complete holes in par. | Hole: 1 | Par: 4 | Hole: 12 | Par: 5 |
| Ring Master 2 | Shoot through all the rings and complete holes in par. | Hole: 3 | Par: 4 | Hole: 18 | Par: 4 |
| Ring Master 3 | Shoot through all the rings and complete holes in par. | Hole: 17 | Par: 3 | Hole: 7 | Par: 4 |
| Ring Master 4 | Shoot through all the rings and complete holes in par. | Hole: 14 | Par: 4 | Hole: 16 | Par: 5 |
| 100 Coins | Try to collect 100 coins over three holes. | Holes: 13/3/12 | Coins: 100 | Holes: 16/2/10 | Coins: 100 |
| Score Attack | Complete nine holes with an overall score of - 4 or better. | Holes: 1~9 | Total: - 4 | Holes: 10~18 | Total: - 5 |
| Time Attack | Complete three holes in 150 seconds. | Holes: 17/1/8 | Time: 02:30.00 | Holes: 13/5/16 | Time: 02:15.00 |
| Point Challenge | Play three holes using Club Slots and earn 4 points. | Holes: 2/7/16 | Total: 4 points | Holes: 6/12/18 | Total: 6 points |
| Koopa Park | |||||
| Name | In-game Description | Star Coin Challenge | Moon Coin Challenge | ||
| Star Coin Collector 1 | Collect Star Coins while achieving par. | Hole: 1 | Par: 4 | Hole: 3 | Par: 4 |
| Star Coin Collector 2 | Collect Star Coins while achieving par. | Hole: 13 | Par: 3 | Hole: 15 | Par: 4 |
| Ring Master 1 | Shoot through all the rings and complete holes in par. | Hole: 2 | Par: 5 | Hole: 5 | Par: 4 |
| Ring Master 2 | Shoot through all the rings and complete holes in par. | Hole: 14 | Par: 4 | Hole: 9 | Par: 4 |
| Ring Master 3 | Shoot through all the rings and complete holes in par. | Hole: 17 | Par: 4 | Hole: 8 | Par: 3 |
| Ring Master 4 | Shoot through all the rings and complete holes in par. | Hole: 12 | Par: 5 | Hole: 18 | Par: 5 |
| 100 Coins | Try to collect 100 coins over three holes. | Holes: 1/16/2 | Coins: 100 | Holes: 18/4/14 | Coins: 100 |
| Score Attack | Complete nine holes with an overall score of - 4 or better. | Holes: 1~9 | Total: - 4 | Holes: 10~18 | Total: - 5 |
| Time Attack | Complete three holes in 150 seconds. | Holes: 8/1/18 | Time: 02:30.00 | Holes: 4/17/12 | Time: 02:05.00 |
| Point Challenge | Play three holes using Club Slots and earn 5 points. | Holes: 16/7/2 | Total: 5 points | Holes: 13/11/6 | Total: 6 points |
| Layer-Cake Desert | |||||
| Name | In-game Description | Star Coin Challenge | Moon Coin Challenge | ||
| Star Coin Collector 1 | Collect Star Coins while achieving par. | Hole: 1 | Par: 4 | Hole: 16 | Par: 4 |
| Star Coin Collector 2 | Collect Star Coins while achieving par. | Hole: 12 | Par: 3 | Hole: 18 | Par: 4 |
| Ring Master 1 | Shoot through all the rings and complete holes in par. | Hole: 3 | Par: 5 | Hole: 11 | Par: 4 |
| Ring Master 2 | Shoot through all the rings and complete holes in par. | Hole: 4 | Par: 4 | Hole: 17 | Par: 5 |
| Ring Master 3 | Shoot through all the rings and complete holes in par. | Hole: 7 | Par: 3 | Hole: 13 | Par: 4 |
| Ring Master 4 | Shoot through all the rings and complete holes in par. | Hole: 14 | Par: 5 | Hole: 5 | Par: 4 |
| 100 Coins | Try to collect 100 coins over three holes. | Holes: 9/11/7 | Coins: 100 | Holes: 8/17/2 | Coins: 100 |
| Score Attack | Complete nine holes with an overall score of - 5 or better. | Holes: 1~9 | Total: - 5 | Holes: 10~18 | Total: - 5 |
| Time Attack | Complete three holes in 140 seconds. | Holes: 15/1/3 | Time: 02:20.00 | Holes: 12/6/14 | Time: 02:05.00 |
| Point Challenge | Play three holes using Club Slots and earn 5 points. | Holes: 2/18/9 | Total: 5 points | Holes: 7/10/17 | Total: 7 points |
| Sparkling Waters | |||||
| Name | In-game Description | Star Coin Challenge | Moon Coin Challenge | ||
| Star Coin Collector 1 | Collect Star Coins while achieving par. | Hole: 9 | Par: 4 | Hole: 16 | Par: 4 |
| Star Coin Collector 2 | Collect Star Coins while achieving par. | Hole: 18 | Par: 5 | Hole: 7 | Par: 5 |
| Ring Master 1 | Shoot through all the rings and complete holes in par. | Hole: 6 | Par: 3 | Hole: 14 | Par: 4 |
| Ring Master 2 | Shoot through all the rings and complete holes in par. | Hole: 8 | Par: 4 | Hole: 12 | Par: 3 |
| Ring Master 3 | Shoot through all the rings and complete holes in par. | Hole: 15 | Par: 3 | Hole: 5 | Par: 4 |
| Ring Master 4 | Shoot through all the rings and complete holes in par. | Hole: 7 | Par: 5 | Hole: 17 | Par: 4 |
| 100 Coins | Try to collect 100 coins over three holes. | Holes: 16/4/6 | Coins: 100 | Holes: 12/9/18 | Coins: 100 |
| Score Attack | Complete nine holes with an overall score of - 5 or better. | Holes: 1~9 | Total: - 5 | Holes: 10~18 | Total: - 5 |
| Time Attack | Complete three holes in 140 seconds. | Holes: 3/1/11 | Time: 02:20.00 | Holes: 15/11/18 | Time: 02:05.00 |
| Point Challenge | Play three holes using Club Slots and earn 5 points. | Holes: 12/2/7 | Total: 5 points | Holes: 6/10/4 | Total: 7 points |
| Rock-Candy Mines | |||||
| Name | In-game Description | Star Coin Challenge | Moon Coin Challenge | ||
| Star Coin Collector 1 | Collect Star Coins while achieving par. | Hole: 5 | Par: 4 | Hole: 2 | Par: 4 |
| Star Coin Collector 2 | Collect Star Coins while achieving par. | Hole: 12 | Par: 3 | Hole: 18 | Par: 4 |
| Ring Master 1 | Shoot through all the rings and complete holes in par. | Hole: 18 | Par: 4 | Hole: 9 | Par: 4 |
| Ring Master 2 | Shoot through all the rings and complete holes in par. | Hole: 5 | Par: 4 | Hole: 16 | Par: 4 |
| Ring Master 3 | Shoot through all the rings and complete holes in par. | Hole: 1 | Par: 4 | Hole: 2 | Par: 4 |
| Ring Master 4 | Shoot through all the rings and complete holes in par. | Hole: 11 | Par: 4 | Hole: 15 | Par: 3 |
| 100 Coins | Try to collect 100 coins over three holes. | Holes: 17/14/4 | Coins: 100 | Holes: 12/3/13 | Coins: 100 |
| Score Attack | Complete nine holes with an overall score of - 5 or better. | Holes: 1~9 | Total: - 5 | Holes: 10~18 | Total: - 6 |
| Time Attack | Complete three holes in 130 seconds. | Holes: 8/2/10 | Time: 02:10.00 | Holes: 15/6/7 | Time: 02:15.00 |
| Point Challenge | Play three holes using Club Slots and earn 6 points. | Holes: 12/18/3 | Total: 6 points | Holes: 4/9/17 | Total: 7 points |
| Mario's Star | |||||
| Name | In-game Description | Star Coin Challenge | Moon Coin Challenge | ||
| Star Coin Collector 1 | Collect Star Coins while achieving par. | Hole: 1 | Par: 4 | Hole: 3 | Par: 5 |
| Star Coin Collector 2 | Collect Star Coins while achieving par. | Hole: 10 | Par: 4 | Hole: 18 | Par: 4 |
| Ring Master 1 | Shoot through all the rings and complete holes in par. | Hole: 15 | Par: 4 | Hole: 13 | Par: 4 |
| Ring Master 2 | Shoot through all the rings and complete holes in par. | Hole: 6 | Par: 3 | Hole: 8 | Par: 4 |
| Ring Master 3 | Shoot through all the rings and complete holes in par. | Hole: 11 | Par: 5 | Hole: 17 | Par: 5 |
| Ring Master 4 | Shoot through all the rings and complete holes in par. | Hole: 16 | Par: 3 | Hole: 9 | Par: 4 |
| 100 Coins | Try to collect 100 coins over three holes. | Holes: 14/4/11 | Coins: 100 | Holes: 12/17/18 | Coins: 100 |
| Score Attack | Complete nine holes with an overall score of - 6 or better. | Holes: 1~9 | Total: - 6 | Holes: 10~18 | Total: - 5 |
| Time Attack | Complete three holes in 130 seconds. | Holes: 12/5/3 | Time: 02:10.00 | Holes: 4/8/11 | Time: 02:05.00 |
| Point Challenge | Play three holes using Club Slots and earn 6 points. | Holes: 16/17/2 | Total: 6 points | Holes: 6/13/7 | Total: 7 points |
