Gallery:Mario & Luigi: Partners in Time: Difference between revisions
From the Super Mario Wiki, the Mario encyclopedia
Jump to navigationJump to search
Megadardery (talk | contribs) (→Maps) |
Megadardery (talk | contribs) (→Maps) |
||
| Line 82: | Line 82: | ||
<center><gallery perrow=5> | <center><gallery perrow=5> | ||
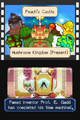
File:CastlePresentFloor1Map.png|<center>[[Princess Peach's Castle]] First floor | File:CastlePresentFloor1Map.png|<center>[[Princess Peach's Castle]] First floor | ||
File:CastlePresentFloor2Map.png|<center> | File:CastlePresentFloor2Map.png|<center>Second floor | ||
File:CastlePresentFloor2BridgeBrokenMap.png|<center> | File:CastlePresentFloor2BridgeBrokenMap.png|<center>Second floor<br>(Bridge broken) | ||
File:CastlePresentFloor3Map.png|<center> | File:CastlePresentFloor3Map.png|<center>Third floor | ||
File:CastlePresentSweersMap.png|<center> | File:CastlePresentSweersMap.png|<center>Cellar | ||
File:BabyCastleMap1.png|<center>[[Baby Bowser's Castle]] Area 1 | File:BabyCastleMap1.png|<center>[[Baby Bowser's Castle]] Area 1 | ||
File:BabyCastleMap2.png|<center> | File:BabyCastleMap2.png|<center>Area 2 | ||
File:BabyCastleMap3.png|<center> | File:BabyCastleMap3.png|<center>Area 3 | ||
</gallery></center> | </gallery></center> | ||
<center><gallery> | <center><gallery> | ||
| Line 95: | Line 95: | ||
<center><gallery perrow=5> | <center><gallery perrow=5> | ||
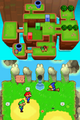
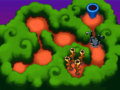
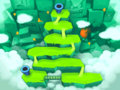
File:ForestMap1.png|<center>[[Toadwood Forest]] | File:ForestMap1.png|<center>[[Toadwood Forest]] | ||
File:ForestMap2.png|<center>[[Toadwood Forest]] (Tree burned) | File:ForestMap2.png|<center>[[Toadwood Forest]]<br>(Tree burned) | ||
File:ForestMap3.png|<center> | File:ForestMap3.png|<center>Factory Entrance | ||
File:FactoryMap1.png|<center>[[Vim Factory]] Area 1 | File:FactoryMap1.png|<center>[[Vim Factory]] Area 1 | ||
File:FactoryMap2.png|<center> | File:FactoryMap2.png|<center>Area 2 | ||
</gallery></center> | </gallery></center> | ||
<center><gallery perrow=5> | <center><gallery perrow=5> | ||
File:Yoshi's Island1.png|<center>[[Yoshi's Island (place)|Yoshi's Island]] Area 1 | File:Yoshi's Island1.png|<center>[[Yoshi's Island (place)|Yoshi's Island]] Area 1 | ||
File:Yoshi's Island2.png|<center> | File:Yoshi's Island2.png|<center>Area 2 | ||
File:Yoshi's Island3.png|<center> | File:Yoshi's Island3.png|<center>Area 3 | ||
File:Yoob1.png|<center>[[Yoob's Belly]] Area 1 | File:Yoob1.png|<center>[[Yoob's Belly]] Area 1 | ||
File:Yoob2.png|<center> | File:Yoob2.png|<center>Area 2 | ||
File:GritzyDesert.png|<center>[[Gritzy Desert]] | File:GritzyDesert.png|<center>[[Gritzy Desert]] | ||
File:Koopaseum.png|<center>[[Koopaseum]] | File:Koopaseum.png|<center>[[Koopaseum]] | ||
File:Koopaseum_Inside_with_Shroobs.png|<center> | File:Koopaseum_Inside_with_Shroobs.png|<center>Stage | ||
</gallery></center> | </gallery></center> | ||
<center><gallery perrow=5> | <center><gallery perrow=5> | ||
File:ThwompVolcano2.png|<center>[[Thwomp Volcano]] Area 1 | File:ThwompVolcano2.png|<center>[[Thwomp Volcano]] Area 1 | ||
File:ThwompVolcano3.png|<center> | File:ThwompVolcano3.png|<center>Area 2 | ||
File:ThwompVolcano.png|<center> | File:ThwompVolcano.png|<center>Area 3 | ||
File:ThwompVolcanoMap.png|<center> | File:ThwompVolcanoMap.png|<center>Area 3<br>(Volcano inactive) | ||
File:ThwompVolcanoCaverns.png|<center>[[Thwomp Caverns]] | File:ThwompVolcanoCaverns.png|<center>[[Thwomp Caverns]] | ||
File:ToadTownMap.png|<center>[[Toad Town]] | File:ToadTownMap.png|<center>[[Toad Town]] | ||
| Line 121: | Line 121: | ||
File:StarHillMap.png|<center>[[Star Hill (Mario & Luigi: Partners in Time)|Star Hill]] | File:StarHillMap.png|<center>[[Star Hill (Mario & Luigi: Partners in Time)|Star Hill]] | ||
File:StarShrineMap1.png|<center>[[Star Shrine]] Area 1 | File:StarShrineMap1.png|<center>[[Star Shrine]] Area 1 | ||
File:StarShrineMap2.png|<center> | File:StarShrineMap2.png|<center>Area 2 | ||
File:StarShrineMap3.png|<center>[[ | File:StarShrineMap3.png|<center>Area 3 | ||
</gallery></center> | |||
<center><gallery perrow=5> | |||
File:CastlePastMap.png|<center>[[Shroob Castle]] Entrance | |||
File:CastlePastMap1.png|<center>First floor | |||
File:CastlePastMap2.png|<center>Second floor | |||
File:CastlePastMap3.png|<center>Third floor | |||
File:CastlePastMap4.png|<center>Statue | |||
File:CastlePastCellerMap1.png|<center>Cellar Area 1 | |||
File:CastlePastCellerMap2.png|<center>Area 2 | |||
</gallery></center> | </gallery></center> | ||
{{BoxTop}} | {{BoxTop}} | ||
Revision as of 08:12, December 25, 2012
All the images from the Nintendo DS game, Mario & Luigi: Partners in Time.
Artwork
Character Artwork
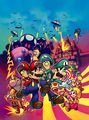
Group picture for the Western box art - Fcaex.png
Mario and Baby Mario - MandL2 BabyLuigi.png
Luigi and Baby Luigi - SAGAMARIO.JPG
- ML2Luigi.jpg
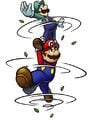
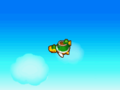
Mario and Luigi performing a Spin Jump 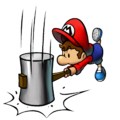
Baby Mario - BabyPeach.png
- Princessshroob.jpg
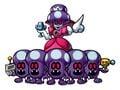
Princess Shroob with some Shroobs. - Toadsworth old.jpg
- MnL ProfessorElvinGadd.jpg
- Kylie Koopa.jpg
- Shroobstand.jpg
- MnL2 Shroob.jpg
Shroob 
Shroob 
Shroobs - Normal shellkick.png
The use of the Green Shell - Copy.png
The use of the Copy Flower 
The use of the Pocket Chomp


Misc.
- MarioLuigiPARTNERSTIMElogosmaller.png
English logo - ME0000619204 2.jpg
Japanese logo 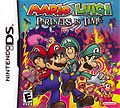
American box art 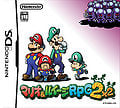
Japanese box art 
Korean box art 
Game icon.


Screenshots
- 404388-mario-luigi-partners-in-time-nintendo-ds-screenshot-title.png

- Toadwood65.png
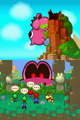
- BabyBowserStoleThem!.png
- MandL2 GritzyDesert.jpg
- Shrowser.PNG
- Gritzy Caves.PNG
- MLPIT01.png


Credits Scenes


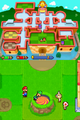
Maps
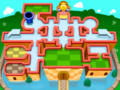
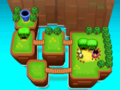
Princess Peach's Castle First floor 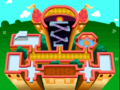
Second floor 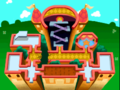
Second floor
(Bridge broken)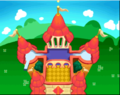
Third floor 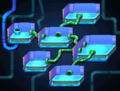
Cellar 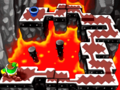
Baby Bowser's Castle Area 1 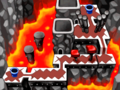
Area 2 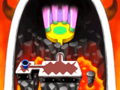
Area 3


Toadwood Forest
(Tree burned)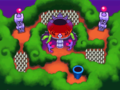
Factory Entrance 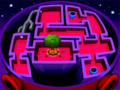
Vim Factory Area 1 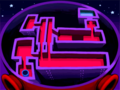
Area 2


Yoshi's Island Area 1 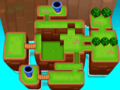
Area 2 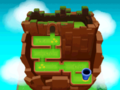
Area 3 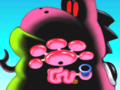
Yoob's Belly Area 1 
Area 2 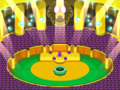
Stage


Thwomp Volcano Area 1 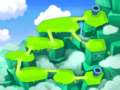
Area 2 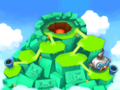
Area 3 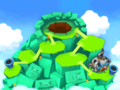
Area 3
(Volcano inactive)


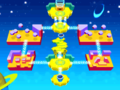
Star Shrine Area 1 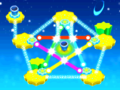
Area 2 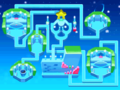
Area 3


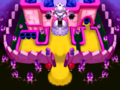
Shroob Castle Entrance 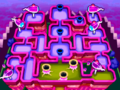
First floor 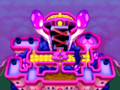
Second floor 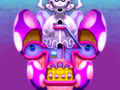
Third floor 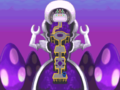
Statue 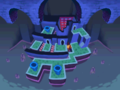
Cellar Area 1 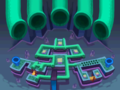
Area 2


