Gallery:Wario Land 4: Difference between revisions
m (→Enemies) |
(Constructing.) |
||
| Line 62: | Line 62: | ||
<center><gallery> | <center><gallery> | ||
File:WarioSmallAni.gif|Wario's in-level movement | File:WarioSmallAni.gif|Wario's in-level movement | ||
File:WL4-WarioCar.PNG|Wario in his [[Wario Car]] | |||
File:Cute Jumprope Land.gif|Wario working out | File:Cute Jumprope Land.gif|Wario working out | ||
File:Wario.gif|Wario seen clearing a [[Wario Land 4#Passages|Passage]] | File:Wario.gif|Wario seen clearing a [[Wario Land 4#Passages|Passage]] | ||
| Line 307: | Line 308: | ||
===Miscellaneous Sprites=== | ===Miscellaneous Sprites=== | ||
<center><gallery> | <center><gallery> | ||
File:WL4- | File:Dr Arewo Stein WL4.png|[[Dr. Arewo Stein]] | ||
File:WL4 | File:WL4-Keyzer.PNG|The [[Keyzer]] | ||
File:WL4-Icon25.png|The [[Mini-Game Shop]] icon | |||
File:WL4 Beta-Game Corner.PNG|Beta name and logo of the Mini-Game Shop | |||
File:WL4-Sack.PNG|The Treasure sack | File:WL4-Sack.PNG|The Treasure sack | ||
File:WL4-EB(wl4).gif|The [[Event Block (Wario Land 4)|Event Block]] | File:WL4-EB(wl4).gif|The [[Event Block (Wario Land 4)|Event Block]] | ||
| Line 314: | Line 317: | ||
File:WL4-Bugle Notes.PNG|[[Bugle]] musical note sprites | File:WL4-Bugle Notes.PNG|[[Bugle]] musical note sprites | ||
File:WL4-Goldenpyramid.PNG|The inner [[Golden Pyramid]] | File:WL4-Goldenpyramid.PNG|The inner [[Golden Pyramid]] | ||
File:WL4-Bonfire Block.PNG|[[Bonfire Block]] | |||
File:WL4-CDbox.PNG|[[CD]] case | |||
File:WL4-CDs.PNG|The four different colored CDs | |||
File:WL4-HeartBox.PNG|[[Heart Box]] | |||
File:WL4-Coins.PNG|[[Coin (Wario Land 4)|Coins]] | |||
File:Frog Medal.PNG|[[Frog Medal]] | |||
File:FrogSwitch.PNG|[[Frog Switch]] | |||
File:WL4-Frog Block.PNG|[[Frog Switch Block]] | |||
File:Diamond2 WL4.png|[[Giant Diamond]] | |||
File:WL4-JPB.PNG|[[Jewel Piece Box]] | |||
File:WL4-MagicCarpet.PNG|[[Magic Carpet#Wario Land 4|Magic Carpet]] | |||
File:WL4-PinballBlock.gif|[[Pinball Block]] | |||
File:WL4-PurplePipe.PNG|[[Purple Pipe]] | |||
File:WL4-PyramidJewels.PNG|The six kinds of [[Pyramid Jewel]]s | |||
File:Rolling Block.PNG|[[Rolling Toy Block]] | |||
File:Treasure chest WL4.PNG|[[Treasure Chest (Wario Land 4)|Treasure Chest]] | |||
File:Triangle block.png|[[Triangle Toy Block]] | |||
</gallery></center> | </gallery></center> | ||
| Line 341: | Line 361: | ||
File:WL4-Title.png|The title screen | File:WL4-Title.png|The title screen | ||
File:WL4-Japanese Title Screen.PNG|The Japanese title screen | File:WL4-Japanese Title Screen.PNG|The Japanese title screen | ||
</gallery></center> | |||
===Levels=== | |||
<center><gallery> | |||
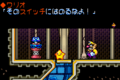
File:Frog Switch.jpg|[[Hall of Hieroglyphs]] | |||
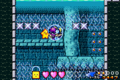
File:Warioland41.PNG|Hall of Hieroglyphs | |||
File:WL4-HBshot.PNG|Hall of Hieroglyphs | |||
</gallery></center> | </gallery></center> | ||
Revision as of 08:23, September 4, 2012
This article is under construction. Therefore, please excuse its informal appearance while it is being worked on. We hope to have it completed as soon as possible.
- For this subject's media gallery, see Wario Land 4/Media
Template:Seealso This is an image gallery of all images pertaining to the Game Boy Advance game Wario Land 4.
Box Artwork and Logos
- Wario Land Advance JAP cover.jpg
Japanese box art
Back cover of Japanese box art
- JapCover WL4.jpg
Japanese flyer
- Wl1.jpg
European box art
- Wario Land 4 NA cover.jpg
North American box art
The back of Wario Land 4
- WL4-Manual.jpg
Wario Land 4 instruction booklet
- Wl4-Artwork.jpg
Cover artwork

Standard logo
- WL4-Logo.PNG
English logo sprite
- WL4-betalogo.PNG
The beta logo

The Japanese logo

The Chinese logo


Artwork
Wario


Allies
- Keyser.jpeg
- WL4-Keyzer Artwork.png
Alternative artwork of Keyzer
Princess Shokora (monochrome)
- WL4-PG&W.PNG

Enemies
- Beezley.png
- Goggley-Blade.png


Sprites
Wario

Wario's in-level movement
- WL4-WarioCar.PNG
Wario in his Wario Car
- Cute Jumprope Land.gif
Wario working out
- Wario.gif
Wario seen clearing a Passage

Beta sprite of Wario opening a Jewel Piece Box
- WL4-Wario's Kiss.PNG
Wario after receiving a kiss from Princess Shokora


Wario's Forms

Wario

Puffy Wario

Flaming Wario

Flat Wario

Fat Wario

Bubble Wario

Snowman Wario

Frozen Wario

Bouncy Wario

Zombie Wario

Bat Wario


Wario's Moves
- WL4-ram.PNG
Ram
- WL4-S-ram.PNG
S-Ram
- WL4-GroundPound.PNG
Ground Pound
- WL4-S-GroundPound.PNG
S-Ground Pound
- WL4-Roll.PNG
Roll
- WL4-Swim.PNG
Swim
- WL4-Crawl.PNG
Crawl
- WL4-Throw.PNG
Throw
Princess Shokora

Bratty Baby Princess

Hideous Princess

Cheeky Young Princess

True Princess Shokora
- WL4-Shokora Angels.PNG
Princess Shokora being lifted into heaven by four angles

Bratty Baby Princess

Hideous Princess

Cheeky Young Princess

True Princess Shokora


Princess Game & Watch
- WL4-MGW.PNG
Princess Game & Watch sprite
- WL4-Smile.PNG
Princess Game & Watch giving a Smile to the player
- WL4-PG&W Unused.PNG
Unused sprite of Princess Game & Watch

Item Shop logo
- WL4-PG&W Sound Room.PNG
Princess Game & Watch in the Sound Room
- WL4-PG&W Sound Room2.PNG
Princess Game & Watch in the Sound Room
- Princessgameandwatch.png
Miscellaneous sprites of Princess Game & Watch
Bosses
- Cuckoocondor.gif
- WL4-Golden Diva Final Form.PNG
Golden Diva's final form


Golden Diva Masks
- Golden Diva-Mask1.PNG
Mask 1
- Golden Diva-Mask2.PNG
Mask 2
- Golden Diva-Mask3.PNG
Mask 3
- Golden Diva-Mask4.PNG
Mask 4
- Golden Diva-Mask5.PNG
Mask 5
- Golden Diva-Mask6.PNG
Mask 6
- Golden Diva-Mask7.PNG
Mask 7
- Golden Diva-Mask8.PNG
Mask 8
- Golden Diva-Mask9.PNG
Mask 9
- Golden Diva-Mask10.PNG
Mask 10
- Golden Diva-Mask11.PNG
Mask 11
- Golden Diva-Mask12.PNG
Mask 12
- Golden Diva-Mask13.PNG
Mask 13
- Golden Diva-Mask14.PNG
Mask 14
- Golden Diva-Mask15.PNG
Mask 15
- Golden Diva-Mask16.PNG
Mask 16
Enemies
- Bouncers.png

Spear Mask (yellow)

Tornado Spear-Mask (blue)

Angry Spear Mask (red)
- Shieragutchi WL4.png
- Archer.PNG
- WL4-Firefly Sprite.PNG
- WL4-PearlBird.PNG
- WL4-Spike Cannon.gif
- WL4-Yellow Duck.PNG
- Drill Bat.PNG
- Spear Bot.PNG
- Doodle.PNG
- Butatabi WL4.png
- WL4-PigHead.PNG
- Tack Soldier1.PNG
- Vampire Bat.PNG
- WL4-Cough Virus.PNG
- WL4-SpikeRock.PNG
- WL4-SpikeHammer.PNG
- WL4-DuckEgg.PNG
- WL4-BearBomb.PNG
- WL4-Lips.PNG


Items
- WL4-Blast Cannon.PNG
- WL4-Bugle.PNG
- Black Dog.PNG
- WL4-LargeLipsSprite.PNG
- WL4-BigFistSprite.PNG
- WL4-BlackDragon.PNG

Apple Bomb

Blast Cannon

Vizorman

Bugle

Black Dog

Large Lips

Big Fist

Black Dragon

Smile


Legendary Treasure

The Earrings, obtained from Cuckoo Condor

The Necklace, obtained from Aerodent


Levels
Entry Passage
- WL4-Icon01.png
- WL4-Icon02.png
Spoiled Rotten (boss)
Emerald Passage
- WL4-Icon03.png
- WL4-Icon04.png
- WL4-Icon05.png
- WL4-Icon06.png
- WL4-Icon07.png
Cractus (boss)
Ruby Passage
- WL4-Icon08.png
- WL4-Icon09.png
- WL4-Icon10.png
- WL4-Icon11.png
- WL4-Icon12.png
Cuckoo Condor (boss)
Topaz Passage
- WL4-Icon13.png
- WL4-Icon14.png
- WL4-Icon15.png
- WL4-Icon16.png
- WL4-Icon17.png
Aerodent (boss)
Sapphire Passage
- WL4-Icon18.png
- WL4-Icon19.png
- WL4-Icon20.png
- WL4-Icon21.png
- WL4-Icon22.png
Catbat (boss)
Golden Pyramid
- WL4-Icon23.png
- WL4-Icon24.png
Golden Diva (boss)
Sound Room
- Sound Room-About That Shepherd.PNG
About That Shepherd
- Sound Room-Things That Never Change.PNG
Things That Never Change
- Sound Room-Tomorrow's Blood Pressure.PNG
Tomorrow's Blood Pressure
- Sound Room-Beyond the Headrush.PNG
Beyond the Headrush
- Sound Room-Driftwood and the Island Dog.PNG
Driftwood & the Island Dog
- Sound Room-The Judge's Feet.PNG
The Judge's Feet
- Sound Room-The Moon's Lamppost.PNG
The Moon's Lamppost
- Sound Room-Soft Shell.PNG
Soft Shell
- Sound Room-So Sleepy.PNG
So Sleepy
- Sound Room-The Short Futon.PNG
The Short Futon
- Sound Room-Avocado Song.PNG
Avocado Song
- Sound Room-Mr. Fly.PNG
Mr. Fly
- Sound Room-Yesterday's Words.PNG
Yesterday's Words
- Sound Room-The Errand.PNG
The Errand
- Sound Room-You and Your Shoes.PNG
You and Your Shoes
- Sound Room-Mr. Ether & Planaria.PNG
Mr. Ether & Planaria
- Sound Room-Karaoke.PNG
- CD-Karaoke2.PNG
Alternate Karaoke cover
Miscellaneous Sprites
- WL4-Keyzer.PNG
The Keyzer
- WL4-Icon25.png
The Mini-Game Shop icon
- WL4 Beta-Game Corner.PNG
Beta name and logo of the Mini-Game Shop
- WL4-Sack.PNG
The Treasure sack
- WL4-EB(wl4).gif
The Event Block
- WL4-Portal.PNG
- WL4-Bugle Notes.PNG
Bugle musical note sprites
- WL4-Goldenpyramid.PNG
The inner Golden Pyramid
- WL4-Bonfire Block.PNG
- WL4-CDbox.PNG
CD case
- WL4-CDs.PNG
The four different colored CDs
- WL4-HeartBox.PNG
- WL4-Coins.PNG
- Frog Medal.PNG
- FrogSwitch.PNG
- WL4-Frog Block.PNG
- Diamond2 WL4.png
- WL4-JPB.PNG
- WL4-MagicCarpet.PNG
- WL4-PurplePipe.PNG
- WL4-PyramidJewels.PNG
The six kinds of Pyramid Jewels
- Rolling Block.PNG
- Treasure chest WL4.PNG


Flashbacks
- WL4-Flashback2.PNG
Wario picking Apples
- WL4-Flashback3.PNG
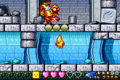
Wario swimming with Goggley Blades and Shieragutchis
- WL4-Flashback4.PNG
Wario wrestling an Iwao
- WL4-Flashback5.PNG
Wario running away from a Skeleton Bird and a Men'ono

Wario and Hoggus
- WL4-Flashback7.PNG
Wario with a box full of Game Boy Advance consoles
- WL4-Flashback8.PNG
Wario with a toy Robot
- WL4-Flashback9.PNG
Wario on a Rocket
- WL4-Flashback10.PNG
Wario with Cuckoo Condor in the background
- WL4-Lunar Flashback.PNG
Wario having a dream while he is sleeping on the Moon

Promotional Photos

Screenshots
Title screens
The title screen
- WL4-Japanese Title Screen.PNG
The Japanese title screen

Levels
- Frog Switch.jpg
- Warioland41.PNG
Hall of Hieroglyphs
- WL4-HBshot.PNG
Hall of Hieroglyphs
Maps
- WL4-Pyramid Map.PNG
Map of the main room
- Entry Passage.PNG
The Entry Passage
- Emerald Passage.PNG
The Emerald Passage
- Ruby Passage.PNG
The Ruby Passage
- Topaz Passage.PNG
The Topaz Passage
- Sapphirepas.PNG
The Sapphire Passage
- WL4-Golden Pyramid Passage.PNG
The Golden Pyramid
Densetsu no Starfy 3 Appearance
Frog Switch cameo
Flaming Wario cameo
- WL4-Densetsu no Starfy 3 Puffy Wario.PNG
Puffy Wario cameo
Bubble Wario cameo
- WL4-Densetsu no Starfy 3 Vortex.PNG
Vortex cameo


