Secret Mine: Difference between revisions
No edit summary |
m (Text replacement - "(\| *)Jap([RMCN\d]* *=)" to "$1Jpn$2") |
||
| (3 intermediate revisions by 2 users not shown) | |||
| Line 69: | Line 69: | ||
{|class="wikitable"style="text-align:center" | {|class="wikitable"style="text-align:center" | ||
|- | |- | ||
! | !Image/Name | ||
! | ![[Gem]] | ||
![[List of Boos in Luigi's Mansion: Dark Moon|Boo]] | |||
! | |||
|- | |- | ||
||[[File:LMDM03.png|200px]]<br>[[Chalet Approach]]||Pebble Sapphire||N/A | |||
|- | |- | ||
||[[File:ChaletLMDM.png|200px]]<br>[[Chalet]]||Coffin Sapphire||'''Booger (American) / Boouncer (British)'''<br>Booger: ''"I'm Booger! Why must you always pick on me?"''<br>Boouncer: ''"I'm Boouncer! You think you can be in here? Naw, mate. Not with those shoes. Now, clear off!"'' | |||
(Availability: D-2) | (Availability: D-2) | ||
|- | |- | ||
||[[File:SmokehouseLMDM.png|200px]]<br>[[Smokehouse]]||Round Sapphire||N/A | |||
|- | |- | ||
||[[File:IceLakeLMDM.png|200px]]<br>[[Ice Lake]]||N/A||N/A | |||
||N/A | |||
|- | |- | ||
||[[File:FishingHutLMDM.png|200px]]<br>[[Fishing Hut]]||Triangle Sapphire||N/A | |||
|} | |} | ||
| Line 90: | Line 88: | ||
{|class="wikitable"style="text-align:center" | {|class="wikitable"style="text-align:center" | ||
|- | |- | ||
! | !Image/Name | ||
! | ![[Gem]] | ||
![[List of Boos in Luigi's Mansion: Dark Moon|Boo]] | |||
! | |||
|- | |- | ||
||[[File:SkipSlopeLMDM.png|200px]]<br>[[File:Luigi going down a slide.png|200px]]<br>[[Skip Slope]]/Icy Slope (PAL)||Star Sapphire||N/A | |||
|- | |- | ||
||[[File:CrossroadsLMDM.png|200px]]<br>[[Crossroads]]||Spindle Sapphire||N/A | |||
|- | |- | ||
||[[Airway (Luigi's Mansion: Dark Moon)|Airway | ||[[File:AirwayLMDM.png|200px]]<br>[[Airway (Luigi's Mansion: Dark Moon)|Airway]]||Drop Sapphire||N/A | ||
|- | |- | ||
||[[File:BasinLMDM.png|200px]]<br>[[Basin]]||N/A||N/A | |||
|- | |- | ||
||[[Drift Hall]]/Drift Passage (PAL) | ||[[File:DriftHallLMDM.png|200px]]<br>[[Drift Hall]]/Drift Passage (PAL)||N/A||N/A | ||
|- | |- | ||
||[[Prospector's Crossing]]/Prospector's Path (PAL) | ||[[File:ProspectorsCrossingLMDM.png|200px]]<br>[[Prospector's Crossing]]/Prospector's Path (PAL)||Rhombus Sapphire||N/A | ||
|- | |- | ||
||[[Terminal]]/Station (PAL) | ||[[File:TerminalLMDM.png|200px]]<br>[[Terminal]]/Station (PAL)||N/A||'''Boofoon'''<br>''"Hey, who turned out the lights? I'm Boofoon!"'' | ||
(Availability: D-1) | (Availability: D-1) | ||
|- | |- | ||
||[[File:UndertheIceLMDM.png|200px]]<br>[[Under the Ice]]||Baguette Sapphire||N/A | |||
|- | |- | ||
||[[File:GondolaLMDM.png|200px]]<br>[[Gondola]]||N/A||N/A | |||
|- | |- | ||
||[[File:HighWiresLMDM.png|200px]]<br>[[High Wires]]||Football Sapphire<br>Mushroom Sapphire||N/A | |||
|- | |- | ||
||[[File:WorkshopLandingLMDM.png|200px]]<br>[[Workshop Landing]]||N/A||N/A | |||
|- | |- | ||
||[[File:MaintenanceRoomLMDM.png|200px]]<br>[[Maintenance Room]]||N/A||N/A | |||
|- | |- | ||
||[[Workshop (Secret Mine)|Workshop | ||[[File:WorkshopSMLMDM.png|200px]]<br>[[Workshop (Secret Mine)|Workshop]]||N/A||N/A | ||
|} | |} | ||
===Basement 2=== | ===Basement 2=== | ||
{|class="wikitable"style="text-align:center" | {|class="wikitable"style="text-align:center" | ||
|- | |- | ||
! | !Image/Name | ||
! | ![[Gem]] | ||
![[List of Boos in Luigi's Mansion: Dark Moon|Boo]] | |||
! | |||
|- | |- | ||
||[[File:ShaftLMDM.png|200px]]<br>[[File:Luigi riding a lift.png|200px]]<br>[[Shaft]]||Octagon Sapphire||N/A | |||
|- | |- | ||
||[[File:SmugglersHideoutLMDM.png|200px]]<br>[[Smuggler's Hideout]]||N/A||N/A | |||
|- | |- | ||
||[[File:SkipSlopeLMDM.png|200px]]<br>[[File:Luigi going down a slide.png|200px]]<br>[[Skip Slope]]/Icy Slope (PAL)||Star Sapphire||N/A | |||
|} | |} | ||
===Basement 3=== | ===Basement 3=== | ||
{|class="wikitable"style="text-align:center" | {|class="wikitable"style="text-align:center" | ||
|- | |- | ||
! | !Image/Name | ||
! | ![[Gem]] | ||
![[List of Boos in Luigi's Mansion: Dark Moon|Boo]] | |||
! | |||
|- | |- | ||
||[[File:ShaftLMDM.png|200px]]<br>[[File:Luigi riding a lift.png|200px]]<br>[[Shaft]]||Octagon Sapphire||N/A | |||
|- | |- | ||
||[[File:CowardsChasmLMDM.png|200px]]<br>[[Coward's Chasm]]||N/A||N/A | |||
|- | |- | ||
||[[File:CinderMineLMDM.png|200px]]<br>[[Cinder Mine]]||N/A||N/A | |||
|- | |- | ||
||[[Deep Hall]]/Deep Passage (PAL) | ||[[File:DeepHallLMDM.png|200px]]<br>[[Deep Hall]]/Deep Passage (PAL)||Oval Sapphire||'''ParaBoola'''<br> American: ''"I'm ParaBoola! A symmetrical open-plane curve formed by the intersection of a cone with a plane parallel to its side! I mean... BOO!"''<br>British: ''"I'm ParaBoola! I've set my derivative to zero to be at my peak! I mean... BOO!"'' | ||
(Availability: D-3) | (Availability: D-3) | ||
|- | |- | ||
||[[File:CrystalQuarryLMDM.png|200px]]<br>[[Crystal Quarry]]||Coffin Sapphire||N/A | |||
|- | |- | ||
||[[File:PitMineLMDM.png|200px]]<br>[[Pit Mine]]||N/A||N/A | |||
|} | |} | ||
===Other=== | ===Other=== | ||
{|class="wikitable"style="text-align:center" | {|class="wikitable"style="text-align:center" | ||
|- | |- | ||
! | !Image/Name | ||
! | ![[Gem]] | ||
![[List of Boos in Luigi's Mansion: Dark Moon|Boo]] | |||
! | |||
|- | |- | ||
||[[File:Chilly Ride LMDM.png|200px]]<br>[[Frozen Pit]]||N/A||N/A | |||
|} | |} | ||
| Line 192: | Line 189: | ||
==Names in other languages== | ==Names in other languages== | ||
{{foreign names | {{foreign names | ||
| | |Jpn=ヒャッキ~ヤ坑道 | ||
| | |JpnR=Hyakki~ya Kōdō | ||
| | |JpnM=Pun of「百鬼夜行」(''{{wp|Hyakki Yagyō}}'') and「坑道」(''kōdō'', "tunnel") | ||
| | |ChiS=百鬼夜行坑道 | ||
| | |ChiSR=Bǎiguǐ Yèxíng Kēngdào | ||
| | |ChiSM=Hundred-Demon-Night Tunnel | ||
|ChiT=百鬼夜行坑道 | |||
|ChiTR=Bǎiguǐ Yèxíng Kēngdào | |||
|ChiTM=Hundred-Demon-Night Tunnel | |||
|Dut=IJzige Mijn | |Dut=IJzige Mijn | ||
|DutM=Icy Mine | |DutM=Icy Mine | ||
Latest revision as of 15:58, January 7, 2025
| Secret Mine | |
|---|---|
| |
| First appearance | Luigi's Mansion: Dark Moon (2013) |
| Latest appearance | Luigi's Mansion 2 HD (2024) |
| Greater location | Evershade Valley |
| Inhabitants | Greenies, Slammers, Hiders, Sneakers, Gold Greenies, Spirit Balls, Strong Greenies, Strong Slammers, Strong Sneakers, Strong Gobber, Shrewd Possessor, fuzzballs |
The Secret Mine is a location in Luigi's Mansion: Dark Moon and Luigi's Mansion 2 HD. It is the fourth mansion that Luigi visits. The Secret Mine has the fewest missions, having three instead of the usual five, a boss mission, and a bonus mission after the player captures the Boos in the area. The Secret Mine is located on a snowy mountain, which causes the mansion to be frozen over, inside and out. As the name implies, the mansion was built near a now-abandoned mining area, which Luigi explores. Professor E. Gadd sends Luigi to the Chalet, where a group of Toads was studying the ghosts. When Luigi finds a blue Toad, the Toad causes the ice to break by dancing, and they drop into a cave. Aside from the ghosts, this is also home to a few fuzzballs that follow Luigi but do not actually hurt him.
History[edit]
The mine near the Chalet was originally a secret mining project run by an unnamed company. The mine was abandoned after ghosts began haunting it, scaring the crew away. Years of neglect have caused it to become flooded with snow and ice, in addition to crystals with special properties. One of the properties of the crystals is that they strengthen ghosts that go inside the crystals for a certain amount of time. The Boos collect a large number of crystals and take them elsewhere. At the bottom of the mine, Luigi encounters several Boos where they strengthen up normal ghosts, causing them to become more powerful and gain white crystal markings all over the body.
Missions[edit]
| Mission | Description | Goal | Objectives |
|---|---|---|---|
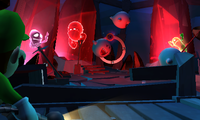
 D-1: Cold Case |
I can’t seem to get a hold of my Toad assistant at the Chalet. He’s probably napping in front of the fireplace again. It’s hard to find good help these days! | The Toad assistant assigned to the Secret Mine is not answering E. Gadd's calls. Find him, and bring him back using the Pixelator Screen in the Chalet.
Find the elevator to the Chalet, and use the Pixelator Screen there to send the Toad back to the Bunker. |
|
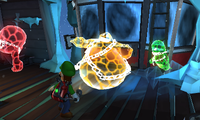
 D-2: Hit Rock Bottom |
According to the Toad assistant, ghosts—Boos especially—have been very active in the mine. Perhaps the security photo will tell us what they’re up to. | The security image revealed strange events in the Crystal Quarry at the bottom of the mine. Get there as soon as possible, and figure out what the Boos are doing with the ghosts. |
|
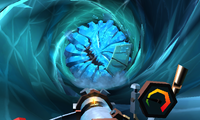
 D-3: Across the Chasm |
Success! The Parascope has located both the Dark Moon piece and the possessor that has it. But you’ll have to cross the chasm and reach the other side to find them! | Find the access to the gondola in the Terminal. Board it, and cross the chasm to reach the location of the Dark Moon piece. Remove the paranormal chains that block the door to the gondola. Capture each ghostly culprit to vanish each chain. Find another way to cross the chasm. Reach the Workshop, and look for the Dark Moon piece. |
|
 Boss: Chilly Ride |
Bingo! I’ve found the possessor ghost hiding in the Workshop! And if we’ve learned anything, it’s that where there are possessors, there are Dark Moon pieces! | Open the door to the Workshop. Once inside, search for the Dark Moon piece.
The possessor is trying to get away, and the sled is overheating! Catch him, and retrieve the Dark Moon piece! |
|
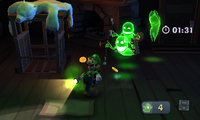 Bonus: Severe Infestation |
We have an infestation on our hands! The Parascope is detecting strong paranormal signals throughout the Secret Mine. It’s go time, Luigi! | Ghosts are back in the Secret Mine. Find and capture all the ghosts as fast as you can! |
|
Objects[edit]
- 13 Sapphires
Bosses[edit]
- Mini-bosses: A Strong Greenie, Strong Slammer, and a Strong Gobber
- Boss: Shrewd Possessor (possessing an icy monster)
Rooms[edit]
First Floor/Ground Floor (PAL)[edit]
| Image/Name | Gem | Boo |
|---|---|---|
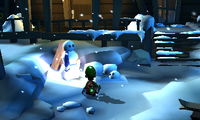 Chalet Approach |
Pebble Sapphire | N/A |
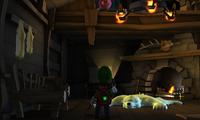 Chalet |
Coffin Sapphire | Booger (American) / Boouncer (British) Booger: "I'm Booger! Why must you always pick on me?" Boouncer: "I'm Boouncer! You think you can be in here? Naw, mate. Not with those shoes. Now, clear off!" (Availability: D-2) |
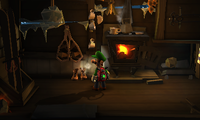 Smokehouse |
Round Sapphire | N/A |
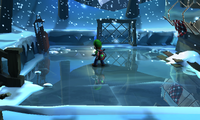 Ice Lake |
N/A | N/A |
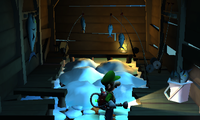 Fishing Hut |
Triangle Sapphire | N/A |
Basement 1[edit]
| Image/Name | Gem | Boo |
|---|---|---|
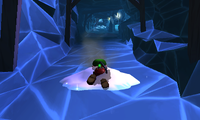 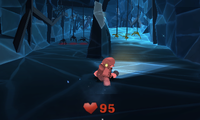 Skip Slope/Icy Slope (PAL) |
Star Sapphire | N/A |
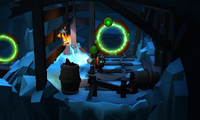 Crossroads |
Spindle Sapphire | N/A |
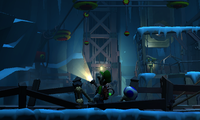 Airway |
Drop Sapphire | N/A |
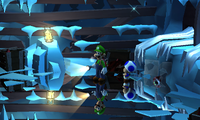 Basin |
N/A | N/A |
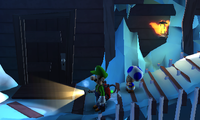 Drift Hall/Drift Passage (PAL) |
N/A | N/A |
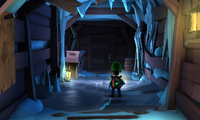 Prospector's Crossing/Prospector's Path (PAL) |
Rhombus Sapphire | N/A |
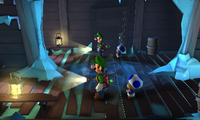 Terminal/Station (PAL) |
N/A | Boofoon "Hey, who turned out the lights? I'm Boofoon!" (Availability: D-1) |
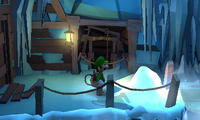 Under the Ice |
Baguette Sapphire | N/A |
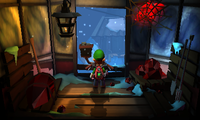 Gondola |
N/A | N/A |
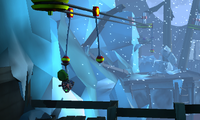 High Wires |
Football Sapphire Mushroom Sapphire |
N/A |
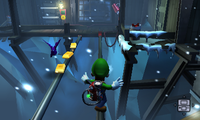 Workshop Landing |
N/A | N/A |
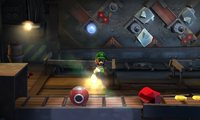 Maintenance Room |
N/A | N/A |
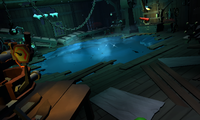 Workshop |
N/A | N/A |
Basement 2[edit]
| Image/Name | Gem | Boo |
|---|---|---|
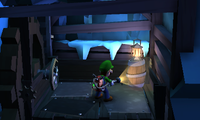 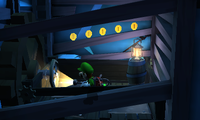 Shaft |
Octagon Sapphire | N/A |
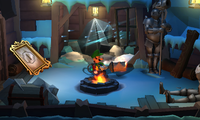 Smuggler's Hideout |
N/A | N/A |
  Skip Slope/Icy Slope (PAL) |
Star Sapphire | N/A |
Basement 3[edit]
| Image/Name | Gem | Boo |
|---|---|---|
  Shaft |
Octagon Sapphire | N/A |
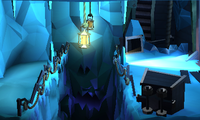 Coward's Chasm |
N/A | N/A |
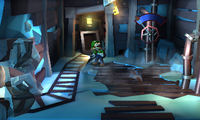 Cinder Mine |
N/A | N/A |
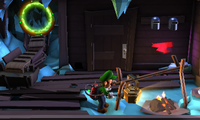 Deep Hall/Deep Passage (PAL) |
Oval Sapphire | ParaBoola American: "I'm ParaBoola! A symmetrical open-plane curve formed by the intersection of a cone with a plane parallel to its side! I mean... BOO!" British: "I'm ParaBoola! I've set my derivative to zero to be at my peak! I mean... BOO!" (Availability: D-3) |
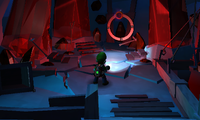 Crystal Quarry |
Coffin Sapphire | N/A |
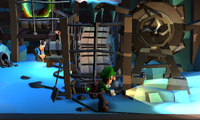 Pit Mine |
N/A | N/A |
Other[edit]
| Image/Name | Gem | Boo |
|---|---|---|
 Frozen Pit |
N/A | N/A |
Profiles[edit]
- In-game description
- English (American):
Some determined geologists started a mining operation in these snowcapped mountains. But when the ghosts started moving in, they got scared and abandoned it! - English (British):
Some determined geologists set up a mining operation in these snow-capped mountains, but they got scared and abandoned it after the ghosts moved in!
- English (American):
Media[edit]
| File info |
| File info |
Gallery[edit]
Background image used for Nintendo Co., Ltd.'s LINE account for celebrate Halloween in 2015
Names in other languages[edit]
| Language | Name | Meaning | Notes |
|---|---|---|---|
| Japanese | ヒャッキ~ヤ坑道[?] Hyakki~ya Kōdō |
Pun of「百鬼夜行」(Hyakki Yagyō) and「坑道」(kōdō, "tunnel") | |
| Chinese (simplified) | 百鬼夜行坑道[?] Bǎiguǐ Yèxíng Kēngdào |
Hundred-Demon-Night Tunnel | |
| Chinese (traditional) | 百鬼夜行坑道[?] Bǎiguǐ Yèxíng Kēngdào |
Hundred-Demon-Night Tunnel | |
| Dutch | IJzige Mijn[?] | Icy Mine | |
| French | Mine des mystères[?] | Mystery Mine | |
| German | Schneebergwerk[?] | Snow Mine | |
| Italian | Miniera segreta[?] | Secret mone | |
| Korean | 비밀의 갱도[?] Bimil-ui Gaengdo |
Secret Mine Shaft | |
| Portuguese | Mina Secreta[?] | Secret Mine | |
| Russian | Секретная Шахта[?] Sekretnaya Shahta |
Secret Mine | |
| Spanish | Mina Secreta[?] | Secret Mine |
Trivia[edit]
- King Boo can be seen in the Ice Lake during the first mission and then near the Workshop in the third mission.
- This is the only mansion where the Polterpup cannot be found.
