Gallery:Mario Party 6: Difference between revisions
| (115 intermediate revisions by 21 users not shown) | |||
| Line 3: | Line 3: | ||
==Logos== | ==Logos== | ||
{{image|more=yes|Needs in-game Japanese logo}} | |||
<gallery widths=420> | <gallery widths=420> | ||
MP6 logo.png|International logo | |||
MP6_JapaneseLogo.jpg|Japanese logo | MP6_JapaneseLogo.jpg|Japanese logo | ||
MP6 in-game logo.png|In-game logo | |||
</gallery> | </gallery> | ||
==Artwork== | ==Artwork== | ||
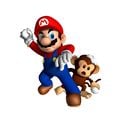
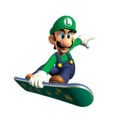
===Playable | ===Playable characters=== | ||
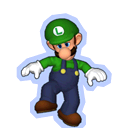
====With | ====With background==== | ||
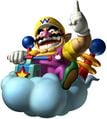
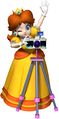
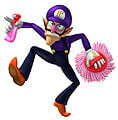
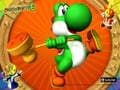
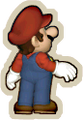
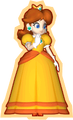
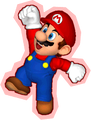
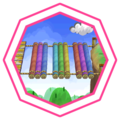
The background in each of the following pictures is based on the "day/night" gameplay, which is the primary feature of this game. | |||
<gallery> | <gallery perrow=6> | ||
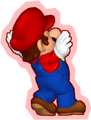
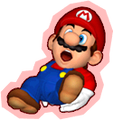
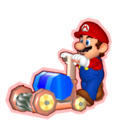
MP6 Mario2.jpg|[[Mario]] ([[Snow Brawl]]) | |||
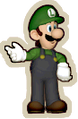
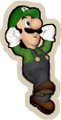
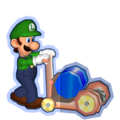
MP6 Luigi2.jpg|[[Luigi]] ([[Snow Whirled]]) | |||
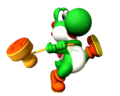
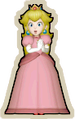
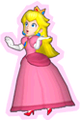
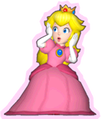
MP6 Peach2.jpg|[[Princess Peach]] ([[Odd Card Out]]) | |||
MP6 Yoshi2.jpg|[[Yoshi]] ([[Stamp By Me]]) | |||
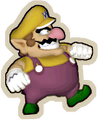
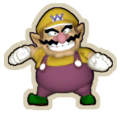
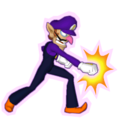
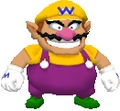
MP6 Wario2.jpg|[[Wario]] ([[Conveyor Bolt]]) | |||
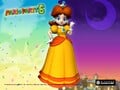
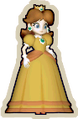
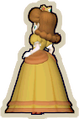
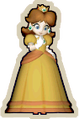
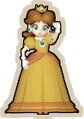
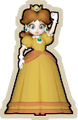
MP6 Daisy2.jpg|[[Princess Daisy]] ([[Freeze Frame]]) | |||
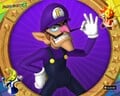
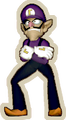
MP6 Waluigi2.jpg|[[Waluigi]] ([[Clean Team]]) | |||
MP6 Toad2.jpg|[[Toad]] ([[Lunar-tics]]) | |||
MP6 Boo2.jpg|[[Boo]] ([[Boonanza!]]) | |||
MP6 KoopaKid2.jpg|[[Koopa Kid]] ([[Insectiride]]) | |||
MP6 Toadette2.jpg|[[Toadette]] ([[Catch You Letter]]) | |||
</gallery> | </gallery> | ||
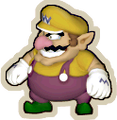
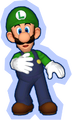
====Without background==== | ====Without background==== | ||
<gallery> | <gallery perrow=6> | ||
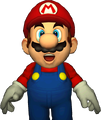
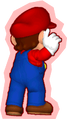
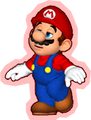
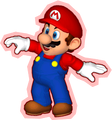
MP6_Mario.jpg|Mario | MP6_Mario.jpg|Mario | ||
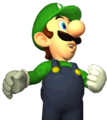
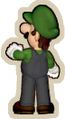
MP6_Luigi.jpg|Luigi | MP6_Luigi.jpg|Luigi | ||
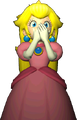
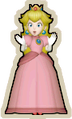
MP6_Peach.jpg|Princess Peach | MP6_Peach.jpg|Princess Peach | ||
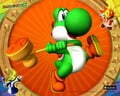
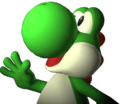
MP6_Yoshi.png|Yoshi | |||
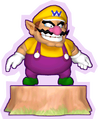
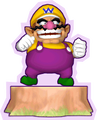
MP6_Wario.jpg|Wario | |||
MP6_Daisy.jpg|Princess Daisy | MP6_Daisy.jpg|Princess Daisy | ||
Waluigimp6.jpg|Waluigi | Waluigimp6.jpg|Waluigi | ||
MP6_Toad.jpg|Toad | MP6_Toad.jpg|Toad | ||
MP6_Boo.jpg|Boo | MP6_Boo.jpg|Boo | ||
MP6_KoopaKid.jpg|Koopa Kid | MP6_KoopaKid.jpg|Koopa Kid | ||
Toadette MP6 artwork alt.jpg|Toadette | |||
</gallery> | </gallery> | ||
===Other | ===Other pictures=== | ||
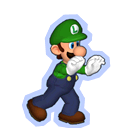
====Profile | ====Profile artwork (playable characters)==== | ||
<gallery> | <gallery perrow=5> | ||
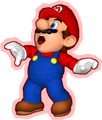
Mario Artwork - Mario Party 6.png|Mario | Mario Artwork - Mario Party 6.png|Mario | ||
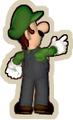
MP6 Luigi Artwork.jpg|Luigi | MP6 Luigi Artwork.jpg|Luigi | ||
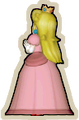
Princess Peach Artwork - Mario Party 6.png|Princess Peach | Princess Peach Artwork - Mario Party 6.png|Princess Peach | ||
Yoshi Artwork - Mario Party 6.png|Yoshi | |||
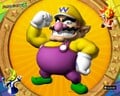
Mario Party 6 - Wario artwork.png|Wario | |||
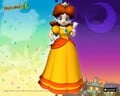
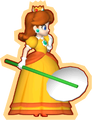
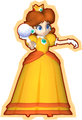
DaisyMP6.png|Princess Daisy | DaisyMP6.png|Princess Daisy | ||
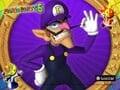
Waluigi Artwork - Mario Party 6.png|Waluigi | Waluigi Artwork - Mario Party 6.png|Waluigi | ||
Toad Artwork - Mario Party 6.png|Toad | Toad Artwork - Mario Party 6.png|Toad | ||
MP7Boo.png|Boo | MP7Boo.png|Boo | ||
| Line 56: | Line 58: | ||
====Miscellaneous==== | ====Miscellaneous==== | ||
<gallery> | <gallery perrow=5> | ||
MP6_Mario3.jpg|Mario (from group | MP6_Mario3.jpg|Mario (from group artwork) | ||
MP6 Toadette Artwork.jpg|Toadette (from group artwork) | |||
Twila.jpg|[[Twila]] | Twila.jpg|[[Twila]] | ||
Brighton.jpg|[[Brighton]] | Brighton.jpg|[[Brighton]] | ||
Pink Boo.png|[[Red Boo]] | |||
MP6 Website Wallpaper Mario 1024px.jpg|Mario wallpaper | |||
MP6 Website Wallpaper Yoshi 1024px.jpg|Yoshi wallpaper | |||
MP6 Website Wallpaper Yoshi 1280px.jpg|Yoshi wallpaper | |||
MP6 Website Wallpaper Wario 1280px.jpg|Wario wallpaper | |||
MP6 Website Wallpaper Waluigi 800px.jpg|Waluigi wallpaper | |||
MP6 Website Wallpaper Waluigi 1280px.jpg|Waluigi wallpaper | |||
MP6 Website Wallpaper Daisy 800px.jpg|Daisy wallpaper | |||
MP6 Website Wallpaper Daisy 1280px.jpg|Daisy wallpaper | |||
MP6 Website Wallpaper Twila&Brighton 800px.jpg|Twila and Brighton wallpaper | |||
MP6 Website Wallpaper Twila&Brighton 1280px.jpg|Twila and Brighton wallpaper | |||
</gallery> | </gallery> | ||
===Orbs=== | ===Orbs=== | ||
====Green Orbs==== | ====Green Orbs==== | ||
<gallery> | <gallery perrow=4> | ||
Mushroom Orb.jpg|[[Mushroom Orb]] | Mushroom Orb.jpg|[[Mushroom Orb]] | ||
Goldshroomorb.jpg|[[Super 'Shroom Orb]] | Goldshroomorb.jpg|[[Super 'Shroom Orb]] | ||
| Line 110: | Line 124: | ||
==Sprites and models== | ==Sprites and models== | ||
===Beginning of the | ===Beginning of the turn=== | ||
<gallery perrow=5> | <gallery perrow=5> | ||
Mario Thumbs Up Go 6.png|Mario | Mario Thumbs Up Go 6.png|Mario | ||
Start Gag 6.png|Luigi | Start Gag 6.png|Luigi | ||
Start Kissy 6.png|Princess Peach | Start Kissy 6.png|Princess Peach | ||
Start Yoshe 6.png|Yoshi | |||
GoWar 6.png|Wario | |||
Daisy Go Mario Party 6.png|Princess Daisy | Daisy Go Mario Party 6.png|Princess Daisy | ||
MP6 Go Waluigi.png|Waluigi | MP6 Go Waluigi.png|Waluigi | ||
Start Psyc 6.png|Toad | Start Psyc 6.png|Toad | ||
Start Boohoo 6.png|Boo | Start Boohoo 6.png|Boo | ||
Start KoopaKid 6.png|Koopa Kid | Start KoopaKid 6.png|Koopa Kid | ||
ToadetteStartMP6.png|Toadette | |||
Start DonkeyDude 6.png|Donkey Kong | Start DonkeyDude 6.png|Donkey Kong | ||
GoBowzer6.png|Bowser | GoBowzer6.png|Bowser | ||
</gallery> | </gallery> | ||
===Beginning of the | ===Beginning of the turn (Japanese)=== | ||
<gallery perrow=5> | <gallery perrow=5> | ||
Start Mario 6 JP.png|Mario | Start Mario 6 JP.png|Mario | ||
Start Luigi 6 JP.png|Luigi | Start Luigi 6 JP.png|Luigi | ||
Start Peach 6 JP.png|Princess Peach | Start Peach 6 JP.png|Princess Peach | ||
Start Yoshi 6 JP.png|Yoshi | |||
Start Wario 6 JP.png|Wario | |||
Start Daisy 6 JP.png|Princess Daisy | Start Daisy 6 JP.png|Princess Daisy | ||
Start Waluigi 6 JP.png|Waluigi | Start Waluigi 6 JP.png|Waluigi | ||
Start Kinopio 6 JP.png|Toad | Start Kinopio 6 JP.png|Toad | ||
Start Teresa 6 JP.png|Boo | Start Teresa 6 JP.png|Boo | ||
Start Minikoopa 6 JP.png|Koopa Kid | Start Minikoopa 6 JP.png|Koopa Kid | ||
Start Kinopico 6 JP.png|Toadette | |||
Start Donkey 6 JP.png|Donkey Kong | Start Donkey 6 JP.png|Donkey Kong | ||
Start Koopa 6 JP.png|Bowser | Start Koopa 6 JP.png|Bowser | ||
</gallery> | </gallery> | ||
===Ending | ===Ending sprites=== | ||
<gallery perrow=5> | <gallery perrow=5> | ||
Mario Ending Sprite 6.png|Mario | Mario Ending Sprite 6.png|Mario | ||
Luigi Gazing Up 6.png|Luigi | Luigi Gazing Up 6.png|Luigi | ||
Peach Gasp 6.png|Princess Peach | Peach Gasp 6.png|Princess Peach | ||
Yoshi End 6.png|Yoshi | |||
War Ending 6.png|Wario | |||
Daisy Mario Party 6.png|Princess Daisy | Daisy Mario Party 6.png|Princess Daisy | ||
Waluigi Sun 6.png|Waluigi | Waluigi Sun 6.png|Waluigi | ||
Toad Smiles Ending 6.png|Toad | Toad Smiles Ending 6.png|Toad | ||
Boo Looking Up 6.png|Boo | Boo Looking Up 6.png|Boo | ||
KoopaKid Staring End 6.png|Koopa Kid | KoopaKid Staring End 6.png|Koopa Kid | ||
</gallery> | </gallery> | ||
===Title | ===Title screen=== | ||
<gallery> | <gallery> | ||
Mario Pointy MP6.png|Mario | Mario Pointy MP6.png|Mario | ||
LuigiChainChompMP6.png|Luigi | LuigiChainChompMP6.png|Luigi | ||
PeachTitleScreenMP6.png|Princess Peach | PeachTitleScreenMP6.png|Princess Peach | ||
YoshiTitleScreenMP6.png|Yoshi | |||
Wariow Party 6 Title.png|Wario | |||
DaisyPinkBooMP6.png|Princess Daisy | DaisyPinkBooMP6.png|Princess Daisy | ||
MP6 Waluigi and Lakitu.png|Waluigi | MP6 Waluigi and Lakitu.png|Waluigi | ||
ToadWavingMP6.png|Toad | ToadWavingMP6.png|Toad | ||
BoowithOrbMP6.png|Boo | BoowithOrbMP6.png|Boo | ||
KoopaKidHammerMP6.png|Koopa Kid | KoopaKidHammerMP6.png|Koopa Kid | ||
KoopaKidBlueTitleScreen.png|Blue | ToadetteMP6TitleScreen.png|Toadette | ||
KoopaKidRedTitleScreen.png|Red | KoopaKidBlueTitleScreen.png|Blue K. Kid | ||
KoopaKidGreenTitleScreen.png|Green | KoopaKidRedTitleScreen.png|Red K. Kid | ||
KoopaKidGreenTitleScreen.png|Green K. Kid | |||
ThwompTitleScreenMP6.png|Thwomp | ThwompTitleScreenMP6.png|Thwomp | ||
WhompTitleScreenMP6.png|Whomp | WhompTitleScreenMP6.png|Whomp | ||
| Line 197: | Line 211: | ||
Luigi6 (opening) - MP6.png|Luigi | Luigi6 (opening) - MP6.png|Luigi | ||
Luigi7 (opening) - MP6.png|Luigi | Luigi7 (opening) - MP6.png|Luigi | ||
Peach1 (opening) - MP6.png|Peach | |||
Peach2 (opening) - MP6.png|Peach | |||
Peach3 (opening) - MP6.png|Peach | |||
Peach4 (opening) - MP6.png|Peach | |||
Peach5 (opening) - MP6.png|Peach | |||
Peach6 (opening) - MP6.png|Peach | |||
Peach7 (opening) - MP6.png|Peach | |||
Yoshi1 (opening) - MP6.png|Yoshi | Yoshi1 (opening) - MP6.png|Yoshi | ||
Yoshi2 (opening) - MP6.png|Yoshi | Yoshi2 (opening) - MP6.png|Yoshi | ||
| Line 204: | Line 225: | ||
Yoshi6 (opening) - MP6.png|Yoshi | Yoshi6 (opening) - MP6.png|Yoshi | ||
Yoshi7 (opening) - MP6.png|Yoshi | Yoshi7 (opening) - MP6.png|Yoshi | ||
Wario1 (opening) - MP6.png|Wario | |||
Wario2 (opening) - MP6.png|Wario | |||
Wario3 (opening) - MP6.png|Wario | |||
Wario4 (opening) - MP6.png|Wario | |||
Wario5 (opening) - MP6.png|Wario | |||
Wario6 (opening) - MP6.png|Wario | |||
Wario7 (opening) - MP6.png|Wario | |||
Daisy1 (opening) - MP6.png|Daisy | |||
Daisy2 (opening) - MP6.png|Daisy | |||
Daisy3 (opening) - MP6.png|Daisy | |||
Daisy4 (opening) - MP6.png|Daisy | |||
Daisy5 (opening) - MP6.png|Daisy | |||
Daisy6 (opening) - MP6.png|Daisy | |||
Daisy7 (opening) - MP6.png|Daisy | |||
Waluigi1 (opening) - MP6.png|Waluigi | |||
Waluigi2 (opening) - MP6.png|Waluigi | |||
Waluigi3 (opening) - MP6.png|Waluigi | |||
Waluigi4 (opening) - MP6.png|Waluigi | |||
Waluigi5 (opening) - MP6.png|Waluigi | |||
Waluigi6 (opening) - MP6.png|Waluigi | |||
Waluigi7 (opening) - MP6.png|Waluigi | |||
Toad1 (opening) - MP6.png|Toad | Toad1 (opening) - MP6.png|Toad | ||
Toad2 (opening) - MP6.png|Toad | Toad2 (opening) - MP6.png|Toad | ||
| Line 227: | Line 269: | ||
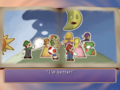
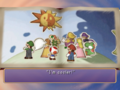
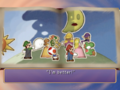
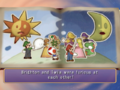
Brighton3 (opening) - MP6.png|Brighton | Brighton3 (opening) - MP6.png|Brighton | ||
Brighton4 (opening) - MP6.png|Brighton | Brighton4 (opening) - MP6.png|Brighton | ||
Twila1 - opening.png|Twila | |||
Twila2 (opening) - MP6.png|Twila | |||
Twila3 (opening) - MP6.png|Twila | |||
Twila4 (opening) - MP6.png|Twila | |||
</gallery> | |||
===Transition screens=== | |||
<gallery class="blackbg"> | |||
Brighton Transition Screen.png|[[Brighton]] | |||
Twila Transition Screen.png|[[Twila]] | |||
Koopa Kid Transition MP6.png|[[Koopa Kid]] | |||
Bowser Transition MP6.png|[[Bowser]] | |||
</gallery> | |||
===Time system=== | |||
<gallery> | |||
Daytime System MP6.png | |||
Nighttime System MP6.png | |||
</gallery> | |||
===Rotating backgrounds=== | |||
<gallery perrow=6> | |||
Daytime Rotation BG.png|[[Mario Party 6#Solo Mode|Solo Mode]] and [[Mario Party 6#Mic Mode|Mic Mode]] | |||
Day and Night Rotation BG.png|[[Mario Party 6#Party Mode|Party Mode]] and [[Star Bank]] | |||
Nighttime Rotation BG.png|[[Mario Party 6#Mini-Game Mode|Mini-Game Mode]] and [[Mario Party 6#Option Mode|Option Mode]] | |||
Thirsty Gulch Rotation BG.png|[[Thirsty Gulch]] | |||
Astro Avenue Rotation BG.png|[[Astro Avenue]] | |||
Infernal Tower Rotation BG.png|[[Infernal Tower]] | |||
Towering Treetop Rotation BG.png|[[Towering Treetop]] | |||
E. Gadd's Garage Rotation BG.png|[[E. Gadd's Garage]] | |||
Faire Square Rotation BG.png|[[Faire Square]] | |||
Snowflake Lake Rotation BG.png|[[Snowflake Lake]] | |||
Castaway Bay Rotation BG.png|[[Castaway Bay]] | |||
Clockwork Castle Rotation BG.png|[[Clockwork Castle]] | |||
Speak Up Rotation BG.png|[[Speak Up]] | |||
Star Sprint Rotation BG.png|[[Star Sprint]] | |||
Mic Mini-Games Rotation BG.png|Mic Mini-games | |||
Mini-game Tour Rotation BG.png|Mini-game Tour | |||
Battle Bridge Rotation BG.png|Battle Bridge | |||
Treetop Bingo Rotation BG.png|Treetop Bingo | |||
Mount Duel Rotation BG.png|Mount Duel | |||
Decathlon Park Rotation BG.png|Decathlon Park | |||
Endurance Alley Rotation BG.png|Endurance Alley | |||
</gallery> | </gallery> | ||
| Line 326: | Line 411: | ||
Toadette2 Miracle YoshiRevenge 6.png|Toadette | Toadette2 Miracle YoshiRevenge 6.png|Toadette | ||
Toadette Miracle KitchenMonkeys 6.png|Toadette | Toadette Miracle KitchenMonkeys 6.png|Toadette | ||
File:Tree 1 (Miracle Book) - Mario Party 6.png|[[Tree]] | |||
File:Tree 2 (Miracle Book) - Mario Party 6.png|Tree | |||
File:Tree 3 (Miracle Book) - Mario Party 6.png|Tree | |||
File:Tree Palm (Miracle Book) - Mario Party 6.png|Tree | |||
FrozenUkiki1 Miracle YoshiRevenge 6.png|[[Ukiki]] | FrozenUkiki1 Miracle YoshiRevenge 6.png|[[Ukiki]] | ||
FrozenUkiki2 Miracle YoshiRevenge 6.png|Ukiki | FrozenUkiki2 Miracle YoshiRevenge 6.png|Ukiki | ||
| Line 356: | Line 445: | ||
MarioMP6.png|Mario | MarioMP6.png|Mario | ||
LuigiMP6.png|Luigi | LuigiMP6.png|Luigi | ||
WarioMP6.png|Wario | WarioMP6.png|Wario | ||
WaluigiMP6.png|Waluigi | WaluigiMP6.png|Waluigi | ||
File:YoshiMP6.png|Yoshi | |||
ToadMP6.png|Toad | |||
BooMP6.png|Boo | |||
ToadetteMP6.png|Toadette | ToadetteMP6.png|Toadette | ||
ShyGuyMP6.png|Shy Guy | ShyGuyMP6.png|Shy Guy | ||
File:DonkeyKongMP6.png|Donkey Kong | |||
BowserMP6.png|Bowser | BowserMP6.png|Bowser | ||
GoombaMP6.png|[[Goomba]] | |||
GoldGoombaMP6.png|[[Gold Goomba]] | |||
File:ChainChompMP6.png|Chain Chomp | File:KoopaTroopaMP6.png|[[Koopa Troopa]] | ||
ChainChompMP6.png|Chain Chomp | |||
CoinMP6.png|Coin | CoinMP6.png|Coin | ||
</gallery> | </gallery> | ||
| Line 375: | Line 467: | ||
MP6ProfEGaddModel.png|[[Professor E. Gadd]] | MP6ProfEGaddModel.png|[[Professor E. Gadd]] | ||
MP6MailShyGuyModel.png|[[Shy Guy]] (from [[Catch You Letter]]) | MP6MailShyGuyModel.png|[[Shy Guy]] (from [[Catch You Letter]]) | ||
MP6HostGoombaModel.png|[[Goomba]] (from [[Control | MP6HostGoombaModel.png|[[Goomba]] (from [[Control Shtick]]) | ||
MP6LakituModel.png|[[Lakitu]] | MP6LakituModel.png|[[Lakitu]] | ||
MP6PokeyModel.png|[[Pokey]] | MP6PokeyModel.png|[[Pokey]] | ||
| Line 382: | Line 474: | ||
</gallery> | </gallery> | ||
===Board | ===Dialogue portraits=== | ||
<gallery widths=80 heights=72> | |||
Brighton and Twila Dialogue Portrait MP6.png|Brighton and Twila | |||
Brighton Dialogue Portrait MP6.png|Brighton | |||
Twila Dialogue Portrait MP6.png|Twila | |||
Goomba Dialogue Portrait MP6.png|[[Goomba]] | |||
Koopa Dialogue Portrait MP6.png|[[Koopa Troopa|Koopa]] | |||
Paratroopa Dialogue Portrait MP6.png|[[Koopa Paratroopa|Paratroopa]] | |||
Shy Guy Dialogue Portrait MP6.png|[[Shy Guy]] | |||
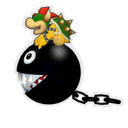
Chain Chomp Dialogue Portrait MP6.png|[[Chain Chomp]] | |||
Whomp Dialogue Portrait MP6.png|[[Whomp]] | |||
Flutter Dialogue Portrait MP6.png|[[Flutter]] | |||
Ukiki Dialogue Portrait MP6.png|[[Ukiki]] | |||
Pink Boo Dialogue Portrait MP6.png|[[Red Boo|Pink Boo]] | |||
Spear Guy Dialogue Portrait MP6.png|[[Spear Guy]] | |||
Kamek Dialogue Portrait_MP6.png|[[Kamek]] | |||
Toady Dialogue Portrait MP6.png|[[Toady]] | |||
Woody Dialogue Portrait MP6.png|[[Woody]] | |||
Evil Woody Dialogue Portrait MP6.png|[[Evil Woody]] | |||
Professor Elvin Gadd Dialogue Portrait MP6.png|[[Professor Elvin Gadd]] | |||
Red Koopa Kid Dialogue Portrait MP6.png|Red K. Kid | |||
Green Koopa Kid Dialogue Portrait MP6.png|Green K. Kid | |||
Blue Koopa Kid Dialogue Portrait MP6.png|Blue K. Kid | |||
Bowser Dialogue Portrait MP6.png|[[Bowser]] | |||
</gallery> | |||
===Round of Miracles icons=== | |||
<gallery> | |||
Mario Round of Miracles MP6.png|Mario | |||
Luigi Round of Miracles MP6.png|Luigi | |||
Peach Round of Miracles MP6.png|Peach | |||
Yoshi Round of Miracles MP6.png|Yoshi | |||
Wario Round of Miracles MP6.png|Wario | |||
Daisy Round of Miracles MP6.png|Daisy | |||
Waluigi Round of Miracles MP6.png|Waluigi | |||
Toad Round of Miracles MP6.png|Toad | |||
Boo Round of Miracles MP6.png|Boo | |||
Koopa Kid Round of Miracles MP6.png|Koopa Kid | |||
Toadette Round of Miracles MP6.png|Toadette | |||
Right 20 coins Round of Miracles MP6.png|20 coins → | |||
Right Star Round of Miracles MP6.png|1 Star → | |||
Right 2 Stars Round of Miracles MP6.png|2 Stars → | |||
Exchange coins Round of Miracles MP6.png|↔ all coins | |||
Exchange Stars Round of Miracles MP6.png|↔ all Stars | |||
Exchange coins and Stars Round of Miracles MP6.png|↔ all coins and Stars | |||
</gallery> | |||
===Board selection markers=== | |||
<gallery> | |||
MP6 Character Selection P1 Text.png|First player | |||
MP6 Character Selection P2 Text.png|Second player | |||
MP6 Character Selection P3 Text.png|Third player | |||
MP6 Character Selection P4 Text.png|Fourth player | |||
MP6 Character Selection CPU Text.png|Computer player | |||
</gallery> | |||
===Place markers=== | |||
<gallery> | |||
MP6 Board Play 1st Place Marker Test.png|1st place | |||
MP6 Board Play 2nd Place Marker Test.png|2nd place | |||
MP6 Board Play 3rd Place Marker Test.png|3rd place | |||
MP6 Board Play 4th Place Marker Test.png|4th place | |||
</gallery> | |||
===Main menu game modes=== | |||
<gallery> | |||
Party Mode Main Menu MP6.png|[[Mario_Party_6#Party_Mode|Party Mode]] | |||
Solo Mode Main Menu MP6.png|[[Mario_Party_6#Solo_Mode|Solo Mode]] | |||
Mic Mode Main Menu MP6.png|[[Mario_Party_6#Mic_Mode|Mic Mode]] | |||
Mini-game Mode Main Menu MP6.png|[[Mario_Party_6#Mini-Game_Mode|Mini-Game Mode]] | |||
Option Mode Main Menu MP6.png|[[Mario_Party_6#Option_Mode|Option Mode]] | |||
Star Bank Main Menu MP6.png|[[Mario_Party_6#Star_Bank|Star Bank]] | |||
</gallery> | |||
===Game mode logos=== | |||
<gallery> | |||
Solo Mode Logo MP6.png|Solo Mode | |||
Mic Mode Logo MP6.png|Mic Mode | |||
Star Bank Logo MP6.png|Star Bank | |||
Party Mode Logo MP6.png|Party Mode | |||
Mini-Game Mode Logo MP6.png|Mini-Game Mode | |||
</gallery> | |||
===Board selection panels=== | |||
<gallery perrow=6> | |||
Towering Treetop Day and Night Panels.png|[[Towering Treetop]] | |||
E. Gadd's Garage Day and Night Panels.png|[[E. Gadd's Garage]] | |||
Faire Square Day and Night Panels.png|[[Faire Square]] | |||
Snowflake Lake Day and Night Panels.png|[[Snowflake Lake]] | |||
Castaway Bay Day and Night Panels.png|[[Castaway Bay]] | |||
Clockwork Castle Day and Night Panels.png|[[Clockwork Castle]] | |||
Thirsty Gulch Panel.png|[[Thirsty Gulch]] | |||
Astro Avenue Panel.png|[[Astro Avenue]] | |||
Infernal Tower Panel.png|[[Infernal Tower]] | |||
</gallery> | |||
===Board icons=== | |||
====Party Mode boards==== | ====Party Mode boards==== | ||
<gallery> | <gallery perrow=6> | ||
MP6 Towering Treetop Logo.png|[[Towering Treetop]] | MP6 Towering Treetop Logo.png|[[Towering Treetop]] | ||
MP6 Towering Treetop Logo JP.png| | MP6 Towering Treetop Logo JP.png|Towering Treetop (Japanese) | ||
MP6 E. Gadd's Garage Logo.png|[[E. Gadd's Garage]] | MP6 E. Gadd's Garage Logo.png|[[E. Gadd's Garage]] | ||
MP6 E. Gadd's Garage Logo JP.png| | MP6 E. Gadd's Garage Logo JP.png|E. Gadd's Garage (Japanese) | ||
MP6 Faire Square Logo.png|[[Faire Square]] | MP6 Faire Square Logo.png|[[Faire Square]] | ||
MP6 Faire Square Logo JP.png| | MP6 Faire Square Logo JP.png|Faire Square (Japanese) | ||
MP6 Snowflake Lake Logo.png|[[Snowflake Lake]] | MP6 Snowflake Lake Logo.png|[[Snowflake Lake]] | ||
MP6 Snowflake Lake Logo JP.png| | MP6 Snowflake Lake Logo JP.png|Snowflake Lake (Japanese) | ||
MP6 Castaway Bay Logo.png|[[Castaway Bay]] | MP6 Castaway Bay Logo.png|[[Castaway Bay]] | ||
MP6 Castaway Bay Logo JP.png| | MP6 Castaway Bay Logo JP.png|Castaway Bay (Japanese) | ||
MP6 Clockwork Castle Logo.png|[[Clockwork Castle]] | MP6 Clockwork Castle Logo.png|[[Clockwork Castle]] | ||
MP6 Clockwork Castle Logo JP.png| | MP6 Clockwork Castle Logo JP.png|Clockwork Castle (Japanese) | ||
</gallery> | |||
====Party Mode logos==== | |||
<gallery> | |||
Towering Treetop Party Mode logo.png|Towering Treetop | |||
E. Gadd's Garage Party Mode logo.png|E. Gadd's Garage | |||
Faire Square Party Mode logo.png|Faire Square | |||
Snowflake Lake Party Mode logo.png|Snowflake Lake | |||
Castaway Bay Party Mode logo.png|Castaway Bay | |||
Clockwork Castle Party Mode logo.png|Clockwork Castle | |||
</gallery> | |||
====Board results logos==== | |||
<gallery> | |||
Towering Treetop Results logo.png|Towering Treetop | |||
E. Gadd's Garage Results logo.png|E. Gadd's Garage | |||
Faire Square Results logo.png|Faire Square | |||
Snowflake Lake Results logo.png|Snowflake Lake | |||
Castaway Bay Results logo.png|Castaway Bay | |||
Clockwork Castle Results logo.png|Clockwork Castle | |||
</gallery> | |||
====Tutorial space icons==== | |||
<gallery> | |||
Blue Space Tutorial MP6.png|[[Blue Space]] | |||
Red Space Tutorial MP6.png|[[Red Space]] | |||
Q Space Tutorial MP6.png|[[Event Space]] | |||
Duel Space Tutorial MP6.png|[[Duel Space]] | |||
Miracle Space Tutorial MP6.png|[[Chance Time Space|Miracle Space]] | |||
DK Space Tutorial MP6.png|[[DK Space]] | |||
Orb Space Tutorial MP6.png|[[Orb Space]] | |||
Bowser Space Tutorial MP6.png|[[Bowser Space]] | |||
4-Player Mini-game Space Tutorial MP6.png|4-Player Mini-game Space | |||
1-Vs.-3 Mini-game Space Tutorial MP6.png|1-Vs.-3 Mini-game Space | |||
2-Vs.-2 Mini-game Space Tutorial MP6.png|2-Vs.-2 Mini-game Space | |||
Battle Mini-game Space Tutorial MP6.png|Battle Mini-game Space | |||
Duel Mini-game Space Tutorial MP6.png|Duel Mini-game Space | |||
Rare Mini-game Space Tutorial MP6.png|Rare Mini-game Space | |||
</gallery> | </gallery> | ||
| Line 407: | Line 633: | ||
MP6 Infernal Tower Logo.png|[[Infernal Tower]] | MP6 Infernal Tower Logo.png|[[Infernal Tower]] | ||
MP6 Infernal Tower Logo JP.png|[[Infernal Tower]] (Japanese) | MP6 Infernal Tower Logo JP.png|[[Infernal Tower]] (Japanese) | ||
</gallery> | |||
====Solo Mode logos==== | |||
<gallery> | |||
Thirsty Gulch Solo Mode logo.png|[[Thirsty Gulch]] | |||
Astro Avenue Solo Mode logo.png|[[Astro Avenue]] | |||
Infernal Tower Solo Mode logo.png|[[Infernal Tower]] | |||
</gallery> | |||
===DK and Bowser event logos=== | |||
<gallery> | |||
DK Bonus Logo MP6.png|DK Bonus | |||
DK Mini-game Logo MP6.png|DK Mini-game | |||
Bowser Bonus Logo MP6.png|Bowser Bonus | |||
Bowser Mini-game Logo MP6.png|Bowser Mini-game | |||
</gallery> | |||
===Mic Mode=== | |||
====Mic Mode logos==== | |||
<gallery> | |||
Speak Up Mic Mode logo.png|[[Speak Up]] | |||
Star Sprint Mic Mode logo.png|[[Star Sprint]] | |||
Mic Mini-games Mic Mode logo.png|Mic Mini-games | |||
</gallery> | |||
====Mic Mode panels==== | |||
<gallery> | |||
Speak Up Panels.png|Speak Up | |||
Star Sprint Meadow Road Panel.png|Star Sprint ([[Meadow Road]]) | |||
Star Sprint Dark Path Panel.png|Star Sprint ([[Dark Path]]) | |||
Star Sprint Magma Flow Panel.png|Star Sprint ([[Magma Flow]]) | |||
Verbal Assault Panel.png|[[Verbal Assault]] | |||
Shoot Yer Mouth Off Panel.png|[[Shoot Yer Mouth Off]] | |||
Talkie Walkie Panel.png|[[Talkie Walkie]] | |||
Word Herd Panel.png|[[Word Herd]] | |||
Fruit Talktail Panel.png|[[Fruit Talktail]] | |||
</gallery> | |||
===Mini-game Mode=== | |||
====Mini-game Mode logos==== | |||
<gallery> | |||
Mini-game Tour Mini-game Mode logo.png|[[Mario Party 6#Mini-Game Mode|Mini-game Tour]] | |||
Battle Bridge Mini-game Mode logo.png|[[Mario Party 6#Mini-Game Mode|Battle Bridge]] | |||
Treetop Bingo Mini-game Mode logo.png|[[Mario Party 6#Mini-Game Mode|Treetop Bingo]] | |||
Mount Duel Mini-game Mode logo.png|[[Mario Party 6#Mini-Game Mode|Mount Duel]] | |||
Decathlon Park Mini-game Mode logo.png|[[Mario Party 6#Mini-Game Mode|Decathlon Park]] | |||
Endurance Alley Mini-game Mode logo.png|[[Mario Party 6#Mini-Game Mode|Endurance Alley]] | |||
</gallery> | |||
====Mini-game Mode panels==== | |||
<gallery> | |||
Mini-game Tour Panel.png|Mini-game Tour | |||
Battle Bridge Panel.png|Battle Bridge | |||
Treetop Bingo Panel.png|Treetop Bingo | |||
Mount Duel Panel.png|Mount Duel | |||
Decathlon Park Panel.png|Decathlon Park | |||
Endurance Alley Panel.png|Endurance Alley | |||
</gallery> | |||
====Decathlon Park mini-game icons==== | |||
<gallery> | |||
Decathlon Park Mini-game 1.png|[[Smashdance]] | |||
Decathlon Park Mini-game 2.png|[[What Goes Up...]] | |||
Decathlon Park Mini-game 3.png|[[Circuit Maximus]] | |||
Decathlon Park Mini-game 4.png|[[Snow Whirled]] | |||
Decathlon Park Mini-game 5.png|[[Note to Self]] | |||
Decathlon Park Mini-game 6.png|[[Pokey Punch-out]] | |||
Decathlon Park Mini-game 7.png|[[Sunday Drivers]] | |||
Decathlon Park Mini-game 8.png|[[Throw Me a Bone]] | |||
Decathlon Park Mini-game 9.png|[[Hyper Sniper]] | |||
Decathlon Park Mini-game 10.png|[[Stamp By Me]] | |||
</gallery> | |||
===Battle Mini-game event panels=== | |||
<gallery> | |||
Hyper Sniper Panel.png|[[Hyper Sniper]] | |||
Insectiride Panel.png|[[Insectiride]] | |||
Stamp By Me Panel.png|[[Stamp By Me]] | |||
Wrasslin' Rapids Panel.png|[[Wrasslin' Rapids]] | |||
Strawberry Shortfuse Panel.png|[[Strawberry Shortfuse]] | |||
Control Shtick Panel.png|[[Control Shtick]] | |||
</gallery> | </gallery> | ||
| Line 420: | Line 727: | ||
==Screenshots== | ==Screenshots== | ||
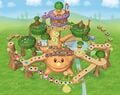
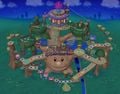
===Boards=== | ===Boards=== | ||
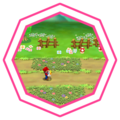
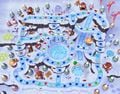
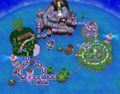
<gallery> | <gallery perrow=6 caption="Party Mode"> | ||
TTday.jpg|[[Towering Treetop]] (day) | TTday.jpg|[[Towering Treetop]] (day) | ||
TTnight.jpg|Towering Treetop (night) | TTnight.jpg|Towering Treetop (night) | ||
GGday.jpg|[[E. Gadd's Garage]] (day) | |||
GGnight.jpg|E. Gadd's Garage (night) | |||
FSday.jpg|[[Faire Square]] (day) | FSday.jpg|[[Faire Square]] (day) | ||
FSnight.jpg|Faire Square (night) | FSnight.jpg|Faire Square (night) | ||
SLday.jpg|[[Snowflake Lake]] (day) | SLday.jpg|[[Snowflake Lake]] (day) | ||
SLnight.jpg|Snowflake Lake (night) | SLnight.jpg|Snowflake Lake (night) | ||
| Line 433: | Line 740: | ||
CCday.jpg|[[Clockwork Castle]] (day) | CCday.jpg|[[Clockwork Castle]] (day) | ||
CCnight.jpg|Clockwork Castle (night) | CCnight.jpg|Clockwork Castle (night) | ||
</gallery> | |||
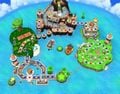
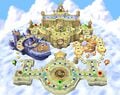
<gallery caption="Solo Mode"> | |||
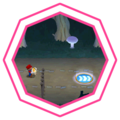
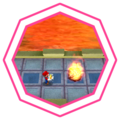
Thirsty Gulch.png|[[Thirsty Gulch]] | Thirsty Gulch.png|[[Thirsty Gulch]] | ||
Astro Avenue.png|[[Astro Avenue]] | Astro Avenue.png|[[Astro Avenue]] | ||
| Line 440: | Line 750: | ||
===Opening=== | ===Opening=== | ||
<gallery> | <gallery> | ||
MarioParty6-Opening.png|The opening to the game. | MarioParty6-Opening-1.png | ||
Mario Party 6 Title screen.png|The title screen | MarioParty6-Opening-2.png | ||
MarioParty6-Opening-3.png | |||
MarioParty6-Opening-4.png | |||
MarioParty6-Opening-5.png | |||
MarioParty6-Opening-6.png | |||
MarioParty6-Opening-7.png | |||
MarioParty6-Opening-8.png | |||
MarioParty6-Opening-9.png | |||
MarioParty6-Opening-10.png | |||
MarioParty6-Opening-11.png | |||
MarioParty6-Opening-12.png | |||
MarioParty6-Opening-13.png | |||
MarioParty6-Opening-14.png | |||
MarioParty6-Opening-15.png | |||
MarioParty6-Opening-16.png | |||
MarioParty6-Opening.png|The opening to the game | |||
MarioParty6-Opening-18.png | |||
MarioParty6-Opening-19.png | |||
MarioParty6-Opening-20.png | |||
MarioParty6-Opening-21.png | |||
MarioParty6-Opening-22.png | |||
MarioParty6-Opening-23.png | |||
Mario Party 6 Title screen.png|The title screen | |||
Mario Party 6 Title Screen JP.png|The title screen (Japanese) | Mario Party 6 Title Screen JP.png|The title screen (Japanese) | ||
</gallery> | |||
===In-game=== | |||
<gallery> | |||
File Screen MP6.png | |||
MP6 Board Map Start.png | |||
Explanation Board in the Day.png | |||
Explanation Board in the Night.png | |||
</gallery> | </gallery> | ||
===Miscellaneous=== | ===Miscellaneous=== | ||
<gallery> | <gallery> | ||
Mtduel.png|Mario wins [[Mario Party 6#Mini-Game Mode|Mount Duel]] | |||
MP6 Garden Grab Daytime Screenshot JP.png|Japanese version of [[Garden Grab]] minigame (daytime) | MP6 Garden Grab Daytime Screenshot JP.png|Japanese version of [[Garden Grab]] minigame (daytime) | ||
MP6 Garden Grab Screenshot JP.png|Japanese version of [[Garden Grab]] minigame (nighttime) | MP6 Garden Grab Screenshot JP.png|Japanese version of [[Garden Grab]] minigame (nighttime) | ||
| Line 455: | Line 796: | ||
==Box art== | ==Box art== | ||
<gallery heights=170> | <gallery heights=170> | ||
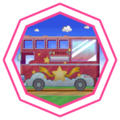
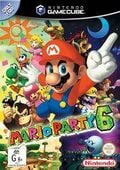
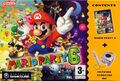
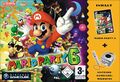
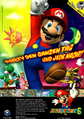
MP6_Cover.jpg|North | MP6 - Box NA.jpg|North American box art | ||
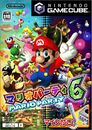
MP6_JapaneseCover.jpg| | MP6_-_Box_UK.png|European box art | ||
MP6- | MP6-German Box.jpg|German box art | ||
MP6 Germany bundle.jpg| | MP6 Box FR.jpg|French box art | ||
Mp6aus.jpg|Australian box art | |||
Mario Party 6 Box JP.jpg|Japanese box art | |||
</gallery> | |||
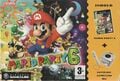
===Microphone bundle=== | |||
<gallery heights=130> | |||
MP6_Cover.jpg|North American box art | |||
MP6_JapaneseCover.jpg|Japanese box art | |||
MP6 - Bundle Box UK.jpg|European box art | |||
MP6 - Bundle Box DU.jpg|Dutch box art | |||
MP6 Germany bundle.jpg|German box art | |||
</gallery> | </gallery> | ||
==Miscellaneous== | ==Miscellaneous== | ||
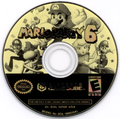
<gallery> | <gallery> | ||
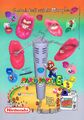
MP6 Disc North America.png|North American game disc | |||
MP6 Print Ad UK.jpg|UK print ad | |||
MP6 - print ad DE.png|German print ad | MP6 - print ad DE.png|German print ad | ||
</gallery> | </gallery> | ||
| Line 468: | Line 821: | ||
{{Galleries}} | {{Galleries}} | ||
{{MP6}} | {{MP6}} | ||
[[Category:Galleries | [[Category:Galleries]] | ||
[[Category:Mario Party 6|*]] | [[Category:Mario Party 6|*]] | ||
[[it:Galleria:Mario Party 6]] | |||
[[de:Mario Party 6/Galerie]] | |||
Latest revision as of 18:23, February 15, 2025
This is a gallery of images for the game Mario Party 6.
Logos[edit]
It has been requested that more images be uploaded for this article. Remove this notice only after the additional images have been added. Specifics: Needs in-game Japanese logo

International logo
Japanese logo

In-game logo

Artwork[edit]
Playable characters[edit]
With background[edit]
The background in each of the following pictures is based on the "day/night" gameplay, which is the primary feature of this game.


Without background[edit]
Mario
Luigi
Princess Peach
Yoshi
Wario
Princess Daisy
Waluigi
Toad
Boo
Koopa Kid
Toadette


Other pictures[edit]
Profile artwork (playable characters)[edit]

Mario
Luigi

Princess Peach
Yoshi
Wario

Princess Daisy
Waluigi
Toad

Boo


Miscellaneous[edit]
Mario (from group artwork)
Toadette (from group artwork)
Mario wallpaper
Yoshi wallpaper
Yoshi wallpaper
Wario wallpaper
Waluigi wallpaper
Waluigi wallpaper
Daisy wallpaper
Daisy wallpaper
Twila and Brighton wallpaper
Twila and Brighton wallpaper


Orbs[edit]
Green Orbs[edit]


Red Orbs[edit]


Yellow Orbs[edit]


Blue Orbs[edit]


Miscellaneous[edit]
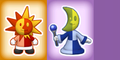
Group artwork showing the Japanese logo
Profile of Daisy from the official site


Sprites and models[edit]
Beginning of the turn[edit]
Mario

Luigi
Princess Peach
Yoshi
Wario

Princess Daisy
Waluigi
Toad

Boo
Koopa Kid
Toadette
Donkey Kong
Bowser


Beginning of the turn (Japanese)[edit]

Mario
Luigi
Princess Peach

Yoshi
Wario
Princess Daisy
Waluigi
Toad
Boo
Koopa Kid
Toadette
Donkey Kong
Bowser


Ending sprites[edit]
Mario
Luigi
Princess Peach
Yoshi
Wario
Princess Daisy
Waluigi

Toad
Boo
Koopa Kid


Title screen[edit]
Mario

Luigi
Princess Peach

Yoshi
Wario
Princess Daisy

Waluigi

Toad

Boo

Koopa Kid

Toadette

Blue K. Kid

Red K. Kid

Green K. Kid

Thwomp

Whomp

Shy Guy

Brighton

Twila


Opening cutscene[edit]
Mario
Mario
Mario
Mario

Mario
Mario
Mario
Luigi

Luigi
Luigi
Luigi
Luigi
Luigi
Luigi
Peach
Peach
Peach
Peach
Peach
Peach
Peach
Yoshi
Yoshi
Yoshi
Yoshi
Yoshi
Yoshi
Yoshi
Wario
Wario
Wario
Wario
Wario
Wario
Wario
Daisy
Daisy
Daisy

Daisy
Daisy
Daisy
Daisy
Waluigi

Waluigi
Waluigi

Waluigi
Waluigi
Waluigi
Waluigi
Toad
Toad
Toad
Toad
Toad
Toad
Toad
Boo
Boo

Boo
Boo

Boo

Boo
Koopa Kid
Koopa Kid
Koopa Kid
Koopa Kid
Koopa Kid
Koopa Kid

Brighton
Brighton
Brighton
Brighton

Twila

Twila
Twila
Twila
_-_MP6.png)
_-_MP6.png)
_-_MP6.png)
_-_MP6.png)
_-_MP6.png)
_-_MP6.png)
_-_MP6.png)
_-_MP6.png)
_-_MP6.png)
_-_MP6.png)
_-_MP6.png)
_-_MP6.png)
_-_MP6.png)
_-_MP6.png)
_-_MP6.png)
_-_MP6.png)
_-_MP6.png)
_-_MP6.png)
_-_MP6.png)
_-_MP6.png)
_-_MP6.png)
_-_MP6.png)
_-_MP6.png)
_-_MP6.png)
_-_MP6.png)
_-_MP6.png)
_-_MP6.png)
_-_MP6.png)
_-_MP6.png)
_-_MP6.png)
_-_MP6.png)
_-_MP6.png)
_-_MP6.png)
_-_MP6.png)
_-_MP6.png)
_-_MP6.png)
_-_MP6.png)
_-_MP6.png)
_-_MP6.png)
_-_MP6.png)
_-_MP6.png)
_-_MP6.png)
_-_MP6.png)
_-_MP6.png)
_-_MP6.png)
_-_MP6.png)
_-_MP6.png)
_-_MP6.png)
_-_MP6.png)
_-_MP6.png)
_-_MP6.png)
_-_MP6.png)
_-_MP6.png)
_-_MP6.png)
_-_MP6.png)
_-_MP6.png)
_-_MP6.png)
_-_MP6.png)
_-_MP6.png)
_-_MP6.png)
_-_MP6.png)
_-_MP6.png)
_-_MP6.png)
_-_MP6.png)
_-_MP6.png)
_-_MP6.png)
_-_MP6.png)
_-_MP6.png)

_-_MP6.png)
_-_MP6.png)
_-_MP6.png)

_-_MP6.png)
_-_MP6.png)
_-_MP6.png)
Transition screens[edit]


Time system[edit]


Rotating backgrounds[edit]

Party Mode and Star Bank
Mic Mini-games

Mini-game Tour

Battle Bridge

Treetop Bingo
Mount Duel
Decathlon Park

Endurance Alley


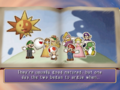
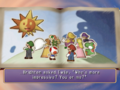
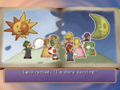
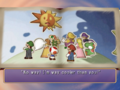
Miracle Book[edit]

Boo
Boo

Boo

Boo
Brighton and Twila
Princess Daisy
Princess Daisy

Princess Daisy
Princess Daisy
Princess Daisy
Princess Daisy
Princess Daisy
Donkey Kong
Donkey Kong
Golden Goomba
Goomba
Koopa Kid
Koopa Kid
Koopa Kid
Koopa Kid
Koopa Kid
Koopa Kid
Mario
Mario
Mario
Mario
Mario
Mario
Mario
Mario
Mario
Mario
Mario
Mario
Mario
Mario
Luigi
Luigi

Luigi

Luigi
Luigi
Luigi
Luigi
Luigi
Luigi
Luigi
Luigi

Luigi
Luigi
Luigi
Luigi
Princess Peach
Princess Peach
Princess Peach
Princess Peach
Princess Peach
Princess Peach
Princess Peach
Princess Peach
Princess Peach
Princess Peach
Princess Peach

Shy Guy
Shy Guy
Shy Guy
Shy Guy
Shy Guy
Shy Guy
Toad
Toad
Toad
Toad
Toadette
Toadette
Toadette

Tree

Tree
Tree
Ukiki

Ukiki
Ukiki
Ukiki
Ukiki

Waluigi
Waluigi
Waluigi
Waluigi
Waluigi
Wario
Wario
Wario
Wario
Wario

Wario and Waluigi

Yoshi

Yoshi

Yoshi

Yoshi


_-_Mario_Party_6.png)
_-_Mario_Party_6.png)
_-_Mario_Party_6.png)
_-_Mario_Party_6.png)


In-game models[edit]
Mario
Luigi
Wario
Waluigi
Yoshi
Toad

Boo
Toadette

Shy Guy
Donkey Kong
Bowser
Chain Chomp

Coin


Data-rendered models[edit]
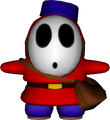
Shy Guy (from Catch You Letter)
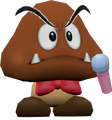
Goomba (from Control Shtick)


Dialogue portraits[edit]

Brighton and Twila

Brighton

Twila

Red K. Kid

Green K. Kid

Blue K. Kid


Round of Miracles icons[edit]

Mario

Luigi

Peach

Yoshi

Wario

Daisy

Waluigi

Toad

Boo

Koopa Kid

Toadette

20 coins →

1 Star →

2 Stars →

↔ all coins

↔ all Stars

↔ all coins and Stars


Board selection markers[edit]

First player

Second player

Third player

Fourth player

Computer player


Place markers[edit]

1st place

2nd place

3rd place

4th place


[edit]


Game mode logos[edit]

Solo Mode

Mic Mode

Star Bank

Party Mode

Mini-Game Mode
Board selection panels[edit]


Board icons[edit]
Party Mode boards[edit]
Towering Treetop (Japanese)
E. Gadd's Garage (Japanese)
Faire Square (Japanese)
Snowflake Lake (Japanese)
Castaway Bay (Japanese)
Clockwork Castle (Japanese)
Party Mode logos[edit]

Towering Treetop

E. Gadd's Garage

Faire Square

Snowflake Lake

Castaway Bay

Clockwork Castle
Board results logos[edit]

Towering Treetop

E. Gadd's Garage

Faire Square

Snowflake Lake

Castaway Bay

Clockwork Castle
Tutorial space icons[edit]
4-Player Mini-game Space
1-Vs.-3 Mini-game Space
2-Vs.-2 Mini-game Space
Battle Mini-game Space
Duel Mini-game Space

Rare Mini-game Space


Solo Mode boards[edit]
Thirsty Gulch (Japanese)
Astro Avenue (Japanese)
Infernal Tower (Japanese)
Solo Mode logos[edit]
DK and Bowser event logos[edit]

DK Bonus

DK Mini-game

Bowser Bonus

Bowser Mini-game
Mic Mode[edit]
Mic Mode logos[edit]

Mic Mini-games
Mic Mode panels[edit]
Speak Up
Star Sprint (Meadow Road)
Star Sprint (Dark Path)
Star Sprint (Magma Flow)


Mini-game Mode[edit]
Mini-game Mode logos[edit]
Mini-game Mode panels[edit]
Mini-game Tour
Battle Bridge
Treetop Bingo
Mount Duel
Decathlon Park
Endurance Alley


Decathlon Park mini-game icons[edit]


Battle Mini-game event panels[edit]


Miscellaneous[edit]

Mario (icon)

Mario (mugshot)

Mario (various icons)

Toadette (icon)

Toadette (mugshot)


Screenshots[edit]
Boards[edit]
- Party Mode
Towering Treetop (day)
Towering Treetop (night)
E. Gadd's Garage (day)
E. Gadd's Garage (night)
Faire Square (day)
Faire Square (night)
Snowflake Lake (day)

Snowflake Lake (night)
Castaway Bay (day)
Castaway Bay (night)
Clockwork Castle (day)
Clockwork Castle (night)


- Solo Mode


Opening[edit]


The opening to the game
The title screen
The title screen (Japanese)


In-game[edit]


Miscellaneous[edit]
Mario wins Mount Duel
Japanese version of Garden Grab minigame (daytime)
Japanese version of Garden Grab minigame (nighttime)
Japanese version of Bountiful Harvest page from Miracle Book (before)
Japanese version of Bountiful Harvest page from Miracle Book (after)


Box art[edit]
North American box art
European box art
German box art
French box art
Australian box art
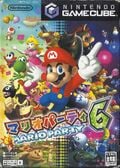
Japanese box art


Microphone bundle[edit]
North American box art
Japanese box art
European box art
Dutch box art
German box art


Miscellaneous[edit]
North American game disc
UK print ad
German print ad


| Mario Party 6 | |
|---|---|
| Main characters | Mario • Luigi • Princess Peach • Yoshi • Wario • Princess Daisy • Waluigi • Toad • Boo • Koopa Kid • Toadette |
| Other characters | Twila • Brighton • Donkey Kong • Bowser • Woody • Evil Woody |
| Orbs | Mushroom Orb • Super 'Shroom Orb • Cursed Mushroom Orb • Sluggish 'Shroom Orb • Metal Mushroom Orb • Flutter Orb • Bullet Bill Orb • Warp Pipe Orb • Zap Orb • Thwomp Orb • Koopa Troopa Orb • Tweester Orb • Podoboo Orb • Bob-omb Orb • Mr. Blizzard Orb • Goomba Orb • Kamek Orb • Klepto Orb • Spiny Orb • Toady Orb • Piranha Plant Orb • Boo-Away Orb • Snack Orb |
| Spaces | Blue Space • Red Space • Happening Space • Duel Space • Bowser Space • DK Space • Minigame Space (4-Player Space • 1-Vs-3 Space • 2-Vs-2 Space • Battle Space) • Miracle Space • Star Space • Character Space • Orb Space • Rare Mini-Game Space • Shadow Star Space |
| Boards | Towering Treetop • E. Gadd's Garage • Faire Square • Snowflake Lake • Castaway Bay • Clockwork Castle |
| Solo Mode boards | Thirsty Gulch • Astro Avenue • Infernal Tower |
| Other | Bowser's Battle Yacht • DK's Riverboat • Miracle Book • Orb hut • Star Bank |
| Further info | Gallery • Minigames • Pre-release and unused content • Quotes • Sound test • Staff |