The 'Shroom:Issue 128/Strategy Wing: Difference between revisions
Meta Knight (talk | contribs) No edit summary |
mNo edit summary |
||
| (9 intermediate revisions by 4 users not shown) | |||
| Line 89: | Line 89: | ||
{{ShroomStrongContent|spoilers}} | {{ShroomStrongContent|spoilers}} | ||
Welcome to the first '' | Welcome to the first ''YoshiFlutterJump's Tips & Tricks''! I am your host, YoshiFlutterJump. In this section I shall list tips for completing tough levels in the Mario franchise. In this issue we shall be looking at [[Pendulum Castle]], also known as Superstar Road-8, from ''[[New Super Mario Bros. U]]''. | ||
The first thing you might be asking is "what is Pendulum Castle?" Unless you've 100% completed the game like I have, you probably haven't heard of it. Pendulum Castle is the eighth level of Superstar Road, the ninth world of ''New Super Mario Bros. U''. To access this level, you must collect all Star Coins in Peach's Castle. '''WARNING''': This is the hardest level in the game. | The first thing you might be asking is "what is Pendulum Castle?" Unless you've 100% completed the game like I have, you probably haven't heard of it. Pendulum Castle is the eighth level of Superstar Road, the ninth world of ''New Super Mario Bros. U''. To access this level, you must collect all Star Coins in Peach's Castle. '''WARNING''': This is the hardest level in the game. | ||
| Line 97: | Line 97: | ||
The level begins with a some Donut Blocks, a Bony Beetle, and a ? Block containing a Super Mushroom. Next are some more Donut Blocks and a Spinner. Dodge the Spinner, and you'll see a Brick Block containing a Coin, a Spinner, and some more Donut Blocks. Avoid the Spinner, some upcoming Bony Beetles, and another spinner, you'll find a ? Block containing another Super Mushroom. Then you'll encounter more Donut Blocks and two Spinners. Between them is the first Star Coin. Dodging these Spinners to get the Star Coin may be tricky, but it may help to follow the Spinners as they sway left and right. | The level begins with a some Donut Blocks, a Bony Beetle, and a ? Block containing a Super Mushroom. Next are some more Donut Blocks and a Spinner. Dodge the Spinner, and you'll see a Brick Block containing a Coin, a Spinner, and some more Donut Blocks. Avoid the Spinner, some upcoming Bony Beetles, and another spinner, you'll find a ? Block containing another Super Mushroom. Then you'll encounter more Donut Blocks and two Spinners. Between them is the first Star Coin. Dodging these Spinners to get the Star Coin may be tricky, but it may help to follow the Spinners as they sway left and right. | ||
[[File:NSMBU | [[File:NSMBU Pendulum Castle Screenshot.jpg|200px|thumb|The first Star Coin.]] | ||
Once you reach the end of the Donut Blocks, perform some Wall Jumps to reach a hidden area with a pipe. Once you enter the pipe, you'll encounter three huge Spinners, a Star Coin, and a ? Block on the far side of the room containing a Super Star. As the Spinners sway to the right, jump along the platforms below the spinner, and crouch on the one in the middle as the Giant Spinners sway to the left. Then perform the remaining jumps, punch the ? Block, and grab the Super Star. While the effect lasts, jump through the Spinners to grab the second Star Coin, defeat the Bony Beetles on the floor, and enter the exit pipe. | Once you reach the end of the Donut Blocks, perform some Wall Jumps to reach a hidden area with a pipe. Once you enter the pipe, you'll encounter three huge Spinners, a Star Coin, and a ? Block on the far side of the room containing a Super Star. As the Spinners sway to the right, jump along the platforms below the spinner, and crouch on the one in the middle as the Giant Spinners sway to the left. Then perform the remaining jumps, punch the ? Block, and grab the Super Star. While the effect lasts, jump through the Spinners to grab the second Star Coin, defeat the Bony Beetles on the floor, and enter the exit pipe. | ||
[[File:NSMBU | [[File:NSMBU 9-8 Coin 2.jpg|200px|thumb|left|The second Star Coin.]] | ||
Once you reenter the main level, dash across the donut blocks. Here you'll see a Spinner, a ? Block containing an Ice Flower, and a Brick Block containing a Coin. Next to the Brick Block there is a semi-solid platform. Punch the ? Block from below, jump onto the semi-solid platform, and grab the Ice Flower. Then escape before the Spinner hits you. Next are more Donut Blocks, a Bony Beetle, and two Spinners. If you still have ice powers, freeze the Bony Beetle. This should help you stand on the Donut Blocks. Dodge the two Spinners and make your way to land (but not safety). Next there are three sets of Donut Blocks, with two Bony Beetles and a Spinner. Using some tricky maneuvers, freeze the Bony Beetles (you've kept your ice powers, right?) and dodge the Spinner. | Once you reenter the main level, dash across the donut blocks. Here you'll see a Spinner, a ? Block containing an Ice Flower, and a Brick Block containing a Coin. Next to the Brick Block there is a semi-solid platform. Punch the ? Block from below, jump onto the semi-solid platform, and grab the Ice Flower. Then escape before the Spinner hits you. Next are more Donut Blocks, a Bony Beetle, and two Spinners. If you still have ice powers, freeze the Bony Beetle. This should help you stand on the Donut Blocks. Dodge the two Spinners and make your way to land (but not safety). Next there are three sets of Donut Blocks, with two Bony Beetles and a Spinner. Using some tricky maneuvers, freeze the Bony Beetles (you've kept your ice powers, right?) and dodge the Spinner. | ||
| Line 107: | Line 107: | ||
But in this course there's no such thing as safety, for the next thing you see is a series of spread-out Donut Blocks and a big Spinner. Make some careful jumps. It really helps to keep hopping on the same Donut Block if you can't move at once. Wait for the Spinner to sway to the left, then jump for it. Then, for the first time in forever (forgive me for the ''Frozen'' reference), you'll see real, solid, permanent ground. Wait there as long as you want (but not too long; this level is timed!). You'll then see a ? Switch, a large Spinner, and a super-wide chasm. Activate the switch, and red blocks will allow you to traverse the chasm. However, this doesn't last forever; the effect will wear off, so traverse the chasm while you still can. If you're fast enough, you can also collect the third Star Coin. Enter the pipe to the goal. | But in this course there's no such thing as safety, for the next thing you see is a series of spread-out Donut Blocks and a big Spinner. Make some careful jumps. It really helps to keep hopping on the same Donut Block if you can't move at once. Wait for the Spinner to sway to the left, then jump for it. Then, for the first time in forever (forgive me for the ''Frozen'' reference), you'll see real, solid, permanent ground. Wait there as long as you want (but not too long; this level is timed!). You'll then see a ? Switch, a large Spinner, and a super-wide chasm. Activate the switch, and red blocks will allow you to traverse the chasm. However, this doesn't last forever; the effect will wear off, so traverse the chasm while you still can. If you're fast enough, you can also collect the third Star Coin. Enter the pipe to the goal. | ||
[[File: | [[File:NSMBU 9-8 Coin 3.jpg|200px|thumb|The third Star Coin.]] | ||
Once you exit the pipe, dash along the remaining Donut Blocks and touch the Flagpole! | Once you exit the pipe, dash along the remaining Donut Blocks and touch the Flagpole! | ||
There you have it, guys. I hope this guide was helpful. Feel free to give feedback on | There you have it, guys. I hope this guide was helpful. Feel free to give feedback on [https://www.marioboards.com/index.php?topic=39515 this forum thread]. Until my next section, farewell. | ||
| Line 121: | Line 121: | ||
</div><br clear=all> | </div><br clear=all> | ||
<div class=shroomsection> | <div class=shroomsection> | ||
== Galactic Expedition == | == Galactic Expedition == | ||
Written By: {{User|Meta Knight}} | Written By: {{User|Meta Knight}} | ||
| Line 126: | Line 127: | ||
<h3>''Metroid II'' Walkthrough</h3> | <h3>''Metroid II'' Walkthrough</h3> | ||
Current Inventory: 2 [[Metroidwiki:Energy Tank|Energy Tanks]], 170 [[Metroidwiki:Missiles|Missiles]], [[Metroidwiki:Morph Ball|Morph Ball]], [[Metroidwiki:Morph Ball Bombs|Bombs]], [[Metroidwiki:Spider Ball|Spider Ball]], [[Metroidwiki:Ice Beam|Ice Beam]] '''or''' [[Metroidwiki:Wave Beam|Wave Beam]], [[Metroidwiki:High-Jump Boots|High-Jump Boots]], [[Metroidwiki:Spring_Ball|Spring Ball]] | Current Inventory: 2 [[Metroidwiki:Energy Tank|Energy Tanks]], 170 [[Metroidwiki:Missiles|Missiles]], [[Metroidwiki:Morph Ball|Morph Ball]], [[Metroidwiki:Morph Ball Bombs|Bombs]], [[Metroidwiki:Spider Ball|Spider Ball]], [[Metroidwiki:Ice Beam|Ice Beam]] '''or''' [[Metroidwiki:Wave Beam|Wave Beam]], [[Metroidwiki:High-Jump Boots|High-Jump Boots]], [[Metroidwiki:Varia Suit|Varia Suit]], [[Metroidwiki:Spring_Ball|Spring Ball]] | ||
Metroid Counter: 13 killed, 26 left | Metroid Counter: 13 killed, 26 left | ||
| Line 136: | Line 137: | ||
[[File:GE128-Area3-A.png|left|thumb|150px|The top of the chamber that leads deeper into Area 3.]] | [[File:GE128-Area3-A.png|left|thumb|150px|The top of the chamber that leads deeper into Area 3.]] | ||
Starting at the Save Station, you're going to want to go left. Whatever you do, don't fall in the pit. It'll take a while to get back up and you're better off ignoring it for now. If you get stuck, you can take a look at [[The_'Shroom:Issue 126/Strategy_Wing | Starting at the Save Station, you're going to want to go left. Whatever you do, don't fall in the pit. It'll take a while to get back up and you're better off ignoring it for now. If you get stuck, you can take a look at [[The_'Shroom:Issue 126/Strategy_Wing#Galactic_Expedition|last time]] to have a refresher on how to get out. When you jump over the pit, keep moving left until you get to the next screen. You will be in a tall chamber with some bug-like creatures hovering. Be careful not to get hit and climb up to the top. Proceed to the right. | ||
[[File:GE128-Area3-B.png|right|thumb|150px|The Missle Recharge at the bottom left in the main room of Area 3.]] | [[File:GE128-Area3-B.png|right|thumb|150px|The Missle Recharge at the bottom left in the main room of Area 3.]] | ||
| Line 151: | Line 152: | ||
[[File:GE128-Area3-F.png|right|thumb|150px|I definitely didn't miss these.]] | [[File:GE128-Area3-F.png|right|thumb|150px|I definitely didn't miss these.]] | ||
In this room there's just a large drop with several platforms. There is also an encounter with a [[Metroidwiki:Gamma_Metroid|Gamma Metroid]]! There isn't any spikes at the bottom of this room, so don't worry about dropping too low. Use your Space Jump to navigate quickly around the platforms to get a good shot at the Gamma Metroid. If you need a refresher on how to get rid of these things, you can take a look [[The_'Shroom:Issue_126/Strategy_Wing | In this room there's just a large drop with several platforms. There is also an encounter with a [[Metroidwiki:Gamma_Metroid|Gamma Metroid]]! There isn't any spikes at the bottom of this room, so don't worry about dropping too low. Use your Space Jump to navigate quickly around the platforms to get a good shot at the Gamma Metroid. If you need a refresher on how to get rid of these things, you can take a look [[The_'Shroom:Issue_126/Strategy_Wing#Galactic_Expedition|here]]. When you defeat the Gamma Metroid, climb back up out of this chamber. | ||
[[File:GE128-Area3-G.png|left|thumb|150px|On the top right you can see the lever is currently down. Stand on it when it is up and Morph Ball over to latch onto the wall.]] | [[File:GE128-Area3-G.png|left|thumb|150px|On the top right you can see the lever is currently down. Stand on it when it is up and Morph Ball over to latch onto the wall.]] | ||
| Line 189: | Line 190: | ||
</div><br clear=all> | </div><br clear=all> | ||
<div class=shroomsection> | <div class=shroomsection> | ||
== Party Trick! == | == Party Trick! == | ||
Written By: [[File:MK_icon.png]] {{User|Meta Knight}} | Written By: [[File:MK_icon.png]] {{User|Meta Knight}} | ||
| Line 208: | Line 210: | ||
Finally, lets take a look at the mini-minigames. These can only be accessed with a Mini Mushroom. The first one is in the top of the map, and slightly right. There's a Shy Guy next to a totem-like structure. For this one, it's pretty simple, you just mash the A Button. The amount of coins you get is determined by how high the Shy Guy is. It isn't too difficult to get 20 coins though if you just tap the A Button as fast as possible. The other mini-minigame is in the left of the map, and by a Shy Guy under a tree. In this minigame you can win an item. They will hang below the tree and swing left and right. Simply press the A Button to get the item you want. There really isn't much else to it. | Finally, lets take a look at the mini-minigames. These can only be accessed with a Mini Mushroom. The first one is in the top of the map, and slightly right. There's a Shy Guy next to a totem-like structure. For this one, it's pretty simple, you just mash the A Button. The amount of coins you get is determined by how high the Shy Guy is. It isn't too difficult to get 20 coins though if you just tap the A Button as fast as possible. The other mini-minigame is in the left of the map, and by a Shy Guy under a tree. In this minigame you can win an item. They will hang below the tree and swing left and right. Simply press the A Button to get the item you want. There really isn't much else to it. | ||
[[File:MK_icon.png]] That's all for this month's ''Party Trick!'' Have a minigame or board you'd like me to do? Send me a message on [[User_talk:Meta_Knight|my talk page]] or message [http://www.marioboards.com/index.php?action=pm;sa=send;u=4791 me] on the [[ | [[File:MK_icon.png]] That's all for this month's ''Party Trick!'' Have a minigame or board you'd like me to do? Send me a message on [[User_talk:Meta_Knight|my talk page]] or message [http://www.marioboards.com/index.php?action=pm;sa=send;u=4791 me] on the [[mb:|forums]] and you could be mentioned in next month's edition! | ||
<br clear=all> | <br clear=all> | ||
</div><br clear=all> | </div><br clear=all> | ||
| Line 262: | Line 264: | ||
<br clear=all> | <br clear=all> | ||
</div><br clear=all> | </div><br clear=all> | ||
<center> | <center>{{#widget:Crowdsignal|id=9877311}} | ||
{{Shroomnav2017|128|fall|S1=Awards Committee Director Election|S2=The 'Shroom Spotlight}}</center> | {{Shroomnav2017|128|fall|S1=Awards Committee Director Election|S2=The 'Shroom Spotlight}}</center> | ||
{{Shroomfooter}} | {{Shroomfooter}} | ||
Latest revision as of 19:55, November 9, 2024
Director Notes
Written by: Meta Knight (talk)
Hello everyone and welcome to this month's Strategy Wing! This month we've got a new writer for Strategy Wing! YoshiFlutterJump (talk) will have his own section on tips and tricks. He'll be on a volunteer based schedule due to real life circumstances, but I would like to give him a warm welcome. Be sure to check it out along with all the other sections! Additionally, next month is the holiday special, so if you have something you would like to contribute, feel free to send it to us! For now though, please enjoy this issue.
Section of the Month
Congratulations to Yoshi876 (talk)! Thanks to DragonFreak (talk) for her section as well.
| STRATEGY WING SECTION OF THE MONTH | ||||
|---|---|---|---|---|
| Place | Section | Votes | % | Writer |
| 1st | Mario Kart: Wheel Tips Corner | 14 | 45.16% | Yoshi876 |
| 2nd | Pokédex Power | 9 | 29.03% | Yoshi876 |
| 3rd | Isaac Synergies | 8 | 25.81% | DragonFreak |
YoshiFlutterJump dances around the pits and the pendulums!
[read more]
YoshiFlutterJump's Tips and Tricks!
Written By: YoshiFlutterJump (talk)
Welcome to the first YoshiFlutterJump's Tips & Tricks! I am your host, YoshiFlutterJump. In this section I shall list tips for completing tough levels in the Mario franchise. In this issue we shall be looking at Pendulum Castle, also known as Superstar Road-8, from New Super Mario Bros. U.
The first thing you might be asking is "what is Pendulum Castle?" Unless you've 100% completed the game like I have, you probably haven't heard of it. Pendulum Castle is the eighth level of Superstar Road, the ninth world of New Super Mario Bros. U. To access this level, you must collect all Star Coins in Peach's Castle. WARNING: This is the hardest level in the game.
The first thing you need to know about this course is that it is a castle level, so you cannot bring Yoshi or Baby Yoshi into the level (meaning, unfortunately, I'm not allowed...). However, if you have a friend, a Wii Remote/Wii U Pro Controller and a Wii U GamePad, you can still play in Boost Mode. In this mode, your friend can create Boost Blocks to assist you. If you enter the course with 99 lives, your friend will create Mini Boost Blocks instead. If you have more controllers and more friends, it may help to have them play with you as well. The time limit is 400 seconds.
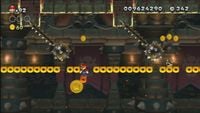
The level begins with a some Donut Blocks, a Bony Beetle, and a ? Block containing a Super Mushroom. Next are some more Donut Blocks and a Spinner. Dodge the Spinner, and you'll see a Brick Block containing a Coin, a Spinner, and some more Donut Blocks. Avoid the Spinner, some upcoming Bony Beetles, and another spinner, you'll find a ? Block containing another Super Mushroom. Then you'll encounter more Donut Blocks and two Spinners. Between them is the first Star Coin. Dodging these Spinners to get the Star Coin may be tricky, but it may help to follow the Spinners as they sway left and right.
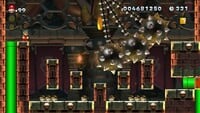
Once you reach the end of the Donut Blocks, perform some Wall Jumps to reach a hidden area with a pipe. Once you enter the pipe, you'll encounter three huge Spinners, a Star Coin, and a ? Block on the far side of the room containing a Super Star. As the Spinners sway to the right, jump along the platforms below the spinner, and crouch on the one in the middle as the Giant Spinners sway to the left. Then perform the remaining jumps, punch the ? Block, and grab the Super Star. While the effect lasts, jump through the Spinners to grab the second Star Coin, defeat the Bony Beetles on the floor, and enter the exit pipe.
Once you reenter the main level, dash across the donut blocks. Here you'll see a Spinner, a ? Block containing an Ice Flower, and a Brick Block containing a Coin. Next to the Brick Block there is a semi-solid platform. Punch the ? Block from below, jump onto the semi-solid platform, and grab the Ice Flower. Then escape before the Spinner hits you. Next are more Donut Blocks, a Bony Beetle, and two Spinners. If you still have ice powers, freeze the Bony Beetle. This should help you stand on the Donut Blocks. Dodge the two Spinners and make your way to land (but not safety). Next there are three sets of Donut Blocks, with two Bony Beetles and a Spinner. Using some tricky maneuvers, freeze the Bony Beetles (you've kept your ice powers, right?) and dodge the Spinner.
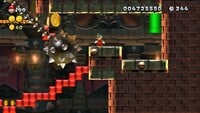
But in this course there's no such thing as safety, for the next thing you see is a series of spread-out Donut Blocks and a big Spinner. Make some careful jumps. It really helps to keep hopping on the same Donut Block if you can't move at once. Wait for the Spinner to sway to the left, then jump for it. Then, for the first time in forever (forgive me for the Frozen reference), you'll see real, solid, permanent ground. Wait there as long as you want (but not too long; this level is timed!). You'll then see a ? Switch, a large Spinner, and a super-wide chasm. Activate the switch, and red blocks will allow you to traverse the chasm. However, this doesn't last forever; the effect will wear off, so traverse the chasm while you still can. If you're fast enough, you can also collect the third Star Coin. Enter the pipe to the goal.
Once you exit the pipe, dash along the remaining Donut Blocks and touch the Flagpole!
There you have it, guys. I hope this guide was helpful. Feel free to give feedback on this forum thread. Until my next section, farewell.
Galactic Expedition
Written By: Meta Knight (talk)
Metroid II Walkthrough
Current Inventory: 2 Energy Tanks, 170 Missiles, Morph Ball, Bombs, Spider Ball, Ice Beam or Wave Beam, High-Jump Boots, Varia Suit, Spring Ball
Metroid Counter: 13 killed, 26 left
Hello everyone and welcome to this month's Galactic Expedition! This issue is themed around 2D Mario games, so to celebrate have a 2D Metroid section. We will be continuing our walkthrough of Metroid II. I have 100% the remake Samus Returns and enjoyed what it had to offer. Last time we made it to Area 3 in a Save Station there. For this month we're just gonna tackle some more of Area 3.
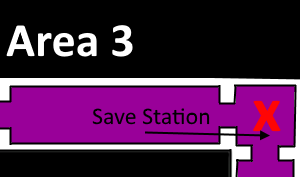
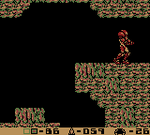
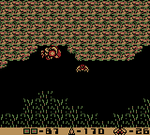
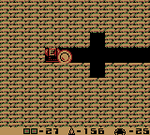
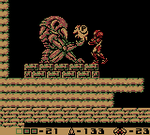
Starting at the Save Station, you're going to want to go left. Whatever you do, don't fall in the pit. It'll take a while to get back up and you're better off ignoring it for now. If you get stuck, you can take a look at last time to have a refresher on how to get out. When you jump over the pit, keep moving left until you get to the next screen. You will be in a tall chamber with some bug-like creatures hovering. Be careful not to get hit and climb up to the top. Proceed to the right.
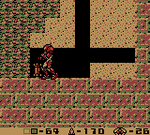
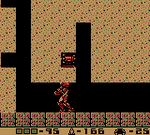
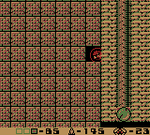
In this next room there will be another batch of sand. Ignore it and continue right into the next screen. Here there are some enemies that come up from the ground and charge after you. Jump over them or shoot them and continue right. These enemies are usually placed at places where you're about to enter another section of the area, and this is no exception. Now you'll be in a very large room. The first thing you'll notice is that there is a large open space and a big drop. It might seem crazy, but actually jump down from the ledge and move a little to the left. You will land on some more sand. Shoot the sand to go to the floor and to the left there is a Missile Recharge. This is extremely useful even if you have a comfortable amount of missiles just because grinding for Missiles in Metroid II is absolutely miserable.
When you're ready, jump back up out of the sand (or use the Spider Ball if you need to) and head right. Watch out for the crab-like enemies that will crawl back and forth on the ground. You'll come across a vertical wall that you will have to scale over. When you get to the top and you round the corner, keep moving right and you'll eventually come across another huge drop. This time however, make sure you constantly shoot down because there are some enemies that can harm you on the way and it is annoying falling into them. You will likely also shoot some of the sand below, but this is fine as you are to head down there anyway. Head left to the next screen.
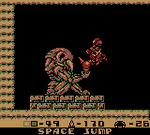
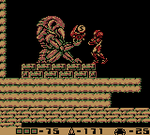
This room is tall, and has some sand in the way, but make your way up the chamber to the top. There will be a Chozo Statue that rewards you with the Space Jump! This is one of the best items in the entire series. This basically lets you jump infinitely if you time it right. To use it, do a somersault jump, and then just after you start to fall from the peak of your jump, press the jump button and Samus will jump again. This is a quick way to get around to high places and outclasses the Spider Ball in nearly every way. I would get comfortable with the Space Jump because you're going to need it for certain obstacles later. Once you've gotten the upgrade, go back down and exit this room.
When you're back in the huge open room, shoot the sand to get a clear pathway up. Be careful of the crab-like enemy that is in the sand just waiting to harm you, because you might end up stepping on it while shooting the sand away. You're basically going to want to use the Space Jump to get as far up and as far right as possible. There's even an Energy Recharge above a pit if you wanna regain your health. When you get all the way to the right, drop down. You'll land on some more sand and even see a Missile Tank, but ignore it for now, and we will come back to it in a second (you'll see why). Shoot the sand out of the way, and you'll notice there's a Metroid shell here. Brace yourself and proceed to the right.
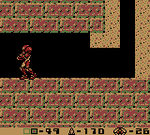
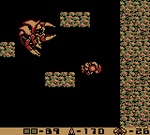
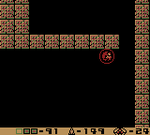
In this room there's just a large drop with several platforms. There is also an encounter with a Gamma Metroid! There isn't any spikes at the bottom of this room, so don't worry about dropping too low. Use your Space Jump to navigate quickly around the platforms to get a good shot at the Gamma Metroid. If you need a refresher on how to get rid of these things, you can take a look here. When you defeat the Gamma Metroid, climb back up out of this chamber.
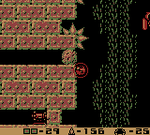
When you're in the main room of this area, shoot the sand to be freed and you're actually going to want to use the Space Jump, but not all the way to the top. You'll notice some sort of lever on the right wall, and you might have noticed a Missile Tank when you originally fell down. The levers are actually platforms. When they are facing left, they are able to be stepped on, and if they're down, they will drop you. Space Jump onto the first lever you see after you pass that Missile Tank. You'll have to be quick or else it will make you fall, but land on the platform, then go into Morph Ball, and use the Spider Ball to latch yourself onto the left wall. You cannot actually scale the left wall by itself because there are spikes preventing you from doing so. However, you can manipulate the platforms to get around it. From there, you can bomb the block and head left. Be careful not to end up deactivating the Spider Ball with the bomb, but if this happens quickly press Down and latch back on to the wall.
When you're in this room, move left and you'll see an Energy Tank. There's some fake platforms and bombable blocks surrounding it that makes it odd to get to, but with enough jumping around you should be able to grab it. This is why we waited until after fighting the Gamma Metroid to come into this corridor. This Energy Tank will restore your health. Although it isn't too big a deal if you need health as you can just Space Jump to the top of the main room to get some. When you got the Energy Tank, go down and right and use the Spring Jump to get the Missile Tank [180] as well. You've gotten all the goodies in this room, so get back out into the main room where you were before.
When you're in the main room, use the Space Jump to get out of the ditch that you are in and move left when you see solid ground you can walk on. You might have noticed a pit here on this floor. Go ahead and jump in and you'll be taken to the next screen. In this room you will be standing on a bunch of sand. However, this sand is different in the sense that not all of it can be broken by just shooting it. Some of it won't even be able to be broken with bombs. This room does contain a Missle Tank [190] buried in the sand though, so keep shooting at the sand until you can find it. You can probably see it blinking in the sand to help you locate it as well. Jump out of the sand pit and move left and you'll find another Save Station. It's probably a good idea to save here.
When you've saved, drop down into the next chamber. There will be a lot of creatures that shoot lasers here. If you want the Spazer Beam, drop down all the way to the bottom of the chamber and move left. You will be in another corridor with these mechanical creatures that hop around. They do quite a bit of damage so be careful to not get hit by them and you will come across a red door. Inside will be the Spazer Beam. This beam will split your shot into three. Once again, beams do not stack in Metroid II, and personally I prefer the Ice Beam, so I will not get it. Head back into the tall chamber with the Metroid shell that is below the Save Station.
When you're in the chamber, Space Jump up until you see an opening on the right. Proceed through the passageway to go into the next room. As soon as you enter this room you will start to drop. Not only that, but you will hear another Gamma Metroid! Be extremely careful as you'll probably end up dropping right on top of it which is stupid. As if that wasn't bad enough, you'll fall through some fake blocks. These platforms are a lot smaller than the previous room, but do your best to navigate around them and take down the Gamma Metroid. Once he's down, use the Spider Ball to scale the right wall and get to the celing. There is a breakable block that has a Missile Tank [200] inside! When you've got that, head back to the bottom of the room, and break the sand that you're standing on. It will reveal another passage to the next room.
In this room there will be another robot that jumps around a lot, but head left. You will be head to head with another Gamma Metroid! This is a wide-open room with not a lot of tricky platforming, so this one should be slightly easier than the other ones. Now that another Gamma Metroid is out of the way, if you want the Plasma Beam, continue to head left. There will be some mechanical robots and you'll come across another red door. In this room you'll find the Plasma Beam! This gives you a single long fire, but it is powerful. One of the downsides is only one shot can be on the screen at once. I still prefer the Ice Beam, so I will not get it, but if you want to grab it then go for it! When you're ready to move on, proceed to the right.
Keep moving right until you can't move right anymore. Along the way there will be another Missile Tank [210] in plain sight so you should grab that as well. In this room is a seemingly dead end with walls covered in spikes. You have to use the Space Jump to carefully get to the top and avoid getting hit by the spikes. When you're at the top move left. You'll notice another tube like you've seen in Area 2, but this one leads nowhere so just ignore it. Watch out for the machines that spit fire and the huge spiked creatures. Make your way left and you'll see another seemingly dead end. Go into Morph Ball and scale the wall to go up a hidden passageway. Bomb the block at the top to into the next room.
You'll drop down a pipe and come across an Alpha Metroid! After all the Gamma Metroids you've fought, this Alpha Metroid should not be a problem. Get him out of the way and move left to the next screen. This room has a lot of open space, and some narrow gaps in it as well. There is an Energy Tank to collect here though, which is always a pleasure. There's nothing else here so keep going right until you drop down and you see the spikes along the walls. Be careful to not be too close to the wall or else you will get hurt. When you're at the bottom, head left back to that sand pit thats floating on a platform and jump up.
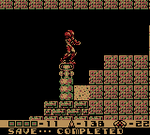
You should be back in that tall chamber where you fought a Gamma Metroid and got a Missile Tank. Space Jump to the top left and exit this room as well. From there, use the Space Jump once again to get to the top. Be careful not to get hit by the lasers or else it will knock you out of your jump. When you get to the top, you should be back at the Save Station. This would be a good point to save, especially because that's all for this issue! Next time we will finish Area 3 and drive the Metroid species closer to extinction. Thanks for joining me, and I'll see you on the next adventure!
Party Trick!
Written By: ![]() Meta Knight (talk)
Meta Knight (talk)
![]() Hello and welcome everyone to this month's edition to Party Trick! School has been stressful, but my apologies for not having this last month. For this issue we're going to fulfill Superchao (talk)'s request of Shy Guy's Jungle Jam from Mario Party 4!
Hello and welcome everyone to this month's edition to Party Trick! School has been stressful, but my apologies for not having this last month. For this issue we're going to fulfill Superchao (talk)'s request of Shy Guy's Jungle Jam from Mario Party 4!
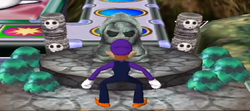
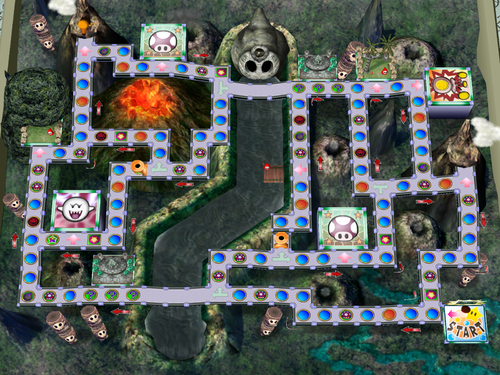
This board has a couple of gimmicks within it. The most notable is the stone Shy Guy at the top of the map. There is a river flowing underneath it. Normally the water is not affecting the board. However, there are six Happening Spaces on this board. If a player lands on one, they will have the option to make a happy wish or a sad wish. The Shy Guy Well will either be happy or sad by the player's choice. If the Shy Guy Well is happy, nothing happens. If the Shy Guy Well is sad, then the large Shy Guy statue at the top of the map will start to shed tears, and the river will flood the board for three turns. While the map is flooded, no one will be able to cross it normally. They will have to use some of the other map features. The Shy Guy Well's is completely random, but if the player chooses a happy wish, the probability for the well to be happy is higher. On the other hand, if the player chooses a sad wish, it is more likely to flood. If someone lands on a Happening Space while the river is already flooded, nothing happens. This can be extremely useful in certain situations. For example, if you are on one side of the map going after the star, you can try to purposefully flood the map so that your opponents can't come after you.
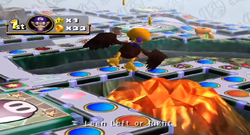
The other main gimmick of this board is the use of Klepto. Klepto starts in the top left corner of the map on a small volcano. If a you encounter Klepto, you can pay 5 coins to have it take you to the other side of the map where the other volcano is slightly above the start space. While riding the Klepto, you can steer with the joystick to earn some coins. If you get a bunch you can gain your 5 coins back, and maybe earn a profit along the way. Sometimes the huge volcano leaking magma on the left will erupt giving you even more coins to collect. Klepto will not move from where it is unless someone uses it for a ride. This is similar to the roller coaster in Toad's Midway Madness that I mentioned here. Klepto can even carry you across the river if it is flooded, so that is one way to get by if an opponent uses the well to prevent you from getting where you want to go. It's also a quick way to get across the map and earn some extra coins.
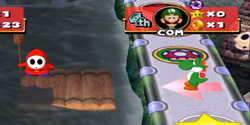
There's a few other small things to this board. For starters, in the center of the map there is a Shy Guy on a platform. You can only get to him by taking the Mini Pipe that is below him, but you do not have to be mini to use his service. What he will do is take you across the water directly to the other side if you pay him coins. If the map is flooded, this can be another way to get across. Sometimes the Star will be spawned right below him, so if you get the star around here, and it spawns to the left, you have a quick way across!
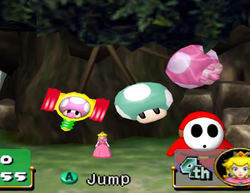
Finally, lets take a look at the mini-minigames. These can only be accessed with a Mini Mushroom. The first one is in the top of the map, and slightly right. There's a Shy Guy next to a totem-like structure. For this one, it's pretty simple, you just mash the A Button. The amount of coins you get is determined by how high the Shy Guy is. It isn't too difficult to get 20 coins though if you just tap the A Button as fast as possible. The other mini-minigame is in the left of the map, and by a Shy Guy under a tree. In this minigame you can win an item. They will hang below the tree and swing left and right. Simply press the A Button to get the item you want. There really isn't much else to it.
![]() That's all for this month's Party Trick! Have a minigame or board you'd like me to do? Send me a message on my talk page or message me on the forums and you could be mentioned in next month's edition!
That's all for this month's Party Trick! Have a minigame or board you'd like me to do? Send me a message on my talk page or message me on the forums and you could be mentioned in next month's edition!
Pokédex Power
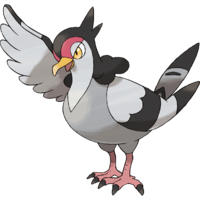
Hello everyone, it's me, Yoshi876 again with a new edition of Pokédex Power, the section written by the person who still hasn't decided what his favourite Generation II Pokémon is. It's either Mantine or Spinarak, I'm leaning more towards the latter. But anyway, none of that is really relevant, as today we're looking at a Generation V Pokémon, and to make that more specific, we're looking at the generic-Flying type of the Unova region.
There's always one of them in every generation, the bird that you'll capture and inevitably teach HM Fly to. I imagine I'm like most people, in which I actually have that bird Pokémon as a main part of my team for a while, before returning it to the PC.
I have used Tranquill and its evolution in the past, in fact it proved to be an integral part of my team when I took on Burgh, but after him I didn't really find much use for it other than my Fly slave. It is a shame, because I do Tranquill, I think it's a good Pokémon despite the fact it was designed to fill this specific role. But, I don't always like the Pokédex entries of Pokémon I like, as we saw last month, so what about this time round?
Generation V
| Pokémon Black | It can return to its Trainer's location regardless of the distance separating them. |
| Pokémon White | Many people believe that, deep in the forest where Tranquill live, there is a peaceful place where there is no war. |
| Pokémon Black 2 | No matter where in the world it goes, it knows where its nest is, so it never gets separated from its Trainer. |
| Pokémon White 2 | No matter where in the world it goes, it knows where its nest is, so it never gets separated from its Trainer. |
The Pokédex entries here do a really good job at introducing our bird here. It's a bit disappointing that three out of the four entries focus on Tranquill's ability to always know where in the world its Trainer is, especially since that's more an ability you'd associate with a dog. However, it's the White entry that I really like. I like the concept of the entry, and I like how instead of focusing on the fact that Tranquill is a bird, they instead chose to play around with its name. I wish more Pokédex entries were this imaginative.
Generation VI
| Pokémon X | Many people believe that, deep in the forest where Tranquill live, there is a peaceful place where there is no war. |
| Pokémon Y | No matter where in the world it goes, it knows where its nest is, so it never gets separated from its Trainer. |
| Pokémon Omega Ruby | Many people believe that, deep in the forest where Tranquill live, there is a peaceful place where there is no war. |
| Pokémon Alpha Sapphire | No matter where in the world it goes, it knows where its nest is, so it never gets separated from its Trainer. |
Generation VI rehashes the Pokédex entries you literally just read.
Conclusion
Despite only having one set of Pokédex entries, Tranquill still manages to have some decent ones. Like I said, I really like the White entry, and although its other entries I think would be better suited for a dog-like Pokémon, it's nice to see its loyalty. To improve the Pokédex, I would have liked at least one entry that focused on Tranquill being a bird. Whether it was how fast or high it could fly, or even the Bug-type Pokémon that it likes to hunt, an entry like this would have made Tranquill feel like a real Pokémon. But honestly, Tranquill has a pretty decent Pokédex.
| The 'Shroom: Issue 128 | |
|---|---|
| Staff sections | Staff Notes • Awards Committee Director Election • The 'Shroom Spotlight |
| Features | Fake News • Fun Stuff • Palette Swap • Pipe Plaza • Critic Corner • Strategy Wing |
