A Towering Tour: Difference between revisions
(Added English Title) |
m (Text replacement - "(\| *)Jap([RMCN\d]* *=)" to "$1Jpn$2") |
||
| (49 intermediate revisions by 29 users not shown) | |||
| Line 1: | Line 1: | ||
{{level infobox | |||
{{level | |||
|title=A Towering Tour | |title=A Towering Tour | ||
|image=[[File: | |image=[[File:SMA4Card M20.jpg|200px]] | ||
|code=20 ([[World-e]]) | |code=20 ([[World-e]]) | ||
|game=''[[Super Mario Advance 4: Super Mario Bros. 3]]'' | |game=''[[Super Mario Advance 4: Super Mario Bros. 3]]'' | ||
| | |limit=400 | ||
| | |track=Ground Theme<br>{{conjectural|Fortress Theme}}<br>Underground Theme | ||
|before=[[ | |sample=Ground Theme<br>[[File:SMA4 Overworld Theme.oga]]<br>Underground Theme<br>[[File:SMA4 Underground Theme.oga]] | ||
|after=[[ | |before=[[Puzzling Pipe Maze|<<]] | ||
|after=[[Castle Dash|>>]] | |||
}} | }} | ||
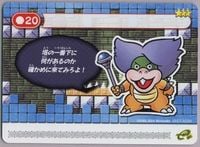
''' | '''A Towering Tour''' is the twentieth level in [[World-e]] of ''[[Super Mario Advance 4: Super Mario Bros. 3]]''. This card was released in Series 2 in Japan. Its official difficulty rating is ★★★☆☆. It was initially never released out of Japan, although the level eventually first became available internationally with the game's release on the [[Wii U]] [[Virtual Console]] in 2016. The key art featured [[Ludwig|Ludwig von Koopa]]. [[Snake Block|Snake platform]]s, [[Seesaw]]s, and gray [[Lift]]s make their in-game debut here. | ||
==Layout== | ==Layout== | ||
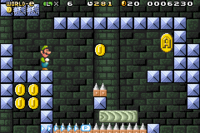
The area is a sky-based level. Mario starts on some clouds, and must cross several motion platforms to reach another cloud platform. On this platform is a single red [[Koopa Troopa]]. After this, there are [[Snake Block]]s, with some [[Koopa Paratroopa]]s along the path. Afterward is another cloud platform, with two | [[File:SMA4 A Towering Tour Screenshot.png|thumb|left|Screenshot from ''Super Mario Advance 4: Super Mario Bros. 3'']] | ||
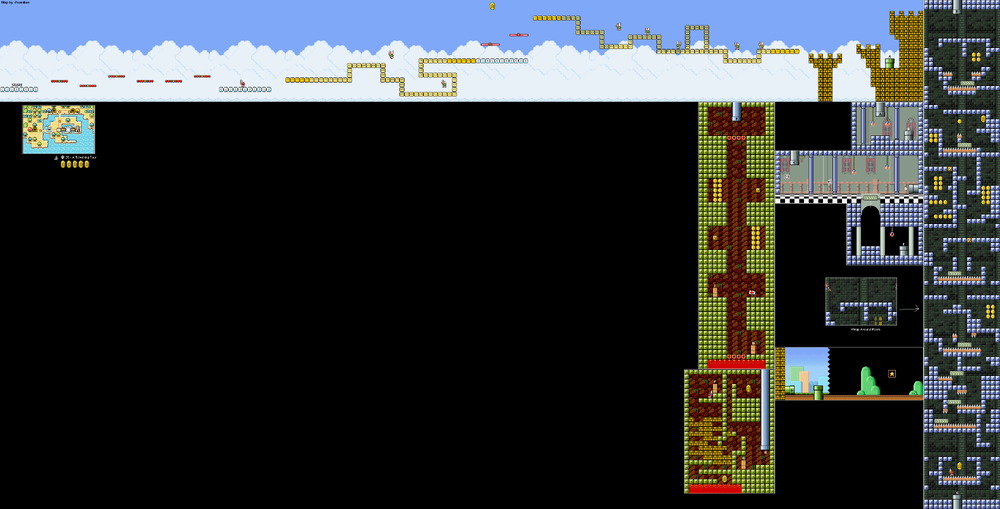
The area is a sky-based level. Mario starts on some clouds, and must cross several motion platforms to reach another cloud platform. On this platform is a single red [[Koopa Troopa]]. After this, there are [[Snake Block|snake platform]]s, with some [[Koopa Paratroopa]]s along the path. Afterward is another cloud platform, with two [[Seesaw]]s that shift with Mario's weight leading to more snake platforms. After taking the snake platforms, there are two Brick Block towers, with a [[Pile Driver Micro-Goomba]]. The [[Warp Pipe]] takes the player to another Warp Pipe leading to the next room of the fortress. | |||
This part of the fortress is a warp-around area. It is filled with solid, unbreakable blocks and [[Spike | This part of the fortress is a warp-around area. It is filled with solid, unbreakable blocks and [[Spike Trap|spike]]s, but there are fast-moving [[lift]] platforms to help maneuver through them. At the bottom is a Warp Pipe leading to the next room. | ||
The room is mostly straightforward to a pipe leading to the end. The only things in the room are [[Boo]]s and a | The room is mostly straightforward to a pipe leading to the end. The only things in the room are [[Boo]]s and a platform on a [[track]], which flies up and down off the screen if stepped on. However, going down the hole left by the platform leads to a pipe. This pipe leads to an underground area with several coins, and two doors, one higher up and one at the very bottom, both leading to different parts of the same room. | ||
The upper door takes the player to an area with a red Koopa Troopa necessary to break several Brick Blocks to reach a lower part of the room. From there, the player needs to jump over the unbreakable blocks to reach a Warp Pipe leading to the end of the level. The bottom door leads to the Warp Pipe. | The upper door takes the player to an area with a red Koopa Troopa necessary to break several Brick Blocks to reach a lower part of the room. From there, the player needs to jump over the unbreakable blocks to reach a Warp Pipe leading to the end of the level. The bottom door leads to the Warp Pipe. | ||
| Line 23: | Line 24: | ||
The end of the level has several Brick Blocks containing coins. The player must simply head over to the end. | The end of the level has several Brick Blocks containing coins. The player must simply head over to the end. | ||
== | ==Items== | ||
;[[Advance Coin]]s | |||
#Floating above the two see-saw platforms. | #Floating above the two see-saw platforms. | ||
#In the area of the second spike trap. | #In the area of the second spike trap. | ||
#Toward the bottom of the third room, | #Toward the bottom of the third room, | ||
#In the bonus room through the door, there is a P | #In the bonus room through the door, there is a [[P Switch|Switch Block]] inside one of the near-bottom [[Brick Block]]s, allowing the shell to continue and collect the coin. | ||
#Inside one of the Brick Blocks is a [[Beanstalk]] leading up to the final coin. | #Inside one of the Brick Blocks is a [[Beanstalk]] leading up to the final coin. | ||
== | ==Enemies== | ||
{|style="text-align:center"class="wikitable" | |||
!Name | |||
!Count | |||
|- | |||
|[[File:SMA4 Koopa Troopa Red.png]]<br>[[Koopa Troopa|Red Koopa Troopa]] | |||
|3 | |||
|- | |||
|[[File:SMA4 Koopa Paratroopa Green.png]]<br>[[Koopa Paratroopa|Green Koopa Paratroopa]] | |||
|7 | |||
|- | |||
|[[File:Boo Animation.gif]]<br>[[Boo]] | |||
|2 | |||
|} | |||
==Flavor | ==Level map== | ||
{{wide image|A Towering Tour map.png|1000}} | |||
==Flavor text== | |||
{| | {| | ||
| | | | ||
*<b>Japanese: | *<b>Japanese: | ||
| Line 47: | Line 62: | ||
|} | |} | ||
== | ==Names in other languages== | ||
{{foreign names | |||
|Jpn=とうのうえからかかけおりろ! | |||
|JpnR=Tō no Ue kara Kakeoriro! | |||
|JpnM=Run Down from the Top of the Tower! | |||
}} | |||
{{ | {{SMB3 levels}} | ||
[[Category:Towers]] | |||
[[Category: | [[Category:World-e]] | ||
Latest revision as of 11:38, January 7, 2025
| Level | |||
|---|---|---|---|
| A Towering Tour | |||

| |||
| Level code | 20 (World-e) | ||
| Game | Super Mario Advance 4: Super Mario Bros. 3 | ||
| Time limit | 400 | ||
| Music track | Ground Theme Fortress Theme Underground Theme | ||
| |||
| << Directory of levels >> | |||
A Towering Tour is the twentieth level in World-e of Super Mario Advance 4: Super Mario Bros. 3. This card was released in Series 2 in Japan. Its official difficulty rating is ★★★☆☆. It was initially never released out of Japan, although the level eventually first became available internationally with the game's release on the Wii U Virtual Console in 2016. The key art featured Ludwig von Koopa. Snake platforms, Seesaws, and gray Lifts make their in-game debut here.
Layout[edit]
The area is a sky-based level. Mario starts on some clouds, and must cross several motion platforms to reach another cloud platform. On this platform is a single red Koopa Troopa. After this, there are snake platforms, with some Koopa Paratroopas along the path. Afterward is another cloud platform, with two Seesaws that shift with Mario's weight leading to more snake platforms. After taking the snake platforms, there are two Brick Block towers, with a Pile Driver Micro-Goomba. The Warp Pipe takes the player to another Warp Pipe leading to the next room of the fortress.
This part of the fortress is a warp-around area. It is filled with solid, unbreakable blocks and spikes, but there are fast-moving lift platforms to help maneuver through them. At the bottom is a Warp Pipe leading to the next room.
The room is mostly straightforward to a pipe leading to the end. The only things in the room are Boos and a platform on a track, which flies up and down off the screen if stepped on. However, going down the hole left by the platform leads to a pipe. This pipe leads to an underground area with several coins, and two doors, one higher up and one at the very bottom, both leading to different parts of the same room.
The upper door takes the player to an area with a red Koopa Troopa necessary to break several Brick Blocks to reach a lower part of the room. From there, the player needs to jump over the unbreakable blocks to reach a Warp Pipe leading to the end of the level. The bottom door leads to the Warp Pipe.
The end of the level has several Brick Blocks containing coins. The player must simply head over to the end.
Items[edit]
- Floating above the two see-saw platforms.
- In the area of the second spike trap.
- Toward the bottom of the third room,
- In the bonus room through the door, there is a Switch Block inside one of the near-bottom Brick Blocks, allowing the shell to continue and collect the coin.
- Inside one of the Brick Blocks is a Beanstalk leading up to the final coin.
Enemies[edit]
| Name | Count |
|---|---|
Red Koopa Troopa |
3 |
Green Koopa Paratroopa |
7 |
Boo |
2 |
Level map[edit]
Flavor text[edit]
|
塔(とう)の一番下(いちばんした)に 何(なに)があるのか 確(たしか)かめに来(き)てみろよ! |
Names in other languages[edit]
| Language | Name | Meaning | Notes |
|---|---|---|---|
| Japanese | とうのうえからかかけおりろ![?] Tō no Ue kara Kakeoriro! |
Run Down from the Top of the Tower! |

