Old Clockworks: Difference between revisions
mNo edit summary |
|||
| (74 intermediate revisions by 40 users not shown) | |||
| Line 1: | Line 1: | ||
{{ | {{location infobox | ||
| | |title=Old Clockworks | ||
|image= | |image=[[File:LMDMMansion5.png|250px]] | ||
| | |greater_location=[[Evershade Valley]] | ||
| | |inhabitants=[[Greenie]]s, [[Slammer (enemy)|Slammer]]s, [[Hider]]s, [[Sneaker]]s, [[mummy|mummies]], [[Polterpup]], [[Spirit Ball]]s, [[Overset Possessor]], [[Ancient Poltergeist]], [[Strong Sneaker]], [[Poltergeist]], [[Gold Greenie]] | ||
|inhabitants=[[Greenie]]s, [[Slammer ( | |first_appearance=''[[Luigi's Mansion: Dark Moon]]'' ([[List of games by date#2013|2013]]) | ||
|first_appearance=''[[Luigi's Mansion: Dark Moon]]'' ([[2013]]) | |latest_appearance=''[[Luigi's Mansion 2 HD]]'' ([[List of games by date#2024|2024]]) | ||
}} | }} | ||
'''Old Clockworks''' is | The '''Old Clockworks''' is a [[List of locations|location]] in ''[[Luigi's Mansion: Dark Moon]]'' and ''[[Luigi's Mansion 2 HD]]''. It is the third mansion visited by [[Luigi]]. A [[Dark Moon]] piece is in the highest point of the clock tower. As its name indicates, this factory is fairly clockwork-themed, featuring various mechanical rooms. It also has somewhat of a desert theme, as its location features a lot of sand, as does the mansion itself. This is where Luigi can find a yellow [[Toad (species)#Luigi's Mansion: Dark Moon|Toad assistant]]. It is also shown here that several [[Boo]]s save the Toad from a long fall, before sticking him in a painting. | ||
The Old Clockworks originally produced the finest watches and clocks long ago. The factory itself is the oldest of the mansions as it is the [[Evershade Valley]]'s ghosts' favorite haunt. The factory was built on top of some ruins. The owners of the clockworks seemed interested in this as mining and excavation equipment can be found strewn about the ruins. There is also a stairway leading from the factory into the ruins. It is unknown why it closed down, but several jackets, coats, and hats can be found still on racks, and the large amount of equipment and crates left behind suggests something happened within the factory itself to cause it to be abandoned. | |||
The Old Clockworks originally produced | |||
==Missions== | ==Missions== | ||
{|width=100% | {|width=100% class=wikitable style="text-align:center" | ||
!Mission | |||
! | |||
!Description | !Description | ||
!Goal | |||
!Objectives | |||
|- | |- | ||
|[[File:ATimelyEntranceLMDM.png|200px]]<br>'''C-1''': [[A Timely Entrance]] | |||
|''Good news, Luigi. I've located the next Dark Moon piece. It's at the top of the Clock Tower. All you've gotta do is mosey on up there and grab it! What could go wrong?'' | |''Good news, Luigi. I've located the next Dark Moon piece. It's at the top of the Clock Tower. All you've gotta do is mosey on up there and grab it! What could go wrong?'' | ||
|''The Parascope has located a Dark Moon piece at the top of the Clock Tower. Use the elevator behind the Clock Tower Gate to get there.'' | |||
''The Clock Tower Gate is missing some parts! The ghosts that took the parts have been located, but you'll need a special compass to reach them. Search the Drafting Room for it!'' | |||
| | |||
*Get to the Clock Tower Gate. | |||
*Retrieve the special compass. | |||
|- | |- | ||
|[[File:UndergroundExpeditionLMDM.png|200px]]<br>'''C-2''': [[Underground Expedition]]/Underground Trek | |||
|''The special compass revealed another path to the underground! Let's hope those ghosts didn't hide the clock hands too well.'' | |''The special compass revealed another path to the underground! Let's hope those ghosts didn't hide the clock hands too well.'' | ||
|''Explore the underground section of the Old Clockworks, and retrieve the clock hands taken by the ghosts.'' | |||
| | |||
*Find your way underground. | |||
*Look for the missing clock hands. | |||
|- | |- | ||
|[[File:RoundhouseBrawlLMDM.png|200px]]<br>'''C-3''': [[Roundhouse Brawl]] | |||
|[[File:RoundhouseBrawlLMDM.png|200px]] | |||
|''That ancient ghost ran off with the clock hands we're looking for. Thankfully, his strong paranormal signal made him easy to find!'' | |''That ancient ghost ran off with the clock hands we're looking for. Thankfully, his strong paranormal signal made him easy to find!'' | ||
|''E. Gadd has located the Ancient Poltergeist in the Roundhouse. Make your way there, and recover the clock hands that he took.'' | |||
| | |||
*Find the Poltergeist in the Roundhouse. | |||
*Recover the clock hands. | |||
|- | |- | ||
|[[File:PlayCatchLMDM.png|200px]]<br>'''C-4''': [[Play Catch]]/Ghosty in the Middle | |||
|''Well, we've recovered the minute hand, but the hour hand is still missing. I've detected some signals in the Clockworks Court, so let's start our search there.'' | |''Well, we've recovered the minute hand, but the hour hand is still missing. I've detected some signals in the Clockworks Court, so let's start our search there.'' | ||
|''A ghostly dog took the hour hand and vanished into the Warehouse. Catch up to the dog before the ghosts do!'' | |||
| | |||
*Chase the dog and get the hour hand. | |||
|- | |- | ||
|[[File:PieceatLastLMDM.png|200px]]<br>'''C-5''': [[Piece at Last]] | |||
|''There's one last clock part we need to find before we can fix the Clock Tower Gate, and I think I know where it is!'' | |''There's one last clock part we need to find before we can fix the Clock Tower Gate, and I think I know where it is!'' | ||
|''A ghost has made off with the rotor, the last piece needed to open the Clock Tower Gate. Follow him and take it back!'' | |||
''The rotor was taken into the Storage Room, which is locked. Look for E. Gadd's Toad assistant, and see if he can help.'' | |||
| | |||
*Chase the ghost and get the rotor. | |||
*Meet the Toad in the Synchronization Room. | |||
*Lead the Toad to the Service Elevator. | |||
|- | |- | ||
|[[File:ShowtimeLMDM.png|200px]]<br>'''Boss''': [[Showtime]]/Show Time | |||
|''We finally have everything we need to reach the top of the Clock Tower! But first, let's check the security image that the Toad brought with him.'' | |''We finally have everything we need to reach the top of the Clock Tower! But first, let's check the security image that the Toad brought with him.'' | ||
|''Open the Clock Tower Gate, and get to the top of the Clock Tower. Then find and retrieve the Dark Moon piece.'' | |||
| | |||
*Find and retrieve the Dark Moon piece. | |||
|- | |- | ||
|[[File:OutlandishInterruptionLMDM.png|200px]]<br>'''Bonus''': [[Outlandish Interruption]] | |||
|[[File:OutlandishInterruptionLMDM.png|200px]] | |||
|''We've got a complication. There are paranormal signals in the Old Clockworks again! It's ghost-hunting time, sonny!'' | |''We've got a complication. There are paranormal signals in the Old Clockworks again! It's ghost-hunting time, sonny!'' | ||
|''Ghosts are back in the Old Clockworks! Capture all the ghosts as soon as possible.'' | |||
| | |||
*Capture all the ghosts as soon as possible! | |||
|- | |- | ||
|} | |} | ||
| Line 55: | Line 71: | ||
==Objects== | ==Objects== | ||
*Special Compass | *Special Compass | ||
*Balls of ribbon in the Warehouse that can be unraveled by a machine, containing items. | *Balls of ribbon in the Warehouse that can be unraveled by a machine, containing items. One of these holds a [[Key]]. | ||
*Clock hands (minute and hour hands) | *Clock hands (minute and hour hands) | ||
*Clock Rotor | *Clock Rotor | ||
*13 [[ | *13 [[Gem#Rubies (Old Clockworks)|Rubies]] | ||
==Bosses== | ==Bosses== | ||
| Line 65: | Line 81: | ||
==Rooms== | ==Rooms== | ||
===First Floor=== | ===First Floor/Ground Floor (PAL)=== | ||
{|class="wikitable"style="text-align:center" | |||
|- | |||
!Image/Name | |||
![[Gem]] | |||
![[List of Boos in Luigi's Mansion: Dark Moon|Boo]] | |||
|- | |||
||[[File:ClockworksCourtLMDM.png|200px]]<br>[[Clockworks Court]]||Round Ruby||N/A | |||
|- | |||
||[[File:WarehouseLMDM.png|200px]]<br>[[Warehouse]]||Triangle Ruby||'''ComBooter'''<br>''"ComBooter says 01100010 01101111 01101111!"'' | |||
(Availability: C-1) | |||
|- | |||
||[[File:RoundhouseLMDM.png|200px]]<br>[[Roundhouse]]||Star Ruby<br>Octagon Ruby||N/A | |||
|- | |||
||[[File:CanyonStairsLMDM.png|200px]]<br>[[Canyon Stairs]]/Ravine Stairs (PAL)||Drop Ruby||N/A | |||
|- | |||
||[[File:WorkshopOCLMDM.png|200px]]<br>[[Workshop (Old Clockworks)|Workshop]]||N/A||N/A | |||
|- | |||
||[[File:ClockTowerGateLMDM.png|200px]]<br>[[Clock Tower Gate]]||Baguette Ruby||'''JamBoolaya'''<br>''"Don't you dare call me GumBoo! My name be JamBoolaya!"'' | |||
(Availability: C-4) | |||
|- | |||
||[[File:MovementsLMDM.png|200px]]<br>[[Movements]]||Mushroom Ruby||N/A | |||
|- | |||
||[[File:CargoRoomLMDM.png|200px]]<br>[[Cargo Room]]||N/A||N/A | |||
|- | |||
||[[File:ServiceElevatorLMDM.png|200px]]<br>[[Service Elevator]]/Service Lift (PAL)||Coffin Ruby||N/A | |||
|- | |||
||[[File:GearChamberLMDM.png|200px]]<br>[[Gear Chamber]]||Oval Ruby||N/A | |||
|- | |||
||[[File:StorageRoomLMDM.png|200px]]<br>[[Storage Room (Luigi's Mansion: Dark Moon)|Storage Room]]||N/A||N/A | |||
|} | |||
===Second Floor=== | ===Second Floor/First Floor (PAL)=== | ||
{|class="wikitable"style="text-align:center" | |||
|- | |||
!Image/Name | |||
![[Gem]] | |||
![[List of Boos in Luigi's Mansion: Dark Moon|Boo]] | |||
|- | |||
||[[File:WarehouseLMDM.png|200px]]<br>[[Warehouse]]||Triangle Ruby||'''ComBooter'''<br>''"ComBooter says 01100010 01101111 01101111!"'' | |||
(Availability: C-1) | |||
|- | |||
||[[File:ClockmakersChambersLMDM.png|200px]]<br>[[Clockmaker's Chambers]]/Clockmaker's Room (PAL)||Rhombus Ruby||N/A | |||
|- | |||
||[[File:RoundhouseLMDM.png|200px]]<br>[[Roundhouse]]||Star Ruby<br>Octagon Ruby||N/A | |||
|- | |||
||[[File:TransportationHallLMDM.png|200px]]<br>[[Transportation Hall]]||N/A||N/A | |||
|- | |||
||[[File:FinishingRoomLMDM.png|200px]]<br>[[Finishing Room]]||N/A||N/A | |||
|- | |||
||[[File:ContainerYardLMDM.png|200px]]<br>[[File:RoboticBombRoundhouseBrawl.png|200px]]<br>[[Container Yard]]||N/A||N/A | |||
|- | |||
||[[File:KilnRoomLMDM.png|200px]]<br>[[Kiln Room]]||N/A||'''Boodonkulous'''<br>''"Boodonkulous is in the building! My name makes no sense..."'' | |||
(Availability: C-3)<br>(Note: This Boo is not required to beat the mission (Luigi can still exit the room), but the Boo appears through usual mission progression like the other mandatory Boos.) | |||
|- | |||
||[[File:ATimelyEntranceDraftOfficeLMDM.png|200px]]<br>[[Drafting Office]]||N/A||N/A | |||
|- | |||
||[[File:ClockTowerGateLMDM.png|200px]]<br>[[Clock Tower Gate]]||Baguette Ruby||'''JamBoolaya'''<br>''"Don't you dare call me GumBoo! My name be JamBoolaya!"'' | |||
(Availability: C-4) | |||
|- | |||
||[[File:MovementsLMDM.png|200px]]<br>[[Movements]]||Mushroom Ruby||N/A | |||
|- | |||
||[[File:BelfryLMDM.png|200px]]<br>[[Belfry]]||N/A||N/A | |||
|- | |||
||[[File:CargoRoomLMDM.png|200px]]<br>[[Cargo Room]]||N/A||N/A | |||
|} | |||
===Third Floor=== | ===Third Floor/Second Floor (PAL)=== | ||
{|class="wikitable"style="text-align:center" | |||
|- | |||
!Image/Name | |||
![[Gem]] | |||
![[List of Boos in Luigi's Mansion: Dark Moon|Boo]] | |||
|- | |||
||[[File:BelfryLMDM.png|200px]]<br>[[Belfry]]||N/A||N/A | |||
|- | |||
||[[File:BelfryClockLMDM.png|200px]]<br>[[Belfry Clock]]||N/A||N/A | |||
|} | |||
===Basement 1=== | ===Basement 1=== | ||
{|class="wikitable"style="text-align:center" | |||
|- | |||
!Image/Name | |||
![[Gem]] | |||
![[List of Boos in Luigi's Mansion: Dark Moon|Boo]] | |||
|- | |||
||[[File:StormCellarLMDM.png|200px]]<br>[[Storm Cellar]]||Football Ruby||N/A | |||
|- | |||
||[[File:CanyonHallLMDM.png|200px]]<br>[[Canyon Hall]]/Ravine Passage (PAL)||Drop Ruby||N/A | |||
|- | |||
||[[File:CanyonNarrowsLMDM.png|200px]]<br>[[Canyon Narrows]]/Ravine Narrows (PAL)||N/A||N/A | |||
|- | |||
||[[File:RoundhousePitLMDM.png|200px]]<br>[[Roundhouse Pit]]||N/A||N/A | |||
|- | |||
||[[File:PitSlideLMDM.png|200px]]<br>[[Pit Slide]]||N/A||N/A | |||
|- | |||
||[[File:CanyonStairsLMDM.png|200px]]<br>[[Canyon Stairs]]/Ravine Stairs (PAL)||Drop Ruby||N/A | |||
|- | |||
||[[File:SynchronizationRoomLMDM.png|200px]]<br>[[Synchronization Room]]/Synchronisation Lab (PAL)||N/A||N/A | |||
|- | |||
||[[File:SynchroGantryLMDM.png|200px]]<br>[[Synchro Gantry]]||N/A||N/A | |||
|- | |||
||[[File:MaintenanceHubLMDM.png|200px]]<br>[[Maintenance Hub]]||Spindle Ruby||N/A | |||
|- | |||
||[[File:CrankRoomLMDM.png|200px]]<br>[[Crank Room]]||N/A||'''Boony Raboot'''<br>''"Boo! You found me! Nobody hare except Boony Raboot!"'' | |||
(Availability: C-5) | |||
|- | |||
||[[File:ServiceElevatorLMDM.png|200px]]<br>[[Service Elevator]]/Service Lift (PAL)||Coffin Ruby||N/A | |||
|- | |||
||[[File:GearChamberLMDM.png|200px]]<br>[[Gear Chamber]]||Oval Ruby||N/A | |||
|- | |||
||[[File:StorageRoomLMDM.png|200px]]<br>[[Storage Room (Luigi's Mansion: Dark Moon)|Storage Room]]||N/A||N/A | |||
|} | |||
===Basement 2=== | ===Basement 2=== | ||
{|class="wikitable"style="text-align:center" | |||
|- | |||
!Image/Name | |||
![[Gem]] | |||
![[List of Boos in Luigi's Mansion: Dark Moon|Boo]] | |||
|- | |||
||[[File:PitSlideLMDM.png|200px]]<br>[[Pit Slide]]||N/A||N/A | |||
|- | |||
||[[File:QuarryLMDM.png|200px]]<br>[[Quarry]]||Pebble Ruby||'''Bootine (American) / Booillon (British)'''<br>Bootine: ''"Boo ha ha! I'm Bootine...with extra gravy!"''<br>Booillion: ''"Boo ha ha! I'm Booillon. Shall I let you stew a bit or pulverise you now?"'' | |||
(Availability: C-2) | |||
|- | |||
||[[File:AntechamberLMDM.png|200px]]<br>[[Antechamber (Luigi's Mansion: Dark Moon)|Antechamber]]||N/A||N/A | |||
|- | |||
||[[File:TombLMDM.png|200px]]<br>[[Tomb]]||N/A||N/A | |||
|} | |||
==Profiles== | |||
{{Multilang profile | |||
|type=game | |||
|Eng=This factory once produced the world's finest clocks and time-measurement devices. Your watch probably comes from here, and you don't even know it! | |||
}} | |||
==Media== | ==Media== | ||
{{media | {{media table | ||
| | |file1=Old_Clockworks_Music.oga | ||
|title1=Old Clockworks Music | |||
| | |description1=The song that plays in the Old Clockworks. | ||
|description1=The song that plays in Old Clockworks. | |||
| | |file2=Outlandish_Interruption_Music.oga | ||
|title2=Outlandish Interruption Music | |||
| | |description2=The song that plays during Outlandish Interruption. | ||
|description2=The song that plays during | |||
}} | }} | ||
==Names in | ==Names in other languages== | ||
{{ | {{foreign names | ||
|Jap=ジゴ~クロック工場 | |Jap=ジゴ~クロック工場 | ||
|JapR= | |JapR=Jigo~kurokku Kōjō | ||
|JapM= | |JapM=Portmanteau of「地獄」(''jigoku'', "hell") and "clock" +「工場」(''kōjō'', "factory") | ||
| | |ChiS=地狱时钟工厂 | ||
| | |ChiSR=Dìyù shízhōng gōngchǎng | ||
|ChiSM=Hell-like Clock Factory | |||
|ChiT=地獄時鐘工廠 | |||
|ChiTR=Dìyù shízhōng gōngchǎng | |||
|ChiTM=Hell-like Clock Factory | |||
|Dut=Oude Klokkenfabriek | |Dut=Oude Klokkenfabriek | ||
|DutM=Old Clock Factory | |DutM=Old Clock Factory | ||
| | |Fre=Pendularium | ||
| | |FreM=From ''pendule'' ("pendulum") and ''-arium'', Latin suffix denoting a place | ||
|Ger=Ingenieurshof | |||
|GerM=Engineer Yard | |||
|Ita=Fabbrica di Orologi | |Ita=Fabbrica di Orologi | ||
|ItaM=Clock Factory | |ItaM=Clock Factory | ||
|Kor=오래된 시계 공장 | |Kor=오래된 시계 공장 | ||
|KorR=Oraedoen Sigye Gongjang | |KorR=Oraedoen Sigye Gongjang | ||
|KorM=Old Clock Factory | |KorM=Old Clock Factory | ||
| | |Por=Fábrica de Relógios | ||
| | |PorM=Clock Factory | ||
| | |Rus=Заброшенный Завод | ||
|RusR=Zabrosheny Zavod | |||
|RusM=Abandoned Factory | |||
|Spa=Fábrica de Relojes | |||
|SpaM=Clock Factory | |||
}} | }} | ||
{{LMDM}} | {{LMDM}} | ||
{{LMDM | {{LMDM missions}} | ||
[[Category: | [[Category:Deserts]] | ||
[[Category:Factories]] | [[Category:Factories]] | ||
[[Category: | [[Category:Haunted areas]] | ||
[[Category:Luigi's Mansion: Dark Moon | [[Category:Luigi's Mansion: Dark Moon locations|*]] | ||
[[it:Fabbrica di orologi]] | |||
Latest revision as of 22:25, September 12, 2024
| Old Clockworks | |
|---|---|

| |
| First appearance | Luigi's Mansion: Dark Moon (2013) |
| Latest appearance | Luigi's Mansion 2 HD (2024) |
| Greater location | Evershade Valley |
| Inhabitants | Greenies, Slammers, Hiders, Sneakers, mummies, Polterpup, Spirit Balls, Overset Possessor, Ancient Poltergeist, Strong Sneaker, Poltergeist, Gold Greenie |
The Old Clockworks is a location in Luigi's Mansion: Dark Moon and Luigi's Mansion 2 HD. It is the third mansion visited by Luigi. A Dark Moon piece is in the highest point of the clock tower. As its name indicates, this factory is fairly clockwork-themed, featuring various mechanical rooms. It also has somewhat of a desert theme, as its location features a lot of sand, as does the mansion itself. This is where Luigi can find a yellow Toad assistant. It is also shown here that several Boos save the Toad from a long fall, before sticking him in a painting.
The Old Clockworks originally produced the finest watches and clocks long ago. The factory itself is the oldest of the mansions as it is the Evershade Valley's ghosts' favorite haunt. The factory was built on top of some ruins. The owners of the clockworks seemed interested in this as mining and excavation equipment can be found strewn about the ruins. There is also a stairway leading from the factory into the ruins. It is unknown why it closed down, but several jackets, coats, and hats can be found still on racks, and the large amount of equipment and crates left behind suggests something happened within the factory itself to cause it to be abandoned.
Missions[edit]
| Mission | Description | Goal | Objectives |
|---|---|---|---|
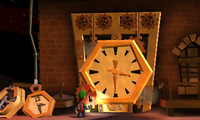 C-1: A Timely Entrance |
Good news, Luigi. I've located the next Dark Moon piece. It's at the top of the Clock Tower. All you've gotta do is mosey on up there and grab it! What could go wrong? | The Parascope has located a Dark Moon piece at the top of the Clock Tower. Use the elevator behind the Clock Tower Gate to get there.
The Clock Tower Gate is missing some parts! The ghosts that took the parts have been located, but you'll need a special compass to reach them. Search the Drafting Room for it! |
|
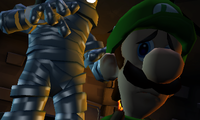 C-2: Underground Expedition/Underground Trek |
The special compass revealed another path to the underground! Let's hope those ghosts didn't hide the clock hands too well. | Explore the underground section of the Old Clockworks, and retrieve the clock hands taken by the ghosts. |
|
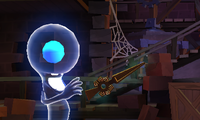 C-3: Roundhouse Brawl |
That ancient ghost ran off with the clock hands we're looking for. Thankfully, his strong paranormal signal made him easy to find! | E. Gadd has located the Ancient Poltergeist in the Roundhouse. Make your way there, and recover the clock hands that he took. |
|
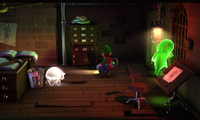 C-4: Play Catch/Ghosty in the Middle |
Well, we've recovered the minute hand, but the hour hand is still missing. I've detected some signals in the Clockworks Court, so let's start our search there. | A ghostly dog took the hour hand and vanished into the Warehouse. Catch up to the dog before the ghosts do! |
|
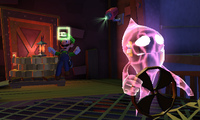 C-5: Piece at Last |
There's one last clock part we need to find before we can fix the Clock Tower Gate, and I think I know where it is! | A ghost has made off with the rotor, the last piece needed to open the Clock Tower Gate. Follow him and take it back!
The rotor was taken into the Storage Room, which is locked. Look for E. Gadd's Toad assistant, and see if he can help. |
|
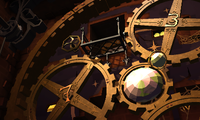 Boss: Showtime/Show Time |
We finally have everything we need to reach the top of the Clock Tower! But first, let's check the security image that the Toad brought with him. | Open the Clock Tower Gate, and get to the top of the Clock Tower. Then find and retrieve the Dark Moon piece. |
|
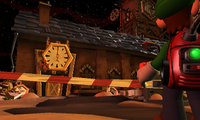 Bonus: Outlandish Interruption |
We've got a complication. There are paranormal signals in the Old Clockworks again! It's ghost-hunting time, sonny! | Ghosts are back in the Old Clockworks! Capture all the ghosts as soon as possible. |
|
Objects[edit]
- Special Compass
- Balls of ribbon in the Warehouse that can be unraveled by a machine, containing items. One of these holds a Key.
- Clock hands (minute and hour hands)
- Clock Rotor
- 13 Rubies
Bosses[edit]
- Mini-Boss: Ancient Poltergeist
- Boss: Overset Possessor (posessing a giant clock)
Rooms[edit]
First Floor/Ground Floor (PAL)[edit]
| Image/Name | Gem | Boo |
|---|---|---|
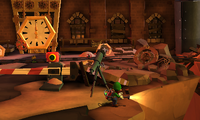 Clockworks Court |
Round Ruby | N/A |
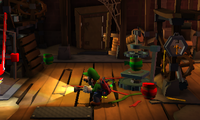 Warehouse |
Triangle Ruby | ComBooter "ComBooter says 01100010 01101111 01101111!" (Availability: C-1) |
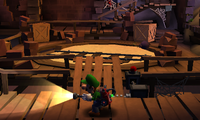 Roundhouse |
Star Ruby Octagon Ruby |
N/A |
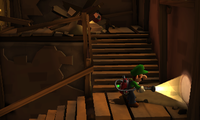 Canyon Stairs/Ravine Stairs (PAL) |
Drop Ruby | N/A |
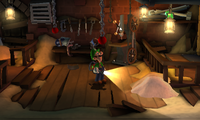 Workshop |
N/A | N/A |
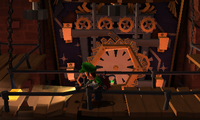 Clock Tower Gate |
Baguette Ruby | JamBoolaya "Don't you dare call me GumBoo! My name be JamBoolaya!" (Availability: C-4) |
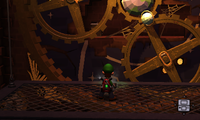 Movements |
Mushroom Ruby | N/A |
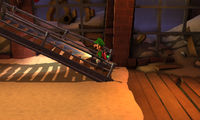 Cargo Room |
N/A | N/A |
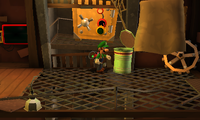 Service Elevator/Service Lift (PAL) |
Coffin Ruby | N/A |
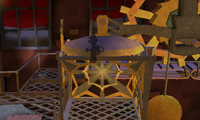 Gear Chamber |
Oval Ruby | N/A |
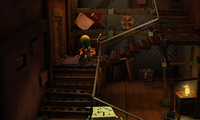 Storage Room |
N/A | N/A |
Second Floor/First Floor (PAL)[edit]
| Image/Name | Gem | Boo |
|---|---|---|
 Warehouse |
Triangle Ruby | ComBooter "ComBooter says 01100010 01101111 01101111!" (Availability: C-1) |
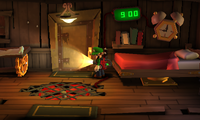 Clockmaker's Chambers/Clockmaker's Room (PAL) |
Rhombus Ruby | N/A |
 Roundhouse |
Star Ruby Octagon Ruby |
N/A |
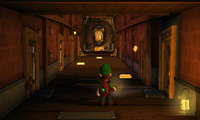 Transportation Hall |
N/A | N/A |
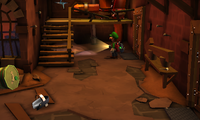 Finishing Room |
N/A | N/A |
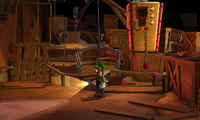 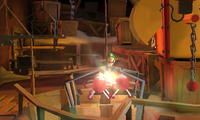 Container Yard |
N/A | N/A |
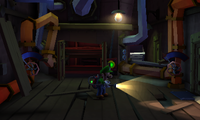 Kiln Room |
N/A | Boodonkulous "Boodonkulous is in the building! My name makes no sense..." (Availability: C-3) |
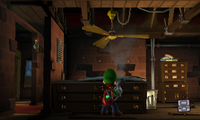 Drafting Office |
N/A | N/A |
 Clock Tower Gate |
Baguette Ruby | JamBoolaya "Don't you dare call me GumBoo! My name be JamBoolaya!" (Availability: C-4) |
 Movements |
Mushroom Ruby | N/A |
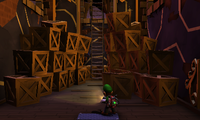 Belfry |
N/A | N/A |
 Cargo Room |
N/A | N/A |
Third Floor/Second Floor (PAL)[edit]
| Image/Name | Gem | Boo |
|---|---|---|
 Belfry |
N/A | N/A |
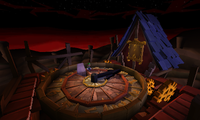 Belfry Clock |
N/A | N/A |
Basement 1[edit]
| Image/Name | Gem | Boo |
|---|---|---|
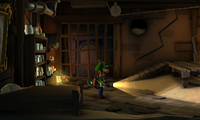 Storm Cellar |
Football Ruby | N/A |
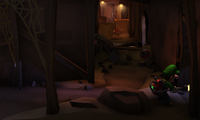 Canyon Hall/Ravine Passage (PAL) |
Drop Ruby | N/A |
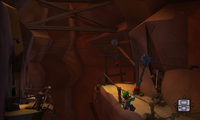 Canyon Narrows/Ravine Narrows (PAL) |
N/A | N/A |
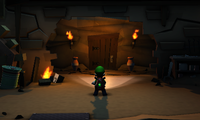 Roundhouse Pit |
N/A | N/A |
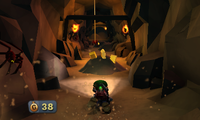 Pit Slide |
N/A | N/A |
 Canyon Stairs/Ravine Stairs (PAL) |
Drop Ruby | N/A |
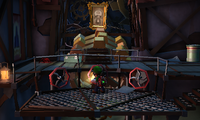 Synchronization Room/Synchronisation Lab (PAL) |
N/A | N/A |
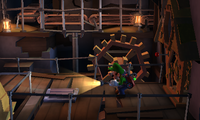 Synchro Gantry |
N/A | N/A |
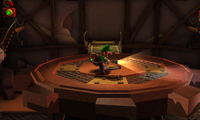 Maintenance Hub |
Spindle Ruby | N/A |
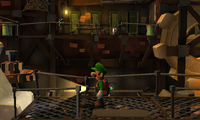 Crank Room |
N/A | Boony Raboot "Boo! You found me! Nobody hare except Boony Raboot!" (Availability: C-5) |
 Service Elevator/Service Lift (PAL) |
Coffin Ruby | N/A |
 Gear Chamber |
Oval Ruby | N/A |
 Storage Room |
N/A | N/A |
Basement 2[edit]
| Image/Name | Gem | Boo |
|---|---|---|
 Pit Slide |
N/A | N/A |
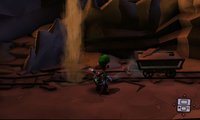 Quarry |
Pebble Ruby | Bootine (American) / Booillon (British) Bootine: "Boo ha ha! I'm Bootine...with extra gravy!" Booillion: "Boo ha ha! I'm Booillon. Shall I let you stew a bit or pulverise you now?" (Availability: C-2) |
 Antechamber |
N/A | N/A |
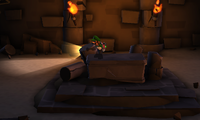 Tomb |
N/A | N/A |
Profiles[edit]
- In-game description
- English:
This factory once produced the world's finest clocks and time-measurement devices. Your watch probably comes from here, and you don't even know it!
- English:
Media[edit]
| File info |
| File info |
Names in other languages[edit]
| Language | Name | Meaning | Notes |
|---|---|---|---|
| Japanese | ジゴ~クロック工場[?] Jigo~kurokku Kōjō |
Portmanteau of「地獄」(jigoku, "hell") and "clock" +「工場」(kōjō, "factory") | |
| Chinese (simplified) | 地狱时钟工厂[?] Dìyù shízhōng gōngchǎng |
Hell-like Clock Factory | |
| Chinese (traditional) | 地獄時鐘工廠[?] Dìyù shízhōng gōngchǎng |
Hell-like Clock Factory | |
| Dutch | Oude Klokkenfabriek[?] | Old Clock Factory | |
| French | Pendularium[?] | From pendule ("pendulum") and -arium, Latin suffix denoting a place | |
| German | Ingenieurshof[?] | Engineer Yard | |
| Italian | Fabbrica di Orologi[?] | Clock Factory | |
| Korean | 오래된 시계 공장[?] Oraedoen Sigye Gongjang |
Old Clock Factory | |
| Portuguese | Fábrica de Relógios[?] | Clock Factory | |
| Russian | Заброшенный Завод[?] Zabrosheny Zavod |
Abandoned Factory | |
| Spanish | Fábrica de Relojes[?] | Clock Factory |