Which-Way Labyrinth: Difference between revisions
m (Text replacement - "(\| *)Jap([RMCN\d]* *=)" to "$1Jpn$2") |
|||
| (63 intermediate revisions by 36 users not shown) | |||
| Line 1: | Line 1: | ||
{{ | {{about|Which-Way Labyrinth, a level in [[New Super Mario Bros. U]]|other uses|[[Soda Jungle-Ghost House]]}} | ||
{{level infobox | |||
|title=Which-Way Labyrinth | |title=Which-Way Labyrinth | ||
|image=[[File: | |image=[[File:NSMBU Which-Way Labyrinth Screenshot.jpg|250px]] | ||
|code= | |code=World 5-[[File:Ghost Icon.png|18px]] | ||
|world=[[Soda Jungle]] | |world=[[Soda Jungle]] | ||
|game=''[[New Super Mario Bros. U]]'' | |game=''[[New Super Mario Bros. U]]'' (''[[New Super Mario Bros. U Deluxe|Deluxe]]'') | ||
|powerup=[[Fire Flower]] | |||
|limit=500 seconds | |limit=500 seconds | ||
| | |before_alt= | ||
|before=[[Snake Block Tower|<<]] | |before=[[Snake Block Tower|<<]] | ||
|after=[[Painted Swampland|>>]] [[Deepsea Ruins|>>]] | |after=[[Painted Swampland|>>]] [[Deepsea Ruins|>>]] | ||
|secret=[[Flight of the Para-Beetles|**]] | |secret=[[Flight of the Para-Beetles|**]] | ||
}} | }} | ||
'''Which-Way Labyrinth''', or '''{{world|Soda|ghost}}''', is the [[Ghost House]] of [[Soda Jungle]] in ''[[New Super Mario Bros. U]]'' | '''Which-Way Labyrinth''', or '''{{world|Soda|ghost}}''', is the [[Ghost House]] located in a Haunted sub-area of [[Soda Jungle]] in ''[[New Super Mario Bros. U]]''. It is unlocked via completion of [[Snake Block Tower]] and its completion unlocks [[Painted Swampland]] and [[Deepsea Ruins]]. This level also has a secret exit that unlocks [[Flight of the Para-Beetles]]. | ||
==Layout== | |||
The player starts in a room with five doors, a couple of [[Boo]]s and a [[? Block]] containing a power-up. The doors on the bottom and top-left are fake. | |||
The top-right door leads to a room with [[Broozer]]s and a large platform that sinks when the player steps onto it. If it sinks too low, the player is dropped into [[Poison (obstacle)|poison]]. Entering the door at the bottom-right takes the player back to the main room. | |||
The left-most door leads to a room with Boos and a platform that rises when the player is on it. Partway up is a ? Block with a [[Glowing Baby Yoshi]], which is capable of eating the Boos. At the top is a door that leads the player back to the main room. | |||
The right-most door leads to a [[dark]] hall lined with [[Scaredy Rat]]s and a ? Block at the beginning of the hall that contains a Glowing Baby Yoshi. Several platforms are in this room; some floating, others connected by stairs. In the center of the room is a [[P Switch]], which reveals nearby [[Blue Coin]]s. At the end of the hall is a door leading back to the main room, though the door above (accessed by a hidden passage) leads to a stairway above the main room, which is where the player needs to go. | |||
The | |||
It is possible to reach this stairway early by using a flight powerup such as a [[Super Acorn]] to go up from underneath. | |||
The staircase leads to two doors: one at the end of the first flight of stairs and a hidden one after the fake door on the second flight, which is accessed by jumping over the wall. The hidden door leads to a room filled with coins as well as the second [[Star Coin]]. The door at the end of the first flight of stairs leads to a room with a tilting platform and a number of Boos and [[Big Boo]]s. The platform gradually lowers as time continues. Partway down, the platform suddenly drops and a ? Block containing a [[Super Star]] is seen. At the bottom of the room is a door that leads to the [[Goal Pole]]. Hitting the [[Flying ? Block]] at the right time allows the player to reach the top of the pole. | |||
{{br}} | |||
==Star | ==[[Star Coin]]s== | ||
{|class="wikitable" style="text-align: center" | |||
|- | |||
!Image | |||
!Location | |||
|- | |||
|[[File:NSMBU 5-GH Coin 1.jpg|200px]] | |||
|Through the top-right door in the first room, the Star Coin is seen on the left. The [[Broozer]] is required to break the wooden blocks guarding it. | |||
|- | |||
|[[File:NSMBU 5-GH Coin 2.jpg|200px]] | |||
|Through the bottom-right door in the first room, the player must head all the way to the left in the next room to the secret door, then the player should do the same for the next to get to the area with the second Star Coin. | |||
|- | |||
|[[File:NSMBU 5-GH Coin 3.jpg|200px]] | |||
|Through the bottom-left door in the first room, the player must ride the platform past the door and reach the left side of the ceiling to get to a secret area. The player should sprint to the right to reach a door, then in the next room stay on the right for a hidden passage to the third Star Coin. | |||
|} | |||
{{br|left}} | |||
==Secret | ==[[Secret exit]]== | ||
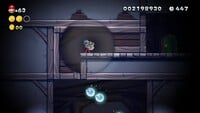
[[File:NSMBU 5-GH Secret Exit.jpg|thumb|right|Mario in the hidden ceiling]] | |||
The player should continue from the same area as the third Star Coin to reach the secret exit. This unlocks [[Flight of the Para-Beetles]]. | The player should continue from the same area as the third Star Coin to reach the secret exit. This unlocks [[Flight of the Para-Beetles]]. | ||
==Enemies== | ==Enemies== | ||
{{number of enemies | |||
|image1=[[File:BooNSMBU.png|50px]] | |||
|name1=[[Boo]] | |||
|count1=62 | |||
|image2=[[File:BooNSMBU sprite.png|50px]] | |||
|name2=[[Big Boo]] | |||
|count2=3 | |||
|image3=[[File:BroozerNSMBU.png|50px]] | |||
|name3=[[Broozer]] | |||
|count3=3 | |||
|image4=[[File:NSMBU Asset Model Scaredy Rat.png|50px]] | |||
|name4=[[Scaredy Rat]] | |||
|count4=56 | |||
}} | |||
==Names in | ==Names in other languages== | ||
{{ | {{foreign names | ||
| | |Jpn=出口はどこ 暗やみやしき | ||
| | |JpnR=Deguchi wa Doko Kurayami Yashiki | ||
| | |JpnM=Where is the Exit, The Dark, Dark House | ||
| | |Fre=Manoir froussard | ||
|FreM=Chicken manor | |||
|Spa=El laberinto tenebroso | |||
|SpaM=The dark labyrinth | |||
|Dut=Duister doolhof der duizend deuren | |||
|DutM=Dark maze of a thousand doors | |||
|Ger=Lichtlos-Labyrinth | |Ger=Lichtlos-Labyrinth | ||
|GerM=Lightless Labyrinth | |GerM=Lightless Labyrinth | ||
|Ita=Labirinto della via perduta | |||
|ItaM=Lost way labyrinth | |||
|Por=Espíritos na Escuridão | |||
|PorM=Spirits in the Dark | |||
|Rus=Неприятности в темноте | |||
|RusR=Nepriyatnosti v temnote | |||
|RusM=Troubles in the dark | |||
|Kor=출구는 어디? 어둠의 집 | |||
|KorR=Chulguneun Eodi? Eodum-ui Jip | |||
|KorM=Where's The Exit? House of Darkness | |||
|Chi=出口在哪里 乌漆麻黑的屋子 (Simplified)<br>出口在哪裡 烏漆麻黑的屋子 (Traditional) | |||
|ChiR=Chūkǒu Zài Nǎlǐ Wūqīmáhēi de Wūzi | |||
|ChiM=Where is the Exit, The Dark, Dark House | |||
}} | }} | ||
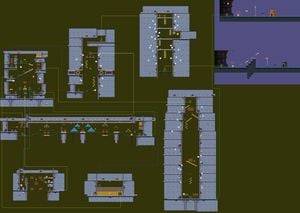
==Level map== | |||
[[File:NSMBU Which-Way Labyrinth Map.jpg|300px|thumb|left|]] | |||
{{NSMBU levels}} | |||
{{NSMBU | |||
[[Category:Ghost Houses]] | [[Category:Ghost Houses]] | ||
[[Category:Levels with a secret exit]] | |||
[[Category:New Super Mario Bros. U levels]] | |||
[[de:Lichtlos-Labyrinth]] | |||
[[it:Labirinto della via perduta]] | |||
Latest revision as of 17:08, January 7, 2025
- This article is about Which-Way Labyrinth, a level in New Super Mario Bros. U. For other uses, see Soda Jungle-Ghost House.
| Level | |
|---|---|
| Which-Way Labyrinth | |
| |
| Level code | World 5- |
| World | Soda Jungle |
| Game | New Super Mario Bros. U (Deluxe) |
| Primary power-up | Fire Flower |
| Time limit | 500 seconds |
| << Directory of levels >> >> ** | |
Which-Way Labyrinth, or Soda Jungle-![]() Ghost House, is the Ghost House located in a Haunted sub-area of Soda Jungle in New Super Mario Bros. U. It is unlocked via completion of Snake Block Tower and its completion unlocks Painted Swampland and Deepsea Ruins. This level also has a secret exit that unlocks Flight of the Para-Beetles.
Ghost House, is the Ghost House located in a Haunted sub-area of Soda Jungle in New Super Mario Bros. U. It is unlocked via completion of Snake Block Tower and its completion unlocks Painted Swampland and Deepsea Ruins. This level also has a secret exit that unlocks Flight of the Para-Beetles.
Layout[edit]
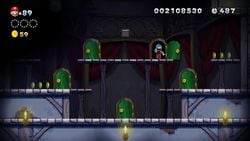
The player starts in a room with five doors, a couple of Boos and a ? Block containing a power-up. The doors on the bottom and top-left are fake.
The top-right door leads to a room with Broozers and a large platform that sinks when the player steps onto it. If it sinks too low, the player is dropped into poison. Entering the door at the bottom-right takes the player back to the main room.
The left-most door leads to a room with Boos and a platform that rises when the player is on it. Partway up is a ? Block with a Glowing Baby Yoshi, which is capable of eating the Boos. At the top is a door that leads the player back to the main room.
The right-most door leads to a dark hall lined with Scaredy Rats and a ? Block at the beginning of the hall that contains a Glowing Baby Yoshi. Several platforms are in this room; some floating, others connected by stairs. In the center of the room is a P Switch, which reveals nearby Blue Coins. At the end of the hall is a door leading back to the main room, though the door above (accessed by a hidden passage) leads to a stairway above the main room, which is where the player needs to go.
It is possible to reach this stairway early by using a flight powerup such as a Super Acorn to go up from underneath.
The staircase leads to two doors: one at the end of the first flight of stairs and a hidden one after the fake door on the second flight, which is accessed by jumping over the wall. The hidden door leads to a room filled with coins as well as the second Star Coin. The door at the end of the first flight of stairs leads to a room with a tilting platform and a number of Boos and Big Boos. The platform gradually lowers as time continues. Partway down, the platform suddenly drops and a ? Block containing a Super Star is seen. At the bottom of the room is a door that leads to the Goal Pole. Hitting the Flying ? Block at the right time allows the player to reach the top of the pole.
Star Coins[edit]
| Image | Location |
|---|---|
|
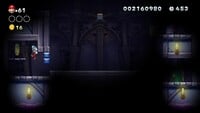
Through the top-right door in the first room, the Star Coin is seen on the left. The Broozer is required to break the wooden blocks guarding it. |
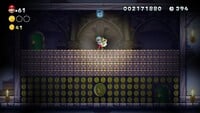
|
Through the bottom-right door in the first room, the player must head all the way to the left in the next room to the secret door, then the player should do the same for the next to get to the area with the second Star Coin. |
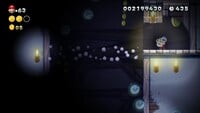
|
Through the bottom-left door in the first room, the player must ride the platform past the door and reach the left side of the ceiling to get to a secret area. The player should sprint to the right to reach a door, then in the next room stay on the right for a hidden passage to the third Star Coin. |
Secret exit[edit]
The player should continue from the same area as the third Star Coin to reach the secret exit. This unlocks Flight of the Para-Beetles.
Enemies[edit]
| Image | Name | Count |
|---|---|---|

|
Boo | 62 |
| Big Boo | 3 | |
| Broozer | 3 | |
| Scaredy Rat | 56 |
Names in other languages[edit]
| Language | Name | Meaning | Notes |
|---|---|---|---|
| Japanese | 出口はどこ 暗やみやしき[?] Deguchi wa Doko Kurayami Yashiki |
Where is the Exit, The Dark, Dark House | |
| Chinese | 出口在哪里 乌漆麻黑的屋子 (Simplified) 出口在哪裡 烏漆麻黑的屋子 (Traditional)[?] Chūkǒu Zài Nǎlǐ Wūqīmáhēi de Wūzi |
Where is the Exit, The Dark, Dark House | |
| Dutch | Duister doolhof der duizend deuren[?] | Dark maze of a thousand doors | |
| French | Manoir froussard[?] | Chicken manor | |
| German | Lichtlos-Labyrinth[?] | Lightless Labyrinth | |
| Italian | Labirinto della via perduta[?] | Lost way labyrinth | |
| Korean | 출구는 어디? 어둠의 집[?] Chulguneun Eodi? Eodum-ui Jip |
Where's The Exit? House of Darkness | |
| Portuguese | Espíritos na Escuridão[?] | Spirits in the Dark | |
| Russian | Неприятности в темноте[?] Nepriyatnosti v temnote |
Troubles in the dark | |
| Spanish | El laberinto tenebroso[?] | The dark labyrinth |
