World 2-2 (New Super Mario Bros. Wii): Difference between revisions
m (→Star Coins) |
Tag: Mobile edit |
||
| (38 intermediate revisions by 21 users not shown) | |||
| Line 1: | Line 1: | ||
{{ | {{italic title|id=yes}} | ||
{{ | {{level infobox | ||
|title={{world|2|2}} | |title={{world|2|2}} | ||
|image=[[File:2- | |image=[[File:NSMBW World 2-2 Screenshot.png|250px]] | ||
|code= | |code= | ||
|world=[[World 2 (New Super Mario Bros. Wii)|World 2]] | |world=[[World 2 (New Super Mario Bros. Wii)|World 2]] | ||
|game=''[[New Super Mario Bros. Wii]]'' | |game=''[[New Super Mario Bros. Wii]]'' | ||
|limit=600 seconds | |limit=600 seconds | ||
| | |before_alt= | ||
|before=[[World 1-Castle (New Super Mario Bros. Wii)|<<]] | |before=[[World 1-Castle (New Super Mario Bros. Wii)|<<]] | ||
|after=[[World 2-3 (New Super Mario Bros. Wii)|>>]] | |after=[[World 2-3 (New Super Mario Bros. Wii)|>>]] | ||
|secret= | |secret= | ||
}} | }} | ||
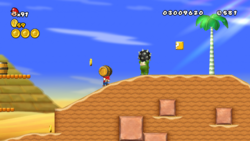
'''World 2-2''' is the second level of | '''World 2-2''' is the second level of [[World 2 (New Super Mario Bros. Wii)|World 2]] in ''[[New Super Mario Bros. Wii]]''; however, the player has the option to play either [[World 2-1 (New Super Mario Bros. Wii)|World 2-1]] or this level to advance. Completing either level unlocks [[World 2-3 (New Super Mario Bros. Wii)|World 2-3]]. Like 2-1, it is a desert-themed level, which introduces [[Spike]]s and [[barrel]]s. | ||
==Layout== | ==Layout== | ||
The level starts with Mario standing next to a pair of barrels. | The level starts with [[Mario]] standing next to a pair of barrels. As the player moves on, there is a hill with several [[Goomba]]s approaching; on the upper [[platform]] floating in the air are three more barrels, and the next section has a Spike. The next section down a hill has a Spike standing on several [[Brick Block|brick]]s. Before the Spike and adjacent to the [[? Block]] on the second platform, there is a brick containing a [[P Switch]]. The next area has several bricks floating over a pit of [[quicksand]] and a Spike on a midair platform. Up the next hill, there are two Spinies, and down the opposite side, there is a [[Koopa Troopa]] and three Goombas. Following this is a vertically moving platform with nine red Koopa Troopas on ledges that can be used to get a [[1-Up Mushroom]], and the [[Checkpoint Flag|midway point]] is after this. However, the adjacent quicksand pit leads to a secret area with a P Switch that spawns a large group of [[Blue Coin]]s, as well as another secret that leads to a [[Star Coin]]. | ||
The section following the | The section following the midway point has a trio of Goombas. On two midair platforms, there are barrels, with a Spike nearby. Next, there is a vertically moving platform; on the left side of it is a pair of platforms with a barrel on one of them, and the right side has a row of bricks and a Spike. The first brick contains a [[beanstalk|vine]] leading to a bonus area. The next area consists of several vertical platforms with a Spike on the opposite end of each. The next section has two vertically scrolling platforms, one with a Spike on it. On the left side of the free platform, there is a [[Warp Pipe]] leading to a bonus underground area with a [[Mini Mushroom]] and a P Switch. After another desert platform, there are several horizontally scrolling platforms and a Spike guarding the next section. Underneath this next section, there is a mini Warp Pipe leading to another underground bonus section with a P Switch and a Star Coin. Following this is a horizontally moving platform, another Spike, and the [[Goal Pole|pole]]. | ||
==Star | ==[[Star Coin]]s== | ||
{| class="wikitable" style="text-align: center" | |||
!Image | |||
!Location | |||
|- | |||
|[[File:NSMBW W2-2 1st Star Coin.jpg|150px]] | |||
|To the immediate left of the midway point is a deep pool of quicksand. Mario and co. should get inside it and sink all the way to the bottom. This will lead to an area with a P Switch followed by a large drop, and a green Pipe at the bottom. This Pipe leads to another area with two Spikes and a [[? Switch]]. Mario and co. should activate the ? Switch to make moving platforms appear, then use them to [[jump]] up to the first Star Coin while avoiding the Spikes. | |||
|- | |||
|[[File:NSMBW W2-2 2nd Star Coin.jpg|150px]] | |||
|Not far from the exit point of the area with the first Star Coin is a row of four bricks. Mario and co. must hit the one on the left from anywhere but the top to make a vine appear. This vine leads to a cloudy area with a long moving platform, and this platform eventually leads to a [[POW Block]], which Mario and co. must use to make the second Star Coin, along with several other [[coin]]s, fall onto the platform. This should be done while the platform is under the Star Coin. | |||
|- | |||
|[[File:NSMBW W2-2 3rd Star Coin.jpg|150px]] | |||
|A Mini Mushroom is required for this one. Near the end of the level, under the hill, is a small green Pipe covered by two barrels. After throwing the barrels away and entering the Pipe, Mario and co. will be brought to an underground area with the third Star Coin floating atop a midair platform. It must be jumped to. | |||
|} | |||
==Enemies== | ==Enemies== | ||
{|border=2 cellspacing=0 cellpadding=3 style="border-collapse:collapse"style="text-align: center" | |||
|- | |||
!Image | |||
!Name | |||
!Number | |||
|- | |||
|[[File:NSMBW Goomba Render.png]] | |||
|[[Goomba]] | |||
|9 | |||
|- | |||
|[[File:RedKoopaTroopa.png]] | |||
|Red [[Koopa Troopa]] | |||
|10 | |||
|- | |||
|[[File:NSMBW Spike Render.png]] | |||
|[[Spike]] | |||
|14 | |||
|- | |||
|[[File:NSMBW Spiny Render.png]] | |||
|[[Spiny]] | |||
|2 | |||
|} | |||
==Level map== | |||
[[File:NSMBW World 2-2 Map.png|400px|thumb|left|]] | |||
{{NSMBW levels}} | |||
{{NSMBW | |||
[[Category:Deserts]] | [[Category:Deserts]] | ||
[[Category:New Super Mario Bros. Wii levels]] | |||
Latest revision as of 00:25, October 31, 2024
| Level | |
|---|---|
| World 2-2 | |

| |
| World | World 2 |
| Game | New Super Mario Bros. Wii |
| Time limit | 600 seconds |
| << Directory of levels >> | |
World 2-2 is the second level of World 2 in New Super Mario Bros. Wii; however, the player has the option to play either World 2-1 or this level to advance. Completing either level unlocks World 2-3. Like 2-1, it is a desert-themed level, which introduces Spikes and barrels.
Layout[edit]
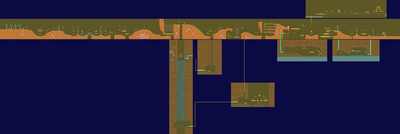
The level starts with Mario standing next to a pair of barrels. As the player moves on, there is a hill with several Goombas approaching; on the upper platform floating in the air are three more barrels, and the next section has a Spike. The next section down a hill has a Spike standing on several bricks. Before the Spike and adjacent to the ? Block on the second platform, there is a brick containing a P Switch. The next area has several bricks floating over a pit of quicksand and a Spike on a midair platform. Up the next hill, there are two Spinies, and down the opposite side, there is a Koopa Troopa and three Goombas. Following this is a vertically moving platform with nine red Koopa Troopas on ledges that can be used to get a 1-Up Mushroom, and the midway point is after this. However, the adjacent quicksand pit leads to a secret area with a P Switch that spawns a large group of Blue Coins, as well as another secret that leads to a Star Coin.
The section following the midway point has a trio of Goombas. On two midair platforms, there are barrels, with a Spike nearby. Next, there is a vertically moving platform; on the left side of it is a pair of platforms with a barrel on one of them, and the right side has a row of bricks and a Spike. The first brick contains a vine leading to a bonus area. The next area consists of several vertical platforms with a Spike on the opposite end of each. The next section has two vertically scrolling platforms, one with a Spike on it. On the left side of the free platform, there is a Warp Pipe leading to a bonus underground area with a Mini Mushroom and a P Switch. After another desert platform, there are several horizontally scrolling platforms and a Spike guarding the next section. Underneath this next section, there is a mini Warp Pipe leading to another underground bonus section with a P Switch and a Star Coin. Following this is a horizontally moving platform, another Spike, and the pole.
Star Coins[edit]
| Image | Location |
|---|---|

|
To the immediate left of the midway point is a deep pool of quicksand. Mario and co. should get inside it and sink all the way to the bottom. This will lead to an area with a P Switch followed by a large drop, and a green Pipe at the bottom. This Pipe leads to another area with two Spikes and a ? Switch. Mario and co. should activate the ? Switch to make moving platforms appear, then use them to jump up to the first Star Coin while avoiding the Spikes. |

|
Not far from the exit point of the area with the first Star Coin is a row of four bricks. Mario and co. must hit the one on the left from anywhere but the top to make a vine appear. This vine leads to a cloudy area with a long moving platform, and this platform eventually leads to a POW Block, which Mario and co. must use to make the second Star Coin, along with several other coins, fall onto the platform. This should be done while the platform is under the Star Coin. |

|
A Mini Mushroom is required for this one. Near the end of the level, under the hill, is a small green Pipe covered by two barrels. After throwing the barrels away and entering the Pipe, Mario and co. will be brought to an underground area with the third Star Coin floating atop a midair platform. It must be jumped to. |
Enemies[edit]
| Image | Name | Number |
|---|---|---|
| Goomba | 9 | |
| Red Koopa Troopa | 10 | |
| Spike | 14 | |
| Spiny | 2 |
