NDDEMO: Difference between revisions
No edit summary |
mNo edit summary Tag: Mobile edit |
||
| (82 intermediate revisions by 37 users not shown) | |||
| Line 1: | Line 1: | ||
{{italic title | {{italic title}} | ||
{{game infobox | |||
{{infobox | |||
|image=[[File:PC Entrance.png|250px]] | |image=[[File:PC Entrance.png|250px]] | ||
|developer=[[Nintendo Entertainment Analysis and Development|Nintendo EAD]] | |developer=[[Nintendo Entertainment Analysis and Development|Nintendo EAD]] | ||
|publisher=[[Nintendo]] | |publisher=[[Nintendo]] | ||
| | |release=2001 | ||
|genre=[[Genre#Platform| | |genre=[[Genre#Platform games|Platformer]] | ||
|modes=Single player | |modes=Single player | ||
|ratings=Not | |ratings=Not rated | ||
|platforms=[[Nintendo GameCube]] | |platforms=[[Nintendo GameCube]] | ||
| | |format={{format|gcn=1}} | ||
|input={{input| | |input={{input|gcn=1}} | ||
}} | }} | ||
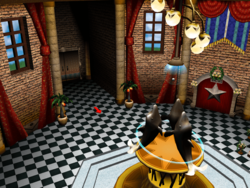
''''' | '''''NDDEMO'''''<ref>{{cite|url=imgur.com/a/QJ9HMUR|title=Nintendo GameCube SDK documentation}}</ref> (short for "'''''Nintendo Developer Demo'''''"; referred to in-game as '''''Welcome to GameCube World!!''''') is a 2001 interactive [[tech demo]]<ref>{{cite|language=en|author=monokoma|date=March 1, 2009|url=www.unseen64.net/2009/03/01/peachs-castle-gamecube-tech-demo|title= Peach’s Castle (GameCube – Tech Demo)|publisher=Unseen64|accessdate=June 5, 2024}}</ref> included in the software development kit for the [[Nintendo GameCube]], created to show developers the system's graphical capabilities. In the demo, the player controls a red arrow that can navigate various rooms in [[Peach's Castle]] from ''[[Super Mario 64]]'', with each room demonstrating a different graphical effect, such as bump mapping, anti-aliasing, or environment mapping. | ||
==Rooms== | ==Rooms== | ||
===#0 Peach Castel - ENTRANCE=== | |||
=== | This is the main hub area featuring six doors, five of which lead to other rooms. This room features several animated objects throughout, as well as a map of the Castle at the center of the bottom floor. | ||
=== | ===#1 Huge Texture - DOME=== | ||
This is a small room with floral and mountain-themed murals on the walls. The floor has a [[Super Star]] with a flower in the background, which is revealed to be made of a small repeating texture of three stars when looked at closely. | |||
=== | |||
This room demonstrates the GameCube's support for large, high-resolution textures, as well as {{wp|Mipmap|mipmapping}}. | |||
=== | |||
===#2 Bump & Shadow - SPIRAL STAIRCASE=== | |||
=== | This is a dimly lit area with a colored stone pillar and spiral staircase in the center. Once the player reaches the stairs, the red arrow begins bouncing, and the player can lead it to the bottom of the room, where a door leading to the Hangar can be found. | ||
=== | This room features {{wp|Bump mapping|bump mapping}}, a method of simulating bumps and wrinkles on an object's surface. | ||
=== | ===#3 Antialiasing - HANGAR=== | ||
This is an indoor hangar with a biplane. Next to it, the player can find a metal [[Warp Pipe]], which leads to the Cave. This room demonstrates the GameCube's {{wp|Anti-aliasing filter|anti-aliasing}} functionality, most prominently with the wire-mesh fences. | |||
===How Many | |||
===#4 Local Lighting - CAVE=== | |||
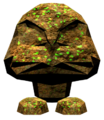
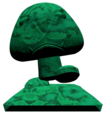
This is a cave featuring a wooden bridge that leads to a [[Goomba]] statue, with some bulbs and colored projector lights illuminating the path. This room demonstrates the GameCube's real-time lighting capabilities, with lights and casted shadows updating to reflect their source's position. | |||
Entering the green Warp Pipe at the beginning of the area takes the player to the top floor of the Entrance. | |||
===#5 Projection Texture - CINEMA THEATER=== | |||
This is a small screening room where a short looping video (featuring prototype GameCube consoles of various colors), along with a blue star and pink heart, is projected and moved around the room. | |||
This area demonstrates {{wp|Projective texture mapping|projected textures}}, which can be animated, overlayed on top of each other, and projected over many objects in real-time. | |||
===#6 Environment Mapping - METAL MARIO !!=== | |||
This is a small room featuring a large [[Metal Mario]] statue that reflects its surroundings, meant to demonstrate {{wp|Reflection mapping|environment mapping}}. | |||
===#7 Maximum POLYGONS - How Many COINS?=== | |||
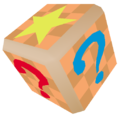
This is a white room with a [[? Block]] at the center. Pressing {{button|gcn|A}} while underneath releases a large number of differently colored [[Coin]]s and stars. This room demonstrates the large number of polygons, models, and objects that the GameCube can process and display at once. | |||
The player can use {{button|gcn|Pad}} to adjust how many Coins appear when the ? Block is hit, up to 1,024 at once; {{button|gcn|Padup}} and {{button|gcn|Paddown}} increase and decrease the number by 20, while {{button|gcn|Padright}} and {{button|gcn|Padleft}} increase and decrease the number by one. The exact number can be viewed by enabling "System Info" in the pause menu. | |||
Pressing {{button|gcn|B}} exits the room; as such, camera control mode is activated by pressing {{button|gcn|X}} instead. | |||
==Features== | ==Features== | ||
===Camera | ===Camera Control Mode=== | ||
By pressing {{button|gcn|B}} the player can control the camera's angle and position. | By pressing {{button|gcn|B}}, the player can freely control the camera's angle and position. {{button|gcn|Stick}} adjusts the camera's position, and {{button|gcn|C}} controls its angle; pressing {{button|gcn|L}} or {{button|gcn|R}} raises and lowers it, respectively. Pressing {{button|gcn|B}} again returns to the arrow. | ||
===Wireframe | |||
===Wireframe Mode=== | |||
The | Pressing {{button|gcn|Y}} enables a {{wp|Wire-frame model|wireframe}} display mode, hiding textures and making the edges of polygons more distinct. | ||
===Pause | |||
The wireframe mode causes reduced performance (as shown on the resource usage meter), most noticeably in the Entrance and How Many Coins? rooms. | |||
===Pause Menu=== | |||
Pressing {{button|gcn|Start}} opens the pause menu; here, the player can toggle mipmap levels, the GameCube's output resolution, system debug information, a resource usage meter, {{wp|Gamma correction|gamma levels}}, background music, and sound effects. | |||
The player may also access the main menu, where two modes are selectable: Normal Demo (default; the player controls the red arrow to explore the castle), or Auto Demo (the camera is controlled automatically, cycling through the different rooms). Additionally, individual rooms can be selected for either mode. | |||
===Doors=== | ===Doors=== | ||
When the player reaches a door, the arrow "knocks" on the door until the corresponding room is finished loading. To reduce load times, the room the player is meant to enter next is loaded ahead of time, indicated by the star on the door being yellow instead of stone-gray. | |||
==Controls== | ==Controls== | ||
*{{button|gcn|A}} | *{{button|gcn|A}} – Jump in How Many Coins?, pause/resume in Auto Demo | ||
*{{button|gcn|B}} | *{{button|gcn|B}} – Enter camera control mode, exit room in How Many Coins? | ||
*{{button|gcn|X}} | *{{button|gcn|X}} – Enter camera control mode in How Many Coins?, slowly advance scene when paused in Auto Demo | ||
*{{button|gcn|Y}} | *{{button|gcn|Y}} – Enter wireframe mode, slowly rewind scene when paused in Auto Demo | ||
*{{button|gcn|R}} - | *{{button|gcn|L}} – Raise the camera in camera control mode, rewind in Auto Demo | ||
*{{button|gcn|Start}} | *{{button|gcn|R}} – Reset the camera behind the player, lower the camera in camera control mode, fast-forward in Auto Demo | ||
*{{button|gcn|Stick}} | *{{button|gcn|Start}} – Enter pause menu | ||
*{{button|gcn|C}} | *{{button|gcn|Stick}} – Move the arrow, adjust the camera's position in camera control mode | ||
*{{button|gcn|C}} – Rotate the camera around the player, adjust the camera's angle in camera control mode | |||
*{{button|gcn|Pad}} – Adjust how many Coins appear when the ? Block is hit in How Many Coins? | |||
==Gallery== | ==Gallery== | ||
===Screenshots=== | |||
<gallery> | |||
PC Room1.png|Dome | |||
PC Room2.png|Spiral Staircase | |||
PC Room3.png|Hangar | |||
PC Room4.png|Cave | |||
PC Room5.png|Cinema Theater | |||
PC Room6.png|Metal Mario | |||
PC Room7.png|How Many Coins? | |||
</gallery></ | PC Map.png|Castle map | ||
</gallery> | |||
===Sprites and models=== | |||
<gallery> | |||
PCTDStarsModel.png|[[Star]]s | |||
PCTDCoinsModel.png|[[Coin]]s | |||
PCTDQuestionBlockModel.png|[[? Block]] | |||
PCTDGoombaRockFormationModel.png|[[Goomba]] rock formation | |||
PCTDGoombaStatueModel.png|Goomba statue | |||
</gallery> | |||
==Media== | ==Media== | ||
{{media | {{media table | ||
| | |file1=PC Entrance.oga | ||
| | |title1=''NDDEMO'' | ||
|description1=Entrance theme | |description1=Entrance theme | ||
|length1= | |length1=0:30 | ||
| | |file2=PC Dome.oga | ||
| | |title2=''NDDEMO'' | ||
|description2=Dome theme | |description2=Dome theme | ||
|length2= | |length2=0:30 | ||
| | |file3=PC Spiralstaircase.oga | ||
| | |title3=''NDDEMO'' | ||
|description3=Spiral Staircase theme | |description3=Spiral Staircase theme | ||
|length3= | |length3=0:30 | ||
| | |file4=PC Hangar.oga | ||
| | |title4=''NDDEMO'' | ||
|description4=Hangar theme | |description4=Hangar theme | ||
|length4= | |length4=0:30 | ||
| | |file5=PC Cave.oga | ||
| | |title5=''NDDEMO'' | ||
|description5=Cave | |description5=Cave theme | ||
|length5= | |length5=0:30 | ||
| | |file6=PC Cinematheater.oga | ||
| | |title6=''NDDEMO'' | ||
|description6=Cinema Theater theme | |description6=Cinema Theater theme | ||
|length6= | |length6=0:30 | ||
| | |file7=PC Metalmario.oga | ||
| | |title7=''NDDEMO'' | ||
|description7=Metal Mario theme | |description7=Metal Mario theme | ||
|length7= | |length7=0:30 | ||
| | |file8=PC Howmanycoins.oga | ||
| | |title8=''NDDEMO'' | ||
|description8=How Many Coins? theme | |description8=How Many Coins? theme | ||
|length8= | |length8=0:30 | ||
}} | }} | ||
==References== | ==References== | ||
<references/> | <references/> | ||
{{ | ==External links== | ||
*[https://www.youtube.com/watch?v=nQLauxlFYwg Gameplay footage] | |||
{{unreleased media}} | |||
[[Category:Games]] | [[Category:Games]] | ||
[[Category: | [[Category:Nintendo GameCube games]] | ||
[[Category: | [[Category:Tech demos]] | ||
[[Category: | [[Category:Platforming games]] | ||
[[it:Peach's Castle (tech demo)]] | |||
Latest revision as of 20:23, June 18, 2024
| NDDEMO | |
|---|---|

| |
| Developer | Nintendo EAD |
| Publisher | Nintendo |
| Platform(s) | Nintendo GameCube |
| Release date | 2001[?] |
| Genre | Platformer |
| Rating(s) | Not rated |
| Mode(s) | Single player |
| Format | Nintendo GameCube:
|
| Input | Nintendo GameCube:
|
NDDEMO[1] (short for "Nintendo Developer Demo"; referred to in-game as Welcome to GameCube World!!) is a 2001 interactive tech demo[2] included in the software development kit for the Nintendo GameCube, created to show developers the system's graphical capabilities. In the demo, the player controls a red arrow that can navigate various rooms in Peach's Castle from Super Mario 64, with each room demonstrating a different graphical effect, such as bump mapping, anti-aliasing, or environment mapping.
Rooms[edit]
#0 Peach Castel - ENTRANCE[edit]
This is the main hub area featuring six doors, five of which lead to other rooms. This room features several animated objects throughout, as well as a map of the Castle at the center of the bottom floor.
#1 Huge Texture - DOME[edit]
This is a small room with floral and mountain-themed murals on the walls. The floor has a Super Star with a flower in the background, which is revealed to be made of a small repeating texture of three stars when looked at closely.
This room demonstrates the GameCube's support for large, high-resolution textures, as well as mipmapping.
#2 Bump & Shadow - SPIRAL STAIRCASE[edit]
This is a dimly lit area with a colored stone pillar and spiral staircase in the center. Once the player reaches the stairs, the red arrow begins bouncing, and the player can lead it to the bottom of the room, where a door leading to the Hangar can be found.
This room features bump mapping, a method of simulating bumps and wrinkles on an object's surface.
#3 Antialiasing - HANGAR[edit]
This is an indoor hangar with a biplane. Next to it, the player can find a metal Warp Pipe, which leads to the Cave. This room demonstrates the GameCube's anti-aliasing functionality, most prominently with the wire-mesh fences.
#4 Local Lighting - CAVE[edit]
This is a cave featuring a wooden bridge that leads to a Goomba statue, with some bulbs and colored projector lights illuminating the path. This room demonstrates the GameCube's real-time lighting capabilities, with lights and casted shadows updating to reflect their source's position.
Entering the green Warp Pipe at the beginning of the area takes the player to the top floor of the Entrance.
#5 Projection Texture - CINEMA THEATER[edit]
This is a small screening room where a short looping video (featuring prototype GameCube consoles of various colors), along with a blue star and pink heart, is projected and moved around the room.
This area demonstrates projected textures, which can be animated, overlayed on top of each other, and projected over many objects in real-time.
#6 Environment Mapping - METAL MARIO !![edit]
This is a small room featuring a large Metal Mario statue that reflects its surroundings, meant to demonstrate environment mapping.
#7 Maximum POLYGONS - How Many COINS?[edit]
This is a white room with a ? Block at the center. Pressing ![]() while underneath releases a large number of differently colored Coins and stars. This room demonstrates the large number of polygons, models, and objects that the GameCube can process and display at once.
while underneath releases a large number of differently colored Coins and stars. This room demonstrates the large number of polygons, models, and objects that the GameCube can process and display at once.
The player can use ![]() to adjust how many Coins appear when the ? Block is hit, up to 1,024 at once;
to adjust how many Coins appear when the ? Block is hit, up to 1,024 at once; ![]() and
and ![]() increase and decrease the number by 20, while
increase and decrease the number by 20, while ![]() and
and ![]() increase and decrease the number by one. The exact number can be viewed by enabling "System Info" in the pause menu.
increase and decrease the number by one. The exact number can be viewed by enabling "System Info" in the pause menu.
Pressing ![]() exits the room; as such, camera control mode is activated by pressing
exits the room; as such, camera control mode is activated by pressing ![]() instead.
instead.
Features[edit]
Camera Control Mode[edit]
By pressing ![]() , the player can freely control the camera's angle and position.
, the player can freely control the camera's angle and position. ![]() adjusts the camera's position, and
adjusts the camera's position, and ![]() controls its angle; pressing
controls its angle; pressing ![]() or
or ![]() raises and lowers it, respectively. Pressing
raises and lowers it, respectively. Pressing ![]() again returns to the arrow.
again returns to the arrow.
Wireframe Mode[edit]
Pressing ![]() enables a wireframe display mode, hiding textures and making the edges of polygons more distinct.
enables a wireframe display mode, hiding textures and making the edges of polygons more distinct.
The wireframe mode causes reduced performance (as shown on the resource usage meter), most noticeably in the Entrance and How Many Coins? rooms.
Pause Menu[edit]
Pressing ![]() opens the pause menu; here, the player can toggle mipmap levels, the GameCube's output resolution, system debug information, a resource usage meter, gamma levels, background music, and sound effects.
opens the pause menu; here, the player can toggle mipmap levels, the GameCube's output resolution, system debug information, a resource usage meter, gamma levels, background music, and sound effects.
The player may also access the main menu, where two modes are selectable: Normal Demo (default; the player controls the red arrow to explore the castle), or Auto Demo (the camera is controlled automatically, cycling through the different rooms). Additionally, individual rooms can be selected for either mode.
Doors[edit]
When the player reaches a door, the arrow "knocks" on the door until the corresponding room is finished loading. To reduce load times, the room the player is meant to enter next is loaded ahead of time, indicated by the star on the door being yellow instead of stone-gray.
Controls[edit]
 – Jump in How Many Coins?, pause/resume in Auto Demo
 – Enter camera control mode, exit room in How Many Coins?
 – Enter camera control mode in How Many Coins?, slowly advance scene when paused in Auto Demo
 – Enter wireframe mode, slowly rewind scene when paused in Auto Demo
 – Raise the camera in camera control mode, rewind in Auto Demo
 – Reset the camera behind the player, lower the camera in camera control mode, fast-forward in Auto Demo
 – Enter pause menu
 – Move the arrow, adjust the camera's position in camera control mode
 – Rotate the camera around the player, adjust the camera's angle in camera control mode
 – Adjust how many Coins appear when the ? Block is hit in How Many Coins?
Gallery[edit]
Screenshots[edit]
Sprites and models[edit]
Goomba rock formation
Media[edit]
| File info 0:30 |
| File info 0:30 |
| File info 0:30 |
| File info 0:30 |
| File info 0:30 |
| File info 0:30 |
| File info 0:30 |
| File info 0:30 |
References[edit]
- ^ Nintendo GameCube SDK documentation.
- ^ monokoma (March 1, 2009). Peach’s Castle (GameCube – Tech Demo). Unseen64 (English). Retrieved June 5, 2024.


