Tilted Tunnel: Difference between revisions
m (Mis-click, my bad) |
No edit summary |
||
| (11 intermediate revisions by 8 users not shown) | |||
| Line 4: | Line 4: | ||
|image=[[File:NSMBU Tilted Tunnel Screenshot.png|250px]] | |image=[[File:NSMBU Tilted Tunnel Screenshot.png|250px]] | ||
|code=World 1-2 | |code=World 1-2 | ||
|game=''[[New Super Mario Bros. U]]'' | |||
|world=[[Acorn Plains]] | |world=[[Acorn Plains]] | ||
| | |powerup=[[Fire Flower]] | ||
|limit=400 seconds<br>500 seconds (''New Super Mario Bros. U Deluxe'') | |limit=400 seconds<br>500 seconds (''New Super Mario Bros. U Deluxe'') | ||
|before_alt= | |before_alt= | ||
| Line 12: | Line 13: | ||
|secret=[[Blooper's Secret Lair|**]] | |secret=[[Blooper's Secret Lair|**]] | ||
}} | }} | ||
'''Tilted Tunnel''', or '''Acorn Plains-2''', is the second course of [[Acorn Plains]] in ''[[New Super Mario Bros. U]]''. It is an underground course that features slanted pipes and shifting crystals. It is the first course to feature the [[Fire Flower]] and to have a secret exit. It is unlocked via completion of [[Acorn Plains Way]], and its own completion unlocks [[Crushing-Cogs Tower]]. After this level is completed, a cutscene shows the flags on Peach's Castle being replaced by Bowser's flags. | '''Tilted Tunnel''', or '''Acorn Plains-2''', is the second course of [[Acorn Plains]] in ''[[New Super Mario Bros. U]]''. It is an underground course that features slanted pipes and shifting crystals. It is the first course to feature the [[Fire Flower]] and to have a secret exit. It is unlocked via completion of [[Acorn Plains Way]], and its own completion unlocks [[Crushing-Cogs Tower]]. After this level is completed, a cutscene shows the flags on [[Peach's Castle]] being replaced by [[Bowser|Bowser's]] flags. | ||
==Layout== | ==Layout== | ||
[[File:NSMBU Tilted Tunnel intro.png|thumb|left|The level's title card]] | [[File:NSMBU Tilted Tunnel intro.png|thumb|left|The level's title card]] | ||
The level begins next to a [[? Block]] containing a power-up, as well as a [[Warp Pipe]] leading underground. Some tilted Warp Pipes containing [[Piranha Plant]]s can be found, along with [[Goomba]]s. The cave splits into two paths, with the bottom path containing [[coin]]s and a [[Koopa Troopa]]. More Piranha Plants and Goombas are encountered in the top path, which leads to a group of shifting crystals. A section with more crystals follows, along with enemies such as Goombas and Piranha Plants. A sloped section with a row of Goombas is found, allowing the player to gain [[Extra life|1-Ups]]. Tilted Warp Pipes containing Piranha Plants are found, along with the [[Checkpoint Flag]]. This area features some [[Brick Block]]s, which can be [[Ground Pound]]ed to allow the player to reach an area with [[pit]]s and coins. More Piranha Plants in Warp Pipes are encountered, with a Warp Pipe that leads to a bonus area full of [[Buzzy Beetle]]s and a [[POW Block]], which can be used to make a shower of coins fall | The level begins next to a [[? Block]] containing a power-up, as well as a [[Warp Pipe]] leading underground. Some tilted Warp Pipes containing [[Piranha Plant]]s can be found, along with [[Goomba]]s. The cave splits into two paths, with the bottom path containing [[coin]]s and a [[Koopa Troopa]]. More Piranha Plants and Goombas are encountered in the top path, which leads to a group of shifting crystals. A section with more crystals follows, along with enemies such as Goombas and Piranha Plants. A sloped section with a row of Goombas is found, allowing the player to gain [[Extra life|1-Ups]]. Tilted Warp Pipes containing Piranha Plants are found, along with the [[Checkpoint Flag]]. This area features some [[Brick Block]]s, which can be [[Ground Pound]]ed to allow the player to reach an area with [[pit]]s and coins. More Piranha Plants in Warp Pipes are encountered, with a Warp Pipe that leads to a bonus area full of [[Buzzy Beetle]]s and a [[POW Block]], which can be used to make a shower of coins fall. More Koopa Troopas and Piranha Plants are encountered. A shifting crystal with a [[Red Ring]] above it is found, along with a Koopa Troopa and a Goomba. More crystals and Piranha Plants are found in the section, leading to a Warp Pipe. To the right of the Warp Pipe is a [[Hidden Block]] that leads to a hidden area with [[coin]]s. The Warp Pipe takes the player to the [[Goal Pole]]. | ||
Alternatively, the player can use a [[P-Acorn]] to fly up above the wall before the pipe leading underground, which will lead to the end of the level. | Alternatively, the player can use a [[P-Acorn]] to fly up above the wall before the pipe leading underground, which will lead to the end of the level. | ||
| Line 22: | Line 23: | ||
==[[Star Coin]]s== | ==[[Star Coin]]s== | ||
{|class="wikitable" style="text-align: center" | |||
|- | |||
!Image | |||
!Location | |||
|- | |||
|[[File:NSMBU 1-2 Coin 1.jpg|200px]] | |||
|The first Star Coin is the end of a long slide with [[Goomba]]s. | |||
|- | |||
|[[File:NSMBU 1-2 Coin 2.jpg|200px]] | |||
|At the end of a corridor full of slanted pipes, the player must use a [[Koopa Troopa|Koopa Shell]] to hit a [[Brick Block]]. The Brick Block contains a [[Beanstalk|vine]] that leads to a sub-area, in which the player can use the [[Pipe Cannon]] to get the second Star Coin. | |||
|- | |||
|[[File:NSMBU 1-2 Coin 3.jpg|200px]] | |||
|Once the player runs into two blue crystals, one with an Arrow Sign on it, the player must [[Ground Pound]] the latter crystal to reveal the path to the [[Warp Pipe]], which leads to the sub-area with the final Star Coin in it. | |||
|} | |||
{{br|left}} | |||
==Secret | ==Secret exit== | ||
[[File:NSMBU Tilted Tunnel Secret Passage. | [[File:NSMBU Tilted Tunnel Secret Passage.png|thumb|300px|The path to the high ledge]] | ||
Near the end of the course, there is a pink crystal with a [[Red Ring]] that shifts upwards. The player can use that crystal to jump up across the ceiling on top of the course. The player can then jump off a blue crystal to reach an even higher ledge. Now Mario has to run | Near the end of the course, there is a pink crystal with a [[Red Ring]] that shifts upwards. The player can use that crystal to jump up across the ceiling on top of the course. The player can then jump off a blue crystal to reach an even higher ledge. Now Mario has to run across the last part of the cave section. There is a hidden Warp Pipe at the back. Finding this secret exit will unlock [[Blooper's Secret Lair]]. | ||
==Enemies== | ==Enemies== | ||
{{number of enemies | |||
NSMBU Goomba Artwork.png|[[Goomba]] | |image1=[[File:NSMBU Goomba Artwork.png|50px]] | ||
KoopaTroopaNSMBU.png|[[Koopa Troopa|Green Koopa Troopa]] | |name1=[[Goomba]] | ||
KoopatroopaNSMBU.png|[[Koopa Troopa|Red Koopa Troopa]] | |count1=16 | ||
NSMBU Piranha Plant | |image2=[[File:KoopaTroopaNSMBU.png|50px]] | ||
NSMBU Buzzy Beetle Artwork.png|[[Buzzy Beetle]] | |name2=[[Koopa Troopa|Green Koopa Troopa]] | ||
|count2=1 | |||
|image3=[[File:KoopatroopaNSMBU.png|50px]] | |||
|name3=[[Koopa Troopa|Red Koopa Troopa]] | |||
|count3=3 | |||
|image4=[[File:NSMBU Piranha Plant Cropped Artwork.png|50px]] | |||
|name4=[[Piranha Plant]] | |||
|count4=41 | |||
|image5=[[File:NSMBU Buzzy Beetle Artwork.png|50px]] | |||
|name5=[[Buzzy Beetle]] | |||
|count5=3 | |||
}} | |||
==Names in other languages== | ==Names in other languages== | ||
| Line 43: | Line 66: | ||
|Jap=いろいろ ななめな どうくつ | |Jap=いろいろ ななめな どうくつ | ||
|JapR=Iroiro Naname na Dōkutsu | |JapR=Iroiro Naname na Dōkutsu | ||
|JapM= | |JapM=All Sorts of Tilted Caves | ||
|Spa=La caverna escarpada | |Spa=La caverna escarpada | ||
|SpaM=The Steep Cavern | |SpaM=The Steep Cavern | ||
| | |Fre=Tunnel turbulent | ||
| | |FreM=Turbulent tunnel | ||
|Dut=Turbulente tunnels | |Dut=Turbulente tunnels | ||
|DutM=Turbulent tunnels | |DutM=Turbulent tunnels | ||
| Line 60: | Line 83: | ||
|RusM=Twisty tunnel | |RusM=Twisty tunnel | ||
|Kor=여러모로 기울어진 동굴 | |Kor=여러모로 기울어진 동굴 | ||
|KorR=Yeoreomoro | |KorR=Yeoreomoro Giureojin Donggul | ||
|KorM=Cave tilted in various ways | |KorM=Cave tilted in various ways | ||
|Chi=满满的倾斜洞窟 (Simplified)<br>滿滿的傾斜洞窟 (Traditional) | |Chi=满满的倾斜洞窟 (Simplified)<br>滿滿的傾斜洞窟 (Traditional) | ||
Latest revision as of 02:30, August 5, 2024
- This article is about Tilted Tunnel, a level in New Super Mario Bros. U. For other uses, see Acorn Plains-2.
| Level | |
|---|---|
| Tilted Tunnel | |
| |
| Level code | World 1-2 |
| World | Acorn Plains |
| Game | New Super Mario Bros. U |
| Primary power-up | Fire Flower |
| Time limit | 400 seconds 500 seconds (New Super Mario Bros. U Deluxe) |
| << Directory of levels >> ** | |
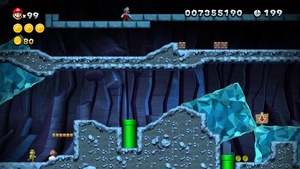
Tilted Tunnel, or Acorn Plains-2, is the second course of Acorn Plains in New Super Mario Bros. U. It is an underground course that features slanted pipes and shifting crystals. It is the first course to feature the Fire Flower and to have a secret exit. It is unlocked via completion of Acorn Plains Way, and its own completion unlocks Crushing-Cogs Tower. After this level is completed, a cutscene shows the flags on Peach's Castle being replaced by Bowser's flags.
Layout[edit]
The level begins next to a ? Block containing a power-up, as well as a Warp Pipe leading underground. Some tilted Warp Pipes containing Piranha Plants can be found, along with Goombas. The cave splits into two paths, with the bottom path containing coins and a Koopa Troopa. More Piranha Plants and Goombas are encountered in the top path, which leads to a group of shifting crystals. A section with more crystals follows, along with enemies such as Goombas and Piranha Plants. A sloped section with a row of Goombas is found, allowing the player to gain 1-Ups. Tilted Warp Pipes containing Piranha Plants are found, along with the Checkpoint Flag. This area features some Brick Blocks, which can be Ground Pounded to allow the player to reach an area with pits and coins. More Piranha Plants in Warp Pipes are encountered, with a Warp Pipe that leads to a bonus area full of Buzzy Beetles and a POW Block, which can be used to make a shower of coins fall. More Koopa Troopas and Piranha Plants are encountered. A shifting crystal with a Red Ring above it is found, along with a Koopa Troopa and a Goomba. More crystals and Piranha Plants are found in the section, leading to a Warp Pipe. To the right of the Warp Pipe is a Hidden Block that leads to a hidden area with coins. The Warp Pipe takes the player to the Goal Pole.
Alternatively, the player can use a P-Acorn to fly up above the wall before the pipe leading underground, which will lead to the end of the level.
Star Coins[edit]
| Image | Location |
|---|---|
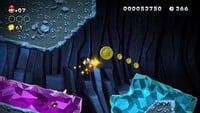
|
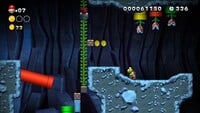
The first Star Coin is the end of a long slide with Goombas. |
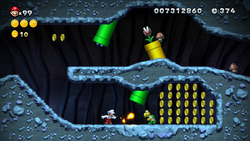
|
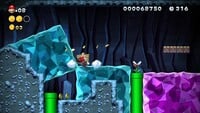
At the end of a corridor full of slanted pipes, the player must use a Koopa Shell to hit a Brick Block. The Brick Block contains a vine that leads to a sub-area, in which the player can use the Pipe Cannon to get the second Star Coin. |
|
Once the player runs into two blue crystals, one with an Arrow Sign on it, the player must Ground Pound the latter crystal to reveal the path to the Warp Pipe, which leads to the sub-area with the final Star Coin in it. |
Secret exit[edit]
Near the end of the course, there is a pink crystal with a Red Ring that shifts upwards. The player can use that crystal to jump up across the ceiling on top of the course. The player can then jump off a blue crystal to reach an even higher ledge. Now Mario has to run across the last part of the cave section. There is a hidden Warp Pipe at the back. Finding this secret exit will unlock Blooper's Secret Lair.
Enemies[edit]
| Image | Name | Count |
|---|---|---|

|
Goomba | 16 |

|
Green Koopa Troopa | 1 |

|
Red Koopa Troopa | 3 |

|
Piranha Plant | 41 |
| Buzzy Beetle | 3 |
Names in other languages[edit]
| Language | Name | Meaning | Notes |
|---|---|---|---|
| Japanese | いろいろ ななめな どうくつ[?] Iroiro Naname na Dōkutsu |
All Sorts of Tilted Caves | |
| Chinese | 满满的倾斜洞窟 (Simplified) 滿滿的傾斜洞窟 (Traditional)[?] Mǎnmǎn dè Qīngxié Dòngkū |
Cave full of Tilts | |
| Dutch | Turbulente tunnels[?] | Turbulent tunnels | |
| French | Tunnel turbulent[?] | Turbulent tunnel | |
| German | Schiefes Bergwerk[?] | Crooked Mine | |
| Italian | Tunnel Sbilenco[?] | Crooked tunnel | |
| Korean | 여러모로 기울어진 동굴[?] Yeoreomoro Giureojin Donggul |
Cave tilted in various ways | |
| Portuguese | Gruta de Cristal[?] | Crystal Cave | |
| Russian | Извилистый тоннель[?] Izvilistyy tonnel' |
Twisty tunnel | |
| Spanish | La caverna escarpada[?] | The Steep Cavern |
