Gallery:Game & Wario: Difference between revisions
m (→Gameplay) |
m (Missing one mark) Tag: Mobile edit |
||
| (31 intermediate revisions by 3 users not shown) | |||
| Line 3: | Line 3: | ||
==Logos== | ==Logos== | ||
<gallery widths=240> | <gallery widths=240> | ||
GameWarioUS.png|American logo | |||
GamenWariologo2.png| | GamenWariologo2.png|European and Australasian logo | ||
GameWariologo3.jpg| | GameWariologo3.jpg|Japanese logo | ||
GameWariojplogo.png|Early Japanese logo | |||
</gallery> | </gallery> | ||
| Line 13: | Line 13: | ||
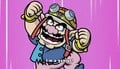
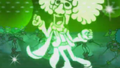
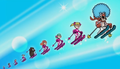
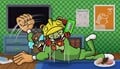
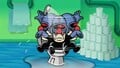
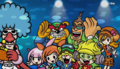
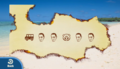
Gameandwarios.png|The principal cast surrounding the logo of the game. | Gameandwarios.png|The principal cast surrounding the logo of the game. | ||
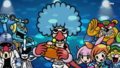
Promotional Character Group Art - Game & Wario.png|Alternate version of the group artwork. | Promotional Character Group Art - Game & Wario.png|Alternate version of the group artwork. | ||
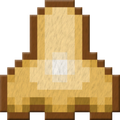
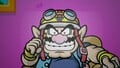
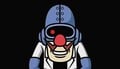
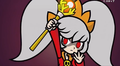
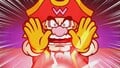
Wario Box Art Figure - Game & Wario.png| | Wario Box Art Figure - Game & Wario.png|Artwork of [[Wario]] used on the Japanese, European and Australasian cover | ||
Box Image | Box Image NA - Game & Wario.png|Artwork used for the North American cover | ||
Box Image | Box Image JP - Game & Wario.png|Artwork used for the Japanese cover | ||
Box Image EU - Game & Wario.png| | Box Image EU - Game & Wario.png|Artwork used for the European and Australasian cover | ||
</gallery> | </gallery> | ||
===Character artwork=== | ===Character artwork=== | ||
| Line 23: | Line 23: | ||
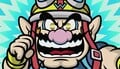
WarioGameWario.png|Wario | WarioGameWario.png|Wario | ||
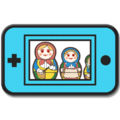
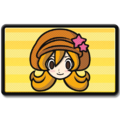
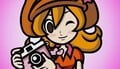
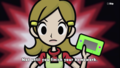
MonaGameWario.png|[[Mona]] | MonaGameWario.png|[[Mona]] | ||
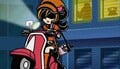
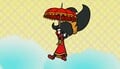
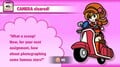
Mona2GameWario.png|Mona on her scooter | Mona2GameWario.png|Mona on [[Mona's scooter|her scooter]] | ||
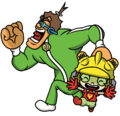
Manager Joe Art - Game & Wario.png|[[Joe]] | Manager Joe Art - Game & Wario.png|[[Joe|Editor Joe]] | ||
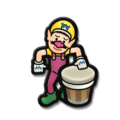
Jimmy T Artwork - Game & Wario.png|[[Jimmy T]] | Jimmy T Artwork - Game & Wario.png|[[Jimmy T]] | ||
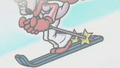
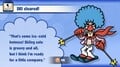
GameWario Jimmy.png|Jimmy T skiing | GameWario Jimmy.png|Jimmy T skiing | ||
| Line 121: | Line 121: | ||
Disco (icon) - Game & Wario.png|[[Disco]] | Disco (icon) - Game & Wario.png|[[Disco]] | ||
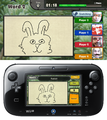
Miiversketch (icon) - Game & Wario.png|[[Miiverse|Miiversketch]] | Miiversketch (icon) - Game & Wario.png|[[Miiverse|Miiversketch]] | ||
</gallery> | |||
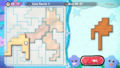
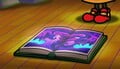
===[[Patchwork]] puzzle images=== | |||
<gallery> | |||
G&W PW Flower.png|Flower | |||
G&W PW Horse.png|Horse | |||
G&W PW Top Hat.png|Top Hat | |||
G&W PW Jumbo Jet.png|Jumbo Jet | |||
G&W PW Sunglasses.png|Sunglasses | |||
G&W PW Boot.png|Boot | |||
G&W PW Car.png|Car | |||
G&W PW Boar.png|Boar | |||
G&W PW Ladybug.png|Ladybug | |||
G&W PW Parrot.png|Parrot | |||
G&W PW Mario.png|[[Mario]] | |||
G&W PW UFO.png|UFO | |||
G&W PW Elephant.png|Elephant | |||
G&W PW Tomato.png|Tomato | |||
G&W PW Footprint.png|Footprint | |||
G&W PW Sheep.png|Sheep | |||
G&W PW Umbrella.png|Umbrella | |||
G&W PW Watermelon.png|Watermelon | |||
G&W PW Letter.png|Letter | |||
G&W PW Banana.png|Banana | |||
G&W PW Super Star.png|[[Super Star]] | |||
G&W PW Music Notes.png|Music Notes | |||
G&W PW Heart.png|Heart | |||
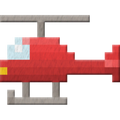
G&W PW Helicopter.png|Helicopter | |||
G&W PW Knife & Fork.png|Knife & Fork | |||
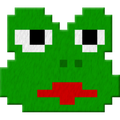
G&W PW Frog.png|Frog | |||
G&W PW Seagull.png|Seagull | |||
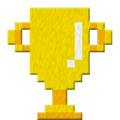
G&W PW Trophy.png|Trophy | |||
G&W PW Letter.png|Letter | |||
G&W PW Scissors.png|Scissors | |||
G&W PW Super Mushroom.png|[[Super Mushroom]] | |||
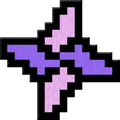
G&W PW Ninja Star.png|Ninja Star | |||
G&W PW Telephone.png|Telephone | |||
G&W PW Monkey.png|Monkey | |||
G&W PW Carrot.png|Carrot | |||
G&W PW Garlic.png|Garlic | |||
G&W PW Chick.png|Chick | |||
G&W PW Diamond.png|Diamond | |||
G&W PW Moon.png|Moon | |||
G&W PW Shoe.png|Shoe | |||
G&W PW Santa.png|Santa | |||
G&W PW Trumpet.png|Trumpet | |||
G&W PW Bow.png|Bow | |||
G&W PW Pig.png|Pig | |||
G&W PW Beetle.png|Beetle | |||
G&W PW Light Bulb.png|Light Bulb | |||
G&W PW Bottle Opener.png|Bottle Opener | |||
G&W PW Sailboat.png|Sailboat | |||
G&W PW Nose.png|Nose | |||
G&W PW Strawberry.png|Strawberry | |||
G&W PW Turkey Leg.png|Turkey Leg | |||
G&W PW Snake.png|Snake | |||
G&W PW Traffic Light.png|Traffic Light | |||
G&W PW Eagle.png|Eagle | |||
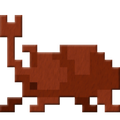
G&W PW Camel.png|Camel | |||
G&W PW Crab.png|Crab | |||
G&W PW Whale.png|Whale | |||
G&W PW Mouse.png|Mouse | |||
G&W PW Bat.png|Bat | |||
G&W PW Butterfly.png|Butterfly | |||
G&W PW Shamrock.png|Shamrock | |||
G&W PW Fronk.png|[[Fronk]] | |||
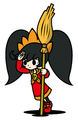
G&W PW Kat.png|[[Kat]] | |||
G&W PW High Heel.png|High Heel | |||
G&W PW Crown.png|Crown | |||
G&W PW Teapot.png|Teapot | |||
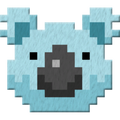
G&W PW Koala.png|Koala | |||
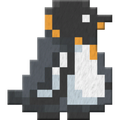
G&W PW Penguin.png|Penguin | |||
G&W PW Skull.png|Skull | |||
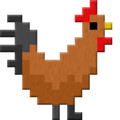
G&W PW Rooster.png|Rooster | |||
G&W PW Saxophone.png|Saxophone | |||
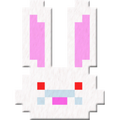
G&W PW Bunny.png|Bunny | |||
G&W PW Dolphin.png|Dolphin | |||
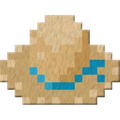
G&W PW Straw Hat.png|Straw Hat | |||
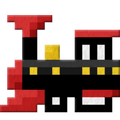
G&W PW Train.png|Train | |||
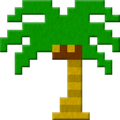
G&W PW Palm Tree.png|Palm Tree | |||
G&W PW Caterpillar.png|Caterpillar | |||
G&W PW Cherries.png|Cherries | |||
G&W PW Spade.png|Spade | |||
G&W PW Pea Pod.png|Pea Pod | |||
G&W PW Cactus.png|Cactus | |||
G&W PW Ring.png|Ring | |||
G&W PW Shell.png|Shell | |||
G&W PW Rhino Beetle.png|Rhino Beetle | |||
G&W PW Grapes.png|Grapes | |||
G&W PW Peach.png|Peach | |||
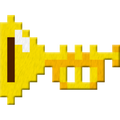
G&W PW Key.png|Key | |||
G&W PW Eggplant.png|Eggplant | |||
G&W PW Boxer Briefs.png|Boxer Briefs | |||
G&W PW Fish.png|Fish | |||
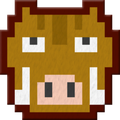
G&W PW Cow.png|Cow | |||
G&W PW House.png|House | |||
G&W PW Ana.png|[[Ana]] | |||
</gallery> | </gallery> | ||
| Line 225: | Line 322: | ||
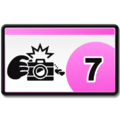
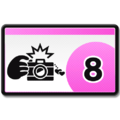
CluckAPop Prize 099.png|Disco Warionette | CluckAPop Prize 099.png|Disco Warionette | ||
CluckAPop Prize 100.png|Flyswatter Warionette | CluckAPop Prize 100.png|Flyswatter Warionette | ||
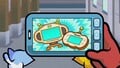
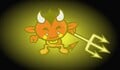
CluckAPop Prize 101.png|Evil Call Code | CluckAPop Prize 101.png|Evil [[Call Code]] | ||
CluckAPop Prize 102.png|Unique Call Code | CluckAPop Prize 102.png|Unique Call Code | ||
CluckAPop Prize 103.png|Homey Call Code | CluckAPop Prize 103.png|Homey Call Code | ||
| Line 272: | Line 369: | ||
CluckAPop Prize 146.png|Mona Superscoop 23 | CluckAPop Prize 146.png|Mona Superscoop 23 | ||
CluckAPop Prize 147.png|Mona Superscoop 24 | CluckAPop Prize 147.png|Mona Superscoop 24 | ||
CluckAPop Prize 148.png|[[Hint Card]] 0: [[ | CluckAPop Prize 148.png|[[Hint Card]] 0: [[GAME & WARIO]] | ||
CluckAPop Prize 149.png|Hint Card 1: [[Arrow|ARROW]] 1 | CluckAPop Prize 149.png|Hint Card 1: [[Arrow|ARROW]] 1 | ||
CluckAPop Prize 150.png|Hint Card 2: ARROW 2 | CluckAPop Prize 150.png|Hint Card 2: ARROW 2 | ||
| Line 375: | Line 472: | ||
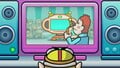
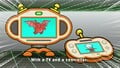
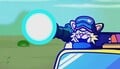
WiiUGameWario03.png|[[Shutter]] on the TV and GamePad | WiiUGameWario03.png|[[Shutter]] on the TV and GamePad | ||
WiiUGameWario04.png|[[Fruit (minigame)|Fruit]] on the TV and GamePad | WiiUGameWario04.png|[[Fruit (minigame)|Fruit]] on the TV and GamePad | ||
WiiUGameWario06.png|Shutter | WiiUGameWario06.png|Shutter | ||
WiiUGameWario07.png|Shutter | WiiUGameWario07.png|Shutter | ||
| Line 389: | Line 485: | ||
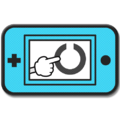
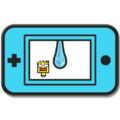
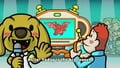
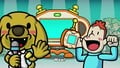
WiiU GameandWario Disco.png|[[Disco]] on the TV and GamePad | WiiU GameandWario Disco.png|[[Disco]] on the TV and GamePad | ||
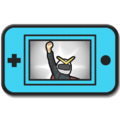
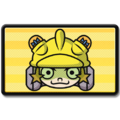
WiiU GameandWario Gamer.png|[[Gamer]] on the TV and GamePad | WiiU GameandWario Gamer.png|[[Gamer]] on the TV and GamePad | ||
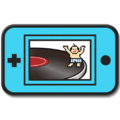
WiiU GameandWario Miiverse Sketch.png|Miiversketch | WiiU GameandWario Miiverse Sketch.png|[[Miiverse|Miiversketch]] | ||
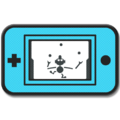
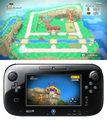
WiiU GameandWario Pirate 01.png| | WiiU GameandWario Pirate 01.png|[[Pirates]] on the TV | ||
WiiU GameandWario Pirate 02.png| | WiiU GameandWario Pirate 02.png|Pirates on the TV and GamePad | ||
WiiU GameandWario Pirate 03.png| | WiiU GameandWario Pirate 03.png|Pirates | ||
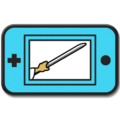
WiiU GameandWario Sketch.png|[[Sketch]] on the TV and GamePad | WiiU GameandWario Sketch.png|[[Sketch]] on the TV and GamePad | ||
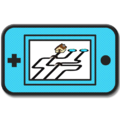
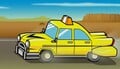
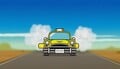
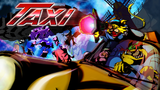
Taxi.png|[[Taxi (minigame)|Taxi]] on the TV and GamePad | Taxi.png|[[Taxi (minigame)|Taxi]] on the TV and GamePad | ||
| Line 408: | Line 504: | ||
WiiU GameandWario Website Screens Bird 4.png|Bird on the GamePad | WiiU GameandWario Website Screens Bird 4.png|Bird on the GamePad | ||
WiiU GameandWario Website Screens Bird 5.png|Bird on the TV | WiiU GameandWario Website Screens Bird 5.png|Bird on the TV | ||
</gallery> | |||
===Cutscenes=== | |||
====Prologue==== | |||
<gallery> | |||
G&W Wario's House.png|[[Wario's House]] | |||
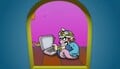
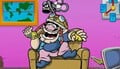
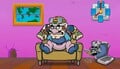
G&W Wario's House Interior.png|[[Wario]] watching TV | |||
G&W Pizza.jpg|A pizza on TV | |||
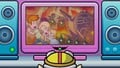
SalOutG&W.png|[[Sal Out]] and [[RhythmHeaven:The Chorus Kids|the Chorus Kids]] on TV | |||
G&W New Game Console.jpg|A new game console on TV | |||
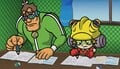
G&W New Game Announcement (1).jpg|[[Reporter John]] announcing the new game console | |||
G&W New Game Announcement (2).jpg|How to play with the new game console | |||
G&W New Game Announcement (3).jpg|Reporter John finishing the announcement | |||
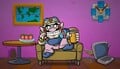
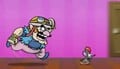
Amazed Wario.jpg|Wario amazed by the new game console | |||
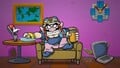
Wario's Money Eyes.jpg|Wario having a new money idea | |||
WiiUGameWario05.png|Wario deciding to make [[Minigame|some games]] | |||
Wario's Money Fantasy.jpg|Wario wanting to make millions of money | |||
G&W Intro with Jimmy T (1).jpg|[[Jimmy T]] walking on the streets with [[Legendary Cat Dancers|some cats]] | |||
G&W Intro with Jimmy T (2).jpg|Jimmy T noticing the new game console on [[Jimmy's Cell|his cell phone]] | |||
G&W Intro with Jimmy T (3).jpg|The new game console on Jimmy T's cell phone | |||
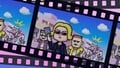
G&W Intro with Mona.jpg|[[Mona]] taking photos before noticing the new game console on an outdoor TV | |||
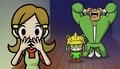
G&W Intro with Kat & Ana.jpg|[[Kat & Ana]] playing rock paper scissors before noticing the new game console | |||
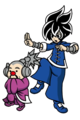
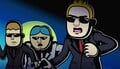
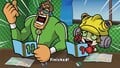
G&W Intro with Dr. Crygor, Mike & Penny.jpg|[[Penny]] scolding [[Dr. Crygor]] & [[Mike]] before noticing the new game console with them | |||
G&W Intro with 9-Volt & 18-Volt.jpg|[[9-Volt]] & [[18-Volt]] playing a video game before noticing the new game console | |||
G&W Intro with Ashley & Red.jpg|[[Ashley & Red]] reading a book before noticing the new game console | |||
G&W Intro with Young Cricket & Master Mantis.jpg|[[Young Cricket & Master Mantis]] training before noticing the new game console | |||
G&W Intro with Dribble & Spitz.jpg|[[Dribble & Spitz]] driving [[Dribble's taxi|their taxi]] before noticing the new game console | |||
Watch out, Orbulon!.png|[[Orbulon]] and his [[Oinker]] accidentally diving to the new game console when happening to appear | |||
G&W New Game Console (close-up).jpg|The new game console zoomed-in | |||
G&W Wario's House Night.png|Wario's House at night | |||
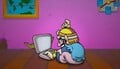
G&W Computer at Night.jpg|Wario using his [[computer]] and thinking at the same time at night | |||
</gallery> | |||
====[[Arrow]]==== | |||
<gallery> | |||
Dusty Computer.jpg|[[Wario]]'s [[computer]] becoming dusty | |||
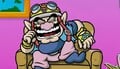
Wario Movie Time (1).jpg|Wario watching a movie while eating strawberries | |||
Wario Movie Time (2).jpg|The movie Wario is watching on TV | |||
Wario VS Mouse.jpg|Wario noticing a mouse stealing his last strawberry | |||
Mouse Chase.jpg|Wario chasing the mouse | |||
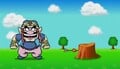
Wario House Hole.jpg|A Wario-shaped hole in a wall made by him | |||
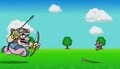
G&W Archer (1).jpg|An archer walking | |||
G&W Archer (2).jpg|The archer encountering Wario | |||
G&W Archer (3).jpg|The archer's spinning caused by Wario | |||
G&W Archer (4).jpg|The archer's equipment stolen by Wario | |||
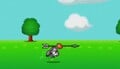
Wario The Archer (1).jpg|Wario using the archer's equipment to try shooting the mouse | |||
Wario The Archer (2).jpg|The last arrow successfully catching the strawberry and making the mouse trip | |||
Wario The Archer (3).jpg|Wario succeeding in getting his strawberry back | |||
Wario Naptime.jpg|Wario napping upon returning home | |||
Wario Sneeze (1).jpg|The mouse spraying Wario's nose with a can of black pepper to make him sneeze as revenge | |||
Wario Sneeze (2).jpg|Wario's sneeze accidentally throwing the mouse and its pepper can at his computer | |||
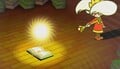
Wario's Arrow Idea.jpg|Wario waking up and having a new idea for his new [[Minigame|game]] | |||
Wario Using His Computer.jpg|Wario using his computer to make his new game | |||
I'm a genius!.jpg|Wario calling himself a genius | |||
</gallery> | |||
====[[Shutter]]==== | |||
<gallery> | |||
Diamond City Times (1).jpg|[[Diamond City Times]] | |||
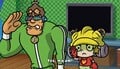
Diamond City Times (2).jpg|[[Joe|Editor Joe]] picking up a ringing phone | |||
Editor Joe in Shutter.png|Editor Joe telling [[Mona]] about a scoop | |||
Mona in Shutter.jpg|Mona ready for the mission | |||
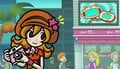
Mona Shutter Driving (1).jpg|Mona driving [[Mona's scooter|her scooter]] out of Diamond City Times | |||
Mona Shutter Driving (2).jpg|Mona driving (1) | |||
Mona's Camera.jpg|Mona's camera | |||
Mona Shutter Driving (3).jpg|Mona driving (2) | |||
Crime Photo (1).jpg|A crime photo (1) | |||
Crime Photo (2).jpg|A crime photo (2) | |||
A crimeful deal!.jpg|Mona finding two groups of thugs making a deal | |||
Mona's Feet.jpg|Mona comforting the thugs | |||
Caught at last!.jpg|The thugs getting caught by Mona | |||
Winking Mona.jpg|Mona winking after taking photos of the thugs | |||
Crime Photo (3).jpg|A photo of the arrested thugs | |||
</gallery> | |||
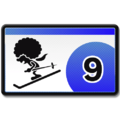
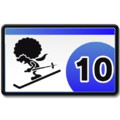
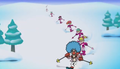
====[[Ski (minigame)|Ski]]==== | |||
<gallery> | |||
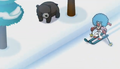
Jimmy T Skiing (1).png|[[Jimmy T]] skiing | |||
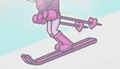
Jimmy T Skiing (2).png|Jimmy T skiing while passing through a bear | |||
Cathy The Ski Bunny.png|[[Ski bunnies|Cathy]] noticing Jimmy T | |||
Jimmy T Group Skiing.png|Jimmy T skiing with the [[Ski bunnies]] | |||
Jimmy T's Ski Poses (1).png|Jimmy T posing (1) | |||
Jimmy T's Ski Poses (2).png|Jimmy T posing (2) | |||
Jimmy T's Ski Poses (3).png|Jimmy T posing (3) | |||
Jimmy T's Ski Poses (4).png|Jimmy T posing (4) | |||
Keep skiing! (1).png|Jimmy T still skiing | |||
Keep skiing! (2).png|Ski bunnies still skiing | |||
Keep skiing! (3).png|The bear joining the group to ski | |||
SKI JUMP!.png|The group ski-jumping | |||
</gallery> | |||
====[[Patchwork]]==== | |||
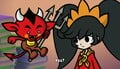
<gallery> | |||
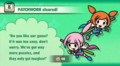
Kat in Patchwork.jpg|[[Kat]] asking [[Ana]] if she's ready | |||
Ana in Patchwork.jpg|Ana answering Kat that she's ready | |||
Patchwork Time (1).jpg|Kat & Ana rolling out several rolls of different colored fabric with different patterns | |||
Prepare your blade! (1).jpg|Kat drawing her katana | |||
Prepare your blade! (2).jpg|Kat's katana drawn by her | |||
Kat S&D.jpg|Kat cutting pieces of fabric into different shapes | |||
Ana S&D.jpg|Ana cutting pieces of fabric into different shapes | |||
Both S&D.jpg|Kat & Ana cutting more pieces of fabric into different shapes | |||
Patchwork Time (2).jpg|Kat & Ana having fun with their home-made patchwork | |||
Double Ninja Pose.jpg|Kat & Ana posing together | |||
</gallery> | |||
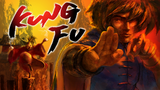
====[[Kung Fu]]==== | |||
<gallery> | |||
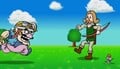
G&W Training (1).jpg|[[Young Cricket]] jumping | |||
G&W Training (2).jpg|Young Cricket coming at [[Master Mantis]] | |||
Master Mantis (WAATATATATATA!).jpg|Master Mantis rapidly hitting Young Cricket | |||
Young Cricket (WAATATATATATA!).jpg|Young Cricket rapidly hitting Master Mantis | |||
Both (AAAATAAAA!).jpg|Both trainers going through each other with their final respective hits | |||
Master Mantis Defeated.jpg|Master Mantis feeling defeated after landing together with Young Cricket | |||
Master Mantis Charge-Up.jpg|Master Mantis charging up | |||
Young Cricket Self-Bracing.jpg|Young Cricket bracing himself | |||
Master Mantis' Technique (1).jpg|Master Mantis rising his arms | |||
Master Mantis' Technique (2).jpg|Master Mantis using a technique | |||
G&W Dumpling.jpg|Master Mantis creating a dumpling | |||
Shocked Young Cricket.jpg|Young Cricket shocked to see what Master Mantis did | |||
Full Master Mantis.jpg|Master Mantis after eating the dumpling | |||
G&W Training Continues (1).jpg|Master Mantis hopping on obstacles to lead Young Cricket somewhere else to train | |||
G&W Training Continues (2).jpg|Young Cricket feeling hungry before hopping on obstacles to follow Master Mantis | |||
</gallery> | |||
====[[Gamer]]==== | |||
<gallery> | |||
G&W 9-Volt's House.jpg|[[9-Volt's House]] | |||
G&W Gaming (1).jpg|[[9-Volt]] playing a video game and [[18-Volt]] panicking | |||
G&W Gaming (2).jpg|9-Volt succeeding in getting a higher score | |||
G&W Gaming (3).jpg|9-Volt having a higher score than 18-Volt | |||
G&W Gaming (4).jpg|9-Volt jumping victoriously and 18-Volt crying | |||
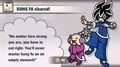
Stop gaming!.jpg|[[5-Volt]] snatching the game console from 9-Volt's hand | |||
G&W 5-Volt Face.png|5-Volt telling the [[9-Volt & 18-Volt|boys]] to do their homework | |||
G&W Homework Time (1).jpg|The boys promising 5-Volt to do their homework | |||
G&W Homework Time (2).jpg|The boys doing their homework | |||
Homework FINISHED!.jpg|The boys finishing their homework | |||
G&W After Homework (1).jpg|5-Volt giving the boys the game console back after their homework | |||
G&W After Homework (2).jpg|The boys noticing something unexpected on the game console's screen | |||
G&W After Homework (3).jpg|5-Volt having a higher score than the boys | |||
G&W After Homework (4).jpg|The boys becoming sad and 5-Volt embarrassing herself for what she did | |||
</gallery> | |||
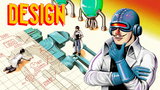
====[[Design]]==== | |||
<gallery> | |||
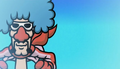
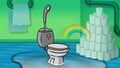
G&W Dr. Crygor's Lab.jpg|[[Dr. Crygor's Lab]] | |||
Morning Stomachache.jpg|[[Dr. Crygor]] having a stomachache upon waking up | |||
G&W Dr. Crygor's Bathroom.jpg|The door to Dr. Crygor's bathroom | |||
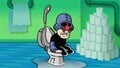
Stuck in the toilet.jpg|Dr. Crygor getting stuck in his own toilet with no way to get loose | |||
An auto switch.jpg|Dr. Crygor deciding to flush his toilet automatically | |||
Showering & Spinning.jpg|Dr. Crygor getting showered and spinning to enter his toilet | |||
Bathroom Rainbow.jpg|The toilet automatically deactivating itself and a rainbow appearing | |||
G&W Dr. Crygor's Piping.jpg|Dr. Crygor sliding through his lab's piping | |||
Welcome to Dr. Crygor's Lab!.jpg|Dr. Crygor landing in his laboratory with his lab coat and a rose | |||
G&W Dr. Crygor.jpg|Dr. Crygor's close-up | |||
</gallery> | |||
====[[Ashley (minigame)|Ashley]]==== | |||
<gallery> | |||
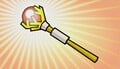
G&W Ashley's Mansion.png|[[Ashley's Mansion]] | |||
Reading a book.jpg|[[Ashley]] reading a book | |||
Dark Witch Ashley.jpg|Ashley imagining herself being in a dark world | |||
That's so cool.jpg|Ashley wanting to enter the book's dark-themed page | |||
A book's dark page.jpg|The book placed on the ground and opened to show its dark-themed page | |||
Red is called for help.jpg|Ashley calling [[Red (WarioWare series)|Red]] for help | |||
TRANSFORM!.jpg|Red transforming | |||
G&W Red's wand form.jpg|Red changing into a magic wand | |||
Ashley Cast G&W.png|Ashley beginning to use Red to cast a spell on the book | |||
A book's dessert page.jpg|A gust of wind turning the book to a dessert-themed page | |||
Ashley "What the!".jpg|Ashley noticing a mistake she will accidentally make | |||
G&W Book Portal.jpg|A portal appearing from the book to transport Ashley & Red inside the book's dessert-themed page | |||
G&W Portal Vortex.jpg|Ashley & Red falling through the portal's vortex | |||
G&W Red's umbrella form.jpg|Red changing into an umbrella to help Ashley land safely | |||
A happy or angry landing.jpg|Ashley & Red landing safely in the dessert world | |||
Welcome to the dessert world!.jpg|The dessert world | |||
Red saying "Awesome!".jpg|Red happy about the development | |||
Angry Ashley (1).jpg|Red sensing Ashley's anger | |||
Angry Ashley (2).jpg|Ashley angrily staring at Red | |||
Fearful Red (1).jpg|Red struggling to talk to Ashley | |||
Fearful Red (2).jpg|Red becoming at a loss | |||
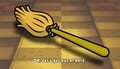
G&W Red's broom form.jpg|Red changing into a flying broom | |||
Let's leave the dessert world!.jpg|Ashley riding Red to leave the dessert world | |||
</gallery> | |||
====[[Taxi (minigame)|Taxi]]==== | |||
<gallery> | |||
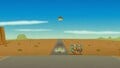
Highway 56.png|[[Highway 56]] | |||
G&W Taxi (1).jpg|[[Dribble's taxi]] in the middle of Highway 56 | |||
G&W D&S (1).jpg|[[Dribble]] driving boredly and [[Spitz]] napping | |||
G&W Customer.jpg|Dribble & Spitz noticing a hitchhiker | |||
G&W D&S (2).jpg|Dribble & Spitz noticing a [[UFO]] appearing above them out of nowhere | |||
G&W UFO (1).jpg|The UFO abducting the hitchhiker | |||
Spitz's Sparkling Eyes.jpg|Spitz deciding to fight the UFO | |||
Spitz's Laser Gun.jpg|Spitz opening the top of the taxi to come out of it and using a laser gun to try shooting at the UFO | |||
G&W UFO (2).jpg|The UFO giggling at Spitz after dodging his laser gun's bullets | |||
G&W D&S (3).jpg|Spitz telling Dribble to chase the UFO and using a toy hammer to hit him | |||
Dribble saying "Yes, sir!".jpg|Dribble buffing up and cooperating | |||
G&W Taxi (2).jpg|Dribble's taxi ready to go | |||
Taxi VS UFO.jpg|Dribble's taxi chasing the UFO | |||
</gallery> | |||
====[[Pirates]]==== | |||
<gallery> | |||
Yawning Wario.jpg|[[Wario]] yawning boredly | |||
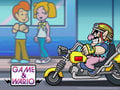
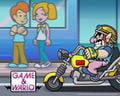
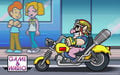
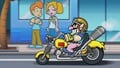
G&W Wario Bike (1).jpg|Wario deciding to ride his [[Wario Bike]] to go out | |||
G&W Diamond City.jpg|[[Diamond City]] | |||
G&W Wario Bike (2).jpg|Wario riding his Wario Bike around Diamond City | |||
G&W Pirate Costume.jpg|Wario noticing a pirate costume | |||
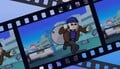
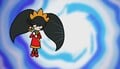
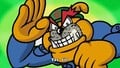
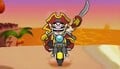
It's-a-me, Captain Wario!.jpg|Wario becoming [[Captain Wario (Game & Wario)|Captain Wario]] | |||
</gallery> | |||
====Ending==== | |||
<gallery> | |||
G&W Toy Express.jpg|[[Toy Express]] | |||
Reporter John Game & Wario.png|[[Reporter John]] reporting about the [[Pirates]] [[Minigame|game]] | |||
Too many Pirates FANS!.jpg|Reporter John reporting about the gaming fans' excitement | |||
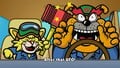
G&W Captain Wario (1).jpg|[[Captain Wario (Game & Wario)|Captain Wario]] intruding on the report to reveal himself being the game's designer | |||
G&W Captain Wario (2).jpg|One gaming fan catching Captain Wario's attention | |||
Let's defeat Captain Wario!.jpg|The gaming fans using their video game pads to create a large energy ball, which is to hit Captain Wario, by dancing | |||
G&W Captain Wario (3).jpg|Captain Wario terrified by the large energy ball coming at him | |||
G&W Captain Wario (4).jpg|Captain Wario blown away by the large energy ball | |||
Club Sugar in G&W.png|[[Club Sugar]] | |||
G&W Dancing (1).png|The [[WarioWare, Inc.]] employees dancing (1) | |||
G&W Dancing (2).png|The WarioWare, Inc. employees dancing (2) | |||
G&W Dancing (3).png|The WarioWare, Inc. employees dancing (3) | |||
G&W Captain Wario (5).jpg|Captain Wario flying | |||
Captain Wario Crashes Into Club Sugar.png|Captain Wario accidentally crashing into Club Sugar | |||
Broken Club Sugar.png|One of Club Sugar's windows accidentally broken by Captain Wario | |||
After Captain Wario Crash-Lands (1).png|The group shocked to see Captain Wario crash-landing into Club Sugar (1) | |||
After Captain Wario Crash-Lands (2).png|The group shocked to see Captain Wario crash-landing into Club Sugar (2) | |||
That's our Wario.png|[[Jimmy T]] smugly saying, "Crashin' the party? That's our Wario." | |||
Smiling Jimmy T.png|Jimmy T smiling | |||
Club Sugar G&W Night.png|[[Alien Bunny|Alien Bunnies]] outside of Club Sugar at night | |||
Let's go bowling!.png|The group leaving Club Sugar and wanting to go [[bowling]] | |||
</gallery> | </gallery> | ||
| Line 432: | Line 761: | ||
===Clear screens=== | ===Clear screens=== | ||
<gallery> | <gallery heights=70> | ||
Arrow G&W Clear.jpg|Arrow | Arrow G&W Clear.jpg|Arrow | ||
Shutter G&W Clear.jpg|Shutter | Shutter G&W Clear.jpg|Shutter | ||
| Line 444: | Line 773: | ||
Pirates G&W Clear.jpg|Pirates | Pirates G&W Clear.jpg|Pirates | ||
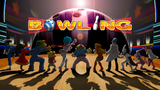
Bowling clear G&Wario.png|Bowling | Bowling clear G&Wario.png|Bowling | ||
</gallery> | |||
===[[Cluck-A-Pop]]=== | |||
<gallery heights=70> | |||
G&W Cluck-A-Pop.png|Cluck-A-Pop | |||
WiiU Game&Wario Chick-n-win 4.png|Getting a Cluck-A-Pop prize | |||
WiiU Game&Wario Chick-n-win 15.png|Playing a Cluck-A-Pop game | |||
</gallery> | </gallery> | ||
===[[Bugband]]=== | ===[[Bugband]]=== | ||
<gallery> | <gallery heights=85> | ||
1st Bugband.png|Bugband: Strawbenemy | 1st Bugband.png|Bugband: Strawbenemy | ||
Arrow Bugband.png|The [[Arrow]] Bugband | Arrow Bugband.png|The [[Arrow]] Bugband | ||
| Line 474: | Line 810: | ||
13th Bugband.png|Bugband: Adrift | 13th Bugband.png|Bugband: Adrift | ||
Islands Bugband.png|The [[Islands]] Bugband | Islands Bugband.png|The [[Islands]] Bugband | ||
</gallery> | |||
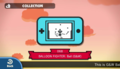
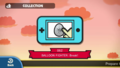
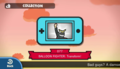
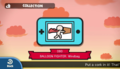
===[[Gamer#Microgames|BALLOON FIGHTER]]=== | |||
====Gameplay==== | |||
<gallery heights=70> | |||
G&W-Allergy.png|[[Allergy Attack]] | |||
G&W-Ball.png|[[Ball (G&W)]] | |||
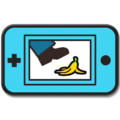
G&W-Banana.png|[[Bananas (microgame)|Bananas]] | |||
G&W-Poke.png|[[Break!]] | |||
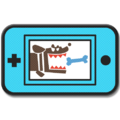
G&W-Dog.png|[[Dachshund]] | |||
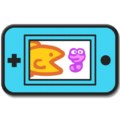
G&W-Chase.png|[[Dinosaur (microgame)|Dinosaur]] | |||
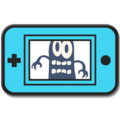
G&W-Test.png|[[Eye Exam (Game & Wario)|Eye Exam]] | |||
GaW Fake Out.png|[[Fake Out]] | |||
G&W-Feed.png|[[Fish]] | |||
G&W-Digger.png|[[Gold Digger]] | |||
G&W-Trails.png|[[Homeward]] | |||
G&W-Teeth.png|[[Loose Tooth]] | |||
G&W-Dolls.png|[[Matryoshka]] | |||
G&W-Freckles.png|[[Mole (microgame)|Mole]] | |||
G&W-Flick.png|[[Record Guy]] | |||
G&W-Stretch.png|[[Rollout]] | |||
G&W-Fish.png|[[Samurai Slice]] | |||
G&W-Stomp.png|[[Sole Man]] | |||
G&W-Star.png|[[Spotlight (Game & Wario)|Spotlight]] | |||
G&W-Swatter.png|[[Super Fly Swatter]] | |||
G&W-Fight.png|[[Transform!]] | |||
G&W-Boss.png|[[Windbag (microgame)|Windbag]] | |||
</gallery> | |||
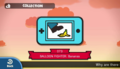
====Collection menu==== | |||
<gallery heights=70> | |||
BF Allergy Attack.png|BALLOON FIGHTER: [[Allergy Attack]] | |||
BF Ball.png|BALLOON FIGHTER: [[Ball (G&W)]] | |||
BF Bananas.png|BALLOON FIGHTER: [[Bananas (microgame)|Bananas]] | |||
BF Break!.png|BALLOON FIGHTER: [[Break!]] | |||
BF Dachshund.png|BALLOON FIGHTER: [[Dachshund]] | |||
BF Dinosaur.png|BALLOON FIGHTER: [[Dinosaur (microgame)|Dinosaur]] | |||
BF Eye Exam.png|BALLOON FIGHTER: [[Eye Exam (Game & Wario)|Eye Exam]] | |||
BF Fake Out.png|BALLOON FIGHTER: [[Fake Out]] | |||
BF Fish.png|BALLOON FIGHTER: [[Fish]] | |||
BF Gold Digger.png|BALLOON FIGHTER: [[Gold Digger]] | |||
BF Homeward.png|BALLOON FIGHTER: [[Homeward]] | |||
BF Loose Tooth.png|BALLOON FIGHTER: [[Loose Tooth]] | |||
BF Matryoshka.png|BALLOON FIGHTER: [[Matryoshka]] | |||
BF Mole.png|BALLOON FIGHTER: [[Mole (microgame)|Mole]] | |||
BF Record Guy.png|BALLOON FIGHTER: [[Record Guy]] | |||
BF Rollout.png|BALLOON FIGHTER: [[Rollout]] | |||
BF Samurai Slice.png|BALLOON FIGHTER: [[Samurai Slice]] | |||
BF Sole Man.png|BALLOON FIGHTER: [[Sole Man]] | |||
BF Spotlight.png|BALLOON FIGHTER: [[Spotlight (Game & Wario)|Spotlight]] | |||
BF Super Fly Swatter.png|BALLOON FIGHTER: [[Super Fly Swatter]] | |||
BF Transform!.png|BALLOON FIGHTER: [[Transform!]] | |||
BF Windbag.png|BALLOON FIGHTER: [[Windbag (microgame)|Windbag]] | |||
</gallery> | |||
===[[Call Code]]s=== | |||
<gallery heights=70> | |||
Evil Call Code.jpg|Evil Call Code | |||
Evil Phone Number.png|Evil Call Code's number | |||
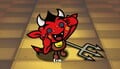
Calling Satan.jpg|Upon using the Evil Call Code... | |||
Unique Call Code.jpg|Unique Call Code | |||
Unique Phone Number.png|Unique Call Code's number | |||
Calling Kat.jpg|Upon using the Unique Call Code... (1) | |||
Calling Ana.jpg|Upon using the Unique Call Code... (2) | |||
Homey Call Code.jpg|Homey Call Code | |||
Homey Phone Number.png|Homey Call Code's number | |||
Calling Family (1).jpg|Upon using the Homey Call Code... (1) | |||
Calling Family (2).jpg|Upon using the Homey Call Code... (2) | |||
Calling Pandas.jpg|Upon using the Homey Call Code... (3) | |||
Burnt Call Code.jpg|Burnt Call Code | |||
Burnt Phone Number.png|Burnt Call Code's number | |||
Calling Gang.jpg|Upon using the Burnt Call Code... | |||
BFF Call Code.jpg|BFF Call Code | |||
BFF Phone Number.png|BFF Call Code's number | |||
Calling Friends.jpg|Upon using the BFF Call Code... | |||
Sappy Call Code.jpg|Sappy Call Code | |||
Sappy Phone Number.png|Sappy Call Code's number | |||
Calling Lovers.jpg|Upon using the Sappy Call Code... | |||
Showy Call Code.jpg|Showy Call Code | |||
Showy Phone Number.png|Showy Call Code's number | |||
Calling Clowns.jpg|Upon using the Showy Call Code... | |||
Energetic Call Code.jpg|Energetic Call Code | |||
Energetic Phone Number.png|Energetic Call Code's number | |||
Calling Exerciser.jpg|Upon using the Energetic Call Code... | |||
Undercover Call Code.jpg|Undercover Call Code | |||
Undercover Phone Number.png|Undercover Call Code's number | |||
Calling Detective Frank (1).jpg|Upon using the Undercover Call Code... (1) | |||
Calling Detective Frank (2).jpg|Upon using the Undercover Call Code... (2) | |||
Calling Detective Frank (3).jpg|Upon using the Undercover Call Code... (3) | |||
Calling Detective Frank (4).jpg|Upon using the Undercover Call Code... (4) | |||
Calling Detective Frank (5).jpg|Upon using the Undercover Call Code... (5) | |||
Smelly Call Code.jpg|Smelly Call Code | |||
Smelly Phone Number.png|Smelly Call Code's number | |||
Calling W-Man.jpg|Upon using the Smelly Call Code... | |||
Frenemy Call Code.jpg|Frenemy Call Code | |||
Frenemy Phone Number.png|Frenemy Call Code's number | |||
Calling Frenemies (1).jpg|Upon using the Frenemy Call Code... (1) | |||
Calling Frenemies (2).jpg|Upon using the Frenemy Call Code... (2) | |||
Suspicious Call Code.jpg|Suspicious Call Code | |||
Suspicious Phone Number.png|Suspicious Call Code's number | |||
Calling Tiny Man.jpg|Upon using the Suspicious Call Code... | |||
Support-Desk Call Code.jpg|Support-Desk Call Code | |||
Support-Desk Phone Number.png|Support-Desk Call Code's number | |||
Calling Shadow Puppet Maker (Puppy).jpg|Upon using the Support-Desk Call Code... (1) | |||
Calling Shadow Puppet Maker (Dove).jpg|Upon using the Support-Desk Call Code... (2) | |||
Calling Shadow Puppet Maker (Hound).jpg|Upon using the Support-Desk Call Code... (3) | |||
Calling Shadow Puppet Maker (Elephant).jpg|Upon using the Support-Desk Call Code... (4) | |||
Calling Shadow Puppet Maker (Duck).jpg|Upon using the Support-Desk Call Code... (5) | |||
Calling Shadow Puppet Maker (Building).jpg|Upon using the Support-Desk Call Code... (6) | |||
Old-Fashioned Call Code.jpg|Old-Fashioned Call Code | |||
Old-Fashioned Phone Number.png|Old-Fashioned Call Code's number | |||
Calling Telephone Man (B&W).jpg|Upon using the Old-Fashioned Call Code... (1) | |||
Calling Telephone Man (with colors).jpg|Upon using the Old-Fashioned Call Code... (2) | |||
Wilderness Call Code.jpg|Wilderness Call Code | |||
Wilderness Phone Number.png|Wilderness Call Code's number | |||
Calling Bear.jpg|Upon using the Wilderness Call Code... | |||
Customer Call Code.jpg|Customer Call Code | |||
Customer Phone Number.png|Customer Call Code's number | |||
Calling Hole Man.jpg|Upon using the Customer Call Code... | |||
Woodsy Call Code.jpg|Woodsy Call Code | |||
Woodsy Phone Number.png|Woodsy Call Code's number | |||
Calling Farmer.jpg|Upon using the Woodsy Call Code... | |||
Otherworldly Call Code.jpg|Otherworldly Call Code | |||
Otherworldly Phone Number.png|Otherworldly Call Code's number | |||
Calling Alien.jpg|Upon using the Otherworldly Call Code... | |||
Fresh Call Code.jpg|Fresh Call Code | |||
Fresh Phone Number.png|Fresh Call Code's number | |||
Calling Doctor.jpg|Upon using the Fresh Call Code... | |||
Artsy Call Code.jpg|Artsy Call Code | |||
Artsy Phone Number.png|Artsy Call Code's number | |||
Calling Artist.jpg|Upon using the Artsy Call Code... | |||
</gallery> | |||
===[[Mona Superscoop]]=== | |||
<gallery heights=70> | |||
Mona Screenshot - Game & Wario.png|British English version | |||
Mona SS No.1.jpg|Mona Superscoop 1 | |||
MonaSuperscoop01.png|Mona Superscoop 1 image | |||
Mona SS No.1 full screen.jpg|Mona Superscoop 1 full screen | |||
Mona SS No.2.jpg|Mona Superscoop 2 | |||
MonaSuperscoop02.png|Mona Superscoop 2 image | |||
Mona SS No.2 full screen.jpg|Mona Superscoop 2 full screen | |||
Mona SS No.3.jpg|Mona Superscoop 3 | |||
MonaSuperscoop03.png|Mona Superscoop 3 image | |||
Mona SS No.3 full screen.jpg|Mona Superscoop 3 full screen | |||
Mona SS No.4.jpg|Mona Superscoop 4 | |||
MonaSuperscoop04.png|Mona Superscoop 4 image | |||
Mona SS No.4 full screen.jpg|Mona Superscoop 4 full screen | |||
Mona SS No.5.jpg|Mona Superscoop 5 | |||
MonaSuperscoop05.png|Mona Superscoop 5 image | |||
Mona SS No.5 full screen.jpg|Mona Superscoop 5 full screen | |||
Mona SS No.6.jpg|Mona Superscoop 6 | |||
MonaSuperscoop06.png|Mona Superscoop 6 image | |||
Mona SS No.6 full screen.jpg|Mona Superscoop 6 full screen | |||
Mona SS No.7.jpg|Mona Superscoop 7 | |||
MonaSuperscoop07.png|Mona Superscoop 7 image | |||
Mona SS No.7 full screen.jpg|Mona Superscoop 7 full screen | |||
Mona SS No.8.jpg|Mona Superscoop 8 | |||
MonaSuperscoop08.png|Mona Superscoop 8 image | |||
Mona SS No.8 full screen.jpg|Mona Superscoop 8 full screen | |||
Mona SS No.9.jpg|Mona Superscoop 9 | |||
MonaSuperscoop09.png|Mona Superscoop 9 image | |||
Mona SS No.9 full screen.jpg|Mona Superscoop 9 full screen | |||
Mona SS No.10.jpg|Mona Superscoop 10 | |||
Mona Superscoop 10.png|Mona Superscoop 10 image | |||
Mona SS No.10 full screen.jpg|Mona Superscoop 10 full screen | |||
Mona SS No.11.jpg|Mona Superscoop 11 | |||
MonaSuperscoop11.png|Mona Superscoop 11 image | |||
Mona SS No.11 full screen.jpg|Mona Superscoop 11 full screen | |||
Mona SS No.12.jpg|Mona Superscoop 12 | |||
MonaSuperscoop12.png|Mona Superscoop 12 image | |||
Mona SS No.12 full screen.jpg|Mona Superscoop 12 full screen | |||
Mona SS No.13.jpg|Mona Superscoop 13 | |||
MonaSuperscoop13.png|Mona Superscoop 13 image | |||
Mona SS No.13 full screen.jpg|Mona Superscoop 13 full screen | |||
Mona SS No.14.jpg|Mona Superscoop 14 | |||
MonaSuperscoop14.png|Mona Superscoop 14 image | |||
Mona SS No.14 full screen.jpg|Mona Superscoop 14 full screen | |||
Mona SS No.15.jpg|Mona Superscoop 15 | |||
MonaSuperscoop15.png|Mona Superscoop 15 image | |||
Mona SS No.15 full screen.jpg|Mona Superscoop 15 full screen | |||
Mona SS No.16.jpg|Mona Superscoop 16 | |||
MonaSuperscoop16.png|Mona Superscoop 16 image | |||
Mona SS No.16 full screen.jpg|Mona Superscoop 16 full screen | |||
Mona SS No.17.jpg|Mona Superscoop 17 | |||
MonaSuperscoop17.png|Mona Superscoop 17 image | |||
Mona SS No.17 full screen.jpg|Mona Superscoop 17 full screen | |||
Mona SS No.18.jpg|Mona Superscoop 18 | |||
MonaSuperscoop18.png|Mona Superscoop 18 image | |||
Mona SS No.18 full screen.jpg|Mona Superscoop 18 full screen | |||
Mona SS No.19.jpg|Mona Superscoop 19 | |||
MonaSuperscoop19.png|Mona Superscoop 19 image | |||
Mona SS No.19 full screen.jpg|Mona Superscoop 19 full screen | |||
Mona SS No.20.jpg|Mona Superscoop 20 | |||
MonaSuperscoop20.png|Mona Superscoop 20 image | |||
Mona SS No.20 full screen.jpg|Mona Superscoop 20 full screen | |||
Mona SS No.21.jpg|Mona Superscoop 21 | |||
MonaSuperscoop21.png|Mona Superscoop 21 image | |||
Mona SS No.21 full screen.jpg|Mona Superscoop 21 full screen | |||
Mona SS No.22.jpg|Mona Superscoop 22 | |||
MonaSuperscoop22.png|Mona Superscoop 22 image | |||
Mona SS No.22 full screen.jpg|Mona Superscoop 22 full screen | |||
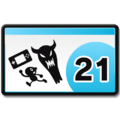
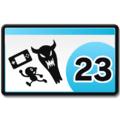
Mona SS No.23.jpg|Mona Superscoop 23 | |||
MonaSuperscoop23.png|Mona Superscoop 23 image | |||
Mona SS No.23 full screen.jpg|Mona Superscoop 23 full screen | |||
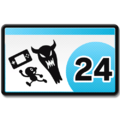
Mona SS No.24.jpg|Mona Superscoop 24 | |||
MonaSuperscoop24.png|Mona Superscoop 24 image | |||
Mona SS No.24 full screen.jpg|Mona Superscoop 24 full screen | |||
</gallery> | |||
===[[Hint Card]]s=== | |||
<gallery heights=70> | |||
G&W Card.png|[[Game & Wario|G&W]] Card | |||
G&W Card (front).png|G&W Card (front) | |||
G&W Card (back).png|G&W Card (back) | |||
1st Arrow Card.jpg|[[Arrow]] Card 1 | |||
1st Arrow Card (front).jpg|Arrow Card 1 (front) | |||
1st Arrow Card (back).jpg|Arrow Card 1 (back) | |||
2nd Arrow Card.jpg|Arrow Card 2 | |||
2nd Arrow Card (front).jpg|Arrow Card 2 (front) | |||
2nd Arrow Card (back).jpg|Arrow Card 2 (back) | |||
3rd Arrow Card.jpg|Arrow Card 3 | |||
3rd Arrow Card (front).jpg|Arrow Card 3 (front) | |||
3rd Arrow Card (back).jpg|Arrow Card 3 (back) | |||
4th Arrow Card.jpg|Arrow Card 4 | |||
4th Arrow Card (front).jpg|Arrow Card 4 (front) | |||
4th Arrow Card (back).jpg|Arrow Card 4 (back) | |||
1st Shutter Card.jpg|[[Shutter]] Card 1 | |||
1st Shutter Card (front).jpg|Shutter Card 1 (front) | |||
1st Shutter Card (back).jpg|Shutter Card 1 (back) | |||
2nd Shutter Card.jpg|Shutter Card 2 | |||
2nd Shutter Card (front).jpg|Shutter Card 2 (front) | |||
2nd Shutter Card (back).jpg|Shutter Card 2 (back) | |||
3rd Shutter Card.jpg|Shutter Card 3 | |||
3rd Shutter Card (front).jpg|Shutter Card 3 (front) | |||
3rd Shutter Card (back).jpg|Shutter Card 3 (back) | |||
4th Shutter Card.jpg|Shutter Card 4 | |||
4th Shutter Card (front).jpg|Shutter Card 4 (front) | |||
4th Shutter Card (back).jpg|Shutter Card 4 (back) | |||
1st Ski Card.jpg|[[Ski (minigame)|Ski]] Card 1 | |||
1st Ski Card (front).jpg|Ski Card 1 (front) | |||
1st Ski Card (back).jpg|Ski Card 1 (back) | |||
2nd Ski Card.jpg|Ski Card 2 | |||
2nd Ski Card (front).jpg|Ski Card 2 (front) | |||
2nd Ski Card (back).jpg|Ski Card 2 (back) | |||
3rd Ski Card.jpg|Ski Card 3 | |||
3rd Ski Card (front).jpg|Ski Card 3 (front) | |||
3rd Ski Card (back).jpg|Ski Card 3 (back) | |||
4th Ski Card.jpg|Ski Card 4 | |||
4th Ski Card (front).jpg|Ski Card 4 (front) | |||
4th Ski Card (back).jpg|Ski Card 4 (back) | |||
1st Patchwork Card.jpg|[[Patchwork]] Card 1 | |||
1st Patchwork Card (front).jpg|Patchwork Card 1 (front) | |||
1st Patchwork Card (back).jpg|Patchwork Card 1 (back) | |||
2nd Patchwork Card.jpg|Patchwork Card 2 | |||
2nd Patchwork Card (front).jpg|Patchwork Card 2 (front) | |||
2nd Patchwork Card (back).jpg|Patchwork Card 2 (back) | |||
3rd Patchwork Card.jpg|Patchwork Card 3 | |||
3rd Patchwork Card (front).jpg|Patchwork Card 3 (front) | |||
3rd Patchwork Card (back).jpg|Patchwork Card 3 (back) | |||
4th Patchwork Card.jpg|Patchwork Card 4 | |||
4th Patchwork Card (front).jpg|Patchwork Card 4 (front) | |||
4th Patchwork Card (back).jpg|Patchwork Card 4 (back) | |||
1st Kung Fu Card.jpg|[[Kung Fu]] Card 1 | |||
1st Kung Fu Card (front).jpg|Kung Fu Card 1 (front) | |||
1st Kung Fu Card (back).jpg|Kung Fu Card 1 (back) | |||
2nd Kung Fu Card.jpg|Kung Fu Card 2 | |||
2nd Kung Fu Card (front).jpg|Kung Fu Card 2 (front) | |||
2nd Kung Fu Card (back).jpg|Kung Fu Card 2 (back) | |||
3rd Kung Fu Card.jpg|Kung Fu Card 3 | |||
3rd Kung Fu Card (front).jpg|Kung Fu Card 3 (front) | |||
3rd Kung Fu Card (back).jpg|Kung Fu Card 3 (back) | |||
4th Kung Fu Card.jpg|Kung Fu Card 4 | |||
4th Kung Fu Card (front).jpg|Kung Fu Card 4 (front) | |||
4th Kung Fu Card (back).jpg|Kung Fu Card 4 (back) | |||
1st Gamer Card.jpg|[[Gamer]] Card 1 | |||
1st Gamer Card (front).jpg|Gamer Card 1 (front) | |||
1st Gamer Card (back).jpg|Gamer Card 1 (back) | |||
2nd Gamer Card.jpg|Gamer Card 2 | |||
2nd Gamer Card (front).jpg|Gamer Card 2 (front) | |||
2nd Gamer Card (back).jpg|Gamer Card 2 (back) | |||
3rd Gamer Card.jpg|Gamer Card 3 | |||
3rd Gamer Card (front).jpg|Gamer Card 3 (front) | |||
3rd Gamer Card (back).jpg|Gamer Card 3 (back) | |||
4th Gamer Card.jpg|Gamer Card 4 | |||
4th Gamer Card (front).jpg|Gamer Card 4 (front) | |||
4th Gamer Card (back).jpg|Gamer Card 4 (back) | |||
1st Design Card.jpg|[[Design]] Card 1 | |||
1st Design Card (front).jpg|Design Card 1 (front) | |||
1st Design Card (back).jpg|Design Card 1 (back) | |||
2nd Design Card.jpg|Design Card 2 | |||
2nd Design Card (front).jpg|Design Card 2 (front) | |||
2nd Design Card (back).jpg|Design Card 2 (back) | |||
3rd Design Card.jpg|Design Card 3 | |||
3rd Design Card (front).jpg|Design Card 3 (front) | |||
3rd Design Card (back).jpg|Design Card 3 (back) | |||
4th Design Card.jpg|Design Card 4 | |||
4th Design Card (front).jpg|Design Card 4 (front) | |||
4th Design Card (back).jpg|Design Card 4 (back) | |||
1st Ashley Card.jpg|[[Ashley (minigame)|Ashley]] Card 1 | |||
1st Ashley Card (front).jpg|Ashley Card 1 (front) | |||
1st Ashley Card (back).jpg|Ashley Card 1 (back) | |||
2nd Ashley Card.jpg|Ashley Card 2 | |||
2nd Ashley Card (front).jpg|Ashley Card 2 (front) | |||
2nd Ashley Card (back).jpg|Ashley Card 2 (back) | |||
3rd Ashley Card.jpg|Ashley Card 3 | |||
3rd Ashley Card (front).jpg|Ashley Card 3 (front) | |||
3rd Ashley Card (back).jpg|Ashley Card 3 (back) | |||
4th Ashley Card.jpg|Ashley Card 4 | |||
4th Ashley Card (front).jpg|Ashley Card 4 (front) | |||
4th Ashley Card (back).jpg|Ashley Card 4 (back) | |||
1st Taxi Card.jpg|[[Taxi (minigame)|Taxi]] Card 1 | |||
1st Taxi Card (front).jpg|Taxi Card 1 (front) | |||
1st Taxi Card (back).jpg|Taxi Card 1 (back) | |||
2nd Taxi Card.jpg|Taxi Card 2 | |||
2nd Taxi Card (front).jpg|Taxi Card 2 (front) | |||
2nd Taxi Card (back).jpg|Taxi Card 2 (back) | |||
3rd Taxi Card.jpg|Taxi Card 3 | |||
3rd Taxi Card (front).jpg|Taxi Card 3 (front) | |||
3rd Taxi Card (back).jpg|Taxi Card 3 (back) | |||
4th Taxi Card.jpg|Taxi Card 4 | |||
4th Taxi Card (front).jpg|Taxi Card 4 (front) | |||
4th Taxi Card (back).jpg|Taxi Card 4 (back) | |||
1st Pirates Card.jpg|[[Pirates]] Card 1 | |||
1st Pirates Card (front).jpg|Pirates Card 1 (front) | |||
1st Pirates Card (back).jpg|Pirates Card 1 (back) | |||
2nd Pirates Card.jpg|Pirates Card 2 | |||
2nd Pirates Card (front).jpg|Pirates Card 2 (front) | |||
2nd Pirates Card (back).jpg|Pirates Card 2 (back) | |||
3rd Pirates Card.jpg|Pirates Card 3 | |||
3rd Pirates Card (front).jpg|Pirates Card 3 (front) | |||
3rd Pirates Card (back).jpg|Pirates Card 3 (back) | |||
4th Pirates Card.jpg|Pirates Card 4 | |||
4th Pirates Card (front).jpg|Pirates Card 4 (front) | |||
4th Pirates Card (back).jpg|Pirates Card 4 (back) | |||
1st Bowling Card.jpg|[[Bowling]] Card 1 | |||
1st Bowling Card (front).jpg|Bowling Card 1 (front) | |||
1st Bowling Card (back).jpg|Bowling Card 1 (back) | |||
2nd Bowling Card.jpg|Bowling Card 2 | |||
2nd Bowling Card (front).jpg|Bowling Card 2 (front) | |||
2nd Bowling Card (back).jpg|Bowling Card 2 (back) | |||
3rd Bowling Card.jpg|Bowling Card 3 | |||
3rd Bowling Card (front).jpg|Bowling Card 3 (front) | |||
3rd Bowling Card (back).jpg|Bowling Card 3 (back) | |||
4th Bowling Card.jpg|Bowling Card 4 | |||
4th Bowling Card (front).jpg|Bowling Card 4 (front) | |||
4th Bowling Card (back).jpg|Bowling Card 4 (back) | |||
1st Bird Card.jpg|[[Bird (minigame)|Bird]] Card 1 | |||
1st Bird Card (front).jpg|Bird Card 1 (front) | |||
1st Bird Card (back).jpg|Bird Card 1 (back) | |||
2nd Bird Card.jpg|Bird Card 2 | |||
2nd Bird Card (front).jpg|Bird Card 2 (front) | |||
2nd Bird Card (back).jpg|Bird Card 2 (back) | |||
3rd Bird Card.jpg|Bird Card 3 | |||
3rd Bird Card (front).jpg|Bird Card 3 (front) | |||
3rd Bird Card (back).jpg|Bird Card 3 (back) | |||
4th Bird Card.jpg|Bird Card 4 | |||
4th Bird Card (front).jpg|Bird Card 4 (front) | |||
4th Bird Card (back).jpg|Bird Card 4 (back) | |||
1st Sketch Card.jpg|[[Sketch]] Card 1 | |||
1st Sketch Card (front).jpg|Sketch Card 1 (front) | |||
1st Sketch Card (back).jpg|Sketch Card 1 (back) | |||
2nd Sketch Card.jpg|Sketch Card 2 | |||
2nd Sketch Card (front).jpg|Sketch Card 2 (front) | |||
2nd Sketch Card (back).jpg|Sketch Card 2 (back) | |||
3rd Sketch Card.jpg|Sketch Card 3 | |||
3rd Sketch Card (front).jpg|Sketch Card 3 (front) | |||
3rd Sketch Card (back).jpg|Sketch Card 3 (back) | |||
4th Sketch Card.jpg|Sketch Card 4 | |||
4th Sketch Card (front).jpg|Sketch Card 4 (front) | |||
4th Sketch Card (back).jpg|Sketch Card 4 (back) | |||
1st Fruit Card.jpg|[[Fruit (minigame)|Fruit]] Card 1 | |||
1st Fruit Card (front).jpg|Fruit Card 1 (front) | |||
1st Fruit Card (back).jpg|Fruit Card 1 (back) | |||
2nd Fruit Card.jpg|Fruit Card 2 | |||
2nd Fruit Card (front).jpg|Fruit Card 2 (front) | |||
2nd Fruit Card (back).jpg|Fruit Card 2 (back) | |||
3rd Fruit Card.jpg|Fruit Card 3 | |||
3rd Fruit Card (front).jpg|Fruit Card 3 (front) | |||
3rd Fruit Card (back).jpg|Fruit Card 3 (back) | |||
4th Fruit Card.jpg|Fruit Card 4 | |||
4th Fruit Card (front).jpg|Fruit Card 4 (front) | |||
4th Fruit Card (back).jpg|Fruit Card 4 (back) | |||
1st Islands Card.jpg|[[Islands]] Card 1 | |||
1st Islands Card (front).jpg|Islands Card 1 (front) | |||
1st Islands Card (back).jpg|Islands Card 1 (back) | |||
2nd Islands Card.jpg|Islands Card 2 | |||
2nd Islands Card (front).jpg|Islands Card 2 (front) | |||
2nd Islands Card (back).jpg|Islands Card 2 (back) | |||
3rd Islands Card.jpg|Islands Card 3 | |||
3rd Islands Card (front).jpg|Islands Card 3 (front) | |||
3rd Islands Card (back).jpg|Islands Card 3 (back) | |||
4th Islands Card.jpg|Islands Card 4 | |||
4th Islands Card (front).jpg|Islands Card 4 (front) | |||
4th Islands Card (back).jpg|Islands Card 4 (back) | |||
1st Disco Card.jpg|[[Disco]] Card 1 | |||
1st Disco Card (front).jpg|Disco Card 1 (front) | |||
1st Disco Card (back).jpg|Disco Card 1 (back) | |||
2nd Disco Card.jpg|Disco Card 2 | |||
2nd Disco Card (front).jpg|Disco Card 2 (front) | |||
2nd Disco Card (back).jpg|Disco Card 2 (back) | |||
3rd Disco Card.jpg|Disco Card 3 | |||
3rd Disco Card (front).jpg|Disco Card 3 (front) | |||
3rd Disco Card (back).jpg|Disco Card 3 (back) | |||
4th Disco Card.jpg|Disco Card 4 | |||
4th Disco Card (front).jpg|Disco Card 4 (front) | |||
4th Disco Card (back).jpg|Disco Card 4 (back) | |||
1st MV Sketch Card.jpg|[[Miiverse]] Sketch Card 1 | |||
1st MV Sketch Card (front).jpg|Miiverse Sketch Card 1 (front) | |||
1st MV Sketch Card (back).jpg|Miiverse Sketch Card 1 (back) | |||
2nd MV Sketch Card.jpg|Miiverse Sketch Card 2 | |||
2nd MV Sketch Card (front).jpg|Miiverse Sketch Card 2 (front) | |||
2nd MV Sketch Card (back).jpg|Miiverse Sketch Card 2 (back) | |||
3rd MV Sketch Card.jpg|Miiverse Sketch Card 3 | |||
3rd MV Sketch Card (front).jpg|Miiverse Sketch Card 3 (front) | |||
3rd MV Sketch Card (back).jpg|Miiverse Sketch Card 3 (back) | |||
4th MV Sketch Card.jpg|Miiverse Sketch Card 4 | |||
4th MV Sketch Card (front).jpg|Miiverse Sketch Card 4 (front) | |||
4th MV Sketch Card (back).jpg|Miiverse Sketch Card 4 (back) | |||
</gallery> | </gallery> | ||
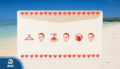
===Character cards=== | ===Character cards=== | ||
<gallery> | <gallery heights=70> | ||
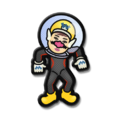
217 Wario Card.jpg|[[Wario]] | 217 Wario Card.jpg|[[Wario]] Card | ||
Wario Card G&W.jpg|Wario (front) | Wario Card G&W.jpg|Wario (front) | ||
Wario G&W Bio.jpg|Wario (back) | Wario G&W Bio.jpg|Wario (back) | ||
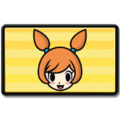
218 Mona Card.jpg|[[Mona]] | 218 Mona Card.jpg|[[Mona]] Card | ||
Mona Card G&W.jpg|Mona (front) | Mona Card G&W.jpg|Mona (front) | ||
Mona G&W Bio.jpg|Mona (back) | Mona G&W Bio.jpg|Mona (back) | ||
219 Editor Joe Card.jpg|[[Joe|Editor Joe]] | 219 Editor Joe Card.jpg|[[Joe|Editor Joe]] Card | ||
Joe Card G&W.jpg|Joe (front) | Joe Card G&W.jpg|Joe (front) | ||
Joe G&W Bio.jpg|Joe (back) | Joe G&W Bio.jpg|Joe (back) | ||
220 Jimmy T Card.jpg|[[Jimmy T]] | 220 Jimmy T Card.jpg|[[Jimmy T]] Card | ||
Jimmy T Card G&W.jpg|Jimmy T (front) | Jimmy T Card G&W.jpg|Jimmy T (front) | ||
Jimmy T G&W Bio.jpg|Jimmy T (back) | Jimmy T G&W Bio.jpg|Jimmy T (back) | ||
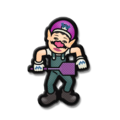
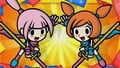
221 Kat Card.jpg|[[Kat]] | 221 Kat Card.jpg|[[Kat]] Card | ||
Kat Card G&W.jpg|Kat (front) | Kat Card G&W.jpg|Kat (front) | ||
Kat G&W Bio.jpg|Kat (back) | Kat G&W Bio.jpg|Kat (back) | ||
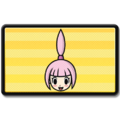
222 Ana Card.jpg|[[Ana]] | 222 Ana Card.jpg|[[Ana]] Card | ||
Ana Card G&W.jpg|Ana (front) | Ana Card G&W.jpg|Ana (front) | ||
Ana G&W Bio.jpg|Ana (back) | Ana G&W Bio.jpg|Ana (back) | ||
223 9-Volt Card.jpg|[[9-Volt]] | 223 9-Volt Card.jpg|[[9-Volt]] Card | ||
9-Volt Card G&W.jpg|9-Volt (front) | 9-Volt Card G&W.jpg|9-Volt (front) | ||
9-Volt G&W Bio.jpg|9-Volt (back) | 9-Volt G&W Bio.jpg|9-Volt (back) | ||
224 18-Volt Card.jpg|[[18-Volt]] | 224 18-Volt Card.jpg|[[18-Volt]] Card | ||
18-Volt Card G&W.jpg|18-Volt (front) | 18-Volt Card G&W.jpg|18-Volt (front) | ||
18-Volt G&W Bio.jpg|18-Volt (back) | 18-Volt G&W Bio.jpg|18-Volt (back) | ||
225 5-Volt Card.jpg|[[5-Volt]] | 225 5-Volt Card.jpg|[[5-Volt]] Card | ||
5-Volt Card G&W.jpg|5-Volt (front) | 5-Volt Card G&W.jpg|5-Volt (front) | ||
5-Volt G&W Bio.jpg|5-Volt (back) | 5-Volt G&W Bio.jpg|5-Volt (back) | ||
226 Young Cricket Card.jpg|[[Young Cricket]] | 226 Young Cricket Card.jpg|[[Young Cricket]] Card | ||
Young Cricket Card G&W.jpg|Young Cricket (front) | Young Cricket Card G&W.jpg|Young Cricket (front) | ||
Young Cricket G&W Bio.jpg|Young Cricket (back) | Young Cricket G&W Bio.jpg|Young Cricket (back) | ||
227 Master Mantis Card.jpg|[[Master Mantis]] | 227 Master Mantis Card.jpg|[[Master Mantis]] Card | ||
Master Mantis Card G&W.jpg|Master Mantis (front) | Master Mantis Card G&W.jpg|Master Mantis (front) | ||
Master Mantis G&W Bio.jpg|Master Mantis (back) | Master Mantis G&W Bio.jpg|Master Mantis (back) | ||
228 Dr. Crygor Card.jpg|[[Dr. Crygor]] | 228 Dr. Crygor Card.jpg|[[Dr. Crygor]] Card | ||
Dr. Crygor Card G&W.jpg|Dr. Crygor (front) | Dr. Crygor Card G&W.jpg|Dr. Crygor (front) | ||
Dr. Crygor G&W Bio.jpg|Dr. Crygor (back) | Dr. Crygor G&W Bio.jpg|Dr. Crygor (back) | ||
229 Ashley Card.jpg|[[Ashley]] | 229 Ashley Card.jpg|[[Ashley]] Card | ||
Ashley Card G&W.jpg|Ashley (front) | Ashley Card G&W.jpg|Ashley (front) | ||
Ashley G&W Bio.jpg|Ashley (back) | Ashley G&W Bio.jpg|Ashley (back) | ||
230 Red Card.jpg|[[Red (WarioWare series)|Red]] | 230 Red Card.jpg|[[Red (WarioWare series)|Red]] Card | ||
Red Card G&W.jpg|Red (front) | Red Card G&W.jpg|Red (front) | ||
Red G&W Bio.jpg|Red (back) | Red G&W Bio.jpg|Red (back) | ||
231 Dribble Card.jpg|[[Dribble]] | 231 Dribble Card.jpg|[[Dribble]] Card | ||
Dribble Card G&W.jpg|Dribble (front) | Dribble Card G&W.jpg|Dribble (front) | ||
Dribble G&W Bio.jpg|Dribble (back) | Dribble G&W Bio.jpg|Dribble (back) | ||
232 Spitz Card.jpg|[[Spitz]] | 232 Spitz Card.jpg|[[Spitz]] Card | ||
Spitz Card G&W.jpg|Spitz (front) | Spitz Card G&W.jpg|Spitz (front) | ||
Spitz G&W Bio.jpg|Spitz (back) | Spitz G&W Bio.jpg|Spitz (back) | ||
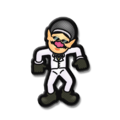
233 Captain Wario Card.jpg|[[Captain Wario (Game & Wario)|Captain Wario]] | 233 Captain Wario Card.jpg|[[Captain Wario (Game & Wario)|Captain Wario]] Card | ||
Captain Wario Card G&W.jpg|Captain Wario (front) | Captain Wario Card G&W.jpg|Captain Wario (front) | ||
Captain Wario G&W Bio.jpg|Captain Wario (back) | Captain Wario G&W Bio.jpg|Captain Wario (back) | ||
234 Orbulon Card.jpg|[[Orbulon]] | 234 Orbulon Card.jpg|[[Orbulon]] Card | ||
Orbulon Card G&W.jpg|Orbulon (front) | Orbulon Card G&W.jpg|Orbulon (front) | ||
Orbulon G&W Bio.jpg|Orbulon (back) | Orbulon G&W Bio.jpg|Orbulon (back) | ||
235 Penny Card.jpg|[[Penny]] | 235 Penny Card.jpg|[[Penny]] Card | ||
Penny Card G&W.jpg|Penny (front) | Penny Card G&W.jpg|Penny (front) | ||
Penny G&W Bio.jpg|Penny (back) | Penny G&W Bio.jpg|Penny (back) | ||
236 Mike Card.jpg|[[Mike]] | 236 Mike Card.jpg|[[Mike]] Card | ||
Mike Card G&W.jpg|Mike (front) | Mike Card G&W.jpg|Mike (front) | ||
Mike G&W Bio.jpg|Mike (back) | Mike G&W Bio.jpg|Mike (back) | ||
237 Fronk Card.jpg|[[Fronk]] | 237 Fronk Card.jpg|[[Fronk]] Card | ||
Fronk Card G&W.jpg|Fronk (front) | Fronk Card G&W.jpg|Fronk (front) | ||
Fronk G&W Bio.jpg|Fronk (back) | Fronk G&W Bio.jpg|Fronk (back) | ||
</gallery> | </gallery> | ||
| Line 558: | Line 1,305: | ||
==Box art== | ==Box art== | ||
<gallery heights="172"> | <gallery heights="172"> | ||
Box NA - Game & Wario.png|North American box art | Box NA - Game & Wario.png|North American box art | ||
Game&WarioEU boxcover.jpg| | Box BR - Game & Wario.png|Brazilian box art | ||
Game&WarioEU boxcover.jpg|European box art | |||
Box DE - Game & Wario.png|German box art | Box DE - Game & Wario.png|German box art | ||
Box AU - Game & Wario.jpg| | Box AU - Game & Wario.jpg|Australasian box art | ||
GameWario.jpg|Japanese box art | |||
</gallery> | </gallery> | ||
Revision as of 12:22, July 25, 2024
This is a gallery of images for the game Game & Wario.
Logos

American logo

European and Australasian logo
Japanese logo
Early Japanese logo


Artwork
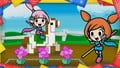
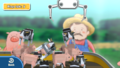
The principal cast surrounding the logo of the game.
Alternate version of the group artwork.
Artwork of Wario used on the Japanese, European and Australasian cover
Artwork used for the North American cover
Artwork used for the Japanese cover
Artwork used for the European and Australasian cover


Character artwork
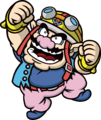
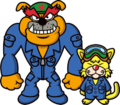
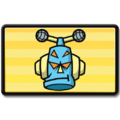
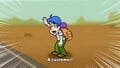
Wario
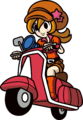
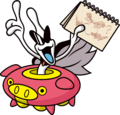
Mona on her scooter
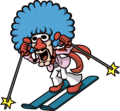
Jimmy T skiing

Kat

Ana
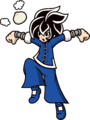
Young Cricket
Young Cricket & Master Mantis
18-Volt
9-Volt & 18-Volt
Ashley observing
Dribble & Spitz
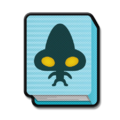
Orbulon in the Oinker and holding a sketch pad
Penny
Mike
_-_Game_%26_Wario.png)


.png)


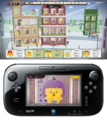
Minigame cases


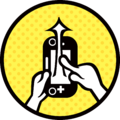
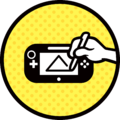
Game pad actions
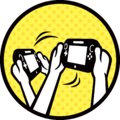
Shake
Move up
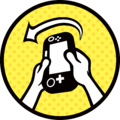
Turn left
Draw
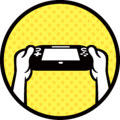
Put in the flat position
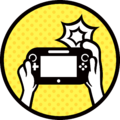
Click
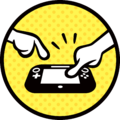
Touch it
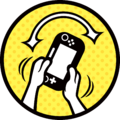
Move for both sides


Miscellaneous
Crowdfarter badge.

Wallpaper of Captain Wario from Game & Wario (800x600)
Wallpaper of Captain Wario from Game & Wario (1024x768)
Wallpaper of Captain Wario from Game & Wario (1280x1024)
Wallpaper of Captain Wario from Game & Wario (1920x1200)
Wallpaper of Wario from Game & Wario (800x600)

Wallpaper of Wario on his motorcycle from Game & Wario (1024x768)
Wallpaper of Wario on his motorcycle from Game & Wario (1280x1024)
Wallpaper of Wario on his motorcycle from Game & Wario (1920x1200)
Wallpaper of Wario from Game & Wario (800x600)

Wallpaper of Wario from Game & Wario (1024x768)
Wallpaper of Wario from Game & Wario (1280x1024)

Wallpaper of Wario from Game & Wario (1920x1200)


Icons
Minigames
_-_Game_%26_Wario.png)
_-_Game_%26_Wario.png)
_-_Game_%26_Wario.png)
_-_Game_%26_Wario.png)
_-_Game_%26_Wario.png)
_-_Game_%26_Wario.png)
_-_Game_%26_Wario.png)
_-_Game_%26_Wario.png)
_-_Game_%26_Wario.png)
_-_Game_%26_Wario.png)
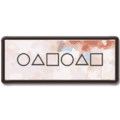
Patchwork puzzle images
Flower
Horse
Top Hat

Jumbo Jet

Sunglasses

Boot
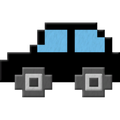
Car
Boar

Ladybug
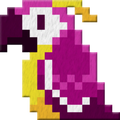
Parrot
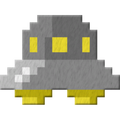
UFO
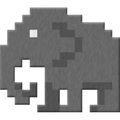
Elephant

Tomato
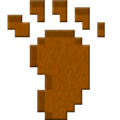
Footprint

Sheep
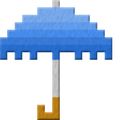
Umbrella

Watermelon
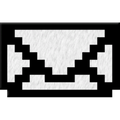
Letter

Banana

Music Notes

Heart
Helicopter

Knife & Fork
Frog

Seagull
Trophy
Letter

Scissors
Ninja Star
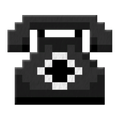
Telephone
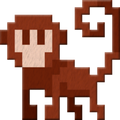
Monkey

Carrot

Garlic
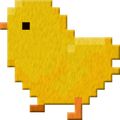
Chick

Diamond

Moon
Shoe

Santa
Trumpet
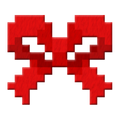
Bow
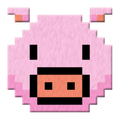
Pig

Beetle

Light Bulb

Bottle Opener
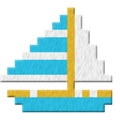
Sailboat
Nose

Strawberry

Turkey Leg
Snake
Traffic Light

Eagle

Camel
Crab

Whale

Mouse
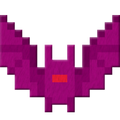
Bat
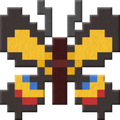
Butterfly

Shamrock

High Heel
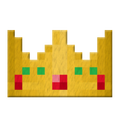
Crown
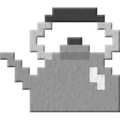
Teapot
Koala
Penguin

Skull
Rooster

Saxophone
Bunny

Dolphin
Straw Hat
Train
Palm Tree

Caterpillar

Cherries

Spade

Pea Pod

Cactus

Ring

Shell
Rhino Beetle

Grapes

Peach
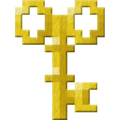
Key

Eggplant

Boxer Briefs

Fish
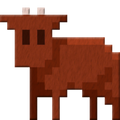
Cow
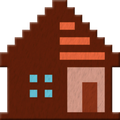
House


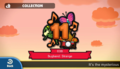
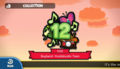
Cluck-A-Pop prizes

Bubble Blower

Dandelion Fluff

Magical Hair

Fireworks
Eraser Dust
Steel Wool

Whipped Cream
Pasta

Forgetful King
Forgetful Queen
Forgetful Dog
Forgetful Robot
Hi-Pitch Mic
Lo-Pitch Mic
Alien Mic
Rap Looper
Rope
Brush
Mysterious Cookie

Mediscope

Neuroscope

Vetrascope
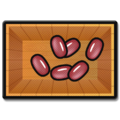
Beans
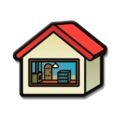
Gnome's House

Prize String

Lucky String
Illustration String

Bugband: Strawbenemy

Bugband: On Target

Bugband: Jimmy Lovin'

Bugband: Hydrangeaville
Bugband: Masterpath
Bugband: Retro4Life

Bugband: ReDESIGN
Bugband: Ashley's Star Revolution
Bugband: Crazy Cabbie

Bugband: Dancin' Pirates

Bugband: Strange

Bugband: Hustlebustle Town

Bugband: Adrift
Mr. Tanaka's Sketchbook
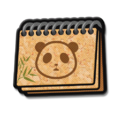
Panda Sketchbook
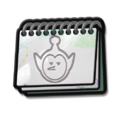
Alien Sketchbook
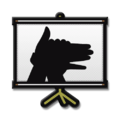
Shadow-Puppet Projector
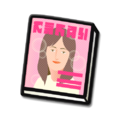
Beauty Magazine
Hand Mirror

Electric Fan
Teacher

Pink Crystal Ball

Blue Crystal Ball

Yellow Crystal Ball

Cat Disguise

Pig Disguise
Duck Disguise

Shy Dog
Unique Hamster
Hi-Tech Mirror

Haunted Mirror
BALLOON FIGHTER: Sole Man
BALLOON FIGHTER: Mole
BALLOON FIGHTER: Break!
BALLOON FIGHTER: Rollout
BALLOON FIGHTER: Spotlight
BALLOON FIGHTER: Super Fly Swatter
BALLOON FIGHTER: Dinosaur
BALLOON FIGHTER: Eye Exam
BALLOON FIGHTER: Ball (G&W)
BALLOON FIGHTER: Samurai Slice
BALLOON FIGHTER: Matryoshka

BALLOON FIGHTER: Fake Out
BALLOON FIGHTER: Dachshund
BALLOON FIGHTER: Bananas
BALLOON FIGHTER: Fish
BALLOON FIGHTER: Loose Tooth
BALLOON FIGHTER: Allergy Attack
BALLOON FIGHTER: Transform!
BALLOON FIGHTER: Homeward
BALLOON FIGHTER: Record Guy
BALLOON FIGHTER: Windbag
Box o' Stink
Box o' Danger

Box o' Love
Orbulon's Prized Masterpiece I
Orbulon's Prized Masterpiece II
Orbulon's Prized Masterpiece III
Orbulon's Prized Masterpiece IV

Orbulon's Prized Masterpiece V
Mothership Catcher

TAXI Toy
Adventure King Clock

Top Set

Veggie Tops
Townsfolk Tops
Chinskina & Cheeky Tops
Decision Boy
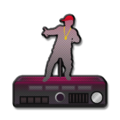
Diver Warionette
Bongo Warionette
Disco Warionette
Flyswatter Warionette
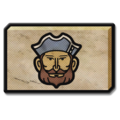
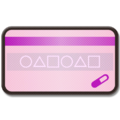
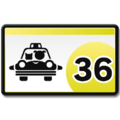
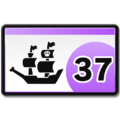
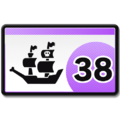
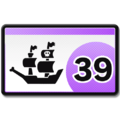
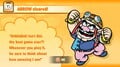
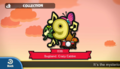
Evil Call Code
Unique Call Code
Homey Call Code
Burnt Call Code
BFF Call Code
Sappy Call Code
Showy Call Code

Energetic Call Code
Undercover Call Code
Smelly Call Code
Frenemy Call Code
Suspicious Call Code
Support-Desk Call Code
Old-Fashioned Call Code
Wilderness Call Code
Customer Call Code
Woodsy Call Code

Otherworldly Call Code
Fresh Call Code
Artsy Call Code
Blue Scroll
Green Scroll
Red Scroll
Mona Superscoop 2

Mona Superscoop 3
Mona Superscoop 4
Mona Superscoop 5

Mona Superscoop 6
Mona Superscoop 7
Mona Superscoop 8
Mona Superscoop 9
Mona Superscoop 10
Mona Superscoop 11
Mona Superscoop 12

Mona Superscoop 13
Mona Superscoop 14

Mona Superscoop 15

Mona Superscoop 16
Mona Superscoop 17
Mona Superscoop 18
Mona Superscoop 19

Mona Superscoop 20
Mona Superscoop 21
Mona Superscoop 22
Mona Superscoop 23
Mona Superscoop 24
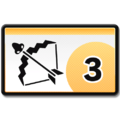
Hint Card 1: ARROW 1
Hint Card 2: ARROW 2
Hint Card 3: ARROW 3
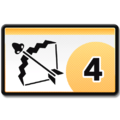
Hint Card 4: ARROW 4
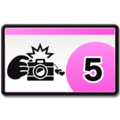
Hint Card 5: SHUTTER 1
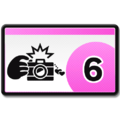
Hint Card 6: SHUTTER 2
Hint Card 7: SHUTTER 3
Hint Card 8: SHUTTER 4
Hint Card 9: SKI 1
Hint Card 10: SKI 2
Hint Card 11: SKI 3
Hint Card 12: SKI 4
Hint Card 13: PATCHWORK 1
Hint Card 14: PATCHWORK 2
Hint Card 15: PATCHWORK 3

Hint Card 16: PATCHWORK 4
Hint Card 17: KUNG FU 1

Hint Card 18: KUNG FU 2
Hint Card 19: KUNG FU 3
Hint Card 20: KUNG FU 4
Hint Card 21: GAMER 1

Hint Card 22: GAMER 2
Hint Card 23: GAMER 3
Hint Card 24: GAMER 4
Hint Card 25: DESIGN 1
Hint Card 26: DESIGN 2
Hint Card 27: DESIGN 3
Hint Card 28: DESIGN 4
Hint Card 29: ASHLEY 1

Hint Card 30: ASHLEY 2
Hint Card 31: ASHLEY 3
Hint Card 32: ASHLEY 4

Hint Card 33: TAXI 1
Hint Card 34: TAXI 2
Hint Card 35: TAXI 3
Hint Card 36: TAXI 4
Hint Card 37: PIRATES 1
Hint Card 38: PIRATES 2
Hint Card 39: PIRATES 3
Hint Card 40: PIRATES 4

Hint Card 41: BOWLING 1

Hint Card 42: BOWLING 2
Hint Card 43: BOWLING 3

Hint Card 44: BOWLING 4
Hint Card 45: BIRD 1

Hint Card 46: BIRD 2
Hint Card 47: BIRD 3
Hint Card 48: BIRD 4
Hint Card 49: SKETCH 1
Hint Card 50: SKETCH 2

Hint Card 51: SKETCH 3
Hint Card 52: SKETCH 4
Hint Card 53: FRUIT 1
Hint Card 54: FRUIT 2
Hint Card 55: FRUIT 3

Hint Card 56: FRUIT 4
Hint Card 57: ISLANDS 1
Hint Card 58: ISLANDS 2

Hint Card 59: ISLANDS 3
Hint Card 60: ISLANDS 4

Hint Card 61: DISCO 1
Hint Card 62: DISCO 2

Hint Card 63: DISCO 3
Hint Card 64: DISCO 4

Hint Card 65: MIIVERSE SKETCH 1
Hint Card 66: MIIVERSE SKETCH 2
Hint Card 67: MIIVERSE SKETCH 3
Hint Card 68: MIIVERSE SKETCH 4
Wario Card
Mona Card

Editor Joe Card
Jimmy T Card
Kat Card
Ana Card
9-Volt Card
18-Volt Card
5-Volt Card
Young Cricket Card
Master Mantis Card
Dr. Crygor Card
Ashley Card
Red Card
Dribble Card
Spitz Card
Captain Wario Card
Orbulon Card

Penny Card
Mike Card
Fronk Card
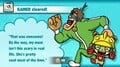
GAME & WARIO Epilogue
Illustrated Schnozzipedia (Staff Credits)
CAPSULE MACHINE (Replica)


Screenshots
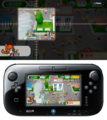
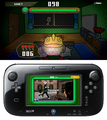
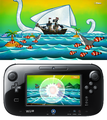
Gameplay
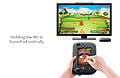
Playing Arrow with the TV and GamePad
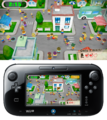
Arrow on the TV and GamePad
Ski on the TV and GamePad
Shutter on the TV and GamePad
Fruit on the TV and GamePad
Shutter
Shutter
Fruit
Fruit
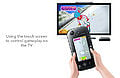
Playing Shutter with the TV and GamePad
Playing Ski with the TV and GamePad

Fruit
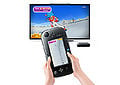
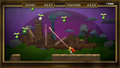
Descriptive image of Arrow
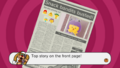
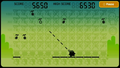
Descriptive image of Ski

Arrow
Playing Bird on the GamePad
Disco on the TV and GamePad
Gamer on the TV and GamePad
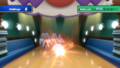
Pirates on the TV
Pirates on the TV and GamePad
Pirates
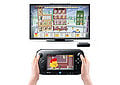
Sketch on the TV and GamePad
Taxi on the TV and GamePad
Patchwork
Bowling
Bowling
Bowling
Bird on the TV
Bird on the GamePad
Bird on the TV

Bird on the GamePad
Bird on the TV


Cutscenes
Prologue
Wario watching TV
A pizza on TV

Sal Out and the Chorus Kids on TV
A new game console on TV
Reporter John announcing the new game console
How to play with the new game console
Reporter John finishing the announcement
Wario amazed by the new game console
Wario having a new money idea
Wario deciding to make some games

Wario wanting to make millions of money
Jimmy T noticing the new game console on his cell phone
The new game console on Jimmy T's cell phone
Mona taking photos before noticing the new game console on an outdoor TV
Kat & Ana playing rock paper scissors before noticing the new game console
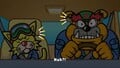
Penny scolding Dr. Crygor & Mike before noticing the new game console with them
Ashley & Red reading a book before noticing the new game console
Young Cricket & Master Mantis training before noticing the new game console
Dribble & Spitz driving their taxi before noticing the new game console
The new game console zoomed-in

Wario's House at night
Wario using his computer and thinking at the same time at night


.jpg)
.jpg)
.jpg)


.jpg)
.jpg)
.jpg)


.jpg)


Arrow
Wario watching a movie while eating strawberries
The movie Wario is watching on TV
Wario noticing a mouse stealing his last strawberry
Wario chasing the mouse

A Wario-shaped hole in a wall made by him
An archer walking
The archer encountering Wario

The archer's spinning caused by Wario
The archer's equipment stolen by Wario
Wario using the archer's equipment to try shooting the mouse
The last arrow successfully catching the strawberry and making the mouse trip
Wario succeeding in getting his strawberry back
Wario napping upon returning home
The mouse spraying Wario's nose with a can of black pepper to make him sneeze as revenge
Wario's sneeze accidentally throwing the mouse and its pepper can at his computer
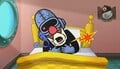
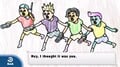
Wario waking up and having a new idea for his new game
Wario using his computer to make his new game
Wario calling himself a genius

.jpg)
.jpg)


.jpg)
.jpg)
.jpg)
.jpg)
.jpg)
.jpg)
.jpg)

.jpg)
.jpg)


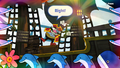
Shutter
Editor Joe picking up a ringing phone
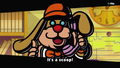
Editor Joe telling Mona about a scoop
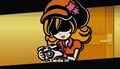
Mona ready for the mission
Mona driving her scooter out of Diamond City Times
Mona driving (1)
Mona's camera
Mona driving (2)
A crime photo (1)
A crime photo (2)

Mona finding two groups of thugs making a deal
Mona comforting the thugs
The thugs getting caught by Mona
Mona winking after taking photos of the thugs
A photo of the arrested thugs
.jpg)
.jpg)


.jpg)
.jpg)

.jpg)
.jpg)
.jpg)


.jpg)
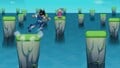
Ski
Jimmy T skiing
Jimmy T skiing while passing through a bear

Cathy noticing Jimmy T
Jimmy T skiing with the Ski bunnies
Jimmy T posing (1)
Jimmy T posing (2)
Jimmy T posing (3)
Jimmy T posing (4)
Jimmy T still skiing
Ski bunnies still skiing
The bear joining the group to ski
The group ski-jumping
.png)
.png)


.png)
.png)
.png)
.png)
.png)
.png)
.png)

Patchwork
Ana answering Kat that she's ready
Kat & Ana rolling out several rolls of different colored fabric with different patterns
Kat drawing her katana
Kat's katana drawn by her
Kat cutting pieces of fabric into different shapes
Ana cutting pieces of fabric into different shapes
Kat & Ana cutting more pieces of fabric into different shapes
Kat & Ana having fun with their home-made patchwork
Kat & Ana posing together


.jpg)
.jpg)
.jpg)


.jpg)

Kung Fu
Young Cricket jumping
Young Cricket coming at Master Mantis
Master Mantis rapidly hitting Young Cricket
Young Cricket rapidly hitting Master Mantis

Both trainers going through each other with their final respective hits
Master Mantis feeling defeated after landing together with Young Cricket
Master Mantis charging up
Young Cricket bracing himself
Master Mantis rising his arms

Master Mantis using a technique
Master Mantis creating a dumpling
Young Cricket shocked to see what Master Mantis did
Master Mantis after eating the dumpling
Master Mantis hopping on obstacles to lead Young Cricket somewhere else to train
Young Cricket feeling hungry before hopping on obstacles to follow Master Mantis
.jpg)
.jpg)
.jpg)
.jpg)
.jpg)


.jpg)
.jpg)


.jpg)
.jpg)
Gamer
9-Volt succeeding in getting a higher score

9-Volt having a higher score than 18-Volt
9-Volt jumping victoriously and 18-Volt crying
5-Volt snatching the game console from 9-Volt's hand
5-Volt telling the boys to do their homework
The boys promising 5-Volt to do their homework
The boys doing their homework
The boys finishing their homework

5-Volt giving the boys the game console back after their homework

The boys noticing something unexpected on the game console's screen
5-Volt having a higher score than the boys
The boys becoming sad and 5-Volt embarrassing herself for what she did

.jpg)
.jpg)
.jpg)
.jpg)


.jpg)
.jpg)

.jpg)
.jpg)
.jpg)
.jpg)
Design
Dr. Crygor having a stomachache upon waking up
The door to Dr. Crygor's bathroom
Dr. Crygor getting stuck in his own toilet with no way to get loose
Dr. Crygor deciding to flush his toilet automatically
Dr. Crygor getting showered and spinning to enter his toilet
The toilet automatically deactivating itself and a rainbow appearing
Dr. Crygor sliding through his lab's piping
Dr. Crygor landing in his laboratory with his lab coat and a rose
Dr. Crygor's close-up


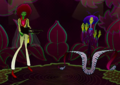
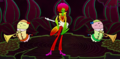
Ashley
Ashley reading a book
Ashley imagining herself being in a dark world
Ashley wanting to enter the book's dark-themed page
The book placed on the ground and opened to show its dark-themed page
Ashley calling Red for help
Red transforming
Red changing into a magic wand
Ashley beginning to use Red to cast a spell on the book
A gust of wind turning the book to a dessert-themed page
Ashley noticing a mistake she will accidentally make
A portal appearing from the book to transport Ashley & Red inside the book's dessert-themed page
Ashley & Red falling through the portal's vortex
Red changing into an umbrella to help Ashley land safely
Ashley & Red landing safely in the dessert world
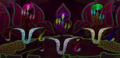
The dessert world
Red happy about the development
Red sensing Ashley's anger
Ashley angrily staring at Red
Red struggling to talk to Ashley
Red becoming at a loss
Red changing into a flying broom
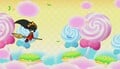
Ashley riding Red to leave the dessert world


.jpg)
.jpg)
.jpg)
.jpg)


Taxi
Dribble's taxi in the middle of Highway 56
Dribble & Spitz noticing a hitchhiker
Dribble & Spitz noticing a UFO appearing above them out of nowhere
The UFO abducting the hitchhiker
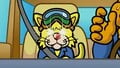
Spitz deciding to fight the UFO
Spitz opening the top of the taxi to come out of it and using a laser gun to try shooting at the UFO
The UFO giggling at Spitz after dodging his laser gun's bullets
Spitz telling Dribble to chase the UFO and using a toy hammer to hit him
Dribble buffing up and cooperating
Dribble's taxi ready to go
Dribble's taxi chasing the UFO

.jpg)
.jpg)

.jpg)
.jpg)


.jpg)
.jpg)

.jpg)

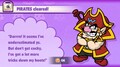
Pirates
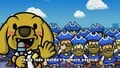
Wario yawning boredly
Wario deciding to ride his Wario Bike to go out
Wario riding his Wario Bike around Diamond City
Wario noticing a pirate costume
Wario becoming Captain Wario

.jpg)

.jpg)


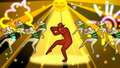
Ending
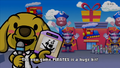
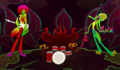
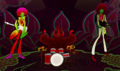
Reporter John reporting about the Pirates game
Reporter John reporting about the gaming fans' excitement
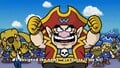
Captain Wario intruding on the report to reveal himself being the game's designer
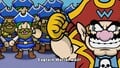
One gaming fan catching Captain Wario's attention
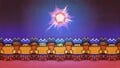
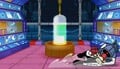
The gaming fans using their video game pads to create a large energy ball, which is to hit Captain Wario, by dancing
Captain Wario terrified by the large energy ball coming at him

Captain Wario blown away by the large energy ball
The WarioWare, Inc. employees dancing (1)
The WarioWare, Inc. employees dancing (2)
The WarioWare, Inc. employees dancing (3)

Captain Wario flying
Captain Wario accidentally crashing into Club Sugar
One of Club Sugar's windows accidentally broken by Captain Wario
The group shocked to see Captain Wario crash-landing into Club Sugar (1)
The group shocked to see Captain Wario crash-landing into Club Sugar (2)
Jimmy T smugly saying, "Crashin' the party? That's our Wario."

Jimmy T smiling

Alien Bunnies outside of Club Sugar at night
The group leaving Club Sugar and wanting to go bowling


.jpg)
.jpg)

.jpg)
.jpg)

.png)
.png)
.png)
.jpg)


.png)
.png)


Minigame title screens
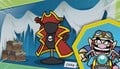
Young Cricket & Master Mantis' minigame, Kung Fu.
Dr. Crygor's minigame, Design.
Dribble & Spitz's minigame, Taxi.
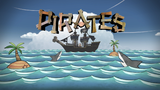
Captain Wario's minigame, Pirates.
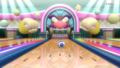
The Bowling minigame.


Clear screens
Arrow
Shutter
Ski
Patchwork
Kung Fu
Gamer
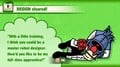
Design
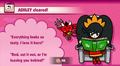
Ashley
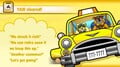
Taxi
Pirates
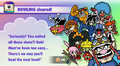
Bowling


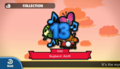
Cluck-A-Pop
Cluck-A-Pop
Getting a Cluck-A-Pop prize
Playing a Cluck-A-Pop game


Bugband
Bugband: Strawbenemy
The Arrow Bugband
Bugband: On Target
The Shutter Bugband
Bugband: Jimmy Lovin'

The Ski Bugband
Bugband: Hydrangeaville
The Patchwork Bugband
Bugband: Masterpath
The Kung Fu Bugband
Bugband: Retro4Life
The Gamer Bugband
Bugband: ReDESIGN
The Design Bugband
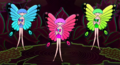
Bugband: Ashley's ☆ Revolution
The Ashley Bugband
Bugband: Crazy Cabbie
The Taxi Bugband
Bugband: Dancin' Pirates
The Pirates Bugband
Bugband: Strange
The Sketch Bugband
Bugband: Hustlebustle Town
The Fruit Bugband
Bugband: Adrift

The Islands Bugband


BALLOON FIGHTER
Gameplay


BALLOON FIGHTER: Allergy Attack
BALLOON FIGHTER: Ball (G&W)
BALLOON FIGHTER: Bananas
BALLOON FIGHTER: Break!
BALLOON FIGHTER: Dachshund
BALLOON FIGHTER: Dinosaur
BALLOON FIGHTER: Eye Exam
BALLOON FIGHTER: Fake Out
BALLOON FIGHTER: Fish
BALLOON FIGHTER: Gold Digger
BALLOON FIGHTER: Homeward
BALLOON FIGHTER: Loose Tooth
BALLOON FIGHTER: Matryoshka
BALLOON FIGHTER: Mole
BALLOON FIGHTER: Record Guy
BALLOON FIGHTER: Rollout
BALLOON FIGHTER: Samurai Slice
BALLOON FIGHTER: Sole Man
BALLOON FIGHTER: Spotlight
BALLOON FIGHTER: Super Fly Swatter
BALLOON FIGHTER: Transform!
BALLOON FIGHTER: Windbag


Call Codes

Evil Call Code
Evil Call Code's number

Upon using the Evil Call Code...

Unique Call Code
Unique Call Code's number
Upon using the Unique Call Code... (1)
Upon using the Unique Call Code... (2)
Homey Call Code
Homey Call Code's number
Upon using the Homey Call Code... (1)
Upon using the Homey Call Code... (2)
Upon using the Homey Call Code... (3)
Burnt Call Code
Burnt Call Code's number
Upon using the Burnt Call Code...
BFF Call Code
BFF Call Code's number
Upon using the BFF Call Code...
Sappy Call Code
Sappy Call Code's number
Upon using the Sappy Call Code...
Showy Call Code
Showy Call Code's number
Upon using the Showy Call Code...
Energetic Call Code
Energetic Call Code's number

Upon using the Energetic Call Code...

Undercover Call Code
Undercover Call Code's number
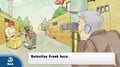
Upon using the Undercover Call Code... (1)
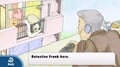
Upon using the Undercover Call Code... (2)

Upon using the Undercover Call Code... (3)
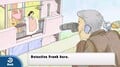
Upon using the Undercover Call Code... (4)
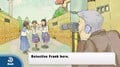
Upon using the Undercover Call Code... (5)
Smelly Call Code
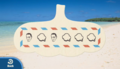
Smelly Call Code's number
Upon using the Smelly Call Code...
Frenemy Call Code
Frenemy Call Code's number
Upon using the Frenemy Call Code... (1)
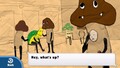
Upon using the Frenemy Call Code... (2)
Suspicious Call Code
Suspicious Call Code's number
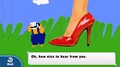
Upon using the Suspicious Call Code...
Support-Desk Call Code
Support-Desk Call Code's number
Upon using the Support-Desk Call Code... (1)
Upon using the Support-Desk Call Code... (2)
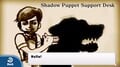
Upon using the Support-Desk Call Code... (3)

Upon using the Support-Desk Call Code... (4)
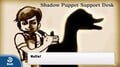
Upon using the Support-Desk Call Code... (5)
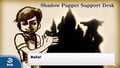
Upon using the Support-Desk Call Code... (6)
Old-Fashioned Call Code
Old-Fashioned Call Code's number
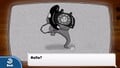
Upon using the Old-Fashioned Call Code... (1)
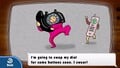
Upon using the Old-Fashioned Call Code... (2)
Wilderness Call Code
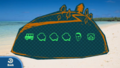
Wilderness Call Code's number
Upon using the Wilderness Call Code...
Customer Call Code
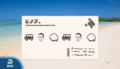
Customer Call Code's number
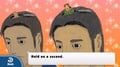
Upon using the Customer Call Code...
Woodsy Call Code
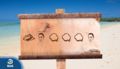
Woodsy Call Code's number
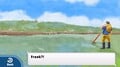
Upon using the Woodsy Call Code...
Otherworldly Call Code
Otherworldly Call Code's number
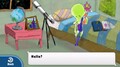
Upon using the Otherworldly Call Code...
Fresh Call Code

Fresh Call Code's number
Upon using the Fresh Call Code...
Artsy Call Code
Artsy Call Code's number

Upon using the Artsy Call Code...


.jpg)
.jpg)


.jpg)
.jpg)
.jpg)
.jpg)
.jpg)


.jpg)
.jpg)


.jpg)
.jpg)
.jpg)
.jpg)
.jpg)
.jpg)


.jpg)
.jpg)


Mona Superscoop
British English version
Mona Superscoop 1
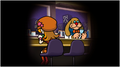
Mona Superscoop 1 image
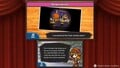
Mona Superscoop 1 full screen
Mona Superscoop 2

Mona Superscoop 2 image
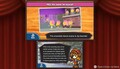
Mona Superscoop 2 full screen
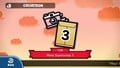
Mona Superscoop 3
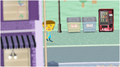
Mona Superscoop 3 image
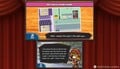
Mona Superscoop 3 full screen
Mona Superscoop 4
Mona Superscoop 4 image
Mona Superscoop 4 full screen
Mona Superscoop 5
Mona Superscoop 5 image
Mona Superscoop 5 full screen
Mona Superscoop 6
Mona Superscoop 6 image
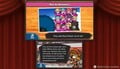
Mona Superscoop 6 full screen
Mona Superscoop 7
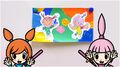
Mona Superscoop 7 image
Mona Superscoop 7 full screen
Mona Superscoop 8

Mona Superscoop 8 image
Mona Superscoop 8 full screen
Mona Superscoop 9
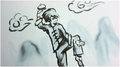
Mona Superscoop 9 image
Mona Superscoop 9 full screen
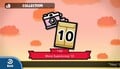
Mona Superscoop 10
Mona Superscoop 10 image
Mona Superscoop 10 full screen
Mona Superscoop 11
Mona Superscoop 11 image
Mona Superscoop 11 full screen
Mona Superscoop 12

Mona Superscoop 12 image
Mona Superscoop 12 full screen
Mona Superscoop 13
Mona Superscoop 13 image
Mona Superscoop 13 full screen
Mona Superscoop 14
Mona Superscoop 14 image
Mona Superscoop 14 full screen

Mona Superscoop 15
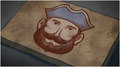
Mona Superscoop 15 image
Mona Superscoop 15 full screen
Mona Superscoop 16
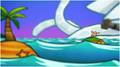
Mona Superscoop 16 image

Mona Superscoop 16 full screen
Mona Superscoop 17
Mona Superscoop 17 image
Mona Superscoop 17 full screen
Mona Superscoop 18
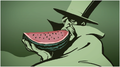
Mona Superscoop 18 image

Mona Superscoop 18 full screen

Mona Superscoop 19
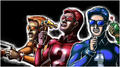
Mona Superscoop 19 image
Mona Superscoop 19 full screen
Mona Superscoop 20
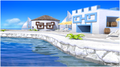
Mona Superscoop 20 image

Mona Superscoop 20 full screen
Mona Superscoop 21
Mona Superscoop 21 image
Mona Superscoop 21 full screen
Mona Superscoop 22
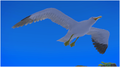
Mona Superscoop 22 image
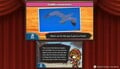
Mona Superscoop 22 full screen
Mona Superscoop 23
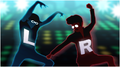
Mona Superscoop 23 image
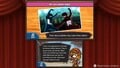
Mona Superscoop 23 full screen
Mona Superscoop 24

Mona Superscoop 24 image
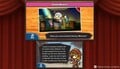
Mona Superscoop 24 full screen


Hint Cards
G&W Card
G&W Card (front)
G&W Card (back)
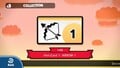
Arrow Card 1
Arrow Card 1 (front)
Arrow Card 1 (back)
Arrow Card 2
Arrow Card 2 (front)
Arrow Card 2 (back)
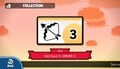
Arrow Card 3
Arrow Card 3 (front)
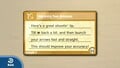
Arrow Card 3 (back)
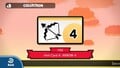
Arrow Card 4
Arrow Card 4 (front)
Arrow Card 4 (back)
Shutter Card 1
Shutter Card 1 (front)
Shutter Card 1 (back)
Shutter Card 2

Shutter Card 2 (front)
Shutter Card 2 (back)
Shutter Card 3
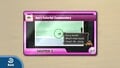
Shutter Card 3 (front)
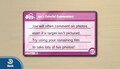
Shutter Card 3 (back)
Shutter Card 4
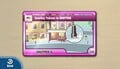
Shutter Card 4 (front)
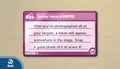
Shutter Card 4 (back)
Ski Card 1
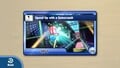
Ski Card 1 (front)
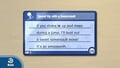
Ski Card 1 (back)
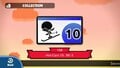
Ski Card 2

Ski Card 2 (front)
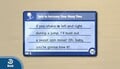
Ski Card 2 (back)
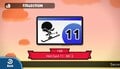
Ski Card 3

Ski Card 3 (front)
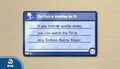
Ski Card 3 (back)
Ski Card 4
Ski Card 4 (front)
Ski Card 4 (back)
Patchwork Card 1
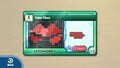
Patchwork Card 1 (front)
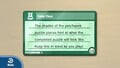
Patchwork Card 1 (back)

Patchwork Card 2
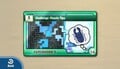
Patchwork Card 2 (front)
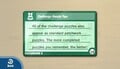
Patchwork Card 2 (back)
Patchwork Card 3
Patchwork Card 3 (front)
Patchwork Card 3 (back)
Patchwork Card 4
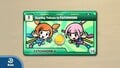
Patchwork Card 4 (front)
Patchwork Card 4 (back)
Kung Fu Card 1
Kung Fu Card 1 (front)
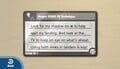
Kung Fu Card 1 (back)
Kung Fu Card 2
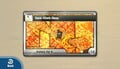
Kung Fu Card 2 (front)
Kung Fu Card 2 (back)
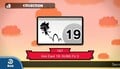
Kung Fu Card 3
Kung Fu Card 3 (front)
Kung Fu Card 3 (back)
Kung Fu Card 4
Kung Fu Card 4 (front)
Kung Fu Card 4 (back)

Gamer Card 1
Gamer Card 1 (front)

Gamer Card 1 (back)
Gamer Card 2

Gamer Card 2 (front)

Gamer Card 2 (back)

Gamer Card 3
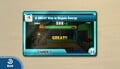
Gamer Card 3 (front)
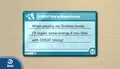
Gamer Card 3 (back)

Gamer Card 4
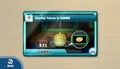
Gamer Card 4 (front)
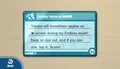
Gamer Card 4 (back)

Design Card 1
Design Card 1 (front)
Design Card 1 (back)
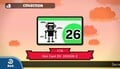
Design Card 2
Design Card 2 (front)
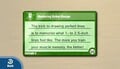
Design Card 2 (back)
Design Card 3
Design Card 3 (front)
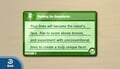
Design Card 3 (back)
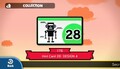
Design Card 4
Design Card 4 (front)
Design Card 4 (back)
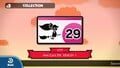
Ashley Card 1
Ashley Card 1 (front)
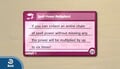
Ashley Card 1 (back)
Ashley Card 2
Ashley Card 2 (front)
Ashley Card 2 (back)
Ashley Card 3
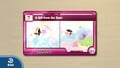
Ashley Card 3 (front)
Ashley Card 3 (back)
Ashley Card 4
Ashley Card 4 (front)
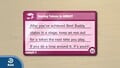
Ashley Card 4 (back)
Taxi Card 1
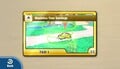
Taxi Card 1 (front)
Taxi Card 1 (back)
Taxi Card 2
Taxi Card 2 (front)
Taxi Card 2 (back)
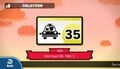
Taxi Card 3
Taxi Card 3 (front)

Taxi Card 3 (back)
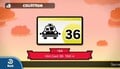
Taxi Card 4
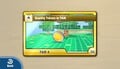
Taxi Card 4 (front)
Taxi Card 4 (back)

Pirates Card 1
Pirates Card 1 (front)
Pirates Card 1 (back)
Pirates Card 2
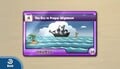
Pirates Card 2 (front)

Pirates Card 2 (back)
Pirates Card 3
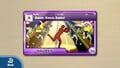
Pirates Card 3 (front)
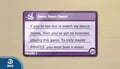
Pirates Card 3 (back)
Pirates Card 4
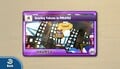
Pirates Card 4 (front)
Pirates Card 4 (back)
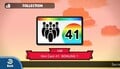
Bowling Card 1
Bowling Card 1 (front)
Bowling Card 1 (back)
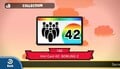
Bowling Card 2
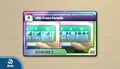
Bowling Card 2 (front)
Bowling Card 2 (back)
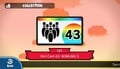
Bowling Card 3
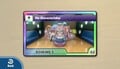
Bowling Card 3 (front)
Bowling Card 3 (back)
Bowling Card 4

Bowling Card 4 (front)
Bowling Card 4 (back)
Bird Card 1
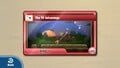
Bird Card 1 (front)
Bird Card 1 (back)
Bird Card 2
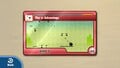
Bird Card 2 (front)
Bird Card 2 (back)
Bird Card 3
Bird Card 3 (front)
Bird Card 3 (back)
Bird Card 4
Bird Card 4 (front)
Bird Card 4 (back)
Sketch Card 1
Sketch Card 1 (front)

Sketch Card 1 (back)

Sketch Card 2
Sketch Card 2 (front)

Sketch Card 2 (back)
Sketch Card 3
Sketch Card 3 (front)
Sketch Card 3 (back)
Sketch Card 4
Sketch Card 4 (front)

Sketch Card 4 (back)
Fruit Card 1
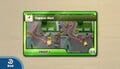
Fruit Card 1 (front)

Fruit Card 1 (back)
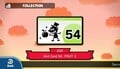
Fruit Card 2
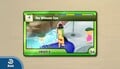
Fruit Card 2 (front)
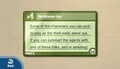
Fruit Card 2 (back)
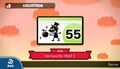
Fruit Card 3
Fruit Card 3 (front)
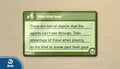
Fruit Card 3 (back)
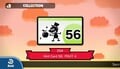
Fruit Card 4
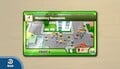
Fruit Card 4 (front)

Fruit Card 4 (back)
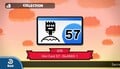
Islands Card 1
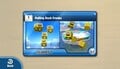
Islands Card 1 (front)
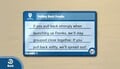
Islands Card 1 (back)

Islands Card 2
Islands Card 2 (front)
Islands Card 2 (back)
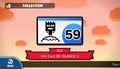
Islands Card 3
Islands Card 3 (front)

Islands Card 3 (back)
Islands Card 4
Islands Card 4 (front)

Islands Card 4 (back)
Disco Card 1
Disco Card 1 (front)
Disco Card 1 (back)

Disco Card 2
Disco Card 2 (front)

Disco Card 2 (back)
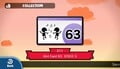
Disco Card 3
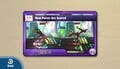
Disco Card 3 (front)
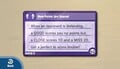
Disco Card 3 (back)
Disco Card 4
Disco Card 4 (front)
Disco Card 4 (back)
Miiverse Sketch Card 1
Miiverse Sketch Card 1 (front)
Miiverse Sketch Card 1 (back)
Miiverse Sketch Card 2
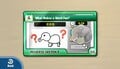
Miiverse Sketch Card 2 (front)

Miiverse Sketch Card 2 (back)
Miiverse Sketch Card 3
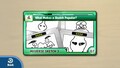
Miiverse Sketch Card 3 (front)
Miiverse Sketch Card 3 (back)
Miiverse Sketch Card 4
Miiverse Sketch Card 4 (front)
Miiverse Sketch Card 4 (back)

.png)
.png)

.jpg)
.jpg)

.jpg)
.jpg)

.jpg)
.jpg)

.jpg)
.jpg)

.jpg)
.jpg)

.jpg)
.jpg)

.jpg)
.jpg)

.jpg)
.jpg)

.jpg)
.jpg)

.jpg)
.jpg)

.jpg)
.jpg)

.jpg)
.jpg)

.jpg)
.jpg)

.jpg)
.jpg)

.jpg)
.jpg)

.jpg)
.jpg)

.jpg)
.jpg)

.jpg)
.jpg)

.jpg)
.jpg)

.jpg)
.jpg)

.jpg)
.jpg)

.jpg)
.jpg)

.jpg)
.jpg)

.jpg)
.jpg)

.jpg)
.jpg)

.jpg)
.jpg)

.jpg)
.jpg)

.jpg)
.jpg)

.jpg)
.jpg)

.jpg)
.jpg)

.jpg)
.jpg)

.jpg)
.jpg)

.jpg)
.jpg)

.jpg)
.jpg)

.jpg)
.jpg)

.jpg)
.jpg)

.jpg)
.jpg)

.jpg)
.jpg)

.jpg)
.jpg)

.jpg)
.jpg)

.jpg)
.jpg)

.jpg)
.jpg)

.jpg)
.jpg)

.jpg)
.jpg)

.jpg)
.jpg)

.jpg)
.jpg)

.jpg)
.jpg)

.jpg)
.jpg)

.jpg)
.jpg)

.jpg)
.jpg)

.jpg)
.jpg)

.jpg)
.jpg)

.jpg)
.jpg)

.jpg)
.jpg)

.jpg)
.jpg)

.jpg)
.jpg)

.jpg)
.jpg)

.jpg)
.jpg)

.jpg)
.jpg)

.jpg)
.jpg)

.jpg)
.jpg)

.jpg)
.jpg)

.jpg)
.jpg)

.jpg)
.jpg)
Character cards
Wario Card
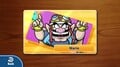
Wario (front)
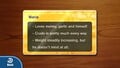
Wario (back)
Mona Card
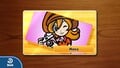
Mona (front)
Mona (back)
Editor Joe Card

Joe (front)
Joe (back)
Jimmy T Card
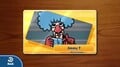
Jimmy T (front)
Jimmy T (back)

Kat Card
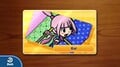
Kat (front)
Kat (back)
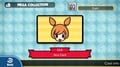
Ana Card
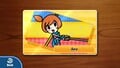
Ana (front)
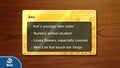
Ana (back)
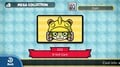
9-Volt Card
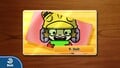
9-Volt (front)
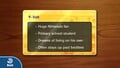
9-Volt (back)
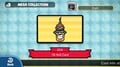
18-Volt Card
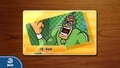
18-Volt (front)
18-Volt (back)
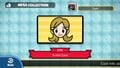
5-Volt Card
5-Volt (front)
5-Volt (back)
Young Cricket Card
Young Cricket (front)
Young Cricket (back)
Master Mantis Card
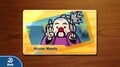
Master Mantis (front)
Master Mantis (back)
Dr. Crygor Card
Dr. Crygor (front)
Dr. Crygor (back)
Ashley Card
Ashley (front)
Ashley (back)
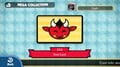
Red Card
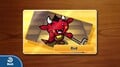
Red (front)
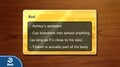
Red (back)
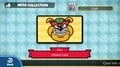
Dribble Card

Dribble (front)

Dribble (back)
Spitz Card
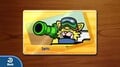
Spitz (front)
Spitz (back)

Captain Wario Card
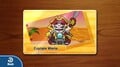
Captain Wario (front)
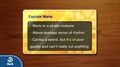
Captain Wario (back)
Orbulon Card
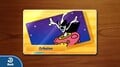
Orbulon (front)
Orbulon (back)
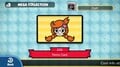
Penny Card
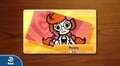
Penny (front)
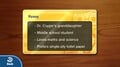
Penny (back)
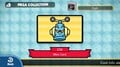
Mike Card
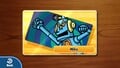
Mike (front)
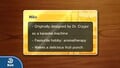
Mike (back)
Fronk Card
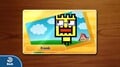
Fronk (front)
Fronk (back)


2D graphics
HOME Menu icon


Box art
North American box art
Brazilian box art
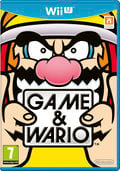
European box art
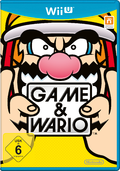
German box art
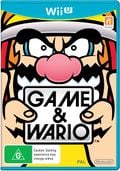
Australasian box art
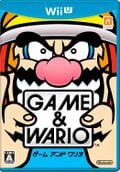
Japanese box art


| Game & Wario | ||
|---|---|---|
| Main characters | Wario (Captain Wario) • Mona • Jimmy T • Kat & Ana • Young Cricket • 9-Volt • 18-Volt • Dr. Crygor • Ashley • Dribble & Spitz • Pyoro • Orbulon • Penny • Fronk • Mike | |
| Minor characters | 5-Volt • Adventure King • Detective Frank • Legendary Cat Dancers • Editor Joe • Master Mantis • Red • Sal Out • Ski bunnies • Reporter John • Alien Bunny • Squeaks | |
| Minigames | Single-player | Arrow • Shutter • Ski • Patchwork • Kung Fu • Gamer • Design • Ashley • Taxi • Pirates • Bowling • Bird |
| Multiplayer | Sketch • Fruit • Islands • Disco | |
| Microgames | Gold Digger • Sole Man • Mole • Break! • Rollout • Spotlight • Super Fly Swatter • Dinosaur • Eye Exam • Ball (G&W) • Samurai Slice • Matryoshka • Fake Out • Dachshund • Bananas • Fish • Loose Tooth • Allergy Attack • Transform! • Homeward • Record Guy • Windbag | |
| Locations | 9-Volt's House • Ashley's Mansion • Club Sugar • Diamond City • Dr. Crygor's Lab • Highway 56 • Toy Express • Wario's House | |
| Objects | Computer • Dribble's taxi • Fruit • Oinker • UFOs | |
| Miscellaneous | Gallery • Cluck-A-Pop • Bugband • Crystal Ball • Call Code • Mona Superscoop • Hint Card • Pre-release and unused content • Quotes • Staff | |