Gallery:Wario Land 4: Difference between revisions
m (Unnecessary) |
|||
| (14 intermediate revisions by 9 users not shown) | |||
| Line 1: | Line 1: | ||
{{italic title}} | {{italic title}} | ||
This is a gallery showing images for the game ''[[Wario Land 4]]''. | This is a gallery showing images for the game ''[[Wario Land 4]]''. | ||
==Logos== | ==Logos== | ||
<gallery widths="250"> | <gallery widths="250"> | ||
| Line 46: | Line 44: | ||
<gallery> | <gallery> | ||
Black Cat Artwork Wario Land 4.png|[[Kuro Neko]] | Black Cat Artwork Wario Land 4.png|[[Kuro Neko]] | ||
Keyzer WL4 artwork.jpg|[[Keyzer]] | |||
WL4 | Keyzer WL4 artwork 2.png|Keyzer | ||
Princess Shokora Artwork - Wario Land 4.png|[[Princess Shokora]]<br>(color) | Princess Shokora Artwork - Wario Land 4.png|[[Princess Shokora]]<br>(color) | ||
Princess Shokora WL4.png|Princess Shokora (monochrome) | Princess Shokora WL4.png|Princess Shokora (monochrome) | ||
| Line 57: | Line 55: | ||
===Enemies=== | ===Enemies=== | ||
<gallery> | <gallery> | ||
Beezley.png|[[Beezley]] | Beezley WL4 artwork.png|[[Beezley]] | ||
WL4 Goggley Blade Artwork.png|[[Goggley-Blade]] | WL4 Goggley Blade Artwork.png|[[Goggley-Blade]] | ||
Hoggus Wario Land 4.png|[[Hoggus]] and [[Butatabi]] | Hoggus Wario Land 4.png|[[Hoggus]] and [[Butatabi]] | ||
| Line 66: | Line 64: | ||
===Objects=== | ===Objects=== | ||
<gallery> | <gallery> | ||
Treasure Chest Artwork Wario Land 4.png|[[ | Treasure Chest Artwork Wario Land 4.png|[[Treasure chest]] | ||
WL4-Giant Diamond Artwork.PNG|[[ | WL4-Giant Diamond Artwork.PNG|[[Diamond]] | ||
WL4 Art Heart.svg|[[Heart (item)|Heart]] | WL4 Art Heart.svg|[[Heart (item)|Heart]] | ||
WL4-Item Icons Artwork.png|Icons of a [[Heart (item)|heart]], a [[CD]] and a Diamond | WL4-Item Icons Artwork.png|Icons of a [[Heart (item)|heart]], a [[CD]] and a Diamond | ||
| Line 188: | Line 186: | ||
<gallery> | <gallery> | ||
WL4 Purple Marumen Sprite.png|[[Marumen]] | WL4 Purple Marumen Sprite.png|[[Marumen]] | ||
SpearMashWarioLand4.png|[[Spear Mask]] (yellow) | SpearMashWarioLand4.png|[[Spear-Mask]] (yellow) | ||
TornadoMaskWarioLand4.png|[[ | TornadoMaskWarioLand4.png|[[Spear-Mask]] (blue) | ||
AngrySpearMaskManWarioLand4.png|[[ | AngrySpearMaskManWarioLand4.png|[[Spear-Mask]] (red) | ||
SpearHeadWarioLand4.png|[[Totsumen]] | SpearHeadWarioLand4.png|[[Totsumen]] | ||
Harimen WL4.png|[[Spiky]] | Harimen WL4.png|[[Spiky]] | ||
| Line 230: | Line 228: | ||
Mayu Bird WL4.png|[[Mayubird]] | Mayu Bird WL4.png|[[Mayubird]] | ||
Onomi WL4.png|[[Onomī]] | Onomi WL4.png|[[Onomī]] | ||
Iwao WL4.png|[[ | Iwao WL4.png|[[Bowler]] | ||
Drill Fish WL4.png|[[Mechanical fish]] | Drill Fish WL4.png|[[Mechanical fish]] | ||
WL4-Cough Virus.png|[[Mine (enemy)|Mine]] | WL4-Cough Virus.png|[[Mine (enemy)|Mine]] | ||
| Line 391: | Line 389: | ||
FrogSwitch.png|[[Switch (Wario Land 4)|Switch]] | FrogSwitch.png|[[Switch (Wario Land 4)|Switch]] | ||
WL4-Frog Block.png|[[Kaeru Block]] | WL4-Frog Block.png|[[Kaeru Block]] | ||
Diamond WL4 Sprite.png|[[ | Diamond WL4 Sprite.png|[[Diamond]] | ||
WL4-Golden Diva Stone.png|[[Golden Diva]] stone | WL4-Golden Diva Stone.png|[[Golden Diva]] stone | ||
WL4-Jewel Piece Box.png|[[Jewel piece box]] | WL4-Jewel Piece Box.png|[[Jewel piece box]] | ||
| Line 398: | Line 396: | ||
WL4-PurplePipe.png|[[Purple Pipe]] | WL4-PurplePipe.png|[[Purple Pipe]] | ||
WL4-PyramidJewels.png|The six kinds of [[jewel]]s | WL4-PyramidJewels.png|The six kinds of [[jewel]]s | ||
Treasure Chest WL4.png|[[ | Treasure Chest WL4.png|[[Treasure chest]] | ||
Triangle block.png|[[Triangle block]] | Triangle block.png|[[Triangle block]] | ||
Rolling Toy Block Sprite.png|[[Round red rock]] | Rolling Toy Block Sprite.png|[[Round red rock]] | ||
| Line 409: | Line 407: | ||
WL4-Flashback2.png|Wario picking [[Apple]]s | WL4-Flashback2.png|Wario picking [[Apple]]s | ||
WL4-Flashback3.png|Wario swimming with [[Goggley Blade]]s and [[Shieragucchi]] | WL4-Flashback3.png|Wario swimming with [[Goggley Blade]]s and [[Shieragucchi]] | ||
WL4-Flashback4.png|Wario wrestling | WL4-Flashback4.png|Wario wrestling a [[Bowler]] | ||
WL4-Flashback5.png|Wario running away from a [[Skeleton Bird]] and a [[Men'ono]] | WL4-Flashback5.png|Wario running away from a [[Skeleton Bird]] and a [[Men'ono]] | ||
WL4 - Flashback Bonus 1.png|Several toys, including Wario | WL4 - Flashback Bonus 1.png|Several toys, including Wario | ||
| Line 557: | Line 555: | ||
===Maps=== | ===Maps=== | ||
{{WL4 | {{WL4 map|center}} | ||
{{br}} | {{br}} | ||
<gallery heights="80"> | <gallery heights="80"> | ||
| Line 567: | Line 565: | ||
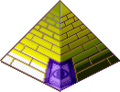
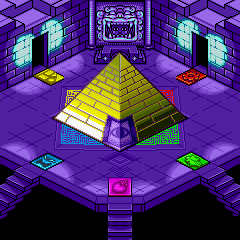
Golden Pyramid Passage.png|The [[Golden Pyramid]] | Golden Pyramid Passage.png|The [[Golden Pyramid]] | ||
</gallery> | </gallery> | ||
====[[Entry Passage]]==== | ====[[Entry Passage]]==== | ||
<gallery heights="80"> | <gallery heights="80"> | ||
| Line 677: | Line 674: | ||
WL4-Hotel Map.png|The map of [[Hotel Horror]] | WL4-Hotel Map.png|The map of [[Hotel Horror]] | ||
WL4-The End.png|Gold Bars forming the words "The End", as seen in the ending cut-scene | WL4-The End.png|Gold Bars forming the words "The End", as seen in the ending cut-scene | ||
</gallery> | </gallery> | ||
| Line 707: | Line 696: | ||
WL4 European Box Art.jpg|European box art (Front) | WL4 European Box Art.jpg|European box art (Front) | ||
WL4BackEurope.jpg|European box art (Back) | WL4BackEurope.jpg|European box art (Back) | ||
WL4 Box AU.jpg|Australian box art | |||
WL4 Back AU.jpg|Australian box art (Back) | |||
</gallery> | </gallery> | ||
| Line 718: | Line 709: | ||
WL4 Wii U VC trailer art.jpg|Promotional artwork for the Wii U Virtual Console release in Europe | WL4 Wii U VC trailer art.jpg|Promotional artwork for the Wii U Virtual Console release in Europe | ||
</gallery> | </gallery> | ||
{{Galleries}} | {{Galleries}} | ||
{{WL4}} | {{WL4}} | ||
[[Category:Galleries]] | [[Category:Galleries]] | ||
[[Category:Wario Land 4|*]] | [[Category:Wario Land 4|*]] | ||
Revision as of 12:07, July 6, 2024
This is a gallery showing images for the game Wario Land 4.
Logos
English logo
Japanese logo
Chinese logo
Pre-release logo
English in-game logo

Japanese in-game logo

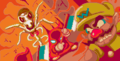
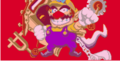
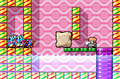
Artwork
Main art
Artwork used for the box
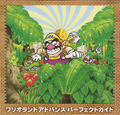
Full version of the artwork, with Japanese text

A banner used on the game's European Virtual Console webpage


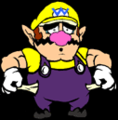
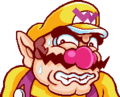
Wario
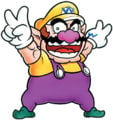
Wario striking his victory pose
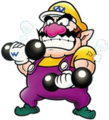
Wario lifting dumbbells
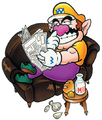
Wario reading the newspaper
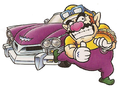
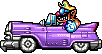
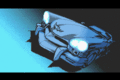
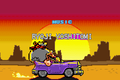
Wario with his Wario Car
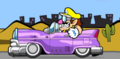
Wario driving his Wario Car
Wario, broke
Wario jumping on the switch
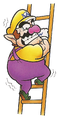
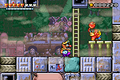
Wario climbing a Ladder


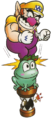
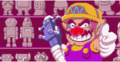
Allies
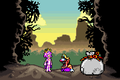
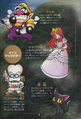
Keyzer
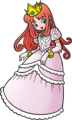
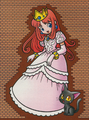
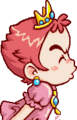
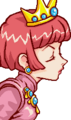
Princess Shokora
(color)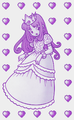
Princess Shokora (monochrome)
Princess Shokora and Kuro Neko


Enemies

Butatabi


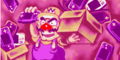
Objects

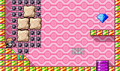
Four jewel pieces
Newspaper seen in the opening cut-scene

Blue Crystal

Red Crystal


Symbols


Miscellaneous
Artwork of the Passage map
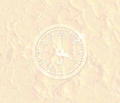
Artwork of a clock used for a background of an official Japanese website


Sprites and models
Wario

Wario's in-level movement
Wario in his Wario Car

Wario working out

Wario seen clearing a Passage

Prototype sprite of Wario opening a jewel piece box.
Wario after receiving a kiss from Princess Shokora
Bad ending


Wario's reactions

Wario

Puffy Wario

Flaming Wario

Flat Wario

Fat Wario

Bubble Wario

Snowman Wario

Frozen Wario

Bouncy Wario

Zombie Wario

Bat Wario


Wario's moves

Attack

Dash Attack

Smash Attack

Super Smash Attack

Roll

Swim

Crawl

Throw upward


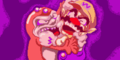
Princess Shokora

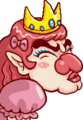
Bratty Baby Princess

Hideous Princess

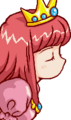
Cheeky Young Princess

True Princess Shokora

Princess Shokora being lifted into heaven by four angels
Bratty Baby Princess
Hideous Princess
Cheeky Young Princess
True Princess Shokora


Kuro Neko

Black and white cat sprites

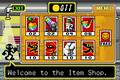
Shop owner

Shop owner sprite

Giving a Smile to the player

Unused sprite

Item Shop logo

Video clip in the Sound Room

Video clip in the Sound Room
Miscellaneous sprites


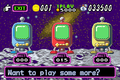
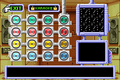
Game Bot

Blue Game Bot, vending Wario's Homerun Derby

Red Game Bot, vending The Wario Hop

Yellow Game Bot, vending Wario's Roulette


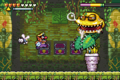
Bosses
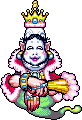
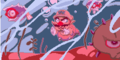
The Golden Diva
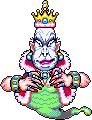
The Golden Diva's final form


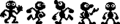
Enemies

Spear-Mask (yellow)

Spear-Mask (blue)

Spear-Mask (red)

An egg

A chick hatched from an egg


Items

Apple Bomb

Blast Cannon

Vizorman

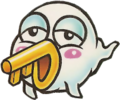
Bugle

Black Dog

Large Lips

Big Fist

Black Dragon

Smile


Legendary treasure

The Earrings, obtained from Cuckoo Condor

The Necklace, obtained from Aerodent


Golden Treasures

Small Tree

Apple

Fish

Candle Holder

Lamp

Crescent Moon Bed

Toy Bear

Lollipop

Toy Robot

Toy Rocket

Rockinghorse


Crowns

Bronze crown

Silver crown

Gold crown
Game modes

Normal Mode icon

Hard Mode icon

S-Hard icon
Levels
Entry Passage

Spoiled Rotten (boss)
Emerald Passage

Cractus (boss)
Ruby Passage

Cuckoo Condor (boss)
Topaz Passage

Aerodent (boss)
Sapphire Passage

Catbat (boss)
Golden Pyramid

Golden Diva (boss)
Sound Room

Alternate Karaoke cover


Miscellaneous sprites

Keyzer (pause menu)

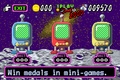
Mini-Game Shop icon

Pre-release logo of the Mini-Game Shop

Treasure sack

Bugle musical notes
Inner Golden Pyramid

CD case

The four different colored CDs

Golden Diva stone

The six kinds of jewels


Flashbacks
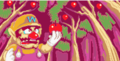
Wario picking Apples
Wario swimming with Goggley Blades and Shieragucchi
Wario wrestling a Bowler
Wario running away from a Skeleton Bird and a Men'ono

Several toys, including Wario

Wario and Hoggus doodling together
Wario with a box full of Game Boy Advance consoles
Wario with a toy Robot
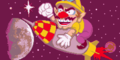
Wario on a Rocket
Wario with Cuckoo Condor in the background
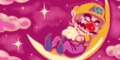
Wario having a dream while he is sleeping on the Moon
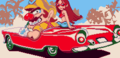
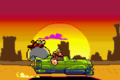
Wario driving a car, with a female.
Note: This particular image is only seen upon completing a game mode higher than "Normal".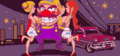
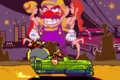
Wario, with two females in a city backdrop.
Note: This particular image is only seen upon completing "S-Hard" mode.


Screenshots
Title screens
English title screen
Japanese title screen
Chinese title screen


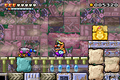
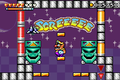
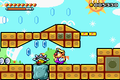
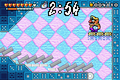
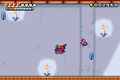
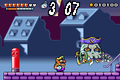
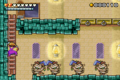
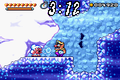
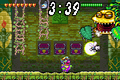
Levels
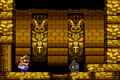
Hall of Hieroglyphs
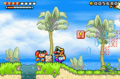
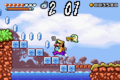
Palm Tree Paradise
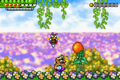
Wildflower Fields
Wildflower Fields
Wildflower Fields
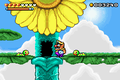
Wildflower Fields
Wildflower Fields
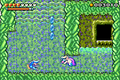
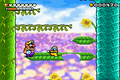
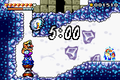
Mystic Lake
Mystic Lake
Mystic Lake
Mystic Lake
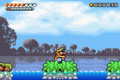
Mystic Lake
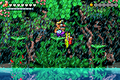
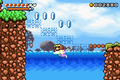
Monsoon Jungle
The Curious Factory
The Curious Factory
The Curious Factory

The Curious Factory
The Toxic Landfill
The Toxic Landfill
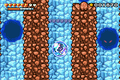
40 Below Fridge

Pinball Zone
Pinball Zone
Pinball Zone
Toy Block Tower
Toy Block Tower
The Big Board
The Big Board
The Big Board

The Big Board
Doodle Woods
Doodle Woods
Domino Row
Domino Row
Domino Row
Crescent Moon Village
Crescent Moon Village

Crescent Moon Village
Crescent Moon Village
Arabian Night
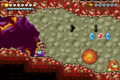
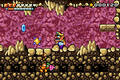
Fiery Cavern
Fiery Cavern
Fiery Cavern
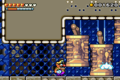
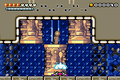
Hotel Horror


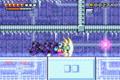
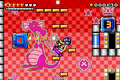
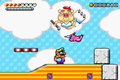
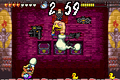
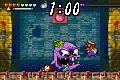
Boss battles
Cractus
Cuckoo Condor
Aerodent
Catbat
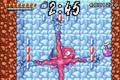
The Golden Diva
The Golden Diva


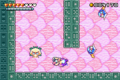
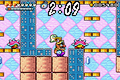
Cutscene screenshots

A stray dog barking at Kuro Neko
The Wario Car
Kuro Neko almost getting run over by Wario's Car
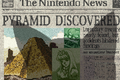
The newspaper seen in the game's opening cut-scene

The Golden Pyramid
Wario entering the Golden Pyramid
Wario hitting a switch

Wario entering a Vortex
Keyzer unlocking the next level
Legendary treasure being restored to the Golden Pyramid

Wario and Kuro Neko recovering the legendary treasure
Wario and Kuro Neko escaping from the Golden Pyramid
Kuro Neko just transformed into Princess Shokora
The newspaper seen in the game's ending cut-scene


Credit scene screenshots

Executive Producer credit to Hiroshi Yamauchi
Music credit to Ryoji Yoshitomi
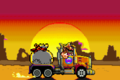
Wario's truck, seen after completing Hard mode.
Wario's hovercar, seen after completing S-Hard mode.
Wario in his hovercar, showing the final flashback sequence of the game in S-Hard mode.


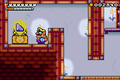
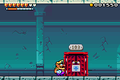
Places
The Game Bots in the Mini-Game Shop
Price discounted
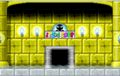
The Item Shop entrance
The Item Shop, with the shop owner
Completed Sound Room
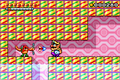
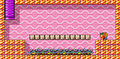
A pink area in Monsoon Jungle


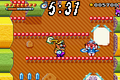
Mini-games
Wario's Homerun Derby


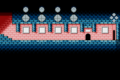
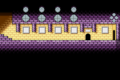
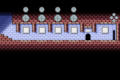
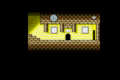
Maps

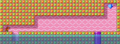
The Entry Passage
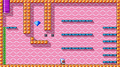
The Emerald Passage
The Ruby Passage
The Topaz Passage
The Sapphire Passage
The Golden Pyramid


Entry Passage

Emerald Passage


Ruby Passage


Topaz Passage


Sapphire Passage


Golden Pyramid

Pink area maps

Palm Tree Paradise

Wildflower Fields

Mystic Lake
Monsoon Jungle

The Curious Factory
The Toxic Landfill
40 Below Fridge

Pinball Zone

Toy Block Tower
The Big Board

Doodle Woods

Domino Row
Crescent Moon Village

Arabian Night

Fiery Cavern
Hotel Horror


Pre-release screenshots
The Spoiled Rotten battle
Unused cave in Palm Tree Paradise
The Cractus battle

Debug level entrance
Debug level


Miscellaneous screenshots
Glitch of Wario holding an "invisible object"
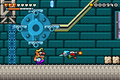
Decompressor, found in The Curious Factory

The map of Hotel Horror

Gold Bars forming the words "The End", as seen in the ending cut-scene


Scans
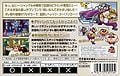
Official Shogakukan Japanese game guide
Page 3 of the official Shogakugan guide, showing several character descriptions.
Official Enterbrain Japanese game guide
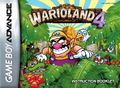
North American instruction booklet

European instruction booklet
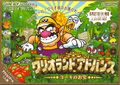
Japanese instruction booklet


Box art
North American box art (Front)
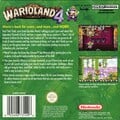
North American box art (Back)
Japanese box art (Front)
Japanese box art (Back)
Japanese flyer
European box art (Front)

European box art (Back)

Australian box art
Australian box art (Back)


Miscellaneous
Wario Land 4 at E3 2001
North American print ad
Brazilian print ad
iQue Club wallpaper

Wii U Virtual Console icon
Promotional artwork for the Wii U Virtual Console release in Europe


| Wario Land 4 | |||
|---|---|---|---|
| Allies | Wario • Kuro Neko • Keyzer • Arewo Shitain-hakase • Shop owner • Princess Shokora • Game Bot | ||
| Bosses | Spoiled Rotten • Cractus • Cuckoo Condor • Aerodent • Catbat • Golden Diva | ||
| Passages | Entry Passage • Emerald Passage • Ruby Passage • Topaz Passage • Sapphire Passage • Golden Pyramid | ||
| Reactions | Bouncy Wario • Bubble Wario • Fat Wario • Flaming Wario • Flat Wario • Frozen Wario • Puffy Wario • Snowman Wario • Bat Wario • Zombie Wario | ||
| Levels | Hall of Hieroglyphs • Palm Tree Paradise • Wildflower Fields • Mystic Lake • Monsoon Jungle • The Curious Factory • The Toxic Landfill • 40 Below Fridge • Pinball Zone • Toy Block Tower • The Big Board • Doodle Woods • Domino Row • Crescent Moon Village • Arabian Night • Fiery Cavern • Hotel Horror • Golden Passage | ||
| Places | Golden Pyramid • Item Shop • Mini-Game Shop • Pink area • Sound Room | ||
| Enemies | Beezley • Black egg • Bow Balloon • Bowler • Butatabi • Deburīna • Denden • Dice • Egg • Eggplant Warrior • Ghost • Glass bird • Goggley-Blade • Green enemy • Hammer • Harimen Zetto • Hoggus • Hotaru • Imomushi • Kaentsubo • Lips • Marumen • Mayubird • Mechanical fish • Menhanmā • Men'ono • Mine • Minicula • Moguramen • Onomī • Petbottom • Pig Head Statue • Pin enemy • Ringosukī • Robobird • Shieragutchi • Skeleton Bird • Spear-Mask • Spike Cannon • Spiky • Teddy Bear • Tobawani • Togemasuku • Togenobi • Togerobo • Totsumen • Toy Car • Utsuboankō • Yeti | ||
| Shop items | Apple Bomb • Blast Cannon • Vizorman • Bugle • Black Dog • Large Lips • Big Fist • Black Dragon • Smile | ||
| Minigames | The Wario Hop • Wario's Homerun Derby • Wario's Roulette | ||
| Objects | "!" Button • Block • Blue block • Blue Crystal • Bonfire Block • Brown block • Bubble • Button • CD • Chance wheel • Chandelier • Chomp ball • Coin • Decompressor • Diamond • Domino block • Electric spark • Flower • Flying carpet • Full Health Item • Heart • Jewel • Jewel piece • Kaeru Block • Legendary treasure • Little heart • Medal • Pinball digital counter • Pinball tulip • Piston • Red Crystal • Round red rock • Spike • Switch • Togetoge • Toy Block Door • Treasure chest • Triangle block • Vortex • Wario Car • Warp Pipe | ||
| Further info | Gallery (Golden Diva) • Media • Staff • Glitches • List of quotes • Pre-release and unused content • Warioland 4 (book) • Welcome to Greedville (Wario's Grab Bag • Wario's Crazy Caps • Wario's Dunk Tank • Greed $chool Test) | ||