List of Collectible Treasures in Paper Mario: The Origami King: Difference between revisions
(Added reformatted tables and removed construction notice) Tag: Disambiguation links |
Nintendo101 (talk | contribs) m (→Blue streamer) |
||
| (17 intermediate revisions by 5 users not shown) | |||
| Line 2: | Line 2: | ||
[[File:PMTOK Treasure Gallery 1.jpg|thumb|320px|Display of [[Musée Champignon#Treasure Gallery|Collectible Treasures]] in the [[Musée Champignon]].]] | [[File:PMTOK Treasure Gallery 1.jpg|thumb|320px|Display of [[Musée Champignon#Treasure Gallery|Collectible Treasures]] in the [[Musée Champignon]].]] | ||
{{Quote|Collectible Treasure? Ooh, it's cute! You should try to collect more of these, Mario. Maybe even all of them!|Olivia|Paper Mario: The Origami King}} | {{Quote|Collectible Treasure? Ooh, it's cute! You should try to collect more of these, Mario. Maybe even all of them!|Olivia|Paper Mario: The Origami King}} | ||
In [[Paper Mario: The Origami King]], Mario can collect treasures throughout the different [[ | In ''[[Paper Mario: The Origami King]]'', Mario can collect treasures throughout the different [[streamer]] areas, which are miniature representations of objects and characters found throughout the game. These treasures are often held within [[chest]]s and [[? Blocks]], and can also be rewarded to Mario after completing certain tasks or purchased from certain shopkeepers. Locating these blocks is made easier after purchasing the [[Treasure Alert]] from the [[Fun, Funky, and Functional]] vendor in [[Breezy Tunnel]]. Finding all Collectible Treasures in a given area will show a message informing the player of their success. This page lists the locations of all '''120''' Collectible Treasures, including pictures and information on how to obtain them. | ||
'''NOTES''': | '''NOTES''': | ||
:*Some treasures are found in areas that are inaccessible until returning later; these entries are highlighted in beige. | :*Some treasures are found in areas that are inaccessible until returning later; these entries are highlighted in beige. | ||
:*Locations absent from the list contain no Collectible Treasures | :*Locations absent from the list contain no Collectible Treasures, specifically: [[Eddy River]], [[Sweetpaper Valley]], Scorching Sandpaper [[Scorching Sandpaper West|West]] and [[Scorching Sandpaper Far East|Far East]], [[Mushroom Island]], [[Heart Island]], [[Spade Island]], [[Club Island]], [[Scuffle Island]], [[Diamond Island]], and [[Hotfoot Crater]]. | ||
==Red | ==Red streamer== | ||
<!--Image maps created by [[User:Eldritchdraaks/sandbox#PMTOK_Maps|Eldritchdraaks]] and modified for the purposes of this page--> | <!--Image maps created by [[User:Eldritchdraaks/sandbox#PMTOK_Maps|Eldritchdraaks]] and modified for the purposes of this page--> | ||
<imagemap> | <imagemap> | ||
| Line 30: | Line 30: | ||
</imagemap><noinclude><!--[[Category:Image map templates]]--></noinclude> | </imagemap><noinclude><!--[[Category:Image map templates]]--></noinclude> | ||
There are a total of 31 treasures to collect in the | There are a total of 31 treasures to collect in the red streamer area: | ||
*[[Whispering Woods]] holds '''3 treasures''' | *[[Whispering Woods]] holds '''3 treasures''' | ||
*[[Toad_Town#Paper_Mario:_The_Origami_King|Toad Town]] holds '''14 treasures''' | *[[Toad_Town#Paper_Mario:_The_Origami_King|Toad Town]] holds '''14 treasures''' | ||
| Line 45: | Line 45: | ||
!width=25%|Image | !width=25%|Image | ||
|-style="background: #d09091;font-size:120%;color:#202122" id="Whispering Woods" | |-style="background: #d09091;font-size:120%;color:#202122" id="Whispering Woods" | ||
!colspan=3|[[Whispering Woods|{{color|Whispering Woods|#202122}}]] ­ ­ ­ ­|­ ­ ­ ­ 3 treasures | |||
|- | |- | ||
!style="background-color:#372500;"|[[File:PMTOK Collectible Treasure 1 (Peach's Castle).jpg|100px|link=Peach's Castle]]<br><br>[[Peach's Castle|{{color|Peach's Castle|white}}]] | !style="background-color:#372500;"|[[File:PMTOK Collectible Treasure 1 (Peach's Castle).jpg|100px|link=Peach's Castle]]<br><br>[[Peach's Castle|{{color|Peach's Castle|white}}]] | ||
| Line 60: | Line 60: | ||
|[[File:PMTOK Whispering Woods Collectible Treasure 3.png|360px]] | |[[File:PMTOK Whispering Woods Collectible Treasure 3.png|360px]] | ||
|-style="background: #d09091;font-size:120%;color:#202122" id="Toad Town" | |-style="background: #d09091;font-size:120%;color:#202122" id="Toad Town" | ||
!colspan=3|[[Toad Town#Paper Mario: The Origami King|{{color|Toad Town|#202122}}]] ­ ­ ­ ­|­ ­ ­ ­ 14 treasures | |||
|- | |- | ||
!style="background-color:#372500;"|[[File:PMTOK Collectible Treasure 4 (Torch from Peach's Castle).jpg|100px]]<br><br>{{color|Torch from Peach's Castle|white}} | !style="background-color:#372500;"|[[File:PMTOK Collectible Treasure 4 (Torch from Peach's Castle).jpg|100px]]<br><br>{{color|Torch from Peach's Castle|white}} | ||
| Line 66: | Line 66: | ||
|[[File:PMTOK Toad Town Collectible Treasure 1.png|360px]] | |[[File:PMTOK Toad Town Collectible Treasure 1.png|360px]] | ||
|- | |- | ||
!style="background-color:#372500;"|[[File:PMTOK Collectible Treasure 5 (Camp Speaker).jpg|100px|link= | !style="background-color:#372500;"|[[File:PMTOK Collectible Treasure 5 (Camp Speaker).jpg|100px|link=Whispering Woods]]<br><br>[[Whispering Woods|{{color|Camp Speaker|white}}]] | ||
|In a treasure chest in the back garden of the house next to the accessory shop. | |In a treasure chest in the back garden of the house next to the accessory shop. | ||
|[[File:PMTOK Toad Town Collectible Treasure 2.png|360px]] | |[[File:PMTOK Toad Town Collectible Treasure 2.png|360px]] | ||
| Line 76: | Line 76: | ||
|-style="background:beige" | |-style="background:beige" | ||
!style="background-color:#372500;"|[[File:PMTOK Colored Pencils Treasure.jpg|100px|link=Colored Pencils]]<br><br>[[Colored Pencils|{{color|Colored Pencils|white}}]] | !style="background-color:#372500;"|[[File:PMTOK Colored Pencils Treasure.jpg|100px|link=Colored Pencils]]<br><br>[[Colored Pencils|{{color|Colored Pencils|white}}]] | ||
|''Required'': ''Red | |''Required'': ''Red streamer destroyed''<br><br>It can be bought from the Rocky Wrench in the harbor for 698 Coins. | ||
|[[File:PMTOK Toad Town Collectible Treasure 4.png|360px]] | |[[File:PMTOK Toad Town Collectible Treasure 4.png|360px]] | ||
|- | |- | ||
|-style="background:beige" | |-style="background:beige" | ||
!style="background-color:#372500;"|[[File:PMTOK Rubber Band Treasure.jpg|100px|link=Rubber | !style="background-color:#372500;"|[[File:PMTOK Rubber Band Treasure.jpg|100px|link=Rubber Band]]<br><br>[[Rubber Band|{{color|Rubber Band|white}}]] | ||
|''Required'': ''Blue | |''Required'': ''Blue streamer destroyed''<br><br>It can be bought from the Rocky Wrench in the harbor for 398 Coins. | ||
|[[File:PMTOK Toad Town Collectible Treasure 5.png|360px]] | |[[File:PMTOK Toad Town Collectible Treasure 5.png|360px]] | ||
|- | |- | ||
|-style="background:beige" | |-style="background:beige" | ||
!style="background-color:#372500;"|[[File:PMTOK Hole Punch Treasure.jpg|100px|link=Hole Punch]]<br><br>[[Hole Punch|{{color|Hole Punch|white}}]] | !style="background-color:#372500;"|[[File:PMTOK Hole Punch Treasure.jpg|100px|link=Hole Punch]]<br><br>[[Hole Punch|{{color|Hole Punch|white}}]] | ||
|''Required'': ''Yellow | |''Required'': ''Yellow streamer destroyed''<br><br>It can be bought from the Rocky Wrench in the harbor for 798 Coins. | ||
|[[File:PMTOK Toad Town Collectible Treasure 6.png|360px]] | |[[File:PMTOK Toad Town Collectible Treasure 6.png|360px]] | ||
|- | |- | ||
|-style="background:beige" | |-style="background:beige" | ||
!style="background-color:#372500;"|[[File:PMTOK Tape Treasure.jpg|100px|link=Tape (boss)]]<br><br>[[Tape (boss)|{{color|Tape|white}}]] | !style="background-color:#372500;"|[[File:PMTOK Tape Treasure.jpg|100px|link=Tape (boss)]]<br><br>[[Tape (boss)|{{color|Tape|white}}]] | ||
|''Required'': ''Purple | |''Required'': ''Purple streamer destroyed''<br><br>It can be bought from the Rocky Wrench in the harbor for 1280 Coins. | ||
|[[File:PMTOK Toad Town Collectible Treasure 7.png|360px]] | |[[File:PMTOK Toad Town Collectible Treasure 7.png|360px]] | ||
|- | |- | ||
|-style="background:beige" | |-style="background:beige" | ||
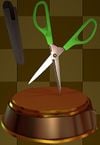
!style="background-color:#372500;"|[[File:PMTOK Scissors Treasure.jpg|100px|link=Scissors (boss)]]<br><br>[[Scissors (boss)|{{color|Scissors|white}}]] | !style="background-color:#372500;"|[[File:PMTOK Scissors Treasure.jpg|100px|link=Scissors (boss)]]<br><br>[[Scissors (boss)|{{color|Scissors|white}}]] | ||
|''Required'': ''Green | |''Required'': ''Green streamer destroyed''<br><br>It can be bought from the Rocky Wrench in the harbor for 1580 Coins. | ||
|[[File:PMTOK Toad Town Collectible Treasure 8.png|360px]] | |[[File:PMTOK Toad Town Collectible Treasure 8.png|360px]] | ||
|- | |- | ||
| Line 111: | Line 111: | ||
|-style="background:beige" | |-style="background:beige" | ||
!style="background-color:#372500;"|[[File:PMTOK Collectible Treasure 14 (Mario).jpg|100px|link=Mario]]<br><br>[[Mario|{{color|Mario|white}}]] | !style="background-color:#372500;"|[[File:PMTOK Collectible Treasure 14 (Mario).jpg|100px|link=Mario]]<br><br>[[Mario|{{color|Mario|white}}]] | ||
|''Required'': ''Green | |''Required'': ''Green streamer destroyed''<br><br>Mario has to go to the house next to the Graffiti Underground entrance and give the green Toad the Manhole Hook to receive treasure in return. | ||
|[[File:PMTOK Toad Town Collectible Treasure 11.png|360px]] | |[[File:PMTOK Toad Town Collectible Treasure 11.png|360px]] | ||
|- | |- | ||
| Line 129: | Line 129: | ||
|[[File:PMTOK Toad Town Collectible Treasure 14.png|360px]] | |[[File:PMTOK Toad Town Collectible Treasure 14.png|360px]] | ||
|-style="background: #d09091;font-size:120%;color:#202122" id="Graffiti Underground" | |-style="background: #d09091;font-size:120%;color:#202122" id="Graffiti Underground" | ||
!colspan=3|[[Graffiti Underground|{{color|Graffiti Underground|#202122}}]] ­ ­ ­ ­|­ ­ ­ ­ 1 treasure | |||
|- | |- | ||
!style="background-color:#372500;"|[[File:PMTOK Collectible Treasure 16 (Manhole Cover).jpg|100px|link=Graffiti Underground]]<br><br>[[Graffiti Underground|{{color|Manhole Cover|white}}]] | !style="background-color:#372500;"|[[File:PMTOK Collectible Treasure 16 (Manhole Cover).jpg|100px|link=Graffiti Underground]]<br><br>[[Graffiti Underground|{{color|Manhole Cover|white}}]] | ||
| | |There is a chest submerged near a pipe leading to [[Peach's Castle]]. Battling against nearby Scaredy Rats reveals a [[1,000-Fold Arms]] Magic Circle used to drain the water above. | ||
|[[File:PMTOK Collectible Treasure 16.jpg|360px]] | |[[File:PMTOK Collectible Treasure 16.jpg|360px]] | ||
|-style="background: #d09091;font-size:120%;color:#202122" id="Picnic Road" | |-style="background: #d09091;font-size:120%;color:#202122" id="Picnic Road" | ||
!colspan=3|[[Picnic Road|{{color|Picnic Road|#202122}}]] ­ ­ ­ ­|­ ­ ­ ­ 3 treasures | |||
|- | |- | ||
|-style="background:beige" | |-style="background:beige" | ||
| Line 149: | Line 149: | ||
|-style="background:beige" | |-style="background:beige" | ||
!style="background-color:#372500;"|[[File:PMTOK Collectible Treasure 24 (Sensor Lab).jpg|100px|link=Sensor Lab]]<br><br>[[Sensor Lab|{{color|Sensor Lab|white}}]] | !style="background-color:#372500;"|[[File:PMTOK Collectible Treasure 24 (Sensor Lab).jpg|100px|link=Sensor Lab]]<br><br>[[Sensor Lab|{{color|Sensor Lab|white}}]] | ||
|''Required'': ''Red | |''Required'': ''Red streamer destroyed''<br><br>Found in the chest right of the Sensor Lab. | ||
|[[File:PMTOK Picnic Road Collectible Treasure 3.png|360px]] | |[[File:PMTOK Picnic Road Collectible Treasure 3.png|360px]] | ||
|-style="background: #d09091;font-size:120%;color:#202122" id="Overlook Mountain" | |-style="background: #d09091;font-size:120%;color:#202122" id="Overlook Mountain" | ||
!colspan=3|[[Overlook Mountain|{{color|Overlook Mountain|#202122}}]] ­ ­ ­ ­|­ ­ ­ ­ 5 treasures | |||
|- | |- | ||
!style="background-color:#372500;"|[[File:PMTOK Collectible Treasure 17 (Lush Greenery).jpg|100px]]<br><br>{{color|Lush Greenery|white}} | !style="background-color:#372500;"|[[File:PMTOK Collectible Treasure 17 (Lush Greenery).jpg|100px]]<br><br>{{color|Lush Greenery|white}} | ||
| Line 174: | Line 174: | ||
|[[File:PMTOK Overlook Mountain Collectible Treasure 5.png|360px]] | |[[File:PMTOK Overlook Mountain Collectible Treasure 5.png|360px]] | ||
|-style="background: #d09091;font-size:120%;color:#202122" id="EV Temple" | |-style="background: #d09091;font-size:120%;color:#202122" id="EV Temple" | ||
!colspan=3|[[Earth Vellumental Temple|{{color|Earth Vellumental Temple|#202122}}]] ­ ­ ­ ­|­ ­ ­ ­ 3 treasures | |||
|- | |- | ||
!style="background-color:#372500;"|[[File:PMTOK Collectible Treasure 25 (Earth Vellumental Relief).jpg|100px|link=Earth Vellumental]]<br><br>[[Earth Vellumental|{{color|Earth Vellumental Relief|white}}]] | !style="background-color:#372500;"|[[File:PMTOK Collectible Treasure 25 (Earth Vellumental Relief).jpg|100px|link=Earth Vellumental]]<br><br>[[Earth Vellumental|{{color|Earth Vellumental Relief|white}}]] | ||
| Line 181: | Line 181: | ||
|- | |- | ||
!style="background-color:#372500;"|[[File:PMTOK Collectible Treasure 26 (Rocks).jpg|100px]]<br><br>{{color|Rocks|white}} | !style="background-color:#372500;"|[[File:PMTOK Collectible Treasure 26 (Rocks).jpg|100px]]<br><br>{{color|Rocks|white}} | ||
| | |A chest is found at the bottom end of the corridor with moving pillars. | ||
|[[File:PMTOK Earth Vellumental Temple Collectible Treasure 2.png|360px]] | |[[File:PMTOK Earth Vellumental Temple Collectible Treasure 2.png|360px]] | ||
|- | |- | ||
!style="background-color:#372500;"|[[File:PMTOK Collectible Treasure 27 (Pipe).jpg|100px|link=Pipe]]<br><br>[[Pipe|{{color|Pipe|white}}]] | !style="background-color:#372500;"|[[File:PMTOK Collectible Treasure 27 (Pipe).jpg|100px|link=Pipe]]<br><br>[[Pipe|{{color|Pipe|white}}]] | ||
| | |A treasure hides in a block found under a Earth Vellumental relief, on the same ledge as the stone opening that resembles the Earth Vellumental's head. | ||
|[[File:PMTOK Earth Vellumental Temple Question Block 12.png|360px]] | |[[File:PMTOK Earth Vellumental Temple Question Block 12.png|360px]] | ||
|-style="background: #d09091;font-size:120%;color:#202122" id="Overlook Tower" | |-style="background: #d09091;font-size:120%;color:#202122" id="Overlook Tower" | ||
!colspan=3|[[Overlook Tower|{{color|Overlook Tower|#202122}}]] ­ ­ ­ ­|­ ­ ­ ­ 2 treasures | |||
|- | |- | ||
|-style="background:beige" | |-style="background:beige" | ||
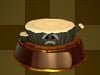
!style="background-color:#372500;"|[[File:PMTOK Collectible Treasure 28 (Chef's TRULY WILD Special).jpg|100px|link=Chef Kinopio]]<br><br>[[Chef Kinopio|{{color|Chef's TRULY WILD Special|white}}]] | !style="background-color:#372500;"|[[File:PMTOK Collectible Treasure 28 (Chef's TRULY WILD Special).jpg|100px|link=Chef Kinopio]]<br><br>[[Chef Kinopio|{{color|Chef's TRULY WILD Special|white}}]] | ||
|''Required'': ''Return after | |''Required'': ''Return after red streamer is destroyed.''<br><br>Talk to the [[Chef Kinopio]] on the second floor's kitchen. | ||
|[[File:PMTOK Chefs TRULY WILD Special Collectible Treasure.jpg|360px]] | |[[File:PMTOK Chefs TRULY WILD Special Collectible Treasure.jpg|360px]] | ||
|- | |- | ||
| Line 198: | Line 198: | ||
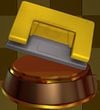
!style="background-color:#372500;"|[[File:PMTOK Collectible Treasure 29 (Overlook Tower).jpg|100px|link=Overlook Tower]]<br><br>[[Overlook Tower|{{color|Overlook Tower|white}}]] | !style="background-color:#372500;"|[[File:PMTOK Collectible Treasure 29 (Overlook Tower).jpg|100px|link=Overlook Tower]]<br><br>[[Overlook Tower|{{color|Overlook Tower|white}}]] | ||
|''Required'': ''Return after | |''Required'': ''Return after red streamer is destroyed.''<br><br>Talk to the blue toad in the coffee stand on the third floor. | ||
|[[File:PMTOK Overlook Tower Collectible Treasure.jpg|360px]] | |[[File:PMTOK Overlook Tower Collectible Treasure.jpg|360px]] | ||
|} | |} | ||
==Blue | ==Blue streamer== | ||
<imagemap> | <imagemap> | ||
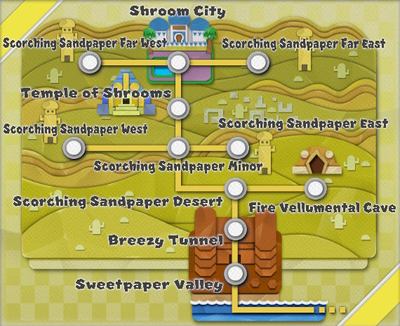
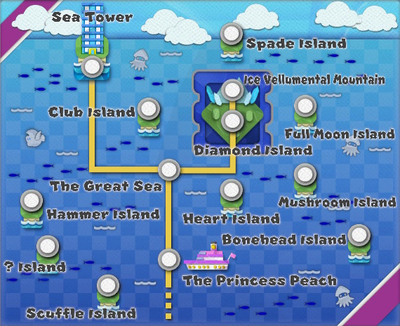
File:PMTOK Blue Streamer Map.png|400px|thumb|Click an area to see the Collectible Treasures found there. | File:PMTOK Blue Streamer Map.png|400px|thumb|Click an area to see the Collectible Treasures found there. | ||
| Line 221: | Line 221: | ||
</imagemap><noinclude><!--[[Category:Image map templates]]--></noinclude> | </imagemap><noinclude><!--[[Category:Image map templates]]--></noinclude> | ||
There are a total of 24 treasures to collect in the | There are a total of 24 treasures to collect in the blue streamer area: | ||
*[[Autumn Mountain]] hides '''4 treasures''' | *[[Autumn Mountain]] hides '''4 treasures''' | ||
*[[Chestnut Valley]] hides '''3 treasures''' | *[[Chestnut Valley]] hides '''3 treasures''' | ||
| Line 235: | Line 235: | ||
!width="25%"|Image | !width="25%"|Image | ||
|-style="background: #7b9ec3;font-size:120%;color:#202122" id="Autumn Mountain" | |-style="background: #7b9ec3;font-size:120%;color:#202122" id="Autumn Mountain" | ||
!colspan=3|[[Autumn Mountain|{{color|Autumn Mountain|#202122}}]] ­ ­ ­ ­|­ ­ ­ ­ 4 treasures | |||
|- | |- | ||
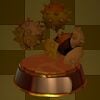
!style="background-color:#372500;"|[[File:PMTOK Collectible Treasure 30 (Fallen Leaves).jpg|100px]]<br><br>{{color|Fallen Leaves|white}} | !style="background-color:#372500;"|[[File:PMTOK Collectible Treasure 30 (Fallen Leaves).jpg|100px]]<br><br>{{color|Fallen Leaves|white}} | ||
| Line 251: | Line 251: | ||
|-style="background:beige" | |-style="background:beige" | ||
!style="background-color:#372500;"|[[File:PMTOK Collectible Treasure 33 (Toad Researcher).jpg|100px|link=Toad Researcher]]<br><br>[[Toad Researcher|{{color|Toad Researcher|white}}]] | !style="background-color:#372500;"|[[File:PMTOK Collectible Treasure 33 (Toad Researcher).jpg|100px|link=Toad Researcher]]<br><br>[[Toad Researcher|{{color|Toad Researcher|white}}]] | ||
|''Required'': ''Eddy River is filled''<br><br>In the middle of the ledge in front of the lake. | |''Required'': ''[[Eddy River]] is filled''<br><br>In the middle of the ledge in front of the lake. | ||
|[[File:PMTOK Autumn Mountain Last Collectibles.png|360px]] | |[[File:PMTOK Autumn Mountain Last Collectibles.png|360px]] | ||
|-style="background: #7b9ec3;font-size:120%;color:#202122" id="Chestnut Valley" | |-style="background: #7b9ec3;font-size:120%;color:#202122" id="Chestnut Valley" | ||
!colspan=3|[[Chestnut Valley|{{color|Chestnut Valley|#202122}}]] ­ ­ ­ ­|­ ­ ­ ­ 3 treasures | |||
|- | |- | ||
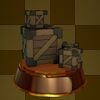
!style="background-color:#372500;"|[[File:PMTOK Collectible Treasure 34 (Sturdy Crates).jpg|100px|link=Crate]]<br><br>[[Crate|{{color|Sturdy Crates|white}}]] | !style="background-color:#372500;"|[[File:PMTOK Collectible Treasure 34 (Sturdy Crates).jpg|100px|link=Crate]]<br><br>[[Crate|{{color|Sturdy Crates|white}}]] | ||
| Line 260: | Line 260: | ||
|[[File:PMTOK Chestnut Valley Collectible Treasure 1.png|360px]] | |[[File:PMTOK Chestnut Valley Collectible Treasure 1.png|360px]] | ||
|- | |- | ||
!style="background-color:#372500;"|[[File:PMTOK Collectible Treasure 35 (Sign).jpg|100px | !style="background-color:#372500;"|[[File:PMTOK Collectible Treasure 35 (Sign).jpg|100px]]<br><br>[[Sign|{{color|Sign|white}}]] | ||
|After pulling up Bob-omb from the platform between the rolling chestnuts. | |After pulling up Bob-omb from the platform between the rolling chestnuts. | ||
|[[File:PMTOK Chestnut Valley Collectible Treasure 2.png|360px]] | |[[File:PMTOK Chestnut Valley Collectible Treasure 2.png|360px]] | ||
| Line 268: | Line 268: | ||
|[[File:PMTOK Chestnut Valley Collectible Treasure 3.png|360px]] | |[[File:PMTOK Chestnut Valley Collectible Treasure 3.png|360px]] | ||
|-style="background: #7b9ec3;font-size:120%;color:#202122" id="Water Vellumental Shrine" | |-style="background: #7b9ec3;font-size:120%;color:#202122" id="Water Vellumental Shrine" | ||
!colspan=3|[[Water Vellumental Shrine|{{color|Water Vellumental Shrine|#202122}}]] ­ ­ ­ ­|­ ­ ­ ­ 3 treasures | |||
|- | |- | ||
!style="background-color:#372500;"|[[File:PMTOK Collectible Treasure 37 (Restaurant Fridge).jpg|100px|link=Overlook Tower]]<br><br>[[Overlook Tower|{{color|Restaurant Fridge|white}}]] | !style="background-color:#372500;"|[[File:PMTOK Collectible Treasure 37 (Restaurant Fridge).jpg|100px|link=Overlook Tower]]<br><br>[[Overlook Tower|{{color|Restaurant Fridge|white}}]] | ||
| Line 282: | Line 282: | ||
|[[File:WaterVellumentalShrineCollectibleC.png|360px]] | |[[File:WaterVellumentalShrineCollectibleC.png|360px]] | ||
|-style="background: #7b9ec3;font-size:120%;color:#202122" id="Shogun Studios" | |-style="background: #7b9ec3;font-size:120%;color:#202122" id="Shogun Studios" | ||
!colspan=3|[[Shogun Studios|{{color|Shogun Studios|#202122}}]] ­ ­ ­ ­|­ ­ ­ ­ 10 treasures | |||
|- | |- | ||
!style="background-color:#372500;"|[[File:PMTOK Collectible Treasure 40 (Downriver Tour Boat).jpg|100px|link=Oarsman]]<br><br>[[Oarsman|{{color|Downriver Tour Boat|white}}]] | !style="background-color:#372500;"|[[File:PMTOK Collectible Treasure 40 (Downriver Tour Boat).jpg|100px|link=Oarsman]]<br><br>[[Oarsman|{{color|Downriver Tour Boat|white}}]] | ||
| Line 296: | Line 296: | ||
|[[File:PMTOK Shogun Studios Collectible Treasure 3.png|360px]] | |[[File:PMTOK Shogun Studios Collectible Treasure 3.png|360px]] | ||
|- | |- | ||
!style="background-color:#372500;"|[[File:PMTOK Collectible Treasure 43 (Relaxing Bench).jpg|100px|link=Bench]]<br><br>[[Bench|{{color|Relaxing Bench|white}}]] | !style="background-color:#372500;"|[[File:PMTOK Collectible Treasure 43 (Relaxing Bench).jpg|100px|link=Relaxing Bench]]<br><br>[[Relaxing Bench|{{color|Relaxing Bench|white}}]] | ||
|In a treasure chest slightly obscured by a tree near the staff room. | |In a treasure chest slightly obscured by a tree near the staff room. | ||
|[[File:PMTOK Shogun Studios Collectible Treasure 4.png|360px]] | |[[File:PMTOK Shogun Studios Collectible Treasure 4.png|360px]] | ||
| Line 326: | Line 326: | ||
|[[File:PMTOK Shogun Studios Question Block 9.png|360px]] | |[[File:PMTOK Shogun Studios Question Block 9.png|360px]] | ||
|-style="background: #7b9ec3;font-size:120%;color:#202122" id="Ninja Attraction" | |-style="background: #7b9ec3;font-size:120%;color:#202122" id="Ninja Attraction" | ||
!colspan=3|[[Ninja Attraction|{{color|Ninja Attraction|#202122}}]] ­ ­ ­ ­|­ ­ ­ ­ 3 treasures | |||
|- | |- | ||
!style="background-color:#372500;"|[[File:PMTOK Collectible Treasure 50 (Luigi).jpg|100px|link=Luigi]]<br><br>[[Luigi|{{color|Luigi|white}}]] | !style="background-color:#372500;"|[[File:PMTOK Collectible Treasure 50 (Luigi).jpg|100px|link=Luigi]]<br><br>[[Luigi|{{color|Luigi|white}}]] | ||
| Line 337: | Line 337: | ||
|- | |- | ||
!style="background-color:#372500;"|[[File:PMTOK Collectible Treasure 52 (Bob-omb).jpg|100px|link=Bob-omb (Paper Mario: The Origami King)]]<br><br>[[Bob-omb (Paper Mario: The Origami King)|{{color|Bob-omb|white}}]] | !style="background-color:#372500;"|[[File:PMTOK Collectible Treasure 52 (Bob-omb).jpg|100px|link=Bob-omb (Paper Mario: The Origami King)]]<br><br>[[Bob-omb (Paper Mario: The Origami King)|{{color|Bob-omb|white}}]] | ||
|Outside the house, navigating the roofs and | |Outside the house, navigating the roofs and moving platform takes Mario to a chest stored behind some bushes. | ||
|[[File:PMTOK Ninja Attraction Collectible Treasure 3.png|360px]] | |[[File:PMTOK Ninja Attraction Collectible Treasure 3.png|360px]] | ||
|-style="background: #7b9ec3;font-size:120%;color:#202122" id="Big Sho' Theater" | |-style="background: #7b9ec3;font-size:120%;color:#202122" id="Big Sho' Theater" | ||
!colspan=3|[[Big Sho' Theater|{{color|Big Sho' Theater|#202122}}]] ­ ­ ­ ­|­ ­ ­ ­ 1 treasure | |||
|- | |- | ||
!style="background-color:#372500;"|[[File:PMTOK Collectible Treasure 53 (Paper Macho Snifit Outlaw).jpg|100px|link=Paper Macho Snifit Outlaw]]<br><br>[[Paper Macho Snifit Outlaw|{{color|Paper Macho Snifit Outlaw|white}}]] | !style="background-color:#372500;"|[[File:PMTOK Collectible Treasure 53 (Paper Macho Snifit Outlaw).jpg|100px|link=Paper Macho Snifit Outlaw]]<br><br>[[Paper Macho Snifit Outlaw|{{color|Paper Macho Snifit Outlaw|white}}]] | ||
|If Mario exits stage left on the western-themed stage, he will find a treasure chest. | |If Mario exits stage right (left on the screen) on the western-themed stage, he will find a treasure chest. | ||
|[[File:PMTOK Paper Macho Snifit Outlaw Collectible Treasure.png|360px]] | |[[File:PMTOK Paper Macho Snifit Outlaw Collectible Treasure.png|360px]] | ||
|} | |} | ||
==Yellow | ==Yellow streamer== | ||
<imagemap> | <imagemap> | ||
File:PMTOK Yellow Streamer Map.png|400px|thumb|Click an area to see the Collectible Treasures found there. | File:PMTOK Yellow Streamer Map.png|400px|thumb|Click an area to see the Collectible Treasures found there. | ||
| Line 369: | Line 369: | ||
</imagemap><noinclude><!--[[Category:Image map templates]]--></noinclude> | </imagemap><noinclude><!--[[Category:Image map templates]]--></noinclude> | ||
There are a total of 17 treasures to collect in the | There are a total of 17 treasures to collect in the yellow streamer area: | ||
*[[Breezy Tunnel]] hold '''2 treasures''' | *[[Breezy Tunnel]] hold '''2 treasures''' | ||
*[[Scorching Sandpaper Desert]] holds '''3 treasures''' | *[[Scorching Sandpaper Desert]] holds '''3 treasures''' | ||
| Line 385: | Line 385: | ||
!width=25%|Image | !width=25%|Image | ||
|-style="background: #cbc689;font-size:120%;color:#202122" id="Breezy Tunnel" | |-style="background: #cbc689;font-size:120%;color:#202122" id="Breezy Tunnel" | ||
!colspan=3|[[Breezy Tunnel|{{color|Breezy Tunnel|#202122}}]] ­ ­ ­ ­|­ ­ ­ ­ 2 treasures | |||
|- | |- | ||
!style="background-color:#372500;"|[[File:PMTOK Collectible Treasure 57 (Huge Rock).jpg|100px|link=Sweetpaper Valley]]<br><br>[[Sweetpaper Valley|{{color|Huge Rock|white}}]] | !style="background-color:#372500;"|[[File:PMTOK Collectible Treasure 57 (Huge Rock).jpg|100px|link=Sweetpaper Valley]]<br><br>[[Sweetpaper Valley|{{color|Huge Rock|white}}]] | ||
| Line 395: | Line 395: | ||
|[[File:PMTOK Breezy Tunnel Collectible Treasure 2.png|360px]] | |[[File:PMTOK Breezy Tunnel Collectible Treasure 2.png|360px]] | ||
|-style="background: #cbc689;font-size:120%;color:#202122" id="Sandpaper Desert" | |-style="background: #cbc689;font-size:120%;color:#202122" id="Sandpaper Desert" | ||
!colspan=3|[[Scorching Sandpaper Desert|{{color|Scorching Sandpaper Desert|#202122}}]] ­ ­ ­ ­|­ ­ ­ ­ 3 treasures | |||
|- | |- | ||
|-style="background:beige" | |-style="background:beige" | ||
| Line 409: | Line 409: | ||
|-style="background:beige" | |-style="background:beige" | ||
!style="background-color:#372500;"|[[File:PMTOK Collectible Treasure 64 (Temple of Shrooms Statues).jpg|100px|link=Temple of Shrooms]]<br><br>[[Temple of Shrooms|{{color|Temple of Shrooms Statues|white}}]] | !style="background-color:#372500;"|[[File:PMTOK Collectible Treasure 64 (Temple of Shrooms Statues).jpg|100px|link=Temple of Shrooms]]<br><br>[[Temple of Shrooms|{{color|Temple of Shrooms Statues|white}}]] | ||
|''Required'': ''Yellow | |''Required'': ''Yellow streamer destroyed''<br><br>Mario must strike the Hidden Block above the crate in the freezer. | ||
|[[File:ScorchingSandpaperDesertBlock5.png|360px]] | |[[File:ScorchingSandpaperDesertBlock5.png|360px]] | ||
|-style="background: #cbc689;font-size:120%;color:#202122" id="Sandpaper Minor" | |-style="background: #cbc689;font-size:120%;color:#202122" id="Sandpaper Minor" | ||
!colspan=3|[[Scorching Sandpaper Minor|{{color|Scorching Sandpaper Minor|#202122}}]] ­ ­ ­ ­|­ ­ ­ ­ 1 treasure | |||
|- | |- | ||
|-style="background:beige" | |-style="background:beige" | ||
| Line 419: | Line 419: | ||
|[[File:PMTOK Scorching Sandpaper Minor Collectible Treasure.png|360px]] | |[[File:PMTOK Scorching Sandpaper Minor Collectible Treasure.png|360px]] | ||
|-style="background: #cbc689;font-size:120%;color:#202122" id="Sandpaper East" | |-style="background: #cbc689;font-size:120%;color:#202122" id="Sandpaper East" | ||
!colspan=3|[[Scorching Sandpaper East|{{color|Scorching Sandpaper East|#202122}}]] ­ ­ ­ ­|­ ­ ­ ­ 1 treasure | |||
|- | |- | ||
!style="background-color:#372500;"|[[File:PMTOK Collectible Treasure 59 (Paper Macho Boo).jpg|100px|link=Paper Macho Boo]]<br><br>[[Paper Macho Boo|{{color|Paper Macho Boo|white}}]] | !style="background-color:#372500;"|[[File:PMTOK Collectible Treasure 59 (Paper Macho Boo).jpg|100px|link=Paper Macho Boo]]<br><br>[[Paper Macho Boo|{{color|Paper Macho Boo|white}}]] | ||
| Line 425: | Line 425: | ||
|[[File:PMTOK Scorching Sandpaper Desert East Collectible Treasure.png|360px]] | |[[File:PMTOK Scorching Sandpaper Desert East Collectible Treasure.png|360px]] | ||
|-style="background: #cbc689;font-size:120%;color:#202122" id="Shroom City" | |-style="background: #cbc689;font-size:120%;color:#202122" id="Shroom City" | ||
!colspan=3|[[Shroom City (Paper Mario: The Origami King)|{{color|Shroom City|#202122}}]] ­ ­ ­ ­|­ ­ ­ ­ 6 treasures | |||
|- | |- | ||
!style="background-color:#372500;"|[[File:PMTOK Collectible Treasure 65 (Snif City Royal Hotel).jpg|100px|link=Shroom City]]<br><br>[[Shroom City|{{color|Snif City Royal Hotel|white}}]] | !style="background-color:#372500;"|[[File:PMTOK Collectible Treasure 65 (Snif City Royal Hotel).jpg|100px|link=Shroom City]]<br><br>[[Shroom City|{{color|Snif City Royal Hotel|white}}]] | ||
| Line 451: | Line 451: | ||
|-style="background:beige" | |-style="background:beige" | ||
!style="background-color:#372500;"|[[File:PMTOK Collectible Treasure 70 (Lamp Scam).jpg|100px]]<br><br>{{color|Lamp Scam|white}} | !style="background-color:#372500;"|[[File:PMTOK Collectible Treasure 70 (Lamp Scam).jpg|100px]]<br><br>{{color|Lamp Scam|white}} | ||
|''Required'': ''Yellow | |''Required'': ''Yellow streamer destroyed''<br><br>Given by Yellow Toad in the lamp stall. | ||
|[[File:PMTOK Shroom City Collectible Treasure 6.png|360px]] | |[[File:PMTOK Shroom City Collectible Treasure 6.png|360px]] | ||
|-style="background: #cbc689;font-size:120%;color:#202122" id="Sandpaper Far West" | |-style="background: #cbc689;font-size:120%;color:#202122" id="Sandpaper Far West" | ||
!colspan=3|[[Scorching Sandpaper Far West|{{color|Scorching Sandpaper Far West|#202122}}]] ­ ­ ­ ­|­ ­ ­ ­ 1 treasure | |||
|- | |- | ||
!style="background-color:#372500;"|[[File:PMTOK Collectible Treasure 62 (Mega Paper Macho Pokey).jpg|100px|link=Mega Paper Macho Pokey]]<br><br>[[Mega Paper Macho Pokey|{{color|Mega Paper Macho Pokey|white}}]] | !style="background-color:#372500;"|[[File:PMTOK Collectible Treasure 62 (Mega Paper Macho Pokey).jpg|100px|link=Mega Paper Macho Pokey]]<br><br>[[Mega Paper Macho Pokey|{{color|Mega Paper Macho Pokey|white}}]] | ||
| Line 460: | Line 460: | ||
|[[File:PMTOK Scorching Sandpaper Far West Collectible Treasure.png|360px]] | |[[File:PMTOK Scorching Sandpaper Far West Collectible Treasure.png|360px]] | ||
|-style="background: #cbc689;font-size:120%;color:#202122" id="FV Cave" | |-style="background: #cbc689;font-size:120%;color:#202122" id="FV Cave" | ||
!colspan=3|[[Fire Vellumental Cave|{{color|Fire Vellumental Cave|#202122}}]] ­ ­ ­ ­|­ ­ ­ ­ 1 treasure | |||
|- | |- | ||
!style="background-color:#372500;"|[[File:PMTOK Collectible Treasure 71 (Fire Flower).jpg|100px|link=Fire Flower]]<br><br>[[Fire Flower|{{color|Fire Flower|white}}]] | !style="background-color:#372500;"|[[File:PMTOK Collectible Treasure 71 (Fire Flower).jpg|100px|link=Fire Flower]]<br><br>[[Fire Flower|{{color|Fire Flower|white}}]] | ||
| Line 466: | Line 466: | ||
|[[File:PMTOK Fire Vellumental Cave Collectible Treasure.png|360px]] | |[[File:PMTOK Fire Vellumental Cave Collectible Treasure.png|360px]] | ||
|-style="background: #cbc689;font-size:120%;color:#202122" id="Temple of Shrooms" | |-style="background: #cbc689;font-size:120%;color:#202122" id="Temple of Shrooms" | ||
!colspan=3|[[Temple of Shrooms|{{color|Temple of Shrooms|#202122}}]] ­ ­ ­ ­|­ ­ ­ ­ 2 treasures | |||
|- | |- | ||
!style="background-color:#372500;"|[[File:PMTOK Collectible Treasure 72 (Fire Vellumental Statue).jpg|100px|link=Fire Vellumental]]<br><br>[[Fire Vellumental|{{color|Fire Vellumental Statue|white}}]] | !style="background-color:#372500;"|[[File:PMTOK Collectible Treasure 72 (Fire Vellumental Statue).jpg|100px|link=Fire Vellumental]]<br><br>[[Fire Vellumental|{{color|Fire Vellumental Statue|white}}]] | ||
| Line 477: | Line 477: | ||
|} | |} | ||
==Purple | ==Purple streamer== | ||
<imagemap> | <imagemap> | ||
File:PMTOK Purple Streamer Map.png|400px|thumb|Click an area to see the Collectible Treasures found there. | File:PMTOK Purple Streamer Map.png|400px|thumb|Click an area to see the Collectible Treasures found there. | ||
| Line 506: | Line 506: | ||
</imagemap><noinclude><!--[[Category:Image map templates]]--></noinclude> | </imagemap><noinclude><!--[[Category:Image map templates]]--></noinclude> | ||
There are a total of 24 treasures to collect in the | There are a total of 24 treasures to collect in the purple streamer area: | ||
*[[The Great Sea]] holds '''10 treasures''' | *[[The Great Sea]] holds '''10 treasures''' | ||
*[[The Princess Peach]] holds '''3 treasures''' | *[[The Princess Peach]] holds '''3 treasures''' | ||
| Line 522: | Line 522: | ||
!width=25%|Image | !width=25%|Image | ||
|-style="background: #ad7caa;font-size:120%;color:#202122" id="Sea" | |-style="background: #ad7caa;font-size:120%;color:#202122" id="Sea" | ||
!colspan=3|[[The Great Sea|{{color|The Great Sea|#202122}}]] ­ ­ ­ ­|­ ­ ­ ­ 10 treasures | |||
|- | |- | ||
!style="background-color:#372500;"|[[File:PMTOK Collectible Treasure 80 (Shangri-Spa Toad Statue).jpg|100px|link=Shangri-Spa Toad]]<br><br>[[Shangri-Spa Toad|{{color|Shangri-Spa Toad|white}}]] | !style="background-color:#372500;"|[[File:PMTOK Collectible Treasure 80 (Shangri-Spa Toad Statue).jpg|100px|link=Shangri-Spa Toad]]<br><br>[[Shangri-Spa Toad|{{color|Shangri-Spa Toad|white}}]] | ||
| Line 564: | Line 564: | ||
|[[File:PMTOK The Great Sea Collectible Treasure 10.png|360px]] | |[[File:PMTOK The Great Sea Collectible Treasure 10.png|360px]] | ||
|-style="background: #ad7caa;font-size:120%;color:#202122" id="Princess Peach" | |-style="background: #ad7caa;font-size:120%;color:#202122" id="Princess Peach" | ||
!colspan=3|[[The Princess Peach|{{color|The Princess Peach|#202122}}]] ­ ­ ­ ­|­ ­ ­ ­ 3 treasures | |||
|- | |- | ||
!style="background-color:#372500;"|[[File:PMTOK Collectible Treasure 54 (Block).jpg|100px|link=Block]]<br><br>[[Block|{{color|Block|white}}]] | !style="background-color:#372500;"|[[File:PMTOK Collectible Treasure 54 (Block).jpg|100px|link=Block]]<br><br>[[Block|{{color|Block|white}}]] | ||
| Line 579: | Line 579: | ||
|[[File:PMTOK Collectible Treasure 56.jpg|360px]] | |[[File:PMTOK Collectible Treasure 56.jpg|360px]] | ||
|-style="background: #ad7caa;font-size:120%;color:#202122" id="Bonehead" | |-style="background: #ad7caa;font-size:120%;color:#202122" id="Bonehead" | ||
!colspan=3|[[Bonehead Island|{{color|Bonehead Island|#202122}}]] ­ ­ ­ ­|­ ­ ­ ­ 1 treasure | |||
|- | |- | ||
!style="background-color:#372500;"|[[File:PMTOK Collectible Treasure 74 (Submarine Marino).jpg|100px|link=Super Marino]]<br><br>[[Super Marino|{{color|Submarine "Marino"|white}}]] | !style="background-color:#372500;"|[[File:PMTOK Collectible Treasure 74 (Submarine Marino).jpg|100px|link=Super Marino]]<br><br>[[Super Marino|{{color|Submarine "Marino"|white}}]] | ||
| Line 585: | Line 585: | ||
|[[File:PMTOK Bonehead Island Collectible Treasure.png|360px]] | |[[File:PMTOK Bonehead Island Collectible Treasure.png|360px]] | ||
|-style="background: #ad7caa;font-size:120%;color:#202122" id="Moon" | |-style="background: #ad7caa;font-size:120%;color:#202122" id="Moon" | ||
!colspan=3|Crescent Moon Island / [[Full Moon Island|{{color|Full Moon Island|#202122}}]] ­ ­ ­ ­|­ ­ ­ ­ 1 treasure | |||
|- | |- | ||
!style="background-color:#372500;"|[[File:PMTOK Collectible Treasure 75 (Paper Macho Koopa Paratroopa).jpg|100px|link=Paper Macho Koopa Paratroopa]]<br><br>[[Paper Macho Koopa Paratroopa|{{color|Paper Macho Koopa Paratroopa|white}}]] | !style="background-color:#372500;"|[[File:PMTOK Collectible Treasure 75 (Paper Macho Koopa Paratroopa).jpg|100px|link=Paper Macho Koopa Paratroopa]]<br><br>[[Paper Macho Koopa Paratroopa|{{color|Paper Macho Koopa Paratroopa|white}}]] | ||
| Line 591: | Line 591: | ||
|[[File:PMTOK Full Moon Island Collectible Treasure.png|360px]] | |[[File:PMTOK Full Moon Island Collectible Treasure.png|360px]] | ||
|-style="background: #ad7caa;font-size:120%;color:#202122" id="Question" | |-style="background: #ad7caa;font-size:120%;color:#202122" id="Question" | ||
!colspan=3|[[? Island|{{color|? Island|#202122}}]] ­ ­ ­ ­|­ ­ ­ ­ 2 treasures | |||
|- | |- | ||
!style="background-color:#372500;"|[[File:PMTOK Collectible Treasure 76 (- Block).jpg|100px|link=? Block]]<br><br>[[? Block|{{color|? Block|white}}]] | !style="background-color:#372500;"|[[File:PMTOK Collectible Treasure 76 (- Block).jpg|100px|link=? Block]]<br><br>[[? Block|{{color|? Block|white}}]] | ||
| Line 601: | Line 601: | ||
|[[File:PMTOK Question Mark Island Not-Bottomless Holes 5 and 6.png|360px]] | |[[File:PMTOK Question Mark Island Not-Bottomless Holes 5 and 6.png|360px]] | ||
|-style="background: #ad7caa;font-size:120%;color:#202122" id="Hammer" | |-style="background: #ad7caa;font-size:120%;color:#202122" id="Hammer" | ||
!colspan=3|[[Hammer Island|{{color|Hammer Island|#202122}}]] ­ ­ ­ ­|­ ­ ­ ­ 2 treasures | |||
|- | |- | ||
!style="background-color:#372500;"|[[File:PMTOK Collectible Treasure 78 (Hammer).jpg|100px|link=Hammer]]<br><br>[[Hammer|{{color|Hammer|white}}]] | !style="background-color:#372500;"|[[File:PMTOK Collectible Treasure 78 (Hammer).jpg|100px|link=Hammer]]<br><br>[[Hammer|{{color|Hammer|white}}]] | ||
| Line 611: | Line 611: | ||
|[[File:PMTOK Hammer Island Question Block 4.png|360px]] | |[[File:PMTOK Hammer Island Question Block 4.png|360px]] | ||
|-style="background: #ad7caa;font-size:120%;color:#202122" id="IV Mountain" | |-style="background: #ad7caa;font-size:120%;color:#202122" id="IV Mountain" | ||
!colspan=3|[[Ice Vellumental Mountain|{{color|Ice Vellumental Mountain|#202122}}]] ­ ­ ­ ­|­ ­ ­ ­ 4 treasures | |||
|- | |- | ||
!style="background-color:#372500;"|[[File:PMTOK Collectible Treasure 90 (Paper Macho Buzzy Beetle).jpg|100px|link=Paper Macho Buzzy Beetle]]<br><br>[[Paper Macho Buzzy Beetle|{{color|Paper Macho Buzzy Beetle|white}}]] | !style="background-color:#372500;"|[[File:PMTOK Collectible Treasure 90 (Paper Macho Buzzy Beetle).jpg|100px|link=Paper Macho Buzzy Beetle]]<br><br>[[Paper Macho Buzzy Beetle|{{color|Paper Macho Buzzy Beetle|white}}]] | ||
| Line 618: | Line 618: | ||
|- | |- | ||
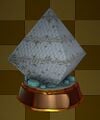
!style="background-color:#372500;"|[[File:PMTOK Collectible Treasure 91 (Ice Vellumental Bust).jpg|100px|link=Ice Vellumental]]<br><br>[[Ice Vellumental|{{color|Ice Vellumental Bust|white}}]] | !style="background-color:#372500;"|[[File:PMTOK Collectible Treasure 91 (Ice Vellumental Bust).jpg|100px|link=Ice Vellumental]]<br><br>[[Ice Vellumental|{{color|Ice Vellumental Bust|white}}]] | ||
|Toward the top of the mountain is a [[Warp Pipe]] taking Mario back to the entrance, creating a shortcut. Here, there is a small alcove with a chest. | |Toward the top of the mountain is a [[Warp Pipe]] taking Mario back to the entrance, creating a shortcut. Here, there is a small alcove with a chest. | ||
|[[File:PMTOK Ice Vellumental Mountain Collectible Treasure 2.png|360px]] | |[[File:PMTOK Ice Vellumental Mountain Collectible Treasure 2.png|360px]] | ||
| Line 630: | Line 629: | ||
|[[File:PMTOK Ice Vellumental Mountain Collectible Treasure 4.png|360px]] | |[[File:PMTOK Ice Vellumental Mountain Collectible Treasure 4.png|360px]] | ||
|-style="background: #ad7caa;font-size:120%;color:#202122" id="Sea Tower" | |-style="background: #ad7caa;font-size:120%;color:#202122" id="Sea Tower" | ||
!colspan=3|[[Sea Tower|{{color|Sea Tower|#202122}}]] ­ ­ ­ ­|­ ­ ­ ­ 1 treasure | |||
|- | |- | ||
!style="background-color:#372500;"|[[File:PMTOK Collectible Treasure 94 (Sea Captain Toad's Boat).jpg|100px|link=Sea Captain Toad]]<br><br>[[Sea Captain Toad|{{color|Sea Captain Toad's Boat|white}}]] | !style="background-color:#372500;"|[[File:PMTOK Collectible Treasure 94 (Sea Captain Toad's Boat).jpg|100px|link=Sea Captain Toad]]<br><br>[[Sea Captain Toad|{{color|Sea Captain Toad's Boat|white}}]] | ||
| Line 637: | Line 636: | ||
|} | |} | ||
==Green | ==Green streamer== | ||
<imagemap> | <imagemap> | ||
File:PMTOK Green Streamer Map.png|400px|thumb|Click an area to see the Collectible Treasures found there. | File:PMTOK Green Streamer Map.png|400px|thumb|Click an area to see the Collectible Treasures found there. | ||
| Line 650: | Line 649: | ||
</imagemap><noinclude><!--[[Category:Image map templates]]--></noinclude> | </imagemap><noinclude><!--[[Category:Image map templates]]--></noinclude> | ||
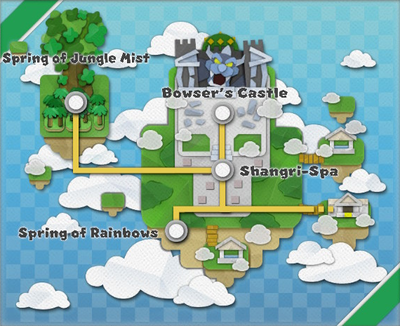
There are a total of 18 treasures to collect in the | There are a total of 18 treasures to collect in the green streamer area: | ||
*[[Shangri-Spa]] holds '''9 treasures''' | *[[Shangri-Spa]] holds '''9 treasures''' | ||
*[[Spring of Jungle Mist]] holds '''4 treasures''' | *[[Spring of Jungle Mist]] holds '''4 treasures''' | ||
| Line 662: | Line 661: | ||
!width=25%|Image | !width=25%|Image | ||
|-style="background: #73cb76;font-size:120%;color:#202122" id="Spa" | |-style="background: #73cb76;font-size:120%;color:#202122" id="Spa" | ||
!colspan=3|[[Shangri-Spa|{{color|Shangri-Spa|#202122}}]] ­ ­ ­ ­|­ ­ ­ ­ 9 treasures | |||
|- | |- | ||
!style="background-color:#372500;"|[[File:PMTOK Collectible Treasure 95 (Earth Vellumental Idol).jpg|100px|link=Earth Vellumental]]<br><br>[[Earth Vellumental|{{color|Earth Vellumental Idol|white}}]] | !style="background-color:#372500;"|[[File:PMTOK Collectible Treasure 95 (Earth Vellumental Idol).jpg|100px|link=Earth Vellumental]]<br><br>[[Earth Vellumental|{{color|Earth Vellumental Idol|white}}]] | ||
| Line 701: | Line 700: | ||
|[[File:PMTOK Boss Sumo Bro Cloud Collectible Treasure.jpg|360px]] | |[[File:PMTOK Boss Sumo Bro Cloud Collectible Treasure.jpg|360px]] | ||
|-style="background: #73cb76;font-size:120%;color:#202122" id="Jungle" | |-style="background: #73cb76;font-size:120%;color:#202122" id="Jungle" | ||
!colspan=3|[[Spring of Jungle Mist|{{color|Spring of Jungle Mist|#202122}}]] ­ ­ ­ ­|­ ­ ­ ­ 4 treasures | |||
|- | |- | ||
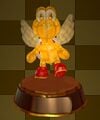
!style="background-color:#372500;"|[[File:PMTOK Collectible Treasure 104 (Bowser Jr.).jpg|100px|link=Bowser Jr.]]<br><br>[[Bowser Jr.|{{color|Bowser Jr.|white}}]] | !style="background-color:#372500;"|[[File:PMTOK Collectible Treasure 104 (Bowser Jr.).jpg|100px|link=Bowser Jr.]]<br><br>[[Bowser Jr.|{{color|Bowser Jr.|white}}]] | ||
| Line 719: | Line 718: | ||
|[[File:CollectibleTreasure-107.png|360px]] | |[[File:CollectibleTreasure-107.png|360px]] | ||
|-style="background: #73cb76;font-size:120%;color:#202122" id="Rainbow" | |-style="background: #73cb76;font-size:120%;color:#202122" id="Rainbow" | ||
!colspan=3|[[Spring of Rainbows|{{color|Spring of Rainbows|#202122}}]] ­ ­ ­ ­|­ ­ ­ ­ 1 treasure | |||
|- | |- | ||
!style="background-color:#372500;"|[[File:PMTOK Collectible Treasure 108 (Sudden Death Cannon).jpg|100px|link=Shy Guys Finish Last]]<br><br>[[Shy Guys Finish Last|{{color|Sudden Death Cannon|white}}]] | !style="background-color:#372500;"|[[File:PMTOK Collectible Treasure 108 (Sudden Death Cannon).jpg|100px|link=Shy Guys Finish Last]]<br><br>[[Shy Guys Finish Last|{{color|Sudden Death Cannon|white}}]] | ||
| Line 725: | Line 724: | ||
|[[File:PMTOK Collectible Treasure 108.jpg|360px]] | |[[File:PMTOK Collectible Treasure 108.jpg|360px]] | ||
|-style="background: #73cb76;font-size:120%;color:#202122" id="Bowser" | |-style="background: #73cb76;font-size:120%;color:#202122" id="Bowser" | ||
!colspan=3|[[Bowser's Castle#Paper Mario series|{{color|Bowser's Castle|#202122}}]] ­ ­ ­ ­|­ ­ ­ ­ 4 treasures | |||
|- | |- | ||
!style="background-color:#372500;"|[[File:PMTOK Collectible Treasure 109 (Paper Macho Chain Chomp).jpg|100px|link=Paper Macho Chain Chomp]]<br><br>[[Paper Macho Chain Chomp|{{color|Paper Macho Chain Chomp|white}}]] | !style="background-color:#372500;"|[[File:PMTOK Collectible Treasure 109 (Paper Macho Chain Chomp).jpg|100px|link=Paper Macho Chain Chomp]]<br><br>[[Paper Macho Chain Chomp|{{color|Paper Macho Chain Chomp|white}}]] | ||
| Line 754: | Line 753: | ||
!width=25%|Image | !width=25%|Image | ||
|-style="background: #6b6486;font-size:120%;color:#e6e8e9;border: #6b6486" | |-style="background: #6b6486;font-size:120%;color:#e6e8e9;border: #6b6486" | ||
!colspan=3|[[Origami Castle|{{color|Origami Castle|#e6e8e9}}]] ­ ­ ­ ­|­ ­ ­ ­ 6 treasures | |||
|- | |- | ||
!style="background-color:#372500;"|[[File:PMTOK Collectible Treasure | !style="background-color:#372500;"|[[File:PMTOK Collectible Treasure 113 (Luigi's Kart).jpg|100px|link=Kart#Paper Mario: The Origami King]]<br><br>[[Kart#Paper Mario: The Origami King|{{color|Luigi's Kart|white}}]] | ||
|Found in a [[? Block]] at the end of the first path in the first room, guarded by a [[Fire Bro]]. | |Found in a [[? Block]] at the end of the first path in the first room, guarded by a [[Fire Bro]]. | ||
|[[File:OrigamiCastleCollectibleA.png|360px]] | |[[File:OrigamiCastleCollectibleA.png|360px]] | ||
| Line 765: | Line 764: | ||
|- | |- | ||
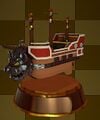
!style="background-color:#372500;"|[[File:PMTOK Collectible Treasure 115 (Paper Plane Squadron).jpg|100px|link=Paper Plane Squadron]]<br><br>[[Paper Plane Squadron|{{color|Paper Plane Squadron|white}}]] | !style="background-color:#372500;"|[[File:PMTOK Collectible Treasure 115 (Paper Plane Squadron).jpg|100px|link=Paper Plane Squadron]]<br><br>[[Paper Plane Squadron|{{color|Paper Plane Squadron|white}}]] | ||
|After constructing the origami | |After constructing the origami house in the room right of the main hall, Mario must enter and hit the ? Block in the northwest corner to receive the treasure. | ||
|[[File:OrigamiCastleCollectibleC.png|360px]] | |[[File:OrigamiCastleCollectibleC.png|360px]] | ||
|- | |- | ||
| Line 839: | Line 838: | ||
|1 | |1 | ||
|- | |- | ||
|[[Shroom City]] | |[[Shroom City (Paper Mario: The Origami King)|Shroom City]] | ||
|6 | |6 | ||
|- | |- | ||
| Line 898: | Line 897: | ||
*[[List of ? Blocks in Paper Mario: The Origami King]] | *[[List of ? Blocks in Paper Mario: The Origami King]] | ||
*[[Not-Bottomless Hole]] | *[[Not-Bottomless Hole]] | ||
*[[Musée_Champignon#Trophies|List of trophies in Paper Mario: The Origami King]] | |||
{{PMTOK}} | {{PMTOK}} | ||
[[Category:Item locations|Collectible Treasures in Paper Mario: The Origami King]] | [[Category:Item locations|Collectible Treasures in Paper Mario: The Origami King]] | ||
[[Category:Paper Mario: The Origami King]] | [[Category:Paper Mario: The Origami King]] | ||
Revision as of 12:34, May 4, 2024

- “Collectible Treasure? Ooh, it's cute! You should try to collect more of these, Mario. Maybe even all of them!”
- —Olivia, Paper Mario: The Origami King
In Paper Mario: The Origami King, Mario can collect treasures throughout the different streamer areas, which are miniature representations of objects and characters found throughout the game. These treasures are often held within chests and ? Blocks, and can also be rewarded to Mario after completing certain tasks or purchased from certain shopkeepers. Locating these blocks is made easier after purchasing the Treasure Alert from the Fun, Funky, and Functional vendor in Breezy Tunnel. Finding all Collectible Treasures in a given area will show a message informing the player of their success. This page lists the locations of all 120 Collectible Treasures, including pictures and information on how to obtain them.
NOTES:
- Some treasures are found in areas that are inaccessible until returning later; these entries are highlighted in beige.
- Locations absent from the list contain no Collectible Treasures, specifically: Eddy River, Sweetpaper Valley, Scorching Sandpaper West and Far East, Mushroom Island, Heart Island, Spade Island, Club Island, Scuffle Island, Diamond Island, and Hotfoot Crater.
Red streamer
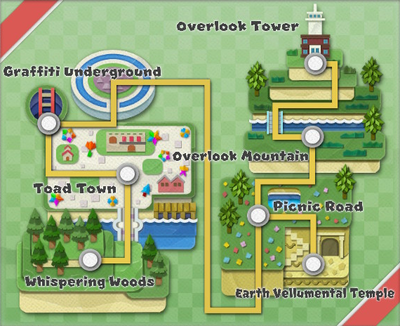
There are a total of 31 treasures to collect in the red streamer area:
- Whispering Woods holds 3 treasures
- Toad Town holds 14 treasures
- Graffiti Underground holds 1 treasure
- Picnic Road holds 3 treasures
- Overlook Mountain holds 5 treasures
- Earth Vellumental Temple holds 3 treasures
- Overlook Tower holds 2 treasures
| Treasure | Description | Image |
|---|---|---|
| #202122 | 3 treasures | ||
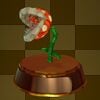
 white |
Found on a ledge across a path of brambles. To access it without damage, Mario needs to be under the effects of a Superstar won from a nearby leaf memory game. | 
|
 white |
Found beside the spring used to restore a Shriveled Seed for Ol' Grandsappy. | 
|
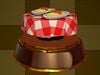
 white |
Required: Rescue Toad's BBQ Foodeatery caretaker. Found inside the cabin at the Toad BBQ Foodeatery, opened after rescuing the owner from The Great Sea. |

|
| #202122 | 14 treasures | ||
.jpg) white |
There are two large crates behind the first Save Block in Toad Town. Behind them is an entrance to a small tunnel. Go through the tunnel to reach a small garden and a treasure chest. | 
|
 white |
In a treasure chest in the back garden of the house next to the accessory shop. | 
|
 white |
Hammering a closed parasol at the local café reveals a Magic Circle, used to open a path up from the café to the nearby balcony. Defeating the Paper Macho Goomba on the roof releases a yellow Snifit who rewards Mario. | 
|
 white |
Required: Red streamer destroyed It can be bought from the Rocky Wrench in the harbor for 698 Coins. |

|
 white |
Required: Blue streamer destroyed It can be bought from the Rocky Wrench in the harbor for 398 Coins. |

|
 white |
Required: Yellow streamer destroyed It can be bought from the Rocky Wrench in the harbor for 798 Coins. |

|
 white |
Required: Purple streamer destroyed It can be bought from the Rocky Wrench in the harbor for 1280 Coins. |

|
 white |
Required: Green streamer destroyed It can be bought from the Rocky Wrench in the harbor for 1580 Coins. |

|
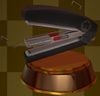 white |
Required: Stapler defeated It can be bought from the Rocky Wrench in the harbor for 498 Coins. |

|
 white |
Required: Rescue Master Toad in Shroom City. Found inside the mansion next to the tea stand. |

|
 white |
Required: Green streamer destroyed Mario has to go to the house next to the Graffiti Underground entrance and give the green Toad the Manhole Hook to receive treasure in return. |

|
 white |
Required: Defeat all bosses in the Bossotronic Fighter. Given by the Battle Lab Toad. |

|
 white |
Required: Defeat King Olly It can be bought from the Weapon and Item shop for 70000 Coins (if no discount is in effect). |

|
 white |
Required: Defeat King Olly Found in the center of town. |

|
| #202122 | 1 treasure | ||
 white |
There is a chest submerged near a pipe leading to Peach's Castle. Battling against nearby Scaredy Rats reveals a 1,000-Fold Arms Magic Circle used to drain the water above. | 
|
| #202122 | 3 treasures | ||
 white |
Required: Earth Vellumental defeated Bought in the shop right of the Earth Vellumental entrance for 2400 Coins. |

|
 white |
Required: Purchase Shellvation Is Near Bought in the shop right of the Earth Vellumental entrance for 3800 Coins. |

|
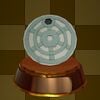
 white |
Required: Red streamer destroyed Found in the chest right of the Sensor Lab. |

|
| #202122 | 5 treasures | ||
.jpg) white |
From the start of the area, Mario has to keep going to the left. | 
|
 white |
Keep going left from Monty Mole auctioner to find a secret area under the slope. | 
|
 white |
Go to the right from the Save Block to reach a fishing spot, Not-Bottomless Hole and ? Block. Ignore them and go to the left to reach a secret area with another hole and treasure chest. | 
|
 white |
Fished out from water by catching a fish with sparkles. | 
|
 white |
Found south of the area with Paper Macho Shy Guys. | 
|
| #202122 | 3 treasures | ||
 white |
Found south of the first Earth Vellumental-like platform. | 
|
.jpg) white |
A chest is found at the bottom end of the corridor with moving pillars. | 
|
 white |
A treasure hides in a block found under a Earth Vellumental relief, on the same ledge as the stone opening that resembles the Earth Vellumental's head. | 
|
| #202122 | 2 treasures | ||
 white |
Required: Return after red streamer is destroyed. Talk to the Chef Kinopio on the second floor's kitchen. |

|
 white |
Required: Return after red streamer is destroyed. Talk to the blue toad in the coffee stand on the third floor. |

|
Blue streamer
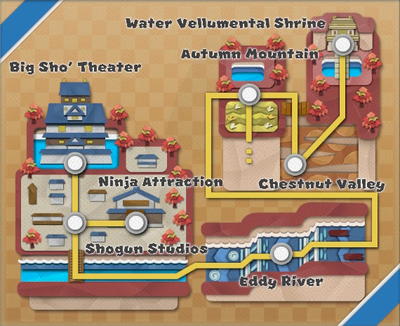
There are a total of 24 treasures to collect in the blue streamer area:
- Autumn Mountain hides 4 treasures
- Chestnut Valley hides 3 treasures
- Water Vellumental Shrine hides 3 treasures
- Shogun Studios hides 10 treasures
- Ninja Attraction hides 3 treasures
- Big Sho' Theater hides 1 treasure
| Treasure | Description | Image |
|---|---|---|
| #202122 | 4 treasures | ||
.jpg) white |
Underneath the stairs connecting to the lake and dry grass field. | 
|
.jpg) white |
There is a gap next to the stairs leading to the office which leads to a chest. | 
|
 white |
On the ledge attached to the right side of the shrine. | 
|
 white |
Required: Eddy River is filled In the middle of the ledge in front of the lake. |

|
| #202122 | 3 treasures | ||
 white |
From the start of the level, Mario should head toward the foreground to find a small ledge with a bag of confetti, as well as a treasure chest. | 
|
.jpg) white |
After pulling up Bob-omb from the platform between the rolling chestnuts. | 
|
 white |
From the tree with the origami Galoombas, Mario must head toward the foreground to find a small ledge with a treasure chest. | 
|
| #202122 | 3 treasures | ||
 white |
Mario must head down below the wheel and continue to the southwest corner to find the chest. | 
|
 white |
Mario must hammer around the northwest area below the wheel to find a small set of Hidden Blocks allowing him to enter a tunnel leading to the chest. | 
|
 white |
Mario must destroy certain blocks in the block section and keep others, allowing him to hop along them to a small overhead tunnel at the entrance with a chest. | 
|
| #202122 | 10 treasures | ||
 white |
Found by using the Royalty Pass in the left building near the entrance. | 
|
 white |
In the Tranquil Pipes Teahouse, accessible by using the Royalty Pass on a treasure chest. | 
|
 white |
Found by using the Royalty Pass in a house near the Lookout Tower. | 
|
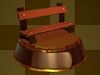 white |
In a treasure chest slightly obscured by a tree near the staff room. | 
|
 white |
Obtained by scoring 80 or more points in Expert Mode at the Shuriken Dojo. Can be seen on the upper shelf behind the counter before obtaining it. | 
|
 white |
Fished up at the fishing spot near the south end of the park. | 
|
 white |
Required: Shogun Studios Master Key Purchased at the Souvenir Shop for 10240 Coins after saving the shop's owner. |

|
 white |
Required: Shogun Studios Master Key Unlock the door found near the training Ninjis and use the Royalty Pass on a chest. |

|
 white |
Found by ringing the Lookout Tower's bell 100 times in a row. | 
|
 white |
In a Hidden Block outside the House of Riddles. | 
|
| #202122 | 3 treasures | ||
 white |
Found by hammering a cabinet in the cabinet room. | 
|
 white |
Finding all 25 ninjas rewards Mario with another treasure. | 
|
 white |
Outside the house, navigating the roofs and moving platform takes Mario to a chest stored behind some bushes. | 
|
| #202122 | 1 treasure | ||
 white |
If Mario exits stage right (left on the screen) on the western-themed stage, he will find a treasure chest. | 
|
Yellow streamer
There are a total of 17 treasures to collect in the yellow streamer area:
- Breezy Tunnel hold 2 treasures
- Scorching Sandpaper Desert holds 3 treasures
- Scorching Sandpaper Minor holds 1 treasure
- Scorching Sandpaper East holds 1 treasure
- Shroom City holds 6 treasures
- Scorching Sandpaper Far West holds 1 treasure
- Fire Vellumental Cave holds 1 treasure
- Temple of Shrooms holds 2 treasures
| Treasure | Description | Image |
|---|---|---|
| #202122 | 2 treasures | ||
 white |
At the end of the secret area reached by destroying the cracked wall. | 
|
 white |
On the ledge in the room reached by the most western door. | 
|
| #202122 | 3 treasures | ||
 white |
Required: Professor Toad rescued Mario must have Professor Toad dig in a glowing spot in the west side of the ruins. |

|
.jpg) white |
Required: Professor Toad rescued Mario must head a good distance southeast of the tower and have Professor Toad dig in a glowing spot. |

|
 white |
Required: Yellow streamer destroyed Mario must strike the Hidden Block above the crate in the freezer. |

|
| #202122 | 1 treasure | ||
 white |
Required: Temple of Shrooms raised from the ground. Behind the temple in the golden spot that can be dug up. |

|
| #202122 | 1 treasure | ||
 white |
Found in the northern part of the ruins. | 
|
| #202122 | 6 treasures | ||
 white |
Bought in the item shop for 13440 Coins. | 
|
 white |
In the DJ Toad's Groovy Sound Discs shop, there is a poster in the left corner that can be rolled up to reveal a hole in the wall. By going through, Mario reaches the empty house next door with treasure chest on top of some crates. | 
|
 white |
Going left from the reception and then into the right door, seen in front of the bed. | 
|
 white |
Required: Professor Toad rescued Use several crates to reach an area left of the railing of the second stairs leading to the hotel, there is a patch of grass in the middle. Professor Toad will dig up treasure from it. |

|
 white |
Required: Suite Key In front of the right table in the suite's bedroom. |

|
.jpg) white |
Required: Yellow streamer destroyed Given by Yellow Toad in the lamp stall. |

|
| #202122 | 1 treasure | ||
 white |
In front of the cactus surrounded by small breakable rocks. Glowing spot with treasure appears only after all rocks have been destroyed. | 
|
| #202122 | 1 treasure | ||
 white |
Found in a treasure chest in the tenth room, guarded by a Fire Bro on top. | 
|
| #202122 | 2 treasures | ||
 white |
Found in the room right of the room where the first faceless Toad is encountered, between two Not-Bottomless Holes. | 
|
 white |
In the room with rows of sealed sarcophagi, opening the ☾ coffin in the middle row reveals a staircase to King Shroomses tomb. In the southeastern corner is a square patch of sand, where Professor Toad can dig up the treasure. | 
|
Purple streamer
There are a total of 24 treasures to collect in the purple streamer area:
- The Great Sea holds 10 treasures
- The Princess Peach holds 3 treasures
- Bonehead Island holds 1 treasure
- Full Moon Island holds 1 treasure
- ? Island holds 2 treasures
- Hammer Island holds 2 treasures
- Ice Vellumental Mountain holds 4 treasures
- Sea Tower holds 1 treasure
| Treasure | Description | Image |
|---|---|---|
| #202122 | 10 treasures | ||
 white |
A treasure awarded upon interacting with all 10 Toad Statues throughout the Great Sea. These statues can be found on each island except for the Sea Tower. This image shows the treasure awarded at Mushroom Island. | 
|
 white |
Chart Position: 5E Once rescued, the Toad on Bonehead Island shares the location of this treasure on the Sea Chart, a diving spot circled by rocks. |

|
 white |
Chart Position: Between 3D and 3E The Toad hiding in a chest on Heart Island reveals a diving spot for this treasure on the Sea Chart after being rescued. |

|
 white |
Chart Position: 2D The Toad stuck in the barrel on Spade Island shows the location of this treasure on Mario's Sea Chart after being rescued. |

|
 white |
Chart Position: 3G Joy from Club Island marks the treasure spot after saving the Feelin' Fungi. |

|
 white |
Chart Position: 3B The Toad caught at the fishing spot on Crescent/Full Moon Island marks the treasure on the Sea Chart after being rescued. |

|
 white |
Chart Position: 6D The origami fish Toad flopping in the backyard of the Mushroom Island house reveals where to find this treasure once saved. |

|
 white |
Chart Position: 6F The Toad turned into a sign at the peak of ? Island marks a spot on the Sea Chart after being unfolded. |

|
 white |
Chart Position: 1A The hidden Toad on Hammer Island reveals the location of this treasure after being rescued. |

|
 white |
Chart Position: 7G Marked by a Blooper in the corner of the Sea Chart, this treasure can be found submerged beneath the opening of a rocky feature resembling a Blooper. |

|
| #202122 | 3 treasures | ||
 white |
Behind the stairs on the aft leading to the second floor, there is a small trail of coins leading to a treasure chest. | 
|
 white |
In the captain's quarters, in front of the Princess Peach portraits. | 
|
 white |
Required: Rescue all Toads from all islands of The Great Sea Mario must return to the ship and visit the captain, who rewards him with another treasure. This one is seen previously in the glass case in the northeastern corner of the main hall. |

|
| #202122 | 1 treasure | ||
 white |
After solving the torch puzzle in the huge skull, the small skull in the middle room raises up to reveal a staircase. In this next room, the chest is found near its end. | 
|
| Crescent Moon Island / #202122 | 1 treasure | ||
 white |
Fished out by reeling in a shiny fish at the fishing spot. | 
|
| #202122 | 2 treasures | ||
 white |
Found under the ? Blocks, accessed by a secret opening found at the right side of the island. | 
|
 white |
Found left of the Not-Bottomless Hole, that when filled turns into a door to the Sensor Lab's satellite office. | 
|
| #202122 | 2 treasures | ||
 white |
Found in a treasure chest on the left side of the island. | 
|
 white |
Also on the left side, found in the hidden ? Block above the crate. | 
|
| #202122 | 4 treasures | ||
 white |
Found in the chest halfway up the precipice, guarded by a Snow Spike. | 
|
 white |
Toward the top of the mountain is a Warp Pipe taking Mario back to the entrance, creating a shortcut. Here, there is a small alcove with a chest. | 
|
 white |
Once the water in the final area has been frozen over, Mario must head southwest to find a chest. | 
|
 white |
Once the water in the entrance room has been frozen, Mario can hop down to find a chest behind the left statue. | 
|
| #202122 | 1 treasure | ||
 white |
In the Earth Vellumental room, behind a moving pillar. | 
|
Green streamer
There are a total of 18 treasures to collect in the green streamer area:
- Shangri-Spa holds 9 treasures
- Spring of Jungle Mist holds 4 treasures
- Spring of Rainbows holds 1 treasure
- Bowser's Castle holds 4 treasures
| Treasure | Description | Image |
|---|---|---|
| #202122 | 9 treasures | ||
 white |
In a treasure chest behind the entrance hall building. It is guarded by a Hammer Bro and is next to the steps leading to a Sensor Lab. | 
|
 white |
Mario must walk through the gap in the southwest corner of the plaza to find a small ledge with a treasure chest. | 
|
 white |
There is a small, hidden tunnel below a Hammer Bro leading to a lift which in turn leads to a small floating platform with a treasure chest. | 
|
 white |
There is a cracked pillar in the ruins of Bowser's Castle and the banquet hall Mario must hammer to knock over, allowing him to get onto the right side of the castle, where there is a chest. | 
|
.jpg) white |
Just before the bridge leading to the Spring of Jungle Mist, Mario must ride the other lift, which takes him southwest to a small floating platform with 100-Coins and a treasure chest. | 
|
 white |
Must be purchased from a Spike on the northwest side of the plaza for 10,000 coins (20,000 if bought after removing the green streamer). | 
|
 white |
Must be purchased from a Shy Guy on the northeast side of the plaza for 10,000 coins (20,000 if bought after removing the green streamer). | 
|
 white |
Must be purchased from the Snifit vendor for 24,800 coins (if no membership discount is equipped). | 
|
 white |
Required: Defeat Boss Sumo Bro After gaining access to Bowser's Castle, there is a detour to the left of the entrance with a dark-gray panel and a Hidden Block above, containing a collectible treasure of the Boss Sumo Bro. |

|
| #202122 | 4 treasures | ||
 white |
Along the second correct path, there is a hidden area with memory-game leaves scattered about. Flipping two specific leaves reveals a Magic Circle, allowing Mario to use the 1,000-Fold Arms to rummage for a treasure chest in the tree. | 
|
 white |
In the middle of the second correct path, atop a large stump. | 
|
.jpg) white |
At the base of the large tree, there are a set of ledges winding around that lead to a tree root with a treasure chest. | 
|
 white |
After climbing the second ladder, Mario must head all the way to the left to find a small, hidden area with a treasure chest. | 
|
| #202122 | 1 treasure | ||
 white |
Won by completing the Sudden Death Round in Shy Guys Finish Last. | 
|
| #202122 | 4 treasures | ||
 white |
Within the quarters of the Koopa Troopas, this chest is found on the left bed, presumably belonging to green Koopa Troopa. | 
|
 white |
Within the quarters of the Spikes, this chest is found on the ground. However, the treasure is not inside the chest but behind it and the chest itself is a trap (opening it means being attacked by Origami Spikes). | 
|
 white |
Within the airship hangar found in the west side of Bowser's Castle, right of the pile of crates. | 
|
 white |
Required: Navigate Hotfoot Crater Mario has to talk to lone Shy Guy in the hangar. |

|
Origami Castle
There are a total of 6 treasures to collect in Origami Castle:
| Treasure | Description | Image |
|---|---|---|
| #e6e8e9 | 6 treasures | ||
 white |
Found in a ? Block at the end of the first path in the first room, guarded by a Fire Bro. | 
|
 white |
There is a set of four ? Blocks in the southwest corner of the room left of the main hall. The bottom right block contains the treasure. | 
|
 white |
After constructing the origami house in the room right of the main hall, Mario must enter and hit the ? Block in the northwest corner to receive the treasure. | 
|
 white |
At the north end of the main hall, to the right of the block puzzle, there is a Hidden Block containing the treasure. | 
|
 white |
After completing the block puzzle, Mario must jump while on the second block on the right to find a Hidden Block containing the treasure. | 
|
 white |
In the center of the room just before the final battle is a ? Block containing the treasure. | 
|
Statistics
This chart shows the number of Collectible Treasures for each location, with the total amount at the bottom.
See also
- List of hidden Toads in Paper Mario: The Origami King
- List of ? Blocks in Paper Mario: The Origami King
- Not-Bottomless Hole
- List of trophies in Paper Mario: The Origami King