|
|
| (88 intermediate revisions by the same user not shown) |
| Line 1: |
Line 1: |
| {{WMODEpisode
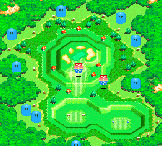
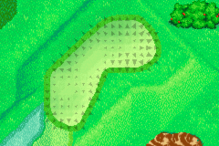
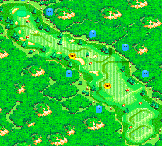
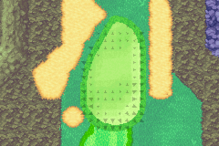
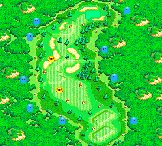
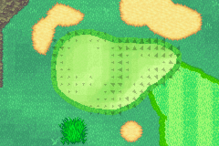
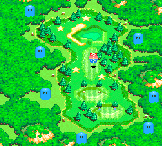
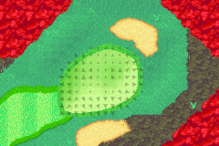
| | ==Holes== |
| |image=[[File:WMODE4.png]]
| | ===Game Boy Color=== |
| |location=[[Sneezemore Cave]]
| |
| |boss=[[Head Honcho Carpaccio]]
| |
| |keyitems=[[File:WMODBirdCrystals.png|link=Crystal (Wario: Master of Disguise)]]
| |
| |gems=[[File:DragonGuiseGem.png|Dragon Guise Gem]] [[File:ArtyMasteryGem.png|Arty Mastery Gem]]
| |
| |titlecard=[[File:WMODEpisode4Card.png|128px]]
| |
| |before=[[The Sphinx Sits on a Secret!|<<]]
| |
| |after=[[Picking the Pharaoh's Brains!|>>]]
| |
| }}
| |
| '''A Third Thief Brings Grief!''' is the fourth episode of ''[[Wario: Master of Disguise]]''. It takes place in [[Sneezemore Cave]].
| |
| | |
| ==Plot== | |
| When Wario arrives at the cave, he drops down a large pit. He begins his search for the "guy in a suit" the Sphinx mentioned in the previous episode, assuming that the person in question is [[Count Cannoli]]. However, once Wario is gone, a nearby snowman reveals itself to be Cannoli in disguise, who is also searching for the "guy in a suit" and by extension, the Wishstone piece.
| |
| | |
| Shortly after exploring the cave for a bit, Wario meets [[Carpaccio]]. He mistakes Wario for Cannoli, who is quick to correct him. Carpaccio apologizes for all the traps he set in the museum, which were intended for Cannoli. Wario then realizes that Carpaccio is the person Wario is looking for, not Cannoli. However, Carpaccio blocks the path to him with four stone doors, telling Wario to look him up when he's "tired of being a loser." Goodstyle notes the bird statues next to the doors, but this only angers and frustrates Wario. Cannoli appears and offers to tell him how to open the doors in exchange for Goodstyle, but Wario refuses.
| |
| | |
| Wario searches the cave for a method of opening the doors and finds four bird-shaped crystals. On the way, he acquires the [[Dragon Wario (Wario: Master of Disguise)|Dragon Wario]] disguise, as well as an upgrade for [[Arty Wario]]. Wario uses the crystals to open the doors, and Cannoli shows up again, amazed that Wario was able to figure out how to open them. Wario then recloses the doors, leaving Cannoli behind.
| |
| | |
| Wario confronts Carpaccio, who has the next Wishstone tablet, in the next room. Carpaccio notices Goodstyle and once again mistakes Wario for Cannoli. He introduces himself as the head of [[Sigil Securities]], but Wario doesn't care and simply wants the Wishstone piece. Carpaccio transforms into [[Head Honcho Carpaccio]] and swallows Wario whole, however, Wario is able to defeat him from the inside. Carpaccio realizes that Wario is not Cannoli and leaves, allowing Wario to get his second Wishstone piece.
| |
| | |
| The text on the Wishstone piece was: ''...the wishes were...bargained for...the Pharaoh's dreams...made real...his dynasty preserved forever...the Pharaoh forever...in his palace...palace turned into a pyramid...pyramid buried under the sand...and one piece of the stone..buried alongside him...''
| |
| | |
| Goodstyle uses this to deduce that the next Wishstone piece is likely buried alongside the [[Poobah the Pharaoh|Pharaoh]] in [[Poobah the Pharaoh's Pyramid|his pyramid]].
| |
| | |
| ==Layout==
| |
| [[File:WMODE4Beginning.png|thumb|left|The entrance to the cave]]
| |
| The episode begins at the entrance to the cave. Upon entering, Wario will drop down a large pit. A red [[treasure chest]] containing the Majestic Heart-Shaped Straw is at the end of a hidden passage to the right. To the left, Wario will encounter the first enemy of the episode, a [[Mr. Cheeky]]. Right next to it is a moneybag. Further to the left is a large room with a purple chest where the cave's map can be found. If Wario continues further to the left, he will meet Carpaccio, who will block the path with four stone doors. Four bird-shaped crystals must be found to open them. There is a door on the upper right which leads to an area with a green background where Wario can climb a ladder to find a moneybag and a green chest. The chest contains the Dragon [[Guise Gem]]. Wario can now turn into [[Dragon Wario]], who can breathe fire. He can use this new ability to destroy fiery [[Red block (Wario: Master of Disguise)|red blocks]] and reach a nearby moneybag. Dragon Wario also falls through [[Semi-Solid Platform]]s, which can be used to find a Hat Switch on the bottom right corner. Near the green chest is a door which leads to a room with a lot of dripping icy water and a breakable floor over a pool of water. In the water is a chest holding the Jurassic Snot, but it cannot be reached without [[Captain Wario (Wario: Master of Disguise)|Captain Wario]]'s upgrade. There are a [[Snow Globe (enemy)|Snow Globe]] and a Mr. Cheeky in here, and at the top of the room is a large [[Heart (item)|heart]] and the purple chest containing the Red Crystal.
| |
| | |
| Back in the green room, Wario can climb upward while destroying red blocks to find another door. Upon entering the door, Wario will immediately find a red chest with the Paranoid Bear Carving in it, as well as a [[Blow Globe]] and a [[Sipping Stalk]]. To the right is a moneybag and a pair of [[blue block]]s blocking the way to the Bath-Time Shampoo Hat, making it impossible to obtain without Dragon Wario's upgrade from Episode 9. Wario can make the Sipping Stalk grow by defeating the Blow Globe while it's above the sprout. By climbing it, Wario will find another moneybag and a ladder leading up to a room with two large ice chunks over a pit. Wario must use Dragon Wario to destroy the red block beneath the ice chunks so they'll fall down, then use [[Cosmic Wario]] to shoot down the small ice formation on the ceiling to make the hill below it icy. He can then slide over to the other side of the pit to find the Yellow Crystal guarded by a [[Sir Lance-A-Lot]]. Dropping down the pit leads back to another part of the previous room, where the large ice chunks will have formed a floor. Past some red blocks is a red chest containing the Spoiled Child's Pacifier. After that, Captain Wario can be used to get past the water current and return to the green room.
| |
| | |
| There is a small ice formation near the door which can be shot down to create an icy floor. By sliding off of it as Cosmic Wario, he can reach a section with multiple icy slopes leading to another door. It leads to a room with two dripping icy water spots and a Hat Switch. A small, somewhat hidden passage to the right leads to a moneybag. By falling down the left side of the pit on the left, Wario will land on a ledge in the room below, allowing him to access another room, which contains a pool of water with the Haunted Television treasure inside. Wario can glide over the pit by shooting down the ice formation near it. The room to the left contains a moneybag, a Sipping Stalk, and two Snow Globes. By climbing the Sipping Stalk and several ladders, Wario will encounter a [[Slithervine]]. From here, there is a hidden passage on the right, and a ladder leading up. Going up leads to a dark room. There is an upper path and lower path, the lower one having a red block in the way, but both lead to the same place. On the right is a pair of Mr. Cheekys, a big heart, and a red chest holding the Mustache Wax. A ladder leads up to a room with another Mr. Cheeky and two dripping water spots. A pit on the right takes Wario to another portion of the dark room, where Wario can drop through two Semi-Solid Platforms into a large area, where he'll find a moneybag. The upper portion of this area has dripping water and two Mr. Cheekys (this is where the hidden passage near the Slithervine leads). The lower portion has a pool of water with several chandelier-like ice formations above it. By going through a passage in the pool on the left, Wario can find a red chest containing the Fancy Ramen Noodle Soup. The "ice chandeliers" function exactly like the chandeliers found in previous episodes and can be lowered by shooting them with Cosmic Wario. By hopping across them, Wario can reach the purple chest holding the Blue Crystal. The door next to the chest leads to a room with an icy slope and a ledge with a red chest. The chest contains the Seductive Lipstick. Going to the right leads to the upper-left corner of the large green room.
| |
| | |
| ==Enemies== | |
| {|class="wikitable" style="text-align: center" | | {|class="wikitable" style="text-align: center" |
| |- | | |- |
| !Sprite | | !Hole |
| !Name | | !Map |
| !Count | | !Green |
| | !Par |
| | !Yardage |
| | !Description |
| | |- |
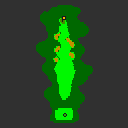
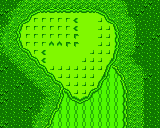
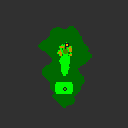
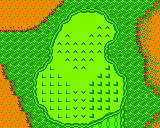
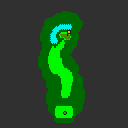
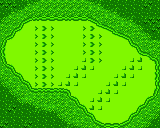
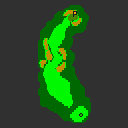
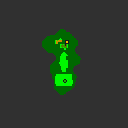
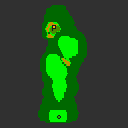
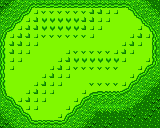
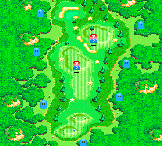
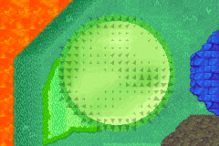
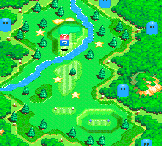
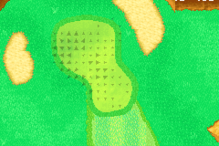
| | |1 |
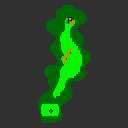
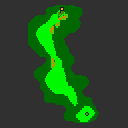
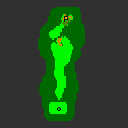
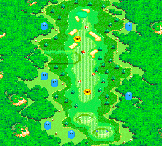
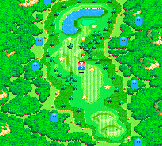
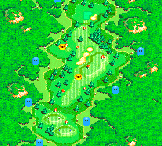
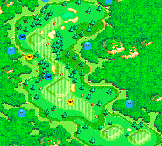
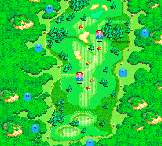
| | |[[File:MGGBC Marion Club Hole 1.png]] |
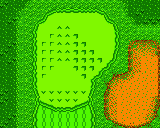
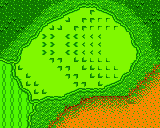
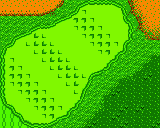
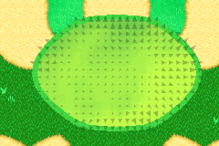
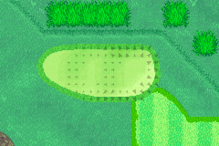
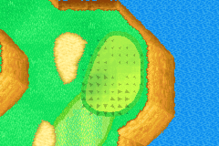
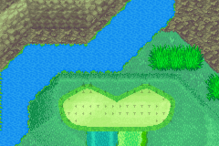
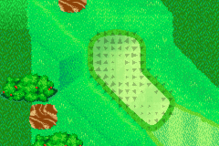
| | |[[File:MGGBC Marion Club Green 1.png]] |
| | |4 |
| | |374 yards |
| | | |
| | |- |
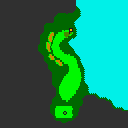
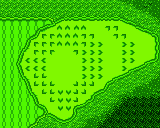
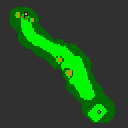
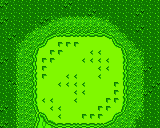
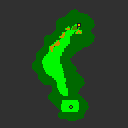
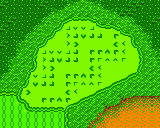
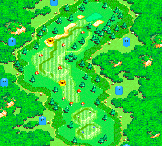
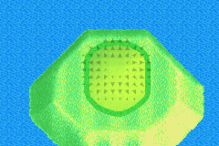
| | |2 |
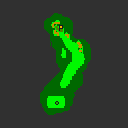
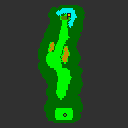
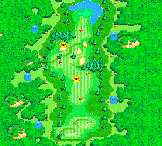
| | |[[File:MGGBC Marion Club Hole 2.png]] |
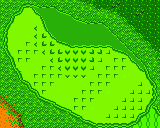
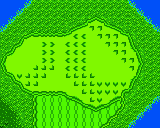
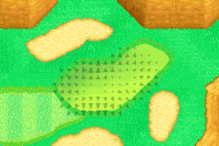
| | |[[File:MGGBC Marion Club Green 2.png]] |
| | |4 |
| | |318 yards |
| | | |
| | |- |
| | |3 |
| | |[[File:MGGBC Marion Club Hole 3.png]] |
| | |[[File:MGGBC Marion Club Green 3.png]] |
| | |3 |
| | |160 yards |
| | | |
| | |- |
| | |4 |
| | |[[File:MGGBC Marion Club Hole 4.png]] |
| | |[[File:MGGBC Marion Club Green 4.png]] |
| | |5 |
| | |480 yards |
| | | |
| | |- |
| | |5 |
| | |[[File:MGGBC Marion Club Hole 5.png]] |
| | |[[File:MGGBC Marion Club Green 5.png]] |
| | |4 |
| | |308 yards |
| | | |
| | |- |
| | |6 |
| | |[[File:MGGBC Marion Club Hole 6.png]] |
| | |[[File:MGGBC Marion Club Green 6.png]] |
| | |4 |
| | |321 yards |
| | | |
| |- | | |- |
| |[[File:Mr. Cheeky.png]]
| |
| |[[Mr. Cheeky]]
| |
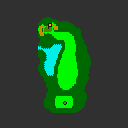
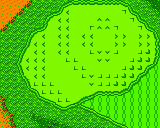
| |7 | | |7 |
| | |[[File:MGGBC Marion Club Hole 7.png]] |
| | |[[File:MGGBC Marion Club Green 7.png]] |
| | |5 |
| | |461 yards |
| | | |
| |- | | |- |
| |[[File:Snow Globe WMOD.png]] | | |8 |
| |[[Snow Globe (enemy)|Snow Globe]] | | |[[File:MGGBC Marion Club Hole 8.png]] |
| | |[[File:MGGBC Marion Club Green 8.png]] |
| |3 | | |3 |
| | |136 yards |
| | | |
| |- | | |- |
| |[[File:Blow Globe.png]] | | |9 |
| |[[Blow Globe]] | | |[[File:MGGBC Marion Club Hole 9.png]] |
| |1 | | |[[File:MGGBC Marion Club Green 9.png]] |
| | |4 |
| | |370 yards |
| | | |
| |- | | |- |
| |[[File:Sir Lance-A-Lot.png]] | | |10 |
| |[[Sir Lance-A-Lot]] | | |[[File:MGGBC Marion Club Hole 10.png]] |
| |1 | | |[[File:MGGBC Marion Club Green 10.png]] |
| | |4 |
| | |351 yards |
| | | |
| |- | | |- |
| |[[File:Slithervine.png]] | | |11 |
| |[[Slithervine]] | | |[[File:MGGBC Marion Club Hole 11.png]] |
| |1 | | |[[File:MGGBC Marion Club Green 11.png]] |
| | |5 |
| | |479 yards |
| | | |
| |- | | |- |
| |[[File:Treasure Pest.png]] | | |12 |
| |[[Treasure Pest]] | | |[[File:MGGBC Marion Club Hole 12.png]] |
| |1 | | |[[File:MGGBC Marion Club Green 12.png]] |
| |} | | |3 |
| | | |149 yards |
| ==Treasure chest locations==
| | | |
| Note: A [[Treasure Pest]] will appear in place of one of the red chests, making it unobtainable on the first run.
| |
| {|class="wikitable"
| |
| |- | | |- |
| !width="30px"|
| | |13 |
| !Treasure
| | |[[File:MGGBC Marion Club Hole 13.png]] |
| !Worth
| | |[[File:MGGBC Marion Club Green 13.png]] |
| !Location
| | |4 |
| | |368 yards |
| | | |
| |- | | |- |
| |[[File:WMoDRedChest.png]] | | |14 |
| |Majestic Heart-Shaped Straw | | |[[File:MGGBC Marion Club Hole 14.png]] |
| |$110 | | |[[File:MGGBC Marion Club Green 14.png]] |
| |Beyond a hidden passage right next to where Cannoli was disguised as a snowman, accessed using Arty Wario. | | |4 |
| | |390 yards |
| | | |
| |- | | |- |
| |[[File:WMoDPurpleChest.png]] | | |15 |
| |Sneezemore Cave Map | | |[[File:MGGBC Marion Club Hole 15.png]] |
| | |[[File:MGGBC Marion Club Green 15.png]] |
| | |4 |
| | |344 yards |
| | | | | |
| |In the large room to the right of where Carpaccio is first met.
| |
| |- | | |- |
| |[[File:WMoDGreenChest.png]] | | |16 |
| |Dragon [[Guise Gem]] | | |[[File:MGGBC Marion Club Hole 16.png]] |
| | |[[File:MGGBC Marion Club Green 16.png]] |
| | |4 |
| | |348 yards |
| | | | | |
| |In the huge room with four doors.
| |
| |- | | |- |
| |[[File:WMoDRedChest.png]] | | |17 |
| |Golden Throne | | |[[File:MGGBC Marion Club Hole 17.png]] |
| |$876 | | |[[File:MGGBC Marion Club Green 17.png]] |
| |Replaces the Dragon Guise Gem during subsequent runs of the episode. | | |3 |
| | |170 yards |
| | | |
| |- | | |- |
| |[[File:WMoDPurpleChest.png]] | | |18 |
| |[[Crystal (Wario: Master of Disguise)|Red Crystal]] | | |[[File:MGGBC Marion Club Hole 18.png]] |
| | |[[File:MGGBC Marion Club Green 18.png]] |
| | |5 |
| | |499 yards |
| | | | | |
| |At the top-left corner of the room beyond the door next to where the Dragon Guise Gem is obtained. | | |} |
| | |
| | ===Game Boy Advance=== |
| | {|class="wikitable" style="text-align: center" |
| | !Hole |
| | !Overview |
| | !Green |
| | !Par |
| | !width=80px|Front Tee |
| | !width=80px|Back Tee |
| | !Differences |
| |- | | |- |
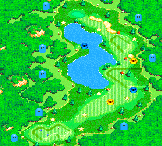
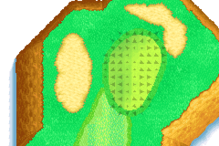
| |[[File:WMoDRedChest.png]] | | |1 |
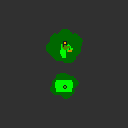
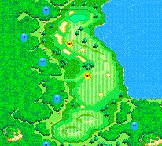
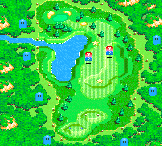
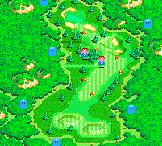
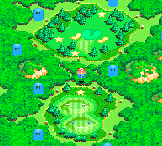
| |Jurassic Snot | | |[[File:MGAT Star Marion Course Hole 1.png]] |
| |$14,783
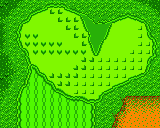
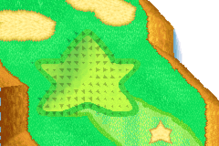
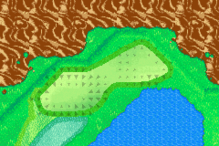
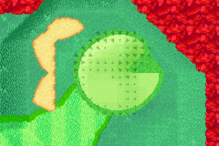
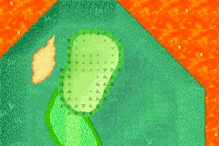
| | |[[File:MGAT Mushroom Course Green 1.png|219px]] |
| |At the bottom left corner of the Red Crystal's room. Unobtainable on the first run due to requiring [[Captain Wario (Wario: Master of Disguise)|Captain Wario]]'s upgrade to break the blocks.
| | |4 |
| | |??? yards |
| | |??? yards |
| | | |
| |- | | |- |
| |[[File:WMoDRedChest.png]] | | |2 |
| |Paranoid Bear Carving | | |[[File:MGAT Star Marion Course Hole 2.png]] |
| |$93 | | |[[File:MGAT Mushroom Course Green 2.png|219px]] |
| |In the bottom-left corner of the room beyond the uppermost door in the room where the Dragon Guise Gem is obtained. | | |4 |
| | |??? yards |
| | |??? yards |
| | | |
| |- | | |- |
| |[[File:WMoDRedChest.png]] | | |3 |
| |Bath-Time Shampoo Hat | | |[[File:MGAT Star Marion Course Hole 3.png]] |
| |$7,359 | | |[[File:MGAT Mushroom Course Green 3.png|219px]] |
| |In the area beyond the two [[blue block]]s in the room where the Paranoid Bear Carving is obtained. Unobtainable on the first run due to requiring Dragon Wario's upgrade to break the blocks. | | |3 |
| | |??? yards |
| | |??? yards |
| | | |
| |- | | |- |
| |[[File:WMoDPurpleChest.png]] | | |4 |
| |[[Crystal (Wario: Master of Disguise)|Yellow Crystal]] | | |[[File:MGAT Star Marion Course Hole 4.png]] |
| | |[[File:MGAT Mushroom Course Green 4.png|219px]] |
| | |5 |
| | |??? yards |
| | |??? yards |
| | | | | |
| |In the room above the one where the Paranoid Bear Carving is. Obtained by shooting down the ice cluster and riding the slippery floor to the right side.
| |
| |- | | |- |
| |[[File:WMoDRedChest.png]] | | |5 |
| |Spoiled Child's Pacifier | | |[[File:MGAT Star Marion Course Hole 5.png]] |
| |$6,501 | | |[[File:MGAT Mushroom Course Green 5.png|219px]] |
| |Obtained by dropping down the large hole from the Yellow Crystal's room. | | |4 |
| | |??? yards |
| | |??? yards |
| | | |
| |- | | |- |
| |[[File:WMoDRedChest.png]] | | |6 |
| |Haunted Television | | |[[File:MGAT Star Marion Course Hole 6.png]] |
| |$492 | | |[[File:MGAT Mushroom Course Green 6.png|219px]] |
| |In the room directly above where Carpaccio is first met, accessed from a high ledge in the room to the right. | | |4 |
| | |??? yards |
| | |??? yards |
| | | |
| |- | | |- |
| |[[File:WMoDRedChest.png]] | | |7 |
| |Mustache Wax | | |[[File:MGAT Star Marion Course Hole 7.png]] |
| |$373 | | |[[File:MGAT Mushroom Course Green 7.png|219px]] |
| |In the dark area above the tall room with the lone Slithervine. | | |5 |
| | |??? yards |
| | |??? yards |
| | | |
| |- | | |- |
| |[[File:WMoDRedChest.png]] | | |8 |
| |Fancy Ramen Noodle Soup | | |[[File:MGAT Star Marion Course Hole 8.png]] |
| |$6,409 | | |[[File:MGAT Mushroom Course Green 8.png|219px]] |
| |In an isolated cove in the tall room with the lone Slithervine, accessed from the room to the right. | | |3 |
| | |??? yards |
| | |??? yards |
| | | |
| |- | | |- |
| |[[File:WMoDPurpleChest.png]] | | |9 |
| |[[Crystal (Wario: Master of Disguise)|Blue Crystal]] | | |[[File:MGAT Star Marion Course Hole 9.png]] |
| | |[[File:MGAT Mushroom Course Green 9.png|219px]] |
| | |4 |
| | |??? yards |
| | |??? yards |
| | | | | |
| |Next to the door in the room to the right of where the Fancy Ramen Noodle Soup is, accessed by hopping across the "ice chandeliers".
| |
| |- | | |- |
| |[[File:WMoDRedChest.png]] | | |10 |
| |Seductive Lipstick | | |[[File:MGAT Star Marion Course Hole 10.png]] |
| |$89 | | |[[File:MGAT Mushroom Course Green 10.png|219px]] |
| |In the room beyond the door in the Blue Crystal's room, the chest is on a ledge. | | |4 |
| | |??? yards |
| | |??? yards |
| | | |
| |- | | |- |
| |[[File:WMoDRedChest.png]] | | |11 |
| |Odd Lucky Thingie | | |[[File:MGAT Star Marion Course Hole 11.png]] |
| |$234 | | |[[File:MGAT Mushroom Course Green 11.png|219px]] |
| |At the bottom left corner of the room with a Mr. Cheeky that runs over an ice bridge. Unobtainable on the first run due to requiring Captain Wario's upgrade to break the blocks. | | |5 |
| | |??? yards |
| | |??? yards |
| | | |
| |- | | |- |
| |[[File:WMoDGreenChest.png]] | | |12 |
| |[[Vita Mighty]] | | |[[File:MGAT Star Marion Course Hole 12.png]] |
| | |[[File:MGAT Mushroom Course Green 12.png|219px]] |
| | |3 |
| | |??? yards |
| | |??? yards |
| | | | | |
| |Accessed via a hidden passage near a Sipping Stalk in the room with the Odd Lucky Thingie.
| |
| |- | | |- |
| |[[File:WMoDRedChest.png]] | | |13 |
| |Gilded Ice Cream Sandwich | | |[[File:MGAT Star Marion Course Hole 13.png]] |
| |$4,734 | | |[[File:MGAT Mushroom Course Green 13.png|219px]] |
| |Replaces the Vita Mighty during subsequent runs of the episode. | | |4 |
| | |??? yards |
| | |??? yards |
| | | |
| |- | | |- |
| |[[File:WMoDRedChest.png]] | | |14 |
| |Friendly Clown Autograph | | |[[File:MGAT Star Marion Course Hole 14.png]] |
| |$379
| | |[[File:MGAT Mushroom Course Green 14.png|219px]] |
| |At the bottom-left corner of the large room of the far left end of the cave, hidden behind [[red block (Wario: Master of Disguise)|red block]]s.
| | |4 |
| | |??? yards |
| | |??? yards |
| | | |
| |- | | |- |
| |[[File:WMoDPurpleChest.png]] | | |15 |
| |[[Crystal (Wario: Master of Disguise)|Green Crystal]] | | |[[File:MGAT Star Marion Course Hole 15.png]] |
| | |[[File:MGAT Mushroom Course Green 15.png|219px]] |
| | |4 |
| | |??? yards |
| | |??? yards |
| | | | | |
| |In the room to the right of the Friendly Clown Autograph's room, accessed by using Dragon Wario to break a red block and drain the water so Captain Wario can reach it.
| |
| |- | | |- |
| |[[File:WMoDRedChest.png]] | | |16 |
| |Really Boring Firework | | |[[File:MGAT Star Marion Course Hole 16.png]] |
| |$270 | | |[[File:MGAT Mushroom Course Green 16.png|219px]] |
| |In the area below the room with the ice ball. | | |4 |
| | |??? yards |
| | |??? yards |
| | | |
| |- | | |- |
| |[[File:WMoDGreenChest.png]] | | |17 |
| |Arty [[Mastery Gem]] | | |[[File:MGAT Star Marion Course Hole 17.png]] |
| | |[[File:MGAT Mushroom Course Green 17.png|219px]] |
| | |3 |
| | |??? yards |
| | |??? yards |
| | | | | |
| |Obtained by removing the ice chunk blocking the ice ball, looping around and pushing the ball from the left to create a hole in the ground, then dropping down.
| |
| |- | | |- |
| |[[File:WMoDRedChest.png]] | | |18 |
| |Crop Circle Pendant | | |[[File:MGAT Star Marion Course Hole 18.png]] |
| |$120 | | |[[File:MGAT Mushroom Course Green 18.png|219px]] |
| |Replaces the Arty Mastery Gem during subsequent runs of the episode. | | |5 |
| | |??? yards |
| | |??? yards |
| | | |
| |} | | |} |
